This is a modern-English version of War Medals and Their History, originally written by Steward, William Augustus.
It has been thoroughly updated, including changes to sentence structure, words, spelling,
and grammar—to ensure clarity for contemporary readers, while preserving the original spirit and nuance. If
you click on a paragraph, you will see the original text that we modified, and you can toggle between the two versions.
Scroll to the bottom of this page and you will find a free ePUB download link for this book.
The cover image was created by the transcriber and is placed in the public domain.
The cover image was made by the transcriber and is in the public domain.
WAR MEDALS
AND THEIR HISTORY
WAR MEDALS
AND THEIR HISTORY
THE MEMOIRS OF THE DUKE DE ST. SIMON
THE MEMOIRS OF THE DUKE DE ST. SIMON
Newly translated and edited by Francis Arkwright.
Newly translated and edited by Francis Arkwright.
In six volumes, demy 8vo, handsomely bound in cloth gilt, with illustrations in photogravure, 10/6 net each volume.
In six volumes, demy 8vo, nicely bound in cloth with gold lettering, featuring photogravure illustrations, £10.6 each volume.
NAPOLEON IN EXILE AT ELBA (1814-1815)
NAPOLEON IN EXILE AT ELBA (1814-1815)
By Norwood Young, Author of "The Growth of Napoleon," etc.; with a chapter on the Iconography by A. M. Broadley.
By Norwood Young, author of "The Growth of Napoleon," and others; with a chapter on the iconography by A. M. Broadley.
Demy 8vo, cloth gilt, with coloured frontispiece and 50 illustrations (from the collection of A. M. Broadley), 21/- net.
Demystifying 8vo, cloth with gold lettering, featuring a colored frontispiece and 50 illustrations (from A. M. Broadley’s collection), £21.00 net.
NAPOLEON IN EXILE AT ST. HELENA (1815-1821)
NAPOLEON IN EXILE AT ST. HELENA (1815-1821)
By Norwood Young, Author of "Napoleon in Exile at Elba," "The Story of Rome," etc.
By Norwood Young, author of "Napoleon in Exile at Elba," "The Story of Rome," and more.
In two volumes, demy 8vo, cloth gilt, with two coloured frontispieces and one hundred illustrations (from the collection of A. M. Broadley), 32/- net.
In two volumes, standard 8vo, cloth with gold lettering, featuring two colored frontispieces and one hundred illustrations (from the collection of A. M. Broadley), £32.00 net.
JULIETTE DROUET'S LOVE-LETTERS TO VICTOR HUGO
JULIETTE DROUET'S LOVE LETTERS TO VICTOR HUGO
Edited with a Biography of Juliette Drouet by Louis Guimbaud; translated by Lady Theodora Davidson.
Edited with a Biography of Juliette Drouet by Louis Guimbaud; translated by Lady Theodora Davidson.
Demy 8vo, cloth gilt, with many illustrations, 10/6 net.
Demy 8vo, cloth covered with gold lettering, featuring many illustrations, £10.6 net.
THE NEW FRANCE
NEW FRANCE
Being a History from the Accession of Louis Philippe in 1830 to the Revolution of 1848, with Appendices.
A History from the Accession of Louis Philippe in 1830 to the Revolution of 1848, with Appendices.
By Alexandre Dumas. Translated into English, with an introduction and notes, by R. S. Garnett.
By Alex Dumas. Translated into English, with an introduction and notes, by R.S. Garnett.
In two volumes, demy 8vo, cloth gilt, profusely illustrated with a rare portrait of Dumas and other pictures after famous artists, 24/- net.
In two volumes, standard 8vo, cloth with gold lettering, filled with illustrations including a rare portrait of Dumas and other images by famous artists, £24 net.

MEDALS AWARDED TO SERGEANT-MAJOR, LATER QUARTERMASTER, CHARLES WOODEN, 17TH LANCERS, ONE OF THE LIGHT BRIGADE.
MEDALS AWARDED TO SERGEANT-MAJOR, LATER QUARTERMASTER, CHARLES WOODEN, 17TH LANCERS, ONE OF THE LIGHT BRIGADE.
Frontispiece
Cover Page
WAR MEDALS
AND THEIR HISTORY
BY
W. AUGUSTUS STEWARD
OFFICIER D'ACADÉMIE
AUTHOR OF "FROM THE BREASTS OF THE BRAVE," ETC.
BY
W. Augustus Steward
ACADEMY OFFICER
AUTHOR OF "FROM THE BREASTS OF THE BRAVE," ETC.
With 258 Illustrations
in Half-tone and Line
With 258 Illustrations
in Half-tone and Line
LONDON
STANLEY PAUL & CO
31 ESSEX STREET STRAND W.C.
LONDON
STANLEY PAUL & CO
31 ESSEX STREET STRAND W.C.
First published in 1915
Initially published in 1915
FOREWORDS
If any excuse were needed for penning this, it is to be found in the exceeding interest which was taken in my monograph "Badges of the Brave." Indeed, many readers have requested me to deal, at greater length, with a subject which not only opens up a great historical vista and awakens national sentiment, but, incidentally, serves an educational mission to those who collect and those who sell the metallic records of many a hard-fought field, which, when collated, form an imperishable record of our island story.
If I needed a reason to write this, it's because there was a lot of interest in my book "Badges of the Brave." In fact, many readers have asked me to explore the topic more deeply. This topic not only reveals a significant historical perspective and stirs national pride, but it also has an educational purpose for collectors and sellers of the metal records from many hard-fought battles. When gathered together, these records create a lasting account of our island's history.
The War Medal is a comparatively modern institution, otherwise we might have learned the names of the common folk who fought so tenaciously in the old wars, as, for instance, the Welsh infantry and Irish soldiers who, with the English bowmen, comprised the army of 30,000 which at Crécy routed an army of 120,000; the followers of the Black Prince who captured the impetuous King John at Poitiers, or the English archers whose deadly volleys made such havoc at Agincourt, on that fateful day in October nearly five hundred years ago; the brave seamen who, under Lord Howard, Drake, Hawkins, and Frobisher, fought the "Invincible Armada"; and those who, under Raleigh, vigorously pursued the Spaniards on the high seas. We might have learned something of the men who composed the Royal Scots and the 18th Royal Irish, and helped to vindicate the reputation of the British soldier at Namur, and covered themselves with glory at Blenheim; the gallant Coldstream Guards who did such excellent service under Marlborough at Oudenarde and Malplaquet, as well as the Gloucesters and Worcesters who fought so well at Ramillies, or the[Pg vi] Royal Welsh Fusiliers who served under George II at Dettingen.
The War Medal is a relatively recent concept; otherwise, we might have known the names of the everyday people who fought so hard in the old wars, like the Welsh infantry and Irish soldiers who, along with the English archers, made up the 30,000 troops that defeated an army of 120,000 at Crécy; the followers of the Black Prince who captured the headstrong King John at Poitiers, or the English archers whose lethal volleys caused so much destruction at Agincourt on that fateful October day nearly five centuries ago; the brave sailors who, under Lord Howard, Drake, Hawkins, and Frobisher, battled the "Invincible Armada"; and those who, under Raleigh, actively pursued the Spaniards on the open seas. We might have learned about the men of the Royal Scots and the 18th Royal Irish, who helped restore the British soldier's reputation at Namur and achieved glory at Blenheim; the courageous Coldstream Guards who performed excellently under Marlborough at Oudenarde and Malplaquet, as well as the Gloucesters and Worcesters who fought valiantly at Ramillies, or the [Pg vi] Royal Welsh Fusiliers who served under George II at Dettingen.
When, however, war medals were designed for distribution among successful combatants, a means of decorating surviving soldiers and sailors was established, and at the same time a sentimental and substantial record of a man's labours for his country upon the field of battle. So that, if the veterans of Drake's historic fleet, or Marlborough's dauntless soldiers, were not possessed of badges to distinguish them from the soldiers of industry, we, at any rate, may hold in our hands the medals which were awarded to those who served the immortal Nelson, and be proud to possess the medals which shone upon the breasts of our great grandparents who defied the Conqueror of Europe on that memorable Sunday, and made his sun to set upon the battlefield of Waterloo.
When war medals were created to honor successful fighters, a way to recognize surviving soldiers and sailors was established, along with a meaningful and significant record of a person's service to their country on the battlefield. So, while the veterans of Drake's historic fleet or Marlborough's fearless soldiers didn't have badges to set them apart from the workers, we can at least hold in our hands the medals awarded to those who served the legendary Nelson, and take pride in the medals that adorned the chests of our great grandparents who stood against the Conqueror of Europe on that unforgettable Sunday, ultimately making his sun set on the battlefield of Waterloo.
Have you listened to the smart British veteran as he explains the disposition of the troops on that historic occasion—how the French cavalry "foamed itself away" in the face of those steady British squares? How he makes the Welsh blood tingle as he records the glorious deeds and death of Sir Thomas Picton, and the Scotsman's dance through his veins as he explains how, with the cold steel of their terrible bayonets, the Black Watch at Quatre Bras, and its second battalion, the Perthshires, at Waterloo, waited for the charge of the cuirassiers; and how Sergeant Ewart of the Scots Greys captured the Eagle of the 45th, and then, with the rest of the Union Brigade (the English Royals and the Irish Inniskillings), crashed through the ranks of the faltering French, and scattered the veterans of Napoleon's army! Have you seen how the mention of the Guards holding the Château of Hougomont brightens the eye of the Englishman? Yes! Then just think what it is to touch and possess the solid proofs of the deeds that those men did, and to feel that you have in your possession the only recompense those brave and daring men received from a grateful country.
Have you listened to the smart British veteran as he explains how the troops were positioned on that historic day—how the French cavalry "foamed itself away" when facing those steadfast British squares? He makes the Welsh blood race as he recounts the glorious actions and death of Sir Thomas Picton, and the Scotsman's blood sing as he describes how the Black Watch at Quatre Bras, and its second battalion, the Perthshires, stood ready with the cold steel of their terrible bayonets, waiting for the charge of the cuirassiers; and how Sergeant Ewart of the Scots Greys captured the Eagle of the 45th, and then, along with the rest of the Union Brigade (the English Royals and the Irish Inniskillings), broke through the ranks of the faltering French, scattering the veterans of Napoleon's army! Have you noticed how the mention of the Guards holding the Château of Hougomont lights up the eye of the Englishman? Yes! Then just imagine what it's like to touch and possess the concrete evidence of the deeds those men accomplished, and to feel that you hold in your hands the only reward those brave and daring men received from a grateful nation.
Historical Value.—My collection of medals enables me to cover over a hundred years of history; takes me back to the stirring times when men yet met face to face in the Peninsula and at Waterloo; to the men who founded our Indian Empire. It enables me to keep in touch with sailors who fought in the battle of the Nile, at Trafalgar, and at Navarino, that last of all naval battles in which we British took part—our allies were then the French and Russians—until our battleships met those of the Germans in the great war now waging. It reminds me of the horsemen who made the world wonder ere, with deathless glory, they passed their little day, and of that "thin red line" of Scots, whose cool daring at Balaklava has only been bedimmed by the gallantry of the Light Brigade. It enables me to think more intimately of the men I know who faced the Russians in that terrible winter, and then, like heroes, plodded through the inferno of the Mutiny. It brings back vividly to my mind the days of the Zulu War and the heroism of Rorke's Drift. It reminds me of the daring march to Kandahar and the frontier wars so necessary to hold back the turbulent human surf which beats on the shores of our great Eastern Empire. It enables me to keep closely in touch with those who so quickly dealt with Arabi Pasha and later faced the fanatical hordes of the Mahdi; the young men of this generation who fought so stubbornly at the Modder River, and who stormed the Tugela Heights. It enables me to keep in touch with those "handymen" and scouts on the fringe of Empire who in Somaliland, Gambia, Benin, Matabeleland, and Bechuanaland uphold the dignity of Britain.
Historical Value.—My collection of medals lets me explore over a hundred years of history; it takes me back to the exciting times when men fought face to face in the Peninsula and at Waterloo; to the founders of our Indian Empire. It helps me connect with sailors who fought at the battle of the Nile, at Trafalgar, and at Navarino, the last major naval battle involving us British—our allies were then the French and Russians—until our battleships encountered the Germans in the huge war currently happening. It reminds me of the horsemen who amazed the world before they passed into history with lasting glory, and of that "thin red line" of Scots, whose calm bravery at Balaklava has only been overshadowed by the Light Brigade's gallantry. It allows me to think more personally about the men I know who faced the Russians in that brutal winter, and then heroically trudged through the chaos of the Mutiny. It brings back vivid memories of the Zulu War and the bravery displayed at Rorke's Drift. It reminds me of the bold march to Kandahar and the frontier wars necessary to keep back the restless tide of humanity pressing against the shores of our vast Eastern Empire. It keeps me connected with those who swiftly dealt with Arabi Pasha and later confronted the fanatical followers of the Mahdi; the young men of this generation who fought fiercely at the Modder River and stormed the Tugela Heights. It allows me to stay in touch with those "handymen" and scouts on the outskirts of Empire who in Somaliland, Gambia, Benin, Matabeleland, and Bechuanaland uphold Britain's dignity.
We sometimes read of a man or woman who has shaken hands, sixty, seventy, or eighty years ago, with some great person, or some one whose deeds have made him or her a name in history. The possession of war medals and decorations, or of medals of honour gained by brave deeds in time of peace, brings us in[Pg viii] close touch with those who honourably gained them. That is an aspect of medal-collecting which appeals to me, and should to every one who admires pluck, grit, daring, and the willingness to personal sacrifice which these badges of the brave denote.
We often read about a man or woman who shook hands, sixty, seventy, or eighty years ago, with some great figure or someone whose actions have made them a notable name in history. Owning war medals and decorations, or medals of honor earned through courageous acts during peacetime, connects us closely with those who earned them honorably. That’s one aspect of collecting medals that resonates with me, and it should with anyone who appreciates courage, determination, audacity, and the willingness to make personal sacrifices that these symbols of bravery represent.
Finally there is an exceptional feature in the collection of war medals which will also appeal, for, as Sir James Yoxall has pointed out in "The A B C About Collecting," the collector of war medals "has concentrated upon a line which can be made complete." If, however, his inclinations or his means will not permit of the acquisition of a complete set he may specialise in either Military or Naval Medals, or those awarded to special regiments or ships, or to men of his own name, or those earned by boys or nurses.
Finally, there's an outstanding aspect of the collection of war medals that will also attract attention. As Sir James Yoxall noted in "The A B C About Collecting," a collector of war medals "has focused on a category that can be made complete." However, if his interests or budget don't allow for acquiring a complete set, he can specialize in either Military or Naval Medals, or those awarded to specific regiments or ships, or to individuals with his last name, or those earned by boys or nurses.
In order to facilitate the search for bars issued with the various medals, the names inscribed thereon are printed in the text in small capitals: these, of course, must not be taken as representing the type used on the official bars; reference must be made to the illustrations, which, being the same size as the original medals, will materially assist the reader in recognising official lettering.
To make it easier to find the bars that have different medals, the names printed on them are displayed in small capitals in the text. These shouldn’t be confused with the actual type used on the official bars; you should refer to the illustrations, which are the same size as the original medals, to help you recognize the official lettering.
In conclusion I have to express my sincere thanks for the help afforded and the deep interest taken in my book by Dr. A. A. Payne, whose kindness in providing photographs of examples in his unique collection has enabled me to illustrate many interesting and rare medals; to G. K. J. and F. W. G. for clerical assistance; G. T. F. for sketches; and to Messrs. Heywood & Co., Ltd., for the loan of several of the blocks of medals which had been used in monographs I had written for publication by them.
In conclusion, I want to sincerely thank everyone who helped and showed great interest in my book, especially Dr. A. A. Payne, whose kindness in providing photos from his unique collection allowed me to illustrate many fascinating and rare medals; G. K. J. and F. W. G. for their clerical support; G. T. F. for his sketches; and Messrs. Heywood & Co., Ltd., for lending several of the medal blocks that I had used in monographs I wrote for them.
W. Augustus Steward.
W. Augustus Steward.
London.
London.
CONTENTS
| MILITARY SECTION | |
|---|---|
| PAGE | |
| First Campaign Medals | 1 |
| Early Medals granted by The Honourable East India Company | 9 |
| First Medal for Egypt, 1801 | 16 |
| The Mahratta War | 20 |
| First Official Military Officers' Medal | 25 |
| The Peninsular War | 26 |
| Continental Peninsular War Medals | 66 |
| Waterloo and Quatre Bras | 70 |
| British and Continental Waterloo Medals | 81 |
| Nepaul, 1814-15 | 86 |
| First Burmese War | 90 |
| First Afghan War | 94 |
| First Chinese War | 98 |
| Second Afghan War | 100 |
| The Gwalior Campaign | 109 |
| The Sikh Wars | 111 |
| Second Punjab Campaign | 119 |
| First New Zealand War | 124 |
| Military General Service Medal granted | 128 |
| India General Service Medal granted | 133 |
| First Kaffir Wars | 134[Pg x] |
| Second Burmese War | 137 |
| The Crimean War | 139 |
| Persian War | 155 |
| Indian Mutiny | 156 |
| Second Chinese War | 178 |
| Second New Zealand War | 182 |
| Abyssinian War | 189 |
| Ashantee War | 192 |
| Zulu War | 197 |
| Third Afghan War | 202 |
| Egyptian Campaigns | 210 |
| Riel's Rebellion | 217 |
| Annexation of Burma | 218 |
| Black Mountain and Border Expeditions | 220 |
| East and West Africa | 227 |
| Second Ashantee War | 229 |
| Chitral | 230 |
| Matabeleland and Rhodesia | 235 |
| The Sudan | 239 |
| Third Ashantee War | 244 |
| Third Chinese War | 245 |
| The Boer War | 248 |
| Nigeria | 256 |
| African Expeditions | 257 |
| Natal Rebellion | 259 |
| Tibet Expedition | 259 |
| Abor | 261 |
| Sudan, 1910 | 262 [Pg xi] |
| NAVAL SECTION | |
| Armada Medals | 266 |
| Charles I Medals | 267 |
| Commonwealth Medals | 268 |
| The Dutch Wars | 269 |
| Charles II Medals | 271 |
| La Hogue | 273 |
| Queen Anne Medals | 274 |
| George I and George II Medals | 276 |
| "The Glorious" 1st of June | 279 |
| Naval Gold Medal instituted | 280 |
| St. Vincent | 281 |
| Camperdown | 283 |
| The Nile | 284 |
| Copenhagen | 287 |
| Trafalgar | 288 |
| Trafalgar Medals | 290 |
| Bars issued with Naval General Service Medal | 293 |
| Bars issued for Boat Actions | 305 |
| Algiers | 306 |
| Ava | 307 |
| Navarino | 308 |
| Syria | 309 |
| China, 1840-2 | 310 |
| Scinde, 1843 | 310 |
| Punjab, 1848-9 | 311 [Pg xii] |
| China, 1856-60 | 311 |
| Pegu | 311 |
| Crimea | 312 |
| Naval Brigade in Crimean War | 315 |
| Indian Mutiny | 316 |
| New Zealand, 1845-6-7 | 317 |
| Crews engaged in Abyssinia, Ashantee, Perak, and South Africa | 318 |
| Egyptian Wars | 319 |
| African Expeditions | 329 |
| Boer War | 333 |
| Meritorious Service Medals | 336 |
| Long Service Medals | 348 |
| How Medals are named | 352 |
| Some Continental and Foreign War Medals | 357 |
| Pistrucci's Waterloo Medal | 374 |
| Regimental Designations | 377 |
| Sale Prices | 382 |
| INDEX | 401 |
ILLUSTRATIONS
| V.C. and Medals awarded to Quartermaster Wooden | Frontispiece |
| FACING PAGE | |
|---|---|
| Royalist Badges | 1 |
| Dunbar Medal | 4 |
| Medal for Oudenarde | 4 |
| H.E.I. Co.'s Medal for Seringapatam, 1799 | 12 |
| H.E.I. Co.'s Medal for Egypt, 1801 | 12 |
| Peninsular Gold Medal | 16 |
| Gold Medal for Maida, 1806 | 20 |
| H.E.I. Co.'s Medal for Ava, 1824-6 | 20 |
| Portuguese Gold Cross (Commander's) for the Peninsular | 28 |
| Portuguese Officer's Cross for the Peninsular | 32 |
| Spanish Cross for Albuhera | 36 |
| Spanish Cross for Ciudad Rodrigo | 36 |
| Spanish Gold Cross for Vittoria | 36 |
| Alcantara Medal, 1809 | 40 |
| Military General Service Medal | 40 |
| Peninsular Gold Cross | 44 |
| Peninsular Gold Medal with Bars | 44 |
| Lieutenant-Colonel Brackenbury's Decorations | 48 |
| Prussian Medals for Napoleonic Wars | 52 |
| Bronze Medal to British German Legion | 52 |
| Silver Medal to Hanseatic Legion | 52 |
| Waterloo Medal | 56 |
| Army of India Medal, 1799-1826 | 56 |
| Nassau Medal for Waterloo | 60 |
| Hanoverian Medal for Waterloo | 60 |
| Prussian Jubilee Medals for Waterloo | 64 [Pg xiv] |
| "St. Helena" Medal | 64 |
| Brunswick Medal for Waterloo | 72 |
| Saxe-Gotha-Altenburg Waterloo Medal | 72 |
| Pistrucci's Waterloo Medal | 80 |
| Governor-General's Medal for Ghuznee, 1839 | 88 |
| Medal for Ghuznee, 1839 | 88 |
| Medal for Kelat-i-Ghilzie, 1842 | 96 |
| First Jellalabad Medal, 1842 | 96 |
| Second Jellalabad Medal ("Flying Victory"), 1842 | 100 |
| China Medal, 1842 | 100 |
| Medal for Cabul, 1842 | 100 |
| Medal for Candahar, etc. | 108 |
| Bronze Star for Maharajpoor | 108 |
| Bronze Star for Punniar, 1843 | 112 |
| Medal for Sutlej, 1845 | 112 |
| Medal for Punjab, 1849 | 112 |
| First India General Service Medal, 1854 | 120 |
| First South Africa Medal, 1853 | 120 |
| Crimea Medals | 128 |
| First Médaille Militaire | 132 |
| Sardinian Crimea Medal | 132 |
| Second Chinese War Medal | 132 |
| Victoria Cross | 136 |
| Indian Order of Merit | 136 |
| Meritorious Service Medal | 136 |
| Distinguished Conduct Medal | 140 |
| Conspicuous Gallantry Medal | 140 |
| Indian Mutiny Medal | 144 |
| New Zealand Medal | 144 |
| Abyssinian Medal | 148 |
| Canada Medal | 148 |
| Ashantee Medal | 148 |
| Zulu War Medal | 148 |
| Afghan Medal, 1878-9-80 | 156 |
| Roberts Star for Kandahar | 156 |
| Hong-Kong Plague Medal | 160 [Pg xv] |
| Egyptian War Medal | 160 |
| Khedive's Star | 160 |
| India Medal for Four Campaigns | 164 |
| Egyptian Medal for Three Campaigns | 164 |
| Africa Medal for Five Expeditions | 164 |
| Jummoo and Kashmir Medal | 168 |
| Hunza Nagar Badge | 168 |
| Medal for Matabeleland | 172 |
| Cape of Good Hope Medal | 172 |
| Queen's Sudan Medal (Reverse) | 172 |
| Khedive's Sudan Medal (Obverse) | 172 |
| Queen's Sudan Medal (Obverse) | 176 |
| Khedive's Sudan Medal (Reverse) | 176 |
| Queen's South Africa Medal (Obverse) | 176 |
| King's South Africa Medal (Reverse) | 176 |
| Boer War Medals for Comparison | 180 |
| Major Crooper's Decorations | 184 |
| Medals illustrating Phases in the Life of Queen Victoria | 188 |
| Bronze Star for Ashanti, 1896 | 192 |
| India 1895 Medal | 192 |
| Mayor's Star for Defence of Kimberley | 192 |
| Medal for Ashanti, 1900 | 198 |
| Medal for Tibet, 1903-4 | 198 |
| Medal for Natal Rebellion | 198 |
| India General Service Medal, 1908 | 204 |
| India General Service Medal for Abor, 1911-12 | 204 |
| Medal for Sudan, 1910 | 204 |
| Distinguished Service Cross | 208 |
| Distinguished Service Order | 208 |
| Conspicuous Service Cross | 208 |
| Royal Naval Reserve Medal | 224 |
| H.E.I. Co.'s Meritorious Service Medal | 224 |
| King Edward's Army Long Service Medal | 224 |
| Victorian Volunteer Officer's Decoration | 240 |
| Edwardian Colonial and Auxiliary Forces Decoration | 240 |
| King Edward's Militia Long Service Medal | 244 [Pg xvi] |
| King George's Territorial Efficiency Medal | 244 |
| Victorian Military Long Service Medal | 252 |
| King George's Naval Distinguished Service Medal | 252 |
| Egyptian Medal for Bravery | 256 |
| The Military Cross | 256 |
| Elizabethan Naval Medal | 266 |
| Commonwealth Medal for Dutch Wars | 266 |
| Lord Uppingham's Armada Medal | 270 |
| The Wyard Medal | 270 |
| Charles II Silver Naval Medal | 272 |
| Queen Anne Silver Naval Medal | 276 |
| William III Silver Medal for La Hogue | 280 |
| Naval Gold Medal for the "Glorious First of June" | 280 |
| Rear-Admiral Ussher's Decorations | 284 |
| Davison's Medal for the Nile | 288 |
| Boulton's Medal for Trafalgar | 290 |
| Naval General Service Medal | 292 |
| Sultan's Medal for Acre | 292 |
| Baltic Medal | 296 |
| Naval Medal for Best Shot | 296 |
| Africa General Service Medal | 296 |
| Earl of St. Vincent's Medal, 1800 | 304 |
| William IV Naval Long Service Medal | 308 |
| Victorian Naval Long Service Medal | 308 |
| Edward VII Naval Long Service Medal | 308 |
| Cross of the Légion d'Honneur | 320 |
| Prussian Order of Merit (2nd Class) | 324 |
| Austrian Cross for 1813-14 | 324 |
| Hessian Medal for 1814-15 | 324 |
| The Iron Cross | 332 |
| Austrian Order of the Iron Crown | 332 |
| Prussian Medal for Distinction in Service | 332 |
| Austrian Officer's Gilt Cross | 332 |
| Silver Cross for San Sebastian, 1846 | 336 |
| Iron Cross for San Sebastian, 1836 | 336 |
| Silver Medal for San Sebastian, 1836 | 340 [Pg xvii] |
| Baden Medal for 1849 | 340 |
| Baden Medal "For Faithful Service" | 340 |
| French Medal for Mexico, 1862-3 | 348 |
| French Medal for Tonkin, 1883-5 | 348 |
| Papal Medal for 1860 | 352 |
| Cross for König Grätz (Sadowa) | 352 |
| Geneva Cross for 1870-1 | 352 |
| French Medal for 1870-1 | 356 |
| German Medal for 1870-1 | 356 |
| Chilian War Medals | 356 |
| Russian War Decorations | 364 |
| Gold Medal for Manila Bay | 368 |
| Medal for Serbo-Turkish War | 372 |
| Medal for Serbo-Bulgarian War | 372 |
| Serbian Medal "For Courage" | 376 |
| Serbian Medal for Service to Wounded | 376 |
| German Medal for South-West Africa | 380 |
| Greek Medal for Greco-Turkish War | 380 |
| Second Médaille Militaire | 384 |
| H.E.I. Co. | Honourable East India Company. |
| M.G.S. | Military General Service. |
| N.G.S. | Naval General Service. |
| I.G.S. | India General Service. |
| V.C. | Victoria Cross. |
| D.S.O. | Distinguished Service Order. |
| D.C.M. | Distinguished Conduct Medal. |
| D.S.C. | Distinguished Service Cross. |
| D.S.M. | Distinguished Service Medal. |
| C.G.M. | Conspicuous Gallantry Medal. |
| G.S.M. | General Service Medal. |


SIR THOMAS FAIRFAX MILITARY AWARD, 1645.
SIR THOMAS FAIRFAX MILITARY AWARD, 1645.

BADGE OF CHARLES I AND HENRIETTA.
BADGE OF CHARLES I AND HENRIETTA.
ROYALIST BADGES.
Royalist badges.
WAR MEDALS AND THEIR HISTORY
Since the days when woad-clad Britons faced Cæsar's legions we have had a military system, but it was not, so far as we have any substantial evidence, until the days of Elizabeth that personal decorations were awarded for military service, or distinction on the seas or in the field.
Since the days when Britons in blue paint faced Cæsar's legions, we’ve had a military system, but, as far as we know, it wasn't until the time of Elizabeth that personal honors were given for military service or achievements at sea or on land.
In the Middle Ages, a warrior, knighted on the field of battle, was permitted to use a square instead of a swallow-tailed pennon, as a knight's banneret, and to use a war cry, from whence we may trace the origin of the mottoes used with Coats of Arms.
In the Middle Ages, a warrior who was knighted on the battlefield was allowed to use a square banner instead of a swallow-tailed pennon, as a knight's banneret, and to have a war cry, from which we can trace the origins of the mottoes used with Coats of Arms.
Later, after Sedgemoor (July 6th, 1685), recognition of the lower ranks is recorded in the bestowal of a gratuity of £40 to Sergeant Weems of the 1st Royals (now the Royal Scots) for serving the great guns in an emergency; but these types of award hardly provided that personal note or record which the war medal, as we know it, gives to the recipient.
Later, after Sedgemoor (July 6th, 1685), there is a record of recognition for the lower ranks through a £40 reward given to Sergeant Weems of the 1st Royals (now the Royal Scots) for operating the big guns in an emergency; however, these kinds of awards didn’t offer the personal significance or acknowledgment that the war medal, as we know it today, provides to the recipient.
It is fitting that the Navy, which had existed for centuries prior to the establishment of a standing Army, should take precedence in the bestowal of awards for active service; the rout of the Spanish Armada—in 1588—probably gave the incentive to Good Queen Bess to commemorate the auspicious occasion by the issue of medals in gold and silver, and we may reasonably assume that they were given for personal decoration to the leading officers[Pg 2] engaged in the defeat of the Armada, or that the recipients thought that by wearing them they would show respect to the Queen, and thus established the custom of wearing medals, presented by the Sovereign for War Service. A specimen of these medals, with rings and chain for suspension, probably from the neck, is to be seen in the British Museum.
It makes sense that the Navy, which existed for centuries before the standing Army was established, should be first in giving out awards for active service. The defeat of the Spanish Armada in 1588 likely inspired Good Queen Bess to honor that significant event by issuing gold and silver medals. We can reasonably assume these were awarded for personal decoration to the leading officers involved in the Armada's defeat, or that the recipients believed wearing them would show respect to the Queen, thus starting the custom of wearing medals given by the Sovereign for War Service. A version of these medals, complete with rings and a chain for hanging, likely worn around the neck, is on display in the British Museum.[Pg 2]
Just over fifty years later, Charles I established the principle for the Army, and thus strengthened the precedent, which was gradually extended, until now every boy and man who has acquitted himself creditably in a campaign, and the nurses also, may rightly claim the medallic recognition and record of their principal services by land or by sea.
Just over fifty years later, Charles I set the standard for the Army, which reinforced the precedent that was gradually broadened. Now, every boy and man who has performed well in a campaign, along with the nurses, can rightfully claim medal recognition and documentation of their main services, whether on land or at sea.
Elizabethan Naval Medals.—A silver medal, with an attached half-ring loop for suspension, was apparently given by Queen Elizabeth for naval achievements; it is oval, and bears on the obverse a bust of the Queen, and on the reverse a bay tree on an island, with the legend impressed thereon NON · IPSA · PERICVLA · TANGVNT. This is a splendidly decorative medal. The "Ark-in-Flood medal," though hardly so well designed or so delicately cut, is characteristic. It is generally stated that it was given to the principal officers who fought against the Armada, or to commanders who had distinguished themselves at sea. The medal was struck in gold and silver and measured 2 in. by 1¾ in., and was suspended by a fancy loop. On the obverse of the medal is a bust of the Queen facing to the left, with the inscription ELIZABETH ◆ D ◆ G ◆ ANGLIE ◆ F ◆ ET ◆ H ◆ REG.
Elizabethan Naval Medals.—A silver medal, featuring a half-ring loop for hanging, was reportedly awarded by Queen Elizabeth for naval achievements. It is oval-shaped and displays a bust of the Queen on the front. On the back, there's an image of a bay tree on an island, along with the inscription NON · IPSA · PERICVLA · TANGVNT. This is a beautifully decorative medal. The "Ark-in-Flood medal," while not as elegantly designed or finely cut, is representative. It's commonly believed that it was awarded to the main officers who fought against the Armada, or to commanders who excelled at sea. The medal was produced in gold and silver and measured 2 inches by 1¾ inches, hanging from an ornate loop. On the front of the medal, there’s a bust of the Queen facing left, with the inscription ELIZABETH ◆ D ◆ G ◆ ANGLIE ◆ F ◆ ET ◆ H ◆ REG.
These, like another medal given by Elizabeth, we may reasonably suppose to have been struck to commemorate the defeat of the "Invincible Armada." James I issued a similar medal in gold and silver, with a ring for suspension. On the reverse is the Ark upon the waters, having above it, like Elizabeth's medal, the symbol indicative of Divine protection, surrounded by the motto STET · SALVUS · IN · VNDIS. There are[Pg 3] two kinds of obverse to this medal, one with a portrait bust of the King in armour with a ruff, and the legend FIDEI DEFENSOR encircling the head. This apparently was for military officers, and the one bearing an obverse with the King's head surmounted by a broad-brimmed hat, for his courtiers. Nothing, however, can be stated with any certainty on this point. The motto on the obverse is JACOBUS · D · G · MAG · BRITA · FR · ET · HI · REX; and on the reverse an ark within an oval band containing the motto PER VNDUS SEVAS TRANQVILLA.
These medals, like another one given by Elizabeth, were likely created to celebrate the defeat of the "Invincible Armada." James I issued a similar medal in gold and silver, featuring a ring for hanging. On the back, there is an Ark on the waters, with a symbol of Divine protection above it, similar to Elizabeth's medal, surrounded by the motto STET · SALVUS · IN · VNDIS. There are[Pg 3] two types of front designs for this medal: one shows a portrait bust of the King in armor with a ruff and the legend Defender of the Faith around the head. This seems to have been intended for military officers, while the version with the King's head topped by a broad-brimmed hat was likely for his courtiers. However, nothing can be stated with certainty on this matter. The motto on the front is JACOBUS · D · G · MAG · BRITA · FR · ET · HI · REX; and on the back, there is an ark within an oval band that contains the motto PER VNDUS SEVAS TRANQVILLA.
Charles I establishes Military Medals.—Having indicated the creation of the campaign or active-service medal for the Navy, we will leave the consideration of naval medals for the section which will be reserved for that purpose and deal with the listing of the military badges of the brave, commencing with those which were struck in the days of Charles I, who established medals for military prowess.
Charles I establishes Military Medals.—After discussing the creation of the campaign or active-service medal for the Navy, we will save the discussion of naval medals for the section dedicated to that topic and focus on the listing of military badges for the courageous, starting with those that were created during the time of Charles I, who introduced medals for military excellence.
They were, according to the order of the Court, held at Oxford on the 18th day of May, 1643, "to be delivered to wear on the breast of every man who shall be certified under the hands of their commander-in-chief to have done us faithful service in the forlorn hope." These medals were only, it will be seen, given for very distinguished conduct in the field. One bore the Royal image on the obverse, and Prince Charles on the reverse; and the other the bust of Charles on the obverse, with the inscription CAROLUS · D · G · MAG · BRI · FR · ET · HIB · REX, and on the reverse the Royal Arms with the Garter bearing the motto HONI · SOIT · QUI · MAL · Y · PENSE. Both medals were silver and oval in shape, the sizes being respectively 1·7 in. by 1·3 in. and 1·5 in. by 1·2 in.
They were, according to the order of the Court, held at Oxford on May 18, 1643, "to be awarded to every man certified by their commander-in-chief for having provided us faithful service in the forlorn hope." These medals were clearly given only for outstanding conduct in battle. One featured the Royal image on one side and Prince Charles on the other; the other had Charles’s bust on one side, with the inscription CAROLUS D.G. MAG. BRI. FR. ET HIB. REX, and on the other side, the Royal Arms with the Garter displaying the motto Shame on anyone who thinks badly of it.. Both medals were silver and oval-shaped, measuring 1.7 in. by 1.3 in. and 1.5 in. by 1.2 in., respectively.
First Distinguished-conduct Medal.—The first record we have of the bestowal of a medal for conspicuous conduct in the field is in the award made to an Irish commander who distinguished himself at the Battle of Edge Hill—the first battle of the Civil War, fought on October 23rd, 1642—by the recovery of a Royal[Pg 4] standard, and certain military accessories. The gallant soldier, who became Sir Robert Welch, was subsequently presented with an oval gold medal specially cut to the King's orders by the Royal "graver of seals and medals," Thomas Rawlins. The King's instructions, given on the 1st day of June 1643, were to the effect that the medal was to have on the obverse his own figure, and that of his son Prince Charles, and on the reverse a copy of the banner Welch saved at Edge Hill, together with the legend PER REGALE MANDATVM CAROLI REGIS HOC ASSIGNATVR ROBERTO WELCH MILITI. Encircling the busts of the King and his son was the inscription CAROLUS REX MAGNAE BRITANNIAE, FRANCAIE ET HIBERNIAE CAROLUS PRINCEPS. The medal, oval in form, was 1·7 in. by 1·5 in.
First Distinguished-conduct Medal.—The first record we have of a medal being given for outstanding conduct in the field is for an Irish commander who made a name for himself at the Battle of Edge Hill—the first battle of the Civil War, which took place on October 23rd, 1642—by retrieving a Royal[Pg 4] standard and some military gear. The brave soldier, who became Sir Robert Welch, was later awarded an oval gold medal specially crafted to the King's specifications by the Royal "graver of seals and medals," Thomas Rawlins. The King's orders, issued on June 1st, 1643, stated that the medal should feature his own image along with that of his son, Prince Charles, on the front, and on the back, a depiction of the banner Welch saved at Edge Hill, accompanied by the inscription By royal mandate of King Charles, this is assigned to Sir Robert Welch.. Surrounding the busts of the King and his son was the phrase King Charles of Great Britain, France, and Ireland, Charles the Prince. The medal, which was oval-shaped, measured 1.7 inches by 1.5 inches.
The First Campaign Medal.—The Dunbar medal—by the famous medallist, Thomas Simon, was struck in two sizes, in gold (1 in. by ·85 in.) and silver (1·35 in. by 1·15 in.), for presentation to officers and men who "did this excellent service," and, to use the quaint words of Oliver Cromwell, in "commemoration of that great mercie at Dunbar" where the Scots Royalists were defeated on September 3rd, 1650. Although these medals, which were worn suspended by a chain from the neck, cannot be regarded as campaign medals in the modern sense, they have the unique distinction of being the first of which there is a reliable record, indicating that the common soldiery and officers equally participated in the receipt of a military decoration for war service. This issue was exceptional, for throughout the existence of the Commonwealth, although medals were struck to commemorate naval victories over the Dutch, they were given to officers only, and during succeeding years this appears to have been the rule also until the beginning of the nineteenth century, when the custom was established to bestow upon all soldiers, from Field Marshal to drummer-boy, the same medal; that was after the battle of Waterloo, June 18th, 1815.
The First Campaign Medal.—The Dunbar medal, created by the renowned medallist Thomas Simon, was minted in two sizes: gold (1 in. by .85 in.) and silver (1.35 in. by 1.15 in.), to be presented to officers and men who "did this excellent service." To quote Oliver Cromwell's old-fashioned phrasing, it was made "in commemoration of that great mercie at Dunbar," where the Scots Royalists were defeated on September 3rd, 1650. While these medals, which were worn on a chain around the neck, don't fit the modern definition of campaign medals, they hold the unique distinction of being the first officially recorded medals indicating that both common soldiers and officers received military decorations for their service in war. This issuance was unusual because, during the Commonwealth, although medals were minted to commemorate naval victories against the Dutch, they were only awarded to officers. Over the following years, this trend continued until the early nineteenth century, when it became customary to award the same medal to all soldiers, from Field Marshal to drummer-boy; this change occurred after the battle of Waterloo on June 18th, 1815.

THE DUNBAR MEDAL, 1650.
THE DUNBAR MEDAL, 1650.

| (Obverse.) | (Reverse.) |
| COMMEMORATIVE SILVER MEDAL FOR THE BATTLE OF OUDENARDE, 1708. | |
The Dunbar medal, as the illustration facing page 1
shows, bears on the obverse the bust of Cromwell in
armour with the inscription in a semicircle above
WORD AT
DVNBAR·THE LORD OF HOSTSSEPTEM
Y3·1650. On the reverse
is quaintly depicted the House of Commons,
which referred to the Committee of the Army the
consideration of a grant of medals to officers and men
who had served in Scotland, and to "set the proportions
and the values of them, and their number, and present
the estimate to the House." Bronze medals exist, but
the reverses of these are plain, despite Cromwell's
request that an Army should form the subject, which
was only acceded to in so far as the legend is concerned,
and a slight suggestion of a fight behind the bust of
the Lord Protector.
The Dunbar medal, as shown in the illustration facing page 1, features the bust of Cromwell in armor on the front, with an inscription in a semicircle above: WORD AT
DVNBAR·THE LORD OF HOSTS
SEPTEM Y3·1650. On the back, there's a quirky depiction of the House of Commons. This house referred the idea of granting medals to officers and men who served in Scotland to the Committee of the Army to "determine the proportions, values, and number of the medals, and present the estimate to the House." While bronze medals exist, their backs are plain, despite Cromwell's request for an Army theme, which was only partially fulfilled with the legend and a slight hint of a battle behind the bust of the Lord Protector.
The Cromwellians voted the sum of £100 to provide a gold medal, for distinguished service, and chain for presentation to Colonel Mackworth, who, as governor of Shrewsbury, had refused to surrender the castle to the Royalists. Of Blake's medal and the other decorations for maritime warfare I shall treat in the section devoted to naval medals, but I might here remark upon the fact that in those Puritan days the seaman appears to have been as much a "handyman" as in modern times, for, like the present-day marine and seaman, he fought Per Mare et per Terram; at any rate Generals Blake and Monk did, for they received naval medals or awards from the Commonwealth for their services against the Dutch.
The Cromwellians voted to allocate £100 for a gold medal and chain to honor Colonel Mackworth for his distinguished service as governor of Shrewsbury, where he refused to surrender the castle to the Royalists. I will discuss Blake's medal and other maritime warfare decorations in the section on naval medals, but I want to point out that during those Puritan times, sailors seemed to be just as much "handymen" as they are today. Just like modern marines and sailors, they fought Per Mare et per Terram; at least Generals Blake and Monk did, as they received naval medals or awards from the Commonwealth for their services against the Dutch.
Various medals were struck during the Civil War by the Royalists, and engravings are extant illustrating medals variously bearing on the obverse the portraits of King Charles I, Prince Rupert, or one or other of his leading supporters and generals, including the Earl of Essex and Sir Thomas Fairfax. The reverse bore either a representation of the Parliament or the arms of the person depicted on the obverse. The victory of Naseby (June 14th, 1645) is commemorated by a silver medal—gilt—with ring for suspension,[Pg 6] upon the obverse of which is a portrait of Sir Thomas Fairfax, and the inscription THO : FAIRFAX MILES MILIT PARL DUX GEN, and on the reverse with a circle meruisti and POST HAEC MELIORA 1645.
Various medals were created during the Civil War by the Royalists, and engravings still exist showing medals that feature portraits of King Charles I, Prince Rupert, or one of his key supporters and generals, including the Earl of Essex and Sir Thomas Fairfax, on the front. The back displayed either an image of Parliament or the coat of arms of the person shown on the front. The victory at Naseby (June 14th, 1645) is commemorated by a silver medal that is gold-plated and has a ring for hanging. On the front, it shows a portrait of Sir Thomas Fairfax, along with the inscription THO: FAIRFAX MILES MILITARY PARLIAMENT DUKE GENERAL, and on the back is a circular design with the words meruisti and POST HAEC MELIORA 1645.
During the reign of Charles II (when the foundation of a standing army was established) and James II, there is no record of military medals being struck, although during the reign of the former, as I shall presently describe, naval medals were issued to commemorate victories over the Dutch, and in the reign of the latter a large silver medal, apparently for presentation to naval men, was issued.
During the time of Charles II (when the standing army was established) and James II, there’s no record of military medals being made, although during Charles II's reign, as I will describe shortly, naval medals were issued to celebrate victories over the Dutch. In James II's reign, a large silver medal was issued, apparently intended for presentation to naval personnel.
During the reign of William III and Mary, naval medals only were struck, and, as far as is known, only one such during the reign of Queen Anne, for there is no record of any being issued for the famous battles of Blenheim, Ramillies, and Oudenarde (where, as "Prince Elector of Hanover," George III distinguished himself), or the sanguinary battle of Malplaquet, although commemorative medals were struck.
During the reign of William III and Mary, only naval medals were made, and as far as we know, there was only one issued during Queen Anne's reign. There are no records of any being issued for the famous battles of Blenheim, Ramillies, and Oudenarde (where George III, as "Prince Elector of Hanover," made a name for himself), or the bloody battle of Malplaquet, even though commemorative medals were produced.
The reign of George I is also barren of military campaign medals, while there were apparently only two issued during the reign of George II—one for the Battle of Culloden (April 16th, 1746), where the Duke of Cumberland well earned the sobriquet of "The Butcher," and the other for the taking of Louisbourg, in Canada (July 27th, 1758), where, after a seven weeks' siege, the French garrison surrendered to General Amherst.
The reign of George I is also lacking in military campaign medals, and it seems only two were issued during the reign of George II—one for the Battle of Culloden (April 16, 1746), where the Duke of Cumberland earned the nickname "The Butcher," and the other for the capture of Louisbourg in Canada (July 27, 1758), where, after a seven-week siege, the French garrison surrendered to General Amherst.
The Culloden Medals.—The Culloden medal was struck to commemorate the crushing of the Jacobite rebellion at the battle of Culloden on April 16th, 1746, when the Scots under Prince Charles Edward and Lord George Murray were defeated by the Duke of Cumberland. The medal, oval in shape, and 1·75 in. by 1·45 in. in size, had on the obverse the head of "The Butcher," with CUMBERLAND above, surrounded by an ornate ribbed border and suspender; a nude figure of Apollo, with a wounded dragon at his feet,[Pg 7] occupies the ground of the reverse, with the words ACTUM EST ILICET PERIIT, and in the exergue PRŒL · COLOD · AP · XVI · MDCCXLVI. The medal, by Richard Yeo, was struck in gold, silver, and bronze, and was suspended from a red ribbon with green edges. This is a very rare medal, and few specimens now exist, and it is assumed it was only given to regimental commanders, although as Mr. Grueber, of the British Museum, pointed out there is no evidence of an order that it should be granted.
The Culloden Medals.—The Culloden medal was made to commemorate the defeat of the Jacobite rebellion at the battle of Culloden on April 16th, 1746, when the Scots led by Prince Charles Edward and Lord George Murray were defeated by the Duke of Cumberland. The medal, oval in shape and measuring 1.75 in. by 1.45 in., featured on the front the head of "The Butcher," with Cumberland above, surrounded by an ornate ribbed edge and suspender; the back shows a nude figure of Apollo, with a wounded dragon at his feet,[Pg 7] and includes the words It is done., with PRŒL · COLOD · AP · 16 · 1746 in the exergue. The medal, designed by Richard Yeo, was made in gold, silver, and bronze, and hung from a red ribbon with green edges. This is a very rare medal, with few specimens still existing, and it is believed it was only awarded to regimental commanders, although Mr. Grueber of the British Museum noted there is no evidence of a formal order for its distribution.
In the British Museum there is a bronze medal commemorating this same battle; it is possible that it was intended to be worn as a war medal. The striking of the medal is with a scroll suspender at the top with a hole, which leaves no doubt that it was intended for suspension by means of a small ring. There is a small ornamental scroll at the bottom. It is plain on the reverse, the obverse being occupied by the equestrian effigy of the Duke of Cumberland, with the date 1746 in the exergue, and above the group GUL · AUG · DUX · CUM · TERROR · REB.
In the British Museum, there’s a bronze medal honoring this same battle; it might have been meant to be worn as a war medal. The medal features a scroll suspender at the top with a hole, clearly indicating it was designed for hanging with a small ring. There’s a small decorative scroll at the bottom. The back is plain, while the front displays the equestrian figure of the Duke of Cumberland, with the date 1746 at the bottom, and above the figure is GUL · AUG · DUX · WITH · TERROR · REB.
Capture of Louisbourg.—For the siege of Louisbourg, gold and silver medals were struck for presentation to those officers who had been conspicuous by their gallantry. In gold and silver the medal, 1·7 in. in diameter, bears on the reverse a representation of the bombardment, with LOVISBOVRG TAKEN MDCCLVII, and on the obverse a globe resting upon a figure symbolic of France (some say a fury) dropping fleur-de-lis, and pointing to boats at sea. On the globe, supported by a British Grenadier and a sailor, are the words CANADA and AMERICA, and above all the figure of Fame, with laurel wreath and trumpet flying in front of the Union Jack, and a scroll with the words PARITER IN BELLA; the ribbon for this is half brownish-yellow and light purple. This rare medal is, however, generally placed in the category of historic medals. It is by Thomas Pingo, who was responsible for a series of historical medals, including those commemorating the capture[Pg 8] of Goree, December 29th, 1758, the capture of Guadaloupe, 1759, the battle of Minden, July 31st, 1759, and the capture of Quebec (where Wolfe lost his life), September 15th, 1759.
Capture of Louisbourg.—During the siege of Louisbourg, gold and silver medals were created to honor the officers who displayed outstanding bravery. The medal, measuring 1.7 inches in diameter, features on the back a depiction of the bombardment, with LOVISBOVRG TAKEN 1757, and on the front a globe resting on a figure symbolizing France (some believe it's a fury) dropping fleur-de-lis and pointing towards boats at sea. On the globe, held up by a British Grenadier and a sailor, are the words CANADA and UNITED STATES, along with the figure of Fame above, adorned with a laurel wreath and trumpet, flying in front of the Union Jack, and a scroll bearing the words Equal in Battle; the ribbon for this medal is half brownish-yellow and light purple. This rare medal is typically categorized as a historic medal. It was created by Thomas Pingo, who was responsible for a series of historical medals, including those commemorating the capture[Pg 8] of Goree on December 29th, 1758, the capture of Guadaloupe in 1759, the battle of Minden on July 31st, 1759, and the capture of Quebec (where Wolfe lost his life) on September 15th, 1759.
Carib War.—For the Carib War in 1773 the Legislative Assembly of the island of St. Vincent ordered that a medal of silver should be awarded to those who had taken part in suppressing the rebellion which had broken out among the natives. The medal bore upon the obverse the bust of George III in high relief, his hair being tied with ribbon, as was the fashion of the times, but represented as clad in armour. Above the bust is the legend GEORGIVS III MB REX. On the reverse Britannia, characteristically helmeted and resting her left hand upon the Union Shield, offers to a beaten Carib an olive branch in token of peace, while the vanquished is represented as having surrendered his arms, which lie at the feet of Britannia. In the exergue is the date MDCCLXXIII, and above the group PEACE AND PROSPERITY TO ST. VINCENTS. The medal, 23∕20 in. in diameter, was cast and chased, and bears on the truncation of the King's head the name of the modeller—C. M. Moser. It was worn suspended from the neck by a red ribbon. Among the regular regiments taking part in the campaign were the 14th, 31st, and 70th.
Carib War.—For the Carib War in 1773, the Legislative Assembly of the island of St. Vincent decided to award a silver medal to those who participated in putting down the rebellion that had erupted among the natives. The medal featured a high-relief bust of George III, depicted in armor and wearing his hair tied with a ribbon, which was the trend of the time. Above the bust is the inscription GEORGE III MB KING. On the reverse side, Britannia, typically wearing a helmet and resting her left hand on the Union Shield, extends an olive branch to a defeated Carib as a sign of peace, while the defeated warrior is shown surrendering his weapons, which lie at Britannia's feet. The date 1773 appears in the exergue, and above the scene, it reads Peace and prosperity to St. Vincents.. The medal measures 23∕20 inches in diameter, was cast and chased, and the name of the artist—C. M. Moser—can be found on the truncation of the King's head. It was worn around the neck with a red ribbon. The regular regiments that took part in the campaign included the 14th, 31st, and 70th.
Isle of St. Vincent.—Another medal was awarded for service in the island of St. Vincent. It was given to the militia officers and non-commissioned officers who commanded about five hundred natives—slaves—who helped in the campaign against the Caribs and French troops in 1795. On the obverse of this medal, which was cast and chased in silver and bronze, is a winged figure of Victory, with her right foot planted upon the body of a defeated Carib, who has dropped his musket at her feet. While in her left hand she bears a palm branch, she shows her determination by grasping a sword in the right. Above is the inscription ST. VINCENTS BLACK CORPS; on the reverse is a repre[Pg 9]sentation of a black soldier standing at attention with his musket, with fixed bayonet, resting on the ground, encircled by the legend BOLD LOCAL OBEDIENT. The whole of the lettering is in a square type of Roman capitals. This medal is 1⅞ in. diameter.
Isle of St. Vincent.—Another medal was awarded for service on the island of St. Vincent. It was given to the militia officers and non-commissioned officers who led about five hundred natives—slaves—who assisted in the campaign against the Caribs and French troops in 1795. On the front of this medal, made of silver and bronze, is a winged figure of Victory, with her right foot on the body of a defeated Carib, who has dropped his musket at her feet. While she holds a palm branch in her left hand, she shows her determination by gripping a sword in her right. Above is the inscription ST. VINCENT'S BLACK CORPS; on the back is a representation of a black soldier standing at attention with his musket, with the fixed bayonet resting on the ground, surrounded by the phrase BOLD LOCAL FOLLOWER. All of the lettering is in a square type of Roman capitals. This medal is 1⅞ in. diameter.
The next in order we have to consider are those issued by the Honourable East India Company to the officers and men who took part in the Deccan and Mysore Campaigns, between 1778 and 1792, against Hyder Ali and his son Tippoo Sahib, but these, despite the significant character of the wars, were not official or Sovereign awards, and were given to the Company's troops only. Previous to this, the Company had awarded a medal (in 1766) to native officers who had quelled a mutiny among European troops at Morighyr.
The next items we need to look at are those issued by the Honourable East India Company to the officers and soldiers who participated in the Deccan and Mysore Campaigns from 1778 to 1792, fighting against Hyder Ali and his son Tippoo Sahib. However, even though these wars were significant, these awards were not official or Sovereign honors and were only given to the Company’s troops. Before this, the Company awarded a medal in 1766 to native officers who had suppressed a mutiny among European troops at Morighyr.
The Deccan Medal.—The medal for Guzerat—1778-84—and Carnatic—1780-84—commonly known as the "Deccan" medal, was issued to native troops only, and, as Dr. Payne states, is the earliest Anglo-Indian medal to be awarded to all ranks. On the obverse Britannia is represented resting upon a trophy of arms, and holding a wreath in the right hand, which she extends toward a fort over which the British flag is flying. On the reverse is an inscription in Persian, which explains that the medal is awarded by the Government of Calcutta to commemorate "the excellent services of the brave; year of the Hegira 1199, A.D. 1784." The medal, issued in two sizes, was intended to be worn suspended from the neck by a yellow cord run through a metal loop. It was issued in gold to Subadars,[1] silver gilt to Jemadars[2] and other native officers, and of an inferior character to those who did not hold warrant rank and the ordinary sepoy. A specimen of the smaller medal, in fine condition, has sold for between £7 10s. and £8 5s.
The Deccan Medal.—The medal for Guzerat—1778-84—and Carnatic—1780-84—commonly known as the "Deccan" medal, was awarded exclusively to native troops and, as Dr. Payne points out, is the earliest Anglo-Indian medal given to all ranks. On the front, Britannia is shown resting on a trophy of arms and holding a wreath in her right hand, which she extends toward a fort where the British flag is flying. On the back, there is an inscription in Persian, stating that the medal is awarded by the Government of Calcutta to honor "the excellent services of the brave; year of the Hegira 1199, CE 1784." The medal was produced in two sizes and was meant to be worn around the neck with a yellow cord threaded through a metal loop. It was issued in gold to Subadars,[1] silver gilt to Jemadars[2] and other native officers, and of lesser quality to those without warrant rank and the regular sepoy. A specimen of the smaller medal, in good condition, has sold for between £7 10s. and £8 5s.
[1] Infantry captain.
__A_TAG_PLACEHOLDER_0__ Infantry captain.
Mysore Campaign.—During 1791 and 1793 the native [Pg 10]troops were engaged against Tippoo Sultaun in Mysore, during which campaign the city of Bangalore was captured in an exceedingly brilliant manner, thanks to the pluck and daring of British officers. On the 1st day of April 1793 it was decided by an Order in Council to give to the successful troops a medal as a reward for their services. As in the case of the forementioned medal, two grades and sizes were issued. The gold ones were all 113∕20 in. in diameter, but a smaller silver one was issued 1½ in diameter, and while some of the medals have only two cannon-balls at the foot of the sepoy, five are found on others. This is probably due to different men cutting the replicas of the dies, which may have cracked in the striking. On the obverse of the medal a sepoy, standing with his left foot on a dismounted cannon, grasps the British colours in his right hand and the Mysore flag reversed in his left; the background shows the fort of Seringapatam in the distance. On the reverse is the wording, For Services in Mysore a.d. 1791-1792, encircled by laurel branches, round which is arranged a Persian inscription to the effect that the medal is "a token of the bravery of the troops of the English Government in the war in Mysore in the year of the Hegira 1205-1206." Like the "Deccan" medal, this was intended for suspension from the neck by means of a yellow cord running through a loop. The Subadars were granted gold medals, the Jemadars and Serrangs silver medals—afterwards gilt—and the non-commissioned officers and men silver medals of less value. The order for striking these medals was given to Mr. Mair, a Calcutta silversmith.
Mysore Campaign.—Between 1791 and 1793, the local [Pg 10]troops fought against Tippoo Sultan in Mysore, during which the city of Bangalore was captured in a remarkably impressive manner, thanks to the courage and bravery of British officers. On April 1, 1793, an Order in Council was made to award the successful troops a medal for their services. Similar to the earlier mentioned medal, there were two grades and sizes issued. The gold medals were all 113∕20 inches in diameter, while a smaller silver medal was issued at 1½ inches in diameter; some medals have two cannonballs at the foot of the sepoy, while others have five. This difference is likely due to various people cutting the replicas of the dies, which may have cracked during striking. On the front of the medal, a sepoy stands with his left foot on a dismounted cannon, holding the British colors in his right hand and the Mysore flag reversed in his left; the background features the fort of Seringapatam in the distance. The back reads, For Services in Mysore in 1791-1792, surrounded by laurel branches, with a Persian inscription indicating that the medal is "a token of the bravery of the troops of the English Government in the war in Mysore in the year of the Hegira 1205-1206." Like the "Deccan" medal, this was meant to be worn around the neck with a yellow cord threaded through a loop. The Subadars received gold medals, while the Jemadars and Serrangs got silver medals—later gilt—and the non-commissioned officers and soldiers received less valuable silver medals. The order to mint these medals was given to Mr. Mair, a silversmith from Calcutta.
Many Counterfeits.—This is a poor class of medal, and doubtless the ease with which it lent itself to the counterfeiter is responsible for the number of cast fakes which one meets with. These, however, are easily detected: in casting, "sandholes" cause little grains on the surface, while dust on the mould causes holes in the cast; the granulations need removing[Pg 11] and the holes closing up by the chasing tool, but the "faker" was invariably careless, and the counterfeits may be distinguished from the genuine medals by the presence of grains on or small holes in the surface, and the fact that the "fakes," having been cast from an original, are slightly smaller, owing to the "shrinkage" which always takes place in casting. This shrinkage is responsible for practically closing up the space between the head of the flagstaff and the rim of the medal. The larger medal is 1¾ in. and the smaller 1½ in. in diameter. A fine specimen of the larger medal has fetched as much as £18.
Many Counterfeits.—This is a lesser quality medal, and it's likely that the ease with which it can be faked is why so many counterfeit versions exist. However, these are easy to spot: during the casting process, "sandholes" create small grains on the surface, and dust in the mold leads to holes in the cast. The granulations need to be removed[Pg 11] and the holes filled in with the chasing tool, but the "counterfeiters" were always careless, making it possible to tell the fakes apart from the genuine medals due to the presence of grains or small holes on the surface. Additionally, the fakes, which were cast from an original, are slightly smaller because of the "shrinkage" that occurs in casting. This shrinkage almost eliminates the gap between the top of the flagstaff and the edge of the medal. The larger medal is 1¾ inches in diameter, while the smaller one is 1½ inches. A nice example of the larger medal has sold for as much as £18.
Capture of Ceylon.—For capturing Ceylon from the Dutch in 1795-6 it was decided by an Order in Council, dated Fort William, May 15th, 1807, to confer a medal upon the Gun Lascars only who served with the European Artillery. Only two gold medals were struck and presented to native officers, and one hundred and twenty to other ranks. Like those previously mentioned, the medals were intended for suspension from the neck by a yellow cord. One and nine-tenths inch in diameter, this is one of the simplest medals ever issued, and the only one in which lettering suffices for decoration. On the obverse is the inscription, For Services on the Island of Ceylon A.D. 1795/6, and on the reverse, in Persian, "This medal was given by way of acknowledgment of services in Ceylon in the year of the Hegira 1209-1210."
Capture of Ceylon.—To recognize the capture of Ceylon from the Dutch in 1795-6, an Order in Council was issued at Fort William on May 15th, 1807, granting a medal specifically to the Gun Lascars who served with the European Artillery. Only two gold medals were made and given to native officers, while one hundred and twenty were awarded to other ranks. Like the earlier medals mentioned, these were meant to be worn around the neck on a yellow cord. Measuring one and nine-tenths inches in diameter, this is one of the simplest medals ever created and the only one that uses lettering for its decoration. The front bears the inscription, For Services on the Island of Ceylon A.D. 1795/6, and the back features the Persian phrase, "This medal was given by way of acknowledgment of services in Ceylon in the year of the Hegira 1209-1210."
Siege of Seringapatam.—The feeling of animosity on the part of Tippoo Sahib, the son of Hyder Ali, fed by the fact that the Directory in France had designs against British India, led him to make preparations for another conflict, but the Earl of Mornington, who afterwards became Marquis of Wellesley, smartly marched an army into Tippoo Sahib's territories, and on March 27th, 1799, advanced in battle array against the enemy, who, after losing about 10,000 men, retreated in disorder, followed by the British Army, which, pressing on to Seringapatam, reached the city[Pg 12] on April 5th, and commenced the famous siege, which terminated on May 8th. Among the slain was Tippoo Sahib, and the British in a magnanimous manner interred his remains in the fine mausoleum which he had caused to be built over the resting-place of his father. Twenty-two officers were killed and 45 wounded; 181 men killed, 624 wounded, and 22 missing; 119 native soldiers killed, 420 wounded, and 100 missing.
Siege of Seringapatam.—The resentment from Tippoo Sahib, the son of Hyder Ali, fueled by the fact that the French Directory had intentions against British India, drove him to prepare for another conflict. However, the Earl of Mornington, who later became the Marquis of Wellesley, quickly marched an army into Tippoo Sahib's lands, and on March 27th, 1799, advanced in battle formation against the enemy, who, after losing about 10,000 men, retreated in chaos, pursued by the British Army. The British pressed on to Seringapatam, reaching the city[Pg 12] on April 5th and began the famous siege, which ended on May 8th. Among the dead was Tippoo Sahib, and the British graciously buried his remains in the beautiful mausoleum he had built over his father's resting place. Twenty-two officers were killed and 45 wounded; 181 soldiers were killed, 624 wounded, and 22 missing; 119 native soldiers were killed, 420 wounded, and 100 missing.
The European regiments that took part in the storming were the 33rd Regiment (now the 1st Batt. West Riding Regiment), which, led by the Hon. Arthur Wellesley (afterwards Duke of Wellington), distinguished itself on the road to Seringapatam—on March 27th—by standing its ground in the face of an advancing body of 2,000 men, and then, after firing a volley, boldly charging upon them, and with the aid of cavalry driving them off. The other European regiments included the 19th and 22nd (late 25th) Light Dragoons (both disbanded), the 12th and 73rd Regiments, 74th Highlanders, 75th and 77th Regiments, the Scots Brigade, afterwards the 94th (disbanded in 1818), and the 103rd. For these excellent services the Honourable East India Company issued a medal, of which two kinds exist—one produced in the Soho Mint near Birmingham, the famous place established by Matthew Boulton, and the other from dies cut in Calcutta after strikings of the Soho medal.
The European regiments that participated in the assault were the 33rd Regiment (now the 1st Batt. West Riding Regiment), which, led by the Hon. Arthur Wellesley (later the Duke of Wellington), made a name for itself on the road to Seringapatam on March 27th by holding its position against an advancing force of 2,000 men. After firing a volley, they bravely charged at them and, with the support of cavalry, drove them away. The other European regiments included the 19th and 22nd (formerly the 25th) Light Dragoons (both now disbanded), the 12th and 73rd Regiments, the 74th Highlanders, the 75th and 77th Regiments, the Scots Brigade, which later became the 94th (disbanded in 1818), and the 103rd. For their outstanding contributions, the Honourable East India Company issued a medal, of which two types were made—one minted at the Soho Mint near Birmingham, established by Matthew Boulton, and the other from dies cut in Calcutta after the Soho medal was produced.

HONOURABLE EAST INDIA CO.'S MEDAL FOR SERINGAPATAM, 1799.
HONORABLE EAST INDIA COMPANY MEDAL FOR SERINGAPATAM, 1799.

HONOURABLE EAST INDIA CO.'S MEDAL FOR EGYPT, 1801.
HONORABLE EAST INDIA CO.'S MEDAL FOR EGYPT, 1801.
Variety of Medals Struck.—Quite a variety were struck. Gold for His Majesty, the Governor-General of India—Lord Melville, the Marquis Cornwallis, certain Nizams, Nabobs, and Rajahs, the Commander-in-Chief and the General Officers on the Staff, and one for the Oriental Museum. (£15 to £20 has been paid at auction for one of these medals.) Silver gilt for the members of the Council of the three Presidencies, the Residents of Hyderabad and Poona, the Field Officers and the General Staff on Service. (£8 has been given for a fine specimen of the gilt medal.) Silver medals were awarded to the captains and subalterns. (As much as £5 and £6 has been paid for one of these.) Bronze for non-commissioned officers of the British Army, and tin for privates. The medals were issued unnamed in 1808, but it was not until August 29th, 1815, that the members of the British Army were permitted to wear them; issued without suspenders, this permission led to the addition of loops and suspenders, and the adoption of a ribbon for suspension, and while some used a dark orange ribbon suggestive of a tiger's skin, in allusion to the victory of the British arms over Tippoo Sahib—"the conquering tiger of God"—the claret-coloured ribbon with dark blue edges, as used with the Peninsular gold medals and crosses and the Waterloo medal, was the recognised ribbon, although some officers wore a watered yellow ribbon.
Variety of Medals Struck.—A wide range of medals was minted. Gold for His Majesty, the Governor-General of India—Lord Melville, the Marquis Cornwallis, some Nizams, Nabobs, and Rajahs, the Commander-in-Chief, and the General Officers on the Staff, plus one for the Oriental Museum. (£15 to £20 has been paid at auction for one of these medals.) Silver gilt for the members of the Council of the three Presidencies, the Residents of Hyderabad and Poona, the Field Officers, and the General Staff on duty. (£8 has been given for a fine example of the gilt medal.) Silver medals were awarded to the captains and subalterns. (As much as £5 and £6 has been paid for one of these.) Bronze for non-commissioned officers of the British Army, and tin for privates. The medals were issued unnamed in 1808, but it wasn’t until August 29th, 1815, that British Army members were allowed to wear them; issued without suspensions, this permission led to the addition of loops and suspensions, and the introduction of a ribbon for wearing. While some used a dark orange ribbon resembling a tiger's skin, referring to the British victory over Tippoo Sahib—"the conquering tiger of God"—the claret-colored ribbon with dark blue edges, seen with the Peninsular gold medals and crosses and the Waterloo medal, was the recognized ribbon, although some officers opted for a watered yellow ribbon.
To the native commissioned officers and non-commissioned officers, sergeants, bandsmen, and trumpeters of European corps, and to others who might be ranked as non-commissioned officers, the bronze medal was also granted, while the tin medals were given to corporals, gunners, and European privates, and to native doctors, guides, and general-utility men with the Army.
To the local commissioned officers and non-commissioned officers, sergeants, musicians, and trumpeters of European units, as well as others who could be considered non-commissioned officers, the bronze medal was awarded. Meanwhile, tin medals were given to corporals, gunners, and European privates, along with local doctors, guides, and general utility workers within the Army.
The Soho Medal.—This, 11∕9 in. in diameter, bears on the obverse a representation of the British lion, with a defeated tiger beneath him, a long pennon flying above, and held erect by the lion's tail, bearing near the staff the Union Jack, and in Arabic the defeated Tippoo's title, "Assad Allah El Ghaleb," and in the exergue IV MAY MDCCXCIX. On the reverse is represented the storming of Seringapatam, with the meridian sun indicating that when the sun was in its full glory the successful assault was made and glorious victory was won. Underneath is the legend in Persian, "Seringapatam God conquered 28th day of the month Zikadah, 1213 of the Hegira." The Soho mint was responsible for the striking, in the years 1801 and 1802, of 30 gold, 185 silver gilt, 5,000 bronze, and 45,000 tin medals.
The Soho Medal.—This medal, measuring 11∕9 inches in diameter, features on the front a depiction of the British lion, with a defeated tiger below it, a long banner flying above and held upright by the lion's tail, which displays the Union Jack and, in Arabic, the title of the defeated Tippoo, "Assad Allah El Ghaleb," along with the date IV MAY 1799 in the exergue. On the back, there is a representation of the storming of Seringapatam, with the sun at its zenith showing that the attack occurred at the peak of daylight, leading to a glorious victory. Below this image is an inscription in Persian that reads, "Seringapatam God conquered 28th day of the month Zikadah, 1213 of the Hegira." The Soho mint produced a total of 30 gold, 185 silver gilt, 5,000 bronze, and 45,000 tin medals in the years 1801 and 1802.
The Calcutta Medal.—Like the medal of Mysore, there are two varieties of the Seringapatam medal owing to mistakes on the part of the die-cutters. The sun at its meridian, a significant and symbolic feature in the Soho medal, is omitted in that struck at Calcutta; moreover the medal is not so large, being only 1⅛ in. in diameter, is thinner, has a loop for suspension by a cord, and, what is very important, of inferior craftsmanship—so that in considering the value or authenticity of a medal for the famous battle of Seringapatam the collector has to remember several important features, since while he may hold in his hand two medals differing somewhat in size, design, and quality of craftsmanship, he may find that both are perfectly genuine. The Calcutta mint issued 83 gold and 2,786 silver medals, so that the collector must carefully consider what he is about when a silver-gilt medal is offered for sale; only 185 bona-fide medals of that quality were issued, but of the 850 British-struck silver medals many have been gilded to simulate the rarer medals, while a number of the smaller and inferior Indian-struck medals have been gilded and offered as original gilts. Despite the large number of tin medals issued (45,000), I have seen many fetch £1 each at auction. No bronze or tin medals were struck from the Calcutta die.
The Calcutta Medal.—Similar to the Mysore medal, there are two versions of the Seringapatam medal due to errors made by the die-cutters. The sun at its highest point, an important and symbolic feature in the Soho medal, is missing from the one made in Calcutta. Additionally, this medal is smaller, with a diameter of only 1⅛ in., it’s thinner, has a loop for hanging by a cord, and, importantly, is of lower quality craftsmanship. So when collectors assess the value or authenticity of a medal from the renowned battle of Seringapatam, they need to keep several key features in mind. While they may hold two medals that differ slightly in size, design, and craftsmanship, both may still be completely genuine. The Calcutta mint produced 83 gold and 2,786 silver medals, so collectors need to be cautious when a silver-gilt medal is offered for sale; only 185 bona-fide medals of that quality were made, but out of the 850 silver medals struck in Britain, many have been gilded to imitate the rarer medals, and several of the smaller, lower-quality medals struck in India have also been gilded and presented as original gilt. Despite the large number of tin medals issued (45,000), I’ve seen many sell for £1 each at auction. No bronze or tin medals were made from the Calcutta die.
Egypt, 1801.—Napoleon, with an eye upon our Indian Empire, invaded Egypt in order "to conquer the East and take Europe in the rear." Fortunate in eluding Nelson, who was cruising in the Mediterranean, he managed to disembark his troops, but he had to suffer the humiliation of Nelson's brilliant victory in the Bay of Aboukir (on August 1st, 1798), by which he lost practically all his fleet. This famous sea battle is known as the Battle of the Nile. It left Napoleon stranded in Egypt with his army, which he marched across the desert. He stormed Jaffa and besieged Acre for two months, but Sir Sidney Smith and his garrison of British and Turks not only held the fort,[Pg 15] but in so doing caused the loss of 4,000 of Napoleon's finest troops. Falling back on Egypt he found disquieting news awaiting him, so he returned to France and proclaimed himself First Consul. Meanwhile his troops had to prepare to meet the British expedition which, under Lieutenant-General Abercromby, had been dispatched to evict them. The total British force which landed under the brilliant but fated General was 15,330 men, but of these, it is stated, only about 12,000 could be counted as fighting units. The French had made formidable preparations to resist the disembarkation, and the seamen had to row the troops ashore under a hail of round shot, grape and shell. Many a boat-load of brave men was sent to the bottom, but those who reached the shore rushed through the surf, formed line, fixed bayonets, and, led by Major-General Moore (who found a soldier's grave at Coruña), charged up the slope, drove out the French battalions, and after withstanding a charge of cavalry, compelled the French to retreat along the road to Alexandria, whither they were ultimately pursued by the British army, many daring exploits taking place en route. One is particularly noteworthy. The Perthshire Regiment, wearing at the time brass helmets, were mistaken by the French cavalry for dragoons, and the Scots were consequently charged in an impetuous manner by them. The affair, which took place at Mandora, was a precursor of the brilliant action of the 93rd Highlanders at Balaklava, for, standing firm, the Perthshires coolly awaited their mounted adversaries until they were within fifty yards of them, and then, firing a volley, caused the main body to wheel off by their left and retreat in confusion. Sir Ralph Abercromby narrowly escaped death in this affair, but, as Archibald Forbes states, he "was rescued by the devoted bravery of the Perthshire Regiment."
Egypt, 1801.—Napoleon, eyeing our Indian Empire, invaded Egypt to "conquer the East and take Europe from behind." Fortunately avoiding Nelson, who was patrolling the Mediterranean, he managed to land his troops, but he faced the humiliation of Nelson's brilliant victory in the Bay of Aboukir (on August 1st, 1798), where he lost almost all his fleet. This famous naval battle is known as the Battle of the Nile. It left Napoleon stuck in Egypt with his army, which he marched through the desert. He stormed Jaffa and laid siege to Acre for two months, but Sir Sidney Smith and his garrison of British and Turks not only held the fort,[Pg 15] but also caused the loss of 4,000 of Napoleon's best troops. As he fell back to Egypt, he found troubling news waiting for him, so he returned to France and declared himself First Consul. Meanwhile, his troops prepared to face the British expedition, led by Lieutenant-General Abercromby, which had been sent to drive them out. The total British force that landed under the brilliant but doomed General was 15,330 men, but it's said that only about 12,000 were actually combat-ready. The French had made strong preparations to resist the landing, and the sailors had to row the troops ashore under a barrage of cannon fire, grapeshot, and shells. Many courageous men lost their lives at sea, but those who made it to shore rushed through the surf, formed lines, fixed their bayonets, and, led by Major-General Moore (who would later die at Coruña), charged up the hill, pushing out the French battalions. After withstanding a cavalry charge, they forced the French to retreat down the road to Alexandria, where they were eventually pursued by the British army, leading to many daring exploits taking place en route. One is particularly noteworthy. The Perthshire Regiment, at the time wearing brass helmets, were mistaken by the French cavalry for dragoons, resulting in an aggressive charge against them. This incident, which occurred at Mandora, foreshadowed the brilliant actions of the 93rd Highlanders at Balaklava, as the Perthshires stood firm, calmly waiting for the mounted adversaries to come within fifty yards before firing a volley that forced the main body to turn and retreat in confusion. Sir Ralph Abercromby narrowly escaped death during this encounter, but as Archibald Forbes noted, he "was rescued by the devoted bravery of the Perthshire Regiment."
The Highlanders at Alexandria, 1801.—At the battle of Alexandria, March 21st, 1801, Generals Moore and Oakes were wounded, but continued to lead their[Pg 16] men, who did prodigies of valour ere the French retreated to their entrenchments before Alexandria. Abercromby had, during the day, kept close to the Highlanders, whom he cheered with the words, "My brave Highlanders, remember your country! Remember your forefathers!" ere ordering them to pursue the enemy; but having sent his staff officers on different missions, he was left a solitary and conspicuous figure. A couple of French cavalrymen, seizing the opportunity, endeavoured to capture the gallant Commander-in-Chief, but, refusing to yield, he made a brilliant fight until a corporal of the 42nd (Black Watch) ran up and shot one of the men, when the other made off, but was bayoneted by another of the 42nd. Meanwhile it was noticed that he dismounted with difficulty from his horse, but as he exhibited no sign of suffering it was not until blood was observed on his thigh that any idea was entertained that he had been wounded. It was then found that a musket-ball had lodged in his hip joint. This caused his death on board the Foudroyant on March 28th, 1801. General Hutchinson, who took command of the force, ultimately invested Alexandria, and after a three days' armistice the terms of capitulation were signed, and arrangements made for the departure of the armies. The French, who were commanded by General Menou, left Egypt with about 27,500 men, and the British with 22,350.
The Highlanders at Alexandria, 1801.—At the battle of Alexandria on March 21, 1801, Generals Moore and Oakes were injured, but they continued to lead their[Pg 16] men, who performed incredible feats of bravery before the French retreated to their fortifications in Alexandria. Abercromby stayed close to the Highlanders throughout the day, encouraging them with the words, "My brave Highlanders, remember your country! Remember your ancestors!" before commanding them to chase the enemy. However, after sending his staff officers on various missions, he became a lonely and noticeable figure. A couple of French cavalrymen saw this as an opportunity and tried to capture the brave Commander-in-Chief. However, refusing to surrender, he fought valiantly until a corporal from the 42nd (Black Watch) rushed in and shot one of the horsemen; the other fled but was bayoneted by another soldier from the 42nd. During the fighting, it was observed that he dismounted from his horse with difficulty, but since he showed no signs of pain, no one suspected he had been injured until blood was seen on his thigh. It was then discovered that a musket ball had lodged in his hip joint, leading to his death on board the Foudroyant on March 28, 1801. General Hutchinson, who took over command of the force, eventually laid siege to Alexandria, and after a three-day armistice, the terms of surrender were signed, and arrangements were made for the armies to depart. The French, commanded by General Menou, left Egypt with about 27,500 troops, while the British had 22,350.
H.E.I. Co.'s Medal for Egypt.—The Military and General Service medal, with bar for Egypt, was not issued to the survivors of the series of strenuous fights which concluded with the capitulation of Alexandria, until February 11th, 1850, almost forty-nine years after. Meanwhile a large number of the army of about 5,000 men, which sailed from India under the command of Sir David Baird, had received a special medal from the Honourable East India Company, which, by a General Order, was granted on July 31st, 1802. The promptitude of the Company in rewarding soldiers stands out in pleasant relief against the thoughtlessness or procrastination of the home Government. This army of 2,000 Europeans, 2,000 sepoys, and 400 artillerymen, marched across the Nubian Desert to Keneh, and after descending the Nile encamped at Rosetta, but saw no fighting. The British regiments which formed part of the army to cross the desert were the 10th and 61st Regiments of foot, and detachments of the 80th, 86th, and 88th.
H.E.I. Co.'s Medal for Egypt.—The Military and General Service medal, with a bar for Egypt, was not awarded to the survivors of the series of intense battles that ended with the surrender of Alexandria until February 11th, 1850, nearly forty-nine years later. In the meantime, a large portion of the army, about 5,000 men, which had sailed from India under Sir David Baird, received a special medal from the Honourable East India Company, which was granted by a General Order on July 31st, 1802. The Company's quickness in rewarding soldiers stands in stark contrast to the carelessness or delay of the home Government. This army, consisting of 2,000 Europeans, 2,000 sepoys, and 400 artillerymen, marched across the Nubian Desert to Keneh, and after navigating the Nile, set up camp at Rosetta, but encountered no combat. The British regiments that were part of the army crossing the desert were the 10th and 61st Regiments of foot, along with detachments from the 80th, 86th, and 88th.

PENINSULAR GOLD MEDAL.
PENINSULAR GOLD MEDAL.
Awarded to Lieutenant-Colonel Alex. Gordon, 83rd Foot, who was killed at Talavera.
Awarded to Lieutenant Colonel Alex Gordon, 83rd Foot, who was killed at Talavera.
Silver medals, 11∕9 in. in diameter, were struck for about half the force, and sixteen gold ones. The medal, illustrated facing page 12, bears on the obverse an energetic figure of a sepoy, carrying the Union Jack, with a background suggesting a camp. In the exergue is a Persian inscription to the effect that the medal is presented to commemorate the defeat of the French armies in Egypt by the bravery and ability of the victorious army of England. On the reverse, suggestive of the transportation of troops, is a ship in full sail, and on the land which forms the background the Pyramids and an obelisk indicative of Egypt. In the exergue is the date MDCCCI.
Silver medals, 11∕9 inches in diameter, were minted for about half the force, along with sixteen gold ones. The medal, shown on the page 12, features on the front an active figure of a sepoy holding the Union Jack, set against a camp background. In the exergue, there’s a Persian inscription stating that the medal is awarded to honor the defeat of the French armies in Egypt through the bravery and skill of the victorious British army. On the back, representing troop transport, is a ship sailing, and in the background on land are the Pyramids and an obelisk symbolizing Egypt. The exergue displays the date 1801.
Order of the Crescent.—Selim III presented a series of gold medals to the officers who took part in the operations. These varied in weight and size, some being set with diamonds, while a few of the larger ones were enamelled crimson in the centre. The medals, being struck from different dies, have the crescent either on the right or left of the star. The principal naval and military officers received medals measuring 21∕10 in. in diameter; those ranking next received a lighter and smaller medal, 19∕10 in. in diameter; while a third medal, given to captains, was still lighter and only 1⅞ in. in diameter. The non-commissioned officers received a silver medal 14∕10 in. in diameter, so that one may gauge by the size the rank of the officer who received it. The medals were suspended from an orange-coloured ribbon by means of a hook and chain. I have seen specimens without attachment for suspension.
Order of the Crescent.—Selim III awarded a series of gold medals to the officers who participated in the operations. These medals varied in weight and size, with some set with diamonds, while a few of the larger ones had a crimson enamel center. The medals, made from different dies, feature the crescent either to the right or left of the star. The main naval and military officers received medals that measured 21∕10 inches in diameter; those of the next rank received a lighter and smaller medal, 19∕10 inches in diameter; while a third medal, given to captains, was even lighter and only 1⅞ inches in diameter. Non-commissioned officers received a silver medal 14∕10 inches in diameter, so the size provides a way to gauge the rank of the officer who received it. The medals were hung from an orange-colored ribbon using a hook and chain. I have seen some examples without any suspension attachment.
The army which landed under Abercromby included the 1st Battalion of the Coldstreams and the Scots Guards; the 1st Royal Scots; 2nd Queen's Royal; 8th King's; 13th, 18th Royal Irish; 19th, 28th; 23rd Welsh Fusiliers; 28th, 30th, 40th (flank companies), 42nd Black Watch; 44th, 50th, 1st and 2nd Battalions of the 54th, 58th; 79th Cameron Highlanders; 89th, 90th Perthshire Light Infantry; 92nd Gordon Highlanders; one squadron of the 11th Light Dragoons; the 12th and 26th Light Dragoons (unmounted); Artillery and Engineers; also Dillon's and De Rolle's Regiments; a detachment of Baron Hompesch's mounted riflemen, and the Corsican Rangers. The army was further strengthened by a squadron of the 8th Light Dragoons; the 10th and 27th Foot; 1st and 2nd Battalions of the 89th, and the Queen's German Regiment.
The army that landed under Abercromby included the 1st Battalion of the Coldstreams and the Scots Guards; the 1st Royal Scots; 2nd Queen's Royal; 8th King's; 13th, 18th Royal Irish; 19th, 28th; 23rd Welsh Fusiliers; 28th, 30th, 40th (flank companies), 42nd Black Watch; 44th, 50th, 1st and 2nd Battalions of the 54th, 58th; 79th Cameron Highlanders; 89th, 90th Perthshire Light Infantry; 92nd Gordon Highlanders; one squadron of the 11th Light Dragoons; the 12th and 26th Light Dragoons (dismounted); Artillery and Engineers; also Dillon's and De Rolle's Regiments; a detachment of Baron Hompesch's mounted riflemen, and the Corsican Rangers. The army was further strengthened by a squadron of the 8th Light Dragoons; the 10th and 27th Foot; 1st and 2nd Battalions of the 89th, and the Queen's German Regiment.
The 22nd Light Dragoons; two battalions of the 20th Regiment; the 24th, 25th, and 26th Regiments; as well as the Ancient Irish Fencibles, the Chasseurs Britanniques, and De Watteville's Regiment, did not reach Egypt until July 1801. The medals of men attached to the regiments which first landed and drove the French off to Alexandria, following up their retreat, and particularly those who took part in the most furious fighting, are the most sought after; those of the Black Watch and Gloucesters being especially and rightly valued, likewise those of the 8th and 13th Foot.
The 22nd Light Dragoons; two battalions of the 20th Regiment; the 24th, 25th, and 26th Regiments; along with the Ancient Irish Fencibles, the Chasseurs Britanniques, and De Watteville's Regiment, didn't arrive in Egypt until July 1801. The medals of the men from the regiments that first landed and pushed the French back to Alexandria, pursuing their retreat, especially those who participated in the most intense fighting, are the most highly sought after; the medals from the Black Watch and Gloucesters are particularly valued, as well as those from the 8th and 13th Foot.
The Red Heckle.—There is even now a common notion that the Black Watch (which lost 54 officers and men killed, and 262 wounded) had its white heckle changed to red because of its prowess against the French "Invincible Legion" in the historic ruins outside Alexandria, where, it is alleged, the heckles in the fallen bonnets became dyed with the blood of the slain, and in honour of their part in the battle of Alexandria they were granted this signal favour. Such, however, is not the correct story, for it is now generally[Pg 19] conceded that the red heckle was granted for their courageous conduct in retaking some guns, at Gildermaslen on January 4th, 1795, which the 11th Light Dragoons had abandoned. The Dragoons wore a red feather in their helmets, and this was passed on, so to speak, to the Black Watch, and the "red heckle" has distinguished the gallant regiment ever since.
The Red Heckle.—Even today, there's a common belief that the Black Watch (which lost 54 officers and men killed, and 262 wounded) changed its white heckle to red because of its impressive performance against the French "Invincible Legion" in the historic ruins outside Alexandria, where it's said that the heckles in the fallen bonnets became stained with the blood of the slain, and in honor of their role in the battle of Alexandria, they were given this special favor. However, that's not the true story, as it's now widely acknowledged[Pg 19] that the red heckle was awarded for their brave actions in recapturing some cannons at Gildermaslen on January 4th, 1795, which had been abandoned by the 11th Light Dragoons. The Dragoons wore a red feather in their helmets, and this was, in a way, passed on to the Black Watch, and the "red heckle" has marked the distinguished regiment ever since.
Highland Society's Medal.—For the "distinguished and brilliant manner in which the 42nd acted at Alexandria," the Highland Society of London had a medal struck to commemorate the capture of the "Invincibles'" standard, and one was presented to each officer and private, and to the relatives of the dead men. The medal is 2 in. in diameter, and bears on the obverse the bust of Sir Ralph Abercromby and the inscription ABERCROMBIUS DUX IN EGYPTO CECIDIT VICTOR 28 MAR 1801, and on the reverse a Highlander capturing a French standard, with the inscription in Gaelic NA FIR A CHOISIN BUAIDH' SAN EPHAIT 21 MAR 1801, which being interpreted means "These are the heroes who achieved victory in Egypt." On the edge of the medal is engraved in Gaelic O'N CHOMUN GHAELEACH D'ON FHREICEADAN DUBH NA XLII RT ("From the London Highland Society to the Black Watch 42nd Regiment"). In this battle the 28th (the 1st Gloucester Regiment) gained the distinction of wearing their badge at the back and front of their helmets, they having—while in line—turned about to meet an attack in the rear by cavalry while repelling an attack on their front by infantry.
Highland Society's Medal.—For the "outstanding and impressive way the 42nd performed at Alexandria," the Highland Society of London created a medal to honor the capture of the "Invincibles'" standard, which was given to each officer and private, as well as to the families of the fallen soldiers. The medal is 2 inches in diameter and features on the front the bust of Sir Ralph Abercromby along with the inscription Abercrombie, the leader, fell in Egypt victorious on March 28, 1801., and on the back, there’s a Highlander capturing a French standard, with the Gaelic inscription NA FIR A CHOISIN BUAIDH' SAN EPHAIT 21 MAR 1801, which translates to "These are the heroes who achieved victory in Egypt." On the edge of the medal is inscribed in Gaelic ON CHOMUN GHAELEACH D'ON FHREICEADAN DUBH NA XLII RT ("From the London Highland Society to the Black Watch 42nd Regiment"). In this battle, the 28th (the 1st Gloucester Regiment) gained the distinction of wearing their badge on both the front and back of their helmets, as they turned around while in line to confront a cavalry attack from behind while also fending off an infantry attack from the front.
THE MAHRATTA WAR
Dowlat Rao Scindiah, aspiring to the conquest of Hindustan, entered into negotiations with other Mahratta (Máráthá) leaders to attack the British and the Peishwah, who having allied himself to the British had been restored to his ancient position. The treaty of Bassein, in which the British agreed to restore him, has been described as "the greatest diplomatic triumph the world has ever witnessed." The war did not last long.
Dowlat Rao Scindiah, wanting to take over Hindustan, started talks with other Mahratta leaders to launch an attack on the British and the Peishwah, who had allied with the British and been brought back to his old position. The treaty of Bassein, in which the British agreed to restore him, has been called "the greatest diplomatic triumph the world has ever witnessed." The war didn't last long.
Allighur.—The first serious engagement was the storming of Allighur, "a bloody struggle, an hour in duration," on September 4th, 1803. The place was defended by General Perron, who had risen from the rank of a non-commissioned officer of the French Marine to be Commander in Chief of the Scindiah's army. General Lake, the British Commander-in-Chief, was his opponent, and he took the fortress by blowing in the gate, an operation described in the Wellington dispatch as "one of the most extraordinary feats I have heard of in this country." The 76th Regiment, led by Colonel Monson, was mainly instrumental in this daring feat; 2,000 of the defenders fell, and 17 officers and 261 men of the British army were killed and wounded. The 27th and 29th Dragoons were the only other European regiments present.
Allighur.—The first major battle was the storming of Allighur, "a bloody struggle, lasting an hour," on September 4th, 1803. The fort was defended by General Perron, who had climbed the ranks from a non-commissioned officer in the French Navy to become Commander in Chief of Scindiah's army. General Lake, the British Commander-in-Chief, was his adversary, and he captured the fortress by blowing open the gate, an action described in the Wellington dispatch as "one of the most extraordinary feats I've heard of in this country." The 76th Regiment, led by Colonel Monson, played a key role in this bold action; 2,000 defenders were killed, and 17 officers and 261 men from the British army were killed or injured. The 27th and 29th Dragoons were the only other European regiments involved.
Delhi.—Within a few days the battle of Delhi was fought and won. A portion of the force was dispatched, and on the 11th day of September, 1803, encamped near the Jehna Nullah within 6 miles of Delhi. Here Lake was, with 4,500 fighting men, confronted by an army of 13,000 infantry and 6,000 horsemen, with 79 pieces of artillery, under the command of a French officer, Louis Bourquien. Lake, despite the fatigued condition of his men, decided to give battle, and the result was a crowning victory for the British General, who with a native army—he had only two of the King's regiments with him, the 76th Foot and 27th Dragoons (since disbanded), to stiffen it—utterly routed the Mahrattas, who lost 3,000 men. The British losses were severe, for 585 men, including 17 European officers, fell ere the victorious army bivouacked on the field of battle, after being seventeen hours under arms. On September 13th the gallant Lake and his men entered Delhi. The result of this victory was the restoration of the Great Mogul, the blind Shah Alum, who had been a prisoner of the Scindiah's for years.
Delhi.—Within a few days, the battle of Delhi was fought and won. A part of the force was sent out, and on September 11, 1803, they camped near the Jehna Nullah, just 6 miles from Delhi. Here, Lake was positioned with 4,500 troops, facing an army of 13,000 infantry and 6,000 cavalry, along with 79 pieces of artillery, commanded by a French officer, Louis Bourquien. Despite his men being fatigued, Lake chose to engage in battle, and the outcome was a significant victory for the British General, who, with a local army—consisting of only two of the King's regiments, the 76th Foot and 27th Dragoons (now disbanded)—completely defeated the Mahrattas, who suffered 3,000 casualties. The British also faced heavy losses, with 585 men, including 17 European officers, falling before the victorious army set up camp on the battlefield after being in action for seventeen hours. On September 13, the brave Lake and his men entered Delhi. This victory resulted in the restoration of the Great Mogul, the blind Shah Alum, who had been a prisoner of Scindiah for years.

GOLD MEDAL FOR MAIDA, 1806.
Gold Medal for Maida, 1806.
Awarded to Sir Henry Edward Bunbury, Bart., K.C.B.
Awarded to Sir Henry Edward Bunbury, Bart., K.C.B.

MEDAL FOR AVA, 1824-6.
MEDAL FOR AVA, 1824-1826.
Assaye.[3]—Meanwhile Major-General the Hon. Arthur Wellesley had besieged and taken Ahmednuggur, possibly at the time the strongest stone fort in India. This he made his base of operations, and hastened to get into touch with Colonel Stevenson in order to make a combined attack on the enemy on September 24th, but while Wellesley was on the march he discovered, when at Naulmah on the 23rd, that he was within 6 miles of the Mahratta army; he decided, therefore, to take what he afterwards termed "a desperate expedient." With a force of 6,400 infantry and 1,600 cavalry (of these only 1,500 were British) and only 17 guns, the man who was to become the hero of Waterloo offered battle to the armies of the confederate chiefs, which included 30,000 horse and 128 cannon in position behind the steep banks of the River Kaitna. The result of the battle was as brilliant as the commander's resolve was daring, for the Mahratta army was routed by one only a fifth its size, and left 2,000 dead on the field; but the cost to the British was a third of the army killed or wounded, including 170 officers. Wellesley had one horse killed under him by a cannon shot, and another by a bayonet wound in the breast—sufficient evidence of the part the General took in the attack. The battle of Assaye, Wellington's first victory, is excellent evidence that he was as bold in attack as he was brilliant in defence. The 19th Light Dragoons (since disbanded), the 74th and 78th Foot were the British regiments engaged in [Pg 22]the battle, and while the latter bore the brunt of the conflict, the Dragoons largely contributed to it by their brilliant charge.
Assaye.[3]—At the same time, Major-General the Hon. Arthur Wellesley had surrounded and captured Ahmednuggur, which was probably the strongest stone fort in India at the time. He used it as his base of operations and quickly reached out to Colonel Stevenson to coordinate a joint attack on the enemy on September 24th. However, while Wellesley was marching, he found out on the 23rd at Naulmah that he was just 6 miles away from the Mahratta army. So, he decided to take what he later called "a desperate expedient." With a force of 6,400 infantry and 1,600 cavalry (of which only 1,500 were British) and just 17 cannons, the man who would become the hero of Waterloo chose to challenge the combined forces of the confederate chiefs, which included 30,000 cavalry and 128 cannons positioned behind the steep banks of the River Kaitna. The outcome of the battle was as impressive as the commander’s gamble was bold, as the Mahratta army was defeated by a force only one-fifth its size, leaving 2,000 dead on the battlefield. However, the British suffered greatly too, with a third of the army killed or wounded, including 170 officers. Wellesley lost one horse to a cannon shot and another to a bayonet wound—clear proof of his active role in the attack. The battle of Assaye, Wellington's first victory, demonstrates that he was as daring in offense as he was exceptional in defense. The 19th Light Dragoons (now disbanded), the 74th, and the 78th Foot were the British regiments involved in the battle, and while the latter bore the brunt of the fighting, the Dragoons made significant contributions with their fierce charges.
Siege of Agra.—The Mahrattas, who had evacuated Delhi after the surrender of their European officers, fell back on Agra, where the garrison, desirous of keeping the great treasure the city held, had shut the gates to their Mahratta countrymen. General Lake, having ordered his army in pursuit, had therefore to deal with these before laying siege to Agra. After a stiff fight, a charge of sepoys was all that was necessary before proceeding to take the city, which when it fell, on October 18th, was found to contain treasure worth £280,000. For this battle no recognition was given, as we shall see when listing the bars for the medals granted for the wars and battles in India between September 4th, 1803, and January 1826.
Siege of Agra.—The Mahrattas, who had left Delhi after their European officers surrendered, retreated to Agra, where the garrison, eager to protect the city's immense treasure, had closed the gates to their fellow Mahrattas. General Lake, having ordered his army to pursue, first had to address this situation before laying siege to Agra. After a tough battle, a charge by the sepoys was all that was needed before taking the city, which, when it fell on October 18th, was discovered to hold treasure worth £280,000. For this battle, no recognition was awarded, as will be shown when recounting the bars for the medals given for the wars and battles in India between September 4th, 1803, and January 1826.
Asseerghur.—At the battle of Asseerghur (October 21st, 1803) there was only one British regiment present, the 94th Foot (the Scotch Brigade). On October 16th Colonel Stevenson took possession of Burhampoor, and then proceeded to Asseerghur, where he assaulted the Pettah, or Citadel, on the 17th, and on the 21st, after cannonading the fort, received the surrender of the place. The battle practically cleared the Scindiah out of the Deccan, but did not humiliate him.
Asseerghur.—During the battle of Asseerghur (October 21st, 1803), only one British regiment was there, the 94th Foot (the Scotch Brigade). On October 16th, Colonel Stevenson took control of Burhampoor and then moved to Asseerghur, where he attacked the Pettah, or Citadel, on the 17th. On the 21st, after bombarding the fort, he accepted the surrender of the place. The battle effectively pushed Scindiah out of the Deccan, but it didn’t bring him to his knees.
Laswarree.—The decisive defeat of the Scindiah's army at Laswarree on November 1st, 1803, might be called the crowning glory of Lake's life, for the battle was a particularly desperate one, fought against great odds, and with a tenacity which had not characterised any previous battles, hard-fought though they had been, the enemy contesting the ground inch by inch. The Mahratta force comprised 9,000 infantry, 4,000 cavalry, with 72 guns, and of this fine army 7,000 were left dead on the field of battle, while 2,000 were taken prisoners; the British force, numbering only 4,000, had 172 killed and 652 wounded. The British regiments present were the Royal Irish Hussars (8th);[Pg 23] the 27th and 29th Light Dragoons; and the 76th Regiment, which lost heavily in the battle, but covered itself with glory after a night march of nearly 25 miles; indeed, the whole of the British army had been under arms for sixteen hours. General Lake, who it was said had "carried bravery to the very verge of rashness," was created Baron Lake of Delhi and Laswarree.
Laswarree.—The decisive defeat of Scindiah's army at Laswarree on November 1st, 1803, could be considered the pinnacle of Lake's career, as the battle was particularly intense, fought against overwhelming odds, and displayed a determination that had not been seen in previous battles, no matter how hard-fought they were, with the enemy fighting for every inch. The Mahratta force consisted of 9,000 infantry, 4,000 cavalry, and 72 guns, and from this impressive army, 7,000 were left dead on the battlefield, while 2,000 were captured; the British force, which numbered only 4,000, had 172 killed and 652 wounded. The British regiments involved included the Royal Irish Hussars (8th);[Pg 23] the 27th and 29th Light Dragoons; and the 76th Regiment, which suffered significant losses in the fight but earned great respect after a night march of nearly 25 miles; indeed, the entire British army had been mobilized for sixteen hours. General Lake, who was said to have "pushed bravery to the brink of recklessness," was made Baron Lake of Delhi and Laswarree.
Argaum.—The battle of Argaum, fought on November 29th, 1803, broke the Mahratta power, Wellesley routing the enemy, who abandoned 38 pieces of cannon and all their ammunition. In this battle the 74th and 78th Highlanders were particularly praised by Major-General Wellesley for repulsing and practically destroying a body of Persian or Arab cavalry. The other infantry regiment present was the 94th, and the only British cavalry regiment the 19th Light Dragoons.
Argaum.—The battle of Argaum, fought on November 29, 1803, ended the Mahratta power, with Wellesley defeating the enemy, who left behind 38 cannons and all their ammunition. In this battle, the 74th and 78th Highlanders were especially commended by Major-General Wellesley for pushing back and nearly wiping out a group of Persian or Arab cavalry. The other infantry regiment present was the 94th, and the only British cavalry regiment was the 19th Light Dragoons.
Gawilghur.—Pressing on, Wellesley arranged with Colonel Stevenson to besiege the fort of Gawilghur, the event taking place on December 15th, 1803. This was only possible after considerable hardships and endurance on the part of the army, which had to make roads along which it could drag its guns by hand. Their labours, however, were rewarded by a comparatively bloodless victory for themselves, in which the enemy lost a large number of men during the storming, among them being Killadar and Bery Sing. Two days later the treaty of peace between the Rajah of Berar and the Honourable East India Company was ratified, and the Scindiah also ratified a treaty of peace on January 5th, 1804, and thus a campaign of five months' duration was brought to an end by the astuteness and daring of Lake and Wellesley. The 74th and 78th Highlanders, and the 94th Foot (then the Scotch Brigade, now 2nd Battalion Connaught Rangers) were the only British regiments present at Gawilghur.
Gawilghur.—Continuing onward, Wellesley coordinated with Colonel Stevenson to lay siege to the fort of Gawilghur, which began on December 15th, 1803. This was only achievable after the army faced significant hardships and had to create paths to move their artillery by hand. Their efforts, however, were rewarded with a relatively bloodless victory, as the enemy suffered heavy losses during the attack, including their leaders Killadar and Bery Sing. Two days later, a peace treaty between the Rajah of Berar and the Honourable East India Company was ratified, and Scindiah also confirmed a peace treaty on January 5th, 1804, thereby concluding a five-month campaign marked by the skill and bravery of Lake and Wellesley. The 74th and 78th Highlanders, along with the 94th Foot (then the Scotch Brigade, now the 2nd Battalion Connaught Rangers), were the only British regiments present at Gawilghur.
Defence of Delhi.—Holkar yet remained to be dealt with, and a series of unfortunate circumstances made him somewhat bold, so he set about besieging Delhi,[Pg 24] which was held by Indian troops and four companies of Europeans under British officers, who, numbering only 2,500, had to defend a city 10 miles in circumference from the attacks of an army of 70,000 men with 130 guns. Meanwhile General Lake, learning of the trouble, marched rapidly up from Agra, and reached the city on October 18th, 1804. Holkar thereupon raised the siege, crossed the Jumna, and proceeded to lay waste the land.
Defense of Delhi.—Holkar still needed to be addressed, and a series of unfortunate events made him a bit more daring, so he started to besiege Delhi,[Pg 24] which was held by Indian troops and four companies of Europeans under British officers. The defenders numbered only 2,500 and had to protect a city that was 10 miles around from the attacks of an army of 70,000 men with 130 guns. Meanwhile, General Lake, hearing about the situation, quickly marched up from Agra and reached the city on October 18th, 1804. Holkar then lifted the siege, crossed the Jumna, and began to devastate the land.
Battle of Deig.—Lake, however, with his usual daring, made after him with his European cavalry and artillery, accompanied by the Delhi garrison. General Frazer was detached to march on Deig, where in the battle outside he was mortally wounded. In this battle the 76th (the only British regiment present) again distinguished itself, and drove the left flank of the enemy into the morass, where many were drowned. Besides the 76th the H.E.I. Co.'s 101st (Bengal Fusiliers) and the Bengal Native Infantry took part. During this action, in which the Mahrattas lost about 2,000 men, Holkar was closely pursued by General Lake, and was ultimately compelled to fly with a few adherents before the surprising onslaught of Lake, who, finding that the Bajah of Bhurtpoor had assisted with his cavalry in the battle of Deig, and not only sheltered Holkar's retreating troops but had fired on their pursuers, determined to act promptly and firmly.
Battle of Deig.—Lake, as always bold, chased after him with his European cavalry and artillery, along with the Delhi garrison. General Frazer was sent to march on Deig, where he was mortally wounded in the battle that took place outside. In this fight, the 76th (the only British regiment present) once again distinguished itself and pushed the enemy's left flank into the swamp, where many of them drowned. Alongside the 76th, the H.E.I. Co.'s 101st (Bengal Fusiliers) and the Bengal Native Infantry also participated. During this action, in which the Mahrattas lost about 2,000 men, Holkar was closely pursued by General Lake, who ultimately forced him to flee with a few supporters due to Lake's surprise attack. Discovering that the Bajah of Bhurtpoor had aided with his cavalry during the Battle of Deig and had not only sheltered Holkar's retreating troops but also fired on their pursuers, Lake resolved to act decisively and firmly.
Capture of Deig.—On December 13th he invested the fortress, but not until the night of the 23rd was the assault made—ten days having been occupied in making a breach—and then within one hour the place was taken after a short but desperate resistance; the citadel, however, still remained in the hands of the enemy, who evacuated the town and citadel on Christmas Eve 1804, and fled to Bhurtpoor, whither Lake resolved to pursue their army. The British regiments present at the capture were the 8th and 29th Light Dragoons, and portions of the 22nd (the Cheshire Regiment) and the 76th Foot. The H.E.I. Co.'s[Pg 25] 1st European Regiment, 6th Light Cavalry, and 8th Native Infantry were also present.
Capture of Deig.—On December 13th, he surrounded the fortress, but the attack didn't happen until the night of the 23rd—ten days were spent creating a breach—and then within an hour, the place was taken after a brief but fierce resistance; however, the citadel still remained under enemy control, who evacuated the town and citadel on Christmas Eve 1804 and fled to Bhurtpoor, where Lake decided to chase their army. The British regiments involved in the capture were the 8th and 29th Light Dragoons, along with parts of the 22nd (the Cheshire Regiment) and the 76th Foot. The H.E.I. Co.'s[Pg 25] 1st European Regiment, 6th Light Cavalry, and 8th Native Infantry were also present.
Lord Lake made the one mistake in his Indian warfare when he sat down before Bhurtpoor, because matériel necessary to a successful issue was lacking. After several unsuccessful assaults, Lake deemed it advisable to withdraw, and on the 24th took up a position 6 miles off, there to await fresh supplies of stores and ammunition. On April 9th he renewed operations, and by the 21st had settled accounts with the Rajah. The Scindiah, having joined Holkar, was pursued by Lake, and on November 23rd, 1805, a treaty was ratified with him; later Holkar was also glad to sign a treaty, whereby the peace of Hindustan was secured for twelve years, and here we must leave for a period the tale of Indian wars, which went unrewarded until April 1851—forty-eight years after the battle of Allighur—and take up the thread with the war in Nepaul.
Lord Lake made one mistake in his Indian warfare when he laid siege to Bhurtpoor because he lacked the necessary supplies for a successful outcome. After several failed attacks, Lake decided it was best to pull back, and on the 24th, he moved to a position 6 miles away to wait for fresh supplies of stores and ammunition. On April 9th, he resumed operations, and by the 21st, he had settled matters with the Rajah. Scindiah, having allied with Holkar, was pursued by Lake, and on November 23rd, 1805, a treaty was signed with him; later, Holkar also agreed to a treaty, which secured peace in Hindustan for twelve years. Here, we must pause the story of the Indian wars, which remained unrewarded until April 1851—forty-eight years after the battle of Allighur—and shift our focus to the war in Nepaul.
Maida, 1806.—The first official war medal for military
service was awarded to the seventeen superior officers
who were engaged in the decisive and brilliant victory
of Sir John Stuart—then Major-General—at Maida
in Calabria, on July 4th, 1806, when the French were
defeated, leaving about 700 dead on the field. The
order for striking the medals was issued in 1808. On
the obverse is a laureated head of King George with
the legend GEORGIVS TERTIVS REX, and on the
reverse the figure of Britannia hurling a spear with
the right hand, while guarding herself with a circular
shield whereon the Union Jack is delineated, and just
underneath this the inscription
MAI
DA
IVL. IV
MDCCCVI. Above is a
small flying figure of Victory, crowning her with a
wreath of laurel, and behind, the ancient symbol of
Sicily—the triguetra, or triple leg—like the Manx arms;
in the exergue are two crossed darts tied with a knot.
This medal, 1½ in. in diameter, framed and glazed, was
worn from the button-hole of the uniform, suspended by[Pg 26]
a claret-coloured blue-edged ribbon from a gold swivel
and loop. The names and rank of recipients are inscribed
on the edge; it was cut by Pidgeon. The
medal illustrated facing page 20 was awarded to Lieut.-Gen.
Henry Edward Bunbury, Bart., K.C.B., who was
Under Secretary of State for War, 1809-16. It was
kindly photographed for use in this book by his grandson,
Sir Henry Bunbury, Bart.
Maida, 1806.—The first official war medal for military service was given to the seventeen senior officers who took part in the decisive and remarkable victory of Sir John Stuart—then Major-General—at Maida in Calabria on July 4th, 1806, when the French were defeated, resulting in about 700 casualties on the battlefield. The order to produce the medals was issued in 1808. The front features a laureate portrait of King George with the inscription GEORGE III KING, while the back shows Britannia throwing a spear with her right hand, while protecting herself with a circular shield displaying the Union Jack. Just below this, there is the inscription MAI
DA
IVL. IV
1806. Above is a small flying figure of Victory, adorning her with a laurel wreath, and behind it is the ancient symbol of Sicily—the triguetra, or triple leg—similar to the Manx arms. In the exergue, there are two crossed darts tied with a knot. This medal, 1½ inches in diameter, was worn from the buttonhole of the uniform, hanging from a claret-colored ribbon with blue edges attached to a gold swivel and loop. The names and ranks of the recipients are engraved on the edge, and it was crafted by Pidgeon. The medal shown on the opposite page 20 was awarded to Lieut.-Gen. Henry Edward Bunbury, Bart., K.C.B., who served as Under Secretary of State for War from 1809 to 1816. It was graciously photographed for this book by his grandson, Sir Henry Bunbury, Bart.
THE PENINSULAR WAR
Napoleon, having by a series of brilliant battles gained supremacy over Central Europe, issued a decree against all commercial intercourse with Great Britain, but having lost any semblance of maritime power by the crushing defeat of Trafalgar (October 21st, 1805), this was a somewhat idle procedure. Portugal declining to carry out his Imperial decrees, Napoleon alleged that the house of Braganza no longer held power, and by cajoling the Spaniards into a false security led them to believe that they would participate in the spoils of Portugal; consequently they permitted an army under Marshal Junot to over-run Portugal, but Napoleon's ulterior object was to place his brother Joseph, King of Naples, on the throne of Spain, and in order to effect this purpose the weak-minded Charles IV and his son Ferdinand were induced to go to Bayonne, where Napoleon extracted from them the renunciation of the throne of Spain; meanwhile the Royal family of Portugal had fled to Brazil. On July 20th, 1808, Joseph Bonaparte entered Madrid, but the high-spirited Spaniards refused to accept him, and established a "junta" at Seville, declared Ferdinand VII king, and drove Joseph out of Madrid within a fortnight. The Spaniards, however, felt unequal to dealing with the usurper, and appealed to England, and not in vain—for an army of 10,000 men was speedily dispatched, under Sir Arthur Wellesley, who fought his first successful battle against the French in Spain on August 17th, 1808.
Napoleon, after winning a series of impressive battles and gaining control over Central Europe, issued a decree to cut off all trade with Great Britain. However, since he had lost any real naval power after the crushing defeat at Trafalgar (October 21, 1805), this move was largely ineffective. When Portugal refused to follow his Imperial decrees, Napoleon claimed that the House of Braganza was no longer in power and tricked the Spaniards into a false sense of security, making them believe they would share in Portugal's spoils. As a result, they allowed an army led by Marshal Junot to invade Portugal, but Napoleon’s true aim was to put his brother Joseph, the King of Naples, on the Spanish throne. To achieve this, he persuaded the weak-minded Charles IV and his son Ferdinand to go to Bayonne, where Napoleon forced them to renounce the Spanish throne. Meanwhile, the Portuguese royal family had fled to Brazil. On July 20, 1808, Joseph Bonaparte entered Madrid, but the proud Spaniards would not accept him. They set up a "junta" in Seville, declared Ferdinand VII as king, and drove Joseph out of Madrid within two weeks. However, the Spaniards felt they couldn't handle the usurper alone and reached out to England, which responded by quickly sending an army of 10,000 men under Sir Arthur Wellesley. He fought his first successful battle against the French in Spain on August 17, 1808.
Roleria.—This was the battle of Roliça, erroneously called Roleria through a mistake in dispatches, and maintained on the colours ever since, when General Laborde was driven from the position he held. The following regiments took part in the battle—5th, 6th, 9th, 29th, 32nd, 36th, 38th, 40th, 45th, 60th, 71st (known with the 43rd as the "Glasgow Light Infantry," owing to the number of Lowland Scots in the regiments), 82nd, 91st, and the Rifle Brigade, which, as Wellesley stated in his dispatch, had just been formed, but the brunt of the fighting fell on the 5th, 9th, 29th, Riflemen of the 60th and the 95th, and also the flank companies of Major-General Rowland (afterwards Viscount) Hill's Brigade. Meanwhile Marshal Junot, the French Commander-in-Chief, decided to brook no delay, and advanced to attack Wellesley, who was at this time at the Vimiera heights near the Maceria River.
Roleria.—This was the battle of Roliça, incorrectly referred to as Roleria due to a mistake in reports, and this error has been preserved on the colors ever since, when General Laborde was pushed out from the position he occupied. The following regiments participated in the battle—5th, 6th, 9th, 29th, 32nd, 36th, 38th, 40th, 45th, 60th, 71st (known with the 43rd as the "Glasgow Light Infantry," because of the number of Lowland Scots in the regiments), 82nd, 91st, and the Rifle Brigade, which, as Wellesley noted in his report, had just been formed, but the majority of the fighting fell on the 5th, 9th, 29th, Riflemen of the 60th and the 95th, along with the flank companies of Major-General Rowland (later Viscount) Hill's Brigade. Meanwhile, Marshal Junot, the French Commander-in-Chief, decided to waste no time and moved to attack Wellesley, who was at that moment on the Vimiera heights near the Maceria River.
Vimiera.—In this battle (August 21st, 1808) Wellesley gave some indication of that power in organising defence which was to prove so valuable at Waterloo. The French attacked with considerable spirit, but the British retaliated with equal vigour and drove them off. In this battle the 50th, known as the "Blind Half Hundred" owing to ophthalmia having attacked the men, and as the "Dirty Half Hundred" owing to the black coming off their cuffs when rubbing their faces, made brilliant and determined charges, which, with those made by the 43rd and the 71st, compelled the French to retreat. In this battle a piper of the 71st, being wounded in the leg, sat upon his knapsack, and declared as he placed his pipes to his lips, "Diel hae me, lads, if ye shall want for music." There were no Victoria Crosses in those days, or George Clark would have had one. Wellesley, who had been superseded in the command by Lieutenant-General Sir Hew Dalrymple and Sir Harry Buzzard, now returned to England, disgusted, it is said, with the Convention of Cintra, by which the French army was permitted to evacuate Portugal and leave Lisbon in September for[Pg 28] Brittany, from whence it soon proceeded to re-enter the Peninsula by way of the Pyrenees. Lieutenant-General Sir John Moore, who arrived in Spain after the battle of Vimiera, was placed in command of the troops, consequent upon the recall of Sir Hew Dalrymple and the resignation of Sir Harry Buzzard. His glorious death at Coruña, after a brilliant retreat, is an imperishable memory.
Vimiera.—In this battle (August 21st, 1808), Wellesley showed some of the organizing power in defense that would later be so important at Waterloo. The French attacked with a lot of determination, but the British responded with equal strength and pushed them back. During this battle, the 50th Regiment, known as the "Blind Half Hundred" because many of the men suffered from ophthalmia, and the "Dirty Half Hundred" since the black dye rubbed off their cuffs when they wiped their faces, made outstanding and courageous charges. Along with the efforts of the 43rd and the 71st, they forced the French to retreat. At one point, a piper from the 71st, after being wounded in the leg, sat on his knapsack and said as he picked up his pipes, "Diel hae me, lads, if ye shall want for music." There were no Victoria Crosses back then, or George Clark would have received one. Wellesley, who had been replaced in command by Lieutenant-General Sir Hew Dalrymple and Sir Harry Buzzard, returned to England, reportedly frustrated with the Convention of Cintra, which allowed the French army to leave Portugal and depart Lisbon in September for[Pg 28]Brittany, from where they quickly made their way back into the Peninsula through the Pyrenees. Lieutenant-General Sir John Moore, who came to Spain after the battle of Vimiera, took command of the troops following the recall of Sir Hew Dalrymple and the resignation of Sir Harry Buzzard. His heroic death at Coruña, after a brilliant retreat, remains an unforgettable memory.
Sahagun.—The story of the advance against Marshal Soult is marked by many brilliant episodes, among them the daring charge of the 15th Hussars on December 20th, 1808, at Sahagun, where, unexpectedly finding a broad ditch to pass, they leapt it in "a true fox-hunting spirit," and put the enemy to flight, with the loss of ten colonels and 160 men prisoners. As a result of this action, Sir John Moore established his headquarters at Sahagun. Though the 10th Hussars also took part in the affair, the 15th is the only cavalry regiment which won the right to carry the name on its battle-roll; the 7th, 18th Hussars, and the 3rd Hussars of the King's German Legion, were also present, and were later deemed worthy of the bar, likewise two batteries of Horse Artillery. It is noteworthy that only fifteen bars for Sahagun were issued, those who took part in the battle of Benevente as well, receiving a single bar inscribed with the two names.
Sahagun.—The story of the advance against Marshal Soult features many remarkable episodes, including the bold charge of the 15th Hussars on December 20th, 1808, at Sahagun, where they unexpectedly encountered a wide ditch, leaped over it "in a true fox-hunting spirit," and drove the enemy back, resulting in the capture of ten colonels and 160 men. Following this action, Sir John Moore set up his headquarters at Sahagun. Although the 10th Hussars also participated, the 15th is the only cavalry regiment allowed to carry the name on its battle-roll; the 7th, 18th Hussars, and the 3rd Hussars of the King's German Legion were also present and later recognized with the bar, along with two batteries of Horse Artillery. It's noteworthy that only fifteen bars for Sahagun were awarded, and those who fought in the battle of Benevente received a single bar inscribed with both names.
Benevente.—On December 24th Sir John Moore thought it advisable to retire from Sahagun, and on the 28th reached Benevente in very inclement, snowy weather, where another brilliant cavalry affair took place on the 29th, when the 10th Hussars, under General Lord Paget, made a most dashing charge against the cavalry of the Imperial Guard, led by General Lefebvre-Desnouettes, who, together with 70 cavalrymen, were made prisoners. The English cavalry lost 50 killed and wounded, and the French 150 killed. Dr. Payne points out that the single bars for this and the previous battle, as well as the bar SAHAGUN-BENEVENTE, were issued so indiscriminately that it is difficult to distinguish to which bar the recipient was entitled. There is a medal with the single bar BENEVENTE in the Chelsea Hospital.
Benevente.—On December 24th, Sir John Moore decided it was best to leave Sahagun, and on the 28th, he arrived in Benevente amid harsh snowy weather. Another notable cavalry clash occurred on the 29th when the 10th Hussars, led by General Lord Paget, launched an impressive charge against the cavalry of the Imperial Guard, commanded by General Lefebvre-Desnouettes, who, along with 70 of his cavalrymen, was captured. The British cavalry suffered 50 casualties, while the French lost 150 men. Dr. Payne mentions that the single bars for this battle and the previous one, along with the bar SAHAGUN-BENEVENTE, were issued so randomly that it's hard to tell which bar each recipient qualified for. There is a medal with the single bar Benevento at Chelsea Hospital.

PORTUGUESE PENINSULAR GOLD CROSS FOR COMMANDERS.
PORTUGUESE PENINSULAR GOLD CROSS FOR COMMANDERS.
Awarded to Lieutenant-Colonel Richard Brunton.
Awarded to Lt. Col. Richard Brunton.
Retreat to Coruña.—Then began the awful yet masterly retreat to Coruña. Through rain and snow, and over almost impassable roads, the British army of about 19,000 retreated with the French army of about 60,000, with 91 guns, hanging on without daring to do more than press the retreat, which became so demoralising to Moore's army, that not only had baggage to be abandoned, but guns and treasure to the amount of £25,000 were thrown over a precipice near Nogales to prevent any possibility of their falling into the hands of the enemy. And so, with his army of comparatively raw troops, Sir John Moore resolutely and defiantly made his way to Coruña, pursued by the veterans, under Ney and Soult, only to find on arriving at the port that the transports which were to bear them to England had not arrived! There was nothing to be done but to accept battle, and this he did in such a splendid manner that it makes his death in the hour of victory an imperishable memory, while the recollection of the valour of his much-tried and distressed soldiers will last as long as men respect courage, especially that which triumphs in the face of adversity. Sir John Moore was buried on the ramparts of Coruña by his staff officers and a few men of the Black Watch and other regiments he loved, but—
Retreat to Coruña.—Then began the terrible yet strategic retreat to Coruña. Through rain and snow, and over nearly impassable roads, the British army of about 19,000 retreated alongside the French army of about 60,000, with 91 guns, managing to hold on without daring to do more than slow the retreat, which became so demoralizing for Moore's army that they had to abandon not only their baggage but also throw guns and treasure worth £25,000 over a cliff near Nogales to prevent them from falling into enemy hands. Thus, with his army of mostly inexperienced troops, Sir John Moore resolutely and defiantly made his way to Coruña, pursued by the seasoned veterans under Ney and Soult, only to find upon arrival at the port that the transports meant to take them to England had not come! There was nothing to do but accept battle, and he did so in such an impressive way that his death at the moment of victory remains an unforgettable memory, while the bravery of his deeply tested and beleaguered soldiers will endure as long as people respect courage, especially that which prevails in the face of hardship. Sir John Moore was buried on the ramparts of Coruña by his staff officers and a few men from the Black Watch and other regiments he cherished, but—
Neither in a sheet nor in a shroud do we wrap him; But he lay like a warrior resting, With his military cloak wrapped around him.
Over his soldier's grave the French Marshals placed a plain tomb, while Marshal Soult, who commanded the French, had placed upon a rock near which Sir John Moore fell a Latin inscription recording the fact. He was not allowed, however, to sleep in his soldier's grave, for the Spaniards removed his body to a more conspicuous position, and covered it with a magnificent[Pg 30] monument eloquent of his deeds, but hardly in keeping with his simple spirit.
Over his soldier's grave, the French Marshals put a simple tomb, while Marshal Soult, who led the French, placed a Latin inscription on a rock near where Sir John Moore fell, marking the occasion. However, he wasn’t allowed to rest in his soldier's grave, as the Spaniards moved his body to a more prominent spot and covered it with a magnificent[Pg 30] monument that celebrated his achievements, but didn’t really reflect his humble nature.
In the battle of Coruña, fought on January 16th, 1809, the 50th Regiment particularly distinguished itself by its use of the bayonet, as did also the 42nd, who made a daring and victorious dash into "the key of the fight," Elvina village—indeed, the battle is said to have been won by Lord William Bentinck's brigade; Sir David Baird's division, consisting of the 4th, 42nd, and 50th, which, as mentioned in general orders issued by Lieutenant-General Hope, "sustained the weight of the attack." The 23rd Royal Welsh Fusiliers were the last to embark.
In the Battle of Coruña, which took place on January 16, 1809, the 50th Regiment stood out for its bayonet skills, as did the 42nd, who made a bold and successful charge into "the key of the fight," Elvina village—indeed, it's said that Lord William Bentinck's brigade won the battle; Sir David Baird's division, made up of the 4th, 42nd, and 50th, as noted in general orders from Lieutenant-General Hope, "withstood the brunt of the attack." The 23rd Royal Welsh Fusiliers were the last to board.
The regiments engaged at Coruña also included the Grenadier Guards; 1st, 2nd, 4th, 5th, 6th, 9th, 14th, 20th, 26th, 28th, 32nd, 36th, 38th, 43rd, 50th, 51st, 52nd, 59th, 71st, 76th, 79th, 81st, 82nd, 91st, 92nd, 95th, and the Rifle Brigade; 7th, 10th, 15th, 18th Light Dragoons; 1st and 2nd Light Battalions King's German Legion, and the 3rd Dragoons of the same corps. Three batteries of the Royal Horse Artillery were also present.
The regiments involved at Coruña also included the Grenadier Guards; 1st, 2nd, 4th, 5th, 6th, 9th, 14th, 20th, 26th, 28th, 32nd, 36th, 38th, 43rd, 50th, 51st, 52nd, 59th, 71st, 76th, 79th, 81st, 82nd, 91st, 92nd, 95th, and the Rifle Brigade; 7th, 10th, 15th, 18th Light Dragoons; 1st and 2nd Light Battalions King’s German Legion, and the 3rd Dragoons of the same corps. Three batteries of the Royal Horse Artillery were also there.
Martinique.—This island was taken by the British in February, 1762, and on several other occasions, but a bar was only given for the campaign in 1809, which had been concluded, despite very bad weather, by its surrender to Lieutenant-General Beckwith on February 24th, 1809. The French were under Admiral Villaret-Joyeuse. It was restored to France in 1814. For this campaign a bar was granted when the decision was made to issue the Military General Service medal, commonly but erroneously known as the Peninsular medal, since not only were bars for Guadaloupe and Java included, but also for Fort Detroit, Chateauguay, and Chrystler's Farm in America.
Martinique.—The British took control of this island in February 1762 and on several other occasions, but the only campaign that resulted in a bar was in 1809. This campaign ended with its surrender to Lieutenant-General Beckwith on February 24, 1809, despite the very bad weather. The French forces were led by Admiral Villaret-Joyeuse. It was returned to France in 1814. A bar was awarded for this campaign when the decision was made to issue the Military General Service medal, which is often incorrectly referred to as the Peninsular medal, because it included bars for Guadaloupe and Java as well as for Fort Detroit, Chateauguay, and Chrystler's Farm in America.
For the capture of Martinique the superior officers were awarded a gold medal, similar to that I shall shortly describe as having been conferred upon the officers who served in the Peninsula.
For capturing Martinique, the senior officers received a gold medal, similar to the one I will soon describe that was given to the officers who served in the Peninsula.
The following regiments took part in this expedition—[Pg 31]60th, 63rd, and 90th; 1st West India Regiment and the flank companies of the 7th Royal Welsh Fusiliers; 8th, 13th Light Infantry, 15th, 23rd, and 25th Regiments.
The following regiments participated in this expedition—[Pg 31]60th, 63rd, and 90th; 1st West India Regiment and the flank companies of the 7th Royal Welsh Fusiliers; 8th, 13th Light Infantry, 15th, 23rd, and 25th Regiments.
Talavera.—In the spring of 1809, Sir Arthur Wellesley left England to take command of the Anglo-Portuguese army, and, landing at Lisbon on April 22nd, placed himself at the head of 25,000 British and Portuguese, crossed the Douro, drove Marshal Soult out of Oporto, advanced into Spain, and giving battle to the French at Talavera, defeated them after a long-drawn conflict lasting over the 27th and 28th July. The French were commanded by the intrusive King Joseph Bonaparte, assisted by Marshal Victor. The French losses in the first day's fighting were about 1,000 officers and men, the British losing about 800. For the two days the French had a total of 7,394 placed hors de combat, including Generals Lapisse and Morlot killed, and Generals Sebastiani and Boulet wounded; the killed numbered 944, and the wounded 6,274, while 150 were taken prisoners. The British losses amounted to 6,268; Generals Mackenzie and Langewith, 857 officers and men being killed; 3 generals, 192 officers, and 3,718 men wounded, 9 officers and 643 men missing. The Spaniards gave their losses as 1,200 killed and wounded. This battle, the victory in which was claimed for both sides, gained for the victorious General the titles of Baron Douro of Wellesley and Viscount Wellington of Talavera, with a pension of £2,000 per annum.
Talavera.—In the spring of 1809, Sir Arthur Wellesley left England to take command of the Anglo-Portuguese army. He arrived in Lisbon on April 22nd, took charge of 25,000 British and Portuguese troops, crossed the Douro River, drove Marshal Soult out of Oporto, moved into Spain, and fought the French at Talavera, defeating them after a protracted battle on July 27th and 28th. The French were led by the imposing King Joseph Bonaparte, supported by Marshal Victor. The French suffered about 1,000 casualties on the first day, while the British lost around 800. Over the two days, the French had a total of 7,394 troops rendered hors de combat, including Generals Lapisse and Morlot killed, and Generals Sebastiani and Boulet wounded; the total killed was 944, with 6,274 wounded, and 150 taken prisoner. The British losses were 6,268; Generals Mackenzie and Langewith among the dead, with 857 officers and men killed; 3 generals, 192 officers, and 3,718 men wounded; and 9 officers and 643 men missing. The Spaniards reported their losses as 1,200 killed and wounded. This battle, claimed as a victory by both sides, earned the victorious General the titles of Baron Douro of Wellesley and Viscount Wellington of Talavera, along with a pension of £2,000 per year.
The following regiments were engaged in the battle of Talavera, those marked with an asterisk being specially mentioned in dispatches. 1st Batt. Coldstream Guards; 1st and 3rd Batts. Scots Guards; 2nd, 3rd, 4th, 5th, 6th, 2nd Batt. 7th Regiment,* 2nd Batt. 24th, 1st Batt. 29th,* 2nd Batt. 31st,* 1st Batt. 40th, 1st Batt. 45th,* 1st and 2nd Batts. 48th, 2nd Batt. 53rd,* 5th Batt. 60th,* 1st Batt. 61st, 2nd Batt. 66th, 71st, 79th, 82nd, 2nd Batt. 83rd, 2nd Batt. 87th, 1st Batt. 88th, 91st, 92nd, 1st Batt. 97th,*[Pg 32] and the Rifle Brigade. 3rd Dragoon Guards, 4th Dragoons, 14th (now Hussars), 16th (now Lancers), and 23rd Light Dragoons; Royal Artillery, Engineers, and Staff Corps; 1st and 2nd Light Battalions, 1st Light Dragoons, and 1st, 2nd, 5th, 7th Line Battalions of the King's German Legion.
The following regiments were involved in the battle of Talavera, with those marked by an asterisk being specifically mentioned in reports: 1st Battalion Coldstream Guards; 1st and 3rd Battalions Scots Guards; 2nd, 3rd, 4th, 5th, 6th, 2nd Battalion 7th Regiment,* 2nd Battalion 24th, 1st Battalion 29th,* 2nd Battalion 31st,* 1st Battalion 40th, 1st Battalion 45th,* 1st and 2nd Battalions 48th, 2nd Battalion 53rd,* 5th Battalion 60th,* 1st Battalion 61st, 2nd Battalion 66th, 71st, 79th, 82nd, 2nd Battalion 83rd, 2nd Battalion 87th, 1st Battalion 88th, 91st, 92nd, 1st Battalion 97th,*[Pg 32] and the Rifle Brigade. 3rd Dragoon Guards, 4th Dragoons, 14th (now Hussars), 16th (now Lancers), and 23rd Light Dragoons; Royal Artillery, Engineers, and Staff Corps; 1st and 2nd Light Battalions, 1st Light Dragoons, and 1st, 2nd, 5th, 7th Line Battalions of the King's German Legion.
Peninsular Gold Medals.—Following this brilliant victory it was notified in the London Gazette , September 9th, 1810, that a gold medal would be granted to commemorate the battles of Roleria, Vimiera, Coruña, and Talavera. It was, however, only given to officers who had taken part in these engagements, or who had participated in any brilliant cavalry affair. It was also decided that the medal to which an officer would have been entitled, had he survived, should be given to his next of kin. The medals vary in size, but are all of the same design. The larger size was conferred upon General Officers, and the smaller ones upon colonels and senior officers. The medal was only given to those who were actually in command during an engagement, or succeeded thereto owing to the commander being killed or placed hors de combat.
Peninsular Gold Medals.—After this impressive victory, it was announced in the London Gazette on September 9th, 1810, that a gold medal would be awarded to honor the battles of Roleria, Vimiera, Coruña, and Talavera. However, it was only given to officers who had participated in these battles or had taken part in any notable cavalry actions. It was also decided that the medal that an officer would have been entitled to if he had survived would be given to his next of kin. The medals come in different sizes, but they all share the same design. The larger size was awarded to General Officers, while the smaller ones were given to colonels and senior officers. The medal was only awarded to those who were actually in command during a battle or who took over due to the commander being killed or incapacitated.
The gold medal bears on the obverse the figure of Britannia, wearing a rather squat Roman-looking helmet, seated upon a globe, and bearing in her extended right hand a laurel wreath and in her left a palm branch, which rests upon an oval shield bearing the Union Jack; to Britannia's right is the British lion. On the reverse is a simple wreath of laurel, with the name of the battle and the date engraved in Roman capitals. The medal is attached to the ribbon by a simple suspender, and a gold buckle was frequently worn in the middle of the ribbon. General and Commanding Officers were ordered to wear the medal suspended from the neck by means of a red ribbon with blue edges—familiarly known as the Peninsular ribbon—and below the rank of lieutenant-general by the same ribbon from a button-hole of their coat. The senior officers complained that it was very inconvenient to wear a medal dangling from the neck while on horseback, and they were supported in their plea by Wellington. This medal is generally found glazed, to prevent its surface being damaged, the name and rank of the officer being engraved upon the edge of the medal itself.
The gold medal has Britannia on the front, wearing a short Roman-style helmet, sitting on a globe. In her right hand, she holds a laurel wreath, and in her left, she has a palm branch resting on an oval shield that displays the Union Jack. Next to Britannia is the British lion. On the back, there’s a simple laurel wreath with the name of the battle and the date engraved in Roman capitals. The medal is attached to the ribbon by a simple suspender, and a gold buckle was often worn in the middle of the ribbon. Generals and Commanding Officers were required to wear the medal around their necks with a red ribbon that has blue edges—commonly known as the Peninsular ribbon—and officers below the rank of lieutenant-general wore it from a button-hole on their coat with the same ribbon. Senior officers complained that it was quite inconvenient to wear a medal hanging from their neck while on horseback, a complaint supported by Wellington. This medal is usually found glazed to protect its surface, with the officer's name and rank engraved on the edge of the medal itself.

PORTUGUESE OFFICER'S CROSS FOR THE PENINSULAR CAMPAIGN.
PORTUGUESE OFFICER'S CROSS FOR THE PENINSULAR CAMPAIGN.
Awarded to Lieutenant-Colonel Richard Brunton.
Awarded to Lt. Col. Richard Brunton.
Guadaloupe.—General Beckwith, who had captured Martinique, attacked the West Indian Island of Guadaloupe, and captured it on February 6th, 1810. The French, who lost nearly 600 men, were commanded by General Ernouf (see Martinique for regiments engaged).
Guadaloupe.—General Beckwith, who had taken Martinique, launched an attack on the West Indian Island of Guadaloupe and succeeded on February 6th, 1810. The French, who lost almost 600 men, were led by General Ernouf (see Martinique for regiments involved).
Busaco.—Wellesley's Spanish allies had failed him, as Sir John Moore with his sorry experience had predicted, and so after the battle of Talavera de la Regna he retired into Portugal, whither Napoleon sent Marshal Masséna to "drive the English Leopards into the sea," but the "Sepoy General," as Napoleon had dubbed Wellesley, was alive to the possibilities of the situation, and in face of the overwhelming numbers of the French, decided to prepare the impregnable lines of Torres Vedras, stretching from the Tagus to the sea; but before he could entrench himself he was compelled to check the pursuit of Masséna on the Busaco Sierra on September 27th, 1810, where his army of British and Portuguese resisted all attempts to dislodge them. In this battle both the British and Portuguese troops fought with daring determination, so that it would appear invidious to single out special regiments for notice, but the 38th, 45th, and the 8th Portuguese Regiments were mentioned in dispatches. The 88th Connaught Rangers repulsed a division of French infantry, while the 74th Highlanders did a like service. General Simon, who had bravely led his brigade up the mountain side, was captured by two men of the 52nd Regiment, and the French losses amounted to 2,000 killed and as many wounded. The British losses were 197 killed and 1,072 wounded. Marshals Ney, Masséna, and Regnier commanded the French, the English and Portuguese being under Wellington.
Busaco.—Wellesley's Spanish allies let him down, just as Sir John Moore had sadly predicted. After the Battle of Talavera de la Regna, he retreated into Portugal, where Napoleon sent Marshal Masséna to "drive the English Leopards into the sea." But Wellesley, nicknamed the "Sepoy General" by Napoleon, recognized the potential of the situation. Faced with the overwhelming numbers of the French, he decided to establish the impregnable lines of Torres Vedras, stretching from the Tagus to the sea. However, before he could fortify his position, he had to stop Masséna's pursuit at Busaco Sierra on September 27th, 1810, where his British and Portuguese army resisted all attempts to dislodge them. In this battle, both British and Portuguese troops fought with remarkable determination, making it difficult to highlight specific regiments, but the 38th, 45th, and the 8th Portuguese Regiments were noted in dispatches. The 88th Connaught Rangers pushed back a division of French infantry, while the 74th Highlanders did the same. General Simon, who bravely led his brigade up the mountains, was captured by two soldiers from the 52nd Regiment, and the French suffered about 2,000 killed and an equal number wounded. The British lost 197 killed and 1,072 wounded. Marshals Ney, Masséna, and Regnier led the French, while Wellington commanded the British and Portuguese forces.
At the battle of Busaco the following regiments took part: the Coldstreams and Scots Guards; 4th, 14th, and 16th Light Dragoons, and three batteries of artillery; 1st Royal Scots 3rd Batt. 3rd, 5th, 7th, 9th, 11th, 24th, 27th, 29th, 31st, 34th, 38th, 39th, 40th, 42nd, 43rd, 45th, 48th, 50th, 52nd, 53rd, 57th, 60th, 61st, 66th, 74th, 79th, 83rd, 88th, 97th, and the Rifle Brigade; there were also present the following units of the King's German Legion; 1st and 2nd Light Battalions, and the 1st, 2nd, 5th, and 7th Line Battalions.
At the Battle of Busaco, the following regiments participated: the Coldstreams and Scots Guards; 4th, 14th, and 16th Light Dragoons, along with three artillery batteries; 1st Royal Scots 3rd Batt. 3rd, 5th, 7th, 9th, 11th, 24th, 27th, 29th, 31st, 34th, 38th, 39th, 40th, 42nd, 43rd, 45th, 48th, 50th, 52nd, 53rd, 57th, 60th, 61st, 66th, 74th, 79th, 83rd, 88th, 97th, and the Rifle Brigade; the following units of the King's German Legion were also present: 1st and 2nd Light Battalions, and the 1st, 2nd, 5th, and 7th Line Battalions.
Rodrigues and Isle of France.—To keep our order chronologically we must leave for a moment the army in Spain to call attention to the fact that it had become necessary, in order to protect British shipping from the French ships harbouring in the Isle of France, or the Mauritius, that the place should be taken from them. Previous to this, as part of the same plan, it had been decided to also take the Island of Rodrigues, as a preliminary to the capture of the Isle of Bourbon. For the action which was fought at Rodrigues it was decided to award a medal to those who had taken part in the expedition in the then French islands, and on September 10th, 1811, a General Order was issued stating that a medal would be awarded to those who had taken part in the action at Rodrigues, the defeat of the French on the Isle of Bourbon, and the capture of the Isle of France. The medal was awarded to native troops only, although the 86th and 96th Regiments bear BOURBON on their colours. 2,201 were struck, 45 gold and 2,156 silver. The obverse bears a figure of a sepoy standing beside a field gun, holding the Union Jack unfurled in his right hand, and in his left his musket with bayonet fixed; with his left foot he tramples on a French colour and Eagle, whilst the British fleet at anchor forms the background. On the reverse is a Persian inscription surrounding a laurel wreath, stating that "this medal was conferred in commemoration of the bravery and accustomed fidelity[Pg 35] exhibited by the sepoys of the English company in the capture of the Mauritius Islands in the year of the Hegira 1226." Outside the wreath is the record RODRIGUES VI JULY MDCCCIX. BOURBON VIII JULY & ISLE OF FRANCE IN DEC. MDCCCX. The medal, 19∕10 in. in diameter, was intended to be worn suspended from a silken cord.
Rodrigues and Isle of France.—To stay in chronological order, we need to pause our focus on the army in Spain and highlight the fact that it was necessary to capture the Isle of France, or Mauritius, to protect British shipping from the French ships based there. Before this, as part of the same strategy, it was also planned to take the Island of Rodrigues to set the stage for capturing the Isle of Bourbon. For the battle fought at Rodrigues, it was decided that a medal would be awarded to those who participated in the expedition in what were then French islands. On September 10th, 1811, a General Order was issued stating that a medal would be given to those who took part in the action at Rodrigues, the defeat of the French on the Isle of Bourbon, and the capture of the Isle of France. The medal was awarded only to native troops, although the 86th and 96th Regiments carry Bourbon on their colors. A total of 2,201 medals were struck, comprising 45 gold and 2,156 silver. The front features a sepoy standing next to a field gun, holding the Union Jack unfurled in his right hand and a musket with the bayonet fixed in his left; with his left foot, he tramples on a French flag and eagle, while the British fleet is visible in the background. The back has a Persian inscription surrounded by a laurel wreath, stating that "this medal was given in acknowledgment of the bravery and loyalty displayed by the sepoys of the English company in the capture of the Mauritius Islands in the year of the Hegira 1226." Outside the wreath, it records RODRIGUES VI JULY 1809. BOURBON VIII JULY & ISLE OF FRANCE IN DEC. 1810.. The medal measures 19∕10 in. in diameter and was meant to be worn suspended from a silk cord.
It is noteworthy that a corporal of the 86th planted the regimental colours on the redoubt, and in the fight for the Isle of Bourbon Lieutenant Munro of the 86th was killed, also 17 men killed and 59 wounded. At the taking of the Isle of France only 29 of both services were killed, and less than 150 wounded and missing; besides the fleet of 70 sail, an army of 10,000 men under Major-General Abercromby took part in the expedition.
It’s worth mentioning that a corporal from the 86th planted the regimental colors on the redoubt, and during the battle for the Isle of Bourbon, Lieutenant Munro of the 86th was killed, along with 17 others killed and 59 wounded. In the capture of the Isle of France, only 29 people from both services were killed, and fewer than 150 were wounded or missing; in addition, a fleet of 70 ships and an army of 10,000 men under Major-General Abercromby participated in the expedition.
Barrosa.—On September 29th Wellington retired with the allied armies of 25,000 British and 30,000 Portuguese behind the famous lines of Torres Vedras, where his force was augmented by the arrival of English troops. Masséna made a series of ineffectual attacks, which had the effect of keeping Wellington's army from getting stale, and then retired to Santarem. Meanwhile a force of 4,500 British, under Lieutenant-General Graham, and 7,000 Portuguese under General Dom Manuel le Lapeña, reached Tarifa to operate against the rear of the French army under Marshal Victor at Chaclana. Graham had unfortunately contented himself with the command of his own troops, leaving Lapeña to assume the position of Commander-in-Chief. On April 5th, 1811, Lapeña halted his army on the Cerro de Puerco, now known as the heights of Barrosa. The Spaniards, lacking in discipline and devoid of esprit de corps, straggled into a situation which gave the keen-eyed French Marshal an opportunity he was not slow to take advantage of, for the blundering Lapeña had left a position which could have been held on the heights of Barrosa, with the result that his Spanish army was routed and driven[Pg 36] towards the sea. Lapeña's stupidity had placed Graham in a very awkward situation. He had obeyed the command to move to Te Bermeja, but, apprised of the danger that threatened the Spanish General, he countermarched, only to find that Lapeña had bolted with his rabble of soldiery, and that the French held the key of the position. Graham determined to take the heights, and it is said there was never a shorter, more violent, or bloodier conflict; it lasted one hour and a quarter, and resulted in a loss to the French of about 3,000 killed and wounded, including General Ruffin and Brigadier Rousseau, who were mortally wounded, and six guns. The British out of their small army lost in killed and wounded about 1,243 men, including 50 officers and 60 sergeants. The 87th Regiment, Royal Irish Fusiliers, distinguished themselves by charging the French line, and capturing the Eagle of the 8th Infantry, the first to be taken during the war; two companies of the Coldstream Guards accompanied the 87th in its charge.
Barrosa.—On September 29th, Wellington retreated with the allied armies of 25,000 British and 30,000 Portuguese behind the famous lines of Torres Vedras, where his force increased with the arrival of English troops. Masséna launched a series of ineffective attacks that kept Wellington's army fresh, and then withdrew to Santarem. Meanwhile, a force of 4,500 British, led by Lieutenant-General Graham, and 7,000 Portuguese under General Dom Manuel le Lapeña, reached Tarifa to operate against the French army under Marshal Victor at Chaclana. Unfortunately, Graham was satisfied with just commanding his own troops, leaving Lapeña to take the role of Commander-in-Chief. On April 5th, 1811, Lapeña positioned his army on the Cerro de Puerco, now known as the heights of Barrosa. The Spaniards, lacking discipline and a sense of unity, fell into a situation that gave the sharp-eyed French Marshal an opportunity he was quick to exploit, as the careless Lapeña abandoned a position that could have been defended on the heights of Barrosa. This resulted in his Spanish army being routed and pushed towards the sea. Lapeña's foolishness put Graham in a very difficult position. He had followed orders to move to Te Bermeja, but, aware of the danger facing the Spanish General, he turned back, only to discover that Lapeña had fled with his disorganized troops and the French had taken control of the position. Graham decided to take the heights, and it's said that the fight was never shorter, more intense, or bloodier; it lasted an hour and a quarter, resulting in around 3,000 French killed and wounded, including General Ruffin and Brigadier Rousseau, who were mortally wounded, and the loss of six cannons. The British, from their small army, suffered about 1,243 casualties, including 50 officers and 60 sergeants. The 87th Regiment, Royal Irish Fusiliers, distinguished themselves by charging the French line and capturing the Eagle of the 8th Infantry, the first to be taken during the war; two companies of the Coldstream Guards supported the 87th in its charge.
The following British regiments took part in the battle: 2nd Batts. of the Grenadier, Coldstream, and Scots Guards; flank companies of the 1st Batt. 9th Regiment; 1st Batt. 28th; flank companies 2nd Batt. 47th; 2nd Batt. 67th; flank companies 2nd Batt. 87th; 2nd Batt. 87th; 2nd and 3rd Batts. Rifle Brigade; Royal Artillery and Royal Engineers, also the 2nd Hussars of the King's German Legion.
The following British regiments participated in the battle: 2nd Battalions of the Grenadier, Coldstream, and Scots Guards; flank companies of the 1st Battalion 9th Regiment; 1st Battalion 28th; flank companies of the 2nd Battalion 47th; 2nd Battalion 67th; flank companies of the 2nd Battalion 87th; 2nd Battalion 87th; 2nd and 3rd Battalions of the Rifle Brigade; Royal Artillery and Royal Engineers, along with the 2nd Hussars of the King's German Legion.
The British had been under arms for twenty-four hours, and fought the battle with Lapeña and his men acting the part of spectators, except for the Spanish Walloon Guard and the regiment of Ciudad Real, who joined in the fray "impelled by the instinct natural to brave men." Napier, in comparing the two leaders at Barrosa, states: "The contemptible weakness of Lapeña furnished a surprising contrast to the heroic vigour of Graham, whose attack was an inspiration rather than a resolution—so wise, so sudden was the decision, so swift, so conclusive was the execution."
The British had been in battle for twenty-four hours and fought while Lapeña and his men mostly watched, apart from the Spanish Walloon Guard and the Ciudad Real regiment, who joined the fight “driven by the instinct natural to brave men.” Napier, in comparing the two leaders at Barrosa, notes: “The pitiful weakness of Lapeña was a stark contrast to the heroic strength of Graham, whose attack was more of an inspiration than a resolve—so smart, so sudden was the decision, so quick, so decisive was the execution.”

SPANISH CROSS FOR ALBUHERA.
Albuhera Spanish Cross.

SPANISH CROSS FOR CIUDAD RODRIGO.
SPANISH CROSS FOR CIUDAD RODRIGO.

SPANISH GOLD CROSS FOR VITTORIA.
Spanish Gold Cross for Vittoria.
Fuentes d'Onor.—On Sunday, May 5th, 1811, the battle of Fuentes d'Onor (Fountain of Honour) was fought. The British and Portuguese armies under Marshal Beresford had invested Almeida, upon which Marshal Masséna marched his army, and the British light division and cavalry retired as the French advanced upon the village, which gave its name to the battle, and together with the heights behind was occupied by the 1st, 2nd, and 3rd division. The French attack upon the village on May 3rd necessitated the aid of reinforcements, and the 71st (Highland Light Infantry), the 79th (Cameron Highlanders), and the 24th (South Wales Borderers) were dispatched, the first-named regiment charging the enemy and driving them out of that portion of the village which they had occupied. The contest raged until nightfall, and over 250 officers and men fell on each side in what was practically a hand-to-hand conflict. The 4th was spent quietly, but on the 5th Masséna decided to try the fortune of the day, which at the commencement seemed to smile in his favour, for Junot carried the village of Posa Velha, while the French cavalry not only drove in the cavalry of the allies, but the whole movement caused Wellington to make a daring change of position, during which an episode unique in the annals of warfare took place. In the retirement, two guns, under Captain Norman Ramsey, had been left behind, and the French and British also were astounded to see Ramsey charge through the French masses at the head of his battery, "his horses breathing fire and stretching like greyhounds along the plain, his guns bounding like things of no weight, and the mounted gunners in close and compact order protecting the rear." Shortly after the 2nd Battalion of the Black Watch again distinguished itself by repulsing a charge of French dragoons.
Fuentes d'Onor.—On Sunday, May 5th, 1811, the battle of Fuentes d'Onor (Fountain of Honour) took place. The British and Portuguese armies under Marshal Beresford had surrounded Almeida, which led Marshal Masséna to move his army forward. As the French advanced on the village, which gave its name to the battle, the British light division and cavalry withdrew, while the 1st, 2nd, and 3rd divisions held the heights behind the village. The French attack on the village on May 3rd required reinforcements, so the 71st (Highland Light Infantry), the 79th (Cameron Highlanders), and the 24th (South Wales Borderers) were sent in, with the 71st charging the enemy and driving them out of the part of the village they had occupied. The fighting continued until nightfall, resulting in over 250 officers and soldiers being lost on each side in what turned into a close-quarter battle. The 4th was relatively calm, but on the 5th, Masséna decided to test his luck, which at first seemed to go in his favor, as Junot captured the village of Posa Velha. Meanwhile, the French cavalry not only pushed back the allies' cavalry but also forced Wellington to make a bold repositioning, during which a remarkable episode in military history occurred. As they pulled back, two cannons under Captain Norman Ramsey were left behind, and both the French and British were astonished to see Ramsey charge through the French ranks at the front of his battery, "his horses breathing fire and sprinting like greyhounds across the plain, his guns bouncing as if weightless, and the mounted gunners tightly organized to protect the rear." Shortly after, the 2nd Battalion of the Black Watch further distinguished itself by repelling a charge of French dragoons.
While the fighting was proceeding on the vast plain, a furious attack was made on Fuentes d'Onor, which was desperately held by the 24th, 71st, and 79th Regiments, but the unequal contest was determined by the[Pg 38] bayonet charge of the 88th Connaught Rangers. Nightfall compelled the cessation of hostilities, and both armies lay down to rest, looking to the morrow to decide the battle, but the French gave no sign of battle, and on the 8th retreated on the road to Ciudad Rodrigo. Masséna claimed Fuentes d'Onor as a victory, despite the fact that his object, to relieve Almeida, was unattained. In this sanguinary battle the British lost 200 killed, 1,028 wounded, and 294 missing. It is said that Masséna's total loss was about 3,000; of the French dead 200 were found in the lower village of Fuentes d'Onor. This was Masséna's last battle, Napoleon recalling the enfant chéri de la victoire, who returned to France broken-hearted, and when opportunity offered gave his allegiance to Louis XVIII.
While the fighting was going on across the vast plain, a fierce attack was launched on Fuentes d'Onor, which was desperately defended by the 24th, 71st, and 79th Regiments. However, the uneven battle was decided by the bayonet charge of the 88th Connaught Rangers. As night fell, both armies stopped fighting and settled down to rest, looking to the next day to determine the outcome of the battle. But the French showed no signs of engagement and, on the 8th, retreated toward Ciudad Rodrigo. Masséna claimed Fuentes d'Onor as a victory, even though he did not accomplish his goal of relieving Almeida. In this bloody battle, the British suffered 200 killed, 1,028 wounded, and 294 missing. It is reported that Masséna's total losses were about 3,000, with 200 French soldiers found dead in the lower village of Fuentes d'Onor. This was Masséna's last battle, as Napoleon recalled the enfant chéri de la victoire, who returned to France heartbroken, and when the opportunity arose, pledged his loyalty to Louis XVIII.
The regiments engaged in the battle were the 2nd Foot Guards (Coldstreams), 3rd Foot Guards (Scots Guards), 1st Dragoons; 14th and 16th Light Dragoons; 1st, 4th, 5th, 9th, 24th, 30th, 38th, 42nd, 43rd, 44th, 45th, 50th, 51st, 52nd, 60th, 71st, 74th, 79th, 83rd, 85th, 88th, 92nd, 94th, and the Rifle Brigade; Horse Artillery; 1st Hussars; 1st and 2nd Light Battalions, and the 1st, 2nd, 5th, and 7th Line Battalions of the King's German Legion.
The regiments involved in the battle were the 2nd Foot Guards (Coldstreams), 3rd Foot Guards (Scots Guards), 1st Dragoons; 14th and 16th Light Dragoons; 1st, 4th, 5th, 9th, 24th, 30th, 38th, 42nd, 43rd, 44th, 45th, 50th, 51st, 52nd, 60th, 71st, 74th, 79th, 83rd, 85th, 88th, 92nd, 94th, and the Rifle Brigade; Horse Artillery; 1st Hussars; 1st and 2nd Light Battalions, and the 1st, 2nd, 5th, and 7th Line Battalions of the King's German Legion.
Albuera.—"Modern history," wrote General Picton, "presents no example of an action so obstinately disputed as that of Albuera." It was there that the "Die-hards" gained their coveted name, and when the roll-call of the "Buffs" was called, after the battle, only three privates and a drummer answered to their names. It was the fight for the regimental colours which accounted in a degree for the grave loss of life, so Lieutenant-General Cust states. Ensign Thomas refused to yield the colours and was killed. Lieutenant Latham, when severely wounded, tore the precious flag he had received from Ensign Walsh from the broken staff, and concealed it under his body, where it was found after the battle by a sergeant of the 7th Fusiliers.
Albuera.—"Modern history," General Picton wrote, "doesn’t have any example of a battle fought so fiercely as that at Albuera." It was here that the "Die-hards" earned their famous name, and when the "Buffs" roll call was conducted after the battle, only three privates and a drummer responded. The struggle for the regimental colors played a part in the significant loss of life, as Lieutenant-General Cust notes. Ensign Thomas refused to give up the colors and was killed. Lieutenant Latham, severely wounded, ripped the precious flag he had received from Ensign Walsh from the shattered staff and hid it under his body, where it was later discovered by a sergeant from the 7th Fusiliers.
Latham Gold Medal.—Latham, who had a wonderful[Pg 39] recovery, was presented by the officers of the "Buffs" with a gold medal commemorating the event, and a royal authority was given him to wear it. The "Buffs," as I have indicated, were almost annihilated—4 officers, 4 sergeants, and 208 rank and file were killed; 13 officers, 11 sergeants, 1 drummer, and 222 rank and file wounded; 1 officer wounded and taken prisoner; 2 officers, 15 sergeants, 1 drummer, and 161 rank and file missing—a loss of 644 officers and men in one battle. The "Buffs" had already lost 27 killed and 208 wounded, and 7 missing, at Talavera. The 57th, Middlesex Regiment, who were called upon by their dying Colonel Inglis to "die hard," went into action 570 strong, but when the battle was over, 23 officers and 400 rank and file "were lying as they had fought, in ranks, with every wound in the front."
Latham Gold Medal.—Latham, who had an amazing[Pg 39] recovery, was awarded a gold medal by the officers of the "Buffs" to commemorate the event, along with royal permission to wear it. The "Buffs," as I've noted, faced near destruction—4 officers, 4 sergeants, and 208 soldiers were killed; 13 officers, 11 sergeants, 1 drummer, and 222 soldiers were wounded; 1 officer was wounded and taken prisoner; 2 officers, 15 sergeants, 1 drummer, and 161 soldiers were missing—a total loss of 644 men in a single battle. The "Buffs" had already suffered 27 killed, 208 wounded, and 7 missing at Talavera. The 57th, Middlesex Regiment, who were urged by their dying Colonel Inglis to "die hard," went into battle with 570 soldiers, but by the end of the fight, 23 officers and 400 soldiers "were lying as they had fought, in ranks, with every wound in the front."
The battle was fought on May 16th, 1811, the Spanish leaders agreeing that Marshal Beresford should have supreme command, and to receive battle in the village of Albuera. The allied army consisted of 32,000 infantrymen and 2,000 cavalry, with 38 guns; half the force was Spanish, and the other half equally composed of British and Portuguese. The Spaniards, as usual, were slack, and did not get into position properly. The battle opened by the French attacking the heights on the right of the Spaniards, and though they fought stubbornly at first they gradually gave way before the onslaught of the French. Matters had become very serious when General Stewart sent the leading brigade of his division up the hill under General Colborne; the advance was made in a drizzling rain. The French made several brilliant charges, and in the mêlée the commanding officer, Marshal Beresford, was attacked by a Polish lancer, whom he seized bodily and threw from his saddle. Those were heroic days indeed! The bad weather, which had so far favoured the French, actually helped to save the day for the English, for the drizzling rain prevented Marshal Soult from appreciating the sad condition of the British. On[Pg 40] the heights the 31st had resolutely held its ground; other regiments had been cut to pieces, and Beresford thought of retreat, when the cool daring of Colonel (afterwards Lord) Hardinge, who took upon himself to order General Cole to advance, and, taking General Abercromby's brigade to the ground, saved the day—to which, by the way, the Portuguese regiments of the fourth division contributed—General Cole leading the 7th and 23rd Fusiliers in person. Cole drove off the Lancers and recovered the lost guns, but ere the enemy were driven from the ridge, they had fired a terrific volley from all the guns, which killed Sir William Myers, wounded the intrepid Cole and three officers, while the Fusiliers "reeled and staggered under the iron tempest like sinking ships, but nothing could stop them." Soult, rushing into the thickest of the fight, tried to encourage his brave soldiers to stand; it was useless. "Suddenly and sternly recovering, they closed on their terrible enemies, and then was seen with what a strength and majesty the British soldier fights." To again quote Napier, "Nothing could stop that astonishing infantry ... their measured tread shook the ground, their dreadful volleys swept away the head of every formation ... the French reserve, mixing with the struggling multitude, endeavoured to sustain the fight, but the effort only increased the irremediable confusion; the mighty mass gave way, and like a loosened cliff went headlong down the steep. The rain flowed after it in streams, discoloured with blood, and 1,500 unwounded men, the remnant of 6,000 unconquerable British soldiers, stood triumphant on the fatal hill." The dead and wounded lay in two distinct lines on the ground, and in such compact masses that 7,000 bodies occupied so small an area that the artillery advancing into action had to pass over the living and the dead, friend and enemy.
The battle took place on May 16, 1811, with the Spanish leaders agreeing that Marshal Beresford would take overall command and fight in the village of Albuera. The allied army consisted of 32,000 infantry and 2,000 cavalry, with 38 guns; half of the force was Spanish, and the other half was made up of British and Portuguese. As usual, the Spaniards were sluggish and didn’t position themselves properly. The battle began with the French attacking the heights on the right of the Spanish, and although they initially fought hard, they gradually gave way under the French assault. Things became dire when General Stewart sent the leading brigade of his division up the hill under General Colborne, with the advance happening in a drizzling rain. The French launched several impressive charges, and during the melee, the commanding officer, Marshal Beresford, was attacked by a Polish lancer, whom he grabbed and threw from his saddle. Those were indeed heroic days! The bad weather, which had favored the French so far, actually helped save the day for the English, as the drizzling rain prevented Marshal Soult from realizing the desperate situation of the British. On the heights, the 31st held its ground firmly; other regiments had been decimated, and Beresford considered retreating when the cool bravery of Colonel (later Lord) Hardinge prompted him to order General Cole to advance. Taking General Abercromby's brigade to the front, he turned the tide, aided by the Portuguese regiments of the fourth division—General Cole personally leading the 7th and 23rd Fusiliers. Cole drove off the Lancers and recaptured the lost guns, but before the enemy was forced from the ridge, they unleashed a devastating volley from all their guns, which killed Sir William Myers, wounded the fearless Cole and three officers, while the Fusiliers "reeled and staggered under the iron tempest like sinking ships, yet nothing could stop them." Soult, rushing into the thick of the battle, tried to encourage his brave soldiers to hold their ground; it was futile. "Suddenly and fiercely recovering, they closed in on their formidable enemies, demonstrating the strength and majesty with which the British soldier fights." To quote Napier again, "Nothing could halt that astonishing infantry ... their measured steps shook the ground, their dreadful volleys swept away the front of every formation ... the French reserve, mingling with the struggling crowd, tried to sustain the fight, but their effort only deepened the chaos; the massive force gave way, and like a loosened cliff, tumbled down the slope. The rain flowed after it in streams, stained with blood, and 1,500 unwounded men—the remnants of 6,000 unbeatable British soldiers—stood victorious on the fateful hill." The dead and wounded lay in two distinct lines on the ground, so tightly packed that 7,000 bodies occupied such a small area that the artillery advancing into action had to pass over both the living and the dead, friend and foe.

ALCANTARA MEDAL, 1809.
(Obverse.)
ALCANTARA MEDAL, 1809.
(Front.)

ALCANTARA MEDAL, 1809.
(Reverse.)
ALCANTARA MEDAL, 1809.
(Back.)

MILITARY GENERAL SERVICE MEDAL.
Military General Service Medal.
The Immortals.—The "Die-hards," the "Buffs," the 7th Fusiliers, and the 23rd Welsh Fusiliers immortalised themselves in that bloodiest of all battles, where in four hours no less than 15,000 men were placed hors de combat. Well might M. Thiers say that "a sort of fatality rendered the heroic bravery of our troops powerless against the cold courage of the English." The 23rd lost 347 men, 80 killed, and 257 wounded and missing, and it is noteworthy that one company was brought out of action by a corporal. The 29th mustered only 2 captains and about 100 junior officers and men; the 57th was little better off, likewise the 48th when the French were driven across the Albuera River. Of the 7,000 British soldiers engaged, 4,300 were killed or wounded; the dead included Major-General Houghton, who was killed while leading his division, 33 officers, 33 sergeants, and 917 men. The Spanish and Portuguese allies lost about 2,000 men killed or wounded, and as the allied army consisted of about 34,000 men, the brunt of the fighting was borne by the British troops. The French, who numbered about 33,000, lost about 1,000 more men than the British, including 5 of their General Officers killed or wounded; 2,000 dead and 800 of their worst wounded were left on the field when the French drew off, leaving the British uncertain as to what the morrow might bring forth, but reinforcements coming for the British, Soult moved off in the direction of Badajoz, followed by Beresford.
The Immortals.—The "Die-hards," the "Buffs," the 7th Fusiliers, and the 23rd Welsh Fusiliers made their mark in the deadliest battle, where in just four hours, 15,000 men were taken out of action. It's no surprise M. Thiers remarked that "a sort of fatality rendered the heroic bravery of our troops powerless against the cold courage of the English." The 23rd lost 347 men, with 80 killed and 257 wounded or missing, and notably, one company was led out of action by a corporal. The 29th only had 2 captains and around 100 junior officers and men; the 57th fared similarly, as did the 48th when the French were pushed across the Albuera River. Of the 7,000 British soldiers involved, 4,300 were killed or wounded; the dead included Major-General Houghton, who fell while leading his division, along with 33 officers, 33 sergeants, and 917 men. The Spanish and Portuguese allies suffered about 2,000 casualties, and with the allied army totaling around 34,000, the bulk of the fighting was carried by the British troops. The French, numbering around 33,000, lost roughly 1,000 more men than the British, including 5 of their general officers who were killed or wounded; 2,000 dead and 800 severely wounded were left on the battlefield when the French retreated, leaving the British uncertain about what the next day would bring, but with reinforcements arriving for the British, Soult moved towards Badajoz, followed by Beresford.
The following regiments took part in the battle: 3rd Dragoon Guards; 4th Dragoons; 13th Light Dragoons; 1st, 3rd Foot (the "Buffs"); 1st and 2nd 7th (Royal Fusiliers); 1st 23rd (Welsh Fusiliers); 1st 27th Inniskillings; 2nd 28th; 29th; 2nd 31st; 2nd 34th; 2nd 39th (Dorsetshire); 1st 40th; 1st and 2nd 48th (Northamptonshire); 1st 57th (West Middlesex); 1st and 2nd 60th and four companies of the 5th Battalion; 2nd 66th (Berkshire); 97th Queen's Own; 1st and 2nd Light Battalions of the King's German Legion, and one company of Brunswick Oels.
The following regiments participated in the battle: 3rd Dragoon Guards; 4th Dragoons; 13th Light Dragoons; 1st, 3rd Foot (the "Buffs"); 1st and 2nd 7th (Royal Fusiliers); 1st 23rd (Welsh Fusiliers); 1st 27th Inniskillings; 2nd 28th; 29th; 2nd 31st; 2nd 34th; 2nd 39th (Dorsetshire); 1st 40th; 1st and 2nd 48th (Northamptonshire); 1st 57th (West Middlesex); 1st and 2nd 60th and four companies of the 5th Battalion; 2nd 66th (Berkshire); 97th Queen's Own; 1st and 2nd Light Battalions of the King's German Legion, and one company of Brunswick Oels.
Java.—The capture of the East Indian island of Java, which the Dutch called the most precious jewel in their diadem, was effected after operations lasting[Pg 42] from July 27th, 1811, when Lieutenant Edmund Lyons—after Admiral Lyons—made a daring landing with a few seamen, until August 26th, ten days after the battle fought at Serondel near Samarang. During this expedition the storming of Fort Cornelis took place, when the enemy lost 1,000 killed; and three Brigadiers, 30 Field Officers, 70 Captains, 140 Subalterns, and 5,000 rank and file prisoners; 400 cannons were captured. A million sterling was received by the British force as prize money. The British loss (naval and military) was 150 killed, 788 wounded, and 16 missing. By the Treaty of Vienna Java was restored to the Dutch in 1814.
Java.—The capture of the East Indian island of Java, which the Dutch referred to as the most precious jewel in their crown, was achieved after operations lasting [Pg 42] from July 27th, 1811, when Lieutenant Edmund Lyons—after Admiral Lyons—made a bold landing with a few sailors, until August 26th, ten days after the battle fought at Serondel near Samarang. During this mission, the storming of Fort Cornelis occurred, resulting in the enemy losing 1,000 killed; and three Brigadiers, 30 Field Officers, 70 Captains, 140 Subalterns, and 5,000 soldiers were taken prisoner; 400 cannons were captured. The British forces received a million sterling in prize money. The British loss (naval and military) was 150 killed, 788 wounded, and 16 missing. By the Treaty of Vienna, Java was returned to the Dutch in 1814.
H.E.I. Co.'s Java Medal.—A medal, 1·9 in. in diameter, was awarded by the Honourable East India Company to the sepoys who took part in the expedition. On the reverse is depicted the attack upon Fort Cornelis, with a British flag flying above the Dutch, and above all CORNELIS. The following is inscribed in Persian upon the reverse: "This medal was conferred in commemoration of the bravery and courage displayed by the sepoys of the English company, in the capture of the Kingdom of Java in the year of the Hegira 1228." "Java conquered XXVI August MDCCCXI." 133 gold and 6,519 silver medals of this type were struck.
H.E.I. Co.'s Java Medal.—A medal, 1.9 inches in diameter, was awarded by the Honourable East India Company to the soldiers who participated in the expedition. The reverse features an illustration of the attack on Fort Cornelis, with a British flag raised above the Dutch flag, and the word CORNELIS at the top. The following inscription appears in Persian on the back: "This medal was awarded in recognition of the bravery and courage shown by the soldiers of the English company in the capture of the Kingdom of Java in the year of the Hegira 1228." "Java conquered August 26, 1811." A total of 133 gold and 6,519 silver medals of this kind were minted.
King George III conferred gold medals upon the officers engaged, and when the Naval and the Military General Service Medals were awarded, the surviving participants in the capture received a medal with bar inscribed JAVA. Four distinct medals were issued for this expedition.
King George III awarded gold medals to the officers involved, and when the Naval and Military General Service Medals were given out, the surviving members of the capture received a medal with a bar inscribed Java. Four different medals were issued for this expedition.
The military present at the capture of Java were the 14th (now West Yorkshire Regiment), 59th (now 2nd East Lancashire Regiment), 69th (now 2nd Welsh Regiment), 78th Highland Regiment (now 2nd Seaforths), 89th (now Royal Irish Fusiliers), Bengal Volunteers and sepoys of "John Company."
The military involved in the capture of Java included the 14th (now the West Yorkshire Regiment), 59th (now the 2nd East Lancashire Regiment), 69th (now the 2nd Welsh Regiment), 78th Highland Regiment (now the 2nd Seaforths), 89th (now the Royal Irish Fusiliers), Bengal Volunteers, and sepoys of "John Company."
Ciudad Rodrigo.—The siege of Ciudad Rodrigo fol[Pg 43]lowed the "soldiers' battle" of Albuera. The army, after considerable manœuvring, marching, and countermarching, besieged Ciudad Rodrigo, which, together with the siege of Badajos, had to be undertaken before Wellington's plan of campaign could be carried out. On January 1st, 1812, the order for the siege of the fortress was suddenly issued, but some days elapsed before the order could be put into execution, owing to the inclement weather, snowstorms preventing any possibility of operations. On the 8th the investment of the fortress was commenced, and the earth redoubt of Teson Grande stormed and taken by Colonel Colborne with three companies of the 52nd Regiment. On the 13th the Convent of Santa Cruz, one of the two convents which had been fortified by the French, was stormed and carried by the light companies of the brigade of Guards, and on the night between the 14th and 15th the 40th Regiment escaladed and carried the fortified San Francisco Convent. Meanwhile preparations had been progressing for the general assault, which took place on the night of January 19th. Wellington had written in his orders "Ciudad must be stormed this evening," and the order was carried out in a brilliant manner, but alas! two British Generals were killed, General Crauford being mortally wounded whilst leading the light division, and General Mackinnon killed on reaching the ramparts of the greater breach. In this assault General Picton adjured the Connaught Rangers, who passed with the forlorn hope to storm the breach, to "spare powder and trust to cold iron," and it was by the use of the bayonet that the 43rd and 95th drove the French from the "fausse braye." The city was taken after a siege lasting twelve days, but the troops "committed frightful excesses," which some have condoned as a prescriptive right which successful besiegers may enjoy. The British losses were 9 officers and 217 rank and file killed, 84 officers—including Major-General Vandeleur and Major (afterwards Sir George) Napier, who lost an arm—and 1,000 men[Pg 44] wounded. For the successful issue to his generalship, Wellington received the patent of an earl, and was made a Spanish duke, the British Government increasing his annuity to £4,000 per annum.
Ciudad Rodrigo.—The siege of Ciudad Rodrigo followed the "soldiers' battle" of Albuera. The army, after a lot of maneuvering, marching, and counter-marching, surrounded Ciudad Rodrigo, which, along with the siege of Badajos, had to be completed before Wellington's campaign could proceed. On January 1st, 1812, the order for the siege of the fortress was abruptly given, but it took several days to act on it due to the harsh weather, with snowstorms making operations impossible. On the 8th, the siege of the fortress began, and Colonel Colborne and three companies of the 52nd Regiment stormed and captured the earth redoubt of Teson Grande. On the 13th, the Convent of Santa Cruz, one of the two fortified convents held by the French, was stormed and taken by the light companies of the Guards brigade, and on the night of January 14th-15th, the 40th Regiment scaled and captured the fortified San Francisco Convent. Meanwhile, preparations were underway for the general assault, which happened on the night of January 19th. Wellington wrote in his orders, "Ciudad must be stormed this evening," and the order was executed brilliantly; however, tragically, two British Generals were killed—General Crauford mortally wounded while leading the light division, and General Mackinnon killed upon reaching the ramparts of the greater breach. During this assault, General Picton urged the Connaught Rangers, who advanced with the forlorn hope to storm the breach, to "save ammunition and rely on cold steel," and it was the bayonet that the 43rd and 95th used to drive the French from the "fausse braye." The city was taken after a twelve-day siege, but the troops "committed terrible excesses," which some have excused as a right that successful besiegers might claim. The British casualties included 9 officers and 217 rank and file killed, 84 officers—among them Major-General Vandeleur and Major (later Sir George) Napier, who lost an arm—and 1,000 men wounded. For his successful leadership, Wellington was granted the title of earl and made a Spanish duke, with the British Government increasing his annual allowance to £4,000.
The regiments engaged in the siege were the 2nd Foot Guards (the Coldstreams); 3rd Foot Guards (Scots Guards); 5th, 7th, 24th, 30th, 40th, 42nd, 43rd, 45th, 48th, 52nd, 60th, 74th, 77th, 83rd, 88th, 94th, 97th, and the Rifle Brigade.
The regiments involved in the siege were the 2nd Foot Guards (the Coldstreams); 3rd Foot Guards (Scots Guards); 5th, 7th, 24th, 30th, 40th, 42nd, 43rd, 45th, 48th, 52nd, 60th, 74th, 77th, 83rd, 88th, 94th, and 97th, along with the Rifle Brigade.
Siege of Badajoz.—Before bringing to a successful issue the siege of Ciudad Rodrigo, Wellington had been busily engaged in preparing for the third siege of Badajoz. On March 16th, 1812, it was invested, but the weather for some time was particularly unfavourable to the besiegers, rain falling in torrents so that the men in the trenches were knee-deep in mud and water. By March 23rd, however, the weather had improved, and the ground was in better condition for placing the guns, which by the 25th were in position at Picurina, the place being taken by storm on that day. On the 26th breaching batteries opened fire on the city, and by April 6th it was deemed possible to storm the castle by escalade, Picton's division being ordered to do so. The bastion of La Trinidad was to be stormed by Colville's division, and the Santa Maria by the light division under Colonel Barnard, while the lunette of San Rocque was to be carried by the 48th under Major Wilson. At 10 o'clock at night the attack was made: General Kempts, leading his brigade to the foot of the castle, was there wounded, but, his men dashing on, the castle was won in an hour and a half. "At the breaches the tumult was such as if the earth had been rent asunder ... the carnage was frightful. It is doubtful whether, since the invention of gunpowder, any mass of men had ever been more fearfully exposed to all its murderous power. The dying were piled upon the dead in mounds, which the living could not pass; and the French soldiers, undisturbed in their avocation, raised the deriding cry 'Vive l'Empéreur!'" By midnight 2,000 men had fallen outside the city, and Wellington ordered the troops to withdraw; but this was as impossible as to go forward. Meanwhile some of the 5th division had entered the town (the 4th Regiment being in first), which by 6 o'clock the next morning was surrendered by the Governor. The besiegers lost 131 officers and 1,707 rank and file killed, and 564 officers and 6,083 men wounded. Napier states that "when the havoc of the night was told to Wellington, the pride of conquest sunk into a passionate burst of grief for the loss of his gallant soldiers," for in the assault alone the British casualties were 59 officers and 744 men killed, and 258 officers and 2,600 rank and file wounded. No wonder one of the Connaught Rangers exclaimed with an oath, "Och! Boys, Soudradrodrago was but a flay-bite to this." The 43rd Monmouth Light Infantry lost more men than any other regiment; 20 officers, including its chief, Colonel M'Leod (who was only twenty-seven), 335 sergeants and privates killed and wounded. Alas! the Saturnalia of Ciudad Rodrigo was repeated, and the disciplined men who had fought with such valour gave way to demoniacal passions which we of to-day can scarce believe. The indignity of the threatened gallows was the only way in which Wellington could curb his men, but not before several of the worst plunderers had been executed.
Siege of Badajoz.—Before successfully completing the siege of Ciudad Rodrigo, Wellington was busy preparing for the third siege of Badajoz. On March 16th, 1812, it was surrounded, but for a while, the weather was particularly bad for the besiegers, with torrential rain turning the trenches into deep mud and water. By March 23rd, however, the weather had improved, and the ground was in better shape for positioning the guns, which were ready at Picurina by the 25th, leading to its capture that day. On the 26th, breaching batteries began firing on the city, and by April 6th, it was considered possible to storm the castle by climbing, with Picton's division assigned to the task. Colville's division was to storm the bastion of La Trinidad, and the light division under Colonel Barnard was to attack Santa Maria, while the 48th under Major Wilson would take the lunette of San Rocque. At 10 o'clock at night, the attack commenced: General Kempts, leading his brigade to the base of the castle, was wounded, but his men charged on, and the castle was captured in an hour and a half. "At the breaches, the uproar was like the earth splitting apart... the carnage was horrific. It is unclear whether, since the invention of gunpowder, any group of soldiers had ever been so brutally exposed to its deadly force. The dying were piled on top of the dead in mounds that the living couldn’t get past; and the French soldiers, undisturbed, shouted 'Vive l'Empéreur!'" By midnight, 2,000 men had fallen outside the city, and Wellington ordered the troops to pull back; but that was as impossible as moving forward. Meanwhile, some of the 5th division had entered the town (with the 4th Regiment being the first in), which was surrendered by the Governor by 6 o'clock the next morning. The besiegers suffered 131 officers and 1,707 rank and file killed, and 564 officers and 6,083 men wounded. Napier writes that "when the devastation of the night was reported to Wellington, the pride of conquest turned into a passionate outburst of grief for the loss of his brave soldiers," as the British casualties in the assault alone included 59 officers and 744 men killed, and 258 officers and 2,600 rank and file wounded. No wonder one of the Connaught Rangers exclaimed with an oath, "Och! Boys, Soudradrodrago was nothing compared to this." The 43rd Monmouth Light Infantry lost more men than any other regiment; 20 officers, including its leader, Colonel M'Leod (who was only twenty-seven), and 335 sergeants and privates were killed and wounded. Sadly, the chaos of Ciudad Rodrigo was repeated, and the disciplined soldiers who had fought with such bravery gave in to wild passions that we today can hardly believe. The threat of the gallows was the only way Wellington could control his men, but not before several of the worst looters were executed.

PENINSULAR GOLD CROSS.
PENINSULAR GOLD CROSS.

PENINSULAR GOLD MEDAL WITH BARS.
Gold medal with bars.
The following regiments were engaged at the siege and storming of Badajoz: 2nd Foot Guards; 1st, 4th, 5th, 7th, 23rd, 24th, 30th, 38th, 40th, 43rd, 44th, 45th, 48th, 52nd, 60th, 74th, 77th, 83rd, 85th, 88th, 94th, and 95th Regiments, the Rifle Brigade, and the 13th and 14th Light Dragoons.
The following regiments participated in the siege and assault of Badajoz: 2nd Foot Guards; 1st, 4th, 5th, 7th, 23rd, 24th, 30th, 38th, 40th, 43rd, 44th, 45th, 48th, 52nd, 60th, 74th, 77th, 83rd, 85th, 88th, 94th, and 95th Regiments, the Rifle Brigade, and the 13th and 14th Light Dragoons.
Salamanca.—The battle of Salamanca, fought on Sunday, July 22nd, 1812, is noteworthy as the first general action in the Peninsular War in which Wellington attacked; his decision was due to Marmont making a sudden movement which threatened to cut the British lines of communication with Portugal, but[Pg 46] although the position appeared to be a critical one for the British General, he turned to the Spanish General Alva and said, "Mon cher Alva, Marmont est perdu!" In this battle the 3rd division, under Major-General Pakenham, were the first in action, and brilliantly carried everything before them. In this division were the Connaught Rangers, who, incensed by the death of a favourite officer, Major Murphy, could hardly be kept in hand. General Pakenham, noticing their impatience, ordered them to "be let loose," when they charged with an impetuosity which nothing could withstand, and together with the 45th and 74th broke through the masses of infantry, bayoneting all they could overtake. Composed of such material, no wonder the 3rd was called "the fighting division." It took just forty minutes to defeat Marmont's left wing, which in his endeavour to close the Ciudad road had got separated from the right, and into the gap made thereby Wellington poured his men. The right, however, reinforced by those who had escaped the conflict on the left, made a very determined resistance, and the shades of evening were falling ere the enemy made a last brave effort to retrieve the day, and, indeed, appeared to be on the way to doing so when Wellington ordered Clinton's division, numbering 6,000 bayonets, to advance, which, after a furious struggle, compelled the French to give way in confusion. Night had set in, and the remnants of Bonnet's division, which Clinton had put to rout, had the good fortune to find a means of escape through the abandonment of the ford of Alba de Tormes by the Spaniards. For six hours the battle of Salamanca raged with unabated fury, and with varying fortune on the right, so that the divisions which had been actively engaged, on an exceedingly hot day, were glad to bivouac on the ground where they had fought a battle, which again demonstrated the brilliant commandership and the keen, quick eye with which Wellington detected an opportunity when it offered. Salamanca was, in the opinion[Pg 47] of experts, the most skilful of any of his victories, though the mistakes which Marmont made would have been obvious to men of lesser capacity. A decisive battle, it would have proved much more fatal to the French had darkness not precluded the possibility of any considerable effort at pursuit on the part of the victors. As it was, however, Wellington pressed the retreating French to the ford of Huerta, and ordered the cavalry to follow the fugitives; continually pressing on the rear, Wellington forced his way on to the romantic city of Valladolid, which he entered in triumph on July 31st. On August 12th he entered Madrid, to the plaudits of the people, who hailed him as the deliverer of their country.
Salamanca.—The battle of Salamanca, fought on Sunday, July 22nd, 1812, is significant as the first major battle in the Peninsular War where Wellington took the initiative. His decision came after Marmont made a sudden move that threatened to cut off the British communication lines to Portugal, but[Pg 46] even though the situation seemed critical for the British General, he turned to Spanish General Alva and said, "My dear Alva, Marmont is lost!" In this battle, the 3rd division, led by Major-General Pakenham, was the first to engage and performed exceptionally well. Among them were the Connaught Rangers, who, fueled by the death of their beloved officer, Major Murphy, were nearly impossible to control. General Pakenham, seeing their eagerness, ordered them to "be let loose," and they charged with a fierce energy that nothing could withstand. Along with the 45th and 74th, they broke through the enemy's infantry, bayoneting anyone they could catch. Given their effectiveness, it's no surprise the 3rd division was called "the fighting division." It took just forty minutes to defeat Marmont's left wing, which had become separated from the right while trying to secure the Ciudad road, and Wellington sent his men into the gap created. The right side, however, reinforced by those who had escaped from the left, put up strong resistance, and by the time evening fell, the enemy made a final brave attempt to turn the tide. It seemed they might succeed until Wellington ordered Clinton's division, totaling 6,000 men, to advance, which, after a fierce struggle, forced the French to retreat in chaos. Night had fallen, and the remnants of Bonnet's division, which Clinton had routed, were fortunate to find an escape route when the Spaniards abandoned the ford of Alba de Tormes. For six hours, the battle of Salamanca raged fiercely, with fortunes shifting on the right side, so that the units actively engaged, in the blistering heat, were relieved to camp on the battlefield where they had fought. This battle once again showcased Wellington's brilliant leadership and sharp eye for opportunity. Salamanca was viewed by experts as his most skillful victory, although Marmont’s mistakes would have been obvious to less capable leaders. A decisive battle, it could have been far more disastrous for the French if night had not prevented any significant pursuit by the victors. Nonetheless, Wellington pressed the retreating French to the ford of Huerta and ordered the cavalry to follow the fleeing soldiers; continually pressuring their rear, he made his way to the historic city of Valladolid, which he entered in triumph on July 31st. On August 12th, he entered Madrid to the cheers of the people, who welcomed him as the liberator of their country.
In this battle the allies' losses exceeded 5,000. The British lost General Le Marchant, who was killed while leading a brilliant and successful charge of the heavy brigade, 24 officers, and 686 rank and file killed. Field-Marshal Beresford, Lieutenant-Generals Cotton, Cole, Leith, and Major-General Allen were wounded, besides 182 officers of inferior rank; 4,270 of the rank and file were wounded. The Portuguese lost about 304 killed and 1,552 wounded; the Spaniards lost—4! The French, who had at the battle about 42,000 men and 74 guns, lost about 7,000 men, besides Generals Desgraviers, Ferrey, and Thormières killed. Marmont, the Commander-in-Chief, was badly wounded early in the action by a shell; Bonnet was severely wounded, and Clausel, who commanded after the disablement of Marmont and Bonnet, slightly; 130 officers and 7,000 men were taken prisoners, and 2 Eagles, 6 standards, and 11 pieces of artillery were captured by the victors.
In this battle, the allies suffered over 5,000 losses. The British lost General Le Marchant, who was killed while leading a brilliant and successful charge of the heavy brigade, along with 24 officers and 686 troops killed. Field-Marshal Beresford, Lieutenant-Generals Cotton, Cole, Leith, and Major-General Allen were wounded, along with 182 lower-ranking officers; 4,270 enlisted men were also wounded. The Portuguese lost around 304 killed and 1,552 wounded; the Spaniards lost—4! The French, who had about 42,000 men and 74 guns at the battle, lost around 7,000 men, including Generals Desgraviers, Ferrey, and Thormières killed. Marmont, the Commander-in-Chief, was seriously wounded early in the fight by a shell; Bonnet was severely injured, and Clausel, who took command after Marmont and Bonnet were incapacitated, was slightly wounded; 130 officers and 7,000 men were taken prisoner, and the victors captured 2 Eagles, 6 standards, and 11 pieces of artillery.
Essentially a General's victory, with exceedingly far-reaching consequences, Wellington was rewarded with a marquisate, an augmentation of his coat-of-arms to commemorate his services, and a grant of £100,000 to maintain the dignity of his rank; while the Spanish Regency presented him with the Order of the Golden Fleece. The vanquished Marmont, Duke of Ragusa,[Pg 48] on the other hand, was told by Napoleon that he had "sacrificed to vanity the glory of the country, and the good of my service."
Essentially a General's victory, with extremely far-reaching consequences, Wellington was awarded a marquisate, an upgrade to his coat-of-arms to honor his services, and a grant of £100,000 to uphold the dignity of his rank; while the Spanish Regency presented him with the Order of the Golden Fleece. The defeated Marmont, Duke of Ragusa,[Pg 48] on the other hand, was told by Napoleon that he had "sacrificed to vanity the glory of the country, and the good of my service."
The following regiments were present at Salamanca, although some were in reserve: 2nd and 3rd Foot Guards; 1st, 2nd, 4th, 5th, 7th, 9th, 11th, 23rd, 24th, 27th, 30th, 32nd, 36th, 38th, 40th, 42nd, 43rd, 44th, 45th, 48th, 51st, 52nd, 53rd, 58th, 60th, 61st, 68th, 74th, 79th, 83rd, 88th, 94th, and 95th Regiments; artillery and Rifle Brigade; 5th Dragoon Guards; 3rd, 4th, 11th, 12th, 14th, 15th, and 16th Light Dragoons. The King's German Legion was represented by the 1st Hussars; 1st and 2nd Light Battalions; 1st, 2nd, and 5th Line Battalions.
The following regiments were present at Salamanca, although some were in reserve: 2nd and 3rd Foot Guards; 1st, 2nd, 4th, 5th, 7th, 9th, 11th, 23rd, 24th, 27th, 30th, 32nd, 36th, 38th, 40th, 42nd, 43rd, 44th, 45th, 48th, 51st, 52nd, 53rd, 58th, 60th, 61st, 68th, 74th, 79th, 83rd, 88th, 94th, and 95th Regiments; artillery and Rifle Brigade; 5th Dragoon Guards; 3rd, 4th, 11th, 12th, 14th, 15th, and 16th Light Dragoons. The King's German Legion was represented by the 1st Hussars; 1st and 2nd Light Battalions; 1st, 2nd, and 5th Line Battalions.
Fort Detroit.—From that unfortunate day in 1773, when the youth of Boston boarded the ships and cast the cargoes of tea into the sea, until the signing of the Treaty of Ghent in 1814, the relations between the English-speaking peoples were continuously strained; the centenary of that auspicious day, and the happy continuance of peace, we celebrate this year. With the events which led up to the outbreak of hostilities I am not here concerned, my province being merely to record such facts as will help in the appraisement of the intrinsic, historical, or sentimental value of medals awarded to those who have carried the burden of war. The capture of Fort Detroit was an episode which followed the declaration of war by the American Senate on June 18th, 1812. Early in July 2,500 Americans, under General Hull, crossed the Detroit and invaded Upper Canada, but, opposed by about 1,330 Canadian militia and regulars under Major-General Brock, they were forced back to Fort Detroit, on the American side of the St. Laurence, which Brock proceeded to invest, but having constructed his batteries and opened fire, before making the assault he sent his aide-de-camp to summon the United States General to obviate bloodshed by surrendering. This he did on August 16th.
Fort Detroit.—From that unfortunate day in 1773, when the young people of Boston boarded the ships and dumped the tea cargoes into the sea, until the signing of the Treaty of Ghent in 1814, the relationship between English-speaking peoples was constantly tense; this year we celebrate the hundredth anniversary of that significant day and the ongoing peace. I'm not focusing on the events that led to the outbreak of conflict; my role is simply to record facts that will help assess the intrinsic, historical, or sentimental value of medals awarded to those who have shouldered the burden of war. The capture of Fort Detroit was an event that occurred after the American Senate declared war on June 18th, 1812. In early July, 2,500 Americans, led by General Hull, crossed the Detroit River and invaded Upper Canada, but faced with about 1,330 Canadian militia and regulars commanded by Major-General Brock, they were forced back to Fort Detroit, on the American side of the St. Lawrence. Brock then laid siege to the fort; after building his artillery and opening fire, he sent his aide-de-camp to ask the United States General to surrender and avoid bloodshed. This happened on August 16th.

- Knight's Badge, Military Order of San Fernando.
- M.G.S. Medal.
- Officer's Gold Cross for Peninsular.
- King John VI's Jewelled Badge, for Special Service.
- Knight's Badge, Order of the Tower and Sword.
- Badge and Star (Knight Commander's) of the Order of St. Bento d'Aviz.
- Officer's Badge, Order of the Tower and Sword.
GROUP OF NINE DECORATIONS AWARDED TO LIEUTENANT-COLONEL SIR EDWARD BRACKENBURY, K.B.A., K.T.S., K.F.
GROUP OF NINE DECORATIONS AWARDED TO LIEUTENANT-COLONEL SIR EDWARD BRACKENBURY, K.B.A., K.T.S., K.F.
The regulars represented in this affair were 30 Royal Artillerymen, about 250 men of the 41st (the Welsh Regiment), which, together with its linked battalion, the 69th, bears DETROIT on its colours; 50 of the Royal Newfoundland Regiment; 400 Canadian militiamen, and 600 Indians.
The regular troops involved in this event consisted of 30 Royal Artillery soldiers, around 250 members of the 41st (the Welsh Regiment), which, along with its linked battalion, the 69th, has DETROIT on its colors; 50 from the Royal Newfoundland Regiment; 400 Canadian militiamen, and 600 Indigenous people.
Vittoria.—Following the abortive siege of Burgos, September 19th, 1813, Wellington retired to Frenada and Coria on the frontiers of Portugal, and went into winter quarters to await reinforcements. They having arrived, and the army being well equipped and in a good disciplinary spirit, he commenced the second part of the Peninsular campaign, which was destined to be a series of successes for the British commander, who commenced the final campaign in May 1813, by bidding adieu to Portugal, and marching into Spain with 70,000 men. He swept everything before him to the Pyrenees. "Neither," says Napier, "the winter gulleys, nor the ravines, nor the precipitate passes among the rocks, retarded even the march of the artillery—where horses could not draw, men hauled; when the wheels would not roll, the guns were let down or lifted by ropes—six days they toiled unceasingly, and on the seventh (June 20th) they burst like raging streams from every defile, and went foaming into the basin of Vittoria." There Joseph Bonaparte and Marshal Jourdan had taken up the position from which they were to be driven by the forceful Wellington, who spared nothing to achieve his object. "Never," wrote Napier, "was an army more hardly used by its commander, and never was a victory more complete." It was a terrific struggle; "the hills laboured and shook, and streamed with fire and water," ere the pseudo-king, Joseph Bonaparte, and his army fled in confusion, leaving all his personal belongings, and the rich pictures and plunder he had taken from every part of Spain, strewn on the road, for whosoever had a mind to acquire; 151 guns, 415 caissons of ammunition, 4,000 rounds for guns, and 2,000,000 musket cartridges were also abandoned, and a full military[Pg 50] treasure-chest. Indeed, never had such an accumulation of military stores and private wealth been abandoned by a routed army.
Vittoria.—After the unsuccessful siege of Burgos on September 19th, 1813, Wellington fell back to Frenada and Coria on the border of Portugal and settled in for the winter to wait for reinforcements. Once they arrived, and with the army well-equipped and in good spirits, he kicked off the second part of the Peninsular campaign, which turned out to be a string of victories for the British commander. He began the final campaign in May 1813 by saying goodbye to Portugal and marching into Spain with 70,000 men. He pushed through to the Pyrenees. "Neither," says Napier, "the winter gullies, the ravines, nor the steep paths among the rocks slowed down the artillery—where horses couldn’t pull, men pulled; when the wheels wouldn’t roll, the guns were lowered or lifted with ropes—six days they worked tirelessly, and on the seventh (June 20th) they burst forth like raging rivers from every pass, flooding into the basin of Vittoria." There, Joseph Bonaparte and Marshal Jourdan had taken their stand, only to be driven out by the relentless Wellington, who spared no effort to reach his goal. "Never," wrote Napier, "was an army treated so harshly by its commander, and never was a victory so absolute." It was an incredible battle; "the hills shook and trembled, and flowed with fire and water," before the false king, Joseph Bonaparte, and his army fled in disarray, leaving behind all his personal belongings and the valuable paintings and loot he had gathered from across Spain, scattered along the road for anyone willing to take them; 151 guns, 415 ammunition wagons, 4,000 rounds for guns, and 2,000,000 musket cartridges were also left behind, along with a full military[Pg 50] treasure chest. Indeed, no routed army had ever abandoned such a massive collection of military supplies and personal wealth.
The French General Gazan, who took part in the battle, recorded that the French "lost all their equipage, all their guns, all their treasure, all their papers, so that no man could prove how much pay was due to him." Joseph Bonaparte's carriage was abandoned in the street in his haste to evade Captain Wyndham, who made a bold dash to secure him; the Sword of State, emblematic of the kingship which the brother of Bonaparte had claimed, but which he had lost for ever, and the marshal's baton belonging to Jourdan, together with the Eagle of the 100th Regiment, were among the spoils. It is also recorded that "a perfect herd of women, including General Gazan's wife, and a number of the wives, mistresses, actresses, and nuns, belonging to officers and men of the French army, were abandoned." The Field Marshal's baton, which was taken by the 87th Royal Irish Fusiliers, commanded by Lieutenant-Colonel (afterwards Viscount) Gough, was sent to the Prince Regent, who responded by sending Wellington the Field Marshal's baton of Britain.
The French General Gazan, who fought in the battle, noted that the French "lost all their gear, all their guns, all their treasure, and all their documents, so that no one could prove how much pay was owed to him." Joseph Bonaparte's carriage was left behind in the street as he hurried to escape Captain Wyndham, who made a bold move to capture him; the Sword of State, representing the kingship claimed by Bonaparte's brother but lost forever, and the marshal's baton belonging to Jourdan, along with the Eagle of the 100th Regiment, were among the spoils. It is also recorded that "a whole group of women, including General Gazan's wife, and several wives, mistresses, actresses, and nuns associated with officers and men of the French army, were left behind." The Field Marshal's baton, taken by the 87th Royal Irish Fusiliers, led by Lieutenant-Colonel (later Viscount) Gough, was sent to the Prince Regent, who responded by sending Wellington the Field Marshal's baton of Britain.
The French loss in killed and wounded was estimated by M. Thiers at 5,000; the allies' losses were, British 500 killed, 2,300 wounded, and 266 missing; the Portuguese loss was about 150 killed and 900 wounded; the Spanish losing 89 killed and 460 wounded.
The French casualties were estimated by M. Thiers at 5,000; the allies' losses were 500 British killed, 2,300 wounded, and 266 missing; the Portuguese lost around 150 killed and 900 wounded; while the Spanish had 89 killed and 460 wounded.
The British regiments present were the 1st and 2nd Life Guards and Horse Guards, represented by two squadrons; 1st, 3rd, and 5th Dragoons; 3rd, 4th, 10th, 11th, 12th, 13th, 14th, 15th, 16th, and 18th Light Dragoons; 2nd and 3rd Foot Guards; 1st Royal Scots; 2nd Queen's Royal; 4th King's Own Royal; 5th Northumberland Fusiliers; 6th Royal 1st Warwickshire; 7th Royal Fusiliers; 9th East Norfolk; 20th; 23rd Royal Welsh Fusiliers; 24th; 27th Inniskilling; 28th North Gloucestershire; 31st, 34th, 38th Stafford[Pg 51]shire; 39th Dorsetshire; 40th; 43rd Monmouth Light Infantry; 45th Sherwood Foresters; 47th Lancashire; 48th Northamptonshire; 50th Queen's Own; 51st King's Own Light Infantry; 52nd Oxford Light Infantry; 53rd Shropshire; 57th West Middlesex; 58th, 59th, 60th King's Royal Rifle Corps; 66th Berkshire; 68th Durham Light Infantry; 71st Highland Light Infantry; 74th Highland Regiment; 82nd Prince of Wales Volunteers; 83rd; 87th Royal Irish Fusiliers; 88th Connaught Rangers; 92nd Gordon Highlanders; 94th; 95th Derbyshire.
The British regiments present were the 1st and 2nd Life Guards and Horse Guards, represented by two squadrons; 1st, 3rd, and 5th Dragoons; 3rd, 4th, 10th, 11th, 12th, 13th, 14th, 15th, 16th, and 18th Light Dragoons; 2nd and 3rd Foot Guards; 1st Royal Scots; 2nd Queen's Royal; 4th King's Own Royal; 5th Northumberland Fusiliers; 6th Royal 1st Warwickshire; 7th Royal Fusiliers; 9th East Norfolk; 20th; 23rd Royal Welsh Fusiliers; 24th; 27th Inniskilling; 28th North Gloucestershire; 31st, 34th, 38th Stafford[Pg 51]shire; 39th Dorsetshire; 40th; 43rd Monmouth Light Infantry; 45th Sherwood Foresters; 47th Lancashire; 48th Northamptonshire; 50th Queen's Own; 51st King's Own Light Infantry; 52nd Oxford Light Infantry; 53rd Shropshire; 57th West Middlesex; 58th, 59th, 60th King's Royal Rifle Corps; 66th Berkshire; 68th Durham Light Infantry; 71st Highland Light Infantry; 74th Highland Regiment; 82nd Prince of Wales Volunteers; 83rd; 87th Royal Irish Fusiliers; 88th Connaught Rangers; 92nd Gordon Highlanders; 94th; 95th Derbyshire.
Pyrenees.—The rout at Vittoria gave Wellington possession of the passes of the Pyrenees, and when in 1849 it was decided to decorate the surviving soldiers of the Peninsular War, all those who had taken part in the series of extraordinary actions in the Pyrenees, Roncesvalles, Maya, Santarem, and Buenzas, from July 28th to August 2nd, 1813, were awarded the medal with bar inscribed PYRENEES, and those who were entitled to the medal for other actions received the additional bar. Napoleon ordered his brother to retire into private life and instructed the officials not to pay him the respect due to a monarch. Soult was ordered to take up the command, and did so with a zest and ability that has called forth the admiration of all who recognise in the dread game of war that sportsmanlike character which thoughtfully dares all and takes its rebuffs with a smile.
Pyrenees.—The defeat at Vittoria gave Wellington control of the Pyrenees passes, and when it was decided in 1849 to honor the surviving soldiers of the Peninsular War, all those who participated in the remarkable battles in the Pyrenees, Roncesvalles, Maya, Santarem, and Buenzas, from July 28th to August 2nd, 1813, were awarded the medal with the bar inscribed PYRENEES. Those who qualified for the medal for other actions received an additional bar. Napoleon ordered his brother to step back into private life and directed officials not to give him the respect owed to a monarch. Soult was ordered to take command, and he did so with enthusiasm and skill that earned the admiration of everyone who sees the competitive spirit in the harsh realities of war, bravely facing challenges and accepting setbacks with a smile.
Siege of Sebastian.—Meanwhile, Wellington instructed the Spanish Generals to blockade the fortress of Pampeluna, and besieged San Sebastian, which was blockaded by the British Navy on July 3rd, and invested by the troops under Sir Thomas Graham on the 9th. During this, the first siege of San Sebastian, a Frenchman states that on the 19th and 20th for fifteen hours the British fired 350 shots per gun. On the 24th General Graham ordered the assault, and the way was led by Colin Campbell (afterwards Lord Clyde) of the 9th, and Machet the engineer. Campbell, doing[Pg 52] many a daring deed, saw all his friends dead round him, while he, seriously wounded, was spared to achieve greater things. In this assault 44 officers of the line and 500 men were killed, wounded, or taken prisoners. The battalion of the Royal Scots present alone lost 87 killed and 246 wounded in the unsuccessful assault. In the meantime Marshal Soult, who had reached Bayonne on July 13th to take command of the united French army, attacked Major-General Byng's brigade at Roncesvalles on the 25th, while Count D'Erlon proceeded to attack Sir Rowland Hill in the Pass of Maya, where very desperate fighting ensued. The fighting at Roncesvalles and Maya continued until nine in the evening, when it was deemed advisable to abandon the Pass of Maya to the enemy.
Siege of Sebastian.—Meanwhile, Wellington instructed the Spanish Generals to block the fortress of Pampeluna and laid siege to San Sebastian, which was blockaded by the British Navy on July 3rd and attacked by the troops under Sir Thomas Graham on the 9th. During this first siege of San Sebastian, a Frenchman noted that on the 19th and 20th, the British fired 350 rounds per gun for fifteen hours. On the 24th, General Graham ordered the assault, with Colin Campbell (later Lord Clyde) of the 9th leading the charge, along with engineer Machet. Campbell, performing many daring acts, saw all his friends fall around him while he, seriously wounded, was left to achieve greater things. In this assault, 44 officers and 500 men were killed, wounded, or captured. The battalion of the Royal Scots alone lost 87 killed and 246 wounded in the unsuccessful attack. Meanwhile, Marshal Soult, who arrived in Bayonne on July 13th to take command of the combined French army, attacked Major-General Byng's brigade at Roncesvalles on the 25th, while Count D'Erlon moved to engage Sir Rowland Hill in the Pass of Maya, where fierce fighting broke out. The fighting at Roncesvalles and Maya continued until nine in the evening, when it was decided to abandon the Pass of Maya to the enemy.
Gallantry of Gordons at Maya.—In the day's fighting the allies lost 1,600 men and 4 guns. In the Pass of Maya the British troops had been engaged for ten hours, and it is noteworthy that the 92nd Gordon Highlanders, being without ammunition, although ordered by General Stewart not to charge, could not be restrained, and not only charged, but led a charge against the enemy. In this engagement the 92nd lost 1 officer and 34 men killed, and 18 officers and 268 men wounded, one wing being practically annihilated. Napier states in his history of the war that "so dreadful was the slaughter, especially of the 92nd, that it is said the advancing enemy was actually stopped by the heaped dead and dying. The stern valour of the 92nd, principally composed of Scotsmen, would have graced Thermopylæ." In this sanguinary combat the 82nd also particularly distinguished itself.
Gallantry of Gordons at Maya.—In the day's fighting, the allies lost 1,600 men and 4 guns. In the Pass of Maya, the British troops had been engaged for ten hours. It’s noteworthy that the 92nd Gordon Highlanders, running low on ammunition and ordered by General Stewart not to charge, couldn’t be held back. They not only charged but also led an attack against the enemy. In this battle, the 92nd lost 1 officer and 34 men killed, along with 18 officers and 268 men wounded, with one wing nearly wiped out. Napier mentions in his history of the war that "so dreadful was the slaughter, especially of the 92nd, that it is said the advancing enemy was actually stopped by the heaped dead and dying. The fierce bravery of the 92nd, mainly made up of Scotsmen, would have honored Thermopylæ." The 82nd also stood out in this bloody combat.

BRONZE MEDAL TO BRITISH GERMAN LEGION FOR PENINSULAR WAR.
BRONZE MEDAL TO BRITISH GERMAN LEGION FOR PENINSULAR WAR.

SILVER MEDAL TO HANSEATIC LEGION, 1813-15.
SILVER MEDAL TO HANSEATIC LEGION, 1813-15.

PRUSSIAN MEDALS FOR NAPOLEONIC WARS.
Prussian medals for Napoleonic Wars.
On the 28th the British were attacked in position on a mountain ridge between the valleys of the Lanz and the Guy, with Byng's brigade in reserve on the second ridge of Huerta, and the 6th division adjoining; the latter had scarcely got into position, when General Clausel attacked it from the Sorauren side; the fight became general, and 27th and 48th Regiments, charging, "rolled back the enemy in disorder, and threw them headlong down the mountain side." With admirable heroism the French soldiers returned three times to the charge, but their efforts could not avail against the dogged determination of the allied troops. In this affair every regiment in the 4th division, the 40th, 7th, 20th, and 23rd, charged four times, while Major-General Ross had two horses shot under him. On the 29th the rival armies were inactive, Soult apparently considering his plans for the relief of Pampeluna and San Sebastian. He decided to abandon any advance on the former, and proceeded to relieve San Sebastian, but by masterly manœuvres Wellington checkmated his opponent, and compelled him to abandon the endeavour, and on August 2nd the French troops evacuated Spain at all points.
On the 28th, the British were attacked while positioned on a mountain ridge between the Lanz and Guy valleys, with Byng's brigade in reserve on the second ridge of Huerta, and the 6th division next to them. The latter had barely settled into position when General Clausel launched an attack from the Sorauren side. The fighting escalated, and the 27th and 48th Regiments charged, "rolling back the enemy in disorder and sending them tumbling down the mountain." With remarkable bravery, the French soldiers charged back three times, but their efforts couldn’t overcome the stubborn resolve of the allied troops. In this conflict, every regiment in the 4th division—the 40th, 7th, 20th, and 23rd—charged four times, while Major-General Ross had two horses shot from under him. On the 29th, both armies were inactive, with Soult seemingly contemplating his plans for the relief of Pampeluna and San Sebastian. He chose to abandon any advance on Pampeluna and opted to relieve San Sebastian instead. However, through strategic maneuvers, Wellington countered his opponent, forcing him to give up that endeavor, and on August 2nd, French troops evacuated Spain at all points.
For nine days the armies had confronted one another, and the allies had lost in the different actions no less than 7,096 officers and men killed and wounded, while the aggregate loss of the French is put down at 15,000. At the conclusion of this series of conflicts Sir William Stewart was wounded, and Wellington narrowly escaped being taken prisoner by a French detachment which surprised him whilst studying a map; the French Commander-in-Chief, Soult, also narrowly escaped with his liberty.
For nine days, the armies faced off against each other, and the allies suffered a total of 7,096 officers and soldiers killed and wounded in various confrontations, while the French total loss is estimated at 15,000. By the end of this series of battles, Sir William Stewart was injured, and Wellington barely avoided being captured by a French unit that caught him off guard while he was studying a map; the French Commander-in-Chief, Soult, also managed to escape from captivity.
St. Sebastian.—While Soult and Wellington had been busily engaged, General Rey, the Governor of San Sebastian, had employed himself in strengthening the city and castle, so that when the second siege was renewed on August 5th, 1813, he was in a position to make a very desperate defence. Many inactive days were spent, to the chagrin of Wellington, who complained of the exceeding inactivity of the navy, which compelled him to lose more than half of August. However, by the 26th he had breaching guns and mortars in position, and with these he opened fire upon the city, and as a result 250 yards of the walls were reduced[Pg 54] to ruins; but it was not until the night between August 30th and 31st that the place was assaulted. Then, again, the British soldier gave proof of his cool bearing, not once, but again and again. At 8 a.m. the town was bombarded by all the batteries, and the fire was kept up until 11 a.m., when the order for the assault was given. A storming party of 750 volunteers was asked for from the 1st, 4th, and light divisions, "men who could show other troops how to mount a breach." They successfully passed one danger which destroyed a party of thirteen that had rushed to cut the saucisson of a mine, to die in mounting the great breach. At the sea wall hundreds of the British were killed by the explosion of a mine, and then "began a frightful slaughter," for there was hardly another conflict so desperate and so sanguinary as that which took place at the storming of the great breach; "the appearance of the breach was perfectly delusive; nothing living could reach the summit; no courage, however desperate, could overcome the difficulties, for they were alike unexpected and unsurmountable." The officers encouraged their men by word and action, "crowd after crowd were seen to mount, totter, and to fall, and at length the whole mass sank to the bottom of the breach, but remained stubborn and immovable on this lower part." General Graham, beholding this, resorted to an unparalleled expedient by ordering all the breaching batteries to fire over the stormers' heads on to the inner wall. This daring inspiration saved the situation, for the terrible storm of missiles, passing over the heads of the British troops, did their deadly work by demolishing the defences, and killing or driving away the defenders. Another furious effort was made upon the breach, and when this seemed as though it must fail, explosions occurred all along the enemy's defences, and the British soldiery, breaking into the first traverse, poured through the town, pushed past the barricades, which the defenders could not hold even for a few moments in face of the impetuous stormers, who were,[Pg 55] however, compelled to leave the castle unattacked. In this terrible conflict the chief engineer, Sir Richard Fletcher, was killed; Burgoyne, the second engineer, wounded; also Generals Sir James Leith, Oswald, and Robinson. The total loss of the besiegers on the day of the capture was 761 killed, 1,697 wounded, and 45 missing. The castle was pluckily defended, but on the 8th was reduced to ruins, and the garrison, surrendering, were allowed to march out, the brave Rey at their head, with all the honours of war. The siege had lasted seventy-three days, during which time nine assaults had been made. The disgraceful scenes of Ciudad Rodrigo and Badajoz were surpassed at San Sebastian by the addition of revolting cruelty to the excesses of drunkenness, and the crimes of rape and murder.
St. Sebastian.—While Soult and Wellington had been preoccupied, General Rey, the Governor of San Sebastian, had focused on fortifying the city and castle. So, when the second siege began on August 5th, 1813, he was ready to mount a fierce defense. Many frustrating days went by, much to Wellington's annoyance, who criticized the navy for their inactivity, which caused him to lose more than half of August. However, by the 26th, he had set up breaching guns and mortars and opened fire on the city, resulting in 250 yards of the walls being destroyed[Pg 54]; but it wasn’t until the night between August 30th and 31st that the assault occurred. Once again, the British soldiers showed their composure, time and again. At 8 a.m., the town was bombarded by all the batteries, and the firing continued until 11 a.m., when the assault order was given. A storming party of 750 volunteers was requested from the 1st, 4th, and light divisions—“men who could teach other troops how to climb a breach.” They successfully navigated one danger that had wiped out a group of thirteen trying to defuse a mine, only to perish while climbing the main breach. At the sea wall, hundreds of British soldiers were killed by a mine explosion, leading to a “frightful slaughter,” as there was hardly another battle so fierce and bloody as the assault on the main breach; “the appearance of the breach was completely deceptive; nothing living could reach the top; no amount of courage, however desperate, could overcome the challenges, as they were both unexpected and insurmountable.” The officers urged their men on with words and actions, “crowd after crowd was seen to climb, stumble, and fall, and eventually, the entire mass collapsed to the bottom of the breach, but remained stubborn and unmoving on this lower part.” Seeing this, General Graham took an unprecedented step by ordering all the breaching batteries to fire over the heads of the stormers at the inner wall. This bold decision changed the course of events, as the intense hail of missiles, passing over the British troops, did its deadly work by destroying the defenses and killing or driving away the defenders. Another fierce charge was made at the breach, and when it seemed likely to fail, explosions erupted all along the enemy’s defenses, allowing the British soldiers to break into the first traverse, surge through the town, and push past the barricades, which the defenders could not hold even for a few moments against the fierce attackers, who were,[Pg 55] however, forced to leave the castle alone. In this brutal conflict, the chief engineer, Sir Richard Fletcher, was killed; Burgoyne, the second engineer, was wounded; along with Generals Sir James Leith, Oswald, and Robinson. The total losses for the besiegers on the day of the capture were 761 killed, 1,697 wounded, and 45 missing. The castle was valiantly defended, but on the 8th, it was left in ruins, and the garrison, surrendering, was allowed to march out, with the brave Rey at the front, receiving all the honors of war. The siege lasted seventy-three days, during which nine assaults were made. The disgraceful scenes of Ciudad Rodrigo and Badajoz were exceeded at San Sebastian by the addition of horrific cruelty to the excesses of drunkenness, and the crimes of rape and murder.
The regiments engaged in the siege and capture were 200 of the Guards; 1st, 2nd, 4th, 7th, 9th, 11th, 20th, 23rd, 24th, 27th, 36th, 38th, 40th, 43rd, 47th, 48th, 51st, 52nd, 53rd, 59th, 68th, 82nd, 85th, 87th, 88th, and 95th, but only the Royal Scots, 4th, 9th, 38th, 47th, and 59th Regiments, are permitted to carry ST. SEBASTIAN on their colours.
The regiments involved in the siege and capture included 200 from the Guards; 1st, 2nd, 4th, 7th, 9th, 11th, 20th, 23rd, 24th, 27th, 36th, 38th, 40th, 43rd, 47th, 48th, 51st, 52nd, 53rd, 59th, 68th, 82nd, 85th, 87th, 88th, and 95th, but only the Royal Scots, 4th, 9th, 38th, 47th, and 59th Regiments are allowed to carry ST. SEBASTIAN on their colors.
Chateauguay.—This battle, fought on October 26th, 1813, occurred during the military campaign in America. Having achieved a series of successes, the Americans concentrated about 18,000 regulars and 10,000 militia at Sackett's Harbour. Sir George Prevost, thinking it expedient, quitted Kingston and proceeded to the capital, whilst Sir R. Skeaffe assembled as many troops as he possibly could, 8,000 militia readily responding to the call. Major-General Hampton, commanding the eastern division of the United States army, crossed the Canadian border with 8,000 men on October 21st, having arranged to co-operate with General Wilkinson, who was in command of about 10,000 men, but through some misunderstanding the two forces were unable to combine, and on October 26th General Hampton found himself faced by a body of 800 men, under Lieutenant-Colonel De Salaberry, who disposed his[Pg 56] little army so admirably that he not only caused the enemy a severe loss, but compelled Hampton to fall back to Plattsburgh, from which he "had not the resolution again to return to the frontier."
Chateauguay.—This battle took place on October 26, 1813, during the military campaign in America. After a series of victories, the Americans gathered around 18,000 regular soldiers and 10,000 militia at Sackett's Harbour. Sir George Prevost, thinking it wise, left Kingston and headed to the capital, while Sir R. Skeaffe brought together as many troops as he could, with 8,000 militia quickly responding to the call. Major-General Hampton, leading the eastern division of the United States army, crossed the Canadian border with 8,000 men on October 21, planning to work together with General Wilkinson, who was in charge of about 10,000 men. However, due to some misunderstandings, the two forces were unable to join up, and on October 26, General Hampton found himself up against a group of 800 men, led by Lieutenant-Colonel De Salaberry, who positioned his[Pg 56]small army so effectively that he inflicted significant losses on the enemy and forced Hampton to retreat to Plattsburgh, from which he "lacked the resolve to return to the frontier."
Those engaged in this affair were the Canadian Fencible Light Infantry, Canadian Militia, two companies of Voltigeurs, some Indians, and Royal Artillery.
Those involved in this situation included the Canadian Fencible Light Infantry, the Canadian Militia, two companies of Voltigeurs, some Indigenous people, and the Royal Artillery.
The Peninsular Gold Cross.—The long-drawn character of the Peninsular War, and the frequent general engagements which called for recognition, occasioned the recipients of the gold medals inconvenience in wearing them; in consequence the names of battles were sometimes engraved on the medals as suggested in Wellington's dispatch of October 1st, 1811, dated from Richoso. Subsequently an order was issued from the Horse Guards, on October 7th, 1813, to the effect that amended regulations would be adopted in the grant and circulation of marks of distinction, i.e. medals. The regulations set forth that (1st) only one medal should be borne by each officer, (2nd) that for the second and third events a gold clasp attached to a ribbon, from which the medal is suspended, inscribed with the name of the battle or siege to which it relates. These bars, which were unconnected, were 2 in. long by ⅗ in. broad, with laureated edges, the names of the battles being soldered on. They were pierced and lapped bright. (3rd) That upon a claim being admitted to a fourth mark of distinction, a cross shall be borne by each officer with the names of the four battles or sieges respectively inscribed thereupon, and to be worn in substitution of the distinctions previously granted. (4th) That upon each occasion of a similar nature, that may occur subsequent to the grant of the cross, the clasp shall again be issued to those who have a claim to the distinction. The following officers were eligible for the distinction: General Officers, Commanding Officers of Brigades, Commanding Officers of Artillery and Engineers, Adjutant-General and Quartermaster-General, also Assistant Adjutant-General and Quartermaster-General ranking with Field Officers; Military Secretary having the rank of Field Officer, Commanding Officers of Battalions or Corps equivalent thereto, and Officers who may have succeeded to the actual command during an engagement, owing to the death or removal of the original Commanding Officer.
The Peninsular Gold Cross.—The long duration of the Peninsular War and the frequent major battles that needed acknowledgment made it difficult for those awarded gold medals to wear them comfortably. As a result, battle names were sometimes engraved on the medals, as suggested in Wellington's dispatch dated October 1st, 1811, from Richoso. Later, an order was issued from the Horse Guards on October 7th, 1813, stating that new regulations would be put in place for the awarding and distribution of honors, i.e. medals. The regulations specified that (1st) each officer should wear only one medal; (2nd) for the second and third occasions, a gold clasp would be attached to a ribbon from which the medal hangs, with the name of the corresponding battle or siege engraved on it. These bars were separate, measuring 2 inches long by ⅗ inch wide, with laurel edges, and the battle names soldered on. They were pierced and polished bright. (3rd) If a claim was accepted for a fourth mark of distinction, a cross would be awarded to each officer with the names of the four battles or sieges inscribed on it, to be worn instead of the previously granted honors. (4th) For each similar occasion that occurred after the grant of the cross, a clasp would again be issued to those entitled to the distinction. The following officers were eligible for the honor: General Officers, Commanding Officers of Brigades, Commanding Officers of Artillery and Engineers, Adjutant-General and Quartermaster-General, as well as Assistant Adjutant-General and Quartermaster-General who rank with Field Officers; Military Secretaries with Field Officer rank, Commanding Officers of Battalions or similar Corps, and Officers who took command during a battle due to the death or removal of the original Commanding Officer.

(Obverse) WATERLOO MEDAL.
WATERLOO MEDAL.

ARMY OF INDIA MEDAL.
Indian Army Medal.

(Reverse.) WATERLOO MEDAL.
WATERLOO MEDAL.
The cross (see facing page 44), Maltese in form, is 1½ in. square, with a bright lapped double border framing a laurel mount. In the centre in bold relief is the British Lion statant, and on the four arms of the cross are arranged the names of the battles the recipient was engaged in. The name of the first battle is arranged in the space above the Lion. The obverse and reverse are similar; the cross was suspended from a crimson ribbon with blue edges—the regulation ribbon at this time—17∕10 in. wide, by means of a gold swivel and laureated ring, connected to the cross by means of a gold loop and ornamentation. The names and regiments of recipients were engraved on the edges of the arms of the cross.
The cross (see facing page 44) is Maltese in shape and measures 1½ inches square, featuring a vibrant double border that frames a laurel design. In the center, prominently displayed, is the British Lion standing still, and the names of the battles the recipient fought in are listed on the four arms of the cross. The name of the first battle appears in the space above the Lion. Both the front and back are the same; the cross hangs from a crimson ribbon with blue edges—the official ribbon of the time—17∕10 inches wide, attached by a gold swivel and laurel ring, linked to the cross with a gold loop and decorative element. The names and regiments of the recipients were engraved along the edges of the cross's arms.
Number Issued.—The Duke of Wellington received the only cross with 9 bars, representing 13 engagements; two were issued with 7 bars; three with 6 bars; seven with 5 bars; eight with 4 bars; seventeen with 3 bars; eighteen with 2 bars; forty-six with 1 bar, and sixty-one the cross alone. Eighty-five large gold medals were issued, and 599 small gold ones. One hundred and forty-three bore 1 bar, and seventy-two 2 bars, leaving four hundred and sixty-nine medals without bars or clasps.
Number Issued.—The Duke of Wellington received the only cross with 9 bars, symbolizing 13 engagements; two were issued with 7 bars; three with 6 bars; seven with 5 bars; eight with 4 bars; seventeen with 3 bars; eighteen with 2 bars; forty-six with 1 bar, and sixty-one received the cross on its own. Eighty-five large gold medals were issued, and 599 small gold ones. One hundred and forty-three had 1 bar, and seventy-two had 2 bars, leaving four hundred and sixty-nine medals without bars or clasps.
Nivelle.—For nearly six cold and inclement weeks after the fall of San Sebastian, Wellington remained inactive in the Pyrenees, the troops suffering considerably in the bleak situation. Then began the operation which has been described as one of the boldest of the war. Wellington determined to seize the great La Rhune mountain, 2,700 ft. high, which stood between the Nivelle and Bidassoa valleys and the dependent heights; by so doing he could menace the centre of the French line, and cross the border. Soult lost his[Pg 58] head, and called upon the French peoples of the provinces to take up arms and war "to the knife." Wellington coolly responded by informing the inhabitants that England did not make war upon the people, but upon their ruler, who did not allow others to remain at peace, and impressed upon his soldiers that any acts of violence or marauding would be punished by death. Early on the morning of October 7th, 1814, the British made their first movement by crossing the mouth of the Bidassoa River—a feat classed among the ablest and boldest of Wellington's operations; the enemy were taken by surprise, and the British carried everything before them. At 3 o'clock in the afternoon the famous exploit of Lieutenant William Havelock, "El Chico Blanco," took place. He had been sent by General Baron Alten to see the progress that Marshal Giron's Spaniards had made, and finding them irresolute, despite their previous successes, his fiery spirit could not brook the check. Taking off his hat, he called upon the Spaniards to follow him, set spurs to his horse, and cleared the abattis at a bound. "Then," wrote Napier, "the soldiers, shouting for 'El Chico Blanco' (the fair boy)—so they called him, for he was young and had light hair—with one shock broke through the French, and at the very moment when their centre was flying under the fire of Kempt's skirmishers from the Puerto de Vera." (Lieutenant-Colonel Havelock, elder brother of Sir Henry Havelock, was born on January 23rd, 1793, and killed while leading the 14th Light Dragoons—"450 sabres against an army amounting to more than 15,000 men with heavy cannon"—at Ramnuggur, November 22nd, 1848.) In three days the allies lost 814 men, and the French 1,400, but the victorious allies were now on French soil, and working well together, the Spaniards rising to the occasion as success succeeded success. For some days the armies were inactive; Wellington was getting ready to resume the offensive, while Soult was preparing to attack. The enemy, however, attacked, and carried a redoubt[Pg 59] in the camp of Sarre held by the Spaniards. They then attacked, on the morning of the 13th, the advance posts of the army of Andalusia, under the command of Marshal Giron, but were easily repulsed. Ultimately the French retreated in confusion towards the bridge of Nivelle, and on November 10th the battle of La Nivelle was fought. It was a beautiful morning, and it must have been a grand sight to see the army of 90,000 men descend to the battle. "Three guns pealed from the mountain heights of Achubia ... and the battle of the Nivelle commenced." Driven from the centre, many of the French troops crossed the Nivelle at St. Pè, while Major-General Colville, with the 3rd division, and General Le Cor with the 7th, drove off those who held the heights above, and established the allied army on the rear of the enemy's right. Night ended the battle, and under cover of the darkness Soult withdrew his army and abandoned the position he had been fortifying for three months. On the 12th he took up his position in front of the camp at Bayonne. In this engagement the allies took 1,400 prisoners, 51 pieces of cannon, and 6 tumbrils of ammunition. The French also lost 2,000 men killed and wounded.
Nivelle.—For nearly six cold and harsh weeks after the fall of San Sebastian, Wellington stayed inactive in the Pyrenees, and the troops suffered a lot in the grim situation. Then the operation began that has been called one of the boldest of the war. Wellington decided to seize the great La Rhune mountain, 2,700 ft. high, which stood between the Nivelle and Bidassoa valleys and the nearby heights; by doing this, he could threaten the center of the French line and cross the border. Soult lost his[Pg 58] composure and urged the French people of the provinces to take up arms and fight "to the knife." Wellington coolly replied by telling the residents that England did not wage war against the people but against their ruler, who wouldn't let others stay at peace, and made sure his soldiers knew that any acts of violence or looting would be punished by death. Early on the morning of October 7th, 1814, the British made their first move by crossing the mouth of the Bidassoa River—a remarkable and daring achievement in Wellington's operations; the enemy was caught off guard, and the British cleared everything in their path. At 3 o'clock in the afternoon, the famous action of Lieutenant William Havelock, "El Chico Blanco," happened. He had been sent by General Baron Alten to check on the progress of Marshal Giron's Spaniards, and seeing them hesitant despite their previous victories, his fiery spirit couldn't stand it. Taking off his hat, he called on the Spaniards to follow him, kicked his horse into action, and effortlessly cleared the obstacles in front of him. "Then," wrote Napier, "the soldiers, cheering for 'El Chico Blanco' (the fair boy)—as they called him because he was young and had light hair—with one charge broke through the French, just as their center was collapsing under the fire of Kempt's skirmishers from the Puerto de Vera." (Lieutenant-Colonel Havelock, elder brother of Sir Henry Havelock, was born on January 23rd, 1793, and killed while leading the 14th Light Dragoons—"450 sabres against an army of more than 15,000 men with heavy cannon"—at Ramnuggur, November 22nd, 1848.) In three days, the allies lost 814 men, and the French lost 1,400, but the victorious allies were now on French soil, working well together, and the Spaniards rose to the occasion as successes piled up. For a few days, the armies were inactive; Wellington was preparing to resume the offensive while Soult was gearing up to attack. However, the enemy attacked and captured a redoubt[Pg 59] in the camp of Sarre held by the Spaniards. They then attacked, on the morning of the 13th, the forward posts of the army of Andalusia, under Marshal Giron, but were easily pushed back. Ultimately, the French retreated in confusion toward the bridge of Nivelle, and on November 10th, the battle of La Nivelle was fought. It was a beautiful morning, and it must have been a grand sight to see the army of 90,000 men move toward the battle. "Three guns fired from the mountain heights of Achubia ... and the battle of the Nivelle began." Driven from the center, many of the French troops crossed the Nivelle at St. Pè, while Major-General Colville, with the 3rd division, and General Le Cor with the 7th, pushed back those who held the heights above and set up the allied army behind the enemy's right flank. Nightfall ended the battle, and under the cover of darkness, Soult withdrew his army and abandoned the position he had been fortifying for three months. On the 12th, he positioned himself in front of the camp at Bayonne. In this engagement, the allies captured 1,400 prisoners, 51 pieces of cannon, and 6 tumbrils of ammunition. The French also lost 2,000 men killed and wounded.
In his dispatch Wellington particularly referred to the gallant conduct of the 51st and 68th Regiments in the attack on the heights above St. Pè. The allies lost 26 officers, including Lieutenant-Colonel Lloyd of the 94th, 28 sergeants, 289 rank and file; 155 officers, including Major-General Kempt, and 2,146 men wounded; 3 officers and 70 men missing.
In his report, Wellington specifically mentioned the courageous actions of the 51st and 68th Regiments during the assault on the heights above St. Pè. The allies suffered 26 officer casualties, including Lieutenant-Colonel Lloyd of the 94th, as well as 28 sergeants and 289 other ranks; 155 officers, including Major-General Kempt, and 2,146 soldiers were wounded; and 3 officers and 70 men went missing.
The following regiments were present in the engagements leading up to the battle of Nivelle. 1st and 2nd Batts. Foot Guards; 1st, 2nd, 3rd, 4th, 5th, 6th, 7th, 9th, 11th, 20th, 23rd, 24th, 27th, 28th, 31st, 32nd, 34th, 36th, 38th, 39th, 40th, 42nd, 43rd, 45th, 47th, 48th, 50th, 51st, 52nd, 53rd, 57th, 58th, 59th, 60th, 61st, 62nd, 66th, 68th, 71st (did not take active part), 74th, 76th, 79th, 82nd, 83rd, 84th, 85th, 87th, 88th,[Pg 60] 91st, 92nd, 94th, and 95th; the Rifle Brigade; 12th, 13th, 14th, and 18th Light Dragoons, and the 1st and 2nd Light Battalions, also the 1st, 2nd, and 3rd Line Battalions of the King's German Legion.
The following regiments were present in the engagements leading up to the battle of Nivelle: 1st and 2nd Battalions of the Foot Guards; 1st, 2nd, 3rd, 4th, 5th, 6th, 7th, 9th, 11th, 20th, 23rd, 24th, 27th, 28th, 31st, 32nd, 34th, 36th, 38th, 39th, 40th, 42nd, 43rd, 45th, 47th, 48th, 50th, 51st, 52nd, 53rd, 57th, 58th, 59th, 60th, 61st, 62nd, 66th, 68th, 71st (did not take active part), 74th, 76th, 79th, 82nd, 83rd, 84th, 85th, 87th, 88th,[Pg 60] 91st, 92nd, 94th, and 95th; the Rifle Brigade; 12th, 13th, 14th, and 18th Light Dragoons; and the 1st and 2nd Light Battalions, as well as the 1st, 2nd, and 3rd Line Battalions of the King's German Legion.
Chrystler's Farm.—The day following the battle of Nivelle in France saw a victory for British arms in Canada at Chrystler's Point, commonly called Chrystler's Farm. This battle was a sequel to that at Chateauguay. I have referred to the fact that the American General Wilkinson, with his army of 10,000 men, had failed to combine with Major-General Hampton, but by November 3rd he landed a portion of his troops near Point Iroquois, to which place the British General dispatched a force of 800 regulars and militia, under Colonel Morrison, to stop the advance. Meeting 3,000 men who had been landed under Major-General Boyd at Chrystler's Farm, Colonel Morrison's little army routed them after a fight lasting two and a half hours, with a loss of 250 killed and wounded, besides 100 prisoners and one gun. The effect of the action at Chrystler's Farm was to compel the enemy to evacuate Lower Canada.
Chrystler's Farm.—The day after the battle of Nivelle in France, British forces achieved a victory in Canada at Chrystler's Point, commonly known as Chrystler's Farm. This battle was a continuation of the one at Chateauguay. I mentioned that American General Wilkinson, with his army of 10,000 men, had failed to team up with Major-General Hampton, but by November 3rd, he landed part of his troops near Point Iroquois. To counter this, the British General sent a force of 800 regulars and militia, led by Colonel Morrison, to stop their advance. When they encountered 3,000 men who had landed under Major-General Boyd at Chrystler's Farm, Colonel Morrison's small army defeated them after a two-and-a-half-hour fight, resulting in 250 killed and wounded, along with 100 prisoners and one captured gun. The impact of the battle at Chrystler's Farm forced the enemy to withdraw from Lower Canada.
Men of the 49th and 2nd Battalion 89th Regiments, the Royal Artillery, Canadian Militia, Fencibles and Voltigeurs, likewise a few Indians, were engaged in this battle. As comparatively few regulars took part in the American battles, Fort Detroit, Chateauguay, and Chrystler's Farm, and because they were awarded so many years after, medals to British regiments bearing these bars are very rare, as indeed are those of the Colonials who took part.
Men of the 49th and 2nd Battalion 89th Regiments, the Royal Artillery, Canadian Militia, Fencibles, and Voltigeurs, along with a few Indigenous peoples, were involved in this battle. Since relatively few regular troops participated in the American battles at Fort Detroit, Chateauguay, and Chrystler's Farm, and since medals for British regiments awarded for these actions were given many years later, those medals are very rare, as are those of the Colonials who also took part.

NASSAU MEDAL FOR WATERLOO.
Nassau Medal for Waterloo.

HANOVERIAN MEDAL FOR WATERLOO.
Hanoverian Medal for Waterloo.
Nive.—Soult, having lost the Nivelle, withdrew his army to Anglet, and formed a line of defence with his unfinished fortified camp in front of Bayonne. Wellington, owing to the bad weather—the 12th was very foggy, and rain fell in torrents from the 11th until the 20th November—was unable to move, and was consequently constrained to maintain the allied army in very close quarters. The bad weather abating, the British commander determined to enlarge the productive area for his army by forcing the line of the Nive, and taking up a position on the left bank of the Adour, where reasonable subsistence could be found for the allied army. The time had not passed tamely, for in pressing the posts slowly forward, Generals Wilson and Vandeleur were wounded, while the light division alone lost 100 men. On December 8th the troops made a forward movement, and on the 9th the Nive was crossed near Cambo by the right of the army under Lieutenant-General Sir Rowland Hill, while the 6th division, under Lieutenant-General Sir H. Clinton, successfully passed at Ustaritz, and by this manœuvre the enemy were driven from the right bank of the river, and retired towards Bayonne by the great road of St. Jean Pied de Port. Those opposite Cambo were nearly intercepted by the 6th division, one regiment being driven from the road and compelled to march across country.
Nive.—Soult, having lost the Nivelle, pulled his army back to Anglet and set up a defensive line with his incomplete fortified camp in front of Bayonne. Wellington, due to the terrible weather—the 12th was really foggy, and it rained heavily from the 11th until the 20th of November—couldn't move and had to keep the allied army very close together. As the bad weather eased, the British commander decided to expand the area available for his army by pushing across the Nive and establishing a position on the left bank of the Adour, where there would be enough supplies for the allied forces. The time hadn’t been idle; while gradually pushing the posts forward, Generals Wilson and Vandeleur were wounded, and the light division alone lost 100 men. On December 8th, the troops advanced, and on the 9th, the Nive was crossed near Cambo by the right of the army under Lieutenant-General Sir Rowland Hill, while the 6th division, led by Lieutenant-General Sir H. Clinton, successfully crossed at Ustaritz. This maneuver forced the enemy to retreat from the right bank of the river towards Bayonne via the main road to St. Jean Pied de Port. Those stationed opposite Cambo were nearly caught by the 6th division, with one regiment being pushed off the road and forced to march across the countryside.
On December 10th, 11th, 12th, and 13th, Soult made a series of determined and often desperate attacks upon the British divisions, but without success, and was ultimately forced to fall back upon Bayonne, leaving the courses of the Nivelle, Nive, and Adour in the possession of the allies, who were thus enabled to obtain plentiful supplies for their needs, while the enemy were harassed by having their communications threatened and supplies restricted. During the conflicts between the 9th and 13th the French lost about 6,000 killed and wounded, and two guns. The British losses were 650 officers (including 6 Generals) and men killed; 233 officers, 215 sergeants, and 3,459 rank and file wounded; 17 officers, 14 sergeants, and 473 rank and file missing.
On December 10th, 11th, 12th, and 13th, Soult launched a series of determined and often desperate attacks against the British divisions, but he was unsuccessful and ultimately had to retreat to Bayonne. This left the courses of the Nivelle, Nive, and Adour in the hands of the allies, allowing them to secure ample supplies for their needs while the enemy faced disruptions to their communications and restricted supplies. During the clashes between the 9th and 13th, the French suffered around 6,000 casualties and lost two guns. The British losses included 650 officers (including 6 Generals) and men killed; 233 officers, 215 sergeants, and 3,459 rank and file wounded; and 17 officers, 14 sergeants, and 473 rank and file missing.
The battle on December 13th, which determined the series of conflicts, was practically fought and won by the corps under Sir Rowland Hill—indeed the glory of the day was frankly given him by Wellington, who, taking him by the hand, said, "My dear Hill, the day[Pg 62] is your own." There could be little doubt about that, for on the heights of St. Pierre—with only 16,000 men and 14 guns—he defied and drove off 35,000 French bayonets and 22 guns which assailed him in front, and the corps (8,000) of General Paris, with the Light Cavalry under Pierre Soult, which threatened his rear. The battle was regarded on both sides as "one of the most sanguinary that the French Army of Spain had fought, and that there was not one where so many deaths took place on the battlefield." No wonder the enemy never again took the offensive!
The battle on December 13th, which determined the series of conflicts, was practically fought and won by the corps under Sir Rowland Hill—indeed, Wellington openly credited him with the glory of the day, taking him by the hand and saying, "My dear Hill, the day[Pg 62] is yours." There was little doubt about that, as on the heights of St. Pierre—with only 16,000 men and 14 guns—he stood against and drove off 35,000 French soldiers and 22 guns attacking him from the front, as well as the corps (8,000) of General Paris, along with the Light Cavalry under Pierre Soult, who threatened his rear. Both sides viewed the battle as "one of the bloodiest that the French Army of Spain had fought, and one where so many deaths occurred on the battlefield." No wonder the enemy never took the offensive again!
The following regiments were present in the series of engagements: 1st, 2nd, and 3rd Foot Guards; 7th, 12th, 13th, 14th, 16th, and 18th Light Dragoons; 1st, 2nd, 3rd, 4th, 5th, 7th, 9th, 11th, 20th, 23rd, 27th, 28th, 31st, 32nd, 34th, 36th, 38th, 39th, 40th, 42nd, 43rd, 45th, 47th, 48th, 50th, 52nd, 53rd, 57th, 59th, 60th, 61st, 62nd, 66th, 71st, 74th, 76th, 79th, 83rd, 84th, 85th, 87th, 88th, 91st, 92nd, 94th, 95th, and the Rifle Brigade. Many of the regiments particularly distinguished themselves on the day of victory; notably the 92nd, which, scattering light troops that should have checked them, charged and repulsed a column; re-forming behind St. Pierre, they again advanced with colours flying and pibroch sounding, as if going to a review, and offered battle to a French column five times their superior: the challenge was, however, declined, for like Napier the French commanding officer recognised that men who could act so understood war.
The following regiments were involved in the series of battles: 1st, 2nd, and 3rd Foot Guards; 7th, 12th, 13th, 14th, 16th, and 18th Light Dragoons; 1st, 2nd, 3rd, 4th, 5th, 7th, 9th, 11th, 20th, 23rd, 27th, 28th, 31st, 32nd, 34th, 36th, 38th, 39th, 40th, 42nd, 43rd, 45th, 47th, 48th, 50th, 52nd, 53rd, 57th, 59th, 60th, 61st, 62nd, 66th, 71st, 74th, 76th, 79th, 83rd, 84th, 85th, 87th, 88th, 91st, 92nd, 94th, 95th, and the Rifle Brigade. Many of the regiments stood out on the day of victory; especially the 92nd, which, after scattering light troops that were meant to hold them back, charged and drove back a column. Reforming behind St. Pierre, they advanced again with their colors flying and music playing, as if heading to a parade, and challenged a French column that was five times their size. However, the French commander, like Napier, understood that soldiers who could act in such a way truly understood warfare and declined the challenge.
Orthes.—On February 27th, 1814, the battle of Orthes (Orthez) was fought. A period of inaction had again been forced on Wellington by the severity of the weather, but by the second week in February the conditions were such as to make the roads passable, and the British commander proceeded to follow up his successes. Several minor, but in some instances obstinate, engagements, were fought, among them that of Garris, where Wellington, determined to force[Pg 63] the passage of the Bidouse, ordered the 29th, with the 28th in support, to carry a bold hill, occupied by 4,000 of the enemy, before dark. This they did in a brilliant manner. Soult, finding the enemy pressing him rather forcibly, crossed the Gave d'Olèron in the night, and marching rapidly to Sauveterre, took up a position on the left of the Gave, while Wellington, having strongly established his right upon the Gave d'Olèron, returned to St. Jean de Luz to superintend the putting together of the remarkable and "wondrous bridge," which had been devised to enable the army to cross the Adour, 3 miles below Bayonne. On the 25th Sir John Hope crossed with his whole corps for the investment of the fortress; meanwhile Wellington was acting vigorously at Gaves, and General Hill was ready to force the passage of the Gave d'Olèron, which he did on the 24th, while Picton crossed between Montfort and Lass; other divisions having made equal progress, Marshal Soult withdrew his army across the Gave du Pau, and determined to make a final stand at Orthez. There, on the semicircular heights, the army of about 40,000 stood at bay, while the allies with about 37,000 men advanced to the attack. They were irresistible, but Soult retreated in a masterly manner, defending his divisions with splendid valour at each ridge they passed. Once forced on to the plain, they fell into disorder, and, charged and pursued by the British cavalry, they hastened to the river, over which they passed in scattered parties, and Soult retreated towards Toulouse, where the last and most unnecessary battle of the campaign was to be fought. It is estimated that 8,000 men were lost to the French in killed and wounded, while the allies lost 18 officers, 25 sergeants, and 234 men killed; 134 officers (including the Duke of Wellington), 89 sergeants, and 1,700 rank and file wounded; 1 officer, 5 sergeants, and 64 men missing.
Orthes.—On February 27th, 1814, the battle of Orthes (Orthez) took place. Wellington had been forced into a period of inactivity due to harsh weather, but by the second week of February, the conditions improved enough for the roads to be passable, allowing the British commander to continue his follow-up on previous successes. Several smaller, yet sometimes stubborn, battles occurred, including the one at Garris, where Wellington, determined to force the passage of the Bidouse, ordered the 29th to take a bold hill held by 4,000 enemy troops, with the 28th providing support before nightfall. They achieved this brilliantly. Soult, finding the enemy pressing him quite hard, crossed the Gave d'Olèron during the night and quickly marched to Sauveterre, establishing a position on the left of the Gave. Meanwhile, Wellington, having established his right strongly on the Gave d'Olèron, returned to St. Jean de Luz to oversee the assembly of the remarkable and "wondrous bridge" designed for the army to cross the Adour, three miles below Bayonne. On the 25th, Sir John Hope crossed with his entire corps to surround the fortress; during this time, Wellington was actively engaged at Gaves, and General Hill was ready to force the passage of the Gave d'Olèron, which he successfully did on the 24th, while Picton crossed between Montfort and Lass; as other divisions made equal advancements, Marshal Soult withdrew his army across the Gave du Pau and decided to make a final stand at Orthez. There, on the semicircular heights, an army of about 40,000 faced off against the allies, who had roughly 37,000 men ready to attack. They were unstoppable, but Soult skillfully retreated, defending his divisions valiantly at each ridge they encountered. Once pushed onto the plain, the troops became disorganized, and as they were charged and pursued by the British cavalry, they rushed towards the river, crossing it in scattered groups, with Soult retreating towards Toulouse, where the final and most unnecessary battle of the campaign was to occur. It is estimated that the French lost 8,000 men in killed and wounded, while the allies lost 18 officers, 25 sergeants, and 234 men killed; 134 officers (including the Duke of Wellington), 89 sergeants, and 1,700 rank and file wounded; and 1 officer, 5 sergeants, and 64 men missing.
The following regiments were present: 3rd, 7th, 10th, 13th, 14th, 15th, and 18th Light Dragoons;[Pg 64] 2nd, 5th, 6th, 7th, 10th, 20th, 23rd, 24th, 27th, 28th, 31st, 32nd, 34th, 36th, 37th, 39th, 40th, 42nd, 45th, 48th, 50th, 51st, 52nd, 57th, 58th, 60th, 61st, 66th, 68th, 71st, 74th, 82nd, 83rd, 87th, 88th, 91st, 92nd, 94th, 95th, and the Rifle Brigade. The 7th Hussars (Light Dragoons) distinguished themselves in the neighbourhood of Sault de Navailles, and made a charge under Lord Edward Somerset which Wellington described as "highly meritorious." The 52nd Oxford Light Infantry were also mentioned in dispatches.
The following regiments were present: 3rd, 7th, 10th, 13th, 14th, 15th, and 18th Light Dragoons;[Pg 64] 2nd, 5th, 6th, 7th, 10th, 20th, 23rd, 24th, 27th, 28th, 31st, 32nd, 34th, 36th, 37th, 39th, 40th, 42nd, 45th, 48th, 50th, 51st, 52nd, 57th, 58th, 60th, 61st, 66th, 68th, 71st, 74th, 82nd, 83rd, 87th, 88th, 91st, 92nd, 94th, 95th, and the Rifle Brigade. The 7th Hussars (Light Dragoons) distinguished themselves near Sault de Navailles, charging under Lord Edward Somerset, which Wellington described as "highly meritorious." The 52nd Oxford Light Infantry were also noted in dispatches.
Toulouse.—On April 10th, 1814, the sanguinary and unnecessary battle of Toulouse was fought, for the allies had entered Paris on March 31st, and Napoleon had abdicated. It is alleged that Soult fought the battle out of personal vanity or pique, since he had news—on April 7th—of what had happened in Paris. It was perhaps his last desperate effort for his master. However, this last battle of the Peninsular War was fought with terrible determination on both sides; but when the range of heights had been carried by the British, and the redoubts of the city won, Soult abandoned the town of Toulouse with 3 Generals and 1,600 men "prisoners at the generosity of the conqueror." The allied British, Portuguese, and Spanish armies lost in killed and wounded about 4,650, the latter including Generals Brisbane, Pack, Mendizabel, and Espelette, while the French had 5 generals and 3,234 men placed hors de combat. These numbers include, British losses, 31 officers and 563 men killed; 248 officers and 3,898 men wounded; 3 officers and 15 men missing.
Toulouse.—On April 10th, 1814, the bloody and unnecessary battle of Toulouse took place, as the allies had entered Paris on March 31st, and Napoleon had already abdicated. It’s said that Soult fought this battle out of personal pride or anger, since he learned—on April 7th—about the events in Paris. This was probably his last desperate attempt to support his leader. Nonetheless, this final battle of the Peninsular War was fought with fierce determination on both sides; however, once the British took the high ground and captured the city's redoubts, Soult abandoned Toulouse along with 3 generals and 1,600 men who were "prisoners at the mercy of the conqueror." The allied British, Portuguese, and Spanish forces suffered about 4,650 casualties, including generals Brisbane, Pack, Mendizabel, and Espelette among the wounded, while the French lost 5 generals and 3,234 men incapacitated. These figures include the British losses of 31 officers and 563 men killed; 248 officers and 3,898 men wounded; and 3 officers and 15 men missing.

PRUSSIAN JUBILEE MEDAL GIVEN BY WILHELM I IN 1863 TO VETERANS OF 1813-14-15 CAMPAIGNS.
PRUSSIAN JUBILEE MEDAL GIVEN BY WILHELM I IN 1863 TO VETERANS OF 1813-14-15 CAMPAIGNS.

JUBILEE MEDAL GIVEN BY THE CITY OF HANOVER TO VETERANS OF WATERLOO.
JUBILEE MEDAL AWARDED BY THE CITY OF HANOVER TO VETERANS OF WATERLOO.

"ST. HELENA MEDAL" GIVEN BY NAPOLEON III TO SURVIVORS OF WATERLOO AND THE NAPOLEONIC WARS.
"ST. HELENA MEDAL" AWARDED BY NAPOLEON III TO SURVIVORS OF WATERLOO AND THE NAPOLEONIC WARS.
In storming the redoubts the 42nd Black Watch, which had the honour of leading the attack, displayed their usual courage, but the withering fire from the defenders was such that in a short time it would have annihilated the regiment; indeed, out of the 500 who went into action, scarcely 90 reached the redoubt, from which the enemy fled, but these "leapt over the trenches like a pack of hungry hounds in pursuit." Two officers and sixty men of inferior rank were all that remained unwounded of the right wing of the regiment that entered the field in the morning. During the battle the standard of the regiment had passed through the hands of three wounded officers, until it was borne by a sergeant and defended by a few men. The 42nd, likewise the 36th, 79th, and 61st, who also lost considerable numbers, were mentioned in Wellington's dispatches. The 13th Light Dragoons, the 14th and 15th Dragoons, and the 18th Hussars, were also mentioned for gallant conduct during the advance on Toulouse.
In storming the redoubts, the 42nd Black Watch, which had the honor of leading the attack, showed their typical bravery, but the heavy fire from the defenders was so intense that in a short time, it would have wiped out the regiment; in fact, out of the 500 who went into action, barely 90 reached the redoubt, from which the enemy fled, but these “leapt over the trenches like a pack of hungry hounds in pursuit.” Two officers and sixty men of lower rank were all that remained uninjured from the right wing of the regiment that entered the field in the morning. During the battle, the regiment's standard passed through the hands of three wounded officers until it was carried by a sergeant and defended by a few men. The 42nd, along with the 36th, 79th, and 61st, who also suffered considerable losses, were mentioned in Wellington's dispatches. The 13th Light Dragoons, the 14th and 15th Dragoons, and the 18th Hussars were also recognized for their courageous actions during the advance on Toulouse.
The regiments represented at the battle were: 2 squadrons of the 1st and 2nd Life Guards and Horse Guards; 1st Dragoons; 3rd and 5th Dragoon Guards; 3rd, 4th, 7th, 10th, 13th, 14th, 15th, and 18th Light Dragoons; 1st, 2nd, 3rd, 5th, 7th, 11th, 20th, 23rd, 27th, 28th, 31st, 32nd, 34th, 36th, 39th, 40th, 42nd, 43rd, 45th, 48th, 50th, 52nd, 53rd, 57th, 60th, 61st, 66th, 71st, 74th, 79th, 83rd, 87th, 88th, 91st, 92nd, 94th, and 95th.
The regiments that took part in the battle included: 2 squadrons of the 1st and 2nd Life Guards and Horse Guards; 1st Dragoons; 3rd and 5th Dragoon Guards; 3rd, 4th, 7th, 10th, 13th, 14th, 15th, and 18th Light Dragoons; and the 1st, 2nd, 3rd, 5th, 7th, 11th, 20th, 23rd, 27th, 28th, 31st, 32nd, 34th, 36th, 39th, 40th, 42nd, 43rd, 45th, 48th, 50th, 52nd, 53rd, 57th, 60th, 61st, 66th, 71st, 74th, 79th, 83rd, 87th, 88th, 91st, 92nd, 94th, and 95th.
Rewards for Generals.—On May 30th, 1814, a treaty of peace was signed between Great Britain and France, Louis XVIII having been restored, and Napoleon permitted to retire to the Isle of Elba, where the allies allowed him to reign as sovereign. The Duke of Wellington was raised to the rank and dignity of a Duke and Marquis of the United Kingdom; Parliament suggested an annuity of £10,000, to be "paid annually out of the consolidated fund for the use of the Duke of Wellington, to be at any time commuted for the sum of £300,000 to be laid out in the purchase of an estate," but the sum was objected to as being too small, and an additional £100,000 was voted. Wellington's lieutenants—Generals Hope, Graham, Cotton, Rowland Hill, and Beresford—were also rewarded by pecuniary grants, and raised to the peerage.
Rewards for Generals.—On May 30th, 1814, a peace treaty was signed between Great Britain and France, with Louis XVIII being restored to the throne and Napoleon allowed to retire to the Isle of Elba, where the allies permitted him to rule as a sovereign. The Duke of Wellington was elevated to the rank and title of Duke and Marquis of the United Kingdom; Parliament proposed an annual payment of £10,000, to be "paid each year from the consolidated fund for the use of the Duke of Wellington, which could be exchanged for a one-time sum of £300,000 to be invested in purchasing an estate," but this amount was criticized as being too low, and an extra £100,000 was allocated. Wellington's officers—Generals Hope, Graham, Cotton, Rowland Hill, and Beresford—were also compensated with monetary grants and given titles of nobility.
Nothing for Officers and Soldiers.—The majority of the officers and all the men who had participated in this seven years' campaign were, notwithstanding the[Pg 66] generosity of the nation to the leaders, left undecorated, and, irony of ironies, the Commander-in-Chief, who had shed tears at the loss of brave soldiers, and who had been so well rewarded, raised his voice against the bestowal of decorations upon the men who had fought and bled with him!
Nothing for Officers and Soldiers.—Most of the officers and all the soldiers who took part in this seven-year campaign were, despite the [Pg 66] generosity of the nation towards the leaders, left without any honors. Ironically, the Commander-in-Chief, who had cried over the loss of brave soldiers and had been handsomely rewarded, spoke out against giving decorations to the men who had fought and bled alongside him!
CONTINENTAL PENINSULAR MEDALS
Alcantara Medal.—For the battle of Alcantara a medal of gold was given to some of the officers, and Dr. Payne has in his collection one awarded to Brigadier-General William Mayne, K.T.S., late Colonel Loyal Lusitana Legion, which by his kindness I am able to illustrate. It is 17∕20 in. in diameter, enclosed in a gold-rimmed glass case, suspended from a gold-hinged waved bar 17∕10 in. long by a salmon-pink ribbon 1½ in. wide, with a gold buckle attached thereto. On the obverse is engraved an outstretched sleeved arm and hand, below is the word CUIDADO, and above an eye, the whole within a wreath of palm and olive. On the reverse is the inscription, in bold Roman capitals, AL MERITO, and underneath, in script, "De la Juntade Gobierno y guerra de la Villa de Alcantara MDCCCIX." On the rim the name of the recipient is engraved in Spanish: AL CORONEL MAYNE DE LA LEAL LEGION LUZITANA.
Alcantara Medal.—For the battle of Alcantara, a gold medal was awarded to some officers, and Dr. Payne has one in his collection that was given to Brigadier-General William Mayne, K.T.S., former Colonel of the Loyal Lusitana Legion, which I am able to show thanks to his generosity. It measures 17∕20 inches in diameter, enclosed in a gold-rimmed glass case, hanging from a gold-hinged waved bar that is 17∕10 inches long, attached to a salmon-pink ribbon that is 1½ inches wide, with a gold buckle. On the front, there's an engraving of an outstretched arm and hand with sleeves, the word WARNING below it, and an eye above, all surrounded by a wreath of palm and olive. On the back, the inscription in bold Roman capitals reads On merit, and below it, in script, "De la Junta de Gobierno y guerra de la Villa de Alcantara MDCCCIX." The rim has the recipient's name engraved in Spanish: TO COLONEL MAYNE OF THE LOYAL LUSITAN LEGION.
Gold Cross for Albuhera.[4]—On March 1st, 1815, it was decided by the Spanish Government to issue a cross to Generals, officers, and men of the army of Estremadura, who had distinguished themselves at the battle of Albuhera on March 16th, 1811. This is an oblong, four-pointed cross of gold enamelled red, the points terminating in gold knobs, having red enamelled gold-edged flames issuing between the arms of the cross. In the centre of the cross, on a white enamelled ground, is the letter F in script, with VII in gold, surrounded by a frosted gold oval band bearing [Pg 67]the inscription in bright gold letters AL BUHE RA. The cross is suspended from a squat green enamelled laurel wreath, to which is fixed a gold loop and ring for attachment to the ribbon, which is 1½ in. wide, and red with blue edges.
Gold Cross for Albuhera.[4]—On March 1, 1815, the Spanish Government decided to award a cross to Generals, officers, and soldiers of the Estremadura army who distinguished themselves at the Battle of Albuhera on March 16, 1811. This is an oblong, four-pointed cross made of gold with red enamel, featuring gold knobs at the ends of the points and red enamel flames edged in gold that rise between the arms of the cross. In the center of the cross, against a white enamel background, is the letter F in script, with VII in gold, surrounded by a frosted gold oval band that bears the inscription in bright gold letters AL BUHE RA. The cross hangs from a short green enamelled laurel wreath, which has a gold loop and ring for attaching to the ribbon, which is 1½ inches wide and red with blue edges.
Gold Cross for Vittoria.—On April 22nd, 1815, a gold enamelled cross was instituted in Spain for presentation to officers to commemorate the battle of Vittoria, June 21st, 1813. The battle was won by the division of the 4th Corps of the Army, under the command of the Captain-General, the Duke of Ciudad Rodrigo (Wellington), and Field-Marshal D. Francisco Thomas de Longa. The cross is 1⅕ in. in diameter, and enamelled white with a red four-pointed star (see facing page 36), and between the cross, which is enamelled the same both sides, is a green enamelled laurel wreath; the cross is suspended from a gold Spanish crown surmounted by an orb ensigned with a gold fleur-de-lis; the ring for attachment to the ribbon being run through the ball. On the obverse is a white enamelled circle with gold borders encircling a red irradiated ground, whereon are three gold crossed swords, with a gold ribbon (inverted) bearing the motto IRURAG BAT. On the reverse, on a domed gold ground, is the legend in raised stamped letters, arranged in three lines, RECOMPENSA DE LA BATALLA DE VITTORIA. This cross depends from a 1½ in. ribbon composed of equal stripes of black, crimson, and pale blue.
Gold Cross for Vittoria.—On April 22, 1815, a gold enamel cross was established in Spain to be awarded to officers in honor of the Battle of Vittoria, which took place on June 21, 1813. The battle was won by the 4th Corps of the Army, led by Captain-General the Duke of Ciudad Rodrigo (Wellington) and Field Marshal D. Francisco Thomas de Longa. The cross is 1⅕ inches in diameter, enamelled in white with a red four-pointed star (see facing page 36), and is surrounded by a green enamel laurel wreath. It hangs from a gold Spanish crown topped with an orb featuring a gold fleur-de-lis; the attachment ring for the ribbon goes through the orb. On the front, there is a white enamel circle with gold borders surrounding a red background, where three gold crossed swords are depicted along with an inverted gold ribbon displaying the motto IRURAG BAT. The back features a domed gold background with the raised stamped words in three lines, REWARD FOR THE BATTLE OF VITTORIA. This cross hangs from a 1½ inch ribbon made of equal stripes of black, crimson, and pale blue.
Gold Cross for Commanders.—This gold cross, as the illustration facing page 28 shows, is star-like in form, but owing to the number of engagements recorded the number of arms varies. This particular cross, weighing nearly 2 oz., was awarded to Lieutenant-Colonel Richard Brunton, of the 13th Light Dragoons, late of the Portuguese Service, and forms part of the great collection of Dr. A. A. Payne. The cross was instituted by King John VI of Portugal, on July 26th, 1816, and was given to British officers who served on the Portuguese Staff during the Peninsular War,[Pg 68] and who were in command of divisions, brigades, or regiments. The arms of this cross, enamelled white, have double points terminating in gold beads, resting on a blue enamelled band bearing a gold wreath of laurel; on each of the arms is a green enamelled torpedo-shaped overlay, each recording the name of an action in which the recipient was engaged: a gold scroll forms the attachment for the loop which carries the broad red ribbon, edged with blue, by which the cross was suspended from the neck. On the obverse a small gold bust of King John occupies the centre, which is enamelled light blue surrounded by a conventional continuous border of leaves. On the reverse, within a similar band, but on a white enamelled ground, are the initials of the recipient. Sir Denis Pack was awarded the cross with eleven actions recorded on it.
Gold Cross for Commanders.—This gold cross, as shown in the illustration facing page 28, has a star-like shape, but the design varies depending on the number of engagements listed. This specific cross, weighing almost 2 oz., was awarded to Lieutenant-Colonel Richard Brunton of the 13th Light Dragoons, formerly of the Portuguese Service, and is part of Dr. A. A. Payne's extensive collection. The cross was established by King John VI of Portugal on July 26th, 1816, and was awarded to British officers who served on the Portuguese Staff during the Peninsular War,[Pg 68] and who were in command of divisions, brigades, or regiments. The arms of this cross, enamelled in white, feature double points ending in gold beads, resting on a blue enamelled band adorned with a gold laurel wreath; on each arm is a green enamelled torpedo-shaped overlay, each noting the name of a battle the recipient participated in: a gold scroll serves as the attachment for the loop that holds the broad red ribbon, trimmed with blue, from which the cross was hung around the neck. The front displays a small gold bust of King John at the center, set against light blue enamel and surrounded by a continuous border of leaves. On the back, within a similar band but on a white enamel background, are the recipient's initials. Sir Denis Pack received the cross with eleven actions recorded on it.
Officers' Gold Crosses.—King John VI also instituted, on July 26th, 1816, an officer's cross for bestowal upon those officers who had participated in all or any of the six campaigns which were fought during the Peninsular War. The cross of gold was awarded to all who fought in at least three campaigns, crosses of silver being given to those who had only been engaged in one or two. The cross illustrated was given to Lieutenant-Colonel Richard Brunton, for service in four campaigns. It has four ornamental arms, 111∕20 in. long, resting upon a green enamelled laurel wreath. In the centre of the obverse are the arms of Portugal in gold on a convex ground, surrounded by a blue enamelled circle, with the inscription GUERRA PENINSULAR. On the reverse is a continuous gold wreath of laurel, enclosing the pierced Roman numerals indicative of the total campaigns in which the recipient was engaged. The loop to carry the broad red blue-edged ribbon is attached to the cross by means of an inverted husk of gold. The gold cross, awarded to Lieutenant-Colonel Sir Edward Brackenbury, differs somewhat from that awarded to Colonel Burton. The arms on the obverse of the cross are 17∕20 in. long, and the[Pg 69] coat-of-arms is of a somewhat different character, and is not surmounted by a crown. On the reverse the single gold pierced figure 4 is within a blue enamelled circle. A gold ball and swivel bar are used for attachment to a blue watered ribbon 1⅗ in. wide.
Officers' Gold Crosses.—King John VI also established, on July 26th, 1816, an officer's cross to be awarded to those officers who participated in any or all of the six campaigns fought during the Peninsular War. The gold cross was awarded to anyone who fought in at least three campaigns, while silver crosses were given to those who were involved in only one or two. The illustrated cross was awarded to Lieutenant-Colonel Richard Brunton for his service in four campaigns. It features four decorative arms, 111∕20 in. long, resting on a green enamelled laurel wreath. In the center of the front side are the arms of Portugal in gold on a convex background, surrounded by a blue enamelled circle with the inscription Peninsular War. The back displays a continuous gold laurel wreath that encloses the pierced Roman numerals, indicating the total campaigns the recipient participated in. The loop for the wide red ribbon with blue edges is attached to the cross by an inverted gold husk. The gold cross awarded to Lieutenant-Colonel Sir Edward Brackenbury is somewhat different from that given to Colonel Burton. The arms on the front of his cross are 17∕20 in. long, and the[Pg 69] coat-of-arms has a different design and is not topped by a crown. On the back, the single gold pierced figure 4 is within a blue enamelled circle. A gold ball and swivel bar are used to attach it to a blue watered ribbon 1⅗ in. wide.
Officer's Silver Cross.—This was of the same size as Lieutenant-Colonel Brackenbury's, and suspended from a gold swivel bar, but the ribbon for suspension was blue silk ribbed, with broad pale yellow borders; the width 1⅗ in.
Officer's Silver Cross.—This was the same size as Lieutenant-Colonel Brackenbury's and hung from a gold swivel bar, but the suspension ribbon was blue silk with ribbed texture and wide light yellow edges; the width was 1⅗ in.
Crosses for Ciudad Rodrigo.—These were instituted on December 6th, 1819, for bestowal upon those who had distinguished themselves at the sorties on July 10th, 1810. They were given in gold to officers and in silver to privates who comprised the garrison. The cross has four arms, with blue enamelled edges tipped with gold beads. On the obverse is a gold tower, with rays issuing therefrom, upon a red enamelled ground enclosed by a white enamelled oval band. On the reverse is an inscription in gold letters upon a white enamelled ground, VALOR ACREDITADO EN CIUDAD RODRIGO. (See facing page 36.)
Crosses for Ciudad Rodrigo.—These were established on December 6th, 1819, to honor those who excelled during the sorties on July 10th, 1810. Officers received the cross in gold, while privates in the garrison were awarded it in silver. The cross features four arms, with edges enameled in blue and tipped with gold beads. On the front, there is a gold tower with rays coming from it, set against a background of red enamel, and surrounded by a white enamel oval band. The back displays an inscription in gold letters on a white enamel background, CREDITED VALUE IN CITY RODRIGO. (See facing page 36.)
Medal for Brunswick Contingent.—On October 30th, 1824, Duke Charles II decided to award a medal to those who formed the Brunswick Contingent, which came to England in 1809 with the Duke Frederick William, and took part in the Spanish and Portuguese war against Napoleon. The Contingent fought in nearly all the battles between 1810-14. The officers received a silver medal, and sub-officers and privates one of bronze. The medal, 13∕16 in. in diameter, has a plain double border, and is suspended from a crimson ribbon by means of a loop and ring. On the obverse is a wreath of laurel and oak and PENINSULAR; on the reverse is a military trophy with a studded shield, arranged sideways, on which the Duke's initials, C. C., are arranged in monogrammic form.
Medal for Brunswick Contingent.—On October 30th, 1824, Duke Charles II decided to give a medal to those who were part of the Brunswick Contingent, which arrived in England in 1809 with Duke Frederick William and participated in the Spanish and Portuguese war against Napoleon. The Contingent fought in almost all the battles from 1810 to 1814. The officers received a silver medal, while sub-officers and privates got a bronze one. The medal, 13∕16 inches in diameter, has a simple double border and is hung from a crimson ribbon using a loop and ring. On the front, there's a wreath made of laurel and oak with PENINSULA; on the back, there's a military trophy featuring a studded shield placed sideways, on which the Duke's initials, C. C., are presented in monogram form.
Medal for British German Legion.—King Ernest Augustus founded, on May 11th, 1841, a medal for[Pg 70] distribution to the survivors of the British German Legion, who had served in the Peninsular War between 1803-14. The medal, having a double rim, was of bronze made from captured cannon. One and seven-twentieths inch in diameter, it bears on the obverse a cross patée with double raised edges, in the centre of which is the King's monogram, E. A. R., surmounted by a crown; on the reverse within a laurel wreath is the inscription TAPFER UND TREU (Brave and Loyal), and within the rim KÖNIGLICH-DEUTSCHE LEGION (Royal German Legion). The medal is suspended from a 1⅖ in. white ribbon, with yellow stripe near the edge, by means of a ring and loop. I have in my possession one without the inscriptions, a laurel wreath and 1813 entirely filling the reverse. (See facing page 58.)
Medal for the British German Legion.—King Ernest Augustus established a medal on May 11th, 1841, to be given to the survivors of the British German Legion who served in the Peninsular War from 1803 to 1814. The medal features a double rim and is made of bronze sourced from captured cannons. It measures one and seven-twentieths inches in diameter and displays a cross patée with double raised edges on the front, in the center of which is the King's monogram, E. A. R., topped with a crown. On the back, inside a laurel wreath, is the inscription Brave and Loyal (Brave and Loyal), with Royal German Legion (Royal German Legion) around the edge. The medal is attached to a 1⅖-inch white ribbon with a yellow stripe near the edge by means of a ring and loop. I have one in my collection that lacks the inscriptions, a laurel wreath, and has 1813 entirely filling the back. (See facing page 58.)
Eve of Waterloo.—On February 27th, 1815, Napoleon, untamed by adversity, escaped from Elba, and on March 1st landed at Cannes in Provence with 1,000 determined followers, but so rapidly did the people rally to his standard that by the 20th he had reached Paris with an army of such proportions that Louis was compelled to retire to Ghent, and the Bourbon dynasty was again forgotten. Early on the morning of June 12th Napoleon quitted the capital, on the 14th joined the army collected on the frontier, and commenced his last campaign, which was to terminate on the 18th at Waterloo. Wellington had been sent to take charge of an army which he described in a letter as "very weak and ill-equipped, and a very inexperienced staff," but we now know that, though it was "a green army," the right material was there, and only required the moulding of opportunity to make good form. Wellington's army comprised British, Hanoverian, and Belgian troops, with contingents of Nassau and Brunswick Oels. Of the 78,500 men comprising it, only about 43,000 were British, German, or Hanoverians. By the 18th it had been reduced to 74,040. The Prussian army was 115,000 strong. The French army, estimated at not less than 154,370,[Pg 71] with 296 pieces of cannon—and variously at 127,000, 122,000, and 115,000, with 350 guns—was mainly composed of men "whose trade was war, and whose battles were as many as their years"; so that against the heterogeneous mass of men of various tongues commanded by Wellington, his great opponent was to hurl an army of veterans who could well be called upon to repeat the deeds of Marengo, of Friedland, and of Austerlitz. As it happened, the raw levies of Britain were to emulate the deeds of their brethren at Badajoz and Albuera.
Eve of Waterloo.—On February 27th, 1815, Napoleon, unbroken by hardship, escaped from Elba, and on March 1st landed at Cannes in Provence with 1,000 determined supporters. The people quickly rallied to his side, and by the 20th, he had reached Paris with such a large army that Louis was forced to retreat to Ghent, making the Bourbon dynasty a distant memory. Early in the morning on June 12th, Napoleon left the capital, joined the assembled army on the frontier on the 14th, and began his final campaign, which would end on the 18th at Waterloo. Wellington had been sent to command an army which he described in a letter as "very weak and ill-equipped, and a very inexperienced staff," but we now know that, despite being "a green army," the right people were there; they just needed the right conditions to excel. Wellington's army consisted of British, Hanoverian, and Belgian troops, along with units from Nassau and Brunswick Oels. Of the 78,500 soldiers, approximately 43,000 were British, German, or Hanoverians. By the 18th, its numbers had decreased to 74,040. The Prussian army was 115,000 strong. The French army, estimated at no less than 154,370, [Pg 71] with 296 cannons—and variously estimated at 127,000, 122,000, and 115,000, with 350 guns—mainly consisted of men "whose trade was war, and whose battles were as many as their years." Against the diverse group of men from various lands led by Wellington, his formidable opponent was preparing to unleash an army of experienced veterans capable of achieving feats similar to those at Marengo, Friedland, and Austerlitz. As it turned out, the inexperienced British recruits were about to perform with the same bravery as their fellow soldiers at Badajoz and Albuera.
On June 15th Napoleon's army crossed the Sambre, and on the morning of the 16th at Ligny he forced back the Prussians, but Blucher—falling back upon Wavre instead of Ligny—upset the French General's calculations. Meanwhile Wellington, having made arrangements with Blucher, was with his officers in the celebrated ballroom of the Duchess of Richmond at Brussels. Two hours after midnight the gaiety of the brilliant ballroom was subdued, and following the "sound of revelry by night" came "the cannon's opening roar" at Quatre Bras.
On June 15th, Napoleon's army crossed the Sambre, and on the morning of the 16th at Ligny, he pushed back the Prussians. However, Blucher retreated to Wavre instead of Ligny, throwing off the French General's plans. Meanwhile, Wellington, having coordinated with Blucher, was with his officers in the famous ballroom of the Duchess of Richmond in Brussels. Two hours after midnight, the lively atmosphere of the dazzling ballroom quieted down, and following the "sound of revelry by night" came "the cannon's opening roar" at Quatre Bras.
Quatre Bras.—By 8 o'clock the British had left Brussels, the 42nd and 92nd Highland Regiments having assembled to the sound of the pibroch, "Come to me and I will give you flesh"—an invitation to the wolf and raven, for which, as Forbes relates, the coming day did in fact spread an ample banquet. At 2 o'clock, after a march of 20 miles in sultry weather, they arrived at the hamlet of Quatre Bras, to find the Prince of Orange pluckily but feebly endeavouring to check the enemy, who had already gained Le Bois de Bossu. There, at the intersection of the Charleroi-Brussels and Namur-Nivelle roads, 7,000 Dutch-Belgians with 16 guns and no cavalry stood against Marshal Ney with 16,000 infantry, 1,700 cavalry, and 36 guns. It was, indeed, an unequal contest until the arrival of Pack's and Kempt's brigades. Wellington at once decided the wood must be taken, and then ensued an[Pg 72] exceedingly sanguinary conflict ere, with the ultimate arrival of the Guards, the French were forced to retire. The Guards (mostly young soldiers) had arrived from Enghein after a march of 27 miles, having started at 3 o'clock in the morning to join the main body. They had halted at Nivelles to rest and feed, but the arrival of a Staff officer, urging them to hurry on, induced them to abandon their meal, and resume their march. They arrived on the field of battle at an opportune moment, and then, despite their fifteen hours' march without food or drink, the first brigade of Guards, having loaded their muskets and fixed bayonets, pushed their way into Le Bois de Bossu, and within half an hour regained possession of it, but they could do no more than hold it. Meanwhile a series of splendid struggles had been taking place. When the 95th had been ordered to clear Le Bois de Bossu, the Royals and the 28th (Gloucesters) were severely engaged on the left, while the 44th, the 42nd and 92nd Highland Regiments were hotly assailed on the right.
Quatre Bras.—By 8 o'clock, the British had left Brussels, with the 42nd and 92nd Highland Regiments gathering to the sound of the pibroch, "Come to me and I will give you flesh"—a call to the wolf and raven, which, as Forbes recounts, turned into a substantial feast that day. By 2 o'clock, after marching 20 miles in humid weather, they arrived at the hamlet of Quatre Bras, where the Prince of Orange was bravely but weakly trying to hold back the enemy, who had already taken Le Bois de Bossu. There, at the crossroads of the Charleroi-Brussels and Namur-Nivelle roads, 7,000 Dutch-Belgians with 16 cannons and no cavalry were up against Marshal Ney and his 16,000 infantry, 1,700 cavalry, and 36 cannons. It was clearly an unfair fight until Pack's and Kempt's brigades arrived. Wellington immediately decided the wood had to be taken, leading to a very bloody battle before, with the eventual arrival of the Guards, the French were forced to fall back. The Guards (mostly young soldiers) had come from Enghein after a 27-mile march, starting at 3 o'clock in the morning to join the main force. They had stopped at Nivelles to rest and eat, but the arrival of a Staff officer urging them to hurry prompted them to leave their meal behind and continue marching. They reached the battlefield at just the right time, and despite having marched for fifteen hours without food or drink, the first brigade of Guards, after loading their muskets and fixing their bayonets, fought their way into Le Bois de Bossu and regained control within half an hour, although they could only hold it. Meanwhile, a series of fierce battles had unfolded. When the 95th was ordered to clear Le Bois de Bossu, the Royals and the 28th (Gloucesters) were heavily engaged on the left, while the 44th, the 42nd, and the 92nd Highland Regiments faced intense fighting on the right.
The 28th, after gallantly standing its ground under a furious cannonade, was suddenly, and on three different sides, assailed by French cavalry. Two faces of the square were charged by the lancers, while the cuirassiers galloped down upon another. It was, as Maxwell states, a trying moment. "There was a death-like silence; and one voice alone, clear and calm, was heard. It was their colonel's (Sir Philip Benson), who called upon them to be 'steady!' On came the enemy! The earth shook beneath the horsemen's feet, while on every side of the devoted band the corn bending beneath the rush of cavalry disclosed their numerous assailants. The lance-blades approached the bayonets of the kneeling front rank—the cuirassiers were within forty paces—yet not a trigger was drawn; but, when the word 'Fire!' thundered from the colonel's lips, each face poured out its deadly volley—and in a moment the leading files of the French lay before the square, as if hurled by a thunderbolt to the earth. The assailants, broken and dispersed, galloped for shelter to the tall rye, while a stream of musketry from the British square carried death into the retreating squadrons."
The 28th, after bravely holding its position under a heavy cannon fire, was suddenly attacked by French cavalry from three different sides. Two sides of the square were charged by the lancers, while the cuirassiers charged from another direction. As Maxwell describes, it was a tense moment. "There was a deathly silence, and only one voice, clear and calm, was heard. It was their colonel's (Sir Philip Benson), who urged them to be 'steady!' The enemy advanced! The ground shook under the horsemen's feet, and all around the dedicated troops, the corn bowed under the onslaught of cavalry, revealing their many attackers. The lance-blades moved closer to the bayonets of the kneeling front rank—the cuirassiers were just forty paces away—but not a trigger was pulled. When the command 'Fire!' echoed from the colonel's lips, each side unleashed its deadly volley, and in an instant, the leading ranks of the French were thrown to the ground as if struck by lightning. The attackers, broken and scattered, fled for cover into the tall rye, while a wave of gunfire from the British square dealt death to the retreating troops."

BRUNSWICK WATERLOO MEDAL.
BRUNSWICK WATERLOO MEDAL.

SAXE-GOTHA-ALTENBURG WATERLOO MEDAL.
Saxe-Gotha-Altenburg Waterloo Medal.
42nd and French Lancers.—The 42nd were not so fortunate, although their difficulty gave them the opportunity of again demonstrating the stern stuff of which they were moulded. The 42nd and 44th, the two foremost regiments posted in line on a reverse slope on the top of the Charleroi road, were suddenly and unexpectedly attacked in the rear by the French lancers under Wathier. The 42nd had almost formed square in the tall rye grass, all but the two flank companies having run in to form the rear face, when the leading squadron of lancers drove in the incompleted square, carrying along with it, by the impetus of their charge, several men of these two companies, and by spearing a number created considerable confusion, during which those who had been detached in the mêlée fought back to back until the fire of their comrades drove off the cavalry, and enabled them to rejoin the ranks, where the body of the Black Watch, coolly standing firm, gradually closed up its faces, and bayoneted the daring lancers who had penetrated their square. These brave fellows, however, died hard; they killed the commanding officer, Sir Robert Macara, and wounded the three officers upon whom the command had devolved in the space of a few moments. The 42nd lost at Quatre Bras 298 officers and men killed and wounded.
42nd and French Lancers.—The 42nd weren't as lucky, but their struggle allowed them to show the tough character they were made of. The 42nd and 44th, the top two regiments positioned on a reverse slope at the top of the Charleroi road, were suddenly and unexpectedly attacked from behind by the French lancers led by Wathier. The 42nd had almost formed a square in the tall rye grass, with nearly all but the two flank companies moving in to complete the rear side, when the leading squadron of lancers broke into the incomplete square, taking several men from those two companies with them due to the force of their charge. They caused significant chaos by spearing a number of soldiers, during which those who were separated in the mêlée fought back to back until their comrades' gunfire drove off the cavalry, allowing them to return to their ranks. Meanwhile, the body of the Black Watch stood firm, gradually closing their formation and bayonetting the audacious lancers who had broken through. However, these brave men proved difficult to defeat; they killed the commanding officer, Sir Robert Macara, and injured the three officers who had taken over command in just a matter of moments. The 42nd suffered 298 officers and men killed and wounded at Quatre Bras.
The 44th were still more unfortunate, for, like the 42nd, they had found a difficulty in forming up in the corn, which was up to their shoulders, and having less time faced their ranks about and waited for the French lancers to get in close before firing a volley. The foremost went down, but those lancers were veterans who did not easily pale before the leaden storm, and individual troopers dashed on; they were, however, repulsed by the rear of the 44th, and galloped away[Pg 74] eastward under a fire from the left company of the line. As a result of the cavalry attacks the 42nd and 44th were so reduced in numbers that at 5 p.m., when the first main attack had concluded, the remnants of the two regiments formed in a single square. Pack's Brigade, formed of the 42nd, 44th, 92nd, and 95th, lost in this strenuous engagement 800 out of 2,000 men.
The 44th had even worse luck because, like the 42nd, they struggled to get into position in the corn, which was shoulder-high, and with less time, they turned their ranks around and waited for the French lancers to close in before firing a volley. The front line went down, but those lancers were veterans who didn't easily back down from the gunfire, and some individuals charged forward; however, they were pushed back by the rear of the 44th and fled eastward under fire from the left company of the line. Due to the cavalry attacks, the 42nd and 44th were so diminished in numbers that by 5 p.m., when the first main attack had ended, what remained of the two regiments formed a single square. Pack's Brigade, made up of the 42nd, 44th, 92nd, and 95th, lost 800 out of 2,000 men in this intense battle.[Pg 74]
The next cavalry charge fell upon Halkett's division, from which, in response to an appeal from Pack, whose men were out of ammunition, the 69th Regiment had been dispatched to assist. The 69th were later ordered by Halkett's aide-de-camp to form square to receive the advance of Kellerman's cavalry, which had trotted in from Charleroi, but the Prince of Orange unwisely countermanding the order, Kellerman and Guiton, leading the 8th Cuirassiers, passed round the flank of the 42nd and 44th square, and charging the unfortunate 69th in line, completely rolled them up; and within a few moments, of the 580 composing the 69th, 150 were dead or dying. During this unfortunate episode, Mr. Clarke, a volunteer, fought with remarkable desperation, killing three cuirassiers and preserving the colours he was carrying, although he had received twenty-six sabre cuts. Kellerman's success was short-lived, for the British artillery fire had begun to play havoc with his cavalry, while the fierce charge of the squadrons of cuirassiers upon the square of the 28th was repelled by deadly discharges of musketry, and the French cavalry were compelled to flee, and in their wild course, 2 miles from the field, they swept 2,000 dismounted horsemen into the stampede. Another incident should be recorded: the 92nd, having repulsed an attack of cavalry and infantry in an advanced movement, were retiring to the wood, when a French column halted and fired upon the Highlanders; already assailed by a superior force, this notwithstanding they held their ground until relieved by a regiment of the Guards, when they retired to their original position,[Pg 75] but not before the regiment had lost 28 officers and nearly 300 men.
The next cavalry charge hit Halkett's division, which, in response to a call for help from Pack—whose men were out of ammunition—sent the 69th Regiment to assist. Halkett's aide-de-camp later ordered the 69th to form a square to defend against Kellerman's cavalry, which had come in from Charleroi. However, the Prince of Orange foolishly canceled the order. As a result, Kellerman and Guiton, leading the 8th Cuirassiers, maneuvered around the flank of the 42nd and 44th squares and charged the unfortunate 69th in line, completely overwhelming them. Within moments, out of the 580 soldiers in the 69th, 150 were dead or dying. During this tragic episode, Mr. Clarke, a volunteer, fought with remarkable bravery, killing three cuirassiers and protecting the colors he was carrying, despite suffering twenty-six saber cuts. Kellerman's victory was short-lived, as British artillery fire began to wreak havoc on his cavalry. The fierce charge of the cuirassier squadrons against the square of the 28th was repelled by deadly musket fire, forcing the French cavalry to retreat. In their chaotic escape, they swept up 2,000 dismounted horsemen along the way, two miles from the battlefield. Another notable event occurred when the 92nd, after repelling an attack from both cavalry and infantry during an advance, were retreating to the woods when a French column halted and fired upon the Highlanders. Despite being overwhelmed by a superior force, they held their ground until a regiment of the Guards came to their aid, allowing them to fall back to their original position,[Pg 75] but not before the regiment had lost 28 officers and nearly 300 men.
Losses at Quatre Bras.—Night compelled the cessation of hostilities, as at Ligny, and the French, having retired to their position held in the morning, left the British in possession of Gemioncourt and the southern end of the Bois de Bossu. The allied army lost at Quatre Bras 3,750 men, and of these 327 killed and 2,156 wounded were British; the French losses were at least 4,500. All those who took part in this battle, where the bull-dog tenacity of the British soldier was shown at its best, were awarded the Waterloo medal. In his dispatch Wellington stated, "I must particularly mention the 28th, 42nd, 79th, and 92nd regiments and the battalion of the Hanoverians." In addition to these the following British regiments were present at Quatre Bras: 2nd and 3rd Batts. 1st Foot Guards; Royal Scots; 32nd, 33rd, 44th, 69th, and 95th Regiments.
Losses at Quatre Bras.—Night forced a halt to fighting, just like at Ligny, and the French, having withdrawn to their earlier position, left the British in control of Gemioncourt and the southern end of the Bois de Bossu. The allied army lost 3,750 men at Quatre Bras, with 327 killed and 2,156 wounded being British; the French losses were at least 4,500. Everyone who participated in this battle, where the stubborn determination of the British soldier was on full display, received the Waterloo medal. In his report, Wellington noted, "I must specifically mention the 28th, 42nd, 79th, and 92nd regiments and the battalion of the Hanoverians." Additionally, the following British regiments were present at Quatre Bras: 2nd and 3rd Batts. 1st Foot Guards; Royal Scots; 32nd, 33rd, 44th, 69th, and 95th Regiments.
WATERLOO
After Quatre Bras Marshal Ney fell back upon Frasnes, and the wearied British, with their allies, piled arms, lighted their camp fires, and laid down to rest upon the field which they had so hardly held. The Prussians, after an intensely obstinate struggle, had been forced to retire to Ligny, when Blucher determined to unite with his 4th Corps and concentrate on Wavre. Wellington, recognising the importance of keeping in communication with the Prussian General, decided to fall back upon a position fronting the village of Waterloo, which, by the way, had already been selected by the British commanders as a suitable battleground. In retiring from Quatre Bras, the British cavalry were attacked by the French, and the 7th Hussars and squadrons of the 11th and 23rd Light Dragoons charged without success. The Life Guards, however, under Lord Uxbridge, compelled the enemy to retreat, and the British were allowed[Pg 76] to quietly take up their position, which they did in decidedly inclement weather, rain falling heavily most of the day, and the night closing wild and stormy. Violent winds, heavy rain, thunder and lightning added to the discomfort of the cheerless bivouac of the allies. The Duke of Wellington and his staff occupied the village of Waterloo, while Napoleon with his brother Jerome and his generals passed the night of the 17th in a farm-house half a league from the Château de Hougomont, which, in advance of the right centre of the British, was held by detachments of the Brigade of Guards and about 300 Nassau Riflemen. This was considered by Wellington to be the key to the position, and how well the Guards maintained it is a matter of glorious history. It is estimated that the allied forces numbered 74,400, and the French 90,000, when just before noon Joseph Bonaparte directed the 2nd Corps to advance against Hougomont. "The British batteries opened on the French masses as they debouched—their own guns covered their advance—and under the crashing fire of 200 pieces of artillery—a fitting overture for such a field—Waterloo opened, as it closed, magnificently."
After Quatre Bras, Marshal Ney retreated to Frasnes, and the exhausted British, along with their allies, stacked their arms, lit their campfires, and settled down to rest on the battlefield they had fought so hard to hold. The Prussians, after a fiercely stubborn battle, had been forced to pull back to Ligny, where Blucher decided to unite with his 4th Corps and concentrate on Wavre. Wellington, recognizing the importance of staying in touch with the Prussian General, chose to fall back to a position facing the village of Waterloo, which had already been identified by the British commanders as a suitable battleground. As they retreated from Quatre Bras, the British cavalry came under attack from the French, and the 7th Hussars along with squadrons of the 11th and 23rd Light Dragoons charged but were unsuccessful. However, the Life Guards, led by Lord Uxbridge, pushed the enemy back, allowing the British to take up their positions quietly, even though the weather was decidedly unpleasant, with heavy rain falling for most of the day and the night turning wild and stormy. Strong winds, heavy rain, thunder, and lightning added to the misery of the allies' miserable bivouac. The Duke of Wellington and his staff set up camp in the village of Waterloo, while Napoleon, along with his brother Jerome and his generals, spent the night of the 17th in a farmhouse about half a league from the Château de Hougomont, which was held by detachments of the Brigade of Guards and around 300 Nassau Riflemen ahead of the British right center. Wellington considered this to be the key position, and how well the Guards held it is a proud part of history. It is estimated that the allied forces numbered 74,400, while the French had 90,000, when just before noon, Joseph Bonaparte ordered the 2nd Corps to advance on Hougomont. "The British batteries fired on the French troops as they emerged—their own guns supported their advance—and under the booming fire of 200 pieces of artillery—a fitting overture for such a battlefield—Waterloo opened as magnificently as it closed."
The Guards at Hougomont.—The Nassau light troops were soon forced from the wood surrounding the Château by overwhelming numbers, and the enemy pressed on to the Château, but the vigorous and disconcerting fire of the Foot Guards arrested them while daring charges compelled the French to give up possession of part of the wood. They were not, however, to be denied, and with great determination repeatedly assaulted the Château. During one of these attacks so closely did they press that the Guards not only lost their position in the garden, but falling back rapidly on the main building could not securely close the gate of the yard, and a number of daring French soldiers entered; the fire of the defenders, however, followed by a courageous sortie from the Château forced the French from the yard, but only after a most gallant struggle between the combatants. Then Lieu[Pg 77]tenant-Colonel (afterwards Sir James) Macdonnell, with the assistance of Captain Wyndham, Ensigns Gooch and Hervey and Sergeant Graham of the Coldstream Guards, closed the gate, but not until, as Captain Siborne relates, the French soldiers had fallen "a sacrifice to their undaunted and conspicuous gallantry." Failing to take the Château by assault, the French artillery was turned upon the old building; soon the tower was in a blaze, and, the fire reaching the chapel, a number of wounded—friend and foe—perished in the flames, which strangely enough are stated to have ceased at the feet of a wooden image of Christ. But when the shades of evening fell, the Coldstreams and Scots Guards still held Hougomont, despite the repeated attacks of 30,000 men, and when the day had been decided it was found that in the sanguinary conflict which had raged so long around this advanced position 6,000 men had been killed. 1,500 were killed within half an hour in the four-acre orchard; 600 French fell in the attack on the Château and farm; 1,100 British were killed in the orchard and meadow; 400 near the farm-garden; 25 in the garden; and 2,000 of both armies behind the great orchard. Opposite the gate of the Château 300 British soldiers lie buried.
The Guards at Hougomont.—The Nassau light troops were quickly driven out of the woods surrounding the Château by overwhelming numbers, and the enemy advanced toward the Château. However, the strong and disruptive fire from the Foot Guards stopped them, while bold charges forced the French to abandon part of the woods. They weren't easily deterred, and with great determination, they repeatedly attacked the Château. During one of these assaults, they pressed so closely that the Guards not only lost their position in the garden but, when falling back rapidly to the main building, couldn't securely close the yard gate, allowing several daring French soldiers to enter. The defenders' fire, followed by a brave sortie from the Château, pushed the French out of the yard, but only after a fierce struggle between the fighters. Then Lieutenant-Colonel (later Sir James) Macdonnell, with the help of Captain Wyndham, Ensigns Gooch and Hervey, and Sergeant Graham of the Coldstream Guards, closed the gate, but not before, as Captain Siborne noted, the French soldiers had fallen "a sacrifice to their undaunted and conspicuous gallantry." Unable to capture the Château by assault, the French artillery was directed at the old building; soon, the tower was ablaze, and as the fire reached the chapel, several wounded—both friends and enemies—perished in the flames, which, strangely enough, reportedly stopped at the feet of a wooden image of Christ. But as evening fell, the Coldstreams and Scots Guards still held Hougomont despite repeated attacks from 30,000 men, and when the day was over, it was revealed that in the bloody conflict that had surrounded this strategic position, 6,000 men had been killed. 1,500 were killed within half an hour in the four-acre orchard; 600 French fell during the attack on the Château and the farm; 1,100 British were killed in the orchard and meadow; 400 near the farm garden; 25 in the garden; and 2,000 of both armies behind the large orchard. Opposite the gate of the Château, 300 British soldiers are buried.
The Death of Picton.—The second attack was made by D'Erlon, with the whole of his corps, against the left and centre; fortune favoured them temporarily when they obtained possession of Papelotte and La Haye Sainte. In repelling this attack the gallant Picton fell. The 5th division, waiting until the heads of the enemy's columns were within 40 yards, delivered a terrible volley, which annihilated the leading sections and put the main body into confusion. Picton, seizing the opportunity, called upon the men to "Charge!" but the word had hardly thundered from his lips ere a bullet pierced his forehead, and he fell from his saddle mortally wounded. The loss of a commander frequently means defeat, but "as he fell he heard the Highland lament answered by the deep execrations of Erin, and[Pg 78] while the Scotch slogan was returned by the Irish hurrah his fading sight saw his favourite division rush on with irresistible fury. The French column was annihilated, and 2,000 dead enemies told how desperately he had been avenged. This was probably the bloodiest struggle of the day; when the attack commenced—and it lasted not an hour—the 5th division exceeded 5,000 men; when it ended they reckoned scarcely 1,000!"
The Death of Picton.—The second attack was launched by D'Erlon, with his entire corps, against the left and center; luck was on their side momentarily as they took control of Papelotte and La Haye Sainte. In fighting off this attack, the brave Picton fell. The 5th division waited until the enemy's columns were within 40 yards before unleashing a devastating volley that wiped out the leading sections and threw the main body into chaos. Picton, seizing the moment, called on the men to "Charge!" but barely had the words left his lips when a bullet struck his forehead, and he fell from his saddle, mortally wounded. The loss of a commander often leads to defeat, but "as he fell he heard the Highland lament met with the fierce curses of Erin, and[Pg 78] as the Scottish chant was answered by the Irish cheer, his fading vision saw his beloved division surge forward with unstoppable fury. The French column was decimated, and the 2,000 dead enemies testified to the vengeance he had exacted. This was likely the bloodiest fight of the day; when the attack began—and it lasted less than an hour—the 5th division had over 5,000 men; by the end, they barely counted 1,000!
Charge of the Union Brigade.—Following this affair, the famous charge of the Union Brigade took place. Lord Anglesea, observing that the French lancers and cuirassiers were preparing to make a flank attack upon the British infantry, wheeled the Royals, Royal North British Dragoons (Scots Greys), and Enniskilleners into line, charged and overwhelmed the French cavalry, and falling upon the disorganised infantry completed the brilliant work of the 5th division. It was in this charge that Sergeant Ewart of the Scots Greys captured the Eagle of the 45th Regiment. The Eagle of the 105th Regiment was captured by Captain Clarke of the Royal Dragoons—securing the right for these regiments to wear the Eagle badge—and 2,000 men were taken prisoners. The impetuosity of the British Dragoons carried them into the rear of the French position, and they were driven back by the French horsemen, their brave leader, Sir William Ponsonby, being killed in the retirement. Meanwhile the incessant attacks which Napoleon commanded had played havoc with several of the British regiments, necessitating the bringing into action of Wellington's reserves—indeed, the position had become so serious that the left wing of the army, though only partially engaged, had suffered so severely that it could not afford to send assistance to the right or centre.
Charge of the Union Brigade.—After this incident, the famous charge of the Union Brigade happened. Lord Anglesea noticed that the French lancers and cuirassiers were gearing up for a flank attack on the British infantry, so he lined up the Royals, Royal North British Dragoons (Scots Greys), and Enniskilleners, charged, and overwhelmed the French cavalry, then attacked the disorganized infantry to finish the impressive work of the 5th division. During this charge, Sergeant Ewart of the Scots Greys captured the Eagle of the 45th Regiment. Captain Clarke of the Royal Dragoons captured the Eagle of the 105th Regiment—earning these regiments the right to wear the Eagle badge—and 2,000 soldiers were taken prisoner. The strong advance of the British Dragoons pushed them behind the French position, but they were repelled by the French horsemen, with their brave leader, Sir William Ponsonby, being killed during the retreat. Meanwhile, Napoleon's constant attacks had severely impacted several British regiments, forcing Wellington to deploy his reserves. The situation had become so critical that the left wing of the army, although only partially engaged, had suffered so much that it couldn’t send help to the right or center.
Great Regimental Losses.—The loss in individual regiments was awful. Four hundred men of the 27th were mowed down in square without drawing a trigger (their medals in fine condition have fetched as many pounds as the number of the regiment represents).[Pg 79] The 92nd, reduced to 200 men, made a daring attack upon a French column 2,000 strong, and with the aid of their countrymen, the Scots Greys, routed it. The 33rd, reduced to a skeleton, asked for support, and the commanding officer was told to "stand or fall where he was," and of the 28th and 73rd it is related that Wellington asked, pointing to a mass of killed and wounded men of these regiments, "What square is that so far in advance!" But the impoverishment of the regiments by incessant attacks and murderous artillery could not break the indomitable tenacity of the British; in vain had Milhaud's Cuirassiers, forty squadrons strong, thrice attacked the British squares. In vain did the remnants of these valorous squadrons, assisted by Kellerman and Guyot—making a total of seventy-seven squadrons, make a desperate effort to pierce those stubborn and thinning squares of British infantry. In vain did Ney repeat his attack upon the centre, even though he annihilated what remained of the German Legion, which had with such admirable courage held the farm of La Haye Sainte, and broke the formation of the British troops, causing Wellington to ask the question relating to the 28th and 73rd. In vain did the ten battalions of the Imperial Guard, led by Marshal Ney, push their way up the slopes between Hougomont and La Haye Sainte, for the Foot Guards—with the 52nd, 71st, and 92nd Regiments—offered such a murderous reception that "the Guard turned and fled." No wonder Napoleon ejaculated, "A present c'est fini—sauvons nous!" for, Wellington ordering the whole line to advance, the weary, hungry, and even wounded soldiers rushed forward with a joyous cheer and forced the retreat, which, as the British leader, with the 42nd and 95th, threw himself on Ney's flank, and the allied cavalry charged the enemy's columns, became an utter rout.
Great Regimental Losses.—The losses in individual regiments were devastating. Four hundred men from the 27th were cut down in formation without firing a shot (their medals, in excellent condition, have sold for as many pounds as the regiment's number).[Pg 79] The 92nd, reduced to 200 men, made a bold attack on a French column of 2,000, and with help from the Scots Greys, managed to rout it. The 33rd, now a mere shell of its former strength, requested support, but the commanding officer was told to "stand or fall where he was." It’s reported that Wellington, pointing to a mass of slain and wounded from the 28th and 73rd, asked, "What square is that so far in advance?" Yet the relentless assaults and deadly artillery could not crush the British resolve; Milhaud's Cuirassiers, a force of forty squadrons, attacked the British squares three times in vain. The remnants of these brave squadrons, bolstered by Kellerman and Guyot—totaling seventy-seven squadrons—made desperate attempts to break through those stubborn, thinning British infantry squares. Ney's repeated attacks on the center proved futile, even though he destroyed what was left of the German Legion, which had gallantly defended La Haye Sainte, disrupting the formation of the British troops, leading Wellington to question the state of the 28th and 73rd. The ten battalions of the Imperial Guard, led by Marshal Ney, tried to advance up the slopes between Hougomont and La Haye Sainte, but the Foot Guards—along with the 52nd, 71st, and 92nd Regiments—put up such a deadly defense that "the Guard turned and fled." It's no surprise that Napoleon exclaimed, "A présent c'est fini—sauvons nous!" because, as Wellington ordered the entire line to advance, the tired, hungry, and even wounded soldiers surged forward with a joyful cheer and forced the retreat. This developed into a complete rout as the British leader, accompanied by the 42nd and 95th, attacked Ney's flank while the allied cavalry charged the enemy's columns.
The Price of Victory.—But the Old Guard, true to their traditions, made a last desperate stand in square against the British cavalry; it was desperate[Pg 80] and grand, but ineffectual, and again they turned and fled, and "the finest army, for its numbers, that France had ever embattled in a field was utterly defeated, and the dynasty of that proud spirit for whom Europe was too little was ended." Over the terrible carnage which followed I must draw a veil, for the unrelenting animosity of the Prussians to the French led them to retaliate in a most vindictive manner, and thousands who had bravely fought and survived the day lived only to fall ignominiously under the revengeful sabre or thrust of Prussian lance. When Wellington recrossed the battlefield, where the destiny of Europe had been changed by the defeat of the greatest of the world's generals, he could have had little stomach for supper, for he had to pass over that 2 square miles of Belgian territory where 50,000 dead or wounded men and horses lay—the terrible price of victory.
The Price of Victory.—But the Old Guard, staying true to their traditions, made one last desperate stand in formation against the British cavalry; it was bold and impressive, but ultimately ineffective, and once again they turned and fled. "The finest army, in terms of numbers, that France had ever assembled in a field was utterly defeated, and the reign of that proud spirit for whom Europe was too small was over." Over the horrific aftermath that followed, I must withhold details, as the relentless hatred of the Prussians towards the French led them to retaliate in a brutally vindictive way, and thousands who had bravely fought and survived the day lived only to fall shamefully under the vengeful saber or thrust of a Prussian lance. When Wellington crossed the battlefield again, where the fate of Europe had been altered by the defeat of the greatest general the world had seen, he must have had little appetite for dinner, as he had to walk over that 2 square miles of Belgian territory where 50,000 dead or wounded men and horses lay—the terrible price of victory.
The following British regiments were represented at Waterloo: 2 squadrons 1st and 2nd Life Guards; 2 squadrons Royal Horse Guards (Blue); 1st Dragoon Guards; 1st Royals,* 2nd Royal North British Dragoons* (Scots Greys); 6th Inniskilling Dragoons*; 12th, 13th, 16th Queen's and 23rd Light Dragoons; 7th, 10th Royal; 15th King's; 18th Hussars; 2nd and 3rd Batts. 1st Foot Guards (Grenadiers); 2nd Batt. 2nd Foot Guards (Coldstreams); 3rd Batt. 3rd Foot Guards (Scots Guards); 3rd Batt. 1st Royal Scots; 1st Batt. 4th; 3rd Batt. 14th; 1st Batt. 23rd Royal Welsh Fusiliers; 1st Batt. 27th Inniskilling;* 1st Batt. 28th (Gloucesters); 2nd Batt. 30th; 1st 32nd; 33rd; 1st Batt. 40th; 1st Batt. 42nd Black Watch*; 2nd Batt. 44th; 51st; 1st Batt. 52nd; 2nd Batt. 69th; 1st Batt. 71st Highland Light Infantry; 2nd Batt. 73rd Perthshires (2nd Batt. Black Watch); 1st Batt. 79th Cameron Highlanders; 1st Batt. 92nd Gordon Highlanders; 1st, 2nd, and Prov. Batts. 95th; 8 Troops Royal Horse Artillery; 6 Brigades Royal Artillery; Corps of Royal Artillery Drivers; Royal Foot Artillery; Royal Engineers; Royal Sappers and Miners; Royal Waggon Train; Field Train Department of the Ordnance; Royal Staff Corps; Commissariat Department; Ordnance Medical Department, and the following units of the King's German Legion: 1st and 2nd Light Dragoons; 1st, 2nd, and 3rd Hussars; 1st, 2nd, 3rd, 4th, 5th, and 8th Line Battalions, and 1st and 2nd Light Battalions: the total present being about 2,308 officers and 42,120 non-commissioned officers and men.
The following British regiments were present at Waterloo: 2 squadrons of the 1st and 2nd Life Guards; 2 squadrons of the Royal Horse Guards (Blue); 1st Dragoon Guards; 1st Royals; 2nd Royal North British Dragoons (Scots Greys); 6th Inniskilling Dragoons; 12th, 13th, 16th Queen's, and 23rd Light Dragoons; 7th, 10th Royal; 15th King's; 18th Hussars; 2nd and 3rd Battalions of the 1st Foot Guards (Grenadiers); 2nd Battalion of the 2nd Foot Guards (Coldstreams); 3rd Battalion of the 3rd Foot Guards (Scots Guards); 3rd Battalion of the 1st Royal Scots; 1st Battalion of the 4th; 3rd Battalion of the 14th; 1st Battalion of the 23rd Royal Welsh Fusiliers; 1st Battalion of the 27th Inniskilling; 1st Battalion of the 28th (Gloucesters); 2nd Battalion of the 30th; 1st of the 32nd; 33rd; 1st Battalion of the 40th; 1st Battalion of the 42nd Black Watch; 2nd Battalion of the 44th; 51st; 1st Battalion of the 52nd; 2nd Battalion of the 69th; 1st Battalion of the 71st Highland Light Infantry; 2nd Battalion of the 73rd Perthshires (2nd Battalion Black Watch); 1st Battalion of the 79th Cameron Highlanders; 1st Battalion of the 92nd Gordon Highlanders; 1st, 2nd, and Prov. Battalions of the 95th; 8 Troops of the Royal Horse Artillery; 6 Brigades of the Royal Artillery; Corps of Royal Artillery Drivers; Royal Foot Artillery; Royal Engineers; Royal Sappers and Miners; Royal Waggon Train; Field Train Department of the Ordnance; Royal Staff Corps; Commissariat Department; Ordnance Medical Department; and the following units of the King's German Legion: 1st and 2nd Light Dragoons; 1st, 2nd, and 3rd Hussars; 1st through 5th and 8th Line Battalions, and 1st and 2nd Light Battalions: the total present being about 2,308 officers and 42,120 non-commissioned officers and soldiers.

PISTRUCCI'S WATERLOO MEDAL.
Pistrucci's Waterloo Medal.
(See page 373.)
(See page __A_TAG_PLACEHOLDER_0__.)
The medals of those regiments marked * are particularly sought after by collectors. The Dragoons lost heavily in their brilliant charge, the Scots Greys having 106 officers and men killed and 97 wounded, and the "Enniskilleners" 86 officers and men killed, their Colonel, Lieutenant-Colonel, 4 subordinate officers and 101 sergeants and rank and file wounded. The 27th went into battle with 698 men, and of these 480 were placed hors de combat, while the 28th was reduced to four companies. The 42nd lost at Quatre Bras and Waterloo 51 killed and 247 wounded, the former including their Colonel and a Major who was mortally wounded, and the latter a Lieutenant-Colonel and a Major. The 92nd was reduced to less than 300 before 4 o'clock. The following regiments composing Sir Charles Colville's division, which was located at Halle owing to Wellington's belief that he might be attacked on his right flank, also received the medal, although not actually engaged in the conflict; 2nd Batt. 35th; 1st Batt. 54th; 2nd 59th and 1st Batt. 91st (Argyll and Sutherland Highlanders); likewise two Brigades of Artillery and the 6th Hanoverian Brigade.
The medals of the regiments marked * are especially sought after by collectors. The Dragoons suffered heavy losses in their remarkable charge, with the Scots Greys having 106 officers and men killed and 97 wounded, and the "Enniskilleners" losing 86 officers and men killed, including their Colonel, Lieutenant-Colonel, 4 subordinate officers, and 101 sergeants and ranks wounded. The 27th went into battle with 698 men, of which 480 became hors de combat, while the 28th was reduced to four companies. The 42nd lost 51 killed and 247 wounded at Quatre Bras and Waterloo, with the dead including their Colonel and a Major who was mortally wounded, along with a Lieutenant-Colonel and a Major among the wounded. The 92nd was brought down to less than 300 by 4 o'clock. The following regiments in Sir Charles Colville's division, positioned at Halle because Wellington feared an attack on his right flank, also received the medal, even though they weren't directly engaged in the battle: 2nd Batt. 35th; 1st Batt. 54th; 2nd 59th and 1st Batt. 91st (Argyll and Sutherland Highlanders); as well as two Brigades of Artillery and the 6th Hanoverian Brigade.
The British Waterloo Medal.—When, on March 10th, 1816, it was decided to bestow upon every soldier, from Commander-in-Chief to drummer boy, the same type and quality of medal as a reward for services at Waterloo, the custom was established to grant a medal to all, irrespective of rank or occupation, who had given war service to his or her country. It was ten[Pg 82] months after that auspicious day that there appeared in the London Gazette the notification that "a medal shall be conferred upon every officer, non-commissioned officer, and soldier present on that memorable occasion," but be it noted "the ribbon issued with the medal shall never be worn but with the medal suspended to it."
The British Waterloo Medal.—When, on March 10th, 1816, the decision was made to award every soldier, from the Commander-in-Chief to the drummer boy, the same medal for their service at Waterloo, the tradition started of giving a medal to everyone, regardless of rank or role, who had served their country in wartime. It was ten[Pg 82] months after that significant day that the London Gazette published the announcement stating that "a medal shall be awarded to every officer, non-commissioned officer, and soldier present on that historic occasion," but it's important to note that "the ribbon issued with the medal shall only be worn when the medal is suspended from it."
First Official War Medal.—The first general official medal issued at the suggestion of the Duke of Wellington—who, however, strenuously opposed the grant of one for the Peninsular—was of silver, 1⅖ in. in diameter, bearing on the obverse the laureated head of the Prince Regent facing to the left, with the inscription GEORGE P. REGENT on either side of the head, and on the reverse a seated figure of Victory with wings outspread, holding in her right hand a palm branch, and in the left a sprig of olive; on a plain tablet is WATERLOO, and in the exergue JUNE 18. 1815, while above is the name of Wellington in Roman letters. As originally issued it had a large steel ring 1 in. wide, run through a steel clip, for suspension by a dark-crimson blue-edged ribbon 1½ in. wide (sometimes found 2 in. wide), as illustrated facing page 56. The clip, however, was not always secure, and as a result the possessors of the medal frequently had silver suspenders made according to their own taste, or that of the local jobbing jeweller, who did not always do justice to Wyon's classic medal, slight differences in which may be observed upon comparison, as the medals were not all struck from one die, and the die-sinker's art was not then mechanical. The names and regiments of the recipients were indented in large capital letters on the edge of the medal, the tops and bottoms of the letters almost touching the rims of the medal.
First Official War Medal.—The first general official medal was issued at the suggestion of the Duke of Wellington—who, however, strongly opposed giving one for the Peninsular—was made of silver, 1⅖ inches in diameter. On the front, it features the laureated head of the Prince Regent facing left, with the inscription GEORGE P. REGENT on either side of the head. The back displays a seated figure of Victory with wings spread, holding a palm branch in her right hand and an olive sprig in her left; on a plain tablet is WATERLOO, and in the exergue JUNE 18, 1815, while above is the name of Wellington in Roman letters. When it was first issued, it had a large steel ring 1 inch wide, connected through a steel clip, for suspension by a dark crimson ribbon with blue edges, which was 1½ inches wide (sometimes found at 2 inches wide), as illustrated facing page 56. However, the clip was not always secure, and as a result, medal owners often had silver suspenders made to their own taste or that of the local jobbing jeweler, who didn’t always do justice to Wyon's classic medal. Slight differences can be seen upon comparison, as the medals were not all struck from the same die, and the die-sinker's skill was not then mechanical. The names and regiments of the recipients were etched in large capital letters on the edge of the medal, with the tops and bottoms of the letters almost touching the rims of the medal.
Second General Award.—This was the first general award of medals for 166 years, when Simon's medal was given to those engaged at Dunbar in 1650. However, the official war medal for all ranks is now an established institution, and, it is said, sometimes[Pg 83] given with too free a hand. But the soldier has a substantial record of his services on the field of battle—not even now, to my mind, satisfactorily complete—and but a small recognition of his country's appreciation; while those interested in the traditions of our race, those who recognise that in the grim and terrible business of war the better part of man is frequently called forth, will find the means of collecting an interesting record of great deeds, and incidentally materialising the history of the epoch-making nineteenth century, and these dawning days of the twentieth, when we had hoped that the dark spectre of war might have been replaced by the radiating figure of peace. But the war drums still throb, the battle flags are still unfurled; and it is good, when duty has called, in the nerve-wracking suspense and in the loud clamour of war, that fortitude, loyalty, honour, and the love of fatherland have shone above the horrors, and made us proud of the men who wear on their breasts the badges of the brave.
Second General Award.—This was the first general award of medals in 166 years, since Simon's medal was given to those who fought at Dunbar in 1650. Now, the official war medal for all ranks is a well-established tradition, although it is said that sometimes it’s awarded too liberally. However, the soldier has a significant record of his services on the battlefield—not, in my opinion, completely satisfactory even now—and just a small acknowledgment from his country of its appreciation. Those who care about our heritage, who understand that in the harsh and brutal reality of war, the best qualities of humanity are often brought out, will find ways to gather a compelling record of great deeds and, in doing so, capture the history of the transformative nineteenth century and these early years of the twentieth century, when we had hoped that the dark presence of war might be replaced by the shining figure of peace. But the war drums still beat, the battle flags are still raised; and it is good that, when duty has called, amid the nerve-wracking tension and the loud chaos of war, fortitude, loyalty, honor, and love of one’s country have risen above the horrors, making us proud of the men who display the badges of the brave on their chests.
Continental Waterloo Medals.—Several other medals were issued for Waterloo, notably the Hanover, Nassau, Saxe-Gotha, Altenburg, and Brunswick medals, also the Belgian silver star.
Continental Waterloo Medals.—Several other medals were issued for Waterloo, including the Hanover, Nassau, Saxe-Gotha, Altenburg, and Brunswick medals, as well as the Belgian silver star.
Nassau Medal.—Fredrich Duke of Nassau was the first to issue a medal for Waterloo—that was on December 23rd, 1815. It is a small silver medal 1⅒ in. in diameter, with a lug stamped with the medal, through which ribbon could be run for suspension. On the obverse is the bust of the Duke, and the inscription FRIEDRICH AUGUST HERZOG ZU NASSAU. Underneath the truncation are the letters I.L. On the reverse, to the left, is a standing figure of Victory, holding in her right hand a palm branch, while with the left she is represented placing a laurel wreath upon the brow of a Roman soldier; in the exergue is DEN 18 JUNI 1815, and round the figures DEN NASSAUISCHEN STREITERN BEY WATERLOO. The medal, issued unnamed, was suspended from a dark-blue ribbon with orange edges.
Nassau Medal.—Fredrich Duke of Nassau was the first to create a medal for Waterloo, which happened on December 23rd, 1815. It's a small silver medal that measures 1⅒ inches in diameter, featuring a lug stamped with the medal, allowing for a ribbon to be threaded through for hanging. On the front, there's a bust of the Duke along with the inscription Friedrich August, Duke of Nassau. Below the bust are the letters I.L.. On the back, to the left, there's a standing figure of Victory, who holds a palm branch in her right hand while using her left hand to place a laurel wreath on the head of a Roman soldier; below is the date June 18, 1815, and surrounding the figures is the text THE NASSAU TROOPS AT WATERLOO. The medal was issued without a name and hung from a dark-blue ribbon with orange edges.
Hanover Medal.—The Hanover medal was struck by command of the Prince Regent of Great Britain. The order was given in December 1817, and was to the effect that surviving soldiers of his German dominions and the relatives of those who had fallen at Waterloo were eligible for the award. The medal is 1⅖ in. in diameter, and bears on the obverse the laureated head of the Prince Regent facing to the right, the truncation draped, and surrounded by the inscription GEORG. PRINZ. REGENT 1815. The reverse bears in the centre WATERLOO JUN. XVIII, flanked by laurel wreaths, with a small trophy consisting of a cuirass and flags above, and the whole encircled by the inscription HANOVERISCHER TAPFERKEIT. The medal was suspended from a steel clip and ring by means of a crimson and blue-edged ribbon, like that used for the British Waterloo.
Hanover Medal.—The Hanover medal was issued on the orders of the Prince Regent of Great Britain. The order was given in December 1817, stating that surviving soldiers from his German territories and the families of those who died at Waterloo could receive the award. The medal measures 1⅖ inches in diameter and features on the front the laureate head of the Prince Regent facing right, draped truncation, and surrounded by the inscription GEORG. PRINZ. REGENT 1815. The back displays WATERLOO June 18 in the center, flanked by laurel wreaths, with a small trophy of a cuirass and flags above, all encircled by the inscription HANOVERIAN BRAVERY. The medal was hung from a steel clip and ring by a crimson ribbon with blue edges, similar to that used for the British Waterloo.
Brunswick Medal.—The Prince Regent (as guardian of the minor Princes of Brunswick) was also responsible for the issue of a medal to the soldiers of Brunswick who were present in the engagements of June 16th, 17th and 18th, 1815. The order for the striking was given on June 11th, 1818, and the medals were struck from captured French cannon. On the obverse is the head of Duke Fredrich Wilhelm of Brunswick, who fell at Quatre Bras, and the inscription in German lettering FRIEDRICH WILHELM HERZOG; on the truncation of the bust is C. Häseler in script. On the reverse is a wreath of oak and laurel, encircling 1815, and the inscription in German lettering arranged round and divided by rosettes, Braunschweig Seinen Kriegern. Quatrebras und Waterloo (Brunswick to her Warriors. Quatre Bras and Waterloo). The medal, 17∕20 in. in diameter, was suspended from a steel clip and ring by a 1½ in. yellow ribbon, with broad blue stripes equal to one quarter the width near the edge. The officers' medals were gilt, with the names indented on the edge.
Brunswick Medal.—The Prince Regent, acting as the guardian of the young Princes of Brunswick, was in charge of issuing a medal to the Brunswick soldiers who participated in the battles on June 16th, 17th, and 18th, 1815. The order to produce the medals was given on June 11th, 1818, and they were made from captured French cannons. On the front, there is a depiction of Duke Friedrich Wilhelm of Brunswick, who was killed at Quatre Bras, along with the inscription in German lettering FRIEDRICH WILHELM DUKE; on the side of the bust is C. Häseler in script. On the back, there's a wreath of oak and laurel surrounding the year 1815, with the inscription in German lettering arranged around it and separated by rosettes, Braunschweig Seinen Kriegern. Quatrebras und Waterloo (Brunswick to her Warriors. Quatre Bras and Waterloo). The medal measures 17∕20 in. in diameter and was hung from a steel clip and ring by a 1½ in. yellow ribbon, featuring broad blue stripes that make up one quarter the width near the edges. The officers' medals were gold-plated, with the names engraved on the edge.
Saxe-Gotha-Altenburg Medal.—In 1816 Duke Emilius Leopold Augustus decided to have a medal struck for presentation to the members of the Foreign Legion[Pg 85] of the Duchy of Saxe-Gotha-Altenburg who had taken part in the campaigns of 1814-15. The medals were of bronze; those awarded to the officers were 1⅗ in. in diameter, gilt all over, and those given to the private soldiers 113∕20 in. in diameter, parti-gilt, the Altenburg rose and ornamental border on the obverse being gilt, likewise the ducal crown and lettering on the reverse, which bears, in old German characters, IM KAMPFE FUER DAS RECHT (In the struggle for right), and round the edge, where the name of the recipient is usually placed, HERZOGTH GOTHA-VND-ALTENBVRG MDCCCXIV : MDCCCXV. The medal has a ball-shaped loop and ring for suspension from a dark-green ribbon 1 in. wide, with a border of black, through which gold is braided at intervals (see facing page 72).
Saxe-Gotha-Altenburg Medal.—In 1816, Duke Emilius Leopold Augustus decided to create a medal to present to the members of the Foreign Legion[Pg 85] of the Duchy of Saxe-Gotha-Altenburg who participated in the campaigns of 1814-15. The medals were made of bronze; those awarded to the officers were 1⅗ inches in diameter, completely gilded, while those given to the private soldiers were 113∕20 inches in diameter and partially gilded. The Altenburg rose and ornamental border on the front were gilded, as well as the ducal crown and lettering on the back, which reads, in old German characters, I'm fighting for what's right. (In the struggle for right), and around the edge, where the recipient's name is typically placed, HERZOGTH GOTHA-VND-ALTENBVRG 1814 : 1815. The medal has a ball-shaped loop and ring for hanging it from a dark-green ribbon 1 inch wide, bordered in black, interspersed with braided gold (see facing page 72).
Belgian Star.—A five-pointed star, with ring for suspension, was granted to the Belgian troops who were present at the battle of Waterloo. Like many continental medals of the period, it is very simple, having on the obverse 1813, and on the reverse 1815. It is not very coveted, owing to the uncertain conduct of the Belgian troops.
Belgian Star.—A five-pointed star with a ring for hanging was awarded to the Belgian troops who fought at the Battle of Waterloo. Like many medals from that time in Europe, it is quite simple, featuring 1813 on the front and 1815 on the back. It’s not highly sought after due to the questionable behavior of the Belgian troops.
Hanoverian Jubilee Medal.—On the fiftieth anniversary of the battle of Waterloo the inhabitants of Hanover presented a bronze medal to the survivors of the Hanoverian troops. On the obverse is the arms of Hanover, encircled with the inscription STADT HANOVER DEN SIEGERN VON WATERLOO 18 JUNI 1815, and on the reverse, within a laurel wreath, ZUR 50 JÄHRIGEN JUBELFEIER AM 18 JUNI 1865.
Hanoverian Jubilee Medal.—On the fiftieth anniversary of the Battle of Waterloo, the people of Hanover presented a bronze medal to the surviving members of the Hanoverian troops. The front features the arms of Hanover, surrounded by the inscription CITY OF HANNOVER TO THE WINNERS OF WATERLOO JUNE 18, 1815, and on the back, inside a laurel wreath, is the inscription FOR THE 50TH ANNIVERSARY CELEBRATION ON JUNE 18, 1865.
French or St. Helena Medal.—It was not until August 12th, 1857, that the survivors of that magnificent army of Frenchmen who followed le petit Caporal in his campaigns from 1792 to 1815 received a medal commemorative of their devotion and gallantry. It was due to the Emperor Napoleon III that the old military and naval warriors received, what their great General and Emperor would wish for them, "marks of merit." The St. Helena medal is oval and of bronze, 1⅕ in.[Pg 86] across. On the obverse is a beaded circle within laurel leaves, which frame the whole medal (see facing page 64), the laureated head of Napoleon facing to the right with the legend NAPOLEON I EMPEREUR. On the reverse, within a beaded circle, is the inscription A SES COMPAGNONS DE GLOIRE SA DERNIERE PENSEE STE. HELENE 5 MAI 1821 (To his companions in glory his last thought St. Helena 5 May 1821), and around CAMPAGNES DE 1792 A 1815, with a small five-pointed star beneath. As part of the medal, but standing above the oval, is the French Imperial Crown, through the terminal of which a ring runs for suspension from a green ribbon, 1½ in. wide, with narrow stripes of red.
French or St. Helena Medal.—It wasn't until August 12, 1857, that the survivors of that extraordinary army of Frenchmen who followed le petit Caporal in his campaigns from 1792 to 1815 received a medal celebrating their dedication and bravery. Emperor Napoleon III was responsible for ensuring that the old military and naval heroes received what their great General and Emperor would have wished for them: "marks of merit." The St. Helena medal is oval and made of bronze, 1⅕ in.[Pg 86] across. On the front is a beaded circle within laurel leaves that frame the entire medal (see facing page 64), featuring the laureled head of Napoleon facing right with the inscription NAPOLEON I EMPEROR. On the back, within a beaded circle, is the inscription A SES COMPAGNONS DE GLOIRE SA DERNIERE PENSEE STE. HELENE 5 MAI 1821 (To his companions in glory his last thought St. Helena 5 May 1821), and around it, CAMPAIGNS FROM 1792 TO 1815, with a small five-pointed star below. The French Imperial Crown, which is part of the medal but sits above the oval, has a ring through its base for hanging from a green ribbon, 1½ in. wide, with narrow red stripes.
NEPAUL
While the attention of Britain was necessarily riveted upon the Peninsula, both East and West, as we have seen, compelled her to keep the torch of battle burning, and I must therefore mention the campaign in Nepaul, for which the Honourable East India Company awarded a special medal. The order dated Fort William, March 20th, 1816, stated that the Government had decided to present silver medals to every native officer who had served within the hills, and to as many non-commissioned officers and privates as might be recommended for distinguished zeal or gallantry. The campaign was brought about owing to the Goorka tribes having adopted an aggressive policy, and refusing to vacate the districts of Bootwal and Sheoraj belonging to the H.E.I. Co., that had to be retaken by an armed force, and by an attack upon the British outposts at Rourah, which had been left in possession when the rainy season commenced. The operations, which followed the declaration of war made on November 1st, 1814, covered a frontier stretching 600 miles. In the early part of the campaign General Gillespie was killed while leading a body of 100 dismounted men of the[Pg 87] 8th Dragoons against the small but well-defended fort of Kalunga. The back of the war was broken when, in March 1815, General Sir David Ochterlony resisted a furious assault of the Gōrkālis for two hours and then, boldly charging, forced them to fly in confusion. For his brilliant services General Ochterlony was made G.C.B., the first officer in the Indian Army to receive the honour. Ummur Singh, Rajah of Nepaul, after the surrender of his officers and men was compelled to submit, but a year elapsed before the treaty was ratified at Fort William. The regiments occupied in the campaign were: H.M.'s 14th (the 14th did not, however, receive the medal, as they had not served in the field), 17th, 24th, 66th, a wing of the 67th, and 87th Royal Irish Fusiliers; a detachment of the 8th Light Dragoons, and the 20th and 25th Native Infantry.
While Britain was understandably focused on the Peninsula, both East and West, it had to keep the fight going, so I need to mention the campaign in Nepal, for which the Honourable East India Company awarded a special medal. The order dated Fort William, March 20th, 1816, stated that the Government decided to present silver medals to every native officer who served in the hills and to as many non-commissioned officers and privates as were recommended for distinguished effort or bravery. The campaign was prompted by the Gorkha tribes adopting an aggressive stance and refusing to leave the districts of Bootwal and Sheoraj, which belonged to the H.E.I. Co. These areas had to be reclaimed by military force after an attack on the British outposts at Rourah, which were left in place when the rainy season began. The operations that followed the declaration of war on November 1st, 1814, spanned a frontier of 600 miles. Early in the campaign, General Gillespie was killed while leading a group of 100 dismounted men from the 8th Dragoons against the small, well-defended fort of Kalunga. The turning point of the war came in March 1815, when General Sir David Ochterlony withstood a fierce assault from the Gorkhalis for two hours and then courageously charged them, causing them to retreat in disarray. For his outstanding service, General Ochterlony was made G.C.B., becoming the first officer in the Indian Army to receive this honor. Ummur Singh, the Rajah of Nepal, had to surrender after his officers and men gave in, but it took a year for the treaty to be ratified at Fort William. The regiments involved in the campaign included H.M.'s 14th (which did not receive the medal, as they didn't serve in the field), 17th, 24th, 66th, a wing of the 67th, and 87th Royal Irish Fusiliers, along with a detachment of the 8th Light Dragoons, and the 20th and 25th Native Infantry.
The H.E.I. Co.'s Nepaul Medal.—The medal awarded by the Honourable East India Company was silver, 119∕20 in. in diameter, and given to all ranks. On the obverse troops with fixed bayonets and colours flying are represented marching through a hilly country, the heights crowned with forts and stockades; in the foreground to the left is a field gun. On the reverse is a Persian inscription, "This medal is conferred by the Nawab Governor-General Bahadar in testimony of the energy, good service, skill, and intrepidity displayed during the campaign in the hills, in the years of the Hegira 1229 and 1230." It was worn suspended from a yellow silk cord, and, as it was only given to native soldiers for particularly distinguished conduct, is very uncommon.
The H.E.I. Co.'s Nepaul Medal.—The medal awarded by the Honourable East India Company was silver, 119∕20 inches in diameter, and given to all ranks. On the front, troops with fixed bayonets and flags waving are depicted marching through hilly terrain, with the heights topped by forts and stockades; in the foreground to the left is a field gun. On the back is a Persian inscription, "This medal is conferred by the Nawab Governor-General Bahadar in recognition of the energy, good service, skill, and bravery displayed during the campaign in the hills, in the years of the Hegira 1229 and 1230." It was worn on a yellow silk cord, and since it was only awarded to native soldiers for particularly exceptional conduct, it is quite rare.
When the "Army of India" medal was issued in 1851, those native soldiers who had not received the H.E.I. Co.'s medal were granted the new medal, with bar for NEPAUL (see facing page 56). The British regiments entitled to the medal with this bar were the 8th Light Dragoons; 17th, 24th, 26th, 66th, one wing of the 67th, 87th Regiments, and 20th and 25th Native Infantry. On November 5th, 1817, the Peishwa,[Pg 88] Bajee Rao, who had again given evidence of his treachery, was defeated at the village of Kirkee by Lieutenant-Colonel Burr of the 7th Bombay Native Infantry, with the 65th Foot and a native force consisting of the 2nd, 6th, 7th, 12th, 13th, and 23rd Bombay Native Infantry; Bombay Artillery, Field and Horse, and Pioneers; the Bombay Fusiliers (now 2nd Batt. Dublin Fusiliers); and Poona Horse. On November 17th Colonel Burr, together with Brigadier-General Lionel Smith commanding H.M.'s 65th British Regiment and the 2nd Grenadier Regiment of Native Infantry, captured the town of Poona. On the 26th of the same month a force under Lieutenant-Colonel Hopetoun Stratford Scott and Brigadier-General Doveton captured the camp of the Rajah of Berar, Apa Sahib, at Seetabuldee (£79 has been paid for a medal with the single bar for this engagement), outside the city of Nagpore, which, after a desperate defence by its garrison of 5,000 men, surrendered on New Year's day, 1818. Although eight companies of the Royal Scots were present at the battle of Seetabuldee, they were not awarded the bar for same when the Army of India medal was distributed. They were also present at the capture of Nagpore (400 medals were issued to officers and men, and 43 to Europeans in the H.E.I. Co.'s service) with the following native regiments: 1st, 2nd, 17th, 21st, 23rd, 26th, 28th, 29th Madras Infantry and 6th Bengal Light Cavalry and 6th Madras Cavalry.
When the "Army of India" medal was issued in 1851, native soldiers who had not received the H.E.I. Co.'s medal were awarded the new medal, featuring a bar for NEPAL (see facing page 56). The British regiments eligible for the medal with this bar included the 8th Light Dragoons and the 17th, 24th, 26th, 66th, one wing of the 67th, 87th Regiments, as well as the 20th and 25th Native Infantry. On November 5th, 1817, the Peishwa, Bajee Rao, who had once again shown his betrayal, was defeated at the village of Kirkee by Lieutenant-Colonel Burr of the 7th Bombay Native Infantry, along with the 65th Foot and a native force consisting of the 2nd, 6th, 7th, 12th, 13th, and 23rd Bombay Native Infantry; Bombay Artillery, Field and Horse, and Pioneers; the Bombay Fusiliers (now 2nd Batt. Dublin Fusiliers); and Poona Horse. On November 17th, Colonel Burr, along with Brigadier-General Lionel Smith, commanding H.M.'s 65th British Regiment and the 2nd Grenadier Regiment of Native Infantry, captured the town of Poona. On the 26th of the same month, a force led by Lieutenant-Colonel Hopetoun Stratford Scott and Brigadier-General Doveton captured the camp of the Rajah of Berar, Apa Sahib, at Seetabuldee (£79 has been paid for a medal with the single bar for this engagement), just outside the city of Nagpore, which surrendered on New Year's Day, 1818, after a fierce defense by its garrison of 5,000 men. While eight companies of the Royal Scots were present at the battle of Seetabuldee, they did not receive the bar for it when the Army of India medal was distributed. They were also present during the capture of Nagpore (400 medals were issued to officers and men, and 43 to Europeans in the H.E.I. Co.'s service) alongside the following native regiments: 1st, 2nd, 17th, 21st, 23rd, 26th, 28th, 29th Madras Infantry and the 6th Bengal Light Cavalry and 6th Madras Cavalry.
Maheidpore.—At Maheidpore, on December 21st, 1817, Lieutenant-General Sir Thomas Hislop defeated the Pindarees under the Mahratta Rajah, Mulhar Rao Holkar. The British troops present were two flank companies of the 1st or Royal Scots (12 medals only with this bar were presented to officers and men of this regiment), who were specially mentioned in the Commander-in-Chief's orders, and one squadron of the 22nd Light Dragoons. Only 26 clasps for this battle were issued to survivors of the 22nd. The native troops comprised 3rd, 14th, 27th, 28th, and 31st Madras Infantry; 1st Madras Fusiliers; 3rd and 4th Madras Light Cavalry.
Maheidpore.—At Maheidpore, on December 21st, 1817, Lieutenant-General Sir Thomas Hislop defeated the Pindarees led by the Mahratta Rajah, Mulhar Rao Holkar. The British forces included two flank companies of the 1st or Royal Scots (only 12 medals with this bar were awarded to officers and men of this regiment), who were specifically mentioned in the Commander-in-Chief's orders, and one squadron of the 22nd Light Dragoons. Only 26 clasps for this battle were given to survivors of the 22nd. The native troops included the 3rd, 14th, 27th, 28th, and 31st Madras Infantry; the 1st Madras Fusiliers; and the 3rd and 4th Madras Light Cavalry.

MEDAL FOR GHUZNEE, 1839.
MEDAL FOR GHUZNEE, 1839.
Awarded to the Rt. Hon. the Earl of Auckland, G.C.B., P.C., Late Governor-General of India.
Awarded to the Right Honorable Earl of Auckland, G.C.B., P.C., Former Governor-General of India.

MEDAL FOR GHUZNEE, 1839.
MEDAL FOR GHUZNEE, 1839.
Corygaum.—On January 1st, 1818, the village of Corygaum was most gallantly defended against the whole force of the Peishwa, and when the "Army of India" medal was issued the surviving soldiers of the 2nd Bombay Native Infantry and 2nd Poona Horse were given the medal, with bar for the defence. Dr. Payne had in his collection a medal awarded to G. Bainbridge of the 65th Foot, with the bar for POONA AND CORYGAUM, which, according to the medal roll, was inaccurate, but it appeared that the man was actually entitled to this rare distinction.
Corygaum.—On January 1st, 1818, the village of Corygaum was heroically defended against the entire force of the Peishwa. When the "Army of India" medal was issued, the surviving soldiers of the 2nd Bombay Native Infantry and 2nd Poona Horse received the medal, along with a bar for the defense. Dr. Payne had in his collection a medal awarded to G. Bainbridge of the 65th Foot, featuring the bar for POONA AND CORYGAUM, which, according to the medal roll, was incorrect, but it turned out that the man was indeed entitled to this rare honor.
Rare Medals.—Ten medals only were issued with bars for POONA and CORYGAUM. For the latter battle only 8 medals were issued. Only 20 with the single bar for SEETABULDEE AND NAGPORE were issued to Europeans and 194 to natives. For KIRKEE AND POONA AND CORYGAUM 73 medals were issued. 16 medals with the bar for KIRKEE AND POONA were issued to officers and men of the 65th Regiment and 44 officers and men of the same regiment had the single bar for POONA. Medals with the bars for AVA and BHURTPOOR are rarely met with, or those for CHRYSTLER'S FARM and AVA to the 89th.
Rare Medals.—Only ten medals were issued with bars for Pune and Corygaum. For the latter battle, only 8 medals were given out. A total of 20 medals with the single bar for Seetabuldee and Nagpore were awarded to Europeans, and 194 to locals. For KIRKEE, POONA, AND CORYGAUM, 73 medals were distributed. Sixteen medals with the bar for KIRKEE AND PUNE went to officers and men of the 65th Regiment, while 44 officers and men from the same regiment received the single bar for Pune. Medals with the bars for AVA and BHURTPOOR are rarely seen, as are those for CHRYSLER'S FARM and AVA awarded to the 89th.
Ceylon, 1818.—In 1819 the Government of Ceylon issued a medal, 1½ in. in diameter, in connection with the Kandian rebellion of 1818. It bears on the obverse a wreath of bay and oak leaves, encircling CEYLON 1818, and on the reverse REWARD OF MERIT, the name of the recipient being engraved in the centre. A blue ribbon was used for suspension. Four men only of the 73rd Perthshire Regiment, two men of the 2nd and 39 of the 1st Ceylon Regiments were awarded the medal.
Ceylon, 1818.—In 1819, the Government of Ceylon issued a medal, 1½ inches in diameter, in relation to the Kandian rebellion of 1818. On the front, it features a wreath of bay and oak leaves surrounding CEYLON 1818, and on the back, it reads Merit-Based Reward, with the recipient's name engraved in the center. A blue ribbon was used for hanging the medal. Only four men from the 73rd Perthshire Regiment, two men from the 2nd, and 39 from the 1st Ceylon Regiments were awarded the medal.
FIRST BURMESE WAR
In 1824 war was declared against Burmah, and the campaign opened by Brigadier-General Sir Archibald Campbell taking possession of Rangoon on May 12th, and the capture by storm of Cheduba on May 17th, 1824. A series of assaults was made by the British, and feeble attacks by the Burmese, before Maha Bandoola, a veteran of considerable force and ability—having provided himself with gold fetters with which to bind Lord Amherst when he was captured—took command of a force of about 50,000 infantry and horsemen, with 300 pieces of artillery, and began to entrench himself in front of the British position. On December 1st Major (afterwards Sir Robert) Sale—who gallantly defended Jellalabad and was killed at Moodkee, December 1845—making a daring and vigorous attack upon the left of his line with 450 men of the 13th Light Infantry and 18th Native Infantry, compelled the Burmese to fly. On December 5th another effort was made against the left wing, and 240 guns were captured; this success was followed, on December 7th, by a determined assault upon the trenches, which resulted in the rout of Bandoola's army with the loss of 5,000 men. With indomitable pluck the Burmese general rallied his army and entrenched himself again; but when the assault was made, upon the 15th, by the British, the Burmese were forced from their position and put to rout in fifteen minutes. In the meantime Brigadier General Morrison, with a force of about 11,000, had moved forward across the mountains into Ava, and on April 1st Arracan was captured, and the Burmese retreated to Donabu, where on the Irrawady, behind a strong teak stockade a mile long, backed by an old brick rampart upon which 150 guns were mounted, they defied a marine attack, and the British had to retire down the river, leaving their wounded to the fiendish treatment of their enemies. On the next day,[Pg 91] however, Sir Archibald Campbell gained possession of Donabu, for Maha Bandoola having been killed the troops lost confidence in their other leaders, and they evacuated the place at night. After a period of inaction at Prome, necessitated by the season, hostilities were resumed in November, and a series of conflicts took place until after the evacuation of Meeaday, when the Burmese again made overtures for peace. On January 19th, 1825, hostilities were resumed, and the British army advanced upon the Burmese capital. In the advance the battle of Melloon was fought, and a new Burmese General took command of an army of 40,000 men. Nee Woon Breen, "King of Hell" or "Prince of Darkness" as he was called, was, however, defeated by the British near Pagahm Mew on February 9th, and fled to Ava, to meet a cruel death by order of his King. Following up this success, the British marched upon the old capital Amarapura, but when within four days' march of the city the King accepted the British terms, and the treaty of peace was signed at Yandaboo on February 24th, 1826. By this treaty Arracan, Mergui, Tavoy, Tenasserim, and Yé were ceded, and became part of the Indian Empire. 3,222 European soldiers and 1,766 sepoys fell in the war.
In 1824, war was declared against Burma, and the campaign started with Brigadier-General Sir Archibald Campbell taking control of Rangoon on May 12th, followed by the capture of Cheduba on May 17th, 1824. The British launched a series of attacks, while the Burmese made weak attempts to resist, until Maha Bandoola, an experienced commander, took charge of a force of about 50,000 infantry and cavalry, along with 300 artillery pieces. He began to fortify his position in front of the British. On December 1st, Major (later Sir Robert) Sale, who valiantly defended Jellalabad and was killed at Moodkee in December 1845, led a bold attack on the left of the Burmese line with 450 men from the 13th Light Infantry and 18th Native Infantry, forcing the Burmese to retreat. On December 5th, another assault on the left wing resulted in the capture of 240 guns; this was followed on December 7th by a determined attack on the trenches, leading to the defeat of Bandoola's army, which lost 5,000 men. The resilient Burmese general regrouped and fortified again; however, when the British attacked on the 15th, the Burmese were driven from their position and defeated in just fifteen minutes. Meanwhile, Brigadier General Morrison had moved forward with about 11,000 troops across the mountains into Ava, and on April 1st, Arracan was captured, prompting the Burmese to retreat to Donabu. There, behind a strong teak stockade a mile long, supported by an old brick wall with 150 mounted guns, they resisted a naval assault, forcing the British to withdraw down the river, leaving their wounded subject to cruel treatment from the enemy. However, the next day, Sir Archibald Campbell took over Donabu because Maha Bandoola had been killed, causing the troops to lose faith in their other leaders, which led them to evacuate the place at night. After a period of inactivity at Prome due to the season, hostilities resumed in November, culminating in a series of battles until after the Burmese evacuated Meeaday, at which point they sought peace again. On January 19th, 1825, fighting resumed as the British army advanced towards the Burmese capital. During this advance, the Battle of Melloon was fought, and a new Burmese general took command of an army of 40,000. Nee Woon Breen, known as the "King of Hell" or "Prince of Darkness," was ultimately defeated by the British near Pagahm Mew on February 9th and fled to Ava, only to be executed by his King. Following this victory, the British marched towards the old capital Amarapura, but four days from the city, the King agreed to the British terms, and the peace treaty was signed at Yandaboo on February 24th, 1826. As part of this treaty, Arracan, Mergui, Tavoy, Tenasserim, and Yé were ceded and became part of the Indian Empire. The war resulted in the loss of 3,222 European soldiers and 1,766 sepoys.
The following regiments were engaged in this campaign, and those marked * were mentioned in general orders with sentiments of unfeigned admiration: 1st,* 13th,* 38th,* 41st,* 44th, 45th,* 47th, 54th, 87th,* and 89th,* also 14th Madras Native Infantry, Madras Fusiliers (European, now 1st Royal Dublin Fusiliers), and 1st Madras Cavalry, Bengal and Madras Artillery (European).
The following regiments took part in this campaign, and those marked * were mentioned in general orders with genuine admiration: 1st,* 13th,* 38th,* 41st,* 44th, 45th,* 47th, 54th, 87th,* and 89th,* as well as the 14th Madras Native Infantry, Madras Fusiliers (European, now 1st Royal Dublin Fusiliers), and 1st Madras Cavalry, Bengal and Madras Artillery (European).
The Ava Medal.—By a General Order, dated "Fort William, April 22nd, 1826," a medal was bestowed upon the native troops engaged in the war between 1824-26. The medal, 1½ in. in diameter, was struck in gold for the officers (Sir Archibald Campbell was the only British officer to receive one) and in silver for the men: it was attached to a large steel clip and[Pg 92] ring for suspension from a crimson ribbon with blue edges, 1½ in. wide. On the obverse is the White Elephant of Ava crouching before the British Lion; behind the Lion is the Union Jack unfurled, and behind the Elephant the Burmese colours submissively lowered; in the background are palm trees. The exergue is occupied by a Persian inscription, "The Elephant of Ava is obedient to the Lion of England, Year 1826." In the left upper corner of the exergue is the designer's name, W. DANIELL, RA. DEL. On the reverse is depicted a storming party advancing against the Great Pagoda of Rangoon, which is surrounded by stockades; to the left is the Irrawady flotilla of gunboats and the "Diana"; In the foreground is depicted Sir Archibald Campbell directing operations from the shade of a palm tree. In the exergue is the Persian inscription, "A medal for the victorious British soldiers on Ava" (on Ava territory). In the left upper corner of the exergue is W. Wyon. Although 750 gold medals were struck for distribution among native officers and civil dignitaries, and over 24,200 silver medals were issued, they are very rare. It is noteworthy, as Dr. Payne points out, that in connection with the issue of this medal it was the first time a ribbon was mentioned for use with an Indian medal. It was ordered to be worn perfectly square upon the centre of the left breast, the upper edge of the ribbon being even with the button for ranks wearing sword-belts only, and even with the second button for ranks wearing cross-belts. A bar for AVA was issued with the "Army of India" medal in 1851.
The Ava Medal.—By a General Order, dated "Fort William, April 22, 1826," a medal was awarded to the native troops who fought in the war from 1824 to 1826. The medal, 1½ inches in diameter, was made of gold for the officers (Sir Archibald Campbell was the only British officer to receive one) and silver for the men. It was attached to a large steel clip and[Pg 92]ring to be worn from a crimson ribbon with blue edges, 1½ inches wide. On the front side is the White Elephant of Ava crouching before the British Lion; behind the Lion is the Union Jack unfurled, and behind the Elephant are the Burmese colors lowered in submission; palm trees are in the background. The exergue features a Persian inscription, "The Elephant of Ava is obedient to the Lion of England, Year 1826." In the upper left corner of the exergue is the designer's name, W. Daniell, RA. Del. On the reverse, there’s a storming party advancing toward the Great Pagoda of Rangoon, which is surrounded by stockades; to the left is the Irrawady flotilla of gunboats and the "Diana"; in the foreground, Sir Archibald Campbell is shown directing operations from the shade of a palm tree. The exergue includes the Persian inscription, "A medal for the victorious British soldiers on Ava" (in Ava territory). In the upper left corner of the exergue is W. Wyon. Even though 750 gold medals were made for distribution among native officers and civil dignitaries, and over 24,200 silver medals were issued, they are quite rare. Notably, as Dr. Payne points out, this was the first time a ribbon was mentioned for use with an Indian medal. It was ordered to be worn perfectly square at the center of the left breast, with the upper edge of the ribbon level with the button for ranks wearing sword-belts only, and even with the second button for ranks wearing cross-belts. A bar for AVA was issued with the "Army of India" medal in 1851.
Burmese Chiefs' Medal.—The H.E.I. Co. had a medal, 23∕20 in. in diameter, struck in gold for presentation to six Talaing chiefs who served with the British army during 1825-26. On the obverse are the arms and motto of the East India College; above is a scroll with "Award of Merit," and underneath a scroll to take the name of recipient. On the reverse in the foreground are two steamers by a river-side, and two soldiers,[Pg 93] one bearing a flag, addressing a group of Burmese; in the background are hills, a pagoda, and a palm tree, and behind all the setting sun. To the right are a cannon and bungalow. The medal has a loop for suspension, composed of two plates held together by means of a gold bezel.
Burmese Chiefs' Medal.—The H.E.I. Co. created a medal, 23∕20 in. in diameter, made of gold to honor six Talaing chiefs who assisted the British army from 1825 to 1826. The front features the coat of arms and motto of the East India College; above it is a scroll that reads "Award of Merit," and below is a scroll meant to inscribe the recipient's name. The back shows two steamboats by a riverside, and two soldiers, [Pg 93] one holding a flag, addressing a group of Burmese people; in the background are hills, a pagoda, and a palm tree, with the setting sun behind it all. To the right are a cannon and a bungalow. The medal includes a loop for suspension, made from two plates held together by a gold bezel.
Bhurtpore.[5]—Owing to the assumption of sovereign power by Doorjun Sal, the nephew of the deceased Rajah of Bhurtpore, Baldeo Singh, it became necessary for the Indian Government to take steps to ensure the succession of the dead ruler's young son, Bhulwunt Singh. An army under Lord Combermere was dispatched to lay siege to the city of Bhurtpore, which with its 5 miles of fortifications, as already described, was able to withstand the four assaults made by General Lake's army twenty years before. On December 10th, 1825, the British army of just over 25,000 men appeared before the city, and prepared to lay siege to the fortress, which was garrisoned by about 25,000. On December 24th the artillery began to fire on the city, but despite the continual bombardment, so well had the walls been built that breaches could not be made large enough to admit of stormers. Mining, therefore, was resorted to, and by the morning of January 18th, 1826, a determined assault was made, and within two hours the British had gained possession of the ramparts; by 4 o'clock the citadel surrendered, and the 14th, as a reward for their gallantry, placed to garrison it. The impregnable city, the capital of the Jants, had fallen after a twenty-six days' siege; Doorjun Sal was captured, spoil to the value of £500,000 taken, the young Rajah placed upon the throne, and the conquest of India confirmed by the success of Lord Combermere, who was rewarded with a Viscountcy. Hand grenades were last used in India at the siege of Bhurtpore. One hundred and eighty of the British troops were killed and 780 wounded. The following regiments took part in the siege: 14th and 59th Regiments, [Pg 94]11th Light Dragoons, and 16th Lancers (who had only just been armed with the lance). The Native Regiments included: 11th, 15th, 21st, 23rd, 31st, 32nd, 33rd, 37th, 41st, 63rd, and 66th Bengal Light Infantry; Simoor Rifles; 1st Bengal Cavalry; 6th Light Cavalry and one wing of the Bengal Fusiliers (Europeans), now 1st Royal Munster Fusiliers; Bengal Horse and Foot Artillery and Bengal Engineers. The 14th, "The Old and Bold," were specially mentioned in dispatches.
Bhurtpore.[5]—After Doorjun Sal, the nephew of the late Rajah of Bhurtpore, took control, the Indian Government needed to ensure the succession of the deceased ruler's young son, Bhulwunt Singh. An army led by Lord Combermere was sent to besiege the city of Bhurtpore, which, as previously mentioned, had 5 miles of fortifications and had successfully resisted four assaults from General Lake's army twenty years earlier. On December 10th, 1825, the British army, numbering just over 25,000, arrived at the city to prepare for the siege of the fortress, which was defended by about 25,000 troops. On December 24th, artillery began firing on the city, but despite the constant bombardment, the walls were so well constructed that breaches could not be made large enough for an assault. As a result, mining was utilized, and by the morning of January 18th, 1826, a determined attack was launched. Within two hours, the British secured the ramparts; by 4 o'clock, the citadel surrendered, and the 14th Regiment was stationed there as a reward for their bravery. The once-impregnable city, the capital of the Jants, fell after twenty-six days of siege; Doorjun Sal was captured, spoils worth £500,000 were seized, the young Rajah was installed on the throne, and Lord Combermere's success confirmed British dominance in India, earning him a Viscountcy. Hand grenades were used for the last time in India during the siege of Bhurtpore. One hundred eighty British troops were killed and 780 wounded. The regiments that participated in the siege included the 14th and 59th Regiments, [Pg 94]the 11th Light Dragoons, and the 16th Lancers (who had just recently been equipped with lances). The Native Regiments involved were the 11th, 15th, 21st, 23rd, 31st, 32nd, 33rd, 37th, 41st, 63rd, and 66th Bengal Light Infantry; Simoor Rifles; 1st Bengal Cavalry; 6th Light Cavalry; and one wing of the Bengal Fusiliers (Europeans), now known as the 1st Royal Munster Fusiliers; as well as the Bengal Horse and Foot Artillery and Bengal Engineers. The 14th, "The Old and Bold," were specifically noted in the dispatches.
Coorg, 1837.—For suppressing the insurrection in Canara in 1837 the Coorg soldiers were, on the recommendation of the Commissioner, Lieutenant-Colonel Mark Cubbon, awarded a medal as a recognition of their noble conduct and courage. The medals of gold and silver were 119∕20 in. in diameter, and of varying thicknesses according to value. They were worn suspended from the neck by chains by the superiors who received them; 20 gold medals and 200 silver medals given to junior officers and ryots were presented without chains. Two gold medals valued at 400 rupees, and 12 valued at 200 rupees, were bestowed with chains. On the obverse is a Coorg warrior in fighting attitude, his upraised right hand grasping a Coorg knife ready to strike, and in his left a matchlock; round the face of the medal is the inscription in Carnese, "For a memorial of Fidelity to the Government of the East India Company in suppressing rebellion in the months of April and May 1837"; on the reverse a trophy of Coorg arms and ornaments within a laurel wreath, surmounted by the inscription, for DISTINGUISHED CONDUCT AND LOYALTY TO THE BRITISH GOVERNMENT, and in the EXERGUE COORG APRIL 1837.
Coorg, 1837.—To recognize the bravery of the Coorg soldiers who helped suppress the uprising in Canara in 1837, the soldiers were awarded a medal on the recommendation of the Commissioner, Lieutenant-Colonel Mark Cubbon. The medals, made of gold and silver, were 119∕20 inches in diameter and varied in thickness based on their value. The superiors wore them hanging from chains around their necks, while 20 gold medals and 200 silver medals given to junior officers and ryots were distributed without chains. Two gold medals valued at 400 rupees and 12 valued at 200 rupees were awarded with chains. The front features a Coorg warrior in a fighting stance, with his right hand raised holding a Coorg knife ready to strike and a matchlock in his left; around the edge of the medal, the inscription in Carnese reads, "For a memorial of Fidelity to the Government of the East India Company in suppressing rebellion in the months of April and May 1837"; on the back, there's a trophy of Coorg arms and ornaments within a laurel wreath, topped with the inscription, for EXCEPTIONAL CONDUCT AND LOYALTY TO THE BRITISH GOVERNMENT, and in the EXERGUE COORG APR 1837.
FIRST AFGHAN WAR
The Shah of Persia, having laid claim to a considerable portion of Afghanistan after Shah Shoojah had been driven from his throne and his kingdom divided[Pg 95] among a number of chieftains, sent an army to besiege Herat. The Indian Government then decided to effect the restoration of Shah Shoojah, and sent forward the "army of the Indus" under the command of Sir John (afterwards Lord) Keane. The Persians had meanwhile raised the siege of Herat, and retired toward their capital. Fighting their way against almost insuperable obstacles, short of food for man and beast, the divisions of the British army pushed their way through to Candahar, which they reached on April 27th, 1839. In the meantime Hyderabad had been captured, the Ameers of Scinde compelled to submit, the erstwhile rulers of Afghanistan forced from their thrones, and the deposed ruler restored, but considerable fighting had to be done ere he could settle down peaceably, and several important battles were fought.
The Shah of Persia claimed a large part of Afghanistan after Shah Shoojah was ousted and his kingdom was divided among various chieftains[Pg 95]. He then sent an army to lay siege to Herat. In response, the Indian Government decided to restore Shah Shoojah and dispatched the "army of the Indus" led by Sir John (later Lord) Keane. Meanwhile, the Persians had lifted the siege of Herat and retreated toward their capital. Despite facing nearly impossible challenges and lacking food for both soldiers and animals, the British army divisions fought their way through to Candahar, reaching it on April 27th, 1839. During this time, Hyderabad was captured, the Ameers of Scinde were forced to surrender, and the former rulers of Afghanistan were ousted, leading to the restoration of the deposed ruler. However, significant fighting was necessary before he could establish peace, and several key battles took place.
Ghuznee, 1839.—The army of the Indus left Candahar at the end of June 1839, and arrived before Ghuznee, which Prince Mahomed Hyder Khan had strongly fortified; leaving only one gate unblocked by masonry. He had with him a garrison of 3,000 Afghans. As the British force possessed no means of breaching the walls, it was determined to take the place by storm, and in order to effect this the gate was blown in by the 13th (now Somerset Light Infantry), and the troops entered the fort, only 5 men being killed, and 6 officers (including Brigadier-General Sale, severely) and 63 men wounded out of Her Majesty's Regiments. On the fall of the fortress the Afghan cavalry outside fled in the direction of Cabul, the British forces following. At Ughundee Dost Mahomed Khan had resolved to try conclusions, but dissatisfied with the morale of his troops he decamped, and on August 7th Shah Shooja regained his throne, which, however, he did little to strengthen. The British losses were 18 men and 20 officers killed, and 153 men wounded. The force engaged in this comparatively bloodless campaign was composed of 8 companies of Her Majesty's 2nd (Queen's Royal); 13th Light Infantry; 17th (Leicester[Pg 96]shire); two squadrons 4th Light Dragoons; 16th Lancers; and the following regiments of the H.E.I. Co.'s army: 1st Bengal Fusiliers (Europeans); Bengal Sappers and Miners; 1st Bombay Light Cavalry; 2nd and 3rd Bengal Light Cavalry; 2nd Skinner's Horse; 300 Poona Horse; Bengal Horse and Foot Artillery; two troops Bombay Horse Artillery; Bombay Foot Artillery; 16th, 19th, 35th, and 48th Native Infantry.
Ghuznee, 1839.—The Indus army left Kandahar at the end of June 1839 and arrived at Ghuznee, which Prince Mahomed Hyder Khan had heavily fortified, leaving only one gate unblocked by masonry. He had a garrison of 3,000 Afghans. Since the British force had no way to breach the walls, they decided to storm the place. To do this, the gate was blown open by the 13th (now Somerset Light Infantry), and the troops entered the fort, suffering only 5 fatalities and 6 officers (including Brigadier-General Sale, who was seriously injured) and 63 men wounded from Her Majesty's Regiments. After the fortress fell, the Afghan cavalry outside fled towards Kabul, with the British forces in pursuit. At Ughundee, Dost Mahomed Khan intended to confront the British but, feeling unhappy with his troops' morale, he retreated. On August 7th, Shah Shooja regained his throne, although he took little action to solidify it. The British losses totaled 18 men and 20 officers killed, with 153 men wounded. The force involved in this relatively bloodless campaign included 8 companies of Her Majesty's 2nd (Queen's Royal); 13th Light Infantry; 17th (Leicester[Pg 96]shire); two squadrons of the 4th Light Dragoons; 16th Lancers; and the following regiments from the H.E.I. Co.'s army: 1st Bengal Fusiliers (Europeans); Bengal Sappers and Miners; 1st Bombay Light Cavalry; 2nd and 3rd Bengal Light Cavalry; 2nd Skinner's Horse; 300 Poona Horse; Bengal Horse and Foot Artillery; two troops of Bombay Horse Artillery; Bombay Foot Artillery; 16th, 19th, 35th, and 48th Native Infantry.
Order of Dooranée.—To reward the British officers who had been instrumental in restoring him to his throne, Shah Shooja instituted the Order of the Dooranée Empire, the first installation taking place at Cabul on September 13th, 1839, when Sir John Keane, the commander of the British army, received the First-Class Order from the Shah. There are three classes of the Order, which is not unlike the Guelphic Order of Hanover. Three of the first class, nineteen of the second, and thirty-six of the third were to be presented. The badge consists of a gold Maltese cross, the borders of which are raised, with eight points terminating in gold beads, resting upon two crossed swords. On a blue and green enamelled ground, which forms the centre, are two sentences in Persian characters; above "Authority is from God alone," and below "Every brave man recognises his sway." This translation, as Dr. Payne states, is very different from the usual one of Duri-i-Dauran, "Pearl of the Age." The enamelled centre is surrounded by a circle of pearls. The star is of cut silver shaped like a Maltese cross, overlaid with a smaller one of gold, in the centre of which is the same decoration as on the badge, except that a diamond is set in each arm of the gold cross, and the enamelled circle is surrounded by seventeen pearls. The star of the second class has rays between the arms, and the small gold cross which rests upon it has crossed swords between the arms; the centre is enamelled with a green flower on a blue ground, surrounded by eighteen pearls set in a gold band. The badge of the second class has twenty pearls set round the centre, and on the reverse a red enamelled centre circled by a green enamelled border decorated with gold tracery. The third-class badge has only fourteen pearls. The badges of each class were suspended from a half red and green ribbon, like that used for the Ghuznee medal.
Order of Dooranée.—To honor the British officers who played a key role in restoring him to power, Shah Shooja established the Order of the Dooranée Empire. The first award ceremony took place in Cabul on September 13th, 1839, when Sir John Keane, the commander of the British army, received the First-Class Order from the Shah. There are three classes of the Order, similar to the Guelphic Order of Hanover. Three awards were to be given for the first class, nineteen for the second, and thirty-six for the third. The badge features a gold Maltese cross with raised edges and eight points ending in gold beads, set upon two crossed swords. In the center, on a blue and green enameled background, there are two phrases in Persian: above it says, "Authority is from God alone," and below, "Every brave man recognizes his sway." This translation, as Dr. Payne notes, differs significantly from the common interpretation of Duri-i-Dauran, which means "Pearl of the Age." The enameled center is surrounded by a circle of pearls. The star is made of cut silver shaped like a Maltese cross, overlaid with a smaller gold cross, which has the same decoration as the badge, but with a diamond set in each arm of the gold cross, and the enameled circle bordered by seventeen pearls. The second-class star has rays between the arms, and the small gold cross on it is flanked by crossed swords; the center is enameled with a green flower on a blue background, surrounded by eighteen pearls set in a gold band. The badge for the second class features twenty pearls surrounding the center, and on its reverse, there's a red enameled center encircled by a green enameled border adorned with gold tracery. The badge for the third class has only fourteen pearls. The badges of each class were hung from a red and green ribbon, similar to the one used for the Ghuznee medal.

MEDAL FOR KELAT-I-GHILZI, 1842.
Medal for Kelat-i-Ghilzi, 1842.
Awarded to Major Robert Leech, C.B., who had also the medal for Candahar, Ghuznee, and Cabul, 1842, and the Order of the Dooranée Empire (3rd Class).
Awarded to Major Robert Leech, C.B., who also received the medal for Candahar, Ghuznee, and Cabul, 1842, and the Order of the Dooranée Empire (3rd Class).

FIRST JELLALABAD MEDAL, 1842.
First Jellalabad Medal, 1842.
Awarded to Captain (later Lieutenant-Colonel) Peter R. Jennings, 13th Foot.
Awarded to Captain (who later became Lieutenant-Colonel) Peter R. Jennings, 13th Foot.
Ghuznee Medal, 1839.—Shah Shoojah had also determined to decorate the ordinary soldiers who had taken part in the campaign, but his assassination prevented the realisation of his desire, and subsequently—November 23rd, 1842—the Governor-General decided that the medals which had been struck at Calcutta in commemoration of the capture of Ghuznee should be given to the officers and men who had participated in the capture. This, the first Indian medal to be issued with a bar for suspension, is of silver, and, with the exception of the medal for Seringapatam, the first to be given to all the troops engaged, the previous medals having been bestowed upon native troops only. It is 1½ in. in diameter, with broad flat edge, bearing on the obverse a view of the gateway of the citadel, with GHUZNEE on an ornamental panel underneath, running with the lines of the medal. On the reverse, within a laurel wreath, a mural crown above 1839, and between the terminals of the wreath the date of the capture of the fortress, 23D. JULY, a space being left in the centre for the recipient's name, which had to be placed there at his expense. The medals are occasionally found with the names engraved or impressed upon the edge. Two dies were used for the obverse, and one has a much wider border. The medal was originally suspended from a half green and yellow ribbon, but it was changed to crimson and green 1⅖ in. wide.
Ghuznee Medal, 1839.—Shah Shoojah had also decided to reward the ordinary soldiers who fought in the campaign, but his assassination stopped him from carrying out his wish. Later, on November 23rd, 1842, the Governor-General ruled that the medals created in Calcutta to remember the capture of Ghuznee should be awarded to the officers and soldiers involved in the capture. This was the first Indian medal issued with a suspension bar; it is made of silver and, except for the medal for Seringapatam, was the first to be awarded to all troops engaged, as previous medals had only been awarded to native troops. It measures 1½ inches in diameter, with a broad flat edge, displaying a view of the citadel's gateway on the front, with GHUZNEE on an ornate panel below, aligned with the design of the medal. On the back, within a laurel wreath, there’s a mural crown above the year 1839, and the date of the fortress's capture, 23D. JULY, is placed between the ends of the wreath, with a space left in the center for the recipient's name to be engraved at their own cost. The medals are sometimes found with the names engraved or stamped on the edge. Two dies were used for the front, one of which has a much wider border. The medal was originally hung from a half green and yellow ribbon, but it was later changed to a crimson and green ribbon that is 1⅖ inches wide.
Governor-General's Medal.—Dr. Payne has kindly enabled me to reproduce the unique silver medal presented to the Right Honourable the Earl of Auckland, G.B.C., Governor-General of India and Governor of the Presidency of Fort William. The medal is 1⅗ in. wide, has no bar for suspension, and is enamelled. On the obverse is represented the fortress of Ghuznee—[Pg 98]a very different rendering to that on the medal just referred to—with the victorious army marching through the gate. On the reverse is the inscription AFGHANISTAN-GHUZNEE—23r.d. JULY 1839. This striking is the only one known to exist. (See facing page 88.)
Governor-General's Medal.—Dr. Payne has kindly allowed me to reproduce the unique silver medal awarded to the Right Honourable the Earl of Auckland, G.B.C., Governor-General of India and Governor of the Presidency of Fort William. The medal is 1⅗ in. wide, has no suspension bar, and is enamelled. On the front side, it features the fortress of Ghuznee—[Pg 98]which is depicted quite differently than on the previously mentioned medal—with the victorious army marching through the gate. On the back side, there is the inscription AFGHANISTAN-GHUZNEE—23rd JULY 1839. This striking is the only known example in existence. (See facing page 88.)
FIRST CHINESE WAR, 1842
The extension of British commerce caused the first Chinese war. The Government not only loathed the "Fan Kwei," or "foreign devils," but objected to the use of opium which the merchants sold. The destruction of about £2,000,000 worth of opium by Chinese officials, and the insult offered to Her Majesty's representative, Captain Elliot, R.N., led to the declaration of war against China, and a force under Brigadier-General Burrell was dispatched to China in June 1840, but following an attack on Ting-hae-hien the Chinese opened negotiations for peace, and after protracted pourparlers they agreed early in 1841 to pay an indemnity, and to cede the island of Hong Kong. In accordance with the treaty the island was occupied by the British, but this was resented by the Chinese, who had determined not to carry out the terms agreed upon. Hostilities were consequently recommenced, and an expedition sent up the Canton River, where it quickly dealt with the batteries at Wantong, landed a body of British and Indian infantry, and captured considerably over 1,000 Chinese soldiers without losing a man. Pursuing its way up the river, the expedition imposed severe punishment upon the different forts, and the Chinese again sued for peace, mainly, however, for the purpose of gaining time to bring up reinforcements. The forts at Canton were silenced, and on May 24th, 1841, the British troops landed and carried the fortified heights, the 18th Royal Irish and the 49th charging in brilliant style. A flag of truce was hoisted on May 26th, and as a result of pourparlers[Pg 99] £4,250,000 sterling was agreed to be paid for the evacuation of Canton, which was to be opened to trade.
The expansion of British trade led to the first Chinese war. The government not only hated the "foreign devils," or "Fan Kwei," but also opposed the use of opium sold by merchants. The destruction of about £2,000,000 worth of opium by Chinese officials and the disrespect shown to Her Majesty's representative, Captain Elliot, R.N., resulted in a declaration of war against China. In June 1840, a force commanded by Brigadier-General Burrell was sent to China, but after an attack on Ting-hae-hien, the Chinese opened peace negotiations. After lengthy discussions, they agreed in early 1841 to pay an indemnity and cede the island of Hong Kong. Following the treaty, the British occupied the island, but the Chinese resented this and decided not to fulfill the agreed terms. As a result, hostilities resumed, and an expedition was sent up the Canton River, quickly dealing with the batteries at Wantong, landing British and Indian infantry, and capturing over 1,000 Chinese soldiers without losing a single man. Continuing up the river, the expedition punished various forts severely, and the Chinese sought peace again, mainly to buy time to bring in reinforcements. The forts at Canton were silenced, and on May 24th, 1841, British troops landed and took the fortified heights, with the 18th Royal Irish and the 49th charging impressively. A flag of truce was raised on May 26th, and as a result of negotiations, £4,250,000 was agreed upon for the evacuation of Canton, which was then to be opened to trade.
The Emperor had no intention of carrying out any such agreement—on the contrary he issued a mandate for the extermination of the British. As a result of this flagrant breach of faith, an expedition was sent to the Island of Amoy, and appeared before the city of Amoy on August 25th. Two hours' bombardment sufficed to demoralise the garrison, despite their 500 pieces of cannon, and a force of troops was landed. Chusan was retaken, the military depot of Chinghai stormed, and the fortified and important city of Ningpo captured. A determined effort was made on March 10th, 1842, to retake it, but despite the surprise the enemy was beaten off. Later the British left Ningpo and again proceeded up-river, attacking Tsekee on March 15th, capturing the heights of Segon and forcing the Chankee pass ere returning to Ningpo on March 17th. In May Ningpo was evacuated, and the fortified city of Chapoo at the mouth of the Shanghai River attacked and a landing effected. In June Woosung and Poonshau, and the city of Shangee, were captured, and with the aid of the 98th Regiment under Lieutenant-Colonel Campbell (afterwards Lord Clyde), which now reinforced the expedition, the city of Chin-Kiang was attacked, and after a severe struggle taken on July 21st, 1842. Lieutenant-Colonel Sir Hugh (afterwards Viscount) Gough, whose decoration from Dr. Payne's collection is used to illustrate the medal awarded for this campaign, led his army to the ancient capital Nankin, which was reached on August 9th, 1842. The demonstration sufficed to bring the enemy to reason, and a treaty of peace was signed, the indemnity paid, the ports of Amoy, Ningpo, Foo-choo-foo, and Shanghai opened to British commerce, and Hong Kong ceded to us.
The Emperor had no intention of following through on any such agreement—instead, he ordered the extermination of the British. As a result of this blatant betrayal, an expedition was sent to the Island of Amoy, arriving before the city on August 25th. Two hours of bombardment were enough to demoralize the garrison, despite their 500 cannons, and troops were landed. Chusan was retaken, the military depot of Chinghai was stormed, and the fortified city of Ningpo was captured. A determined attempt was made on March 10th, 1842, to reclaim it, but despite the surprise, the enemy was driven off. Later, the British left Ningpo and moved upstream, attacking Tsekee on March 15th, capturing the heights of Segon, and forcing the Chankee pass before returning to Ningpo on March 17th. In May, Ningpo was evacuated, and the fortified city of Chapoo at the mouth of the Shanghai River was attacked, resulting in a successful landing. In June, Woosung and Poonshau, along with the city of Shangee, were captured. With the support of the 98th Regiment under Lieutenant-Colonel Campbell (who later became Lord Clyde), which had now reinforced the expedition, the city of Chin-Kiang was attacked and taken after a fierce struggle on July 21st, 1842. Lieutenant-Colonel Sir Hugh (who later became Viscount) Gough, whose decoration from Dr. Payne's collection is used to illustrate the medal awarded for this campaign, led his army to the ancient capital Nankin, which they reached on August 9th, 1842. This show of force was enough to bring the enemy to the negotiating table, leading to a peace treaty. The indemnity was paid, the ports of Amoy, Ningpo, Foo-choo-foo, and Shanghai were opened to British trade, and Hong Kong was ceded to us.
The army of about 3,000 men was composed of the 18th Royal Irish, 26th Cameronians (which lost nearly 600 men out of 900, by disease, before Canton fell),[Pg 100] 49th, 55th (which particularly distinguished itself at the assault on the city of Chin-Kiang), 98th, 37th Madras Infantry, Royal and Indian Artillery, and a Naval Brigade, including marines, also took a prominent part.
The army, made up of around 3,000 troops, included the 18th Royal Irish, 26th Cameronians (who lost nearly 600 out of 900 men to disease before Canton fell),[Pg 100] 49th, 55th (which notably distinguished itself during the assault on the city of Chin-Kiang), 98th, 37th Madras Infantry, Royal and Indian Artillery, and a Naval Brigade, which included marines and played a significant role as well.
The First China Medal, 1842.—In January 1843 the grant of a medal was made to commemorate "the signal successes of Her Majesty's Naval and Military forces," both European and Native, upon the coast and in the interior of the Empire of China. On the obverse is the diademed head of Queen Victoria facing to the left, with the legend VICTORIA REGINA on either side, and on the truncation of the head W. WYON, R.A. This was the first medal issued with the Queen's head. On the reverse is a trophy of naval and military weapons, very badly disposed, with an oval shield bearing the Royal Arms in the centre, the whole backed by a palm tree, and above ARMIS EXPOSCERE PACEM, with CHINA on a plain panel in the exergue, and underneath the date 1842. The medal is 1⅖ in. in diameter, with a plain straight German-silver clasp soldered on for suspension from a ribbon of red with broad yellow edges, the same width as the diameter of the medal. The names of the recipients, and the number of the regiment or name of ship, were impressed upon the edge in bold Roman capital letters. The reverse of this medal has been used ever since for presentation to troops taking part in Chinese wars, the date 1842 being deleted, and fishtail bars recording the engagements and dates used to indicate the campaign.
The First China Medal, 1842.—In January 1843, a medal was granted to commemorate "the notable successes of Her Majesty's Naval and Military forces," both European and Native, along the coast and in the interior of the Empire of China. On the front is the crowned head of Queen Victoria facing left, with the legend Queen Victoria on either side, and on the edge of the head W. Wyon, R.A. This was the first medal issued featuring the Queen's head. On the back is a trophy of naval and military weapons, arranged quite poorly, with an oval shield bearing the Royal Arms in the center, all backed by a palm tree, and above it ARMIS EXPOSCERE PACEM, with CHINA on a plain panel in the exergue, and below that the date 1842. The medal measures 1⅖ in. in diameter, with a simple straight German-silver clasp soldered on for suspension from a ribbon of red with broad yellow edges, matching the width of the medal's diameter. The names of the recipients and the number of the regiment or ship name were engraved along the edge in bold Roman capital letters. The back of this medal has been used since then for presentation to troops involved in Chinese wars, with the date 1842 removed, and fishtail bars recording the engagements and dates used to mark the campaign.
SECOND AFGHAN WAR
Shah Shoojah made a very indifferent ruler, and, as I have stated, did little to strengthen his hold on the throne upon which the British had placed him—indeed, without British arms he possessed no authority. The price we paid to keep this unpopular and bad ruler upon his throne—mainly, it is true, to ensure a barrier against Russia—was a heavy one. In October 1841 the Afghans openly rebelled at Cabul, murdered Sir Alexander Burnes and Sir William Macnaughton, and the troops were forced to retire upon Jellalabad, but were practically cut to pieces on the march, Dr. Brydon—who became one of the famous Lucknow garrison—being the only British officer to reach that city. It is estimated that of 20,000 who left Cabul, only a few hundreds escaped with their lives. The 44th (1st Essex Regiment) had 22 officers and 543 men killed during this disastrous retreat. Meanwhile Sir Robert Sale with the 13th Somerset Light Infantry, which had been detached from Cabul to deal with the insurgents in the Khoord-Cabul pass, had occupied Jellalabad.
Shah Shoojah was a very ineffective ruler, and as I mentioned earlier, he did little to secure his position on the throne that the British had placed him on—without British military support, he had no real authority. The cost of keeping this unpopular and poor ruler in power was significant—mainly, it was true, to create a buffer against Russia. In October 1841, the Afghans openly rebelled in Cabul, killing Sir Alexander Burnes and Sir William Macnaughton. The troops were forced to retreat to Jellalabad, but they were almost entirely destroyed during the march, with Dr. Brydon—who later became one of the famous members of the Lucknow garrison—being the only British officer to reach that city. It's estimated that out of the 20,000 who left Cabul, only a few hundred managed to survive. The 44th (1st Essex Regiment) lost 22 officers and 543 men during this disastrous retreat. Meanwhile, Sir Robert Sale, with the 13th Somerset Light Infantry, which had been sent from Cabul to deal with the insurgents in the Khoord-Cabul pass, had taken control of Jellalabad.

(Reverse.)
(Rewind.)

(Obverse.)
(Front.)
SECOND JELLALABAD MEDAL, "FLYING VICTORY," 1842.
SECOND JELLALABAD MEDAL, "FLYING VICTORY," 1842.

CHINA, 1842.
CHINA, 1842.
Awarded to Field-Marshal Hugh Viscount Gough, K.P., G.C.B., G.C.S.I
Awarded to Field Marshal Hugh Viscount Gough, K.P., G.C.B., G.C.S.I.

CABUL, 1842, WITH ORIGINAL STEEL SUSPENDER.
CABUL, 1842, WITH ORIGINAL STEEL SUSPENDER.
Jellalabad.—The defence of Jellalabad by the little force under Sir Robert Sale, including Captain (afterwards the famous Sir Henry) Havelock, is the bright gem which sparkles in the dross of this unfortunate campaign. The city was in a very poor condition when the gallant defender seized the place and proceeded to strengthen it. On November 12th, 1841, the garrison had only one half-day's rations, but by a plucky sortie they managed to drive off the Afghans and obtain supplies. The place was again invested on the 27th, but by a successful sally on December 1st they were routed. On January 9th the leader of the rebellion called upon Sir Robert Sale to surrender the fortress, but he naturally refused. Not only was the indomitable spirit of the British tried by the repeated attacks of the enemy, but it almost appeared as if Nature herself was in league with the insurgents, for within a month a series of earthquake shocks demolished a third of the place and part of the defences, and necessitated continual repair of the works. Then came the blockade by Mahomed Akbar Khan, who after assassinating the British envoy at Cabul was responsible for the destruction of the army which left that city. On April 7th, however, the defenders made[Pg 102] a determined attack upon the camp of the besiegers, and the 6,000 men under Mahomed Akbar were put to rout, and the siege abandoned. The regiments engaged in the defence of Jellalabad, under Sir Robert Sale, were H.M.'s 13th Light Infantry; a squadron of the 5th Bengal Light Cavalry; 35th Bengal Native Infantry; detachments of Broadfoot's Sappers and the 6th Shah's Infantry; half the Shah's Mountain Train; 2nd and 6th Batts. Bengal Artillery; a few native officers, and 682 armed followers.
Jellalabad.—The defense of Jellalabad by the small force led by Sir Robert Sale, which included Captain (later the renowned Sir Henry) Havelock, stands out as a shining moment amidst the difficulties of this unfortunate campaign. The city was in terrible shape when the brave defenders took control and started to fortify it. On November 12th, 1841, the garrison had only enough rations for half a day, but thanks to a brave sortie, they managed to drive off the Afghans and secure supplies. The city was besieged again on the 27th, but a successful counterattack on December 1st sent the enemy fleeing. On January 9th, the leader of the rebellion demanded that Sir Robert Sale surrender the fortress, but he obviously refused. The relentless spirit of the British was tested not just by the constant attacks from the enemy, but it seemed like Nature was also against them, as a series of earthquakes within a month damaged a third of the city and part of the defenses, requiring continuous repairs. Then came the blockade by Mahomed Akbar Khan, who, after murdering the British envoy in Cabul, was responsible for the destruction of the army that had left that city. However, on April 7th, the defenders launched a determined attack on the besiegers' camp, causing the 6,000 troops under Mahomed Akbar to scatter and the siege to be lifted. The regiments involved in the defense of Jellalabad, under Sir Robert Sale, included H.M.'s 13th Light Infantry; a squadron of the 5th Bengal Light Cavalry; the 35th Bengal Native Infantry; detachments of Broadfoot's Sappers and the 6th Shah's Infantry; half of the Shah's Mountain Train; the 2nd and 6th Battalions of Bengal Artillery; a few native officers, and 682 armed followers.
First Jellalabad Medal.—The "Illustrious" garrison of Jellalabad, which had kept the flag flying for five months, was awarded a medal by General Order dated Allahabad, April 30th, 1842. It is a very simple medal, 1½ in. in diameter, bearing on the obverse JELLALABAD in capital block letters taking the line of the medal above a mural crown, and on the reverse the date APRIL boldly occupying the centre, with VII above and 1842 below. The suspenders were of two kinds—a steel clip and ring, or a silver wire loop attached to a ring through a hole in the broad flat rim. The medals were mostly issued without names; a few were indented, but the majority were engraved. The ribbon of watered silk is 1⅘ in. wide, and shaded rainbow fashion from crimson to yellow and blue. Two thousand five hundred and ninety-six medals were issued, and the relatives of those defenders who succumbed between April 7th, 1842, and the date of issue in December received the medal. The rarer medals are those awarded to the Shah's Mountain Train and the Shah's Cavalry, also the 5th Bengal Light Infantry.
First Jellalabad Medal.—The "Illustrious" garrison of Jellalabad, which had kept the flag flying for five months, was awarded a medal by General Order dated Allahabad, April 30th, 1842. It is a very simple medal, 1½ inches in diameter, featuring on the front Jalalabad in capital block letters above a mural crown, and on the back the date APRIL prominently in the center, with VII above and 1842 below. The suspenders came in two types—a steel clip and ring, or a silver wire loop attached to a ring through a hole in the broad flat rim. The medals were mostly issued without names; a few had names etched, but the majority were engraved. The ribbon is made of watered silk, 1⅘ inches wide, and has a rainbow gradient from crimson to yellow and blue. A total of two thousand five hundred and ninety-six medals were issued, and the relatives of those defenders who died between April 7th, 1842, and the issue date in December received the medal. The rarer medals were awarded to the Shah's Mountain Train, the Shah's Cavalry, and the 5th Bengal Light Infantry.
Second Jellalabad Medal.—Lord Ellenborough, the Governor-General of India, being dissatisfied with the simple and somewhat crude character of the award, had a more decorative medal designed by W. Wyon and struck at the Royal Mint, that those who cared might exchange when they were issued in March 1845. The men, however, were loath to part with the original medal, and very few applied for the new one; it is[Pg 103] stated that of the famous 13th—the only European regiment to receive the award—only five exchanged their medals. The obverse of the second Jellalabad, or the "Flying Victory," bears the head of Queen Victoria as on the China medal, with VICTORIA VINDEX above (a few were issued with VICTORIA REGINA), and on the reverse the fortress of Jellalabad, with a bold flying figure of Victory above bearing in her uplifted left hand the Union Jack, and in her right two wreaths; above is JELLALABAD VII APRIL, and in the exergue MDCCCXLII. The medal, 1⅖ in. in diameter, was suspended from the crimson, yellow, and blue ribbon by a steel or plated bar 2⅖ in. long. The recipient's name, etc., was impressed upon the edge in capital Roman letters, but some were issued engraved in script. In addition to the 13th (later called Prince Albert's Light Infantry, as one of the honours conferred for the occasion; they also had their facings changed from yellow to blue), the 35th Native Infantry, 2-6th Batt. Bengal Artillery, Anderson's Horse, one squadron 5th Bengal Light Native Cavalry, and Broadfoot's Sappers and Miners took part in the defence.
Second Jellalabad Medal.—Lord Ellenborough, the Governor-General of India, was not happy with the simple and somewhat rough design of the original medal. He had a more decorative version created by W. Wyon and minted at the Royal Mint, so that those who wanted could exchange their medals when they were released in March 1845. However, the men were reluctant to give up the original medal, and very few opted for the new one; it is[Pg 103] noted that out of the famous 13th—the only European regiment to receive the award—only five exchanged their medals. The front of the second Jellalabad, or the "Flying Victory," features the head of Queen Victoria, just like the China medal, with VICTORIA VINDEX above (a few were issued with QUEEN VICTORIA), and the back shows the fortress of Jellalabad, with a striking flying figure of Victory above holding the Union Jack in her lifted left hand, and two wreaths in her right; above is Jalalabad, 7 April, and in the exergue 1842. The medal, 1⅖ in. in diameter, was hung from a crimson, yellow, and blue ribbon by a steel or plated bar 2⅖ in. long. The recipient's name, etc., was engraved on the edge in capital Roman letters, although some were issued with script engraving. In addition to the 13th (which later became known as Prince Albert's Light Infantry, receiving this honor as part of the occasion, and they also changed their facings from yellow to blue), the 35th Native Infantry, 2-6th Batt. Bengal Artillery, Anderson's Horse, one squadron of the 5th Bengal Light Native Cavalry, and Broadfoot's Sappers and Miners participated in the defense.
Cabul.—The prestige of Britain had been lowered as a result of the insurrections, and in order to relieve Jellalabad (but it is said to take vengeance upon the enemy), Major-General Pollock was dispatched with an army, with which he forced the Kyber Pass and relieved Jellalabad on April 16th, where he halted for some months to organise his transport. Meanwhile oppressive heat and pestilence played havoc with the troops encamped in the valley of Jellalabad, and it was determined to divide the force and advance on Cabul, General Pollock having a hard fight at the pass of Jugdulluck, where he beat off Mahomed Khan and the Ghilzie chiefs. Later the combined divisions of Pollock and Sale combated the enemy in the Tezeen pass, where, on September 13th, Akbar Khan with 20,000 men disputed passage. His force, however, was put to rout, and the leader escaped accompanied by a[Pg 104] single soldier. The debacle was complete, and on September 15th the army encamped on the race-course at Cabul, and next day the British flag again flew over the city.
Cabul.—Britain's reputation had diminished due to the uprisings, and to relieve Jellalabad (though it's said to also seek revenge on the enemy), Major-General Pollock was sent with an army. He successfully crossed the Kyber Pass and relieved Jellalabad on April 16th, pausing there for several months to organize his supplies. In the meantime, extreme heat and disease took a toll on the troops stationed in the Jellalabad valley, leading to the decision to split the force and move on to Cabul. General Pollock faced a tough battle at the Jugdulluck Pass, where he defeated Mahomed Khan and the Ghilzie leaders. Later, Pollock's and Sale's combined divisions confronted the enemy at the Tezeen Pass, where, on September 13th, Akbar Khan and his 20,000 men tried to block their way. However, his forces were routed, and he fled alongside a[Pg 104] single soldier. The defeat was total, and on September 15th, the army set up camp at the racecourse in Cabul, and the next day the British flag was raised over the city once again.
The following troops took part in the march and recapture of Cabul: 9th, 13th, 31st, 40th, and 41st Foot Regiments, and the 3rd Light Dragoons, who were awarded the medal for Cabul, also the following regiments in the H.E.I. Co.'s service: 4th, 5th, 6th, and 12th Bengal Infantry; 1st and 10th Bengal Light Cavalry; 3rd Irregular Cavalry; the 5th company of the Bengal Artillery, and Sappers and Miners.
The following troops participated in the march and recapture of Cabul: the 9th, 13th, 31st, 40th, and 41st Foot Regiments, as well as the 3rd Light Dragoons, who were awarded the medal for Cabul. Additionally, the following regiments in the H.E.I. Co.'s service were included: the 4th, 5th, 6th, and 12th Bengal Infantry; the 1st and 10th Bengal Light Cavalry; the 3rd Irregular Cavalry; the 5th company of the Bengal Artillery; and Sappers and Miners.
Three thousand five hundred medals were issued to Europeans for Cabul, but very few were issued to the 40th Regiment.
Three thousand five hundred medals were awarded to Europeans for Cabul, but only a handful were given to the 40th Regiment.
Candahar.—Major-General Knott's defence of Candahar, if not so famous as that of Jellalabad by Sir Robert Sale, exhibited the same tenacity and cool determination. The rebels in the vicinity of Candahar were led by Prince Sufter Jung, a son of Shah Shoojah, and Prince Timour; they and their men, however, were helpless in the face of the little British army that sallied forth on the morning of January 12th, 1842, and routed them. The success of the battle did but keep the enemy at a respectful distance, for they spent their time in plundering the villages in the neighbourhood. Bad weather militated against any further effort on the part of the British general until March 7th, when he advanced against the rebel Afghans, and again put them to rout, but while the detachment was engaged in combating one section of the insurgents, another made a daring attack upon the city; they were, however, repulsed with considerable loss. Another action was fought on March 25th, and, with the assistance of the brigade under Colonel Wymer, the investing enemy was driven in confusion across the Urghundaub. On April 28th Major-General (later Sir) Richard England, after attacking the enemy at Hykulzie, successfully[Pg 105] reached Candahar, and enabled Major-General Knott to advance upon Cabul.
Candahar.—Major-General Knott's defense of Candahar, while not as well-known as that of Jellalabad by Sir Robert Sale, showed the same persistence and calm determination. The rebels around Candahar were led by Prince Sufter Jung, a son of Shah Shoojah, and Prince Timour. However, they and their men were powerless against the small British army that charged out on the morning of January 12th, 1842, and routed them. The success of the battle merely kept the enemy at a safe distance, as they spent their time looting nearby villages. Bad weather hindered any further efforts by the British general until March 7th, when he advanced against the rebel Afghans and again defeated them. However, while the detachment was busy fighting one group of insurgents, another group launched a bold attack on the city; they were pushed back with significant losses. Another battle occurred on March 25th, and with the help of the brigade under Colonel Wymer, the besieging enemy was driven in confusion across the Urghundaub. On April 28th, Major-General (later Sir) Richard England, after attacking the enemy at Hykulzie, successfully[Pg 105] reached Candahar, allowing Major-General Knott to advance on Cabul.
"The Fighting Fortieth" was the only British regiment present in the defence and in the actions outside. It is noteworthy that through disease the regiment had been considerably reduced before it took part in the defence of Candahar. Major Biddulph states that only 64 "Candahar" medals were struck for the 40th Foot, and of these 42 were for the relatives of deceased officers and soldiers, and 22 for sick, etc., who had returned to India. The 41st, the Welsh Regiment, was the only British unit that took part in the relief of Candahar. The 5th, 6th, and 12th Bengal Infantry; Poona Horse; 1st Bengal (Skinner's) and 3rd Bombay Cavalry, and Bombay and Bengal Artillery were engaged in the defence and relief.
"The Fighting Fortieth" was the only British regiment involved in the defense and the actions outside. It's important to note that due to illness, the regiment had significantly decreased in numbers before participating in the defense of Candahar. Major Biddulph mentions that only 64 "Candahar" medals were awarded to the 40th Foot, and of these, 42 were given to the relatives of deceased officers and soldiers, while 22 were for those who were sick and had returned to India. The 41st, the Welsh Regiment, was the only British unit that took part in the relief of Candahar. The 5th, 6th, and 12th Bengal Infantry; Poona Horse; 1st Bengal (Skinner's) and 3rd Bombay Cavalry, along with Bombay and Bengal Artillery, were involved in the defense and relief efforts.
Only 130 Europeans received the medal for Candahar.
Only 130 Europeans were awarded the medal for Candahar.
Kelat-i-Ghilzie.—Colonel Wymer, C.B., with a detachment which included a few men of "The Fighting Fortieth," marched on Kelat-i-Ghilzie, a hill fort 84 miles from Candahar, in order to draw off the garrison, which had held the fort during the winter, and (on May 21st) five days before Colonel Wymer's arrival had succeeded in defeating 4,000 Ghilzees who had attacked the fort. The garrison of only 950, under the command of Captain Craigie, included about 100 Europeans. For this heroic defence a silver medal was issued to every man taking part; it is 1⅖ in. in diameter, and depends from a steel clip and bar, as in the medal illustrated facing page 96, and was suspended from the same kind of ribbon. On the obverse is an ornamental shield inscribed KELAT-I-GHILZIE, surrounded by a laurel wreath with a mural crown above. On the reverse is a military trophy, with a breast-plate and helmet forming the central feature, and "INVICTA MDCCCXLII" on an ornamental tablet underneath. The names of the recipients were all engraved, generally in script. None of the Queen's Regiments took part in the defence,[Pg 106] the majority (600) of the defenders being of the Shah's army. Three companies of the 43rd Bengal Infantry, 44 European Artillerymen including one officer, and 60 Sappers and Miners of the H.E.I. Co.'s service were also engaged. Only 55 Europeans received this medal.
Kelat-i-Ghilzie.—Colonel Wymer, C.B., with a detachment that included a few men from "The Fighting Fortieth," marched to Kelat-i-Ghilzie, a hill fort 84 miles from Candahar, to draw off the garrison. This garrison had held the fort throughout the winter and, on May 21st, just five days before Colonel Wymer's arrival, had successfully defeated 4,000 Ghilzees who attacked the fort. The garrison consisted of only 950 men, commanded by Captain Craigie, and included about 100 Europeans. For their heroic defense, every man who participated received a silver medal; it measures 1⅖ inches in diameter and hangs from a steel clip and bar, like the medal illustrated on page 96, suspended from the same type of ribbon. The front features an ornamental shield inscribed Khelat-e-Ghilzai, surrounded by a laurel wreath with a mural crown above. The back displays a military trophy, featuring a breastplate and helmet as the central elements, with "INVICTA 1842" on an ornamental tablet below. The names of the recipients were all engraved, generally in script. None of the Queen's Regiments participated in the defense; the majority (600) of the defenders belonged to the Shah's army. Three companies of the 43rd Bengal Infantry, 44 European Artillerymen including one officer, and 60 Sappers and Miners from the H.E.I. Co.'s service were also involved. Only 55 Europeans received this medal.
Recapture of Ghuznee.—Ghuznee, with its garrison of exhausted and half-frozen men, had capitulated in March under the orders of Major-General Elphinstone, who had been taken prisoner at Cabul, and died shortly afterwards. Elphinstone's orders to surrender Jellalabad and Candahar had been ignored by Sir Robert Sale and Sir William Knott. They not only had the determination of Englishmen, but knew the treacherous character of their enemies. Colonel Palmer, unfortunately, forced by the weakness of his men and relying upon the promise of a safe escort for his sepoys to Hindoostan, agreed to surrender. The troops were unarmed, and with their womenfolk had hardly left the citadel when they were attacked and the majority massacred. Colonel Palmer was tortured, and with nine other officers thrown into a dungeon. When Sir William Knott appeared before Ghuznee, on September 5th, 1842, he found the city swarming with rebel troops, and great bodies of cavalry and infantry in the mountainous environs. He drove these off, erected breaching batteries, and prepared to attack the city, but on the morning of the 6th it was discovered that the fortress had been evacuated; and so with very few casualties Ghuznee was again taken, over 300 unfortunate sepoys released, and the sacred gates of Somnath, which Mahommedan invaders had taken from India centuries before, were taken down as mementoes of a campaign which did nothing to improve our prestige.
Recapture of Ghuznee.—Ghuznee, with its garrison of exhausted and half-frozen men, had surrendered in March under the orders of Major-General Elphinstone, who had been captured at Cabul and died shortly afterward. Elphinstone's orders to hand over Jellalabad and Candahar were ignored by Sir Robert Sale and Sir William Knott. They not only had the resolve of Englishmen but were also aware of the treacherous nature of their enemies. Colonel Palmer, unfortunately, pressured by the weakness of his men and counting on a promise of safe passage for his sepoys to Hindoostan, agreed to surrender. The troops were unarmed, and with their families had barely left the citadel when they were attacked, resulting in the majority being massacred. Colonel Palmer was tortured and, along with nine other officers, thrown into a dungeon. When Sir William Knott arrived at Ghuznee on September 5th, 1842, he found the city crawling with rebel troops and large groups of cavalry and infantry in the surrounding mountains. He drove them off, set up breaching batteries, and got ready to attack the city, but on the morning of the 6th, it was discovered that the fortress had been evacuated. With very few casualties, Ghuznee was retaken, over 300 unfortunate sepoys were freed, and the sacred gates of Somnath, which Muslim invaders had taken from India centuries earlier, were removed as reminders of a campaign that did nothing to enhance our reputation.
The 40th and 41st were the only British regiments to receive the medal with Ghuznee inscribed thereon. Members of these regiments who had been in the other actions were entitled to the medals bearing Candahar and Cabul also.
The 40th and 41st were the only British regiments to receive the medal with Ghuznee engraved on it. Members of these regiments who participated in the other battles were also eligible for the medals featuring Candahar and Cabul.
The Ghuznee, Candahar, and Cabul Medals.—For this war a silver medal was issued by the Indian Government to those who had taken part in it. Four types of medals were issued. One with the words CANDAHAR, GHUZNEE, CABUL, 1842, the names being above one another and the date below, all within a laurel wreath, the whole surmounted by the royal crown; another for GHUZNEE-CABUL, 1842, with the names in entwined wreaths and the date beneath them; and those for CANDAHAR, 1842, and CABUL, 1842, as indicated in the illustration facing page 100 of one with the original bright steel suspender attached to a hinged clip. The medals are 1⅖ in. in diameter, the obverse bearing the diademed head of the young Queen Victoria with the legend "Victoria Vindex" above; some have the words "Victoria Regina," but these are scarce, while a few of the medals for Cabul are spelt thus, CABVL, but it is doubtful whether they were actually issued to soldiers. It is noteworthy that on certain of the medals in this series the name of the executant, W. Wyon, R.A., is on the truncation of the Queen's head instead of beneath it. In this issue the recipients' names were engraved either in Italian script or in square Roman letters; a few were impressed, and some were issued unnamed. The "rainbow" or military ribbon for India is used for suspension.
The Ghuznee, Candahar, and Cabul Medals.—For this war, the Indian Government issued a silver medal to those who participated. Four types of medals were created. One features the words Candar, Ghazni, Kabul, 1842, with the names stacked above each other and the date below, all encircled by a laurel wreath topped with the royal crown; another reads GHUZNEE-CABUL, 1842, with the names in intertwined wreaths and the date below them; and there are also medals for CANDAHAR, 1842, and CABUL, 1842, as shown in the illustration facing page 100 featuring one with the original bright steel suspender attached to a hinged clip. The medals are 1⅖ inches in diameter, with the front displaying the crowned head of the young Queen Victoria and the legend "Victoria Vindex" above; some have the words "Victoria Regina," but these are rare, while a few of the medals for Cabul are spelled CABVL, though it's unclear if they were actually issued to soldiers. It's worth noting that on certain medals in this series, the name of the engraver, W. Wyon, R.A., is placed on the truncation of the Queen's head instead of underneath it. In this edition, recipients' names were engraved either in Italian script or in square Roman letters; a few were stamped, and some were issued without names. The "rainbow" or military ribbon for India is used for suspension.
One thousand four hundred Europeans received the medal with Candahar, Ghuznee, Cabul.
One thousand four hundred Europeans were awarded the medal for Candahar, Ghuznee, and Cabul.
Meeanee.—In 1843 the "tail of the Afghan storm" arose. It followed the attempt on the part of several Ameers, with an army of 8,000 Belooches, to obtain possession of the British Presidency at Hyderabad; they were driven off, but owing to the weakness of the place it was decided to abandon it for the safety of the camp commanded by Sir Charles Napier, to whom the conduct of the campaign in Scinde had been entrusted, and who gained for himself the native sobriquet "Shaitan-ke-bhaee," or "The devil's brother," by his determined action in dealing with the Ameers. He first[Pg 108] destroyed the fort at Emaun Ghur on January 14th and 15th, a feat which drew forth the eulogiums of Wellington, and ruined the chance of the Ameers in the campaign. On February 17th the battle of Meeanee was fought, 2,800 men, with 12 guns, under Major-General Sir Charles Napier attacking, and in three hours defeating the Scindian army of 30,000 infantry and 5,000 cavalry, with 15 guns, but not before nearly all the European officers were killed or wounded. The Belooches, who fought with remarkable valour, lost 5,000 men, their camp and all its appurtenances falling into the hands of the British. Next day six of the Ameers surrendered. The only Queen's Regiment represented at Meeanee was the 22nd Foot, and only 65 medals were issued to the regiment, with two companies of Bombay Artillery; Grenadiers of the 1st Native Infantry; 12th and 25th Native Infantry; a detachment of Poona Irregular Horse, to which corps only 14 medals were issued; Scinde Irregular Horse; 9th Bengal Light Cavalry, and half company of Madras Sappers and Miners. The 22nd lost 1 officer and 23 men killed; its commanding officer, Lieutenant-Colonel Pennefeather, 6 officers, and 52 men wounded.
Meeanee.—In 1843, the "tail end of the Afghan storm" began. It followed an attempt by several Ameers, leading an army of 8,000 Belooches, to take control of the British Presidency in Hyderabad. They were pushed back, but due to the vulnerabilities of the area, it was decided to abandon it for the safety of the camp led by Sir Charles Napier, who was in charge of the campaign in Scinde. He earned the local nickname "Shaitan-ke-bhaee," or "The devil's brother," for his decisive actions against the Ameers. He first[Pg 108]destroyed the fort at Emaun Ghur on January 14th and 15th, an achievement that earned him praise from Wellington and diminished the Ameers' chances in the campaign. On February 17th, the battle of Meeanee took place, where 2,800 men, along with 12 guns, under Major-General Sir Charles Napier attacked and, in three hours, defeated the Scindian army of 30,000 infantry and 5,000 cavalry, who had 15 guns, but not before nearly all the European officers were either killed or wounded. The Belooches, who fought with incredible courage, lost 5,000 men, and their camp and everything in it fell to the British. The next day, six of the Ameers surrendered. The only Queen's Regiment present at Meeanee was the 22nd Foot, which received just 65 medals, alongside two companies of Bombay Artillery, Grenadiers from the 1st Native Infantry, the 12th and 25th Native Infantry, a detachment of Poona Irregular Horse (which received only 14 medals), Scinde Irregular Horse, the 9th Bengal Light Cavalry, and half a company of Madras Sappers and Miners. The 22nd lost 1 officer and 23 men killed; its commanding officer, Lieutenant-Colonel Pennefeather, along with 6 officers and 52 men, were wounded.
Hyderabad.—The Ameers, who still held out against the British army, made a stand with 20,000 men at the village of Duppa, near Hyderabad, under Meer Shere Mahomed, where on March 24th they were attacked by Sir Charles Napier with 5,000 troops, and defeated with great loss. The arch enemy of the British, Hoche Mahomed Seede, was killed, and Meer Shere Mahomed fled to the desert; the battle was decided by the 22nd Regiment and the troop of Bombay Horse Artillery. In this battle the 22nd, which numbered 560 rank and file, lost 23 men killed, 5 officers and 134 men wounded.
Hyderabad.—The Ameers, who were still resisting the British army, made a stand with 20,000 men at the village of Duppa, near Hyderabad, under Meer Shere Mahomed. On March 24th, they were attacked by Sir Charles Napier with 5,000 troops and suffered a significant defeat. Their main adversary, Hoche Mahomed Seede, was killed, and Meer Shere Mahomed fled to the desert. The battle was decided by the 22nd Regiment and the troop of Bombay Horse Artillery. In this battle, the 22nd, which had 560 personnel, lost 23 men killed, along with 5 officers and 134 men wounded.

| AFGHAN MEDAL FOR CANDAHAR, GHUZNEE, AND CABUL, 1842. | BRONZE STAR FOR MAHARAJPOOR. |
As a result of the campaign Scinde and Meerpore passed into British possession. The troops engaged at Hyderabad were: H.M.'s 22nd Foot; 1st Troop of Bombay Horse Artillery; 2nd-1st and 2nd-2nd Companies of the Bombay Artillery; 1st, 8th, 12th, 21st, and 25th Native Infantry; 3rd and 5th Companies of Golundaze; Madras Sappers and Miners; 3rd Bombay Cavalry; 9th Bengal Cavalry; Poona Horse and Scinde Horse; also men from the Indus Flotilla.
As a result of the campaign, Scinde and Meerpore came under British control. The troops involved at Hyderabad included: H.M.'s 22nd Foot; 1st Troop of Bombay Horse Artillery; 2nd-1st and 2nd-2nd Companies of the Bombay Artillery; 1st, 8th, 12th, 21st, and 25th Native Infantry; 3rd and 5th Companies of Golundaze; Madras Sappers and Miners; 3rd Bombay Cavalry; 9th Bengal Cavalry; Poona Horse and Scinde Horse; along with personnel from the Indus Flotilla.
Medals for Meeanee and Hyderabad.—The medal for the war in Scinde in 1843 was the only war medal given by the Home Government to the troops employed in India during the period of the East India Company's rule. The medal is practically the same as that described and illustrated as given for Candahar, Ghuznee, and Cabul in the 1842 campaign, the name of the battle—MEEANEE or HYDERABAD—and date, 1843, being arranged inside a wreath surmounted by the royal crown. A third medal given to those who were present in both actions has MEEANEE-HYDERABAD within laurel wreaths tied together, the whole surmounted by the royal crown. A medal for the battle of Meeanee, awarded to the 22nd, has realised from £7 to £9. The steel suspender, as in the Cabul medal illustrated, was issued with the medal given to non-commissioned officers and privates, but those with the officers' medals were of silver; the Colonel, however, of the only English regiment present—the 22nd—had, at his own expense, silver suspenders made for his men in place of the steel ones. The 22nd were present at both battles, also detachments of royal and horse artillery. Some of these medals have the names of the recipients, etc., engraved in script; others are mostly impressed in Roman capitals. Those to the 22nd were generally engraved in block lettering. The ribbon used is the "rainbow" or Army of India type.
Medals for Meeanee and Hyderabad.—The medal for the Scinde war in 1843 was the only war medal awarded by the Home Government to the troops stationed in India during the East India Company's rule. The medal is almost identical to the one issued for the campaigns at Candahar, Ghuznee, and Cabul in 1842, featuring the name of the battle—MEEANEE or HYDERABAD—and the date, 1843, arranged inside a wreath topped with the royal crown. A third medal awarded to those who participated in both battles has MEEANEE-HYDERABAD within laurel wreaths tied together, all topped by the royal crown. A medal for the battle of Meeanee, given to the 22nd, has sold for between £7 and £9. The steel suspender, as seen in the Cabul medal depicted, was issued along with the medal given to non-commissioned officers and privates, while the officers received silver suspenders; however, the Colonel of the only English regiment present—the 22nd—had silver suspenders made for his men at his own expense instead of the steel ones. The 22nd participated in both battles, along with detachments from royal and horse artillery. Some of these medals have the names of the recipients, etc., engraved in script; others are generally stamped in Roman capitals. The medals for the 22nd were usually engraved in block letters. The ribbon used is the "rainbow" or Army of India type.
THE GWALIOR CAMPAIGN
The year 1843 also saw the Gwalior campaign, in which the two decisive battles of Maharajpoor and Punniar were fought on the same day, December 29th. "The Army of Exercise" had been assembled at Agra owing to[Pg 110] troubles following the death of the Maharajah. Tyajee Rao Scindiah had been acknowledged by the British Government, and Mama Sahib was appointed Regent. He was, however, expatriated, and an attempt made to undermine the position of the young Maharajah. His authority was, however, re-established, and the British army prepared to leave the country under the command of Major-General Sir Hugh Gough.
The year 1843 also saw the Gwalior campaign, where the two major battles of Maharajpoor and Punniar were fought on the same day, December 29th. "The Army of Exercise" had been gathered in Agra due to[Pg 110] issues following the Maharajah's death. Tyajee Rao Scindiah was recognized by the British Government, and Mama Sahib was named Regent. However, he was exiled, and there was an effort to weaken the position of the young Maharajah. His authority was ultimately restored, and the British army got ready to leave the country under the leadership of Major-General Sir Hugh Gough.
Maharajpoor.—They crossed the Koharee River on the morning of December 29th, to find about 18,000 Mahrattas with 100 guns strongly entrenched at the village of Maharajpoor. The British army consisted of 14,000 men with 40 guns. A terrific conflict ensued owing to the superiority of the enemy in artillery, but attacked on all sides by the British force they were routed, despite the splendid determination of the Mahratta gunners, who were bayoneted at their guns, and the gallantry of the infantry, who discarding their matchlocks stubbornly fought hand to hand with the British soldiers.
Maharajpoor.—They crossed the Koharee River on the morning of December 29th, only to find around 18,000 Mahrattas with 100 cannons heavily fortified in the village of Maharajpoor. The British army was made up of 14,000 men with 40 cannons. A fierce battle broke out due to the enemy's artillery advantage, but after being attacked from all sides by the British forces, they were defeated, despite the remarkable resolve of the Mahratta gunners, who were bayoneted at their positions, and the bravery of the infantry, who, leaving behind their matchlocks, fought hand-to-hand against the British soldiers.
The regiments engaged were the 39th and 40th Foot and the 16th Lancers. The H.E.I. Co.'s troops were the 2nd, 14th, 16th, 31st, 43rd, and 56th Bengal Native Infantry; 1st Bengal Light Cavalry; 4th, section of the 5th, 8th Bengal Light Cavalry; 10th Bengal Light Cavalry; 2nd Skinner's Horse; 4th Irregular Cavalry (in reserve); 2 companies of Bengal Foot Artillery (3 companies and 4 of natives in reserve); 3 troops of Bengal Horse Artillery and 3rd, 4th, and 7th companies Bengal Sappers and Miners.
The regiments involved were the 39th and 40th Foot and the 16th Lancers. The H.E.I. Co.'s troops included the 2nd, 14th, 16th, 31st, 43rd, and 56th Bengal Native Infantry; 1st Bengal Light Cavalry; 4th, a section of the 5th, and 8th Bengal Light Cavalry; 10th Bengal Light Cavalry; 2nd Skinner's Horse; 4th Irregular Cavalry (in reserve); 2 companies of Bengal Foot Artillery (3 companies and 4 of natives in reserve); 3 troops of Bengal Horse Artillery; and the 3rd, 4th, and 7th companies of Bengal Sappers and Miners.
Punniar.—On the afternoon of the 29th the left wing of the army, under Major-General Grey, discovered about 1,200 of the enemy in position on a range of hills near Punniar, and by a brilliant attack carried every position, and routed the enemy with considerable loss. These two victories which terminated the war were dearly bought, over 1,000 men being placed hors de combat.
Punniar.—On the afternoon of the 29th, the left wing of the army, led by Major-General Grey, found about 1,200 enemy troops positioned on a range of hills near Punniar. Through a brilliant attack, they captured every position and defeated the enemy with significant losses. These two victories that ended the war came at a high cost, with over 1,000 men being taken hors de combat.
The Queen's Regiments at Punniar were the 3rd[Pg 111] Buffs, 50th, Queen's Own, and 2 squadrons 9th Lancers; 5 companies of the 39th, 50th, and 51st Native Infantry; 2 squadrons 5th Bengal Light Cavalry; 8th Bengal and 8th Irregular Cavalry; 2 squadrons 11th Bengal Light Cavalry; 1st Company Bengal Sappers and Miners; 2 troops Bengal Horse Artillery and 1 company Bengal Foot Artillery.
The Queen's Regiments at Punniar were the 3rd[Pg 111] Buffs, 50th, Queen's Own, and 2 squadrons of the 9th Lancers; 5 companies from the 39th, 50th, and 51st Native Infantry; 2 squadrons of the 5th Bengal Light Cavalry; the 8th Bengal and 8th Irregular Cavalry; 2 squadrons of the 11th Bengal Light Cavalry; the 1st Company Bengal Sappers and Miners; 2 troops of Bengal Horse Artillery and 1 company of Bengal Foot Artillery.
Maharajpoor and Punniar Stars.—For these fights
the victorious Britishers and native troops were awarded
bronze six-pointed stars, 17∕10 in. in diameter (as illustrated
facing pages 108 and 112), made from the captured
cannon, having in the centre a small silver star bearing the
words PUNNIAR or MAHARAJPOOR, 1843, in a circle, and
in the centre the date of the action,
29th.
DECr. The star
worn by Lord Gough had a silver elephant on the obverse
instead of the silver star. These stars were originally
fitted with broad brass hooks for attachment to a loop
on the coat, but in some instances a steel ring was run
through it, so as to allow for suspension by the rainbow
ribbon used at the time with other Indian war medals,
as illustrated in the pair for Candahar, Ghuznee, Cabul,
and Maharajpoor, or a silver, or German-silver, suspender
was attached, as shown in the Punniar star.
The name, number, and regiment of the soldier were
engraven on the back, at either side of the hook, in a
light, slanting script.
Maharajpoor and Punniar Stars.—In these battles, the winning British and local troops received bronze six-pointed stars, 17∕10 inches in diameter (as shown on pages 108 and 112), made from captured cannons. Each star featured a small silver star in the center with the words Punny or MAHARAJPOOR, 1843 in a circle, along with the date of the action, 29th DEC. The star worn by Lord Gough had a silver elephant on the front instead of the silver star. These stars were initially equipped with wide brass hooks for attaching to a loop on the coat, but in some cases, a steel ring was threaded through it to hang from the rainbow ribbon used with other Indian war medals, as seen in the pair for Candahar, Ghuznee, Cabul, and Maharajpoor. Alternatively, a silver or German-silver suspender was attached, as demonstrated in the Punniar star. The soldier's name, number, and regiment were engraved on the back, on either side of the hook, in a light, slanting script.
THE SIKH WARS
The Sikh wars of 1845-6 and 1848-9, which concluded with the annexation of the Punjab, and the Koh-i-noor diamond being presented to Queen Victoria, were particularly hard-fought campaigns; and Lord Gough—one of the famous fighting Goughs—whom Wellington thought unworthy to continue the command in the second campaign, which, however, he successfully closed, is depicted on the medal for the Punjab[Pg 112] campaign receiving from the defeated Sikhs the arms they were no longer allowed to bear against us. Some state that the mounted soldier depicted on the medal is Sir Walter Raleigh Gilbert.
The Sikh wars of 1845-46 and 1848-49, which ended with the annexation of Punjab and the presentation of the Koh-i-noor diamond to Queen Victoria, were particularly hard-fought campaigns. Lord Gough—one of the famous fighting Goughs—was considered by Wellington to be unfit to continue the command in the second campaign, which he nonetheless successfully wrapped up. He is shown on the medal for the Punjab[Pg 112] campaign receiving the arms from the defeated Sikhs that they were no longer allowed to carry against us. Some say that the mounted soldier depicted on the medal is Sir Walter Raleigh Gilbert.
Runjeet Singh, who died in 1839, left an army trained by Europeans and a young son, Dhuleep Singh. The former, numbering 60,000, inspired by the ambitious Ministers of the infant Maharajah, crossed the Sutlej and invested Ferozepore with the object of expelling the British from Hindoostan, but was encountered at Moodkee on December 18th by the "Army of the Sutlej," consisting of 3,850 Europeans and 8,500 natives, which with 42 guns had made a tiring march of 22 miles to relieve Ferozepore.
Runjeet Singh, who died in 1839, left behind an army trained by Europeans and a young son, Dhuleep Singh. This army, made up of 60,000 troops, was driven by the ambitious Ministers of the young Maharajah to cross the Sutlej and lay siege to Ferozepore with the goal of driving the British out of India. However, on December 18th, they were confronted at Moodkee by the "Army of the Sutlej," which had 3,850 Europeans and 8,500 local soldiers. This force, equipped with 42 guns, completed a demanding 22-mile march to relieve Ferozepore.
Moodkee.—It was 3 o'clock in the afternoon when the alarm was given that the Sikhs were to give battle. The fatigued and famished soldiers abandoned the meal they were preparing, and, many coatless, rushed to their arms and to meet the Sikh army, the strength of which was so great that it outflanked the British, which practically only formed a single line to oppose it. The infantry meeting them in front gave a brilliant account of itself with the bayonet. The second brigade of cavalry, with the 3rd Light Dragoons, swept the enemy's left, while the rest of the British cavalry turned their right, but the fight continued until darkness, aided by the great clouds of dust from the sandy desert, came to the aid of the Sikhs, who sullenly retired to their camp at Ferozeshuhur after the loss of 17 guns, while the British rested on the battlefield for a few hours and then returned to their camp. In this battle, Colonel James Robertson, C.B., relates, Captain (afterwards Lord) Napier had a remarkable escape with his life; when riding armed merely with a walking-stick several of the enemy rushed at him, but he escaped unscathed. He had ridden from Umballa alone and straight into the battle when it was at its height! In this battle, Colonel Robertson states, the Sikh gunners "were conspicuous for their reckless bravery and devotion to their guns." They "died rather than yield; and there were no white flags, and no quarter asked or given on either side, so we had just to fight it out," and these were the men with whom we had fought side by side in the advance on Cabul but three years before! In this encounter 84 officers and 800 men were placed hors de combat, and the hero of Jellalabad, Major-General Sir Robert Sale, mortally wounded, Sir John McGaskill killed, and 4 brigadiers wounded.
Moodkee.—It was 3 o'clock in the afternoon when the alarm was raised that the Sikhs were preparing to fight. Exhausted and hungry soldiers left the meal they were making and, many without their coats, rushed to grab their weapons to face the Sikh army, which was so strong that it outflanked the British, who effectively formed only a single line against it. The infantry at the front performed brilliantly with their bayonets. The second brigade of cavalry, along with the 3rd Light Dragoons, charged the enemy's left, while the rest of the British cavalry attacked their right, but the battle continued until darkness fell, helped along by the thick clouds of dust from the sandy desert. The Sikhs reluctantly retreated to their camp at Ferozeshuhur after losing 17 guns, while the British rested on the battlefield for a few hours before returning to their camp. In this battle, Colonel James Robertson, C.B., reports that Captain (later Lord) Napier had an incredible escape; while riding armed only with a walking stick, he was charged by several enemy soldiers but emerged unscathed. He had come from Umballa alone and rode straight into the thick of the battle! Colonel Robertson also notes that the Sikh gunners "showed remarkable bravery and dedication to their artillery." They "preferred to die rather than surrender; there were no white flags, and no quarter asked or given on either side, so we just had to fight it out," and these were the same men we had battled alongside during the advance on Cabul just three years earlier! In this clash, 84 officers and 800 men were put hors de combat, and the hero of Jellalabad, Major-General Sir Robert Sale, was mortally wounded, Sir John McGaskill was killed, and 4 brigadiers were wounded.

MEDAL FOR SUTLEJ, 1845.
Medal for Sutlej, 1845.

BRONZE STAR FOR PUNNIAR, 1843.
BRONZE STAR FOR PUNNIAR, 1843.

MEDAL FOR PUNJAB, 1849.
MEDAL FOR PUNJAB, 1849.
At Moodkee H.M.'s 9th, 31st, 50th, and 80th Regiments and the 3rd Light Dragoons were present, also the 2nd, 16th, 24th, 26th, 42nd, 45th, 47th, 48th, and 73rd Bengal Native Infantry; 4th and 5th Bengal Light Cavalry, 9th Irregular Cavalry; 4 troops of Horse Artillery and 2 companies of Foot Artillery. On the day following the battle H.M.'s 26th Foot, the 1st Bengal European Regiment, 11th and 41st Bengal Native Infantry, and 2 companies of Bengal Artillery joined the force.
At Moodkee, H.M.'s 9th, 31st, 50th, and 80th Regiments, along with the 3rd Light Dragoons, were present, as well as the 2nd, 16th, 24th, 26th, 42nd, 45th, 47th, 48th, and 73rd Bengal Native Infantry; the 4th and 5th Bengal Light Cavalry; and the 9th Irregular Cavalry; along with 4 troops of Horse Artillery and 2 companies of Foot Artillery. The day after the battle, H.M.'s 26th Foot, the 1st Bengal European Regiment, 11th and 41st Bengal Native Infantry, and 2 companies of Bengal Artillery joined the force.
Ferozeshuhur.—The Sikhs strengthened their position at "Ferushahr" and entrenched themselves with 120 guns; meanwhile the British army had been reinforced with heavy guns and a number of troops, while Major-General Sir John Littler had brought his division of 5,000 men from Ferozepore, making a total of about 5,674 Europeans and 12,053 native troops, with 65 guns, to be ranged against 25,000 Regulars and 10,000 Irregular Sikhs, with 83 guns, strengthened by an army of about 23,000, with 67 guns, under Tej Singh, encamped only ten miles away. The battle of Ferushahr, or Ferozeshuhur, as it is officially spelt, opened on December 21st, with a terrific cannonade by the Sikhs, under which the British infantry advanced, stormed the entrenchments, and took a number of the enemy's guns. So hardly did the Sikhs fight that they could not be forced from the whole of their entrenchments; indeed, so stubborn was the battle of Ferozeshuhur that it lasted for two days, while the intervening night was also kept lively by the Sikh artillery playing[Pg 114] on to the ground gained by the British. The 80th Regiment was sent with the 1st European Light Infantry to silence the guns, and the 80th was successful in capturing three. "A more wonderful battle never was. Within 150 yards of one another were 8,000 British troops against an unknown number of enemies yet unbroken." All the Governor-General's staff were killed or wounded before the day of retribution arrived. The Commander-in-Chief and the Governor-General of India, Sir Henry Hardinge, placed themselves in front of the two wings of the army "to prevent the troops from firing" until they closed! Unchecked by the enemy's fire, the line advanced, dislodged the enemy and swept everything before it. Halting, as on the parade ground, the army vociferously cheered its leaders, for they were masters of the field. Sirdar Tej Singh, however, brought up his army of over 30,000 men, with a large field of artillery, and endeavoured to retrieve the day; but despite the fact that the British artillery had already expended its ammunition, he was compelled to retire, and the day was won. On the field, however, were 2,415 dead or wounded soldiers, and 115 officers, which the victorious army had lost. The men who fought and won this protracted and sanguinary battle had mostly been without food or water for forty-eight hours.
Ferozeshuhur.—The Sikhs solidified their position at "Ferushahr" and fortified themselves with 120 cannons; meanwhile, the British army received reinforcements of heavy artillery and additional troops, as Major-General Sir John Littler brought his division of 5,000 men from Ferozepore, bringing the total to about 5,674 European soldiers and 12,053 native troops, equipped with 65 cannons, facing off against 25,000 Regulars and 10,000 Irregular Sikhs, armed with 83 cannons, bolstered by an army of around 23,000 with 67 cannons, camped just ten miles away. The battle of Ferushahr, or Ferozeshuhur as it's officially spelled, began on December 21st, with a massive artillery barrage from the Sikhs, under which the British infantry advanced, stormed the fortifications, and captured several enemy cannons. The Sikhs fought so fiercely that they couldn't be dislodged from their entire defensive positions; indeed, the battle of Ferozeshuhur was so intense that it continued for two days, with the Sikh artillery keeping the night active by targeting the territory gained by the British. The 80th Regiment, along with the 1st European Light Infantry, was deployed to silence the enemy's guns, and the 80th succeeded in capturing three of them. "A more remarkable battle never happened. Within 150 yards of each other were 8,000 British troops facing an unknown number of unbroken enemies." All of the Governor-General's staff were killed or wounded before the day of reckoning arrived. The Commander-in-Chief and the Governor-General of India, Sir Henry Hardinge, positioned themselves in front of the two flanks of the army "to prevent the troops from firing" until they closed! Undeterred by enemy fire, the line advanced, drove back the enemy, and pressed on relentlessly. Stopping as if on a parade ground, the army enthusiastically cheered its leaders, for they had claimed mastery of the battlefield. Sirdar Tej Singh, however, rallied his army of over 30,000 men, with a significant artillery presence, and tried to turn the tide; but despite the British artillery having exhausted its ammo, he was forced to withdraw, and the day was won. On the battlefield, however, there were 2,415 soldiers dead or wounded, including 115 officers, representing the losses sustained by the victorious army. The soldiers who fought and won this drawn-out and bloody battle had mostly gone without food or water for forty-eight hours.
The Queen's Regiments present at Ferozeshuhur were the 9th, 29th, 31st, 50th, 62nd, and 80th; 3rd Light Dragoons; 1st and 3rd Brigades Bengal Horse Artillery, and the 4th, 6th, and 7th Batteries of Artillery; the 2nd, 12th, 14th, 16th, 24th, 26th, 33rd, 42nd, 44th, 45th, 47th, 48th, 54th, and 73rd Native Infantry; Royal Bengal Fusiliers; No. 6 Company Bengal Sappers and Miners; 4th, 5th, and 8th Bengal Light Cavalry; 3rd and 9th Bengal Irregular Cavalry; 2nd Skinner's Horse, and the Governor-General's Bodyguard. The 11th and 41st Bengal Native Infantry guarding the wounded at Moodkee and the men of the 27th and 63rd Bengal Native Infantry, Bengal Artillery, and[Pg 115] Sappers who garrisoned Ferozepore were also granted the medal or the bar for Ferozeshuhur.
The Queen's Regiments at Ferozeshuhur included the 9th, 29th, 31st, 50th, 62nd, and 80th; 3rd Light Dragoons; 1st and 3rd Brigades of Bengal Horse Artillery, along with the 4th, 6th, and 7th Batteries of Artillery; the 2nd, 12th, 14th, 16th, 24th, 26th, 33rd, 42nd, 44th, 45th, 47th, 48th, 54th, and 73rd Native Infantry; Royal Bengal Fusiliers; No. 6 Company of Bengal Sappers and Miners; 4th, 5th, and 8th Bengal Light Cavalry; 3rd and 9th Bengal Irregular Cavalry; 2nd Skinner's Horse, and the Governor-General's Bodyguard. The 11th and 41st Bengal Native Infantry, who were guarding the wounded at Moodkee, along with the men of the 27th and 63rd Bengal Native Infantry, Bengal Artillery, and[Pg 115] Sappers who garrisoned Ferozepore, were also awarded the medal or the bar for Ferozeshuhur.
Aliwal.—Within a month the battle of Aliwal was fought. The Sikh Sirdars having effected a passage of the Sutlej near Loodiana, likewise at Ferozeshuhur near Sobraon, and threatened the garrison at the former place, the first brigade under Sir Harry Smith—a Peninsular veteran who bore twelve clasps to his medal—was ordered to make a forced march to relieve it. At Budiwal the enemy had prepared to intercept the British force by strongly entrenching the range of sand-hills and the villages. Sir Harry Smith, however, refusing to take any risks with his army of footsore and fatigued men, decided to make a flank movement by the right, although it would mean running the gauntlet of a heavy fire from the forty guns which was opened upon his columns. The British troops passed through the ordeal with remarkable discipline, but with a loss (this was on January 21st, 1846) far greater than was sustained later at Aliwal.
Aliwal.—Within a month, the battle of Aliwal took place. The Sikh leaders managed to cross the Sutlej River near Loodiana and also at Ferozeshuhur near Sobraon, threatening the troops stationed at the former location. The first brigade, led by Sir Harry Smith—a veteran from the Peninsular War who had earned twelve clasps for his medal—was ordered to make a rapid march to support them. At Budiwal, the enemy prepared to ambush the British forces by heavily entrenching the sand-hills and the villages. However, Sir Harry Smith, unwilling to risk his weary and footsore troops, chose to execute a flank maneuver to the right, even though that meant exposing his men to intense fire from the forty cannons targeting his columns. The British forces endured this challenging situation with impressive discipline, but they faced heavier losses (this occurred on January 21st, 1846) than those later experienced at Aliwal.
Colonel Godby, who commanded the garrison, on observing the approach of the British force, moved out from Loodiana and joined the relieving force. General Wheeler's brigade also arrived, and on January 28th the battle of Aliwal was fought. About 10,000 men against 20,000 with 68 guns, Sir Harry Smith boldly advanced upon the Sikh position held by the flower of that fine army. The British cavalry drove the Sikh horsemen on their own infantry, and captured several guns, while the British infantry made terrible havoc with the bayonet. The battle commenced at 10 a.m., and by 1 o'clock the Sikh army was flying in disorder, the whole of their artillery being left in possession of the victors. In this action the British losses were 151 killed, 413 wounded, and 25 missing. The 16th Lancers, who had greatly distinguished themselves, lost 8 officers and 100 men. Colonel Robertson, who was present with the 31st, records a "magnificent charge of the 16th Lancers, who rode right through one of the[Pg 116] enemy's squares. As they (the Lancers) came round our right flank a regiment of sepoys, our own men, opened fire upon them!" The gallant Colonel, however, at the risk of his life, ran along the line knocking up their muskets with his sword as he shouted in Hindustani, "Our men, our own men!"
Colonel Godby, who was in charge of the garrison, saw the British forces approaching and moved out from Loodiana to join the reinforcements. General Wheeler's brigade also showed up, and on January 28th, the battle of Aliwal took place. About 10,000 British soldiers faced 20,000 Sikhs supported by 68 guns. Sir Harry Smith confidently advanced on the Sikh positions held by the elite of their army. The British cavalry charged the Sikh horsemen, pushing them back into their own infantry and capturing several artillery pieces, while the British infantry caused severe damage with their bayonets. The battle started at 10 a.m., and by 1 p.m., the Sikh army was retreating in disarray, abandoning all their artillery to the victors. The British suffered 151 killed, 413 wounded, and 25 missing. The 16th Lancers, who performed exceptionally well, lost 8 officers and 100 men. Colonel Robertson, who was with the 31st, noted a "magnificent charge of the 16th Lancers, who charged right through one of the[Pg 116] enemy's squares. As they (the Lancers) moved around our right flank, a regiment of sepoys, our own troops, started firing at them!" The brave Colonel, at great personal risk, ran along the line, pushing their muskets aside with his sword while shouting in Hindustani, "Our men, our own men!"
The following regiments were engaged at Aliwal: H.M.'s 31st, 50th, and 53rd Foot and 16th Lancers. The H.E.I. Co.'s troops were the 1st and 2nd Goorkas, 30th, 36th, 47th, and 48th Bengal Native Infantry and a wing of the 24th; 1st, 3rd, and 5th Bengal Light Cavalry; 4th Irregular Cavalry and the Bodyguard; Bengal Horse and Foot Artillery; Bengal Sappers and Miners.
The following regiments were involved at Aliwal: H.M.'s 31st, 50th, and 53rd Foot and 16th Lancers. The H.E.I. Co.'s troops included the 1st and 2nd Goorkas, 30th, 36th, 47th, and 48th Bengal Native Infantry, and a wing of the 24th; 1st, 3rd, and 5th Bengal Light Cavalry; 4th Irregular Cavalry and the Bodyguard; Bengal Horse and Foot Artillery; Bengal Sappers and Miners.
Sobraon.—The completeness of the victory at Aliwal did not utterly dispirit the Sikhs, for they made a bold stand at Sobraon, where, on February 10th, they desperately disputed the day with the army composed of the combined forces of Sir Hugh Gough and Sir Harry Smith. The Sikhs held their 3,500 yards of entrenchments, shielding 70 guns, with 34,000 men, while on the other bank of the Sutlej 20,000 more were ready for battle. Sir Hugh Gough's army of 16,224 men—6,533 Europeans and 9,691 native troops—prepared for battle at sunrise, when the British batteries opened fire, but with little effect upon the enemy's guns in the strong redoubts. At 9 o'clock the European infantry advanced to attack, and then, without firing a shot, under a galling fire rushed upon the Sikhs, while the cavalry, passing in single files through the gaps in the entrenchments made by the sappers, re-formed and sabred the stubborn Sikh artillerymen at their posts. Those who fled were drowned in thousands in the waters of the Sutlej, which was red in places with the blood of men and horses, and the fine army of Sikhs (Khalsas) melted away, after leaving about 8,000 on the field of battle. No longer was there any doubt as to the determination of the British to maintain their prestige and possessions, and the haughty chieftains sought peace[Pg 117] from their conquerors. The youthful Maharajah Dhuleep Singh was, however, compelled to treat in person. As a result the victors occupied the rich district between the Sutlej and the Beeas, and he was allowed to nominally rule the Punjab until the war indemnity of £1,500,000 was paid. It was a dear victory for the British: the 10th lost 3 officers and 130 men; the 29th Regiment lost 13 officers and 135 men; the 31st, 7 officers and 147 men, two of the officers—Ensign Tritton and Jones—being killed while bearing the regimental colours, which were ultimately planted on the highest point of the enemy's entrenchments by Sergeant Bernard McCabe, who as Captain McCabe was mortally wounded when leading a fourth sortie from Lucknow on October 1st, 1857. The 50th lost 12 officers and 227 men. Generals McLaren and Cyril Taylor were among the dead, also Major-General Sir Robert Dick, who gained considerable fame as leader of the 42nd Highlanders during the Peninsular War and at Waterloo, and who fell at the moment of victory.
Sobraon.—The total victory at Aliwal didn’t completely demoralize the Sikhs, as they made a strong stand at Sobraon, where, on February 10th, they fiercely contested the day against the combined forces of Sir Hugh Gough and Sir Harry Smith. The Sikhs held their 3,500 yards of fortifications, protecting 70 guns with 34,000 men, while another 20,000 were ready for battle on the opposite bank of the Sutlej. Sir Hugh Gough's army, consisting of 16,224 soldiers—6,533 Europeans and 9,691 native troops—readied for battle at sunrise when the British artillery opened fire, but with little impact on the enemy's strong defenses. At 9 o'clock, the European infantry moved forward to attack, and then, without firing a shot, charged at the Sikhs under intense enemy fire, while the cavalry slipped through the gaps in the defenses created by the sappers, regrouped, and confronted the determined Sikh artillerymen at their positions. Those who fled drowned by the thousands in the Sutlej, which ran red in places with the blood of men and horses, and the formidable Sikh (Khalsa) force diminished, leaving around 8,000 on the battlefield. There was no longer any doubt about the British resolve to uphold their prestige and possessions, and the proud chieftains sought peace[Pg 117] from their conquerors. The young Maharajah Dhuleep Singh was forced to negotiate in person. Consequently, the victors took control of the wealthy district between the Sutlej and the Beeas, and he was allowed to nominally govern the Punjab until the war indemnity of £1,500,000 was paid. It was an expensive victory for the British: the 10th lost 3 officers and 130 men; the 29th Regiment lost 13 officers and 135 men; the 31st, 7 officers and 147 men, two of whom—Ensign Tritton and Jones—were killed while carrying the regimental colors, which were ultimately planted on the highest point of the enemy’s defenses by Sergeant Bernard McCabe, who, as Captain McCabe, was mortally wounded leading a fourth sortie from Lucknow on October 1st, 1857. The 50th lost 12 officers and 227 men. Generals McLaren and Cyril Taylor were among the deceased, along with Major-General Sir Robert Dick, who was well-known as the leader of the 42nd Highlanders during the Peninsular War and at Waterloo, and who fell at the moment of victory.
The regiments engaged at Sobraon were: H.M.'s 9th, 10th, 29th, 31st, 50th, 53rd, and 62nd Infantry Regiments; 3rd Light Dragoons; 9th and 16th Lancers; 1st Bengal Europeans; 1st and 2nd Goorkas; 1 company 12th, 16th, wing of 24th, 26th, 33rd, some of the 38th, 41st, 42nd, 43rd, 47th, 59th, 63rd, and 68th Bengal Native Infantry; with the 45th and 59th in reserve; 3rd, 4th, and 5th Bengal Light Cavalry; 2nd, 8th, and 9th Irregular Cavalry; 10 troops of Horse Artillery; 11 companies Foot Artillery. The 73rd Bengal Native Infantry stationed at Rhodawalla also received the medal. It should be noted that the record of regiments engaged does not necessarily represent all the units taking part. Details and drafts from various corps were often present through one cause or another, or by accident. This should be borne in mind whenever a medal comes under notice. The medal rolls will generally assist, but there have been instances, and very serious ones for the collector, where the want[Pg 118] of accuracy in a medal roll has cost him very dearly. Dr. Payne gives an instance of this on page 74 of "British and Foreign Orders, War Medals and Decorations," a bar for Corygaum being on a medal awarded to a man of the 65th Foot, as well as the bar for Poona. The first-named bar made the medal one of the rarest of the series issued to a British soldier, but the medal roll led Dr. Payne to think it a fraud, which later evidence demonstrated was not the case.
The regiments involved at Sobraon included: H.M.'s 9th, 10th, 29th, 31st, 50th, 53rd, and 62nd Infantry Regiments; 3rd Light Dragoons; 9th and 16th Lancers; 1st Bengal Europeans; 1st and 2nd Gurkhas; 1 company each from the 12th, 16th, along with units from the 24th, 26th, 33rd, and some from the 38th, 41st, 42nd, 43rd, 47th, 59th, 63rd, and 68th Bengal Native Infantry; with the 45th and 59th in reserve; 3rd, 4th, and 5th Bengal Light Cavalry; 2nd, 8th, and 9th Irregular Cavalry; 10 troops of Horse Artillery; and 11 companies of Foot Artillery. The 73rd Bengal Native Infantry based at Rhodawalla also received the medal. It’s important to note that the list of engaged regiments doesn’t necessarily reflect all the units involved. Details and contingents from various corps often participated for various reasons or by chance. This should be kept in mind whenever a medal is referenced. The medal rolls can generally provide assistance, but there have been serious cases for collectors where inaccuracies in a medal roll have resulted in significant losses. Dr. Payne presents an example of this on page 74 of "British and Foreign Orders, War Medals and Decorations," where a bar for Corygaum was included on a medal awarded to a man from the 65th Foot, in addition to the bar for Poona. The first bar made the medal one of the rarest in the series issued to a British soldier, but the medal roll led Dr. Payne to suspect it was a fraud, which later evidence proved was not true.
The Sutlej Medal.—The first, or Sutlej medal, 1¼ in. in diameter, bearing the legend "ARMY OF THE SUTLEJ," was given with three bars for four battles; that is to say, that those who fought through all the battles had their record on the medal and three bars. A soldier taking part in the battle of MOODKEE would have the name impressed in raised letters, with the date, 1845, in the exergue of the medal, and the succeeding battles on the bars, as in the illustration facing page 112, of a medal awarded to a man of the 31st Royal East Surrey Regiment—this and the 50th Royal West Kent Regiment being the only two British regiments to receive the three bars, for FEROZESHUHUR, ALIWAL, and for SOBRAON, the battle which determined the first campaign. This was the first Indian medal issued with bars. The ribbon is dark blue, edged with dark crimson. The medal, with W. WYON, R.A., on the truncation of the Queen's head and W.W. above the left-hand corner of the exergue, is generally considered a good one, and certainly it does stand out among the many issued during the reign of Queen Victoria as symbolic and suited for its purpose. The names of the recipients are impressed in Roman capitals on the edges. The medal is attached to the ribbon by means of a scroll bar fixed to the medal by a claw clip acting on a swivel, so that the medal may be turned about when fixed on the breast.
The Sutlej Medal.—The first, or Sutlej medal, 1¼ in. in diameter, features the inscription "ARMY OF THE SATLUJ." It was awarded with three bars for four battles; this means that those who fought in all the battles had their record on the medal along with three bars. A soldier participating in the battle of MOODKEE would have the name engraved in raised letters, with the date, 1845, at the bottom of the medal, and the subsequent battles listed on the bars, as shown in the illustration on page 112, of a medal given to a soldier of the 31st Royal East Surrey Regiment—this and the 50th Royal West Kent Regiment being the only two British regiments to receive the three bars for FEROZESHUHUR, ALIWAL, and for SOBRAON, the battle that decided the first campaign. This was the first Indian medal issued with bars. The ribbon is dark blue, edged with dark crimson. The medal features W. WYON, R.A. on the bottom of the Queen's head and W.W. in the left-hand corner of the bottom section, and is generally regarded as a quality medal. It certainly stands out among the multiple awards issued during Queen Victoria's reign for being symbolic and fitting for its purpose. The names of the recipients are engraved in Roman capitals along the edges. The medal is attached to the ribbon using a scroll bar fixed to the medal by a claw clip that acts on a swivel, allowing the medal to be rotated when worn on the chest.
SECOND PUNJAB CAMPAIGN
This originated in a murderous assault made upon the British officials accompanying the Sirdar Khan Singh, who was deputed to take over the charge of the fortress of Mooltan (Multan) and province from the native Governor Dewan Moolraj, who had resigned. On arriving at the gate of the fortress the officers and their escort were attacked and killed by some of the Governor's men. A punitive force, including a body of 1,400 Sikhs, was consequently sent to punish the city, but the Sikhs went over to the rebels, and it was found necessary to send a strong force to reduce the mutineers who had been excited by Moolraj. Mooltan, a city three miles in circumference, is of considerable antiquity; it was taken by Alexander the Great, and at the beginning of the eleventh century by Mahmud of Ghazni, and by Tamerlane at the end of the fourteenth century; besieged by Ranjit Singh in 1810, he was bought off by the Afghan Governor, but it fell in 1818, and was annexed to the Punjab.
This started with a violent attack on the British officials who were with Sirdar Khan Singh, who was assigned to take control of the fortress of Mooltan (Multan) and the province from the native Governor Dewan Moolraj, who had stepped down. When they reached the fortress gate, the officers and their escort were ambushed and killed by some of the Governor's men. As a result, a punitive force that included 1,400 Sikhs was sent to retaliate against the city, but the Sikhs joined the rebels, making it necessary to send a stronger force to deal with the mutineers incited by Moolraj. Mooltan, a city with a circumference of three miles, has a long history; it was captured by Alexander the Great, then by Mahmud of Ghazni in the early eleventh century, and by Tamerlane at the end of the fourteenth century. It was besieged by Ranjit Singh in 1810, but he was persuaded to withdraw by the Afghan Governor; it ultimately fell in 1818 and was annexed to the Punjab.
General Whish marched upon the city from Lahore with a force which included H.M.'s 10th and 32nd Regiments, and concentrated at Mooltan in the middle of August; but he had realised, after the desertion of 5,000 Sikhs under Sheer Ali, that it was fruitless to maintain the siege, and therefore raised it on September 15th. Lieutenant Edwardes, however, had by superhuman energy and indomitable pluck raised a force of Sikhs and Mahommedans, which was of the greatest possible assistance in holding Moolraj and his army of about 8,800 infantry and 1,200 cavalry, with 54 guns, in check, twice defeating him in battle at Kineyree and Suddoosam.
General Whish marched toward the city from Lahore with a force that included H.M.'s 10th and 32nd Regiments, concentrating at Mooltan in mid-August. However, he realized, after the desertion of 5,000 Sikhs under Sheer Ali, that it was pointless to continue the siege, and he therefore lifted it on September 15th. Lieutenant Edwardes, however, through extraordinary effort and determination, managed to assemble a force of Sikhs and Muslims, which was incredibly helpful in keeping Moolraj and his army of about 8,800 infantry and 1,200 cavalry, along with 54 guns, in check, defeating him twice in battles at Kineyree and Suddoosam.
Edwardes's Medal.—For his splendid services the H.E.I. Co. presented him with a gold medal designed by W. Wyon, R.A., bearing on the obverse the bust of Her Majesty Queen Victoria, and on the reverse,[Pg 120] resting upon a lotus flower, the figures of Valour and Victory, crowning the arms of Major (afterwards Sir Herbert) Edwardes; beneath, in allusion to the youthfulness of the hero, the infant Hercules strangling serpents. Within the border is the inscription, FROM THE EAST INDIA COMPANY TO LIEUTENANT AND BREVET-MAJOR H. B. EDWARDES, C.B., FOR HIS SERVICES IN THE PUNJAB A.D. MDCCCXLVIII.
Edwardes's Medal.—For his outstanding services, the H.E.I. Co. awarded him a gold medal designed by W. Wyon, R.A. The front features the bust of Her Majesty Queen Victoria, and on the back, [Pg 120], resting on a lotus flower, are the figures of Valour and Victory, crowning the arms of Major (later Sir Herbert) Edwardes; underneath, symbolizing the hero's youth, is the infant Hercules strangling serpents. The inscription around the border reads, FROM THE EAST INDIA COMPANY TO LIEUTENANT AND BREVET-MAJOR H. B. EDWARDES, C.B., FOR HIS SERVICES IN THE PUNJAB A.D. 1848.
Where "El Chico Blanco" fell.—While Whish and Edwardes had been holding the ground, Lord Gough assembled an army at Ferozepore, and marching into the Punjab met the rebels at Ramnuggur on the banks of the Chenab on November 28th, 1848, where after a determined battle the enemy drew off beaten. It was here Lieutenant-Colonel William Havelock, K.H., "El Chico Blanco," the fair-haired and gallant boy-leader of the Peninsular War, was killed while leading the 14th Dragoons in the cavalry charge. Colonel Havelock was brother to Sir Henry Havelock, and his six-bar Peninsular medal is in the great collection of my friend Dr. A. A. Payne, of Sheffield. Brigadier-General Cureton, C.B., the commander of the cavalry division, also fell. The brilliant charges made by the 13th and 14th Light Dragoons, and the 5th and 8th Light Cavalry, against the great bodies of hostile horsemen numbering nearly 4,000, called forth special mention in general orders. Various minor engagements were fought while Major-General Whish renewed the siege of Mooltan, which lasted twenty-five days, during which time a shell from one of the British mortar batteries struck the "Jumma Musjid," or Great Mosque, while another blew up a powder-magazine with 400,000 lb. of powder, when, states Colonel Maude, "as if by mutual consent the firing on both sides ceased a while, every one gazing upwards with silent awe and wonder! Then from the British camp arose one long burst of triumph, which was speedily answered by a furious cannonade from our courageous and still unsubdued enemy." Two breaches had been made in the walls by January 1st, 1849, one at the Delhi Gate and one near the "Khonee Boorj," or Bloody Bastion; this the Bombay European Fusiliers, the 4th Rifles, and the 19th Native Infantry were told off to storm, but the "Old Toughs," as the Fusiliers were called, had to make three desperate attempts before they and their comrades could gain the summit. Meanwhile the 32nd, with two Bengal regiments in support, had been ordered to storm the Delhi Gate; but their efforts were unsuccessful owing to the imperfect breaching, and they entered the city by the "Khonee Boorj." So Mooltan was won, but no rest was obtained until the troops reached the Soharee Gate, after fighting through the streets of the blood-stained city, in the siege of which the British force lost 1,200 in killed and wounded.
Where "El Chico Blanco" fell.—While Whish and Edwardes held the ground, Lord Gough gathered an army at Ferozepore and marched into Punjab, meeting the rebels at Ramnuggur on the banks of the Chenab on November 28th, 1848. After a fierce battle, the enemy retreated, defeated. It was here that Lieutenant-Colonel William Havelock, K.H., known as "El Chico Blanco," the brave and fair-haired boy-leader of the Peninsular War, was killed while leading the 14th Dragoons in a cavalry charge. Colonel Havelock was the brother of Sir Henry Havelock, and his six-bar Peninsular medal is part of my friend Dr. A. A. Payne's great collection in Sheffield. Brigadier-General Cureton, C.B., the commander of the cavalry division, also fell. The impressive charges made by the 13th and 14th Light Dragoons, along with the 5th and 8th Light Cavalry, against the large groups of hostile horsemen, nearly 4,000 strong, earned special mention in general orders. Several minor engagements occurred as Major-General Whish resumed the siege of Mooltan, which lasted twenty-five days. During this time, a shell from one of the British mortar batteries hit the "Jumma Musjid," or Great Mosque, while another exploded a powder magazine containing 400,000 pounds of powder. Colonel Maude noted that "as if by mutual consent, the firing on both sides ceased for a while, with everyone staring upwards in silent awe and wonder! Then, from the British camp, a long cheer of triumph rang out, quickly answered by a fierce cannonade from our brave and still unconquered enemy." By January 1st, 1849, two breaches had been made in the walls, one at the Delhi Gate and another near the "Khonee Boorj," or Bloody Bastion; the Bombay European Fusiliers, the 4th Rifles, and the 19th Native Infantry were assigned to storm it. However, the "Old Toughs," as the Fusiliers were called, had to make three desperate attempts before they and their comrades could reach the top. Meanwhile, the 32nd, with support from two Bengal regiments, was ordered to storm the Delhi Gate, but their efforts failed due to the inadequate breaching, and they entered the city through the "Khonee Boorj." Mooltan was captured, but there was no rest for the troops until they reached the Soharee Gate, having fought through the streets of the blood-soaked city, where the British forces sustained 1,200 casualties in killed and wounded.

FIRST INDIA GENERAL SERVICE MEDAL.
First India General Service Medal.
Issued for Second Burmese War, 1854.
Issued for the Second Burmese War, 1854.

MEDAL FOR SOUTH AFRICA, 1853.
South Africa Medal, 1853.
Awarded to Lieutenant-General A. C. Cavendish Bentinck.
Awarded to Lieutenant General A. C. Cavendish Bentinck.

(Obverse.)
(Front.)
INDIA GENERAL SERVICE MEDAL.
India General Service Medal.
With bar for Persia, 1856-7.
With bar for Iran, 1856-7.
The British regiments which took part in the siege were the 10th, 32nd, and 1st Batt. 60th Rifles (only 100 of this regiment received the single bar for Mooltan, and fakers frequently remove the Goojerat bar from a medal in order to enhance its value); likewise a Naval Brigade (Indus Flotilla) of about 100 men; 1st (Royal) Bombay Fusiliers; 3rd, 4th, 9th, and 19th Bombay Native Infantry; 8th, 49th, 51st, 52nd, and 72nd Native Infantry; Bengal and Bombay Sappers and Miners; 1st and 2nd Scinde; Irregular Horse and 1st and 11th Bengal Light Cavalry; and 7th, 11th Irregular Cavalry with a detachment of the 14th. Likewise a detachment of Guides and Horse and Foot Artillery.
The British regiments that were involved in the siege included the 10th, 32nd, and 1st Batt. 60th Rifles (only 100 members of this regiment received the single bar for Mooltan, and counterfeiters often remove the Goojerat bar from a medal to increase its value); also, a Naval Brigade (Indus Flotilla) of about 100 men; 1st (Royal) Bombay Fusiliers; 3rd, 4th, 9th, and 19th Bombay Native Infantry; 8th, 49th, 51st, 52nd, and 72nd Native Infantry; Bengal and Bombay Sappers and Miners; 1st and 2nd Scinde; Irregular Horse and 1st and 11th Bengal Light Cavalry; and the 7th, 11th Irregular Cavalry with a detachment of the 14th. There was also a detachment of Guides and both Horse and Foot Artillery.
Chilianwala.—After the fall of Mooltan, Major-General Whish, with the 10th, 32nd, and the 60th Rifles, proceeded to join Gough's army, and was in time to take part in the final battle of Goojerat. The sanguinary battle of Chilianwala was fought on January 13th, 1849, and although described by Sir Henry Havelock as "the most sanguinary, and the nearest approximation to a defeat," it was not at first decided to issue a bar for the engagement. It was not an officers' battle; all the more reason, therefore, that the bar should be given to the soldiers "whose dauntless valour rectifies[Pg 122] the errors of its commanders," for, as the Calcutta Review rightly affirmed, the soldiery "redeemed their errors with its blood," the unfortunate 24th, which advanced on the Sikh guns with unloaded muskets, losing no less than 14 officers and 241 men killed in the action, and 10 officers and 253 men wounded, besides losing one of their colours which was left on the field, but four others shared the same fate when after this confused battle Lord Gough drew his men off a mile in order to find water. The total loss of the British was 38 officers and 564 men killed, 94 officers and 1,557 men wounded, and 104 missing. The Sikhs, who "fought like devils," lost about 3,000 killed and 4,000 wounded.
Chilianwala.—After the fall of Mooltan, Major-General Whish, along with the 10th, 32nd, and 60th Rifles, moved to join Gough's army and arrived in time for the final battle of Goojerat. The bloody battle of Chilianwala took place on January 13th, 1849, and although Sir Henry Havelock described it as "the most bloody, and the closest to a defeat," it was initially decided not to issue a bar for the engagement. It wasn't a battle fought by officers; therefore, it made even more sense for the bar to be awarded to the soldiers "whose fearless bravery corrects the mistakes of their commanders," because, as the Calcutta Review rightly stated, the troops "redeemed their mistakes with their blood." The unfortunate 24th regiment advanced on the Sikh guns with unloaded muskets, suffering no less than 14 officers and 241 men killed, along with 10 officers and 253 men wounded, and they lost one of their colors left on the field, while four others faced the same fate when Lord Gough pulled his men back a mile to find water after this chaotic battle. The total British loss was 38 officers and 564 men killed, 94 officers and 1,557 men wounded, and 104 missing. The Sikhs, who "fought like devils," lost about 3,000 killed and 4,000 wounded.
The following British regiments took part: 24th, 29th (whose "undaunted bravery" was placed on record), 61st Foot; 3rd, 9th, and 14th Light Dragoons; Bengal Horse and Foot Artillery; the 2nd Bengal Fusiliers; 15th, 20th, 25th, 30th, 31st, 36th, 45th, 46th, 56th, and 69th Bengal Native Infantry; 1st, 5th, 6th, and 8th Bengal Light Cavalry; 3rd and 9th Irregular Cavalry and Bengal Pioneers.
The following British regiments participated: 24th, 29th (whose "undaunted bravery" was noted), 61st Foot; 3rd, 9th, and 14th Light Dragoons; Bengal Horse and Foot Artillery; the 2nd Bengal Fusiliers; 15th, 20th, 25th, 30th, 31st, 36th, 45th, 46th, 56th, and 69th Bengal Native Infantry; 1st, 5th, 6th, and 8th Bengal Light Cavalry; 3rd and 9th Irregular Cavalry and Bengal Pioneers.
Goojerat.—The last battle of the campaign was fought at Goojerat (Gujerat) on February 21st, 1849. Hitherto the Sikhs had proudly attacked; in this instance they acted upon the defensive under Sheer Singh, who commanded a force of 34,000 Sikhs, with 59 guns, and about 1,500 Afghans under the command of a son of the Ameer. In this battle the British General was superior in artillery, having 97 guns, but only 24,000 men. In advancing upon the Sikh position, Gough, as usual, intended sending his infantry forward before the artillery had done its work. Colonel Robertson alleges that, "Sir Hugh Gough's simple strategy was to put the strongest regiment into the hottest place, and no attempt was made to outflank or turn a position, which must account for the heavy list of casualties." However, on this occasion, Malleson states his staff induced the veteran to mount the top story[Pg 123] of an isolated building which commanded a complete view of the battlefield, and then quietly removed the ladder, and only replaced it when the artillery had done its work. Then this indomitable army went for the well-served Sikh guns, and put the enemy to rout, leaving the cavalry to pursue them for twelve miles. The power of the Sikhs was broken, the Punjab became a possession of the British Crown, and the Maharajah Dhuleep Singh granted a pension. The Sikh losses were terrific, but only 29 officers and 671 men of the British force were placed hors de combat.
Goojerat.—The final battle of the campaign took place at Goojerat (Gujerat) on February 21, 1849. Until this point, the Sikhs had boldly attacked, but in this instance, they defended their position under Sheer Singh, who led a force of 34,000 Sikhs with 59 guns, alongside about 1,500 Afghans commanded by a son of the Ameer. The British General had an advantage in artillery, with 97 guns, but only 24,000 men. As he moved toward the Sikh position, Gough, as usual, planned to send his infantry forward before the artillery had completed its job. Colonel Robertson states that "Sir Hugh Gough's straightforward strategy was to put the strongest regiment into the most challenging spot, with no attempts made to outflank or turn the position, which likely explains the large number of casualties." However, on this occasion, Malleson claims that his staff encouraged the veteran to climb to the top of an isolated building that offered a complete view of the battlefield, and then quietly took away the ladder, replacing it only after the artillery had done its work. Then, this relentless army charged towards the well-positioned Sikh guns, sending the enemy fleeing, while the cavalry pursued them for twelve miles. The power of the Sikhs was shattered, the Punjab became a territory of the British Crown, and Maharajah Dhuleep Singh was granted a pension. The Sikh losses were staggering, but only 29 officers and 671 men from the British force were rendered hors de combat.
The following regiments were represented at Goojerat: 10th, 24th, 29th, 32nd, 53rd (which arrived in the evening), 60th, and 1st Batt. 61st Foot; 3rd Light Dragoons, 9th Lancers, and 14th Light Dragoons; 1st Bombay Europeans; 1st and 2nd Bengal Europeans; 3rd, 8th, 13th, 15th, 19th, 20th, 25th, 31st, 36th, 45th, 46th, 51st, 52nd, 56th, 69th, 70th, 72nd Bengal Native Infantry; 19th Bombay Infantry; 1st, 5th, 6th, and 8th Bengal Light Cavalry; 3rd, 9th, 11th, and 14th Irregular Cavalry, and Scinde Horse; 4 field batteries of Bombay Artillery, and 9 troops of Horse Artillery; 2 companies of Bengal Sappers and Miners, 6 companies of Bengal Pioneers, and 1st Company of Bombay Pioneers. A Brigade of Seamen from the Indian Navy which accompanied the Bombay column were awarded the medal.
The following regiments were present at Goojerat: 10th, 24th, 29th, 32nd, 53rd (which arrived in the evening), 60th, and 1st Batt. 61st Foot; 3rd Light Dragoons, 9th Lancers, and 14th Light Dragoons; 1st Bombay Europeans; 1st and 2nd Bengal Europeans; 3rd, 8th, 13th, 15th, 19th, 20th, 25th, 31st, 36th, 45th, 46th, 51st, 52nd, 56th, 69th, 70th, 72nd Bengal Native Infantry; 19th Bombay Infantry; 1st, 5th, 6th, and 8th Bengal Light Cavalry; 3rd, 9th, 11th, and 14th Irregular Cavalry, and Scinde Horse; 4 field batteries of Bombay Artillery, and 9 troops of Horse Artillery; 2 companies of Bengal Sappers and Miners, 6 companies of Bengal Pioneers, and 1st Company of Bombay Pioneers. A Brigade of Seamen from the Indian Navy that accompanied the Bombay column were awarded the medal.
The Punjab Medal.—The obverse bears the diademed head of Queen Victoria by Wyon, and the legend VICTORIA REGINA, and the reverse Sikh chiefs laying down their arms before a victorious British General seated on horseback in the front of his troops, who are drawn up in line with colours flying. In the background are palm trees, and above TO THE ARMY OF THE PUNJAB. In the exergue is the date MDCCCXLIX. The medal is 1⅖ in. in diameter, and has the names of the recipients impressed on the edge in Roman capital letters. The clasps for suspension, and the bars, are similar to those on the Sutlej medal; the ribbon is[Pg 124] 1¾ in. wide, and of dark blue with bright-yellow stripes at the side.
The Punjab Medal.—The front features the crowned head of Queen Victoria designed by Wyon, along with the inscription QUEEN VICTORIA. On the back, Sikh leaders are surrendering their weapons to a victorious British General on horseback, positioned in front of his troops, who are lined up with flags waving. In the background, there are palm trees, and above it reads TO THE ARMY OF THE PUNJAB. The date 1849 is at the bottom. The medal has a diameter of 1⅖ inches and includes the names of the recipients stamped on the edge in Roman capital letters. The suspension clasps and bars are similar to those on the Sutlej medal; the ribbon is [Pg 124] 1¾ inches wide, dark blue with bright yellow stripes on the sides.
FIRST NEW ZEALAND WAR
During this time trouble had arisen in the distant colony of New Zealand, the sovereignty of which had been ceded to Britain in 1840, a year after the first settlers had established themselves. The trouble arose mainly owing to the occupation of tribal land, although other causes were alleged. The first outbreak took place in July 1844, when a police magistrate and a number of settlers were killed, and a powerful chief, Hone Heke, tore down the British flag at Kororareka—in the north islands—took possession of the township and plundered it. H.M.S. "Hazard," with a detachment of the 95th, was sent to quell the disturbance and guard the place, but so persistent and successful was Heke in his attacks that it was deemed advisable, in March 1845, to abandon the settlement and embark the inhabitants for Auckland. On the arrival of reinforcements from Sydney, the Union Jack was again hoisted, and martial law proclaimed. A force consisting of the 58th Regiment, a detachment of the 96th, Seamen and Marines from the "Hazard" and "North Star," and a number of natives under Colonel Hulme of the 96th Regiment, then proceeded to Okaihau, where Heke had built a Pah or fortification. Although only 18 miles inland, the troops were four days in reaching their goal, and then the place was found impregnable, and as no artillery accompanied the expedition, it was forced to return, having lost 14 killed and 39 wounded. The expedition being strengthened by reinforcements, another attempt was made to try conclusions with Heke, who had entrenched himself at Oheawai. The 58th Regiment, with detachments of the 96th and 99th, a number of volunteers from Auckland, and 30 men from the "Hazard," in all 630 men with 250 natives and 4 guns, under the command of Colonel Despard, appeared before Oheawai on June 23rd; the guns, how[Pg 125]ever, proved useless for the work, but breaches were made with a 32-pounder brought up by the commander of the "Hazard." On July 1st an assault was made by 200 soldiers and seamen, but half the stormers were killed or wounded, and they were compelled to retire. They consequently sat down in front of the stockades, and when preparing to make another assault, on July 10th, they discovered that the enemy had evacuated their Pah. In November 1845 more active measures were taken by the newly appointed Governor, Captain (afterwards Sir George) Grey. A force of about 1,170 soldiers, volunteers, and seamen, with 450 natives, 4 guns, and rocket tubes, were sent against the chiefs Heke and Kawiti. While a friendly Maori chief, Macquarrie, kept Heke engaged at Ikorangi, the main force attacked the Pah at Ruapekapeka held by Kawiti, which after withstanding a siege from December 31st until January 10th, 1846, was practically abandoned by the Maoris, and then taken with a loss of 13 men killed and 30 wounded. The chiefs were pardoned, and the war in the North Island ended. Meanwhile trouble had been brewing in the South Island, which was brought to a head by an attack in May 1847 on a party of the 58th Regiment. A reprisal was made by the British attacking the stockade of Rangihaeata, and dispersing the natives, 600 of whom, however, on May 19th made an attack on the Wanganui settlement, and maintained it for several hours until night fell, when they retired. The place was held by 170 of the 58th, assisted by a gunboat. Early in June an attack was made on a detachment of the 65th; but following a sortie from the block-houses, held by the 58th, the Maori chiefs sued for peace.
During this time, issues had arisen in the distant colony of New Zealand, which had been handed over to Britain in 1840, a year after the first settlers had established themselves. The troubles primarily stemmed from the occupation of tribal land, though other reasons were also claimed. The first outbreak happened in July 1844 when a police magistrate and several settlers were killed, and a powerful chief, Hone Heke, tore down the British flag at Kororareka—in the North Island—took over the town, and looted it. H.M.S. "Hazard," with a group from the 95th Regiment, was sent to restore order and protect the area, but Heke's persistent and successful attacks led to the decision in March 1845 to abandon the settlement and evacuate the residents to Auckland. When reinforcements arrived from Sydney, the Union Jack was raised again, and martial law was declared. A force made up of the 58th Regiment, a detachment from the 96th, seamen and marines from the "Hazard" and "North Star," as well as a number of natives led by Colonel Hulme of the 96th Regiment, then advanced on Okaihau, where Heke had built a Pah or fort. Even though it was only 18 miles inland, it took the troops four days to reach their destination, only to find the fort impregnable, and since no artillery was part of the expedition, they had to retreat, suffering 14 killed and 39 wounded. After receiving reinforcements, another attempt was made to confront Heke, who had fortified himself at Oheawai. On June 23rd, the 58th Regiment, along with troops from the 96th and 99th Regiments, a group of volunteers from Auckland, and 30 men from the "Hazard," totaling 630 men with 250 natives and 4 guns, under the command of Colonel Despard, arrived at Oheawai; however, the guns were ineffective, but breaches were made with a 32-pounder brought by the commander of the "Hazard." On July 1st, an assault was launched by 200 soldiers and seamen, but half of those storming the fort were killed or wounded, forcing them to fall back. They then settled in front of the stockades and, while preparing for another attack on July 10th, discovered that the enemy had evacuated their Pah. In November 1845, more decisive actions were taken by the newly appointed Governor, Captain (later Sir George) Grey. A force of about 1,170 soldiers, volunteers, and seamen, along with 450 natives, 4 guns, and rocket tubes, was sent against the chiefs Heke and Kawiti. While a friendly Maori chief, Macquarrie, kept Heke engaged at Ikorangi, the main force assaulted the Pah at Ruapekapeka held by Kawiti, which withstood a siege from December 31st until January 10th, 1846, before being almost entirely abandoned by the Maoris and then captured with a loss of 13 men killed and 30 wounded. The chiefs were pardoned, and the war in the North Island ended. Meanwhile, tensions had been escalating in the South Island, culminating in an attack in May 1847 on a group from the 58th Regiment. In retaliation, the British attacked the stockade of Rangihaeata, dispersing the natives. However, on May 19th, 600 natives launched an attack on the Wanganui settlement, sustaining it for several hours until nightfall when they withdrew. The settlement was defended by 170 soldiers from the 58th, aided by a gunboat. In early June, an attack was made on a detachment of the 65th Regiment; however, following a counter-offensive from the blockhouses held by the 58th, the Maori chiefs sought peace.
The regiments engaged were the 58th, 65th, 96th, 99th; Royal Artillery; Royal Engineers; H.E.I. Co.'s Artillery; Royal Marines, and the crews of nine of Her Majesty's ships, the names of which are recorded in the naval section. The medal for the war was not authorised until March 1869.
The regiments involved were the 58th, 65th, 96th, 99th; Royal Artillery; Royal Engineers; H.E.I. Co.'s Artillery; Royal Marines, and the crews of nine of Her Majesty's ships, which are listed in the naval section. The medal for the war wasn't approved until March 1869.
Medal for Peninsular War.—It would appear strange that although a medal was so readily awarded for Waterloo, no recognition was given to the veterans of the Peninsular, and that they should have to wait until 1847 before a medal was issued as a record of, and reward for, their services against the veteran troops of France. That they ultimately received a decoration was due to the efforts of the veteran Duke of Richmond, who, on July 21st, 1854, presented a petition in the House of Lords, "requesting their Lordships' recommendation of them to their Sovereign, that they may receive a decoration for the services they had performed." The gallant Duke urged the claims of the junior officers, non-commissioned officers, and men in simple but powerful terms, while the Duke of Wellington, who had previously refused to present a petition to King George, opposed the grant to the survivors of over sixty battalions of the army who had, as he admitted, served under him in six campaigns.
Medal for Peninsular War.—It seems odd that, while a medal was quickly given for Waterloo, no recognition was provided to the veterans of the Peninsular War, forcing them to wait until 1847 for a medal acknowledging their service against the experienced troops of France. They finally received a decoration thanks to the efforts of the veteran Duke of Richmond, who, on July 21, 1854, submitted a petition in the House of Lords, "requesting their Lordships' recommendation of them to their Sovereign, that they may receive a decoration for the services they had performed." The brave Duke advocated for the junior officers, non-commissioned officers, and men in straightforward but impactful terms, while the Duke of Wellington, who had previously declined to present a petition to King George, objected to granting awards to the survivors of over sixty battalions of the army who, as he acknowledged, had served under him in six campaigns.
He appeared, according to the record of the debate, to have thought only of the senior officers. "Have no rewards been bestowed upon these officers?" he asked. "New modes were discovered and adopted of distinguishing and rewarding the officers." Medals had been struck and distributed to 1,300 officers, special brevets were issued, and 7 officers raised to the peerage, as the Duke of Wellington pointed out; but he had no word of remembrance, no word of support for the thousands of officers and men whose only rewards had been hardship and scars. No word of commendation for the men who kept "grim Busaco's bloody ridge," and ultimately hurled the veterans of Marengo and Austerlitz into the ravine below; or for those who added laurels to Britain's fame at Fuentes d'Onor (Fountain of Honour); the Fusiliers and their brave companions in arms who fought so splendidly and so fiercely on the heights of Albuera, where the 57th—the first battalion of the Middlesex Regiment—gained their coveted nom de guerre, "Die Hards," for, as Napier states, "nothing[Pg 127] could stop that astonishing infantry," which turned the day in the bloodiest battle of the war. It was indeed a soldiers' battle, but the senior officers, as usual, received the gold medal. What a case the Duke of Richmond had if only by stating the result of this one battle, after which "1,800 unwounded men, the remnant of 6,000 unconquerable British soldiers, stood triumphant on the fatal hill." The Iron Duke must have forgotten the gallant storming of the breaches at Ciudad Rodrigo, the success of which gained for him his viscountcy; the storming of Badajoz, which caused him to weep at the cost of the victory, and Orthes, where Picton's men climbed the rough, rocky bank, and Colborne's 52nd undauntedly pressed forward knee-deep in the marshy swamp and up the hill to the victory which practically determined the Peninsular campaign.
He seemed to focus solely on the senior officers during the debate. "Haven't these officers received any rewards?" he asked. "New ways were found and implemented to recognize and reward the officers." Medals had been made and given to 1,300 officers, special rankings were issued, and 7 officers were elevated to the peerage, as the Duke of Wellington pointed out; but he didn't have any words of acknowledgment or support for the thousands of officers and men whose only rewards were the hardships they endured and their scars. There was no praise for the men who defended "grim Busaco's bloody ridge," driving the veterans of Marengo and Austerlitz into the ravine below; or for those who brought honor to Britain's name at Fuentes d'Onor (Fountain of Honor); the Fusiliers and their brave comrades who fought so valiantly on the heights of Albuera, where the 57th—the first battalion of the Middlesex Regiment—earned their well-deserved nom de guerre, "Die Hards," for, as Napier notes, "nothing[Pg 127] could stop that incredible infantry," which turned the tide in the bloodiest battle of the war. It was indeed a battle fought by soldiers, but the senior officers, as usual, received the gold medals. The Duke of Richmond would have had a strong point just by stating the outcome of this one battle, after which "1,800 unwounded men, the remnants of 6,000 unbeatable British soldiers, stood victorious on the deadly hill." The Iron Duke must have forgotten the brave assault on the breaches at Ciudad Rodrigo, which earned him his viscountcy; the assault on Badajoz, which made him weep over the cost of the victory; and Orthes, where Picton's men climbed the steep, rocky bank, and Colborne's 52nd pressed on fearlessly, knee-deep in the swamp and up the hill to the victory that essentially decided the Peninsular campaign.
In his efforts, however, to oppose and belittle the claims of the petitioners for the Peninsular medal he incidentally and unconsciously brought forward the claims of those who had fought in Egypt and on the high seas, and at the battle of the Nile and Trafalgar, from the "Glorious First of June" to the blockade of France and the Bay of Biscay during the Peninsular War. As a result, we may assume, of his arguments against the issue of what is known as the "Military General Service Medal," when the claims came to be considered it was felt that justice must also be done to the sister service, and the "Naval General Service Medal" was likewise instituted on June 1st, 1847, when by a General Order it was commanded that medals be struck and conferred upon every officer and soldier who was present at any battle or siege for which gold medals had been awarded. The medal was given to those who had taken part in the Peninsular Campaign, Egypt, Italy, North America, and in the East and West Indies; and although thirty-four years had elapsed since the last battle, Toulouse, in 1814, over 30,000 applicants made good their claims to the medal. Only six applied for fifteen bars, and of[Pg 128] these two made good their claims, Private Talbot of the 45th, and Private Loochstädt, formerly of the King's German Legion. This medal is in Lord Cheylesmore's collection.
In his attempts to dismiss and downplay the claims of those petitioning for the Peninsular medal, he inadvertently highlighted the claims of those who fought in Egypt and at sea, including battles like the Nile and Trafalgar, from the "Glorious First of June" to the blockades of France and the Bay of Biscay during the Peninsular War. As a consequence of his arguments against issuing what is now called the "Military General Service Medal," when the claims were reviewed, it was recognized that justice also needed to be served for the naval forces, leading to the creation of the "Naval General Service Medal" on June 1st, 1847. A General Order was issued stating that medals would be made and granted to every officer and soldier who was present at any battle or siege for which gold medals had been awarded. The medal was awarded to those who participated in the Peninsular Campaign, Egypt, Italy, North America, and the East and West Indies; and although thirty-four years had passed since the last battle, Toulouse, in 1814, over 30,000 applicants successfully claimed the medal. Only six applied for fifteen bars, and out of these, two were successful: Private Talbot of the 45th and Private Loochstädt, who had previously served in the King's German Legion. This medal is part of Lord Cheylesmore's collection.
The Military General Service Medal.—The medal, 1⅖ in. in diameter, bears on the obverse the diademed head of Queen Victoria, with VICTORIA REGINA on either side of the head, and the date of issue, 1848, underneath. On the reverse is depicted Queen Victoria, robed and crowned, standing on a daïs in the act of placing a laurel wreath on the head of the Duke of Wellington, who kneels on his left knee and holds his field-marshal's baton in his right hand. By the side of the daïs is the British Lion dormant; above is the inscription TO THE BRITISH ARMY, and in the exergue 1793-1814. In the left-hand corner of the exergue is the letter "w," the initial of W. Wyon, R.A., the medallist. The medal depends from a straight clasp, which is attached to the medal by a swivelled four-claw clip. The ribbon is 1¼ in. wide, of dark crimson with blue edges. The recipient's name, rank, and regiment are impressed in Roman capitals. It is noteworthy that the bars, which are 13∕10 in. by ⅒ in., are arranged in sets of three, where the number warrants, the earliest date being nearest the medal. Those awarded to the infantry are arranged 3∕40 in. apart until the number exceeds six, when they are arranged, like those issued to the cavalry, closely together.
The Military General Service Medal.—The medal, 1⅖ inches in diameter, has the crowned head of Queen Victoria on the front, with Queen Victoria on either side and the issue date, 1848, below. On the back, Queen Victoria, wearing a robe and crown, is shown standing on a platform while placing a laurel wreath on the head of the Duke of Wellington, who is kneeling on his left knee and holding his field-marshal's baton in his right hand. Next to the platform is a dormant British Lion; above is the inscription TO THE UK ARMY, and in the lower section, 1793-1814. In the lower left corner of the exergue is the letter "w," the initial of W. Wyon, R.A., the medallist. The medal hangs from a straight clasp that is attached to the medal by a swiveling four-claw clip. The ribbon is 1¼ inches wide, dark crimson with blue edges. The recipient's name, rank, and regiment are engraved in Roman capitals. It's important to note that the bars, which are 13∕10 inches by ⅒ inch, are arranged in groups of three when applicable, with the earliest date closest to the medal. Those awarded to infantry are spaced 3∕40 inches apart until the number exceeds six, at which point they are grouped closely together, similar to those given to cavalry.
The following regiments received the medal with bars—the bar for EGYPT being granted by General Order dated February 11th, 1850; and as an indication of the depletion of the ranks of those who fought in 1801, I might mention that only three officers—Hill, Beaven, and Deane—of the 18th Royal Irish Regiment were alive to receive the Military General Service Medal with the bar for Egypt.
The following regiments received the medal with bars—the bar for EGYPT was awarded by a General Order dated February 11th, 1850. To illustrate the decrease in the number of those who fought in 1801, it's worth noting that only three officers—Hill, Beaven, and Deane—from the 18th Royal Irish Regiment were still alive to receive the Military General Service Medal with the bar for Egypt.

| English Crimea. | Turkish Crimea. |
| MEDALS FOR CRIMEAN WAR. | |
Egypt, 1801.—The 2nd and 3rd Foot Guards; 1st, 2nd, 8th, 10th, 13th, 18th, 20th, 23rd, 24th, 25th, 26th, 27th, 28th, 30th, 40th, 42nd, 44th, 50th, 54th, 58th, 61st, 79th, 80th, 86th, 88th, 89th, 90th, 92nd, and 96th Foot; 11th, 12th, and 26th Light Dragoons; Hompesch's Hussars; De Rolls and Dillon's Regiments; Corsican Rangers; and the 2nd and 13th Bombay Infantry.
Egypt, 1801.—The 2nd and 3rd Foot Guards; 1st, 2nd, 8th, 10th, 13th, 18th, 20th, 23rd, 24th, 25th, 26th, 27th, 28th, 30th, 40th, 42nd, 44th, 50th, 54th, 58th, 61st, 79th, 80th, 86th, 88th, 89th, 90th, 92nd, and 96th Foot; 11th, 12th, and 26th Light Dragoons; Hompesch's Hussars; De Rolls and Dillon's Regiments; Corsican Rangers; and the 2nd and 13th Bombay Infantry.
Maida, July 4th, 1806.—20th, 27th, 35th, 58th, 61st, 78th, and 81st Foot; 20th Light Dragoons.
Maida, July 4th, 1806.—20th, 27th, 35th, 58th, 61st, 78th, and 81st Infantry; 20th Light Cavalry.
Roleia, August 17th, 1808.—5th, 6th, 9th, 29th, 32nd, 36th, 38th, 40th, 45th, 50th, 60th, 71st, 82nd, 91st, 95th, and 97th Foot; 20th Light Dragoons.
Roleia, August 17th, 1808.—5th, 6th, 9th, 29th, 32nd, 36th, 38th, 40th, 45th, 50th, 60th, 71st, 82nd, 91st, 95th, and 97th Foot; 20th Light Dragoons.
Vimiera, August 21st, 1808.—2nd, 5th, 6th, 9th, 20th, 29th, 32nd, 36th, 38th, 40th, 43rd, 45th, 50th, 52nd, 60th, 71st, 82nd, 91st, 95th, and 97th Foot; 20th Light Dragoons.
Vimiera, August 21, 1808.—2nd, 5th, 6th, 9th, 20th, 29th, 32nd, 36th, 38th, 40th, 43rd, 45th, 50th, 52nd, 60th, 71st, 82nd, 91st, 95th, and 97th Infantry; 20th Light Dragoons.
Sahagun, December 20th, 1808.—7th, 10th, 15th, and 18th Hussars; 3rd Hussars, K.G.L., and two batteries of Horse Artillery.
Sahagún, December 20th, 1808.—7th, 10th, 15th, and 18th Hussars; 3rd Hussars, K.G.L., and two batteries of Horse Artillery.
Corunna, January 16th, 1809.—1st, 2nd, 4th, 5th, 6th, 9th, 14th, 20th, 23rd, 26th, 28th, 32nd, 36th, 38th, 42nd, 43rd, 50th, 51st, 52nd, 59th, 60th, 71st, 76th, 79th, 81st, 82nd, 91st, 92nd, 95th; 1st and 3rd Batts. 1st Foot Guards; 7th, 10th, 15th, and 18th Light Dragoons; 3rd Dragoons, K.G.L.; three batteries Royal Horse Artillery; five batteries Royal Artillery; 1st and 2nd Light Battalions, K.G.L.
Corunna, January 16th, 1809.—1st, 2nd, 4th, 5th, 6th, 9th, 14th, 20th, 23rd, 26th, 28th, 32nd, 36th, 38th, 42nd, 43rd, 50th, 51st, 52nd, 59th, 60th, 71st, 76th, 79th, 81st, 82nd, 91st, 92nd, 95th; 1st and 3rd Battalions, 1st Foot Guards; 7th, 10th, 15th, and 18th Light Dragoons; 3rd Dragoons, K.G.L.; three batteries Royal Horse Artillery; five batteries Royal Artillery; 1st and 2nd Light Battalions, K.G.L.
Martinique, February 24th, 1809.—7th, 8th, 13th, 15th, 23rd, 25th, 46th, 60th, 63rd, and 90th Foot; 1st West India Regiment, and the Royal York Rangers.
Martinique, February 24th, 1809.—7th, 8th, 13th, 15th, 23rd, 25th, 46th, 60th, 63rd, and 90th Foot; 1st West India Regiment, and the Royal York Rangers.
Talavera, July 27th-28th, 1809.—2nd and 3rd Foot Guards; 2nd, 3rd, 4th, 5th, 6th, 7th, 20th, 24th, 28th, 29th, 31st, 32nd, 36th, 38th, 40th, 42nd, 43rd, 45th, 48th, 50th, 52nd, 53rd, 60th, 61st, 66th, 71st, 79th, 82nd, 83rd, 87th, 88th, 91st, 92nd, 95th, and 97th Foot; 3rd Dragoon Guards; 4th, 14th, 16th, and 23rd Light Dragoons; 1st Light Dragoons, K.G.L.; 1st and 2nd Light Battalions, K.G.L.; 1st, 2nd, 4th, 5th, and 7th Line Battalions, K.G.L.; 1st Hussars; 2nd and 4th Batteries Foot Artillery, K.G.L.
Talavera pottery, July 27th-28th, 1809.—2nd and 3rd Foot Guards; 2nd, 3rd, 4th, 5th, 6th, 7th, 20th, 24th, 28th, 29th, 31st, 32nd, 36th, 38th, 40th, 42nd, 43rd, 45th, 48th, 50th, 52nd, 53rd, 60th, 61st, 66th, 71st, 79th, 82nd, 83rd, 87th, 88th, 91st, 92nd, 95th, and 97th Foot; 3rd Dragoon Guards; 4th, 14th, 16th, and 23rd Light Dragoons; 1st Light Dragoons, K.G.L.; 1st and 2nd Light Battalions, K.G.L.; 1st, 2nd, 4th, 5th, and 7th Line Battalions, K.G.L.; 1st Hussars; 2nd and 4th Batteries Foot Artillery, K.G.L.
Guadaloupe, January to February 6th, 1810.—1st,[Pg 130] 13th, 15th, 25th, 46th, 60th, 63rd, 70th, 90th, and 96th Foot; Marine Artillery and Naval Brigade; the Light Companies of the 1st, 2nd, 3rd, 4th, and 6th West India Regiments; the 8th West India Regiment; York Light Infantry Volunteers; Royal York Rangers; Royal Artillery and Military Artificers.
Guadeloupe, January to February 6th, 1810.—1st,[Pg 130] 13th, 15th, 25th, 46th, 60th, 63rd, 70th, 90th, and 96th Foot; Marine Artillery and Naval Brigade; the Light Companies of the 1st, 2nd, 3rd, 4th, and 6th West India Regiments; the 8th West India Regiment; York Light Infantry Volunteers; Royal York Rangers; Royal Artillery and Military Artificers.
Busaco, September 27th, 1810.—1st, 3rd, 5th, 7th, 9th, 11th, 24th, 27th, 29th, 31st, 34th, 38th, 39th, 40th, 42nd, 43rd, 45th, 48th, 50th, 52nd, 53rd, 57th, 60th, 61st, 66th, 74th, 79th, 83rd, 88th, 95th, and 97th Foot; three batteries of Royal Artillery; and the 1st and 2nd Light Batts. and the 1st, 2nd, 5th, and 7th Line Batts., K.G.L.; 4th, 14th, and 16th Light Dragoons; 2nd and 3rd Foot Guards.
Busaco, September 27th, 1810.—1st, 3rd, 5th, 7th, 9th, 11th, 24th, 27th, 29th, 31st, 34th, 38th, 39th, 40th, 42nd, 43rd, 45th, 48th, 50th, 52nd, 53rd, 57th, 60th, 61st, 66th, 74th, 79th, 83rd, 88th, 95th, and 97th Foot; three batteries of Royal Artillery; and the 1st and 2nd Light Battalions and the 1st, 2nd, 5th, and 7th Line Battalions, K.G.L.; 4th, 14th, and 16th Light Dragoons; 2nd and 3rd Foot Guards.
Barrosa, March 5th, 1811.—1st, 2nd, and 3rd Foot Guards; 9th, 28th, 47th, 67th, 82nd, 87th, and 95th Foot.
Barrosa, March 5th, 1811.—1st, 2nd, and 3rd Foot Guards; 9th, 28th, 47th, 67th, 82nd, 87th, and 95th Foot.
Fuentes d'Onor, May 5th, 1811.—1st, 4th, 5th, 9th, 24th, 30th, 38th, 42nd, 43rd, 44th, 45th, 50th, 51st, 52nd, 60th, 71st, 74th, 79th, 83rd, 85th, 88th, 92nd, 94th, and 95th Foot; 1st Dragoons; 14th and 16th Light Dragoons; 1st Hussars, K.G.L.; 1st and 2nd Light Batts., K.G.L.; 1st, 2nd, 5th, and 7th Line Battalions, K.G.L.; 2nd and 3rd Foot Guards.
Fuentes d'Onor, May 5th, 1811.—1st, 4th, 5th, 9th, 24th, 30th, 38th, 42nd, 43rd, 44th, 45th, 50th, 51st, 52nd, 60th, 71st, 74th, 79th, 83rd, 85th, 88th, 92nd, 94th, and 95th Foot; 1st Dragoons; 14th and 16th Light Dragoons; 1st Hussars, K.G.L.; 1st and 2nd Light Battalions, K.G.L.; 1st, 2nd, 5th, and 7th Line Battalions, K.G.L.; 2nd and 3rd Foot Guards.
Albuera,[6] May 11th, 1811.—3rd, 7th, 23rd, 27th, 28th, 29th, 31st, 34th, 39th, 40th, 48th, 57th, 60th, 66th, and 97th Foot; 3rd Dragoon Guards; 4th and 13th Light Dragoons.
Albuera,[6] May 11th, 1811.—3rd, 7th, 23rd, 27th, 28th, 29th, 31st, 34th, 39th, 40th, 48th, 57th, 60th, 66th, and 97th Infantry; 3rd Dragoon Guards; 4th and 13th Light Dragoons.
[6] Spelt ALBUHERA on bars.
__A_TAG_PLACEHOLDER_0__ Spelled ALBUHERA on bars.
Java, August to September 18th, 1811.—14th, 59th, 69th, 78th, and 89th Foot; 22nd Light Dragoons; Indian Native Cavalry, Infantry, and Bengal Volunteers.
Java, August to September 18th, 1811.—14th, 59th, 69th, 78th, and 89th Foot; 22nd Light Dragoons; Indian Native Cavalry, Infantry, and Bengal Volunteers.
Ciudad Rodrigo, January 19th, 1812.—2nd and 3rd Foot Guards; 5th, 7th, 23rd, 24th, 30th, 40th, 42nd, 43rd, 45th, 48th, 52nd, 60th, 74th, 77th, 83rd, 88th, 94th, and 95th Foot.
Ciudad Rodrigo, January 19th, 1812.—2nd and 3rd Foot Guards; 5th, 7th, 23rd, 24th, 30th, 40th, 42nd, 43rd, 45th, 48th, 52nd, 60th, 74th, 77th, 83rd, 88th, 94th, and 95th Foot.
Badajoz, March 17th to April 6th, 1812.—2nd Foot Guards; 1st, 4th, 5th, 7th, 23rd, 27th, 30th, 38th, [Pg 131]40th, 43rd, 44th, 45th, 48th, 52nd, 60th, 74th, 77th, 83rd, 85th, 88th, 94th, and 95th Foot; 13th and 14th Light Dragoons.
Badajoz, March 17th to April 6th, 1812.—2nd Foot Guards; 1st, 4th, 5th, 7th, 23rd, 27th, 30th, 38th, [Pg 131]40th, 43rd, 44th, 45th, 48th, 52nd, 60th, 74th, 77th, 83rd, 85th, 88th, 94th, and 95th Foot; 13th and 14th Light Dragoons.
Salamanca, July 22nd, 1812.—2nd and 3rd Foot Guards; 1st, 2nd, 4th, 5th, 7th, 9th, 11th, 23rd, 24th, 27th, 30th, 32nd, 36th, 38th, 40th, 42nd, 43rd, 44th, 45th, 48th, 51st, 52nd, 53rd, 58th, 60th, 61st, 68th, 74th, 79th, 83rd, 88th, 94th, and 95th Foot; 5th Dragoon Guards; 3rd, 4th, 11th, 12th, 14th, 15th, and 16th Light Dragoons; and the following regiments of the K.G.L.: 1st Hussars; 1st and 2nd Light Battalions, 1st, 2nd, and 5th Line Battalions, and Artillery.
Salamanca, July 22, 1812.—2nd and 3rd Foot Guards; 1st, 2nd, 4th, 5th, 7th, 9th, 11th, 23rd, 24th, 27th, 30th, 32nd, 36th, 38th, 40th, 42nd, 43rd, 44th, 45th, 48th, 51st, 52nd, 53rd, 58th, 60th, 61st, 68th, 74th, 79th, 83rd, 88th, 94th, and 95th Foot; 5th Dragoon Guards; 3rd, 4th, 11th, 12th, 14th, 15th, and 16th Light Dragoons; and the following regiments of the K.G.L.: 1st Hussars; 1st and 2nd Light Battalions, 1st, 2nd, and 5th Line Battalions, and Artillery.
Vittoria, June 21st, 1813.—2nd and 3rd Foot Guards; 1st, 2nd, 4th, 5th, 6th, 7th, 9th, 20th, 23rd, 24th, 27th, 28th, 31st, 34th, 38th, 39th, 40th, 43rd, 45th, 47th, 48th, 50th, 51st, 52nd, 53rd, 57th, 58th, 59th, 60th, 66th, 68th, 71st, 74th, 82nd, 83rd, 87th, 88th, 92nd, 94th, and 95th Foot; two squadrons 1st and 2nd Life Guards and Horse Guards; 1st Dragoons; 3rd and 5th Dragoon Guards; 3rd, 4th, 10th, 11th, 12th, 13th, 14th, 16th, and 18th Light Dragoons; 15th Hussars.
Vittoria, June 21st, 1813.—2nd and 3rd Foot Guards; 1st, 2nd, 4th, 5th, 6th, 7th, 9th, 20th, 23rd, 24th, 27th, 28th, 31st, 34th, 38th, 39th, 40th, 43rd, 45th, 47th, 48th, 50th, 51st, 52nd, 53rd, 57th, 58th, 59th, 60th, 66th, 68th, 71st, 74th, 82nd, 83rd, 87th, 88th, 92nd, 94th, and 95th Foot; two squadrons of the 1st and 2nd Life Guards and Horse Guards; 1st Dragoons; 3rd and 5th Dragoon Guards; 3rd, 4th, 10th, 11th, 12th, 13th, 14th, 16th, and 18th Light Dragoons; 15th Hussars.
Pyrenees, July 28th to August 2nd, 1813.—2nd, 3rd, 5th, 6th, 7th, 11th, 20th, 23rd, 24th, 27th, 28th, 31st, 32nd, 34th, 36th, 39th, 40th, 42nd, 43rd, 45th, 48th, 50th, 51st, 52nd, 53rd, 57th, 58th, 60th, 61st, 66th, 68th, 71st, 74th, 79th, 82nd, 83rd, 87th, 88th, 91st, 92nd, 94th, and 95th Foot; 13th and 14th Light Dragoons.
Pyrenees Mountains, July 28th to August 2nd, 1813.—2nd, 3rd, 5th, 6th, 7th, 11th, 20th, 23rd, 24th, 27th, 28th, 31st, 32nd, 34th, 36th, 39th, 40th, 42nd, 43rd, 45th, 48th, 50th, 51st, 52nd, 53rd, 57th, 58th, 60th, 61st, 66th, 68th, 71st, 74th, 79th, 82nd, 83rd, 87th, 88th, 91st, 92nd, 94th, and 95th Infantry; 13th and 14th Light Dragoons.
Fort Detroit, August 16th, 1812.—Three hundred men of the 41st Foot; Newfoundland Regiment; Canadian Militia, and 600 Indians; Royal Artillery (30 men).
Fort Detroit, August 16th, 1812.—Three hundred men from the 41st Foot, Newfoundland Regiment, Canadian Militia, and 600 Native Americans; Royal Artillery (30 men).
San Sebastian, August and September 9th, 1813.—200 of the Foot Guards; 1st, 2nd, 4th, 7th, 9th, 11th, 20th, 23rd, 24th, 27th, 36th, 38th, 40th, 43rd, 47th, 48th, 51st, 52nd, 53rd, 59th, 68th, 82nd, 85th, 87th, 88th, and 95th Foot, and a Naval Brigade.
San Sebastián, August and September 9th, 1813.—200 of the Foot Guards; 1st, 2nd, 4th, 7th, 9th, 11th, 20th, 23rd, 24th, 27th, 36th, 38th, 40th, 43rd, 47th, 48th, 51st, 52nd, 53rd, 59th, 68th, 82nd, 85th, 87th, 88th, and 95th Foot, and a Naval Brigade.
Chateauguay, October 26th, 1812.—Royal Artillery;[Pg 132] Indians; Canadian Fencibles; Canadian Militia; Voltigeurs; and Chasseurs.
Chateauguay, October 26th, 1812.—Royal Artillery;[Pg 132] Indians; Canadian Fencibles; Canadian Militia; Voltigeurs; and Chasseurs.
Nivelle, November 10th, 1813.—1st, 2nd, and 3rd Foot Guards; 1st, 2nd, 3rd, 4th, 5th, 6th, 7th, 9th, 11th, 20th, 23rd, 24th, 27th, 28th, 31st, 32nd, 34th, 36th, 38th, 39th, 40th, 42nd, 43rd, 45th, 47th, 48th, 50th, 51st, 52nd, 53rd, 57th, 58th, 59th, 60th, 61st, 62nd, 66th, 68th, 71st, 74th, 76th, 79th, 82nd, 83rd, 84th, 85th, 87th, 88th, 91st, 92nd, 94th and 95th Foot; and the following regiments of the K.G.L.: 1st and 2nd Light Battalions; 1st, 2nd, and 5th Line Battalions; 12th, 13th, 14th, and 18th Light Dragoons.
Nivelle, November 10th, 1813.—1st, 2nd, and 3rd Foot Guards; 1st, 2nd, 3rd, 4th, 5th, 6th, 7th, 9th, 11th, 20th, 23rd, 24th, 27th, 28th, 31st, 32nd, 34th, 36th, 38th, 39th, 40th, 42nd, 43rd, 45th, 47th, 48th, 50th, 51st, 52nd, 53rd, 57th, 58th, 59th, 60th, 61st, 62nd, 66th, 68th, 71st, 74th, 76th, 79th, 82nd, 83rd, 84th, 85th, 87th, 88th, 91st, 92nd, 94th, and 95th Foot; and the following regiments of the K.G.L.: 1st and 2nd Light Battalions; 1st, 2nd, and 5th Line Battalions; 12th, 13th, 14th, and 18th Light Dragoons.
Chrystler's Farm, November 11th, 1813.—49th and 89th Foot; Canadian Fencibles; Canadian Militia; Indians; Voltigeurs; and Royal Artillery.
Chrysler's Farm, November 11th, 1813.—49th and 89th Foot; Canadian Fencibles; Canadian Militia; Indigenous Peoples; Voltigeurs; and Royal Artillery.
Nive, December 9th to 13th, 1813.—1st, 2nd, and 3rd Foot Guards; 1st, 2nd, 3rd, 4th, 5th, 7th, 9th, 11th, 20th, 23rd, 27th, 28th, 31st, 32nd, 34th, 36th, 38th, 39th, 40th, 42nd, 43rd, 45th, 47th, 48th, 50th, 52nd, 53rd, 57th, 59th, 60th, 61st, 62nd, 66th, 71st, 74th, 76th, 79th, 83rd, 84th, 85th, 87th, 88th, 91st, 92nd, 94th, and 95th Foot; 7th, 12th, 13th, 14th, 16th, and 18th Light Dragoons.
Nive, December 9th to 13th, 1813.—1st, 2nd, and 3rd Foot Guards; 1st, 2nd, 3rd, 4th, 5th, 7th, 9th, 11th, 20th, 23rd, 27th, 28th, 31st, 32nd, 34th, 36th, 38th, 39th, 40th, 42nd, 43rd, 45th, 47th, 48th, 50th, 52nd, 53rd, 57th, 59th, 60th, 61st, 62nd, 66th, 71st, 74th, 76th, 79th, 83rd, 84th, 85th, 87th, 88th, 91st, 92nd, 94th, and 95th Foot; 7th, 12th, 13th, 14th, 16th, and 18th Light Dragoons.
Orthes, February 17th, 1814.—2nd, 5th, 6th, 7th, 11th, 20th, 23rd, 24th, 27th, 28th, 31st, 32nd, 34th, 36th, 37th, 39th, 40th, 42nd, 45th, 48th, 50th, 51st, 52nd, 57th, 58th, 60th, 61st, 66th, 68th, 71st, 74th, 82nd, 83rd, 87th, 88th, 91st, 92nd, 94th, and 95th Foot; 3rd, 7th, 10th, 13th, 14th, 15th, and 18th Light Dragoons.
Orthes, February 17th, 1814.—2nd, 5th, 6th, 7th, 11th, 20th, 23rd, 24th, 27th, 28th, 31st, 32nd, 34th, 36th, 37th, 39th, 40th, 42nd, 45th, 48th, 50th, 51st, 52nd, 57th, 58th, 60th, 61st, 66th, 68th, 71st, 74th, 82nd, 83rd, 87th, 88th, 91st, 92nd, 94th, and 95th Foot; 3rd, 7th, 10th, 13th, 14th, 15th, and 18th Light Dragoons.
Toulouse, April 10th, 1814.—1st, 2nd, 3rd, 5th, 7th, 11th, 20th, 23rd, 27th, 28th, 31st, 32nd, 34th, 36th, 39th, 40th, 42nd, 43rd, 45th, 48th, 50th, 52nd, 53rd, 57th, 60th, 61st, 66th, 71st, 74th, 79th, 83rd, 87th, 88th, 91st, 92nd, 94th, and 95th Foot; 2 squadrons 1st and 2nd Life Guards and Horse Guards; 1st Dragoons; 3rd and 5th Dragoon Guards; 3rd, 4th, 7th, 10th, 13th, 14th, 15th, and 18th Light Dragoons.
Toulouse, April 10, 1814.—1st, 2nd, 3rd, 5th, 7th, 11th, 20th, 23rd, 27th, 28th, 31st, 32nd, 34th, 36th, 39th, 40th, 42nd, 43rd, 45th, 48th, 50th, 52nd, 53rd, 57th, 60th, 61st, 66th, 71st, 74th, 79th, 83rd, 87th, 88th, 91st, 92nd, 94th, and 95th Foot; 2 squadrons 1st and 2nd Life Guards and Horse Guards; 1st Dragoons; 3rd and 5th Dragoon Guards; 3rd, 4th, 7th, 10th, 13th, 14th, 15th, and 18th Light Dragoons.

FIRST FRENCH MÉDAILLE MILITAIRE.
FIRST FRENCH MILITARY MEDAL.

SARDINIAN MEDAL.
Sardinian Medal.

MEDAL FOR SECOND CHINESE WAR.
MEDAL FOR SECOND OPium WAR.
Twenty-eight bars were authorised. Twenty-one for the Peninsular, three for North America, two for services in the West Indies, one for Italy, and one for Egypt, 1801, "to those who were still alive." The bars, it should be noted, vary in their arrangement, some being farther apart than others, those awarded to the cavalry being very close together, and those to the infantry 3∕40 in. apart. If more than six are attached they are placed quite close like those for the cavalry. The bars are attached in sets of three, so that no rivets were used in the fixing of two or three bars to a medal, the set being struck in one piece; six, nine, or more bars were riveted together with very neat, small-headed rivets.
Twenty-eight bars were authorized. Twenty-one for the Peninsula, three for North America, two for services in the West Indies, one for Italy, and one for Egypt, 1801, "to those who were still alive." It's important to note that the bars vary in their arrangement; some are spaced farther apart than others, with those awarded to the cavalry being very close together, and those to the infantry 3/40 in. apart. If more than six are attached, they are placed quite close together like those for the cavalry. The bars are attached in sets of three, so no rivets are used to fix two or three bars to a medal, as the set is struck in one piece; six, nine, or more bars are riveted together with very neat, small-headed rivets.
The India Medal, 1799-1826.—The European veterans of the Indian wars had been as badly treated in the way of war decorations as the heroes of the Peninsular, but an effort to reward the survivors was made public by the announcement on April 14th, 1851—forty-eight years after the first battle, for which a bar was issued, was fought—that the Queen had assented to the measure proposed by the Court of Directors of the East India Company to grant a medal at their expense to the surviving officers and soldiers of the Crown who were engaged in the services in India from 1799 to 1826. On the obverse is the diademed head of Queen Victoria with VICTORIA REGINA similar to that on the obverse of the medals already described, and on the reverse a seated figure of Victory, holding in her left hand, which falls by her side, a chaplet of laurel, and in her right hand an olive branch. In the background is a palm tree, and in front a trophy of oriental arms. Above all is inscribed TO THE ARMY OF INDIA, and in the exergue 1790-1826 and W.W., the initials of the medallist, in small capitals. The medal is 1⅖ in. in diameter, attached to a scroll suspender as used with the Punjab and Sutlej medals; the bars are also of the same design. The ribbon of pale-blue corded silk is 1¼ in. wide. The names, etc., of the European recipients were impressed in capital Roman letters, but most of those[Pg 134] awarded to native officers and soldiers were officially engraved in a light, slanting script.
The India Medal, 1799-1826.—The European veterans of the Indian wars were treated just as poorly regarding war decorations as the heroes of the Peninsular. However, an effort to recognize the survivors was made when it was announced on April 14th, 1851—forty-eight years after the first battle, for which a bar was issued—that the Queen had approved the proposal from the Court of Directors of the East India Company to award a medal at their expense to the surviving officers and soldiers of the Crown who served in India from 1799 to 1826. On the front is the crowned head of Queen Victoria with QUEEN VICTORIA similar to that on the front of the previously described medals, and on the back is a seated figure of Victory holding a laurel wreath in her left hand, which rests at her side, and an olive branch in her right hand. There is a palm tree in the background and a trophy of oriental arms in front. Above all that is inscribed TO THE INDIAN ARMY, and at the bottom, 1790-1826 along with W.W., the initials of the medallist, in small capitals. The medal measures 1⅖ in. in diameter and is attached to a scroll suspender like those used with the Punjab and Sutlej medals; the bars also share the same design. The ribbon is made of pale-blue corded silk and is 1¼ in. wide. The names and details of the European recipients were impressed in capital Roman letters, while most medals awarded to native officers and soldiers were officially engraved in a light, slanting script.
Bars Awarded.—Twenty-one bars were issued with the medal: ALLIGHUR, DELHI, ASSYE, ASSEERGHUR, LASWARREE, ARGAUM, GAWILGHUR, DEFENCE OF DELHI, DEIG, CAPTURE OF DEIG, NEPAUL, KIRKEE, POONA, KIRKEE AND POONA, SEETABULDEE, NAGPORE, SEETABULDEE AND NAGPORE, MAHEIDPOOR, CORYGAUM, AVA, BHURTPOOR. Only four medals were issued with the single bar for Seetabuldee and Nagpore, and one of these with edge impressed and verification of award to a man of the 39th Native Infantry realised £74 at auction. Nineteen only were issued for Assye, thirteen for Gawilghur, twenty-six for Maheidpoor, forty-eight for Laswarree, seventy-nine for Corygaum, but only a few of any of these to Europeans. The Duke of Wellington's medal had three clasps; for ASSYE, ARGAUM, and GAWILGHUR. Only thirteen with this combination were issued. A single bar for Capture of Deig awarded to a Lieutenant-Colonel has realised £50. An officer's four bar has realised £100, and a five bar £150. (See sales prices.)
Bars Awarded.—Twenty-one bars were given out with the medal: ALLIGHUR, DELHI, ASSYE, ASSEERGHUR, LASWARREE, ARGAUM, GAWILGHUR, DEFENSE OF DELHI, DEIG, CAPTURE OF DEIG, NEPAL, KIRKEE, Pune, KIRKEE AND POONA, SEETABULDEE, NAGPORE, SEETABULDEE AND NAGPORE, MAHEIDPOOR, CORYGAUM, AVA, BHURTPOOR. Only four medals were issued with the single bar for Seetabuldee and Nagpore, and one of these with the edge impressed and verification of award to a man of the 39th Native Infantry sold for £74 at auction. Nineteen were issued for Assye, thirteen for Gawilghur, twenty-six for Maheidpoor, forty-eight for Laswarree, seventy-nine for Corygaum, but only a few of any of these went to Europeans. The Duke of Wellington's medal had three clasps; for Assaye, ARGAUM, and GAWILGHUR. Only thirteen with this combination were issued. A single bar for Capture of Deig awarded to a Lieutenant-Colonel sold for £50. An officer's four bar sold for £100, and a five bar £150. (See sales prices.)
FIRST KAFFIR WARS
In 1834-5 the Kaffirs in South Africa became very troublesome and necessitated the employment of armed force to subdue them, but the first serious Kaffir war broke out in 1846 owing to the outrages perpetrated by the Gaikas, and considerable fighting had to be done before the Kaffirs, by this time armed with firearms, were subdued, and Sandilli and his brother surrendered. In this campaign the following regiments were represented: 6th, 27th, 45th, 73rd, 90th, 91st, and 1st Battalion Rifle Brigade; 7th Dragoon Guards; Royal Artillery; Engineers, Sappers and Miners, also Cape Mounted Riflemen.
In 1834-5, the Kaffirs in South Africa became quite troublesome, requiring the use of armed force to control them. However, the first serious Kaffir war erupted in 1846 due to the violent acts committed by the Gaikas, leading to significant fighting before the Kaffirs, now armed with guns, were subdued, and Sandilli and his brother surrendered. In this campaign, the following regiments participated: 6th, 27th, 45th, 73rd, 90th, 91st, and 1st Battalion Rifle Brigade; 7th Dragoon Guards; Royal Artillery; Engineers, Sappers and Miners; and Cape Mounted Riflemen.
At the end of the year 1850 the Kaffirs were again in a turbulent condition, and Sir Harry Smith, a Peninsular veteran whose record in India I have[Pg 135] indicated, summoned the chiefs to meet him, but Sandilli ignored the invitation and was outlawed. Then began another protracted war with the natives, during which several disasters befell the British troops. In the Keiskamma defile misfortune overtook Colonel Mackinnon, where with a force of 600 men, which included detachments of the 6th and 73rd Regiments, he was ambuscaded. He, however, reached Fort Cox, where the Governor, Sir Harry Smith, was surrounded by the dusky hordes. He managed to get away with a flying escort, and safely reached King William's Town. In June 1851 operations were conducted in the Amatola and Wolf Valley with comparatively severe losses to the British troops. In December the passage of the Kei was effected, despite the enemy's ingenious attempt—a new method in warfare to them—at constructing breastworks. Ultimately the chiefs of the Gaikas and Seyolo requested peace upon terms which could not be conceded, and the war was continued. In the spring of 1852 a determined advance was made by the British against Sandilli's stronghold in the Amatola mountains, from whence the 74th Highland Regiment, the "tortoises" as the Kaffirs called them in allusion to the markings of their kilt, after much hard fighting cleared them out. Sir Harry Smith was relieved of his command at the Cape by Sir George Cathcart, and ultimately the Water Kloof was cleared, and the Basutos under Moshesh defeated at Berea; Sandilli again surrendered, and the recalcitrant natives were expelled from the territory they had previously occupied.
At the end of 1850, the Kaffirs were once again in a state of unrest, and Sir Harry Smith, a veteran of the Peninsular War with a notable record in India, summoned the chiefs to meet with him. However, Sandilli ignored the invitation and was declared an outlaw. This led to another lengthy war with the natives, during which the British troops faced several setbacks. In the Keiskamma defile, Colonel Mackinnon and a force of 600 men, which included units from the 6th and 73rd Regiments, were ambushed. Nonetheless, he managed to reach Fort Cox, where Gov. Sir Harry Smith was surrounded by the hostile forces. He escaped with a small escort and safely made it to King William's Town. In June 1851, operations were carried out in the Amatola and Wolf Valley, resulting in significant losses for the British troops. In December, the crossing of the Kei River was accomplished despite the enemy's clever strategy—new to them—of building fortifications. Eventually, the chiefs of the Gaikas and Seyolo sought peace on terms that could not be accepted, and the war continued. In the spring of 1852, the British launched a strong assault on Sandilli's stronghold in the Amatola mountains, where the 74th Highland Regiment, nicknamed the "tortoises" by the Kaffirs due to the design of their kilts, successfully fought them off. Sir Harry Smith was relieved of his command at the Cape by Sir George Cathcart, and ultimately the Water Kloof was cleared, with the Basutos under Moshesh defeated at Berea. Sandilli surrendered again, and the defiant natives were expelled from the territories they had occupied.
The regiments represented in the campaign were the 2nd, 6th, 12th, 43rd, 45th; 2nd Batt. 60th Rifles; 73rd, 74th, 91st; 1st Batt. Rifle Brigade; 12th Lancers; Royal Artillery; Engineers, Sappers and Miners; Cape Mounted Rifles, Seamen and Marines.
The regiments involved in the campaign were the 2nd, 6th, 12th, 43rd, 45th; 2nd Batt. 60th Rifles; 73rd, 74th, 91st; 1st Batt. Rifle Brigade; 12th Lancers; Royal Artillery; Engineers, Sappers, and Miners; Cape Mounted Rifles; Seamen, and Marines.
Loss of the "Birkenhead."—The South African Wars of 1834-53 recall the loss of the troopship "Birkenhead" on February 26th, 1852, when 9 officers and 349[Pg 136] men, drawn up in parade order on the deck, went to a watery grave after placing the women and children, and sick, in the boats. They were on their way out as drafts for the regiments engaged in the third Kaffir war, which began at the end of 1850, and was not terminated until March 1853. The German Emperor was so impressed with the heroism of these British soldiers, who so calmly went to their death, that he caused an account of their gallant conduct to be read to every regiment of his army.
Loss of the "Birkenhead."—The South African Wars of 1834-53 bring to mind the sinking of the troopship "Birkenhead" on February 26, 1852, when 9 officers and 349[Pg 136] men, lined up in formation on the deck, met a watery fate after placing the women, children, and sick in the lifeboats. They were heading out as reinforcements for the regiments involved in the third Kaffir war, which started at the end of 1850 and ended in March 1853. The German Emperor was so moved by the bravery of these British soldiers, who faced their deaths with such composure, that he had an account of their courageous actions shared with every regiment in his army.
Those who took part in these wars were awarded a medal in a General Order issued in November 1854, and although many of the recipients had fought their battles twenty years previously, the medal, 1⅖ in. in diameter, bore the date 1853 in the exergue, above which is an admirably modelled lion, crouching under a mimosa bush; above all the record SOUTH AFRICA. No bars were given with the medal, which was only awarded to survivors, and the only way to distinguish the campaign for which it was granted is by the name of the regiment indented on the edge of the medal; but this means of identification is not possible in medals issued to the Naval Brigade, for the rank only is frequently given, as for instance, J. SHORE, STOKER. The diademed head of Queen Victoria, as issued with the medal previously described, was used on the obverse of this medal, which was suspended by a scroll clasp. The ribbon is orange and watered, with two thick and thin stripes of dark blue, leaving a narrow orange margin at the edge; the names, etc., were indented on the edge in square Roman capitals. The illustration of the medal is from a photograph of the one awarded to Captain (afterwards Lieutenant-General) A. C. Bentinck of the 7th Dragoon Guards—father of the present Duke of Portland.
Those who participated in these wars were awarded a medal through a General Order issued in November 1854. Although many of the recipients had fought in their battles twenty years earlier, the medal, which is 1⅖ inches in diameter, features the date 1853 in the exergue, with a beautifully crafted lion crouching under a mimosa bush above it; all above the record S.Africa. No bars were given with the medal, which was only awarded to survivors. The only way to identify the campaign for which it was granted is by the name of the regiment etched on the edge of the medal. However, this method of identification is not applicable to medals issued to the Naval Brigade, as only the rank is often provided, such as J. Shore, Stoker. The crowned head of Queen Victoria, as seen on the previously mentioned medal, was used on the front of this medal, which was attached by a scroll clasp. The ribbon is orange and watered, featuring two thick and thin stripes of dark blue, leaving a narrow orange margin at the edge. The names and other details were etched on the edge in square Roman capitals. The illustration of the medal is from a photograph of the one awarded to Captain (later Lieutenant-General) A. C. Bentinck of the 7th Dragoon Guards, who is the father of the current Duke of Portland.
The regiments engaged in the three Kaffir wars were: 1834-5: 27th, 72nd, 75th. 1846-7: 6th, 27th, 45th, 73rd, 90th, 91st; Rifle Brigade and 7th Dragoon Guards. 1850-3: 2nd, 6th, 12th, 43rd; 2nd Batt. 60th; 73rd, 74th, 91st; 1st Batt. Rifle Brigade; Royal Marines; a Naval Brigade and Cape Mounted Rifles.
The regiments involved in the three Kaffir wars were: 1834-5: 27th, 72nd, 75th. 1846-7: 6th, 27th, 45th, 73rd, 90th, 91st; Rifle Brigade and 7th Dragoon Guards. 1850-3: 2nd, 6th, 12th, 43rd; 2nd Batt. 60th; 73rd, 74th, 91st; 1st Batt. Rifle Brigade; Royal Marines; a Naval Brigade and Cape Mounted Rifles.

VICTORIA CROSS.
Victoria Cross.

INDIAN ORDER OF MERIT.
Indian Order of Merit.

MERITORIOUS SERVICE MEDAL.
Service Medal for Outstanding Achievement.
SECOND BURMESE WAR
As a result of the violation of the treaty of Yandaboo, which was really never kept, and the refusal of the King of Ava to redress the grievances of the Europeans in Rangoon, who had been compelled to seek safety on board the "Proserpine," a force of 5,767 men, composed of the 18th Royal Irish, 51st and 80th, together with Artillery, Sappers and Miners, Gun Lascars, and three Infantry Regiments of the H.E.I. Co., under the command of General Godwin, occupied, after very little resistance, Martaban and Rangoon. In the reduction of the latter place the naval contingent and the ships of the fleet participated. The key to the position, the Golden Pagoda, Shwe Dagon, was carried by the Royal Irish and the 80th after a very trying time caused by the excessive heat, five of the senior officers being struck down by solar apoplexy—Major Oakes, who commanded the artillery, and another officer fatally. In the capture of Rangoon 2 officers were killed, and 14 wounded; 15 non-commissioned officers and men killed, and 114 wounded, of whom one-third belonged to the Royal Irish, which lost its adjutant at the foot of the Shwe Dagon.
As a result of breaking the treaty of Yandaboo, which was never really honored, and the King of Ava's refusal to address the complaints of the Europeans in Rangoon, who had to seek safety on board the "Proserpine," a force of 5,767 men, consisting of the 18th Royal Irish, 51st and 80th Regiments, along with Artillery, Sappers and Miners, Gun Lascars, and three Infantry Regiments of the H.E.I. Co., led by General Godwin, easily took control of Martaban and Rangoon. In the capture of the latter, the naval contingent and fleet participated. The key location, the Golden Pagoda, Shwe Dagon, was seized by the Royal Irish and the 80th after a challenging time due to the extreme heat, with five senior officers succumbing to heatstroke—Major Oakes, who commanded the artillery, and another officer fatally. During the capture of Rangoon, 2 officers were killed, and 14 were wounded; 15 non-commissioned officers and soldiers were killed, with 114 wounded, a third of whom were from the Royal Irish, which lost its adjutant at the base of the Shwe Dagon.
Pegu.—Expeditions were sent out to the north and west, Bassein being captured by one force and Pegu taken on November 21st, 1852, by the other. The province of Pegu was then annexed; but the Burmese continued to harass the garrison which held the city, and it was not until after the arrival of reinforcements from Rangoon that steps could be taken to successfully deal with the enemy. The war was concluded in June 1853, but not before the army had been considerably reduced by disease, cholera claiming a large number of victims, and 22 men had been killed, and 14 officers and 94 men wounded in the taking of the village of[Pg 138] Donobyu, held by Myat Toon, a robber chief who had about 8,000 guerillas at his call. It was in the attack on this village that Viscount, then Ensign, Wolseley of the 80th, in leading a small body of men from the 18th, 51st, and 80th, was struck down at the moment of victory. On June 30th, 1853, the war was declared at an end without any formal treaty, and a few months later the troops left a country which had claimed a terrible toll of brave men's lives in the swamps and jungles, the 18th Royal Irish having alone lost 365 officers and men mostly by disease.
Pegu.—Expeditions were launched to the north and west, with one force capturing Bassein and the other seizing Pegu on November 21st, 1852. The province of Pegu was then annexed; however, the Burmese continued to attack the garrison in the city, and it wasn't until reinforcements arrived from Rangoon that effective measures could be taken against the enemy. The war ended in June 1853, but not before the army suffered significant losses due to disease, with cholera claiming many lives, along with 22 soldiers killed and 14 officers and 94 soldiers wounded during the capture of the village of [Pg 138] Donobyu, held by Myat Toon, a bandit leader with about 8,000 guerrillas at his command. During the assault on this village, Viscount Wolseley, then an Ensign in the 80th, was struck down at the moment of victory while leading a small group from the 18th, 51st, and 80th regiments. On June 30th, 1853, the war was declared over without a formal treaty, and a few months later, the troops left a country that had taken a heavy toll on brave soldiers' lives in the swamps and jungles, with the 18th Royal Irish alone losing 365 officers and men, primarily to disease.
First India General Service Medal.—On January 23rd, 1854, Queen Victoria sanctioned the issue of a silver medal with bar for PEGU to those who had taken part in the Burmese War of 1852-3. This, later called the India General Service Medal, 1854, has been given for all the various campaigns up to the fighting in the Kachin Hills in 1892-3. Twenty-three bars were given, representing the different "little wars" in which the recipients were engaged during forty-one years. This medal, illustrated facing page 120, has the same kind of suspender and bars as the Punjab medal, likewise the same head of Victoria, but on the reverse a figure of Victory crowning with laurel a seated warrior in classic pose, holding in his right hand a Roman sword, and in his left a sheath. In the exergue is a lotus flower and leaves, and L. C. WYON beneath it. The medals, 1⅖ in. in diameter, have the rank, name, and the regiment or ship, impressed in Roman capitals for Pegu, Persia, North-West Frontier, Umbeyla, Bhootan, but for Perak and the rest of the series, except Jowaki, the lightly engraved running hand or Roman capitals were used for naming. The ribbon, 1¾ in. wide, is dark crimson with two dark-blue stripes.
First India General Service Medal.—On January 23, 1854, Queen Victoria approved the issuance of a silver medal with a bar for PEGU to those who participated in the Burmese War of 1852-3. This medal, later known as the India General Service Medal, 1854, has been awarded for various campaigns up to the fighting in the Kachin Hills in 1892-3. Twenty-three bars were awarded, representing the different "little wars" in which the recipients were involved over forty-one years. This medal, shown on the page opposite 120, has the same style of suspender and bars as the Punjab medal, featuring the same image of Victoria, but on the reverse, there is a figure of Victory crowning a seated warrior in a classic pose, holding a Roman sword in his right hand and a sheath in his left. At the bottom, there is a lotus flower and leaves, with L. C. WYON beneath it. The medals, measuring 1⅖ inches in diameter, have the rank, name, and regiment or ship, impressed in Roman capitals for Pegu, Persia, North-West Frontier, Umbeyla, and Bhootan, but for Perak and the rest of the series, except Jowaki, lightly engraved running hand or Roman capitals were used for naming. The ribbon is 1¾ inches wide, dark crimson with two dark-blue stripes.
The regiments entitled to the medal with bar for Pegu were the 18th, 51st, and 80th; Artillery; Sappers and Miners; 1st Bengal Fusiliers; 1st Madras Fusiliers; 5th Madras Native Infantry; and the Naval Brigade from thirteen of Her Majesty's ships.
The regiments eligible for the medal with a bar for Pegu were the 18th, 51st, and 80th; Artillery; Sappers and Miners; 1st Bengal Fusiliers; 1st Madras Fusiliers; 5th Madras Native Infantry; and the Naval Brigade from thirteen of Her Majesty's ships.
The V.C. and Distinguished Conduct Medal.—These were comparatively small but significant campaigns, although the period between Waterloo and the breaking out of the Crimean War has been termed the long peace. The war in the Crimea was of a very different kind. Once again it was the meeting of Europeans face to face, and a long struggle resulted. An important outcome of the war from one point of view was the institution on January 29th, 1856, of that coveted decoration, the Victoria Cross, preceded by the institution of the Distinguished Conduct Medal on December 4th, 1854, and the Conspicuous Gallantry Medal for naval men on August 13th, 1855. The ribbon for the V.C. is dark red—dark blue for the Navy—that for the Distinguished Conduct Medal (illustrated facing page 140) dark blue with broad, red stripe down the centre, and the ribbon blue with a white stripe down the centre for the Conspicuous Gallantry medal. In the first issues the names were impressed on the edge, but in the later issues they are engraved, and the date of the action is also included. It is particularly noteworthy that the first medals of this class issued were struck from the Meritorious Service Medal, the two words being erased and Conspicuous Gallantry engraved in place thereof (see facing page 140).
The V.C. and Distinguished Conduct Medal.—These were relatively small but important campaigns, even though the time between Waterloo and the start of the Crimean War has been called the long peace. The war in Crimea was very different. Once again, Europeans faced each other directly, and it led to a long conflict. A significant result of the war, from one perspective, was the establishment of the highly sought-after decoration, the Victoria Cross, on January 29th, 1856, which followed the creation of the Distinguished Conduct Medal on December 4th, 1854, and the Conspicuous Gallantry Medal for naval personnel on August 13th, 1855. The ribbon for the V.C. is dark red—dark blue for the Navy—the ribbon for the Distinguished Conduct Medal (illustrated facing page 140) is dark blue with a broad red stripe down the center, and the ribbon for the Conspicuous Gallantry Medal is blue with a white stripe down the center. In the initial issues, names were stamped on the edge, but in later versions, they are engraved, along with the date of the action. It is particularly noteworthy that the first medals of this kind issued were made from the Meritorious Service Medal, with the two words being removed and Conspicuous Gallantry engraved in their place (see facing page 140).
THE CRIMEAN WAR
In October 1853 the Czar of Russia declared war against the Sultan of Turkey, and to defend "the sick man" Great Britain and France landed troops at Varna, a Bulgarian port in the Black Sea. At the end of February 1854 Queen Victoria bade farewell to the Guards at Buckingham Palace, and these with other regiments sailed for the East to take part in a war which, declared on March 28th, 1854, was to cost us the lives of thousands of brave men: 21,815 were killed, or died of wounds or disease, and 11,876 were wounded—a total of 32,691 officers and men. Disease accounted[Pg 140] for the deaths of 16,041, battle only 4,774! The old soldiers, as Sir Evelyn Wood states, died without a murmur, and it "is impossible to overpraise the disciplined silence of men under privations which in a few weeks reduced one battalion from nearly 1,000 effectives to a strength of 30 rank and file." At the end of February 1855, although the strength of the British army was on paper 44,000, only 18,000 were "present and fit for duty"; and yet the medals of the brave and patient survivors of this war are selling at a few shillings apiece unless they happen to have the bar for Balaklava or Inkermann—Sebastopol, that long-drawn agony, counts for nothing!
In October 1853, the Czar of Russia declared war on the Sultan of Turkey, and to support "the sick man," Great Britain and France sent troops to Varna, a Bulgarian port on the Black Sea. At the end of February 1854, Queen Victoria said goodbye to the Guards at Buckingham Palace, and they, along with other regiments, sailed east to participate in a war that was officially declared on March 28, 1854. This conflict would cost us the lives of thousands of brave soldiers: 21,815 were killed or died from wounds or disease, and 11,876 were wounded—a total of 32,691 officers and men. Disease was responsible for the deaths of 16,041, while battle accounted for only 4,774! The old soldiers, as Sir Evelyn Wood noted, died without protest, and it "is impossible to overpraise the disciplined silence of men under privations that reduced one battalion from nearly 1,000 effective troops to just 30." By the end of February 1855, although the British army officially numbered 44,000, only 18,000 were "present and fit for duty"; and yet the medals of the brave and enduring survivors of this war are being sold for just a few shillings, unless they come with the bar for Balaklava or Inkermann—Sebastopol, that prolonged suffering, means nothing!
On September 7th, 1854, the Anglo-French army put to sea, its objective being the great naval station of Sebastopol in the Crimea. There were, in addition to the crews of the warships, about 27,000 British, including the Light Brigade of 1,000, with 60 guns, under Lord Raglan, who had served on Wellington's staff in the Peninsular; 28,000 French under Marshal St. Arnaud, and 7,000 Turks under Omar Pasha. The Sardinian contingent under General La Marmora did not reach the Crimea until May 1855. The troops were landed, between September 14th and 18th, on the beach at Kalamita Bay, about twenty-five miles from Sebastopol, and two days after the disembarkation had been effected they had to force the Alma, when they defeated the Russians under Prince Mentschikoff so effectively that the allies were allowed to march southwards unmolested, and to form bases within a few miles of Sebastopol. The British established themselves at the little port of Balaklava, eight miles to the south of Sebastopol, and the French at Kamiesch Bay, six miles north of the place.
On September 7th, 1854, the Anglo-French army set sail, aiming for the major naval base of Sebastopol in Crimea. Along with the warship crews, there were around 27,000 British troops, including the Light Brigade of 1,000 men with 60 guns, led by Lord Raglan, who had been on Wellington's staff during the Peninsular War; 28,000 French troops under Marshal St. Arnaud; and 7,000 Turks led by Omar Pasha. The Sardinian contingent under General La Marmora didn't arrive in Crimea until May 1855. The troops landed between September 14th and 18th at Kalamita Bay, about twenty-five miles from Sebastopol. Two days after landing, they had to storm the Alma, where they defeated the Russians under Prince Mentschikoff so decisively that the allies could march south without interference and set up bases just a few miles from Sebastopol. The British established themselves at the small port of Balaklava, eight miles south of Sebastopol, and the French at Kamiesch Bay, six miles north of the area.

(Reverse.)
DISTINGUISHED CONDUCT MEDAL.
(Reverse.)
HONORABLE CONDUCT MEDAL.

(First Type.)
CONSPICUOUS GALLANTRY MEDAL.
Conspicuous Gallantry Medal.

(Obverse.)
DISTINGUISHED CONDUCT MEDAL.
(Distinguished Conduct Medal.)
The Alma.—The Russians had taken up a position commanding the road to Sebastopol, with a front of two miles, mainly on the range of hills varying in height from 120 ft. to 200 ft. on the left bank of the River Alma, and on the morning of September 20th the allies prepared to attack them. The French and Turks began the battle, Marshal St. Arnaud attacking the left of the Russian position, and the centre with the aid of one British division, and Lord Raglan the right. The French General Bosquet made a brilliant advance, and drove the enemy from some high ground, but the French centre did not support him, and he was isolated; Raglan therefore decided to order the second and light divisions to advance, and this they did under a murderous cannonade. "Opposed to the English were at least two-thirds of the Russians," but the young and untried soldiers of Britain once again demonstrated the splendid fighting material of which they were made. Through the entangling vineyards and into the rapid waters of the Alma they steadily marched; emerging, they were ordered "to fix bayonets, get up the bank, and advance to the attack." They quickly climbed the steep and rugged hill-sides, but received a check, and then some one calling "Cease fire and retire," they became somewhat confused; they soon rallied, and the light division stormed into the great redoubt with its 14 guns of heavy calibre, carried the Kourgane hill, defended by 17,000 men with two redoubts and 14 guns, and then, with their depleted and broken ranks swelled by the Guards and the Highlanders, the Black Watch to the fore, who had pressed into the fight and up the Kourgane hill, charged the heights and at the point of the bayonet drove the Russians off in confusion. Thus the battle of the Alma was won, not by the brilliant tactics of the officers, but by the courage and tenacity of the men, and so by 6 o'clock in the evening Marshal St. Arnaud's tent was pitched on the spot where Mentschikoff had his headquarters in the morning. After the battle, a staff officer relates, Lord Raglan's eyes filled with tears when he shook hands with Sir Colin Campbell, and "he could not speak when the brave old veteran said to him, pointing to the dead Highlanders, 'Sir, it was they who did it,' and then the cheer went up when he asked to wear a bonnet! With its horrors, war has its[Pg 142] romance." The same officer, writing a little later, said, "Glory when looked at close, and while it is being earned, is rather an ugly thing." The heroes of the Crimea certainly learned that.
The Alma.—The Russians had taken a position controlling the road to Sebastopol, with a two-mile front mainly along a range of hills varying in height from 120 ft. to 200 ft. on the left bank of the River Alma. On the morning of September 20th, the allies prepared to attack them. The French and Turks started the battle, with Marshal St. Arnaud attacking the left of the Russian position and the center with support from one British division, while Lord Raglan targeted the right. French General Bosquet made a brilliant advance and pushed the enemy off some high ground, but the French center didn't support him, leaving him isolated. Raglan decided to order the second and light divisions to advance, which they did under intense cannon fire. "Opposed to the English were at least two-thirds of the Russians," but the young and inexperienced British soldiers once again proved their remarkable fighting spirit. They marched steadily through the tangled vineyards and into the swift waters of the Alma; once emerging, they were ordered "to fix bayonets, get up the bank, and advance to the attack." They quickly climbed the steep, rugged hills but faced a setback, and when someone shouted "Cease fire and retire," they became somewhat disoriented; however, they soon regrouped, and the light division charged into the large redoubt with its 14 heavy guns, took the Kourgane hill defended by 17,000 men with two redoubts and 14 guns, and then, despite their diminished and battered ranks bolstered by the Guards and Highlanders—particularly the Black Watch, who surged into the fight and up the Kourgane hill—charged the heights and forced the Russians to retreat in chaos. Thus, the battle of the Alma was won, not through the brilliant strategies of the officers, but by the bravery and determination of the soldiers. By 6 o'clock in the evening, Marshal St. Arnaud's tent was set up where Mentschikoff had had his headquarters that morning. After the battle, a staff officer recounted that Lord Raglan was moved to tears when he shook hands with Sir Colin Campbell, who pointed to the fallen Highlanders and said, "Sir, it was they who did it." A cheer erupted when he requested to wear a bonnet! Despite its horrors, war has its[Pg 142] romance. The same officer, writing a bit later, remarked, "Glory, when looked at closely, and while it is being earned, is rather an ugly thing." The heroes of the Crimea certainly learned that.
The late Major-General (then Colour-Sergeant) Luke O'Connor, gained his Victoria Cross in this battle. Ensign Anstruther of the Royal Welsh had with boyish impetuosity gallantly rushed forward and, outpacing all, proudly planted the Queen's colour on the parapet of the Redoubt; riddled with Russian bullets he fell, but O'Connor, taking the colour from his dying grasp again planted them on the Redoubt, and, although wounded in the breast, carried them through the rest of the fight. Captain (afterwards Major-General) Bell, C.B., also won his V.C. at the heights of Alma for his daring conduct on that day, when, all the senior officers of the regiment being placed hors de combat, he found himself in command, and successfully brought the 23rd out of action. The gallant Welsh Fusiliers, who were the first to land in the Crimea, lost their colonel and 8 officers, and the Light Division, of which they formed part, lost 47 officers and 850 men. The Division was composed of the 7th, 19th, 23rd, 33rd, 77th, and 88th. The total British losses were 2,000, and those of the French 3 officers, including Generals Canrobert and Thomas wounded and 560 men. The Russians had 5,000 placed hors de combat, including 45 officers, among whom were Generals Karganoff and Shokanoff.
The late Major-General (then Colour-Sergeant) Luke O'Connor earned his Victoria Cross in this battle. Ensign Anstruther of the Royal Welsh, with youthful eagerness, bravely rushed forward and, outpacing everyone, proudly planted the Queen's colors on the parapet of the Redoubt. He was shot by Russian bullets and fell, but O'Connor, taking the colors from his dying grip, planted them again on the Redoubt, and despite being wounded in the chest, carried them through the rest of the fight. Captain (later Major-General) Bell, C.B., also received his V.C. at the heights of Alma for his brave actions that day when, with all the senior officers of the regiment incapacitated, he found himself in command and successfully led the 23rd out of action. The brave Welsh Fusiliers, who were the first to land in the Crimea, lost their colonel and 8 officers, while the Light Division, which included them, lost 47 officers and 850 men. The Division was made up of the 7th, 19th, 23rd, 33rd, 77th, and 88th. The total British losses were 2,000, while the French lost 3 officers, including Generals Canrobert and Thomas who were wounded, and 560 men. The Russians had 5,000 incapacitated, including 45 officers, among whom were Generals Karganoff and Shokanoff.
The regiments present at the Alma were the Grenadier, Coldstream, and Scots Guards; 1st, 4th, 7th, 19th, 20th, 21st, 23rd, 28th, 30th, 33rd, 38th, 41st, 42nd, 44th; two companies of the 46th; 47th, 49th, 50th, 55th, 63rd, 68th, 77th, 79th, 88th, 93rd, 95th Foot; 4th and 13th Light Dragoons; 8th and 11th Hussars and 17th Lancers. The cavalry were never called into action. Lord Raglan had said he preferred to keep his "cavalry in a band-box."
The regiments at the Alma included the Grenadier, Coldstream, and Scots Guards; 1st, 4th, 7th, 19th, 20th, 21st, 23rd, 28th, 30th, 33rd, 38th, 41st, 42nd, 44th; two companies of the 46th; 47th, 49th, 50th, 55th, 63rd, 68th, 77th, 79th, 88th, 93rd, 95th Foot; 4th and 13th Light Dragoons; 8th and 11th Hussars, and 17th Lancers. The cavalry was never called into action. Lord Raglan mentioned that he preferred to keep his "cavalry in a band-box."
Siege of Sebastopol.—On September 23rd, 1854, the army began its slow and "most remarkable flank[Pg 143] march in military history." Balaklava was ultimately reached, "the result of blind accident rather than knowledge of how war should be conducted," and the armies of Britain and France settled down on the Chersonese upland, and the siege of Sebastopol commenced. From September 28th, 1854, it ran its long course until September 11th, 1855, when the Russians, who had fought so well under Todleben, retired and the allies entered it unopposed. This long and complex siege cannot here be dealt with in detail. How the unfortunate troops fared in the trenches has passed into the history of this country as a blot upon the administration which allowed brave men to die like flies; "between November 1854 and February 1855 there were 9,000 deaths in hospital, and by the end of February there were no less than 13,600 officers and men in hospital," and no wonder when men, emaciated by disease and tried by the severe weather, "carrying great-coat and blanket, marched through a sea of mud to the trenches," where they remained in a cramped position all night until day broke, and, after a few hours' rest, "often in a puddle, which chilled their bones under a worn-out tent through which the rain beat"; they who had the heart of a lion were compelled to do asses' work. The hospitals were frequently merely bell tents, and "the men lay, often in mud, on the ground, and in many cases their diet was only meat and biscuit. They were, moreover, so crowded together that the doctors could scarcely pass between the patients." The heroic Florence Nightingale, as every one knows, with her band of nurses helped to lighten the burden of pain and suffering which the men endured, but the lasting disgrace which attaches to the callous administrators of the period is only accentuated when we consider the dire necessity for her action.
Siege of Sebastopol.—On September 23rd, 1854, the army began its slow and "most remarkable flank[Pg 143] march in military history." Balaklava was finally reached, "the result of blind accident rather than knowledge of how war should be conducted," and the armies of Britain and France settled on the Chersonese upland, starting the siege of Sebastopol. From September 28th, 1854, it continued until September 11th, 1855, when the Russians, who fought bravely under Todleben, withdrew and the allies entered without opposition. This lengthy and complicated siege cannot be covered in detail here. The suffering of the unfortunate troops in the trenches has become a dark chapter in the history of this country, reflecting poorly on the administration that allowed brave men to die in such numbers; "between November 1854 and February 1855 there were 9,000 deaths in hospital, and by the end of February there were no less than 13,600 officers and men in hospital," which is hardly surprising considering the emaciated men, afflicted by disease and harsh weather, "carrying great-coat and blanket, marched through a sea of mud to the trenches," where they remained cramped all night until dawn, and after a few hours' rest, "often in a puddle, which chilled their bones under a worn-out tent through which the rain beat"; those who had the heart of a lion were forced to do menial work. The hospitals were often just bell tents, and "the men lay, often in mud, on the ground, and in many cases their diet was only meat and biscuit. They were, moreover, so crowded together that the doctors could scarcely pass between the patients." The heroic Florence Nightingale, as everyone knows, with her group of nurses, helped ease the pain and suffering that the men endured, but the lasting shame associated with the indifferent administrators of the time is only highlighted when we consider the urgent need for her intervention.
Capture of the Mamelon.—Sebastopol was bombarded, with the co-operation of the fleet, on October 17th, and the Russians made their first sortie on the 26th; in March 1855 they made another, and on April 9th the[Pg 144] place was ineffectively bombarded; but on June 6th a bombardment was followed by an assault, and the Mamelon, an outwork of the Malakoff, was taken. Then the allies essayed the capture of the Malakoff and the Redan, the French to take the former and the British the latter; but despite the strenuous efforts of the men, the forts remained in the possession of the enemy. In these abortive attempts on June 17th and 18th the French lost 3,500 men, and the British 1,500; and of the six British and French Generals and Commanders who led the attacks on the 18th, 4 were killed and 1 wounded. The Royal Irish lost 259 officers and men by death and wounds in the attack on the Redan, and Captain Thomas Esmond of that regiment gained the V.C. and Sergeant John Grant the Meritorious Service medal. The Russians lost 4,500 officers and men killed and wounded. The siege was, following these repulses, resumed in the ordinary way, and the stubborn Russians, who were losing 250 men each day, began to realise that their magnificent courage could not stand much longer against the determination of the allies; and at the end of August, when the brave garrison was being depleted by the loss of over 900 each day, they determined upon the evacuation of the fortress they had held so well. So they built a bridge across the outer harbour, and made preparations to cover their retreat.
Capture of the Mamelon.—Sebastopol was bombarded, with the fleet's help, on October 17th, and the Russians made their first attack on the 26th; in March 1855 they tried again, and on April 9th the[Pg 144] place was bombarded without much effect; but on June 6th, a bombardment was followed by an assault, and the Mamelon, an outpost of the Malakoff, was captured. Then the allies attempted to take the Malakoff and the Redan, with the French aiming for the former and the British for the latter; but despite the determined efforts of the troops, the forts remained in enemy hands. In these unsuccessful attempts on June 17th and 18th, the French lost 3,500 men and the British 1,500; of the six British and French Generals and Commanders who led the attacks on the 18th, 4 were killed and 1 was wounded. The Royal Irish lost 259 officers and men to death and injuries during the attack on the Redan, and Captain Thomas Esmond of that regiment was awarded the V.C. while Sergeant John Grant received the Meritorious Service medal. The Russians suffered 4,500 officers and men killed and wounded. After these setbacks, the siege resumed as usual, and the determined Russians, losing 250 men each day, began to understand that their incredible bravery couldn't hold out much longer against the determination of the allies; by the end of August, when the valiant garrison was losing over 900 men daily, they decided to evacuate the fortress they had defended so fiercely. So they built a bridge across the outer harbor and prepared to cover their retreat.
Capture of the Malakoff.—Then the allies again determined to reduce the fortress, and bombarded it for practically three days and nights, at the end of which, on September 8th, the French again assailed the Malakoff, and carried and held it against the enemy, but the British failed to capture the Redan. The British losses were 2,271 officers and men placed hors de combat, including three generals wounded, and the French 7,567, including 5 generals killed and 4 wounded. The Russian losses were 12,915, including 9 generals. During the night the Russians exploded their mines, and Prince Gortschakoff successfully took his garrison, with most of the wounded, across the bridge, which they destroyed, and took up a position on the heights to the north of Sebastopol, from whence they cannonaded the fortress which the allies had occupied. The war was thus virtually at an end, although hostilities continued until February 1856, and the treaty of peace was not signed in Paris until March 29th.
Capture of the Malakoff.—Then the allies decided to take the fortress, bombarding it for nearly three days and nights. On September 8th, the French launched another attack on the Malakoff, capturing and holding it against the enemy, while the British were unable to take the Redan. The British suffered 2,271 officers and men who were rendered hors de combat, including three wounded generals, while the French lost 7,567, with 5 generals killed and 4 wounded. The Russian losses amounted to 12,915, including 9 generals. That night, the Russians detonated their mines, and Prince Gortschakoff managed to evacuate his garrison, along with most of the wounded, across a bridge they then destroyed. They took position on the heights north of Sebastopol, from where they shelled the fortress occupied by the allies. Thus, the war was practically over, even though fighting continued until February 1856, and the peace treaty wasn't signed in Paris until March 29th.

(Obverse.)
MEDAL FOR INDIAN MUTINY,
1857-8.
(Obverse.)
MEDAL FOR INDIAN REBELLION,
1857-8.

(Reverse.)
MEDAL FOR NEW ZEALAND WARS,
1861-6.
(Reverse.)
MEDAL FOR NEW ZEALAND WARS,
1861-6.

(Reverse.)
MEDAL FOR INDIAN MUTINY,
1857-8.
(Reverse.)
MEDAL FOR INDIAN REBELLION,
1857-8.
Meanwhile the battles of Balaklava and Inkermann had been fought, both brought about by the efforts of the Russians to raise the siege, and both battles remarkable for the courage and fearlessness of the British troops, and alas! for the lack of simple military genius on the part of many of the officers. As a military authority has stated, "The army ought to have been beaten according to all the canons of war, but it wasn't!" Tommy Atkins saved the face of his superiors.
Meanwhile, the battles of Balaklava and Inkermann had taken place, both driven by the Russians' attempts to lift the siege, and both battles notable for the bravery and determination of the British troops, and unfortunately, for the lack of basic military strategy from many of the officers. As one military expert put it, "The army should have been defeated according to all the principles of war, but it wasn't!" The common soldier, Tommy Atkins, saved the reputation of his superiors.
Balaklava.—The charge of the Light Brigade in this battle was an example of what appears to have been either muddle-headedness or overweening belief in the importance of our cavalry, but it gave to the Light Cavalry of the British Army undying fame. Their "death-ride" gave them eternal life! The battle of Balaklava was fought on October 25th, 1854, the anniversary of Agincourt. The Russian relieving force, numbering 22,000 infantry and 3,400 cavalry, with 78 guns, advanced from the Tchernaya by Kamara across the Woronzoff Road to attack the front of the position at Balaklava, and to meet them Lord Raglan took down the first and fourth divisions to the plain, which General Canrobert—St. Arnaud had died—reinforced with the first division of French Infantry and the Chasseurs d'Afrique.
Balaklava.—The charge of the Light Brigade in this battle was an example of what seems to have been either confusion or an overconfidence in the importance of our cavalry, but it brought the Light Cavalry of the British Army lasting fame. Their "death-ride" gave them eternal life! The battle of Balaklava was fought on October 25th, 1854, the anniversary of Agincourt. The Russian relieving force, consisting of 22,000 infantry and 3,400 cavalry, along with 78 guns, advanced from the Tchernaya by Kamara across the Woronzoff Road to attack the front of the position at Balaklava. In response, Lord Raglan sent down the first and fourth divisions to the plain, which General Canrobert—St. Arnaud had died—reinforced with the first division of French Infantry and the Chasseurs d'Afrique.
"The Thin Red Line."—The Russians obtained possession of three forts, and managed to retain two of them with 7 guns; then "their artillery advanced with a large mass of cavalry, and their guns ranged to the 93rd Highlanders, which, with 100 invalids, under Lieutenant-Colonel Daveney, in support, occupied very insufficiently, from the smallness of their[Pg 146] numbers, the slightly rising ground in front of No. 4 Battery." Then a body of the enemy's cavalry, "amounting to about 400, turned to their left, separating themselves from those who attacked Lord Lucan's Division, and charged the 93rd Highlanders, who immediately advanced to the crest of the hill, on which they stood and opened their fire, which forced the Russian cavalry to give way and turn to their left; after which they made an attempt to turn the flank of the 93rd ... upon which the Grenadiers of the 93rd under Captain Ross were wheeled up to their right and fired on the enemy, which manœuvre completely discomforted them." Thus the gallant Sir Colin Campbell officially described the deed of the "thin red line" at Balaklava; that line of imperturbable Highlanders armed only with muzzle loaders, that, despite the rounds of shot and shell which harried them, dared to accept the charge of cavalry and drove them off.
"The Thin Red Line."—The Russians took control of three forts and managed to keep two of them with 7 guns; then "their artillery moved forward with a large group of cavalry, and their guns were aimed at the 93rd Highlanders, who, along with 100 disabled soldiers, under Lieutenant-Colonel Daveney, occupied the slightly elevated ground in front of No. 4 Battery, though they were greatly outnumbered." Then a group of enemy cavalry, "around 400 strong, turned to their left, separating themselves from those who were attacking Lord Lucan's Division, and charged the 93rd Highlanders, who immediately advanced to the top of the hill, where they stood and opened fire, forcing the Russian cavalry to retreat and turn to their left; after that, they tried to flank the 93rd ... upon which the Grenadiers of the 93rd under Captain Ross moved to their right and fired at the enemy, which completely threw them off." Thus the brave Sir Colin Campbell officially described the actions of the "thin red line" at Balaklava; that line of steadfast Highlanders armed only with muzzle loaders, who, despite the barrage of shots and shells hitting them, dared to face the cavalry charge and drove them away.
Charge of the Heavy Brigade.—Then the main body of the Russian horsemen, about 3,000, advanced against the British Heavy Brigade, 900 sabres strong. The light-blue jackets, with embroidery of silver lace, the grey coats of the Dragoons, and the glitter of the lances, made a brave picture as the enemy's cavalry cantered toward their objective. They "nearly halted. Their first line was at least double the length of ours—it was three times as deep. Behind them was a similar line, equally strong and compact. They evidently despised their insignificant-looking enemy," but the trumpets rang out again in the valley; then Brigadier-General Scarlett, with about 300 Scots Greys and Enniskilleners, went right at the centre of the Russian cavalry, and then, as W. H. Russell, the famous Times correspondent, graphically described, "as lightning flashes through a cloud the Greys and Enniskilleners pierced through the dark masses of the Russians. The shock was but of a moment. There was a clash of steel, and a light play of sword blades in the air, and then the Greys and the redcoats disappeared in the midst of[Pg 147] the shaken and quivering columns. In another moment we saw them emerging with diminished numbers, and in broken order, charging against the second line. It was a terrible moment.... With unbated fire the noble hearts dashed at the enemy. It was a fight of heroes.... By sheer steel and sheer courage, Enniskillener and Scot were winning their desperate way through the enemy's squadrons, and already grey horses and red coats had appeared right at the rear of the second mass, when, with visible force, like one bolt from a bow, the 4th Dragoon Guards riding straight at the right flank of the Russians, and the 5th Dragoon Guards, following close after the Enniskilleners, rushed at the remnants of the first line of the enemy, went through it as though it were made of pasteboard, and put them to utter rout." Then followed that "superb incident—at once a blunder and a miracle."
Charge of the Heavy Brigade.—Then the main group of Russian cavalry, about 3,000 strong, moved toward the British Heavy Brigade, which had 900 sabers. The light-blue jackets, embellished with silver lace, the grey coats of the Dragoons, and the shine of the lances created a bold scene as the enemy's cavalry approached. They "almost stopped. Their first line was at least double the length of ours and three times as deep. Behind them was another line, equally strong and solid. They clearly looked down on their seemingly weak opponent," but the trumpets sounded again in the valley; then Brigadier-General Scarlett, with around 300 Scots Greys and Enniskilleners, charged straight into the center of the Russian cavalry. As W. H. Russell, the famous Times correspondent, vividly described, "like lightning flashing through a cloud, the Greys and Enniskilleners broke through the dark masses of the Russians. The impact was brief. There was a clash of steel, and a flurry of sword blades in the air, and then the Greys and the redcoats vanished into the shaken and trembling columns. Moments later, we saw them coming out with fewer numbers and in disarray, charging against the second line. It was a harrowing moment.... With unwavering courage, the brave hearts charged at the enemy. It was a battle of heroes.... Through sheer strength and bravery, the Enniskilleners and Scots were carving their way through the enemy’s ranks, and already grey horses and red coats had reached the back of the second formation when, with remarkable force, like an arrow released, the 4th Dragoon Guards charged directly at the right flank of the Russians, and the 5th Dragoon Guards, closely following the Enniskilleners, crashed into the remnants of the first enemy line, breaking through as if it were made of cardboard, routing them completely." Then came that "remarkable moment—both a mistake and a miracle."
Charge of the Light Brigade.—Lord Raglan, being desirous that the withdrawal of the Russians should be taken advantage of to regain the heights, and fearing that the enemy might attempt to remove the guns from the redoubts captured from the Turks, gave orders for the Light Cavalry to be moved forward. Captain Nolan misconstrued the order, and indicated to Lord Lucan that the heavy battery of guns a mile away, supported by masses of cavalry and infantry, with other batteries on either flank, was to be charged. Lucan hesitated to carry the mad order into effect, but ultimately decided that it was his duty to do so, and gave the order to the Earl of Cardigan to take the terrible odds which he saw arrayed against him. Cardigan, like Scarlett, was a brave and daring cavalry leader, and into the "valley of death" he rode with his Light Brigade of 621 men. Encircled by fire they charged down the valley, dashed through the guns, sabred the gunners where they stood, cut their way through a brigade of Russian cavalry and a company of infantry, turned about, what was left of them, when four squadrons of Lancers were hurled at them, but they met the[Pg 148] charge gallantly, and then the Russian artillerymen, recovering from their shock, but without regaining their senses, turned their guns upon the daring British cavalry and their own men who were struggling with them! The Greys and Enniskilleners, and the Chasseurs d'Afrique created a diversion, otherwise it is doubtful whether a single man of that brave little band, which rode so fearlessly and fought so uselessly, would have survived to receive the plaudits of his countrymen, and—shame of shames—as was the case with several of them, to end his days in the workhouse or eke them out with the aid of charity. It were almost idle for the poet to sing:
Charge of the Light Brigade.—Lord Raglan wanted to take advantage of the Russians' retreat to reclaim the heights and worried that the enemy might try to move the artillery from the redoubts they had captured from the Turks. He ordered the Light Cavalry to advance. Captain Nolan misunderstood the order and indicated to Lord Lucan that they should charge the heavy battery of guns a mile away, supported by large groups of cavalry and infantry, with additional batteries on both flanks. Lucan hesitated to carry out the reckless order but eventually decided it was his duty to comply and instructed the Earl of Cardigan to take on the overwhelming odds he saw ahead. Cardigan, like Scarlett, was a brave and daring cavalry leader, and into the "valley of death" he rode with his Light Brigade of 621 men. Surrounded by gunfire, they charged down the valley, broke through the artillery, fought the gunners where they stood, cut through a brigade of Russian cavalry and a company of infantry, and turned back, what was left of them, when four squadrons of Lancers attacked them. They bravely faced the charge, and then the Russian artillerymen, recovering from their shock but still confused, turned their guns on the bold British cavalry and their own men who were struggling with them! The Greys and Enniskilleners and the Chasseurs d'Afrique created a distraction; otherwise, it's questionable whether even one of those brave soldiers, who rode so fearlessly and fought so futilely, would have lived to hear the cheers of their countrymen, and—shame of shames—as happened to several of them, to end their days in a workhouse or barely survive with the help of charity. It would almost be pointless for the poet to sing:
Honor the Light Brigade,
Noble 600!
Four hundred and twenty-six of the brigade were placed hors de combat, 13 officers and 162 men were killed or taken prisoners, the former including Captain Nolan, who was struck early in the charge by a piece of shell and killed; 27 officers and 224 men were wounded. There struggled back to camp, in scattered groups, a remnant of 195 mounted men. In this charge Quartermaster Charles Wooden, whose group of medals forms the frontispiece to this volume, as Sergeant-Major in the 17th Lancers, gained the Victoria Cross by assisting Surgeon Mouat in saving the life of Lieutenant-Colonel Morris of his own regiment when lying exposed to a heavy fire of shot and shell, and carrying him to a place of safety. The Sergeant-Major had a horse shot under him.
Four hundred and twenty-six members of the brigade were put hors de combat. Thirteen officers and 162 men were killed or captured, including Captain Nolan, who was hit early in the charge by a piece of shrapnel and killed. Twenty-seven officers and 224 men were injured. A remaining group of 195 mounted men struggled back to camp in scattered formations. During this charge, Quartermaster Charles Wooden, whose collection of medals appears as the frontispiece to this volume, earned the Victoria Cross as a Sergeant-Major in the 17th Lancers for helping Surgeon Mouat save the life of Lieutenant-Colonel Morris of his regiment while he lay exposed to heavy gunfire and carrying him to safety. The Sergeant-Major had a horse shot out from under him.
The regiments engaged at Balaklava were the Heavy Brigade, comprising the 1st, 2nd, and 6th Dragoons; 4th and 5th Dragoon Guards; the Light Brigade, consisting of the 13th Light Dragoons and 17th Lancers in the first line, 4th Light Dragoons and 8th and 11th Hussars in the second line, and the 93rd Highlanders; but men of the Rifle and Naval Brigades, and of the artillery and various line regiments, including the 4th, 19th, 21st, 30th, 33rd, 44th, 47th, 50th, 53rd, 68th, and 77th, were also present and received the medal with the bar for Balaklava.
The regiments that fought at Balaklava included the Heavy Brigade, which was made up of the 1st, 2nd, and 6th Dragoons; the 4th and 5th Dragoon Guards; and the Light Brigade, consisting of the 13th Light Dragoons and 17th Lancers in the front line, as well as the 4th Light Dragoons and the 8th and 11th Hussars in the second line, along with the 93rd Highlanders. Additionally, troops from the Rifle and Naval Brigades, as well as the artillery and various line regiments, including the 4th, 19th, 21st, 30th, 33rd, 44th, 47th, 50th, 53rd, 68th, and 77th, were also there and received the medal with the bar for Balaklava.

ABYSSINIAN WAR MEDAL, 1867-8.
Abyssinian War Medal, 1867-68.

CANADA MEDAL, 1866 AND 1870.
CANADA MEDAL, 1866 & 1870.

ASHANTEE WAR MEDAL, 1873-4.
Ashantee War Medal, 1873-74.

ZULU WAR MEDAL, 1877-9.
ZULU WAR MEDAL, 1877-79.
Inkermann.—On Sunday, November 5th, 1854, the battle of Inkermann was fought. The Russians had received considerable reinforcements; it is estimated that by that time 120,000 troops were under Prince Mentschikoff's command, and the Czar's soldiers were in high fettle, owing to the presence in camp of the Czar's sons, Michael and Nicholas. A general advance was made by the Russians, Mount Inkermann being the objective, and the battle commenced by an assault thereon by General Danneburg with about 40,000 men. The Mount of Inkermann and the district thereof was held by the Second Division under General Pennefeather. At daybreak masses of Russians were discerned marching to the attack, and soon afterwards the armies were in conflict. Then began the "soldiers' battle," which was to add lustre to the record of the several British regiments whose gallantry gained the day. How can one adequately paint the picture of 200 men of the 30th charging a couple of Russian battalions and putting them to rout, or of the 49th defeating a strong column and chasing their flying foemen? How can one do justice to the 525 men of the 41st who fought and dispersed five battalions of the enemy, and the 260 men of the 77th who put to rout 1,500 of the famous Tomsk Regiment? In the first stage of the battle 4,000 British soldiers beat back 15,000 Russians from the slopes of Inkermann, where, in the detached fighting that had taken place, many a V.C. was well earned. In the second stage the terrific struggle ranged around the worthless sand-bag battery; seven times did the Russians capture it, and as often was it retaken by the British, each time with awful slaughter, until the dead lay around the battery in heaps and filled the entrenchment. In this useless and stubborn fight Generals Adams, Cathcart, and Torrens fell. There[Pg 150] young Captain Stanley of the "Die Hards" fell as he called to his men to "remember Albuera" and follow him. There a few hundred Coldstreams, who had 8 officers killed, fought back to back against 6,000 Russians, and sustained "the bloodiest struggle ever witnessed since war cursed the earth." Then two 18-pounders were ordered up by Lord Raglan, and, as happened at the Alma, helped to determine the events of the day. An artillery duel resulted, many a British gunner falling by his gun, in the discomfiture of the enemy ere the Zouaves, led by their Vivandière, pushed into the fight and drove the Russians toward the sand-bag battery, where the dead had formed a wall. The French Zouaves and British soldiers then made short work of the contest, and the Zouaves' standard was firmly planted on the sand-bag battery. By 1 o'clock the battle was decided, but such was the straggling and intermittent nature of the fighting that it was not until 3 o'clock that Mount Inkermann was again entirely in the possession of the allies. In this great battle 10 British Generals were killed or wounded—Lord Raglan alone being unharmed—39 officers and 558 men killed, and 1,760 officers and men wounded (rather more than one-third of the total strength of the army engaged). The French lost 130 killed and wounded, and the Russians over 11,000, including 256 officers killed.
Inkermann.—On Sunday, November 5th, 1854, the battle of Inkermann took place. The Russians had received significant reinforcements, with an estimated 120,000 troops under Prince Mentschikoff's command by this time, and morale was high among the Czar's soldiers, thanks to the presence of the Czar's sons, Michael and Nicholas. The Russians launched a general advance, aiming for Mount Inkermann, starting with an assault led by General Danneburg and around 40,000 men. Mount Inkermann and the surrounding area were held by the Second Division under General Pennefeather. At daybreak, large groups of Russians were seen marching to the attack, and soon after, the two armies clashed. Thus began the "soldiers' battle," which would enhance the reputation of the various British regiments whose bravery secured victory that day. How can one fully capture the moment when 200 men from the 30th charged against two Russian battalions and sent them fleeing, or when the 49th overcame a strong column and pursued their retreating enemies? How can one properly acknowledge the 525 men of the 41st who fought and routed five enemy battalions, or the 260 men of the 77th who scattered 1,500 members of the famous Tomsk Regiment? In the initial phase of the battle, 4,000 British soldiers fended off 15,000 Russians from the slopes of Inkermann. In this detached fighting, many earned the Victoria Cross. In the second phase, a fierce struggle erupted around a worthless sand-bag battery; the Russians captured it seven times, and each time the British reclaimed it with heavy casualties, until piles of the dead surrounded the battery and filled the entrenchments. In this futile and fierce combat, Generals Adams, Cathcart, and Torrens fell. There, young Captain Stanley of the "Die Hards" fell as he urged his men to "remember Albuera" and follow him. A few hundred Coldstreams, with 8 officers killed, fought back-to-back against 6,000 Russians, enduring "the bloodiest struggle ever witnessed since war cursed the earth." Then Lord Raglan ordered two 18-pounders up, which, as at the Alma, proved pivotal in the day's outcome. An artillery duel ensued, with many British gunners falling by their guns, significantly demoralizing the enemy before the Zouaves, led by their Vivandière, joined the battle and pushed the Russians toward the sand-bag battery, now a wall of corpses. The French Zouaves and British soldiers quickly ended the fight, and the Zouaves planted their standard firmly on the sand-bag battery. By 1 o'clock, the battle was decided, but due to the fragmented nature of the combat, it wasn't until 3 o'clock that Mount Inkermann was fully back in allied control. In this significant battle, 10 British Generals were killed or wounded—Lord Raglan remained unharmed—along with 39 officers and 558 men killed, and 1,760 officers and men wounded (a bit more than one-third of the total army engaged). The French suffered 130 killed and wounded, while the Russians lost over 11,000, including 256 officers killed.
The following regiments were present at Inkermann: Grenadiers, Coldstreams, and Scots Fusilier Guards; 1st, 4th, 7th, 19th, 20th, 21st, 23rd, 28th, 30th, 33rd, 38th, 41st, 2 companies 46th, 47th, 49th, 50th, 55th, 57th, 63rd, 68th, 77th, 88th, 95th; 4th, 8th, 11th, and 13th Hussars; 17th Lancers and 2 batteries of the Royal Horse Artillery and Royal Field Artillery.
The following regiments were present at Inkermann: Grenadiers, Coldstreams, and Scots Fusilier Guards; 1st, 4th, 7th, 19th, 20th, 21st, 23rd, 28th, 30th, 33rd, 38th, 41st, 2 companies from the 46th, 47th, 49th, 50th, 55th, 57th, 63rd, 68th, 77th, 88th, 95th; 4th, 8th, 11th, and 13th Hussars; 17th Lancers and 2 batteries of the Royal Horse Artillery and Royal Field Artillery.
Medals with bars for the Alma or Inkermann, or both, are rare to the 46th Foot, while the medals awarded the Coldstream Guards and to participants in the charge of the Light Brigade realise good prices when offered for sale.
Medals with bars for the Alma or Inkermann, or both, are uncommon for the 46th Foot, while the medals given to the Coldstream Guards and those involved in the charge of the Light Brigade fetch good prices when sold.
The Crimean Medals.—In December 1854 Queen[Pg 151] Victoria commanded that a medal bearing the word "CRIMEA" should be struck, and that bars for the ALMA and INKERMANN ("the soldiers' battle") should be awarded to those who had taken part in the battles; but the world had wondered at the "death-ride" of the Light Brigade—on October 29th, 1854—and so no one was surprised when, in February 1855, a clasp for BALAKLAVA was granted to those who rode so bravely into the jaws of death, and, wonder of wonders, came out again; likewise to the Heavy Brigade and to the regiments engaged in the vicinity. The bar for SEBASTOPOL was added to the list in October 1855, so that the four-bar medal illustrated is a complete record of one of the greatest of modern wars, significant because of the fact that we fought shoulder to shoulder with our old adversaries the French, and side by side with the Turks and Sardinians against the Russian Army. The medal, designed by W. Wyon, represents on the reverse a Roman warrior with a flying figure of Victory crowning him with a laurel wreath; to the right of the figure is the word CRIMEA arranged perpendicularly. The obverse is the same as that on the Peninsular and India General Service medals. The bars are the most ornate of the whole series given with British medals. A special bar for AZOFF was given to the Navy. The suspender is of a very appropriate character, suggesting a palm wreath issuing from a conventional cusp. The ribbon is of pale blue with yellow edges, and, be it noted, the ribbon for the Baltic medal—illustrated facing page 296—granted to sailors and a few marines, is yellow, with pale-blue edges. The Baltic medals were all issued unnamed, as were also the Crimean; but some recipients of the latter had their name and regiment engraved privately. Others were officially named later, with the same stamps as were used for the Army General Service and early Kaffir War medals, in square Roman capitals.
The Crimean Medals.—In December 1854, Queen[Pg 151] Victoria ordered that a medal featuring the word "CRIMEA" be created, and that bars for the ALMA and INKERMANN ("the soldiers' battle") be awarded to those who fought in these battles. However, the world was still in shock from the "death-ride" of the Light Brigade on October 29, 1854, so it wasn’t surprising when, in February 1855, a clasp for Balaclava was awarded to the brave soldiers who rode into danger and, remarkably, survived. The same clasp was also given to the Heavy Brigade and other regiments involved. The bar for SEBASTOPOL was added to the collection in October 1855, making the four-bar medal shown a complete record of one of the greatest modern wars. This war was significant because we fought alongside our old adversaries, the French, and side by side with the Turks and Sardinians against the Russian Army. The medal, designed by W. Wyon, depicts on the reverse a Roman warrior with a flying figure of Victory crowning him with a laurel wreath; to the right of the figure is the word CRIMEA arranged vertically. The obverse is the same as that on the Peninsular and India General Service medals. The bars are the most ornate of all the British medals. A special bar for AZOFF was awarded to the Navy. The suspender has a fitting design, suggesting a palm wreath emerging from a conventional cusp. The ribbon is light blue with yellow edges, and it's worth noting that the ribbon for the Baltic medal—illustrated on page 296—awarded to sailors and a few marines, is yellow with light blue edges. The Baltic medals were all issued unnamed, as were the Crimean medals; however, some recipients had their name and regiment privately engraved. Others were officially named later, using the same stamps as those for the Army General Service and early Kaffir War medals, in square Roman capitals.
Five bars in all were issued, but four is the greatest[Pg 152] number awarded with any medal. The bars should read upward from the medal as follows: Alma, Balaklava, Inkermann, Sebastopol, but a number of the medals were issued without the bars being fixed, and the order is consequently sometimes found to be inaccurate; care should therefore be taken to verify the record of the person named on the medal. Many medals were issued before the grant of the bar for Sebastopol at the end of October 1855, and many exist without this bar, although all who took part in the battles of Balaklava and Inkermann were entitled to it. The troops who landed in the Crimea after September 9th, 1855, the day Sebastopol fell, were not entitled to the medal unless they had been engaged against the enemy after that date.
Five bars were issued in total, but four is the maximum number awarded with any medal. The bars should be arranged above the medal as follows: Alma, Balaklava, Inkermann, Sebastopol. However, some medals were issued without the bars being attached, so the order may sometimes be incorrect; therefore, it’s important to verify the record of the person named on the medal. Many medals were given out before the bar for Sebastopol was awarded at the end of October 1855, and many exist without this bar, even though everyone who fought in the battles of Balaklava and Inkermann was entitled to it. The troops who landed in Crimea after September 9th, 1855, the day Sebastopol fell, were not eligible for the medal unless they had engaged with the enemy after that date.
The Turkish Medals.—The Turkish Government, in whose cause we took up arms, gave to the allies a silver medal suspended by a bright-red ribbon with green edges ½ in. wide running through a small ring. This is illustrated beside the British Crimean medal. These medals vary; they were intended for the British, French, and Sardinian soldiers, and had among the trophy of flags that of the country the recipient belonged to in the front, beside the Turkish flag, and in the exergue either CRIMEA 1855, LA CRIMEA 1855, or CRIMEE 1855, but as the ship which was bringing the medals to England foundered, many men received the French or Sardinian variety. These medals, 1⅖ in. in diameter, bear on the obverse the Sultan's cypher encircled by a laurel wreath, with the date in Arabic Hegira "1271."
The Turkish Medals.—The Turkish Government, for which we fought, awarded a silver medal to the allies. This medal is hung from a bright-red ribbon with green edges that is ½ inch wide, running through a small ring. It's illustrated next to the British Crimean medal. These medals come in different versions; they were meant for British, French, and Sardinian soldiers, and featured the flag of the recipient's country beside the Turkish flag on the front, with either CRIMEA 1855, Crimea, 1855, or CRIMEE 1855 in the exergue. However, because the ship carrying the medals to England sank, many soldiers ended up receiving the French or Sardinian version. These medals are 1⅖ inches in diameter and display the Sultan's cipher surrounded by a laurel wreath on the front, along with the date in Arabic Hegira "1271."
They were generally issued unnamed, but I have several impressed.
They were usually issued without names, but I have several that are marked.
The French Medal.—The Emperor of the French awarded crosses of the Legion of Honour to officers and men who had been conspicuous during the war, and the Médaille Militaire to about 500 non-commissioned officers and men who had distinguished themselves. The Duke of Wellington and Sir William Cordington,[Pg 153] who was presented by Marshal Pellisier with his own medal, were the only two British officers to receive it. The medal is silver, the eagle and centre being gilt, and the band surrounding the head of Louis Napoleon enamelled, likewise that on the reverse, encircling VALEUR ET DISCIPLINE. The medal is suspended from an orange-coloured ribbon with green edges.
The French Medal.—The Emperor of France awarded crosses of the Legion of Honour to officers and soldiers who had stood out during the war, and the Médaille Militaire to about 500 non-commissioned officers and soldiers who had excelled. The Duke of Wellington and Sir William Cordington,[Pg 153] who received his own medal from Marshal Pellisier, were the only two British officers to get it. The medal is made of silver, with a gilt eagle and center, and the band around the head of Louis Napoleon is enamelled, as is the reverse, which features the inscription Value and Discipline. The medal hangs from an orange ribbon with green edges.
The Sardinian Medal.—The King of Sardinia awarded the Sardinian war medal to 400 officers, non-commissioned officers, and men of the Army, sailors, and marines. The obverse has the arms of Savoy within a wreath of palm or laurel encircled by the legend AL VALORE MILITARE. On the reverse is a laurel wreath and the inscription SPEDIZIONE D'ORIENTE 1855-1856. The medal of silver is suspended by blue watered silk ribbon through a broad loop with a flat top, much the same as the handle of a flat-iron; medals of gunmetal with similar loops were given by the German States for certain campaigns.
The Sardinian Medal.—The King of Sardinia awarded the Sardinian war medal to 400 officers, non-commissioned officers, and soldiers of the Army, sailors, and marines. The front features the arms of Savoy within a wreath of palm or laurel, surrounded by the inscription FOR VALOR IN MILITARY SERVICE. On the back is a laurel wreath and the inscription EXPEDITION TO THE EAST 1855-1856. The silver medal hangs from a blue watered silk ribbon through a broad loop with a flat top, similar to the handle of a flat-iron; medals made of gunmetal with similar loops were also awarded by the German States for certain campaigns.
Turkish General Service Medal.—The Turkish General Service medal, incorrectly called the "Danube Medal," was awarded by the Turkish Government in 1855 to the officers and 30 men comprising the crew of a British gunboat, and to a Colonel and 16 men of the Royal Engineers, for services rendered on the Danube in 1854. On the obverse is the cypher of the Sultan Abdil Mageed Khan II within a beaded circle, with flags and laurel branches, and above all a crescent and star. On the reverse is an elliptical star of twelve points, with a smaller one of six in the centre; underneath is a scroll bearing an inscription in Persian characters, reading "Mischani Iftikar" (Medal for Glory), and under all a small star between laurel wreaths. The medal is 1⅕ in. in diameter, and was suspended from a silver scroll bar by the same ribbon as used with the Turkish Crimean medal. The General Service medals were issued in gold and silver, gold to the officers and silver to the men.
Turkish General Service Medal.—The Turkish General Service Medal, often mistakenly called the "Danube Medal," was awarded by the Turkish Government in 1855 to the officers and 30 crew members of a British gunboat, as well as to a Colonel and 16 men of the Royal Engineers, for their service on the Danube in 1854. On the front, it features the cipher of Sultan Abdil Mageed Khan II within a beaded circle, decorated with flags and laurel branches, topped with a crescent and star. On the back, there's an elliptical star with twelve points, with a smaller six-pointed star in the center; below it is a scroll with an inscription in Persian that reads "Mischani Iftikar" (Medal for Glory), and underneath is a small star flanked by laurel wreaths. The medal measures 1⅕ inches in diameter and was suspended from a silver scroll bar by the same ribbon used for the Turkish Crimean Medal. The General Service medals were issued in gold and silver, with gold for the officers and silver for the men.
The Silistria Medal.—Sir John Lintorn Arabin Sim[Pg 154]monds, who was one of the officers to receive the medal referred to above, was awarded another in gold for his services in the defence of Silistria in 1854. Six other British officers also received the medal, but in silver. The obverse is the same as the General Service medal, but on the reverse is, within a beaded border, the fortress of Silistria, over which the Turkish flag is flying, with the Danube in the foreground. In the exergue on a scroll is SILISTRIA and the year of the Hegira "1271" in Arabic characters. The medal is 19∕20 in. in diameter, and was suspended from a steel ring run through it by the same ribbon as used with the Turkish Crimean medal.
The Silistria Medal.—Sir John Lintorn Arabin Sim[Pg 154]monds, one of the officers awarded the medal mentioned earlier, received an additional gold medal for his efforts defending Silistria in 1854. Six other British officers were also awarded the medal, but in silver. The front side is identical to the General Service medal, while the back features, within a beaded border, the fortress of Silistria, with the Turkish flag flying above it, and the Danube River in the foreground. At the bottom is a scroll with SILISTRIA and the year of the Hegira "1271" in Arabic characters. The medal has a diameter of 19∕20 inches and is hung from a steel ring attached with the same ribbon used for the Turkish Crimean medal.
Kars Medal.—The Sultan of Turkey granted a silver medal for his brilliant defence of Kars to Sir William Fenwick Williams, and to several other British officers who had served with him, and also to his artillery servant. It has the same obverse as the Turkish General Service medal, but on the reverse is depicted the citadel and town of Kars, with the Turkish flag flying over the citadel, and underneath KARS and the date Hegira "1272" (1856). The medal, 19∕20 in. in diameter, has a milled edge and was suspended from a straight silver bar and clip by 1½ in. crimson ribbon with green stripes at the side.
Kars Medal.—The Sultan of Turkey awarded a silver medal to Sir William Fenwick Williams for his outstanding defense of Kars, along with several other British officers who served with him and his artillery servant. It shares the same front design as the Turkish General Service medal, but the back features the citadel and town of Kars, with the Turkish flag flying over the citadel, and underneath it is KARS along with the Hegira date "1272" (1856). The medal measures 19∕20 inches in diameter, has a milled edge, and is attached to a straight silver bar and clip by a 1½ inch crimson ribbon with green stripes on the sides.
The Order of the Medjidie.—The Sultan of Turkey rather profusely awarded the newly established Order of the Medjidie to officers in the British Army and Navy for services rendered in the Crimean War. Field Marshal Sir Evelyn Wood was awarded the fifth class. He was then a midshipman of seventeen. Five classes were given, and the recipients exceeded 1,000. The size of the decorations gradually decreased according to grade. The centre of the Badge of the first four classes is gold, and that of the fifth silver; the first three classes wear the Badge round the neck, suspended by a crimson ribbon with green edges, whilst the other two classes suspend the Badge from the left breast by a similar ribbon. The Badge or[Pg 155] Cross is of silver, with seven triple points or rays, between which are disposed seven small crescents and stars of five points. On a red enamelled band in Arabic characters are the words "Loyalty—Patriotism—Zeal" and the year of the Hegira "1268" (1852, when the order was founded) around the cypher of the Sultan. The badge is suspended from a red enamelled crescent and star.
The Order of the Medjidie.—The Sultan of Turkey generously awarded the newly established Order of the Medjidie to officers in the British Army and Navy for their services during the Crimean War. Field Marshal Sir Evelyn Wood received the fifth class. He was just a seventeen-year-old midshipman. Five classes were created, and the recipients numbered over 1,000. The size of the decorations gradually decreased by grade. The center of the Badge for the first four classes is gold, while the fifth class has a silver center; the first three classes wear the Badge around their necks, suspended by a crimson ribbon with green edges, while the other two classes attach the Badge to the left side of their chests using a similar ribbon. The Badge or[Pg 155] Cross is made of silver, featuring seven triple points or rays, with seven small crescents and five-pointed stars arranged between them. On a red enamelled band in Arabic, the words "Loyalty—Patriotism—Zeal" and the year of the Hegira "1268" (1852, the year the order was founded) are inscribed around the Sultan's cypher. The badge hangs from a red enamelled crescent and star.
Persia.—The Persian War followed in 1856-7; it was brought about by the intimate relations of the Persian Government with Russia. A rebellion broke out in Herat, "the Gate of Persia," and the place was besieged by the aid of Russia; as this was contrary to the provisions of a convention made between the Shah and the British Minister in 1853, an expedition under General Outram was dispatched. It landed near Bushire, and on December 9th, 1856, a battle was fought at Reshire, and the next day another at Bushire. Conflicts also took place at Kooshab—where the 3rd Bombay Cavalry broke a Persian square—Barajoom, Mohummerah and Ahaz, before the "King of Kings" sued for peace.
Persia.—The Persian War took place in 1856-7 and was triggered by the close ties between the Persian Government and Russia. A rebellion erupted in Herat, known as "the Gate of Persia," and the city was besieged with Russia's support. Since this went against a treaty established between the Shah and the British Minister in 1853, an expedition led by General Outram was sent out. It landed near Bushire, and on December 9th, 1856, a battle occurred at Reshire, followed by another the next day at Bushire. There were also conflicts at Kooshab—where the 3rd Bombay Cavalry broke a Persian formation—Barajoom, Mohummerah, and Ahaz, before the "King of Kings" sought peace.
The following regiments were engaged: 64th and 78th Foot, and 14th Light Dragoons; and the regiments in the H.E.I. Co.'s service: 2nd Bombay European Fusiliers; Bombay Sappers and Miners; 2nd, 3rd, 4th, 5th, 8th, 11th, 15th, 20th, 22nd, 23rd, 25th, 26th, 28th, and 29th Bombay Infantry; 1st Scinde Horse; 3rd Bombay Cavalry and Poona Horse.
The following regiments were involved: 64th and 78th Infantry, and 14th Light Dragoons; along with the regiments serving in the H.E.I. Co.: 2nd Bombay European Fusiliers; Bombay Sappers and Miners; 2nd, 3rd, 4th, 5th, 8th, 11th, 15th, 20th, 22nd, 23rd, 25th, 26th, 28th, and 29th Bombay Infantry; 1st Scinde Horse; 3rd Bombay Cavalry and Poona Horse.
The India General Service medal, illustrated facing page 120, was awarded with the clasp for PERSIA, or the clasp was added to the medal of the soldier who had taken part in the second Burmese War; indeed, the medal was instituted to obviate the necessity for designing medals for each campaign, and multiplying the number which might adorn the soldier's breast.
The India General Service medal, shown on the page 120, was given with the clasp for IRAN, or the clasp was added to the medal of the soldier who fought in the second Burmese War; actually, the medal was created to avoid the need for designing separate medals for every campaign, and to reduce the number that could decorate a soldier's chest.
THE INDIAN MUTINY
On Sunday, May 10th, 1857, the native soldiers in Meerut openly mutinied. It was not the fat used in the making of cartridges which caused the outbreak; that was merely the ostensible reason, for there can be little doubt that a section of the natives, failing to understand European institutions and principles, were easily led by political agitators to take the desperate step of rebellion. The Kings of Oude and Delhi had been practically deposed by the Indian Government, and it was the effort to restore the Mogul dynasty, engineered by those who for political reasons wished to see the English expelled from India, that had much to do with the mutiny—for mutiny it certainly was, bred among men who had gathered extravagant notions of their own importance and their ruler's weaknesses. The common people were hardly affected—indeed, the princes were also, with the exception of the Ranee of Jhansi and the Náná Sáhib, loyal to the British. The arch-fiend of the mutiny was the Náná Sáhib, who had been quietly waiting his opportunity for revenge upon the British for refusing to continue the pension granted to his foster-father. The cartridge incident merely helped him in his nefarious designs, and forwarded the efforts of our external enemies. It was not, however, expected that the mass of the people of India, with their princes, would remain loyal as they did. At the time the mutiny broke out, in a population of 18,000,000, 200,000 of whom were sepoys, there were only 38,000 British soldiers, so that it is quite evident that the outbreak was not national, but military, otherwise they would have been swallowed up in the tempest. Disaffection had occurred at two or three stations, and the 19th and 34th Native Infantry had to be disbanded, the latter after Mangul Pandy had shot two officers at Barrackpore. Then the more determined outbreak occurred at Oude and Meerut; the English officers were murdered, and the European civilians slaughtered before the two regiments of mutineers marched off to join others in Delhi, which became the centre of mutinous activity. They proclaimed as king a descendant of the great Mogul, and attempted to capture the magazine, but, as we shall see hereafter, ten Britishers gallantly defended it, and ultimately blew it up. At this time the 8th were at Jallundur, the 32nd at Lucknow, the 60th and 6th Carabineers, with a troop of horse artillery and details of other regiments, at Meerut. The 61st at Ferozepore, the 75th at Umballah, the 81st at Meeau Meer, the 37th were called up from Ceylon, and the Madras Fusiliers from Madras. The 64th and 78th hurried from Persia, and the 84th were recalled from Burmah. The troops, which included the 93rd Highlanders, en route for China were ordered to India, and Sir Colin Campbell hurried off from England to take command of the operations. Meanwhile the insurrection spread, until the whole region between the Punjab and Lower Bengal was in revolt, a district as great as Austria, France, and Prussia combined. Within six weeks of the murder of Colonel Finnis at Meerut, of the 120 sepoy regiments only 25 had not mutinied, and of these only 5 could be relied upon.
On Sunday, May 10th, 1857, the native soldiers in Meerut openly rebelled. It wasn't just the fat used in making cartridges that sparked the uprising; that was only the surface reason. It's clear that a part of the native population, who misunderstood European systems and principles, were easily influenced by political agitators to take the drastic step of rebellion. The Kings of Oude and Delhi had essentially been removed from power by the Indian Government, and the push to restore the Mogul dynasty, driven by those wanting to see the British expelled from India for political reasons, played a significant role in the mutiny. This was indeed a mutiny, fueled by men who had inflated views of their own importance and their rulers' weaknesses. The common people were largely unaffected; in fact, most of the princes remained loyal to the British, except for the Ranee of Jhansi and the Náná Sáhib. The main instigator of the mutiny was the Náná Sáhib, who had been quietly waiting for his chance to take revenge on the British for cutting off the pension to his foster father. The cartridge incident only aided his malicious plans and supported the efforts of our external enemies. However, it was unexpected that the majority of the Indian population, along with their princes, would remain as loyal as they did. When the mutiny began, out of a population of 18 million, with 200,000 being sepoys, there were only 38,000 British soldiers. So it was clear that the uprising was not national but military; otherwise, they would have been overwhelmed in the chaos. Discontent arose at a few stations, leading to the disbanding of the 19th and 34th Native Infantry, the latter after Mangul Pandy shot two officers at Barrackpore. This was followed by a more determined uprising in Oude and Meerut, where English officers were killed and European civilians slaughtered before the two regiments of mutineers marched off to join others in Delhi, which became the center of the rebellious activity. They declared as king a descendant of the great Mogul and attempted to seize the magazine, but as we’ll see later, ten British soldiers bravely defended it and ultimately blew it up. At this time, the 8th was in Jallundur, the 32nd in Lucknow, the 60th and 6th Carabineers, along with a troop of horse artillery and details from other regiments, were in Meerut. The 61st was in Ferozepore, the 75th in Umballah, the 81st in Meeau Meer, the 37th was summoned from Ceylon, and the Madras Fusiliers were called from Madras. The 64th and 78th rushed in from Persia, and the 84th were recalled from Burma. The troops, which included the 93rd Highlanders heading to China, were redirected to India, and Sir Colin Campbell hurried from England to take command of the operations. Meanwhile, the insurrection spread until the entire area between Punjab and Lower Bengal was in revolt, an area as large as Austria, France, and Prussia combined. Within six weeks of Colonel Finnis' murder in Meerut, only 25 of the 120 sepoy regiments had not mutinied, and of those, only 5 could be trusted.

MEDAL FOR AFGHAN WAR.
Medal for Afghan War.

ROBERTS STAR FOR MARCH TO KANDAHAR.
ROBERTS STAR FOR MARCH TO KANDAHAR.
Cawnpore.—Náná Sáhib took his opportunity directly the news of the rebellion at Meerut and Delhi became known. Placing himself at the head of the rebels, he proclaimed himself Peshwa of the Mahrattas, and on June 6th informed General Sir Hugh Wheeler that he was about to attack the position held by him, a miserably slight fortification within which he had gathered about 1,000 souls, of whom only 465 were males of all ages and classes. How bravely they fought, despite hunger, thirst, and disease, for twenty days, and only surrendered when a safe passage to Allahabad had been guaranteed by the bloodthirsty Náná, and how by his treachery they were butchered by gunshot and sword, or burnt to death, is one of those heroic episodes which will live for ever; while the butchery of the women and children also by order of the Náná Sáhib[Pg 158] will blot the pages of Indian history for all time. On July 16th General Havelock, who had hastened to the relief, defeated the Náná with 7,000 men and powerful artillery, a few miles south of the city, and he fled during the night. Next morning the British soldiers entered Cawnpore, too late to save the unfortunate captives. Havelock's little army, which had marched 126 miles in eight days and captured 24 guns, consisted of 435 men of the 64th, about 300 78th Highlanders (Ross-shire Buffs), 190 of the 84th, 400 of the 1st Madras Fusiliers, 20 Volunteer Cavalry, 76 Royal Artillery, 450 Sikhs, and 50 Irregular Native Horse. "Better soldiers have never trod the earth," states Archibald Forbes; and when we consider the sweltering heat of the Indian summer, the men wading "in a sea of slush ... while the flood of tropical rain beat down," and fighting against overwhelming odds, we may heartily endorse Dr. Fitchett when he says, "In the whole history of war, men have seldom dared, and endured, and achieved more than did Havelock's column in the gallant but vain struggle to relieve Cawnpore"; and of the "Ironsides" who were to press on to relieve and reinforce Lucknow, only 250 remained to participate in the glorious march.
Cawnpore.—Náná Sáhib seized his chance as soon as the news of the rebellion in Meerut and Delhi spread. He took command of the rebels, declared himself Peshwa of the Mahrattas, and on June 6th notified General Sir Hugh Wheeler that he was preparing to attack his position, a poorly defended fort where he had gathered about 1,000 people, of whom only 465 were men of various ages and backgrounds. They fought valiantly for twenty days, enduring hunger, thirst, and illness, only surrendering when Náná promised them safe passage to Allahabad. However, due to his betrayal, they were slaughtered by gunfire and sword, or burned alive, becoming part of a heroic tale that will be remembered forever; while the massacre of the women and children, also ordered by Náná Sáhib[Pg 158], will stain the history of India for eternity. On July 16th, General Havelock, who rushed to their rescue, defeated Náná with 7,000 troops and heavy artillery just a few miles south of the city, forcing him to flee overnight. The next morning, the British soldiers entered Cawnpore, too late to save the unfortunate captives. Havelock's small force, which had marched 126 miles in eight days and captured 24 cannons, included 435 men from the 64th, around 300 from the 78th Highlanders (Ross-shire Buffs), 190 from the 84th, 400 from the 1st Madras Fusiliers, 20 Volunteer Cavalry, 76 Royal Artillery, 450 Sikhs, and 50 Irregular Native Horse. "Better soldiers have never trod the earth," claims Archibald Forbes; and considering the scorching heat of the Indian summer, the men trudging "in a sea of muck ... while the downpour of tropical rain pelted down," and facing overwhelming odds, we can fully agree with Dr. Fitchett when he says, "In the entire history of warfare, few have dared, endured, and accomplished as much as Havelock's column in their brave but futile attempt to relieve Cawnpore"; and of the "Ironsides" set to continue on to relieve and support Lucknow, only 250 remained to take part in the heroic march.
Delhi.—On May 11, 1857, the 3rd Native Cavalry, who had outstripped their infantry companions in revolt on the long march of 38 miles from Meerut, appeared before the King's palace at Delhi, and declared they had "slain all the English at Meerut, and had come to fight for the faith." The old King had no desire to become embroiled in the tumult that had begun to rage around him, but his guards, sympathising with the mutineers, opened the gates and stood by while the miscreants murdered the English officers and officials, and their families, and any white person they could find. Lieutenant Willoughby, with 2 other officers and 7 British soldiers, determined not only to sell their lives dearly, but to do as much hurt to the rebels as possible, before they accepted[Pg 159] their fate. Their daring exploit of keeping nearly 2,000 mutineers at bay as long as they could serve the 10 guns, and coolly taking their chance of life and death as they blew the magazine and the surging masses of sepoys into the air, is one of the most brilliant in history. Brave Conductor Scully, who fired the train, and four of his companions heroically met their death, but the three officers, Willoughby (who was captured later and killed), Raynor, and Forrest, and Conductor Buckley, miraculously escaped for the time being.
Delhi.—On May 11, 1857, the 3rd Native Cavalry, who had outpaced their infantry comrades in rebellion during the long 38-mile march from Meerut, arrived at the King's palace in Delhi and announced that they had "killed all the English at Meerut and had come to fight for their faith." The old King wanted no part of the chaos that was erupting around him, but his guards, sympathizing with the mutineers, opened the gates and stood by as the criminals killed English officers and officials, along with their families and any white person they could find. Lieutenant Willoughby, along with 2 other officers and 7 British soldiers, resolved not only to defend their lives fiercely but also to inflict as much damage as possible on the rebels before facing[Pg 159] their fate. Their brave act of holding off nearly 2,000 mutineers for as long as they could operate the 10 guns, while calmly accepting their chances of life or death as they detonated the magazine and sent the rushing crowds of sepoys into the air, is one of the most remarkable feats in history. The courageous Conductor Scully, who ignited the fuse, and four of his companions heroically lost their lives, but the three officers, Willoughby (who was captured later and killed), Raynor, and Forrest, along with Conductor Buckley, miraculously escaped for the time being.
Meanwhile the Commander-in-Chief, General Anson, had collected all the available troops and marched upon Delhi, but dying of cholera at Kurnaul, the command devolved upon Major-General Reed. Major-General Sir Henry Barnard had collected a number of men at Aleepore, and Brigadier-General Archdale Wilson had quitted Meerut with about 700 men in order to join forces with the Commander-in-Chief. On May 30th he was attacked by the mutineers at Ghazee-ood-deen-nuggur, but drove off his assailants numbering over 4,000. They returned to the attack on the following day (Whit-Sunday), but the 6th Carabineers and the Rifles drove them off with considerable slaughter, and captured 26 guns.
Meanwhile, the Commander-in-Chief, General Anson, gathered all the available troops and marched to Delhi, but he died of cholera at Kurnaul, so control passed to Major-General Reed. Major-General Sir Henry Barnard had assembled a number of men at Aleepore, and Brigadier-General Archdale Wilson left Meerut with about 700 men to join forces with the Commander-in-Chief. On May 30th, he was attacked by mutineers at Ghazee-ood-deen-nuggur but managed to repel his attackers, who numbered over 4,000. They returned to attack the next day (Whit-Sunday), but the 6th Carabineers and the Rifles pushed them back with significant losses and captured 26 guns.
Then commenced the siege of Delhi, but for three and a half months the ancient city withstood the assaults of the besiegers. First Badlee-ke-Serai was taken, the 75th particularly distinguishing itself in the valiant fight which the English troops made in acquiring it, and then, after the Delhi cantonments had been taken and burned, the Goorkas giving splendid evidence of their loyalty and gallantry, the army sat down before the city, and the British lines were slowly but deliberately pushed forward. On June 17th one of the enemy's positions near the Ajmeer gate was taken; and on June 23rd, the fatal day of prophecy when British rule was to cease, the mutineers made a determined advance from the city, but after a hard[Pg 160] day's fighting, in which they had charged the Rifles, the Guides, and the Goorkas again and again, they were compelled to retire.
Then the siege of Delhi began, and for three and a half months, the ancient city held out against the attackers. First, Badlee-ke-Serai was captured, with the 75th showing exceptional bravery in the fierce battle fought by the British troops to take it. After the Delhi cantonments were seized and set on fire, the Goorkas displayed remarkable loyalty and courage. The army then settled in front of the city, and the British lines were gradually but steadily advanced. On June 17th, one of the enemy's positions near the Ajmeer gate was secured; and on June 23rd, the fateful day when it was foretold that British rule would end, the mutineers launched a strong attack from the city. However, after a tough day's fighting, during which they charged at the Rifles, the Guides, and the Goorkas repeatedly, they were forced to retreat.
In June cholera broke out in the camp, and early in July Sir Henry Barnard was among its victims, while the 8th and 61st regiments suffered considerably. Again and again the rebels sallied forth, only to be beaten back, and the fighting proceeded gallantly week after week, during which time Major Tombs, Lieutenant Hill, and a number of men gained the V.C. Then Brigadier-General John Nicholson, having gained a brilliant victory at Nujjuffhur, and prevented an attack upon the rear of the British camp, rode in on August 7th. Shortly after his little army marched in; it comprised 680 men of the 52nd, a wing of the 61st, the 2nd Punjab Infantry, and a field battery with detachments of Beloochees and military police.
In June, cholera broke out in the camp, and by early July, Sir Henry Barnard was one of its victims, while the 8th and 61st regiments suffered significantly. Time and again, the rebels charged out, only to be pushed back, and the fighting continued fiercely week after week, during which Major Tombs, Lieutenant Hill, and several others earned the V.C. Then, Brigadier-General John Nicholson, having achieved a brilliant victory at Nujjuffhur and preventing an attack on the rear of the British camp, rode in on August 7th. Shortly after, his small army marched in; it consisted of 680 men from the 52nd, a wing of the 61st, the 2nd Punjab Infantry, and a field battery with detachments of Beloochees and military police.
The besiegers were waiting for the siege train with which to breach the walls, and the mutineers having learned that it was en route, sallied forth in considerable numbers to intercept it; but Nicholson, with 1,600 infantry, 400 cavalry, and a battery of field guns, set out on August 25th to save the train. The troops had to cross the swamps, made more difficult by the ceaseless rain; but after wading through them, the water sometimes over the horses' backs, and along the rain-drenched roads, they came up with the enemy at Nujutgurh after a march of twelve hours. The mutineers numbered 6,000, but the tired and drenched soldiers of Britain, led by the daring Nicholson, charged the enemy, placed 800 of them hors de combat, captured 13 guns, and sent the sepoys flying back to Delhi. Retracing their steps, the little force, having lost 60 men, arrived back in camp, having in forty hours, during twenty-four of which they were foodless, marched 35 miles and beaten and dispersed an army of well-trained men.
The attackers were waiting for the siege train to break through the walls, and the rebels, having found out that it was en route, rushed out in large numbers to intercept it. But Nicholson, with 1,600 infantry, 400 cavalry, and a battery of field guns, set out on August 25th to save the train. The troops had to navigate through the swamps, which were made worse by the constant rain. After struggling through the water, sometimes high enough to reach the horses' backs, and along the muddy roads, they encountered the enemy at Nujutgurh after a twelve-hour march. The rebels numbered 6,000, but the exhausted and soaked British soldiers, led by the fearless Nicholson, charged at them, taking 800 out of action, capturing 13 guns, and sending the sepoys retreating back to Delhi. Retracing their steps, the small force, having lost 60 men, returned to camp after forty hours, during which they had gone without food for twenty-four hours, having marched 35 miles and defeated an army of well-trained troops.

(Obverse.)
(Front.)
EGYPTIAN MEDAL FOR 1882.
Egyptian Medal for 1882.

(Obverse.)
(Front side.)
KHEDIVE'S BRONZE STAR FOR 1882.
Khedive's Bronze Star 1882.

HONG-KONG PLAGUE MEDAL.
HONG KONG PLAGUE MEDAL.
Awarded to about 350 of the Shropshire Light Infantry, Engineers, and men of the R.N.
Awarded to around 350 members of the Shropshire Light Infantry, Engineers, and personnel from the Royal Navy.
The siege train arrived on September 4th, together with a wing of the 8th Detachment of the 9th and 60th, and a battalion of Beloochees. The guns were mounted, and by the 11th ready for action, when fire was opened and incessantly sustained against the Cashmere and Watergates until breaches had been made, and then it was determined to assault the city.
The siege train arrived on September 4th, along with a section of the 8th Detachment of the 9th and 60th, and a battalion of Beloochees. The guns were set up, and by the 11th, they were ready for action. Fire was opened and continuously maintained against the Cashmere and Watergates until breaches were created, and it was then decided to attack the city.
Blowing in the Cashmere Gate.—It was found necessary, however, to blow up the Cashmere Gate, and a party of twenty men under Lieutenants Home and Salkeld of the Engineers were detailed for the purpose. They effected their object, but Salkeld was mortally wounded and many of the men killed and wounded in their gallant effort. Bugler Robert Hawthorne of the 52nd, having thrice sounded the regimental call of the 52nd for the column to advance, took charge of the wounded lieutenant, and having bound up his wounds, removed him to a place of comparative safety. The bugler was decorated with the V.C. for "as noble a deed as any that has ever graced the annals of war." In the assault on September 14th the gallant Irishman John Nicholson fell, mortally wounded while leading his men near the Lahore Gate, and 1,169 officers and men were killed, wounded, or missing, but the whole of the outer parts of the city were in possession of the British. On the 16th the magazine which Willoughby had, it was found, only partially blown up was captured by the 61st, but desultory fighting was continued until the 20th, when the Lahore Gate and the palatial Jumma Musjid were captured. Then the gates of the palace were blown in, and the 60th Rifles led the way into the ancient home of the Mogul Kings, and Delhi was in the hands of the British Army. In the grand assault upon Delhi 8 European officers and 162 men were killed, 52 officers and 510 men wounded, and 103 sepoys killed and 310 wounded. It is estimated that over 5,000 mutineers perished in the defence of the city.
Blowing up the Cashmere Gate.—It became necessary to blow up the Cashmere Gate, so a group of twenty men under Lieutenants Home and Salkeld from the Engineers was assigned to the task. They achieved their goal, but Salkeld was fatally wounded, and many of the men were killed or injured in their brave effort. Bugler Robert Hawthorne of the 52nd, after sounding the regimental call for the 52nd three times for the column to advance, took charge of the wounded lieutenant. After bandaging his wounds, he moved him to a safer location. The bugler was awarded the V.C. for "as noble a deed as any that has ever graced the annals of war." During the assault on September 14th, the brave Irishman John Nicholson was mortally wounded while leading his men near the Lahore Gate, and 1,169 officers and men were killed, wounded, or missing, but the British held all the outer parts of the city. On the 16th, it was discovered that the magazine which Willoughby had only partially blown up was seized by the 61st, but sporadic fighting continued until the 20th, when the Lahore Gate and the grand Jumma Musjid were captured. Then the palace gates were blown open, and the 60th Rifles led the charge into the historic home of the Mogul Kings, thus Delhi was under the control of the British Army. In the major assault on Delhi, 8 European officers and 162 men were killed, 52 officers and 510 men were injured, and 103 sepoys were killed and 310 wounded. It's estimated that over 5,000 mutineers lost their lives in the defense of the city.
Hodson's Daring Feat.—But the king and his family had taken refuge in Humayon's Tomb, about 7 miles from the city, and Hodson, the daring Captain of the[Pg 162] Light Horse bearing his name, determined to capture him. Taking only fifty men, he essayed one of the most daring feats on record. With his little band he rode along the rebel-infested road to the tomb where, in the gigantic marble dome, the King and his two sons had concealed themselves; for two hours he parleyed with the intermediaries of the decrepit King, undismayed by the thousands of retainers who guarded him. At last the old man, on promise of his life, surrendered, and Hodson marched off before the wondering natives with his royal prisoner. There yet remained the two sons of the King, whose conduct in torturing English prisoners had made them notorious. They had barbarously slaughtered innocent women and hapless children, and Hodson determined that they should also become his prisoners. On September 21st he and his second in command, Macdowell, with 100 men rode off to effect the capture of the princes, who had 6,000 or 7,000 armed followers at their command. Reaching Humayon's Tomb, he demanded their surrender, but they at first refused to submit unless their lives were promised. Hodson calmly refused, and then they came forth with 3,000 armed men. But the daring Hodson interposed his troopers between the bullock-cart in which the princes were riding and the armed men, sent forward the princes with an escort of troopers, and then—calmly ordered the retainers to lay down their arms! Having collected them, Hodson quickly said to Macdowell "We'll go now," and then rode off with his troop. Overtaking the princes, he found that a crowd appeared to be threatening the troopers in charge of the cart, and fearing that he might lose them and that the ends of justice would be defeated, he ordered the princes to strip, and, after stating the nature of the crimes they had committed, shot them with his own hand. Brave, gallant, and daring Hodson was prepared to take the consequences which he fully appreciated, and, convinced that he was right, did not flinch from moral censure any more[Pg 163] than he had from physical consequences when he sallied forth with a handful of men to capture the King and his bloodthirsty sons. With the fall of Delhi the back of the mutiny was broken, but it had cost the besiegers a loss of 3,854 killed, wounded, and missing.
Hodson's Daring Feat.—The king and his family had taken shelter in Humayon's Tomb, about 7 miles from the city, and Hodson, the fearless Captain of the[Pg 162] Light Horse named after him, was determined to capture him. Taking only fifty men, he attempted one of the most audacious feats on record. With his small group, he rode along the rebel-infested road to the tomb where, in the massive marble dome, the King and his two sons had hidden themselves. For two hours, he negotiated with the intermediaries of the frail King, undeterred by the thousands of retainers guarding him. Eventually, the old man, with a promise of his life, surrendered, and Hodson marched off before the astonished locals with his royal prisoner. However, the two sons of the King remained, known for their brutal treatment of English prisoners. They had viciously killed innocent women and helpless children, and Hodson decided that they should also be captured. On September 21st, he and his second-in-command, Macdowell, along with 100 men, set off to apprehend the princes, who had 6,000 or 7,000 armed followers. Upon reaching Humayon's Tomb, he demanded their surrender, but they initially refused unless their lives were guaranteed. Hodson calmly refused, and they then emerged with 3,000 armed men. But the audacious Hodson positioned his troopers between the bullock-cart with the princes and the armed men, sent the princes forward with an escort of troops, and then—calmly ordered the retainers to lay down their arms! Once he had collected their weapons, Hodson quickly told Macdowell, "We'll go now," and rode off with his troop. Catching up with the princes, he found that a crowd seemed to be threatening the troops guarding the cart, and fearing he might lose them and justice would go unserved, he ordered the princes to strip, and after explaining the nature of their crimes, shot them himself. Brave, gallant, and daring, Hodson was ready to face the consequences he fully understood, and convinced of his righteousness, he did not shy away from moral criticism any more[Pg 163] than he had from physical risk when he set out with a handful of men to capture the King and his bloodthirsty sons. With the fall of Delhi, the heart of the mutiny was broken, but it had cost the besiegers a loss of 3,854 killed, wounded, and missing.
Defence of Lucknow.—The neighbourhood of Lucknow, however, remained in possession of the mutineers, although over the Residency
Defense of Lucknow.—The area around Lucknow, however, was still occupied by the rebels, even though the Residency
"Ever upon the topmost wall our banner of England flew."
"Always on the highest wall, our England flag waved."
For several weeks Lucknow had been in a state of unrest, and then at 9 o'clock on the night of May 30th, 1857, the smouldering fire broke into flame. Sir Henry Lawrence, that stalwart, cool northern Irishman, as just and firm as he was unselfish, had but 700 Europeans in a city of 700,000, of whom 7,000 were sepoys. He did not lose heart, but quickly and steadily made preparations for the defence of the place; he knew he could rely upon the Sikhs and a small number of the sepoys—700 actually remained true to their salt during the siege; he made no error in his calculations, and took few chances. He turned the Residency into a fortress, and generally prepared for the worst, while his sense of humour and his smiling face gave no sign of the stern practical heart within him. He was, as he said, "virtually besieging four regiments—in a quiet way—with 300 Europeans," while he resided "in cantonments guarded by the gentlemen" he was besieging!
For several weeks, Lucknow had been in turmoil, and then at 9 o'clock on the night of May 30th, 1857, the simmering unrest erupted into a full-blown crisis. Sir Henry Lawrence, a strong and level-headed Northern Irishman, as just and steadfast as he was selfless, had only 700 Europeans in a city of 700,000, with 7,000 being sepoys. He remained resolute and quickly and methodically prepared for the defense of the area; he knew he could count on the Sikhs and a small group of sepoys—700 actually stayed loyal during the siege; he made no mistakes in his calculations and took few risks. He transformed the Residency into a fortress and generally braced for the worst, while his sense of humor and cheerful demeanor hid the determined heart within him. He was, as he described, "virtually besieging four regiments—in a quiet way—with 300 Europeans," while residing "in cantonments guarded by the gentlemen" he was besieging!
On June 30th he decided to "blood" the native troops, and he accordingly sent half a dozen guns with sepoy artillerymen in the little force of just over 800, of whom only 336 were Europeans, to meet the mutinous regiments which were marching upon the city from Eastern Oude. The estimated force was 5,000; it turned out to be 15,000, and when they were encountered at Chinhut the Sikh horsemen bolted, and the artillerymen disabled and deserted their guns. The fates generally went against the bold step that Lawrence[Pg 164] had taken. The remnants of the little band had to retire in face of the great moving mass of mutineers; "regiment after regiment of sepoys steadily pursued towards us," and the 32nd who had gone into battle—300 foodless and badly armed men—were reduced to a skeleton, 5 of their officers and 112 men being killed. Lawrence returned with his straggling men to Lucknow; it was one of the few mistakes which the hero of Lucknow made, but he saved the survivors of the desperate fight by a masterly stroke in placing empty guns upon the iron bridge (the ammunition was exhausted), and with gunners standing beside them with lighted port-fires stayed the advance of the victorious sepoys. The time for desperate action had arrived. On July 1st he blew up the Mutchee Bhawan with its 1,000,000 cartridges and 250 barrels of gunpowder, and concentrated upon the Residency, and there for eighty-eight days, with a force of 927 Europeans and 700 sepoys, made one of the most famous defences in history. And there, despite the supreme efforts of the mutineers to shoot it down, the British flag was only temporarily out of position when the staff was shot away, and so
On June 30th, he decided to first engage the local troops, so he sent a handful of cannons with sepoy artillerymen as part of a small force of just over 800, only 336 of whom were Europeans, to confront the rebellious regiments advancing from Eastern Oude. While they expected an estimated force of 5,000, it actually turned out to be 15,000. When they met at Chinhut, the Sikh cavalry fled, and the artillerymen disabled their cannons and deserted. Fate generally was not on Lawrence's side for this bold move he made. The remaining members of the small group had to pull back in the face of the large number of mutineers; "regiment after regiment of sepoys steadily pursued us," and the 32nd, which had gone into battle—300 underfed and poorly armed men—became a mere shell of their former selves, with 5 officers and 112 men killed. Lawrence returned with his scattered troops to Lucknow; it was one of the few mistakes made by the hero of Lucknow, but he managed to save the survivors of the intense fight by cleverly placing empty cannons on the iron bridge (having run out of ammunition), with gunners next to them holding lighted port-fires to slow down the advance of the victorious sepoys. The time for desperate action had come. On July 1st, he blew up the Mutchee Bhawan, which contained 1,000,000 cartridges and 250 barrels of gunpowder, and focused on the Residency, where for eighty-eight days, with a force of 927 Europeans and 700 sepoys, he conducted one of the most renowned defenses in history. Despite the mutineers' determined efforts to take it down, the British flag only temporarily fell out of position when the staff was shot away, and so
"Ever aloft on the palace roof the old banner of England blew."
"High up on the palace roof, the old banner of England waved."
On July 2nd Sir Henry Lawrence was mortally wounded, and died on the 4th; then Brigadier Inglis took command of the troops. During the defence the populace of 3,000 and the troops were harassed by cholera, smallpox, and an indefinable disease, but the spirit of the troops remained undaunted until Jessie Brown's keen Scots ears heard the far-off skirl of the bagpipes of the 78th, Outram's Highlanders—"the saviours of India"—and Havelock, marching into Lucknow on September 25th, reinforced, as well as relieved, the brave garrison which still had, for another six weeks, to hold the Residency against 60,000 mutineers.
On July 2nd, Sir Henry Lawrence was fatally wounded and passed away on the 4th; then Brigadier Inglis took charge of the troops. During the defense, the 3,000 civilians and the soldiers faced challenges from cholera, smallpox, and an unidentifiable illness, but the morale of the troops stayed strong until Jessie Brown's sharp Scots ears caught the distant sound of the bagpipes from the 78th, Outram's Highlanders—"the saviors of India"—and Havelock, arriving in Lucknow on September 25th, who not only provided reinforcement but also relieved the brave garrison that still had to endure for another six weeks while holding the Residency against 60,000 mutineers.

EGYPTIAN MEDAL FOR THREE
CAMPAIGNS.
(Reverse.)
EGYPTIAN MEDAL FOR THREE CAMPAIGNS.
(Reverse.)

INDIA MEDAL FOR FOUR
CAMPAIGNS.
(Reverse.)
INDIA MEDAL FOR FOUR CAMPAIGNS.
(Reverse.)

EAST AND WEST AFRICA MEDAL
FOR FIVE EXPEDITIONS.
(Reverse.)
EAST AND WEST AFRICA MEDAL
(Reverse.)
The original defenders of the Residency were 535 men of the 32nd, 50 of the 84th, with 89 artillerymen, and 100 British officers whose native regiments had mutinied, and 153 civilians who took up arms to assist the regulars; and these, with 700 sepoys, undeterred by "the terrific and incessant fire by day and night," had for eighty-eight days defied not less than "8,000 men firing at one time into the position."
The original defenders of the Residency were 535 men from the 32nd regiment, 50 from the 84th, along with 89 artillerymen and 100 British officers whose local regiments had rebelled, plus 153 civilians who took up arms to support the regular troops; together with 700 sepoys, they courageously faced "the relentless and constant fire day and night" for eighty-eight days, standing strong against "8,000 men firing at one time into the position."
Relief of Lucknow.—Havelock, having rested his men after the advance on Cawnpore, followed up the Náná Sáhib, destroyed his palace and stronghold at Bithoor, and then with his tiny force, which was daily lessening through wounds and disease, marched towards Lucknow. He attacked Oonas en route, and passed through it, despite the 15 rebel guns which guarded the only road; pushed past the opposition at Busserut Gunge, but with a loss of 88 officers and men killed and wounded; then in despair, owing to his enfeebled force, Havelock started to return to Cawnpore. On reaching the Ganges the mutineers made a determined attack upon the little force, but the 78th, Ross-shire Buffs, dashed at the enemy's guns, and, as Havelock said, saved themselves and their comrades. Retracing his footsteps, Havelock was not aware that he had unconsciously helped the besieged in Lucknow by drawing off the rebel force to meet him, thus giving the garrison breathing-space in which to strengthen the fortifications and increase its stock of provisions. After a four-days rest the undaunted Havelock again set out for Lucknow with 1,300 men, but again meeting with opposition at Bithoor, and although the enemy was defeated, he decided to return to Cawnpore and await reinforcements. The 5th and 90th Regiments arrived early in September, five companies of men came in to make up for the terrible losses of the 78th, and then Sir James Outram, the "Bayard of India," arrived to take command of the Cawnpore and Dinapore divisions, but chivalrously delegated the command to Havelock "in gratitude for the brilliant deeds of arms achieved by General Havelock and his gallant troops." The relieving force consisted of the 1st Brigade—5th Fusi[Pg 166]liers, 84th, and 100 men of the 64th under Brigadier-General Neill; 2nd Brigade—78th Highlanders, 90th (Perthshire) Light Infantry, and Brasyer's Sikhs under Colonel Walter Hamilton of the 78th; 3 batteries of artillery under the dauntless Maude, "Hell-fire Jack" Olpherts, and brave Vincent Eyre; 109 volunteer cavalry and 59 native cavalry under the dashing Barrow.
Relief of Lucknow.—After resting his troops following the advance on Cawnpore, Havelock pursued Náná Sáhib, destroyed his palace and stronghold at Bithoor, and then marched towards Lucknow with his small force, which was dwindling daily due to injuries and illness. He attacked Oonas en route and passed through it, despite the 15 rebel guns guarding the only road; he pushed through the resistance at Busserut Gunge, but suffered a loss of 88 officers and men killed and wounded. Then, in despair due to his weakened force, Havelock decided to return to Cawnpore. When he reached the Ganges, the mutineers launched a determined attack on his small force, but the 78th, Ross-shire Buffs, charged at the enemy's guns, and, as Havelock noted, saved themselves and their comrades. While retracing his steps, Havelock was unaware that he had unintentionally aided the besieged in Lucknow by drawing off the rebel forces to confront him, giving the garrison a breather to fortify their defenses and stock up on supplies. After a four-day rest, the undeterred Havelock set out for Lucknow again with 1,300 men, but upon encountering resistance at Bithoor and defeating the enemy, he chose to return to Cawnpore and wait for reinforcements. The 5th and 90th Regiments arrived in early September, along with five companies to make up for the heavy losses of the 78th, and then Sir James Outram, the "Bayard of India," arrived to take command of the Cawnpore and Dinapore divisions, but graciously passed command to Havelock "in gratitude for the brilliant deeds of arms achieved by General Havelock and his gallant troops." The relieving force included the 1st Brigade—5th Fusiliers, 84th, and 100 men of the 64th under Brigadier-General Neill; 2nd Brigade—78th Highlanders, 90th (Perthshire) Light Infantry, and Brasyer's Sikhs under Colonel Walter Hamilton of the 78th; 3 batteries of artillery under the fearless Maude, "Hell-fire Jack" Olpherts, and brave Vincent Eyre; 109 volunteer cavalry and 59 native cavalry under the daring Barrow.
Crossing the Ganges on September 19th and 20th, the relieving force of 2,500 men attacked the enemy at Mungulwah on the 21st, and, although an obstinate opposition was met with, defeated the enemy and captured a couple of guns. Pushing forward, drenched by heavy rains for three days and through quagmires of mud, the badly fed little force came upon the enemy, 12,000 men, entrenched on the outskirts of Lucknow at the Alambagh, but after the artillery had opened fire the 78th Highlanders and the Fusiliers rushed the position, and in ten minutes the mutineers were flying in all directions. "The petticoated devils" were too much for them. After a day's rest, leaving 300 sick men to hold the place, the army advanced towards the Residency, and through a storm of shot gallantly rushed the Charbagh bridge, leaving the 78th as a rear-guard to hold it, which they bravely did, although stormed at by rifles and field pieces. The column then pushed on to the Kaiser Bagh, or King's palace, taking in reverse the battery which had been firing on the main body; and then the Highlanders, followed by the Sikhs and Fusiliers, made a desperate effort to reach the Residency. For three-quarters of a mile, with desperate and dauntless courage, the men pressed forward through a street in which from every housetop, door, and window a relentless hail of bullets poured upon them. In this grand advance Brigadier Neill fell, shot through the head, but the troops pushed on, and then through the embrasure by the side of the battered archway of the Baillie Guard they pressed. The picture has often been painted of the big rough-bearded[Pg 167] soldiers—those stern but soft-hearted Highlanders—seizing the little children out of their mothers' arms and "kissing them with tears running down their cheeks." The relieving column lost over 700 men by death or wounds, or nearly one in four of its total complement of 3,000.
Crossing the Ganges on September 19th and 20th, a relief force of 2,500 men attacked the enemy at Mungulwah on the 21st. Even though they faced stubborn resistance, they defeated the enemy and captured a couple of guns. Pushing forward, drenched by heavy rains for three days and slogging through muddy quagmires, the poorly fed small force encountered the enemy—12,000 men—entrenched on the outskirts of Lucknow at Alambagh. After the artillery opened fire, the 78th Highlanders and the Fusiliers charged the position, and in just ten minutes, the mutineers were fleeing in every direction. "The petticoated devils" were too much for them. After taking a day to rest and leaving 300 sick men to hold the place, the army advanced towards the Residency. Amid a storm of bullets, they bravely rushed the Charbagh bridge, leaving the 78th as a rear guard to hold it, which they did admirably despite being attacked by rifles and field pieces. The column then moved on to the Kaiser Bagh, or King's palace, and took the battery that had been firing on the main body from behind. The Highlanders, followed by the Sikhs and Fusiliers, made a desperate effort to reach the Residency. For three-quarters of a mile, with fierce and fearless courage, the men pressed forward through a street where bullets poured down from every roof, door, and window. In this magnificent advance, Brigadier Neill was shot through the head, but the troops continued on, pressing through the embrasure beside the battered archway of the Baillie Guard. The image of those big, rough-bearded soldiers—those tough yet tender-hearted Highlanders—grabbing little children from their mothers’ arms and "kissing them with tears running down their cheeks" has often been portrayed. The relief column suffered over 700 casualties from death or wounds, nearly one in four of its total 3,000 men.
Defence Continued.—As I have stated, the relief of Lucknow was also a reinforcement, and those who relieved the garrison, continued its defence for nearly fifty days, and survived the war, were awarded the clasp for the Defence of Lucknow.
Defense Continued.—As I mentioned, the relief of Lucknow was also a reinforcement, and those who rescued the garrison, continued to defend it for nearly fifty days, and survived the war, were awarded the clasp for the Defense of Lucknow.
Havelock, having relieved Lucknow, did not deem it advisable to take the risk of escorting the women and children and non-combatants through the thousands of sepoys who still encircled the Residency, so for six weeks the garrison, under Outram, kept the enemy at bay, until Sir Colin Campbell, the cool and daring Scots veteran of the Peninsular War, fresh from the Crimea, who was ready at the age of sixty-five to take up the arduous duties of Commander-in-Chief in India, prepared for the final relief. He landed at Calcutta on August 13th, but through delays, largely occasioned through want of transport, he could not start out on the march to Lucknow until November 9th. Three days later he had under his command 4,700 men, a number of whom had been engaged in the siege of Delhi; detachments of the 4th, 5th, and 23rd Fusiliers; a wing of the 53rd, a number of the 82nd, and the 93rd Highlanders 1,000 strong, 700 wearing the Crimean medal; remnants of the war-worn 8th King's (Liverpool) Regiment; the 75th (now 1st Gordons); a heavy battery Royal Artillery; Bengal Horse and Field Artillery; two squadrons of the 9th Lancers; Hodson's Horse; a squadron each of the 1st, 2nd, and 5th Punjab Cavalry; 2nd and 4th Punjab Infantry; detachments of Bengal and Punjab Sappers and Miners; and the Naval Brigade with 8 guns under Captain Peel.
Havelock, after rescuing Lucknow, decided it wasn't wise to take the risk of escorting the women, children, and non-combatants through the thousands of sepoys who still surrounded the Residency. So for six weeks, the garrison, led by Outram, held off the enemy until Sir Colin Campbell, the calm and daring Scots veteran of the Peninsular War, fresh from the Crimea, was ready at the age of sixty-five to take on the challenging role of Commander-in-Chief in India and prepare for the final rescue. He arrived in Calcutta on August 13th, but due to delays mostly caused by a lack of transport, he couldn't begin the march to Lucknow until November 9th. Three days later, he commanded 4,700 men, many of whom had fought in the siege of Delhi; detachments from the 4th, 5th, and 23rd Fusiliers; a wing of the 53rd; several from the 82nd; and the 93rd Highlanders, 1,000 strong, with 700 wearing the Crimean medal; remnants of the battle-weary 8th King's (Liverpool) Regiment; the 75th (now 1st Gordons); a heavy battery from the Royal Artillery; Bengal Horse and Field Artillery; two squadrons of the 9th Lancers; Hodson's Horse; one squadron each from the 1st, 2nd, and 5th Punjab Cavalry; 2nd and 4th Punjab Infantry; detachments from Bengal and Punjab Sappers and Miners; and the Naval Brigade with 8 guns under Captain Peel.
Sir Colin Campbell arrived at the Alambagh, where Sir James Hope Grant had resolved to await reinforce[Pg 168]ments, on November 12th, and having determined upon his plan of advance forced his way round the north of the city, pushed the enemy through the Dilkoosha Park, and after taking the Secundrabagh and the Shah Nujeef, entered the Residency, where on the afternoon of November 17th he was shaking hands with Outram and Havelock in front of the Mess House, with bullets and shells pouring around them, for although the relief force had reached the Residency they stood in fear of being themselves besieged. Sir Colin Campbell therefore determined to take the 1,000 sick and wounded men, and 600 women and children, out of the place that had so long protected them from the "devil's work" of the mutineers. On the night of November 19th the work of removal commenced, and by the morning of the 22nd the Residency had been completely evacuated. As Captain R. H. Burgoyne, who was present, states, "Thus was accomplished one of the most difficult and daring achievements ever attempted, for such it must be acknowledged it was, when we consider that with a force scarcely exceeding 4,000 Sir Colin Campbell, opposed by upwards of 40,000 regularly trained soldiers supplied with munitions of war far exceeding ours, and holding one of the strongest positions imaginable, penetrated into their midst, carried one fortified position after another, and finally brought away in safety every living man, woman, and child shut up in the Residency, together with their baggage, treasure, etc.," and "the guns it was thought worth while to keep."
Sir Colin Campbell arrived at Alambagh, where Sir James Hope Grant had decided to wait for reinforcements[Pg 168], on November 12th. Once he had figured out his plan of attack, he maneuvered around the north of the city, drove the enemy back through Dilkoosha Park, and after seizing Secundrabagh and Shah Nujeef, entered the Residency. On the afternoon of November 17th, he was shaking hands with Outram and Havelock in front of the Mess House, surrounded by bullets and shells, because even though the relief force had reached the Residency, they were still anxious about being besieged themselves. Sir Colin Campbell then decided to evacuate the 1,000 sick and wounded men, along with 600 women and children, from the place that had long shielded them from the "devil's work" of the mutineers. The evacuation began on the night of November 19th, and by the morning of the 22nd, the Residency had been completely cleared. As Captain R. H. Burgoyne, who was there, states, "Thus was accomplished one of the most difficult and daring achievements ever attempted. For it must be acknowledged that with a force hardly exceeding 4,000, Sir Colin Campbell, faced with over 40,000 trained soldiers equipped with far superior munitions and holding one of the strongest positions imaginable, managed to penetrate their ranks, capture one fortified position after another, and ultimately bring every single person — man, woman, and child — held in the Residency out safely, along with their baggage, treasure, etc.," and "the guns it was deemed worthwhile to maintain."

JUMMOO AND KASHMIR MEDAL,
1895.
(Obverse.)
Jammu and Kashmir Medal, 1895.
(Obverse.)

JUMMOO AND KASHMIR MEDAL,
1895.
(Reverse.)
Jammu and Kashmir Medal, 1895.
(Reverse.)

BRONZE HUNZA NAGAR BADGE, 1891.
Bronze Hunza Nagar Badge, 1891.
The Secundrabagh.—The storming of the Secundrabagh is full of heroic deeds. "There never was a bolder feat of arms," stated Sir Colin Campbell in his dispatch. There seven companies of the 93rd, as the 4th Punjabis halted for a moment when their British officers were shot down, raced ahead of their Sikh comrades, and Lance-Corporal Dunlay gained his V.C. for being one of the first through the breaches and supporting Captain Burroughs, who had been wounded, against superior numbers of the enemy. There also Lieutenant Kirke Ffrench and Private Irwin of the 53rd, and Private J. Smith of the 1st Madras Fusiliers, gained the V.C. for being among the first to enter the Secundrabagh by the gateway. When the roll of the 93rd was called after the storming, it was found that 8 officers had been wounded, 28 non-commissioned officers and men killed, and 71 wounded. At the Shah Nujeef, a domed mosque, the enemy withstood a heavy cannonade by Captain Peel's naval siege train, and the field battery with some mortars for three hours, when "it was stormed in the boldest possible manner by the 93rd Highlanders under Brigadier Hope," while Captain Peel took his guns forward with such daring that had it not been for the withering fire of the Highlanders the naval brigade would have suffered considerable loss. As Sir Colin Campbell stated in his dispatch, it should not be forgotten that the heroes of the relief of Lucknow had made the longest forced marches, some from Agra, some from Allahabad, and had undergone great fatigues and privations in pressing forward for the attainment of this great object.
The Secundrabagh.—The assault on the Secundrabagh is packed with heroic acts. "There has never been a bolder act of bravery," said Sir Colin Campbell in his report. There, seven companies of the 93rd, as the 4th Punjabis paused briefly after their British officers were shot, rushed ahead of their Sikh allies, and Lance-Corporal Dunlay earned his V.C. for being one of the first through the breaches and assisting Captain Burroughs, who had been injured, against overwhelming enemy forces. Lieutenant Kirke Ffrench, Private Irwin of the 53rd, and Private J. Smith of the 1st Madras Fusiliers also received the V.C. for being among the first to enter the Secundrabagh through the gateway. When the 93rd was accounted for after the assault, it was found that 8 officers had been wounded, 28 non-commissioned officers and men had died, and 71 were injured. At the Shah Nujeef, a domed mosque, the enemy held out against a heavy bombardment from Captain Peel's naval siege train and the field battery with mortars for three hours, until "it was bravely stormed by the 93rd Highlanders under Brigadier Hope," while Captain Peel pushed his guns forward with such audacity that, without the relentless fire from the Highlanders, the naval brigade would have faced significant losses. As Sir Colin Campbell noted in his report, it is important to remember that the heroes of the relief of Lucknow had completed the longest forced marches, some from Agra and some from Allahabad, enduring great fatigue and hardship in their determination to achieve this significant goal.
No Bar for Cawnpore.—On the afternoon of November 20th Sir Colin Campbell, with his great convoy, arrived at the Alambagh, and encamped on the open space his force had occupied before advancing on Lucknow. Three days after the march was resumed, and as he advanced towards Cawnpore the sounds of firing were heard, and he learned that the Gwalior contingent, 10,000 strong, under Tantia Topi—the only leader the mutiny produced—had joined with the force of the Náná Sáhib in attacking Major-General Windham (Redan Windham). Leaving the convoy in charge of the rear-guard, Sir Colin hurried forward with the main column, which, despite its fatigued condition, footsore and hungry, pressed onward to the assistance of their comrades at Cawnpore, fighting their way forward until on December 6th the city was[Pg 170] taken, the rebel armies split in twain, and the portion under Tantia Topi driven across the Jumna, and that with the Náná across the Ganges. This was a general's battle. With a force of about 5,000 men, Sir Colin Campbell had not only defeated an army of 25,000 well-trained men, but had captured all their baggage and 32 guns. It is noteworthy that in order to take part in this battle the 42nd, Black Watch, marched 80 miles in fifty-six hours, no mean feat in a tropical climate. Actions were fought at Kâla Muddee, and Futteghur—where the 53rd spontaneously charged the enemy and captured several guns—and having occupied the latter place Sir Colin made arrangements for the retaking of Lucknow.
No Bar for Cawnpore.—On the afternoon of November 20th, Sir Colin Campbell arrived at Alambagh with his large convoy and set up camp in the open area his force had previously occupied before moving on Lucknow. Three days later, the march resumed, and as he moved toward Cawnpore, the sounds of gunfire were heard. He learned that the Gwalior contingent, 10,000 strong, led by Tantia Topi—the only notable leader of the mutiny—had teamed up with the forces of Náná Sáhib to attack Major-General Windham (Redan Windham). Leaving the convoy in the care of the rear-guard, Sir Colin quickly advanced with the main group, which, despite being exhausted, weary, and hungry, pressed on to assist their comrades in Cawnpore, fighting their way forward until December 6th when the city was[Pg 170] captured, the rebel armies split apart, with Tantia Topi's forces driven across the Jumna and those with the Náná across the Ganges. This was a general's battle. With about 5,000 soldiers, Sir Colin Campbell not only defeated an army of 25,000 well-trained troops but also captured all their supplies and 32 cannons. It's worth noting that to participate in this battle, the 42nd, Black Watch, marched 80 miles in fifty-six hours, a significant accomplishment in a tropical climate. Battles took place at Kâla Muddee and Futteghur—where the 53rd spontaneously charged the enemy and captured several cannons—and after taking control of the latter location, Sir Colin began preparations to retake Lucknow.
Lucknow.—To retake Lucknow, which Sir Colin Campbell had evacuated on relieving the city, a splendidly equipped army was organised to march upon the place under the Commander-in-Chief. On March 2nd, 1858, he advanced with about 18,700 men, to be later strengthened by Brigadier Frank's column and the Nepaulese under Jung Bahadoor. Approaching Lucknow by the Dilkoosha Park, the rebel pickets retired before the 42nd and 93rd Highlanders, who swept the rebels from their works in front of the Martinière, and the British troops took possession of the palace and the Mahomed Bagh. On the morning of March 9th the Martinière was assaulted. The Punjabis, with the 42nd Highlanders, took the rebels in flank, the 93rd Highlanders in skirmishing order advanced at the double, supported by the 90th, and as they approached the Martinière the mutineers bolted, and took refuge in their entrenchments across the canal.
Lucknow.—To reclaim Lucknow, which Sir Colin Campbell had evacuated after relieving the city, a well-equipped army was organized to march towards it under the Commander-in-Chief. On March 2nd, 1858, he moved forward with about 18,700 men, later reinforced by Brigadier Frank's column and the Nepaulese led by Jung Bahadoor. Approaching Lucknow through Dilkoosha Park, the rebel pickets retreated before the 42nd and 93rd Highlanders, who cleared the rebels from their positions in front of the Martinière, allowing the British troops to take control of the palace and the Mahomed Bagh. On the morning of March 9th, the Martinière was attacked. The Punjabis, along with the 42nd Highlanders, flanked the rebels, while the 93rd Highlanders advanced in skirmishing order, supported by the 90th. As they got closer to the Martinière, the mutineers fled and sought refuge in their entrenchments across the canal.
On the 11th the Begum's palace (Begum Kotee), sheltering 5,000 sepoys, was stormed, the regiments rushing forward under "a perfect storm of musketry," but "not a man wavered." The rebels had cunningly devised "every obstacle that could be opposed to the stormers," but the 93rd and the 4th Punjab Rifles were not deterred, and they fired their muskets and[Pg 171] plied their bayonets for two hours, until, with the aid of a party of the 42nd, the enemy was forced to disperse, and the Begum Kotee, the key of the position, was won after the most sanguinary fight in the siege of Lucknow, nearly 1,000 rebels being killed. In this fight Adjutant (later Lieutenant-Colonel) McBean, an Inverness ploughman who rose from the ranks to the command of the 93rd, gained the V.C. for his intrepid conduct in forcing his way through the breach and killing eleven of the enemy with his own hands. Here the 93rd lost a captain, a lieutenant, and 13 men killed, and 45 men wounded, several dying afterwards of their wounds. Here, also, the dauntless Major Hodson, of Hodson's Horse, met his death. Some of the flying sepoys had taken refuge in the rooms abutting on a narrow lane, and Sergeant Forbes Mitchell, of the 93rd Highlanders, records that Hodson, sabre in hand, demanded of him "Where are the rebels?" The sergeant pointed to the door of a room, and Hodson, shouting "Come on!" heedless of Mitchell's entreaties to wait, made a step forward and was shot through the body.
On the 11th, the Begum's palace (Begum Kotee), housing 5,000 sepoys, was stormed, with the regiments charging forward under "a perfect storm of gunfire," but "not a man wavered." The rebels had cleverly created "every obstacle that could be thrown at the attackers," but the 93rd and the 4th Punjab Rifles pressed on, firing their muskets and[Pg 171] using their bayonets for two hours until, with help from a group of the 42nd, they forced the enemy to scatter, capturing the Begum Kotee, the key position, after the bloodiest battle in the siege of Lucknow, with almost 1,000 rebels killed. During this fight, Adjutant (later Lieutenant-Colonel) McBean, an Inverness ploughman who rose through the ranks to command the 93rd, earned the V.C. for his fearless actions in breaking through the breach and killing eleven enemies with his own hands. Here, the 93rd lost a captain, a lieutenant, and 13 men killed, with 45 more wounded, several later dying from their injuries. This was also where the brave Major Hodson of Hodson's Horse lost his life. Some of the fleeing sepoys had taken cover in the rooms near a narrow lane, and Sergeant Forbes Mitchell of the 93rd Highlanders recalls that Hodson, sword in hand, asked him, "Where are the rebels?" The sergeant pointed to the door of a room, and Hodson shouted, "Come on!" ignoring Mitchell's pleas to wait, stepped forward, and was shot through the body.
The Secundrabagh (Alexander's Garden) was again taken, this time with comparatively little opposition, two companies of Highlanders being conspicuous by the alacrity with which, on being faced by a wall, they obeyed Sir Colin Campbell's command to "Tear off the tiles, and in at the roof!" The Imambarrah was next stormed, and Brasyer's Sikhs rushed the Kaiser Bagh, or King's palace; the different smaller points of defence were carried, the mutineers scattered in all directions, and the outworks of the city were soon in the possession of the besiegers. It only remained to take the city itself, and this was effected by a combined effort on the part of Sir James Outram, Sir James Hope Grant and Brigadier Campbell, and after a stiff fight on March 21st Lucknow was again under the British flag. The defeat of the retreating mutineers by Sir Hope Grant about 12 miles out of the city removed all fears for its safety.
The Secundrabagh (Alexander's Garden) was taken again, this time with relatively little resistance. Two companies of Highlanders stood out for their quick response when faced with a wall, immediately following Sir Colin Campbell's command to "Tear off the tiles, and in at the roof!" Next, the Imambarrah was stormed, and Brasyer's Sikhs charged the Kaiser Bagh, or King's palace. The various smaller defensive points were captured, the mutineers scattered in every direction, and the outworks of the city were soon in the hands of the attackers. The only task left was to take the city itself, which was accomplished through the combined efforts of Sir James Outram, Sir James Hope Grant, and Brigadier Campbell. After a tough battle on March 21st, Lucknow was once again under the British flag. Sir Hope Grant’s defeat of the retreating mutineers about 12 miles outside the city removed all concerns for its safety.
Central India.—Between January and June 1858 a number of engagements were fought, for which the clasp inscribed Central India was awarded. The troops under Sir Hugh Rose (afterwards Lord Straithnairn) had cannonaded the fort of Rathghur for a couple of days, and then on January 28th, after a section of the mutineers had made an attack on the rear of the British camp, took the place by storm. Three days after they thrashed a force near Baroda, and then pressed on to the relief of Saugor, where a number of Europeans with their wives and families had been besieged for six months. Sir Hugh's force relieved the fort on February 3rd, 1858. Major-General Whitlock, with the Madras column, had started on the same errand, and in pushing his way onward to the goal had cleared the Jubbulpore district. On March 17th Brigadier Stuart took the fort of Chandairee with the 86th Queen's and 26th Bombay Native Infantry, and then with Sir Hugh Rose proceeded to the investment of Jhansi, where the mutineers had shot down some of their officers in cold blood, and treacherously murdered others. On March 21st the army appeared before the place, but had hardly done so when it was discovered that the remnants of the Gwalior contingent, under Tantia Topi, which had retreated from Cawnpore, and had gathered strength in its march, were advancing upon Jhansi from Kalpee. Sir Hugh Rose gave the enemy no time to think, but turning his troops about charged the rebel hordes with such vigour that it is estimated 2,000 of them were killed. The effect of this punishment so impressed the Ranee, and the garrison of 12,000 men in Jhansi, that the bulk of them fled during the night, and next day, after a considerable amount of opposition, the British troops occupied the place. In the pursuit of the rebels about 1,500 were killed, their guns, ammunition, and baggage falling into the victors' hands. In this affair, in which Lieutenant Leith won the V.C., were engaged the 14th Dragoons (who lost, out of 243, 5 killed and 24 wounded); 207 Native Cavalry; 208 of the 86th Queen's; 226 3rd Bombay Fusiliers; 298 of the 14th, and 400 of the 25th Bombay Native Infantry.
Central India.—Between January and June 1858, several battles took place that earned the clasp inscribed Central India. The troops led by Sir Hugh Rose (later Lord Straithnairn) bombarded the fort of Rathghur for a couple of days, and then on January 28th, after some of the mutineers attacked the rear of the British camp, they stormed the fort. Three days later, they defeated a force near Baroda and then moved on to rescue Saugor, where several Europeans with their wives and families had been besieged for six months. Sir Hugh's troops relieved the fort on February 3rd, 1858. Major-General Whitlock, commanding the Madras column, had begun the same mission and cleared the Jubbulpore district as he advanced. On March 17th, Brigadier Stuart captured the fort of Chandairee with the 86th Queen's and 26th Bombay Native Infantry. He then joined Sir Hugh Rose in besieging Jhansi, where the mutineers had coldly executed some of their officers and treacherously killed others. On March 21st, the army arrived at Jhansi, but as soon as they got there, it was discovered that the remnants of the Gwalior contingent, led by Tantia Topi, which had retreated from Cawnpore and gained strength on their way, were approaching Jhansi from Kalpee. Sir Hugh Rose wasted no time and turned his troops around to charge the rebel forces with such intensity that it is estimated around 2,000 of them were killed. This heavy defeat so intimidated the Ranee and the garrison of 12,000 in Jhansi that most of them fled during the night. The following day, after some resistance, the British troops took control of the fort. During the pursuit of the rebels, about 1,500 were killed, and their guns, ammunition, and baggage were captured by the victors. In this engagement, where Lieutenant Leith earned the V.C., the forces involved included the 14th Dragoons (who lost 5 killed and 24 wounded out of 243), 207 Native Cavalry, 208 from the 86th Queen's, 226 from the 3rd Bombay Fusiliers, 298 from the 14th, and 400 from the 25th Bombay Native Infantry.

MEDAL FOR MATABELELAND, 1893, WITH BAR FOR RHODESIA, 1896.
MEDAL FOR MATABELELAND, 1893, WITH BAR FOR RHODESIA, 1896.

CAPE OF GOOD HOPE GENERAL SERVICE MEDAL, WITH BAR FOR BECHUANALAND, 1896.
CAPE OF GOOD HOPE GENERAL SERVICE MEDAL, WITH BAR FOR BECHUANALAND, 1896.

(Reverse.)
(Reverse.)
QUEEN VICTORIA'S SUDAN MEDAL.
Queen Victoria's Sudan Medal.

(Obverse.)
(Front.)
KHEDIVE'S SUDAN MEDAL.
Khedive's Sudan Medal.
Kotah.—General Roberts, in order to deal with the mutineers who had murdered the Resident, Major Burton, and his two sons, pushed past all opposition in Rajpootana, and in spite of great hardships advanced against Kotah, and on March 30th, under the leadership of the 72nd the troops poured through the Kittenpole Gate, which had been blown up by the Engineers; and after terrific fighting, in which Lieutenant Cameron of the 72nd gained his V.C., the mutineers gave way, and by the evening Kotah, with its 70 guns, was denuded of mutineers. The force engaged included 250 of the 72nd Highlanders; 500 of the 83rd; 250 of the 95th; a like number of the 10th and 13th Bengal Native Infantry; a number of Sappers, and a detachment of the 8th Hussars.
Kotah.—General Roberts, to confront the mutineers who had killed the Resident, Major Burton, and his two sons, pushed through all resistance in Rajpootana, and despite significant hardships, moved forward against Kotah. On March 30th, under the command of the 72nd, the troops streamed through the Kittenpole Gate, which had been blown up by the Engineers. After intense fighting, in which Lieutenant Cameron of the 72nd earned his V.C., the mutineers retreated, and by the evening, Kotah, with its 70 guns, was cleared of mutineers. The engaged force included 250 members of the 72nd Highlanders; 500 from the 83rd; 250 from the 95th; an equal number from the 10th and 13th Bengal Native Infantry; a number of Sappers, and a detachment of the 8th Hussars.
The Highland brigade, after the capture of Lucknow, was engaged in assisting to stamp out the rebellion in the province of Rohilcund, and to that end were employed in Brigadier Walpole's force, which marched from Lucknow with the object of advancing upon the district from one point while Brigadier John Jones advanced from Roorkee. In Walpole's advance he called upon the Rajah in possession of the jungle fort of Rhooyah to surrender the place, and on his refusal ordered four companies of the "Black Watch" to advance without protection or cover against the strongest face of the fort, from which, after gallantly remaining in an exposed position for six hours, they ultimately retired, but not before Brigadier Adrian Jones of the 93rd, Lieutenants Douglas and Bramley of the 42nd, and Lieutenant Willoughby of the Punjabis had been killed, also a sergeant and 6 privates of the 42nd, a lieutenant, 3 sergeants, and 34 privates wounded, in an affair that, but for the want of spirit on the part of the commander, might have been settled in a few minutes by a bayonet charge into the mud fort! Next[Pg 174] day the place was found to be deserted, and after burying their dead the British marched in pursuit of the mutineers, whom they caught up and defeated at Allahgunge.
The Highland brigade, after taking Lucknow, was involved in helping to crush the rebellion in the Rohilcund province. To achieve this, they were part of Brigadier Walpole's force, which moved out from Lucknow aiming to approach the area from one direction while Brigadier John Jones advanced from Roorkee. During Walpole's advance, he asked the Rajah, who controlled the jungle fort of Rhooyah, to surrender. When the Rajah refused, Walpole ordered four companies of the "Black Watch" to move forward without any protection or cover against the fort's strongest point. After bravely holding their position for six hours, they eventually pulled back, but not before Brigadier Adrian Jones of the 93rd, Lieutenants Douglas and Bramley of the 42nd, and Lieutenant Willoughby of the Punjabis were killed. Additionally, a sergeant and 6 privates of the 42nd were lost, and a lieutenant, 3 sergeants, and 34 privates were injured. This situation, which could have been resolved quickly with a bayonet charge into the mud fort, was hampered by a lack of determination from the commander. The next day, the fort was found empty, and after burying their dead, the British continued their pursuit of the mutineers, catching up with and defeating them at Allahgunge.
Three V.C.'s won by 42nd.—In this unfortunate affair Quartermaster-Sergeant Simpson of the 42nd gained the V.C. for bravely going back and rescuing an officer and a private who lay dangerously wounded. Private Davis of the 42nd was also awarded the coveted distinction for going up to the very walls of the fort and rescuing the body of Lieutenant Bramley. Lance-Corporal Alex Thompson of the 42nd also received the Cross for assisting Major-General W. M. Cafe to bear away, under a heavy fire, the body of Lieutenant Willoughby, and going to the rescue of Private Spence, who had been mortally wounded in the same effort.
Three V.C.'s won by 42nd.—In this unfortunate event, Quartermaster-Sergeant Simpson of the 42nd earned the V.C. for bravely going back to rescue an officer and a private who were dangerously wounded. Private Davis of the 42nd was also recognized with the prestigious award for going right up to the fort's walls to retrieve the body of Lieutenant Bramley. Lance-Corporal Alex Thompson of the 42nd also received the Cross for helping Major-General W. M. Cafe carry away, under heavy fire, the body of Lieutenant Willoughby, and for rescuing Private Spence, who had been fatally wounded in the same attempt.
The Occupation of Bareilly.—The advance on Bareilly was begun on April 28th, and on May 5th the army came up with the rebels on the plains to the east of the fort, where after a fight lasting four hours, the mutineers were compelled to retreat, and the city of Bareilly was occupied with little opposition. In the contest on the plains the "Black Watch" particularly distinguished itself when a body of Ghazis, Mussulman fanatics, charging down with mad fury upon the column forced the 4th Punjabis back on the 42nd. The charge of the Ghazis was described by Sir Colin Campbell as "the most determined effort he had seen during the war," but it was coolly met by the Scots, and in the hand-to-hand fight which ensued between them and the Ghazis the latter were speedily exterminated. During this bloody episode Sergeant Gardiner of the 42nd gained the V.C. by killing two fanatics with his bayonet, and saving Colonel Cameron, who was dragged from his horse by four of them, and was in danger of being killed. In this struggle the famous Times correspondent, W. H. Russell, would have been killed but for the timely intervention of Sergeant Forbes-Mitchell of the 93rd, who shot the attacking rebel. The back of[Pg 175] the mutiny being broken the Highland brigade was ordered to encamp at Bareilly, where the last serious fight had been made by the mutineers. Parties of them, however, continued to give trouble for some time, and in a sharp encounter at Maylah Ghaut, on the banks of the Sarda, where on January 15th, 1859, Captain Lawson and 37 men of the "Black Watch" kept at bay 2,000 rebels from sunrise to sunset, and still further added to the roll of honour of the 42nd by Privates W. Cook and D. Millar earning the V.C. by going to the front and directing their company when their officers had been shot down.
The Occupation of Bareilly.—The advance on Bareilly started on April 28th, and by May 5th, the army encountered the rebels in the fields east of the fort. After a four-hour battle, the mutineers were forced to retreat, and the city of Bareilly was captured with minimal resistance. In the clash on the plains, the "Black Watch" notably stood out when a group of Ghazis, Muslim extremists, charged furiously at the column, pushing the 4th Punjabis back onto the 42nd. Sir Colin Campbell described the Ghazi charge as "the most determined effort he had seen during the war," but it was calmly faced by the Scots. In the close-quarters fight that followed between them and the Ghazis, the latter were quickly eliminated. During this bloody conflict, Sergeant Gardiner of the 42nd earned the V.C. for killing two extremists with his bayonet and rescuing Colonel Cameron, who was pulled from his horse by four of them and at risk of being killed. In this struggle, the well-known Times correspondent, W. H. Russell, would have died if it weren't for the timely action of Sergeant Forbes-Mitchell of the 93rd, who shot the attacking rebel. With the majority of the mutiny quelled, the Highland brigade was instructed to set up camp at Bareilly, where the last significant fight occurred against the mutineers. However, groups of them continued to cause issues for a while, and in a fierce encounter at Maylah Ghaut, on the banks of the Sarda, on January 15th, 1859, Captain Lawson and 37 men of the "Black Watch" held off 2,000 rebels from dawn until dusk, further adding to the honor roll of the 42nd as Privates W. Cook and D. Millar earned the V.C. for stepping up and leading their company after their officers had been shot down.
The mutiny was now crushed, thanks to the bravery and endurance of the European soldiers, and the staunch conduct of those Indian troops who, with their Princes, remained true to Britain. The gallant Sir Colin Campbell at last received something like due reward for his services to his country by being raised to the peerage as Lord Clyde. The Honourable East India Company ceasing to exist, the Government of India was transferred to the Crown by the India Act of 1858, and the government of the country vested in a Viceroy and Council, the last Governor-General under the old order becoming the first Viceroy of our Indian Empire.
The mutiny was finally put down, thanks to the courage and perseverance of the European soldiers and the steadfastness of those Indian troops who, along with their princes, remained loyal to Britain. The brave Sir Colin Campbell was finally recognized for his service to his country by being elevated to the peerage as Lord Clyde. With the Honourable East India Company no longer in operation, the Government of India was handed over to the Crown through the India Act of 1858. The governance of the country was placed in the hands of a Viceroy and a Council, with the last Governor-General from the previous system becoming the first Viceroy of our Indian Empire.
The following British regiments took part in the war: 5th, 8th, 10th, 13th, 23rd, 32nd, 34th, 38th, 42nd, 52nd, 53rd, 60th, 61st, 64th, 71st, 72nd, 75th, 78th, 79th, 80th, 82nd, 83rd, 84th, 86th, 88th, 90th, 93rd, 95th, 97th, 101st Royal Bengal Fusiliers (now 1st Royal Munster Fusiliers), 102nd Royal Madras (now 1st Royal Dublin Fusiliers), 104th Bengal Fusiliers (now 2nd Royal Dublin Fusiliers), 108th Madras (now 2nd Royal Inniskilling Fusiliers); Rifle Brigade; 7th, 8th, and 14th Hussars; 9th and 12th Lancers.
The following British regiments participated in the war: 5th, 8th, 10th, 13th, 23rd, 32nd, 34th, 38th, 42nd, 52nd, 53rd, 60th, 61st, 64th, 71st, 72nd, 75th, 78th, 79th, 80th, 82nd, 83rd, 84th, 86th, 88th, 90th, 93rd, 95th, 97th, 101st Royal Bengal Fusiliers (now 1st Royal Munster Fusiliers), 102nd Royal Madras (now 1st Royal Dublin Fusiliers), 104th Bengal Fusiliers (now 2nd Royal Dublin Fusiliers), 108th Madras (now 2nd Royal Inniskilling Fusiliers); Rifle Brigade; 7th, 8th, and 14th Hussars; 9th and 12th Lancers.
The medal was also granted to a naval brigade from the "Pearl" and "Shannon" (see Naval Section).
The medal was also awarded to a naval brigade from the "Pearl" and "Shannon" (see Naval Section).
The Mutiny Medal.—This medal (1⅖ in. in diameter) was granted by a General Order of the Indian Govern[Pg 176]ment to those in the service of Her Majesty, and of the H.E.I. Co., the men who composed the naval brigade, and to all persons not in the military service who were employed in the suppression of the mutiny. By a General Order, May 19th, 1859, a clasp for DELHI was granted to those employed in the operations against and at the assault of Delhi from May 30th to September 14th, 1857. A clasp for the DEFENCE OF LUCKNOW was granted to all the original garrison under Major-General Sir John Inglis (who had succeeded to the command after the death of Sir Henry Lawrence) and to those who succoured them and continued the defence under Major-Generals Havelock and Outram, until relieved by Sir Colin Campbell, from June 29th to September 25th, 1857. A clasp for the RELIEF OF LUCKNOW was awarded to those who, under Havelock, had for nine weeks striven to succour the beleaguered garrison. Outram joined him on September 16th, and on the 25th they clambered through the battered gun embrasure beside the Baillie Guard at Lucknow. The members of the force under Generals Havelock and Outram were awarded this clasp. A clasp for LUCKNOW was granted to all the troops engaged in the several operations against Lucknow under the immediate command of Sir Colin Campbell in November 1857 and March 1858. A clasp for CENTRAL INDIA was granted to the troops of the column under Major-General Sir Hugh Rose engaged in the operations against Jhansi, Kalpee, and Gwalior, and also to the troops under the command of Major-Generals Roberts and Whitlock. Subsequently, by a general order, May 3rd, 1860, the troops employed at and prior to the battle of Banda and siege of Kotah were held entitled to the clasp for Central India, but those of either of the columns commanded by Major-Generals Roberts and Whitlock, who were employed in the subsequent minor engagements, were considered to have a claim to the medal only. On August 21st, 1860, it was notified that the few officers and soldiers who may have been present in the actions in which the Malwa Force was engaged under Brigadier Stuart, but who, from the consequence of wounds received in action or other causes, were prevented from accompanying the force on its junction with Sir Hugh Rose, were entitled to receive the bar for Central India. A General Order, dated January 10th, 1860, stated "that a clasp for the Relief of Lucknow was granted to the troops engaged in the operations against that city under the immediate command of Lord Clyde in November, 1857."
The Mutiny Medal.—This medal (1⅖ in. in diameter) was awarded by a General Order of the Indian Government to those serving Her Majesty and the H.E.I. Co., including the members of the naval brigade and all individuals not in military service who were involved in suppressing the mutiny. According to a General Order from May 19th, 1859, a clasp for DELHI was awarded to those who took part in the operations against and the assault on Delhi from May 30th to September 14th, 1857. A clasp for the Defense of Lucknow was given to all members of the original garrison under Major-General Sir John Inglis (who took command after Sir Henry Lawrence's death) and to those who assisted them and continued the defense under Major-Generals Havelock and Outram until relieved by Sir Colin Campbell, from June 29th to September 25th, 1857. A clasp for the Lucknow Relief was awarded to those who, under Havelock, fought for nine weeks to assist the besieged garrison. Outram joined him on September 16th, and on the 25th they climbed through the damaged gun embrasure beside the Baillie Guard at Lucknow. The members of the force under Generals Havelock and Outram received this clasp. A clasp for LUCKNOW was awarded to all troops involved in the various operations against Lucknow under the direct command of Sir Colin Campbell in November 1857 and March 1858. A clasp for Central India was awarded to the troops in the column under Major-General Sir Hugh Rose during operations against Jhansi, Kalpee, and Gwalior, as well as to those under the command of Major-Generals Roberts and Whitlock. Later, by a general order on May 3rd, 1860, troops stationed at and before the battle of Banda and siege of Kotah were granted the clasp for Central India, but those from either of the columns led by Major-Generals Roberts and Whitlock, who were involved in later minor engagements, were deemed eligible for the medal only. On August 21st, 1860, it was announced that the few officers and soldiers who may have been part of the actions involving the Malwa Force under Brigadier Stuart but who, due to wounds or other reasons, could not join the force when it met up with Sir Hugh Rose, were eligible to receive the bar for Central India. A General Order dated January 10th, 1860, stated that "a clasp for the Relief of Lucknow was granted to the troops involved in the operations against that city under the direct command of Lord Clyde in November, 1857."

KHEDIVE'S SUDAN MEDAL.
(Reverse.)
KHEDIVE'S SUDAN MEDAL. (Back.)

QUEEN VICTORIA'S SUDAN
MEDAL.
(Obverse.)
QUEEN VICTORIA'S SUDAN MEDAL.
(Front.)

QUEEN'S MEDAL FOR BOER
WAR.
(Obverse.)
QUEEN'S MEDAL FOR BOER WAR.
(Front.)

KING'S MEDAL FOR BOER
WAR.
(Reverse.)
KING'S MEDAL FOR BOER WAR.
(Reverse.)
It is noteworthy that the infantry did not receive more than two bars, and that it was impossible for any participant in the war to obtain more than four, and very few received as many. This is a very striking medal, a very dignified figure of Britannia being represented on the reverse holding a wreath in the outstretched right hand, and an oval shield with the Union Jack thereon on the left arm, which also holds a laurel wreath; INDIA is arranged above following the line of the medal, and 1857-58 in the exergue. The obverse bears the same head of Queen Victoria as the Military General Service medal. The names were impressed on the edge in capital Roman letters, and the suspender and fishtail bars are of the same kind as those used with the China medal of 1857. The ribbon, which is 1¼ in. wide, consists of scarlet and white stripes arranged alternately, three of white and two of red. This was the last medal issued by the H.E.I. Co., and it might be said almost the last of the classic medals (L. C. Wyon modelled the reverse).
It’s important to note that the infantry received no more than two bars, and it was impossible for anyone who participated in the war to get more than four; very few received that many. This is a striking medal, featuring a dignified image of Britannia on the back, holding a wreath in her outstretched right hand and an oval shield with the Union Jack on her left arm, which also holds a laurel wreath; INDIA is displayed above along the edge of the medal, and 1857-58 appears in the exergue. The front features the same head of Queen Victoria as the Military General Service medal. The names were engraved on the edge in capital Roman letters, and the suspender and fishtail bars are similar to those used with the China medal of 1857. The ribbon, which is 1¼ inches wide, has alternating scarlet and white stripes, with three white and two red. This was the last medal issued by the H.E.I. Co., and it could be considered almost the last of the classic medals (L. C. Wyon modeled the reverse).
Reissues of Earlier Medals.—On January 21st, 1859, the Government of India sanctioned the reissue of medals gratis to all officers and men who had lost their decorations through the mutiny. This is an important fact to remember when considering war medals issued prior to the mutiny, as reissues are not generally considered as valuable as originals.
Reissues of Earlier Medals.—On January 21, 1859, the Government of India approved the free reissue of medals to all officers and soldiers who had lost their decorations during the mutiny. This is an important detail to keep in mind when looking at war medals issued before the mutiny, as reissues are usually not seen as valuable as the originals.
SECOND CHINESE WAR
Fatshan, 1857.—The seizure by the Chinese of a small trading-vessel, the "Arrow," led to the second Chinese War, the first stages of which were confined to operations by seamen and marines under Admiral Sir Michael Seymour, who, attacking the Chinese fleet in Fatshan Creek with 11 gunboats and about 50 ships' boats from the fleet, defeated the enemy's fleet of 80 junks armed with 800 guns, and manned by 6,000 seamen; only 3 of the junks escaped destruction.
Fatshan, 1857.—The capture of a small trading ship, the "Arrow," by the Chinese triggered the second Chinese War. The initial phases involved operations led by sailors and marines under Admiral Sir Michael Seymour, who, while attacking the Chinese fleet in Fatshan Creek with 11 gunboats and about 50 boats from the fleet, defeated the enemy's fleet of 80 junks armed with 800 cannons and staffed by 6,000 sailors; only 3 of the junks managed to escape destruction.
Canton, 1857.—Having defeated the fleet, it was considered that there was little chance of obtaining satisfaction without resort to arms, and a force of 5,000 men was dispatched to the Far East, but the mutiny breaking out they were diverted to India. The 59th Regiment, however, was on the China station, and with a body of marines took part in the bombardment and storm of Canton on December 29th, 1857, and the blockade of the fort until some semblance of satisfaction had been obtained. With the deportation of the late Imperial Commissioner Yeh to India the possibility of a satisfactory treaty was imminent, and when the treaty of Tientsin was signed, on June 26th, 1858, it was hoped that peace was assured.
Canton, 1857.—After defeating the fleet, it was believed that there was little chance of achieving satisfaction without military action, so a force of 5,000 troops was sent to the Far East. However, when a mutiny broke out, they were redirected to India. The 59th Regiment, though, was stationed in China and, along with a group of marines, participated in the bombardment and assault on Canton on December 29th, 1857, as well as the blockade of the fort until some form of satisfaction was achieved. With the deportation of the former Imperial Commissioner Yeh to India, the likelihood of a satisfactory treaty became imminent, and when the Treaty of Tientsin was signed on June 26th, 1858, it was hoped that peace was guaranteed.
Taku Forts, 1860.—The signature of a treaty was one thing, the ratification another; and when the British Envoy was proceeding up the Peiho River, in order to obtain the ratification, the forts at the mouth of the river opened fire upon the ships accompanying him, and they had to retire. It was therefore determined to achieve by force of arms what diplomacy had failed to do. An army of 10,000 British troops, and a force of 7,000 French, were organised to take the offensive against the Celestials. The British were under the command of Lieutenant-General Sir Hope Grant, and the French under General de Montaubon, a "beau sabreur." At the end of July 1860 the British and French fleets were ready, and on August 1st the allied[Pg 179] troops were disembarked a couple of thousand yards from the Pehtang Forts in the Gulf of Pecheli, and they marched towards Sin-ho, where a battle was fought in which the new Armstrong guns were used in warfare for the first time. In this battle the allies outnumbered the enemy by two to one, and their steadfastness in the face of the most modern artillery and seasoned troops called forth the praise of General Sir Robert Napier, who stated that the enemy "had behaved with courageous endurance." After another engagement on the following day, and the rout of the enemy, the way was clear to attack the Taku Forts. The northern forts were assailed on land and bombarded from the sea on August 21st; the assault was made difficult by an arrangement of spiked bamboo stakes that had been planted over a space 20 feet wide, and while the allies were gingerly creeping over it missiles of all kinds were hurled at them. Ultimately the walls were reached, and a daring French soldier planted the tricolour on the parapet, only to fall dead with the cry of victory on his lips. Lieutenant Rogers of the 44th and Ensign Chaplin of the 67th were more fortunate, and the Queen's colours were firmly fixed over the fort. In their retreat from the first northern fort the unfortunate Chinamen had to cross the ground they had so ingeniously staked out as an obstacle for their enemy, and were spitted on their own stakes. The fall of the first fort advised the commander of the second fort that opposition was useless, and he hoisted a white flag; later the troops took possession of it, and then the southern forts were likewise surrendered, and the capture of the Taku Forts effected with the loss to the British force of 67 rank and file killed, and 22 officers and 161 men wounded; and to the French of 30 killed, and about 100 wounded. The Chinese are said to have had at least 2,000 killed.
Taku Forts, 1860.—Signing a treaty was one thing, but getting it ratified was another. As the British Envoy was making his way up the Peiho River to secure this ratification, the forts at the river’s mouth opened fire on the ships accompanying him, forcing them to retreat. It was then decided to achieve by military force what diplomacy could not accomplish. An army of 10,000 British troops and a force of 7,000 French soldiers were organized to take the offensive against the Chinese. The British were led by Lieutenant-General Sir Hope Grant, while the French were under General de Montaubon, a renowned swordsman. By the end of July 1860, the British and French fleets were prepared, and on August 1st, the allied[Pg 179] troops disembarked a couple of thousand yards from the Pehtang Forts in the Gulf of Pecheli and marched toward Sin-ho, where a battle took place, marking the first use of the new Armstrong guns in warfare. In this battle, the allies outnumbered the enemy two to one, and their determination in the face of advanced artillery and experienced troops earned them praise from General Sir Robert Napier, who noted that the enemy "had shown courageous endurance." After another engagement the following day, which resulted in the enemy's rout, the path was clear to attack the Taku Forts. The northern forts were targeted on land and bombarded from the sea on August 21st; the assault was complicated by a series of spiked bamboo stakes set up across a 20-foot-wide area, and as the allies cautiously crossed it, they were bombarded with all kinds of projectiles. Eventually, they reached the walls, and a brave French soldier planted the tricolor on the parapet, only to fall dead with the victory cry on his lips. Lieutenant Rogers of the 44th and Ensign Chaplin of the 67th were luckier, securing the Queen's colors over the fort. During their retreat from the first northern fort, the unfortunate Chinese had to traverse the ground they had skillfully staked out as a barrier for their enemy, becoming impaled on their own stakes. The fall of the first fort led the commander of the second fort to realize further resistance was futile, and he raised a white flag; soon after, the troops took control of it, followed by the southern forts also surrendering. The capture of the Taku Forts resulted in 67 British rank and file killed, along with 22 officers and 161 men wounded; the French lost 30 killed and about 100 wounded. The Chinese are reported to have suffered at least 2,000 deaths.
Pekin, 1860.—The Buffs were left to garrison Taku, and the 44th Shanghai, which was threatened by the Taiping rebels, while the army marched on to Tientsin,[Pg 180] from which on September 8th the 1st Division and about half the French force set out on the advance to Pekin. At Changdia-wan there was a sharp skirmish, and the enemy abandoned their entrenchments with 74 guns, and offered to sign a convention. Mr. (afterwards Sir Harry) Parkes, Lord Elgin's secretary, together with four officers and an escort, set out to arrange preliminaries, but were treacherously taken prisoners, and all the officials, with the exception of Mr. Parkes, barbarously murdered. Sir Hope Grant then prepared to meet the Chinese attack, and in the action which was fought at Chow-ho the Chinese were put to rout, and a great number cut down in the pursuit by the Dragoons and Probyn's Horse. The allies then advanced on Pekin, and the French army occupied the Summer Palace of Yuan-ming-Yuan. At the Bridge of Palichaio a last desperate effort was made by the Chinese Imperial Guard, but the vigorous French attack drove them back with the loss of 25 guns, and gained for General Montauban the title of Comte de Paliko.
Peking, 1860.—The Buffs were left to guard Taku, and the 44th Shanghai, which was under threat from the Taiping rebels, while the army moved on to Tianjin,[Pg 180] from where on September 8th the 1st Division and about half of the French troops began their advance to Peking. At Changdia-wan, there was a brief skirmish, and the enemy abandoned their defenses with 74 guns, offering to sign an agreement. Mr. (later Sir Harry) Parkes, Lord Elgin's secretary, along with four officers and an escort, set out to negotiate the terms, but they were treacherously captured, and all the officials except for Mr. Parkes were brutally murdered. Sir Hope Grant then prepared to face the Chinese attack, and in the battle at Chow-ho, the Chinese were defeated, with many cut down during the pursuit by the Dragoons and Probyn's Horse. The allies then progressed to Peking, and the French army took over the Summer Palace of Yuan-ming-Yuan. At the Bridge of Palichaio, the Chinese Imperial Guard made one last desperate attempt, but the strong French assault pushed them back, resulting in the loss of 25 guns and earning General Montauban the title of Comte de Paliko.
On October 7th the enemy was informed that unless the prisoners were restored and one of the gates of the city given up to the allies, the city would be stormed. The Chinese agreed to this, and the Au-ting gate of the city was occupied without opposition by 200 British and French troops on October 13th. It was found, however, that twenty of Mr. Parkes' party had succumbed to the terrible treatment of their Chinese captors, and Lord Elgin having given his word to spare the city if it were surrendered, ordered the Summer Palace, where the atrocities had been committed, to be razed to the ground. The Summer Palace consisted of thirty buildings in grounds extending for about 6 miles, and although the troops set to work with a will to burn—and to plunder—it took two days to destroy the buildings by fire. Of the loot of the Summer Palace at Pekin many fabulous stories have been told, but there can be no doubt that in this wilful destruction of the palace, and the indiscriminate dispersal of its valued contents, gems of art and wonderful pieces of jewellery and goldsmith's work were annexed by men who had not the faintest notion of their exceeding value. It is said that a French officer found a string of beautiful pearls, each about the size of a small marble, and sold it for £3,000! The loot taken by the British troops, such as was given up, was sold at public auction by order of Sir Hope Grant, and it is recorded the share of each private soldier was not less than £4 sterling. The city of Pekin was then occupied by the allies, and, the Chinese having agreed to cede the island of Kowloon, opposite Hong Kong, to Britain, to make Tientsin an open port, and to pay an indemnity of £100,000 to the relatives of the murdered men, the war was concluded.
On October 7th, the enemy was told that unless the prisoners were released and one of the city gates was given up to the allies, the city would be attacked. The Chinese agreed to this, and on October 13th, the Au-ting gate of the city was taken without resistance by 200 British and French troops. However, it was discovered that twenty members of Mr. Parkes' party had died due to the harsh treatment from their Chinese captors. Since Lord Elgin had promised to spare the city if it surrendered, he ordered the Summer Palace, where the atrocities had occurred, to be completely destroyed. The Summer Palace included thirty buildings spread over about 6 miles, and although the troops eagerly began to burn and loot, it took two days to fully destroy the buildings. Many incredible stories have been told about the loot from the Summer Palace in Beijing, but it's clear that during this wanton destruction and the random scattering of its valuable contents, art gems and amazing pieces of jewelry and goldsmith’s work were taken by men who had no idea of their immense worth. It’s said that a French officer found a string of beautiful pearls, each about the size of a small marble, and sold it for £3,000! The loot collected by the British troops, as much as was given back, was sold at public auction by order of Sir Hope Grant, and it’s noted that each private soldier received at least £4 sterling. The city of Beijing was then occupied by the allies, and after the Chinese agreed to cede the island of Kowloon, opposite Hong Kong, to Britain, make Tientsin an open port, and pay £100,000 to the families of the murdered men, the war ended.

BOER WAR MEDALS FOR COMPARISON. THE BARS ON CENTRE MEDAL ARE UNOFFICIAL.
BOER WAR MEDALS FOR COMPARISON. THE BARS ON THE CENTER MEDAL ARE UNOFFICIAL.
The following regiments were engaged: 1st, 2nd, 1st Batt. 3rd, 31st, 44th, 59th, 60th, 67th, 99th; Royal Artillery; Sappers and Miners, and two squadrons 1st Dragoon Guards; 11th and 19th Bengal Lancers; 20th and 23rd Bengal Cavalry.
The following regiments were involved: 1st, 2nd, 1st Batt. 3rd, 31st, 44th, 59th, 60th, 67th, 99th; Royal Artillery; Sappers and Miners, and two squadrons of 1st Dragoon Guards; 11th and 19th Bengal Lancers; 20th and 23rd Bengal Cavalry.
The China Medal, 1857-60.—This medal was granted on February 28th, 1861, to commemorate the successes of Her Majesty's British and Indian forces, both naval and military, employed in the operations in China which terminated in the capture of Canton on December 29th, 1857, and in the operations which terminated in the capture of the city of Pekin. The bars issued with the medal were, CHINA 1842 to those who had been in the first war; CANTON 1857, TAKU FORTS 1858, TAKU FORTS 1860, PEKIN 1860, and FATSHAN 1857 to seamen and marines only. The medal, which is the same size and design as that issued for 1842, but with the date left out on the reverse, is affixed to an ornamental clasp for suspension; the ribbon is also the same, and the names of the recipients, their regiments and rank, are impressed on the edge in Roman capitals. The medals given to the navy were mostly issued unnamed, with the exception of those awarded to the[Pg 182] Indian navy, and sometimes those to the marines. The suspender and bars of this medal are of the same pattern as those used with the "Mutiny Medal." A bar, or bars only, was granted for the second China War, 1857-60, to be affixed to the medal of those who had also served in the first China War, 1842, but such specimens are of the greatest rarity.
The China Medal, 1857-60.—This medal was awarded on February 28th, 1861, to celebrate the achievements of Her Majesty's British and Indian forces, both naval and military, involved in the operations in China that led to the capture of Canton on December 29th, 1857, as well as the operations that resulted in the capture of the city of Peking. The bars issued with the medal were, China 1842 for those who participated in the first war; Canton 1857, TAKU FORTS 1858, TAKU FORTS 1860, PEKING 1860, and Foshan 1857 for sailors and marines only. The medal, which has the same size and design as the one issued for 1842, but without the date on the reverse, is attached to an ornamental clasp for suspension; the ribbon is also the same, and the names of the recipients, their regiments, and rank are engraved on the edge in Roman capitals. The medals awarded to the navy were mostly issued unnamed, except for those given to the[Pg 182] Indian navy, and occasionally those for the marines. The suspender and bars of this medal follow the same design as those used for the "Mutiny Medal." A bar, or bars, was granted for the second China War, 1857-60, to be attached to the medal of those who had also served in the first China War, 1842, but such examples are extremely rare.
The medal given with the two bars TAKU FORTS 1860 and PEKIN 1860 to the 1st Dragoon Guards is rare, as only two squadrons of the regiment were present, no other British cavalry being engaged, and because of the brilliant action of the men on September 21st in riding at "a very ugly place," and scattering the Tartar cavalry. Lord Cheylesmore has in his collection the only five-bar medal issued for the war; it was awarded to a gunner in the Royal Marine Artillery, and has the bars for FATSHAN 1857, CANTON 1857, TAKU FORTS 1858, TAKU FORTS 1860, and PEKIN 1860.
The medal awarded with the two bars TAKU FORTS 1860 and PEKING 1860 to the 1st Dragoon Guards is rare, as only two squadrons of the regiment were present, with no other British cavalry involved, due to the impressive action of the men on September 21st, riding into “a very tough spot” and scattering the Tartar cavalry. Lord Cheylesmore has the only five-bar medal issued for the war in his collection; it was given to a gunner in the Royal Marine Artillery and includes the bars for Foshan 1857, Canton 1857, TAKU FORTS 1858, TAKU FORTS 1860, and PEKING 1860.
NEW ZEALAND, 1860-6
War again broke out in New Zealand in 1860, and so serious did it become that at one time as many as 10,000 regulars and 15,000 colonials were under arms. At Taranaki, on June 13th, the Maoris were defeated, and again at Mahoetaki on November 6th. In order to protect New Plymouth, or the Taranaki district, a chain of redoubts was built, and from one of these, on the Waitara River, a little party of men of the 40th Regiment moved out to locate the Maories known to be in the bush. Directly they entered it a number were killed and wounded by the fire of the hidden enemy, and in a very short time hardly a man was unhurt. In this unfortunate affair, on March 18th, 1861, Sergeant Lucas gained the V.C. for his heroic conduct in assisting Lieutenant Rees, who had been wounded, into cover, and, although himself wounded, remaining at his post under a galling fire. Next day[Pg 183] the Maoris surrendered, and for a short spell peace was restored.
War broke out again in New Zealand in 1860, becoming so serious that at one point, around 10,000 regular troops and 15,000 colonials were mobilized. The Maoris were defeated at Taranaki on June 13th and again at Mahoetaki on November 6th. To protect New Plymouth and the Taranaki area, a series of fortifications was built. From one of these, located on the Waitara River, a small group of men from the 40th Regiment went out to find the Maoris known to be in the bush. As soon as they entered, many were killed or wounded by the fire from the hidden enemy, and soon hardly anyone was unhurt. In this tragic event on March 18th, 1861, Sergeant Lucas was awarded the V.C. for his bravery in helping Lieutenant Rees, who had been wounded, to safety, and despite being injured himself, he stayed at his post under heavy fire. The next day[Pg 183] the Maoris surrendered, and peace was restored for a brief time.
In 1863 war again broke out. The Maoris in the North Island had elected a young, characterless man as King, and established a capital at Ngaruawahia, near the junction of the Waikoto and Waipa Rivers. British law was defied, and when the supporters of the weak and pliant "King" had interfered in a dispute affecting Europeans and Maoris, it became necessary to take strong measures. Lieutenant-General Sir Duncan A. Cameron, learning that the Waikoto tribe had planned to invade Auckland, advanced into the wild country north of the Waikoto River, where at Kohera, above the Mangatawari Creek, the rebels had taken up a strongly fortified position. Attacking them on July 12th, 1863, Cameron drove them out and into the swamps, but owing to difficulties in transport was unable to follow up his success. An instance of the chivalry which characterised the brave Maori warriors throughout the war may here be mentioned; the Maoris at Meri-Meri, hearing a rumour that Cameron and his men were short of food, sent a little fleet of canoes under a flag of truce with potatoes and milch goats for their enemy. When he was able to move, Cameron set out to attack Meri-Meri, but on his arrival he discovered that the Maoris had retired southwards across country, whither, owing to the condition of the land caused by the heavy rains, they could not be followed. Cameron pushed on up the river, and at Rangireri attacked the strongly fortified Pah on November 20th; but owing to the assault being made before the artillery had completed its work, the troops, after their repeated assaults, were only partially successful, and during which 6 officers were killed and 9 wounded, and 120 men killed and wounded. At night a number of the enemy escaped from the Pah, and the remnant of 183 surrendered at daybreak.
In 1863, war broke out again. The Maoris in the North Island elected a young, unremarkable man as King and set up a capital at Ngaruawahia, near where the Waikato and Waipa Rivers meet. British law was disregarded, and when the supporters of the weak and compliant "King" got involved in a dispute between Europeans and Maoris, it became necessary to take strong action. Lieutenant-General Sir Duncan A. Cameron, upon hearing that the Waikato tribe planned to invade Auckland, moved into the rugged area north of the Waikato River, where the rebels had established a stronghold at Kohera, above the Mangatawari Creek. On July 12th, 1863, Cameron attacked, driving the rebels into the swamps, but due to transport issues, he couldn't capitalize on his success. An example of the chivalry shown by the brave Maori warriors throughout the conflict can be noted here: the Maoris at Meri-Meri, hearing a rumor that Cameron and his men were low on food, sent a small fleet of canoes under a flag of truce with potatoes and milch goats for their enemy. When he was able to move, Cameron set out to attack Meri-Meri, but upon arrival, he found that the Maoris had retreated southward across the countryside, a path he could not follow due to the muddy conditions from heavy rains. Cameron continued up the river and attacked the well-fortified Pah at Rangiriri on November 20th; however, because the assault was launched before the artillery finished its work, the troops, despite repeated attacks, achieved only partial success, resulting in the deaths of 6 officers and 9 wounded, as well as 120 men killed and wounded. That night, a number of enemy fighters escaped from the Pah, and the remaining 183 surrendered at dawn.
Four V.C.'s in 1863.—In this fight about 50 artillerymen, armed with swords and revolvers, led by Colonel[Pg 184] Mercer, made a brave effort to enter the Pah, but the Colonel was mortally wounded and the gunners had to retire: brave efforts were made by some of his men to rescue him, and Surgeon Temple of the artillery well earned his V.C. for dressing the dying man's wound while the bullets showered around him. Prior to this, Sergeant McKenna of the 65th had gained the V.C. for his coolness and excellent handling of a small detachment of men after the officers had been mortally wounded near Cameron Town on September 8th, and Ensign Donn and Drummer Stagpoole of the 57th had won theirs by a very gallant action in bringing in a wounded man under a heavy fire at Pontoko, on October 2nd. On December 9th General Cameron occupied Ngaruawahia and the Maori "King" surrendered.
Four V.C.'s in 1863.—In this battle, about 50 artillerymen, armed with swords and revolvers, led by Colonel[Pg 184] Mercer, made a brave attempt to enter the Pah, but the Colonel was mortally wounded and the gunners had to fall back. Some of his men made courageous efforts to save him, and Surgeon Temple of the artillery truly earned his V.C. for treating the dying man's wound while bullets rained down around him. Before this, Sergeant McKenna of the 65th had received the V.C. for his composure and skillful management of a small group of men after the officers had been killed near Cameron Town on September 8th. Ensign Donn and Drummer Stagpoole of the 57th earned their medals through a very courageous act in bringing in a wounded man under heavy fire at Pontoko on October 2nd. On December 9th, General Cameron took control of Ngaruawahia and the Maori "King" surrendered.
The "Gate Pah."—On February 21st, 1864, Rangiawahia was taken, and on March 31st Orakau was invested by a force under Major-General Carey, and captured on April 2nd. Sixteen officers and men were killed and 52 wounded in this engagement. The Maoris then fortified Tauranga, which, on April 29th, after the artillery had played on the place for several hours, a party of the 43rd and about 150 seamen and marines stormed, and thinking the enemy had deserted the Pah, took little precautions for their own safety. The Maoris, however, breaking from the inner entrenchments, mortally wounded the officers, and the storming party, which had entered the "Gate Pah" with ringing cheers, poured out again in confusion. The Pah was evacuated during the night. The "Fighting 43rd" lost 7 officers killed and mortally wounded, and 97 men killed or wounded, the naval brigade losing its Commander, also 4 officers and 40 seamen and marines killed or wounded. In the assault on the Gate Pah Samuel Mitchell, Captain of the Foretop of H.M.S. "Harrier," gained the Victoria Cross for refusing to leave Commander Hay when ordered by him to do so, and, under a shower of bullets, carrying him in his arms out of the Pah. Surgeon Mauley of the R.A. also earned the V.C. for his gallantry in succouring the dying Commander and the wounded generally under the most dangerous circumstances.
The "Gate Pah."—On February 21, 1864, Rangiawahia was captured, and on March 31, Orakau was surrounded by a force led by Major-General Carey and was taken on April 2. Sixteen officers and soldiers were killed and 52 were injured in this battle. The Maoris then fortified Tauranga, which, on April 29, after artillery had shelled the area for several hours, was stormed by a group from the 43rd and about 150 sailors and marines. Believing the enemy had abandoned the Pah, they didn't take many precautions for their own safety. However, the Maoris, emerging from their inner defenses, fatally wounded the officers, and the assault party, which had charged into the "Gate Pah" cheering, quickly retreated in chaos. The Pah was abandoned during the night. The "Fighting 43rd" lost 7 officers killed or mortally wounded, and 97 men either killed or injured, while the naval brigade lost its Commander, along with 4 officers and 40 sailors and marines killed or wounded. In the attack on the Gate Pah, Samuel Mitchell, Captain of the Foretop of H.M.S. "Harrier," received the Victoria Cross for refusing to leave Commander Hay when ordered to do so, and, under heavy fire, carried him out of the Pah. Surgeon Mauley of the R.A. also earned the V.C. for his bravery in assisting the dying Commander and the wounded in extremely dangerous conditions.

- Distinguished Service Order.
- Albert Medal
(3rd Class). - Jubilee Medal.
- Zulu War Medal.
- Queen's South Africa.
- Royal Humane Society's Medal.
DECORATIONS AWARDED TO THE LATE MAJOR EDWARD DENMAN THORNBURG CROOPER, D.S.O.
DECORATIONS AWARDED TO THE LATE MAJOR EDWARD DENMAN THORNBURG CROOPER, D.S.O.
On June 21st the 43rd and a detachment of the 68th marched against the Maoris at a Pah they had started to fortify at Te Ranga. After a short but stubborn fight the enemy was worsted and routed, among the killed being the chief, Rawhiwi, who had led the Maoris at the Gate Pah. In this affair Sergeant J. Murray of the 68th gained the V.C. for his bravery in charging one of the enemy's rifle pits and, singlehanded, killing or wounding the eight or ten men who occupied it.
On June 21st, the 43rd and a group from the 68th marched against the Maoris at a fort they had started to build at Te Ranga. After a brief but intense fight, the enemy was defeated and driven back, with the chief, Rawhiwi, who had led the Maoris at the Gate Pah, among the casualties. In this engagement, Sergeant J. Murray of the 68th earned the V.C. for his courage in charging one of the enemy's rifle pits and, single-handedly, killing or wounding eight to ten men who were stationed there.
V.C. and three D.C.M.'S.—On January 25th, 1865, a daring attack was made on the British camp at Nukumaru, but was repulsed with great loss. At this place, on the 24th, Captain Shaw of the 18th Royal Irish gallantly won his V.C., and Privates John Brandon, George Clampitt, and James Kearns Distinguished Conduct Medals for the daring rescue of a comrade who had been wounded within about 30 yards of the Maori position.
V.C. and three D.C.M.'S.—On January 25th, 1865, a bold attack was launched on the British camp at Nukumaru, but it was pushed back with heavy losses. On the 24th, Captain Shaw of the 18th Royal Irish heroically earned his V.C., and Privates John Brandon, George Clampitt, and James Kearns received Distinguished Conduct Medals for their brave rescue of a comrade who had been injured about 30 yards from the Maori position.
After the repulse at Nukumaru the Maoris retired upon Wereros, a Pah considered by them to be impregnable and apparently also by General Cameron, for he moved slowly up the coast; and it was not until July 20th, 1865, that the place was attacked, and then under orders from Sir George Grey, the Governor of the Colony. One hundred of the 14th and a like number of the 18th Royal Irish were deputed to threaten an attack on the front of the position, while the 470 colonials and friendly Maoris worked round the rear. This strategy disconcerted the enemy and they abandoned their fortress without firing a shot. During the rest of 1865 and 1866 the fighting was restricted to the West Coast.
After the defeat at Nukumaru, the Maoris retreated to Wereros, a stronghold that they considered unbeatable, and apparently General Cameron thought so too, as he moved slowly up the coast. It wasn't until July 20th, 1865, that the place was attacked, and that was under orders from Sir George Grey, the Governor of the Colony. One hundred soldiers from the 14th and a similar number from the 18th Royal Irish were assigned to threaten an attack on the front of the position, while 470 colonials and allied Maoris moved around the back. This tactic confused the enemy, and they abandoned their fortress without firing a shot. For the remainder of 1865 and into 1866, the fighting was limited to the West Coast.
In January 1866 an expedition was organised against the Hau-Haus, a body of fanatics whose religion was a strange mixture of cannibalism, paganism, and Christianity. The force consisted of 139 of the 14th, 100[Pg 186] men of the 18th Royal Irish and a like number of the 50th, 45 Forest Rangers, and 300 native auxiliaries under Major Rocke of the Royal Irish. This little army captured the palisaded village of Otahuhu and the Putahi Pah, a fort in the top of a hill 500 feet high covered with dense and primeval jungle. On the night of October 17th Papoia, a native village in the depths of the primitive forest, was captured, and the Hau-Haus no longer offered serious resistance. This was the last serious engagement in which the regular troops took part, and for the rest of the campaign, which terminated in 1869, the Colonials were engaged under the direction of Colonel (afterwards Sir George) Whitmore.
In January 1866, an expedition was organized against the Hau-Haus, a group of extremists whose faith was a bizarre mix of cannibalism, paganism, and Christianity. The force included 139 soldiers from the 14th, 100[Pg 186] from the 18th Royal Irish, a similar number from the 50th, 45 Forest Rangers, and 300 local auxiliaries led by Major Rocke of the Royal Irish. This small army captured the fortified village of Otahuhu and the Putahi Pah, a fort situated on a hill 500 feet high, covered in dense, untouched jungle. On the night of October 17th, Papoia, a native village deep within the primal forest, was taken, and the Hau-Haus ceased to pose significant resistance. This marked the last major engagement involving regular troops, and for the remainder of the campaign, which concluded in 1869, the Colonial forces operated under the leadership of Colonel (later Sir George) Whitmore.
The New Zealand Medal.—This, the second in the chronological order of the series facing page 188, was granted to the troops and seamen who had taken part in the Maori Wars of 1845-6-7 and 1860-1-2-3-4-5-6. The medal, however, was not authorised by a general order until 1869, and there are twenty-two different dates for the army and ten for the navy in raised letters in the centre of a laurel wreath, above which, following the outline of the medal, is "NEW ZEALAND" and below "VIRTUTIS HONOR." On the obverse is the bust of Queen Victoria with a coronet, in which fleur-de-lis stand out prominently, holding a veil which falls upon the shoulders, and the legend VICTORIA D. G. BRITT. REG. F. D. The suspender is fashioned after the manner of a fern frond. This type is only seen with this medal, which is 1⅖ in. in diameter. No bars were issued, but the dates of service were struck as stated above, for example: 1845-7, 1860, or 1860-6; the rank, name, and ship or regiment being impressed on the edge. The medallists were Joseph S. and Alfred B. Wyon, but their names are not always found on truncation of the bust on the obverse of the medals. The ribbon, 1¼ in. wide, is dark blue with dark-red centre of equal width to the blue which borders it.
The New Zealand Medal.—This, the second in the chronological order of the series facing page 188, was awarded to the troops and sailors who participated in the Maori Wars of 1845-6-7 and 1860-1-2-3-4-5-6. However, the medal wasn’t officially authorized by a general order until 1869, and there are twenty-two different dates for the army and ten for the navy displayed in raised letters within a laurel wreath. Above this, following the shape of the medal, is "New Zealand", and below it is "Honor of Virtue." On the front is the bust of Queen Victoria wearing a coronet, with prominent fleur-de-lis, holding a veil that drapes over her shoulders, along with the legend VICTORIA D. G. BRITT. REG. F. D. The suspender is designed to look like a fern frond. This design is exclusive to this medal, which is 1⅖ inches in diameter. No bars were issued, but the service dates were engraved as mentioned earlier, for example: 1845-7, 1860, or 1860-6; with the rank, name, and ship or regiment engraved on the edge. The medallists were Joseph S. and Alfred B. Wyon, but their names are not always visible on the truncation of the bust on the front of the medals. The ribbon is 1¼ inches wide, dark blue with a dark-red center of equal width to the surrounding blue.
North-West Frontier.—Between the end of 1849[Pg 187] and the beginning of 1868 no less than seventeen expeditions had been sent to deal with the turbulent inhabitants on the North-West Frontier of India, but the troops which took part in the operations were not granted a medal until 1869, when by a general order dated July 1st it was decided to issue a medal for the services rendered, and then the India General Service Medal, with a bar inscribed NORTH WEST FRONTIER, was given to those who had taken part in fifteen of the expeditions enumerated below; to those who already possessed the medal the bar was added. The names and the regiments were impressed on the edge of the medal in Roman capitals.
North-West Frontier.—Between the end of 1849[Pg 187] and the beginning of 1868, a total of seventeen expeditions were launched to address the unrest among the people living on the North-West Frontier of India. However, the troops involved in these missions didn’t receive a medal until 1869, when a general order issued on July 1st decided to award a medal for their service. The India General Service Medal, with a bar labeled NORTH WEST FRONTIER, was granted to those who participated in fifteen of the expeditions listed below. For those who already had the medal, the bar was added. The names and regiments were inscribed on the edge of the medal in Roman capitals.
The following regiments took part in the various expeditions. Regiments present, 1849: 60th and 61st. 1850: 60th, 61st, and 99th. 1852: 32nd, 53rd, and a battery of Royal Horse Artillery. 1853: 22nd, Guides, 66th Goorkas. 1857: 81st and 98th. 1863: bar for UMBEYLA—7th and 101st Fusiliers; 71st and 93rd Highlanders; half a battery of Royal Artillery and a Mountain Mule battery; the Guides, both Foot and Horse; a squadron of Probyn's Horse; 4th and 5th Goorkas; 3rd and 14th Sikhs; 1st, 3rd, 5th, 6th, and 20th Punjab Infantry; 23rd and 32nd Punjab Pioneers and a company of Native Sappers. End of December 1863 to January 1864: 79th Highlanders; 3rd Batt. Rifle Brigade; "D" Battery 5th Brigade Royal Horse Artillery; 7th Hussars and Native Corps.
The following regiments participated in the various expeditions. Regiments present, 1849: 60th and 61st. 1850: 60th, 61st, and 99th. 1852: 32nd, 53rd, and a battery of Royal Horse Artillery. 1853: 22nd, Guides, 66th Goorkas. 1857: 81st and 98th. 1863: bar for UMBEYLA—7th and 101st Fusiliers; 71st and 93rd Highlanders; half a battery of Royal Artillery and a Mountain Mule battery; the Guides, both Foot and Horse; a squadron of Probyn's Horse; 4th and 5th Goorkas; 3rd and 14th Sikhs; 1st, 3rd, 5th, 6th, and 20th Punjab Infantry; 23rd and 32nd Punjab Pioneers and a company of Native Sappers. End of December 1863 to January 1864: 79th Highlanders; 3rd Batt. Rifle Brigade; "D" Battery 5th Brigade Royal Horse Artillery; 7th Hussars and Native Corps.
Umbeyla.—At the end of 1863 a somewhat serious trouble again broke out on the borders of the Aklumd of Swat by the fanatical outbreak of Hindustanis, and a very arduous campaign had to be undertaken between October and December before the district settled down. This little war in Umbeyla (Ambela) was responsible for the death of a great number of officers; first the Buner people refused to allow Sir Neville Chamberlain's army to pass, and the commanding points on the mountains were repeatedly taken and retaken, despite the bravery of the Punjabis and the general gallantry of[Pg 188] the troops. Around the Eagle's Nest and the Craig Piquet the most desperate fighting took place, and at the latter post Lieutenants Fosbery and Pitcher won the V.C. for their daring, but to little avail until the force was increased to 9,000 men, and then through strenuous opposition it pushed on, and the Hussanzaie tribes were dispersed. In this expedition 36 British and 31 native officers were killed, and 150 British and 689 native soldiers killed or wounded. A bar for this expedition was not authorised until July 1st, 1869.
Umbeyla.—At the end of 1863, a serious conflict broke out on the borders of the Aklumd of Swat due to a fanatical uprising by Hindustanis, leading to a tough campaign from October to December before the region stabilized. This small war in Umbeyla (Ambela) resulted in the deaths of many officers; initially, the Buner people denied Sir Neville Chamberlain's army passage, and the key positions in the mountains were taken and retaken, despite the courage of the Punjabis and the overall bravery of[Pg 188] the troops. The fiercest fighting occurred around the Eagle's Nest and Craig Piquet, where Lieutenants Fosbery and Pitcher earned the Victoria Cross for their bravery, but it was not until the force was increased to 9,000 men that they could advance, eventually dispersing the Hussanzaie tribes. In this campaign, 36 British and 31 native officers were killed, along with 150 British and 689 native soldiers wounded or killed. A bar for this expedition wasn't approved until July 1, 1869.
Bhootan, 1864-6.—The Umbeyla campaign was but the precursor of another, for that restless spirit which seems to thrive so well on the frontier engendered another outbreak, and disturbances among the Bhootanese in 1864 necessitated the sending of an expedition of four columns to invade Bhootan, a district to the north-east of India. The left column met with little opposition at Dhalimcote, where the fort was bombarded and stormed, or at Bhumsong, where the stockaded positions were evacuated without a shot being fired by the enemy, although they made something of a stand at Chamoorchee. Buxa was taken by one column, and while another pressing on to the Barungah Pass found small opposition, the other reached Bisheusing unmolested. The annexation of Bhootan was then formally declared. In 1865, however, the inhabitants endeavoured to free themselves from British dominion, and rather determined fighting ensued; at the various places already mentioned attacks were made upon the garrisons, and it became evident that stronger force was necessary to hold the country. Reinforcements were hurried forward under Brigadier-General Tombs, C.B., V.C., but after the defeat of the Bhootanese at Dewangari, a hill post at the summit of the Dungarah Pass, hostilities came to an end, and with a stronger permanent military establishment peace was ensured, but not effectually until in 1866 a force of 7,000 men was sent into the country. This determined attitude on the part of the Indian Government resulted in the Deb Rajah of Bhootan signing a treaty of peace.
Bhootan, 1864-6.—The Umbeyla campaign was just the start of another conflict, as that restless energy on the frontier sparked another uprising. Disturbances among the Bhootanese in 1864 required an expedition of four columns to invade Bhutan, a region northeast of India. The left column faced little resistance at Dhalimcote, where the fort was bombarded and stormed, or at Bhumsong, where the fortified positions were abandoned without any shots fired by the enemy, although they did put up a bit of a fight at Chamoorchee. One column captured Buxa, and while another pushed on to the Barungah Pass with little resistance, the third reached Bisheusing without trouble. The annexation of Bhutan was then officially announced. However, in 1865, the locals tried to shake off British control, leading to determined fighting; garrisons were attacked at various locations already mentioned, making it clear that a stronger force was needed to maintain control of the area. Reinforcements were rushed in under Brigadier-General Tombs, C.B., V.C., but after the Bhootanese were defeated at Dewangari, a hill post at the top of the Dungarah Pass, hostilities ceased. With a stronger, permanent military presence, peace was secured, but not effectively until 1866 when a force of 7,000 men was deployed to the region. This firm stance by the Indian Government led to the Deb Rajah of Bhutan signing a peace treaty.

- Naval General Service.
- New Zealand.
- Ashantee.
- Afghanistan.
- I.G.S., 1895.
- Sudan, 1899.
- South Africa, 1900.
SEVEN PHASES OF QUEEN VICTORIA'S LIFE AS REPRESENTED ON THE OBVERSE OF HER WAR MEDALS.
SEVEN PHASES OF QUEEN VICTORIA'S LIFE AS SHOWN ON THE FRONT OF HER WAR MEDALS.
1881
1881
The following regiments were engaged in the campaign, for which a bar was granted on April 28th, 1870: 55th and 80th Foot; 2 batteries of Royal Artillery; 2nd Goorkas; 11th, 12th, 18th, 43rd, and 44th Bengal Infantry; 5th and 14th Bengal Cavalry; 19th, 29th, and 30th Punjab Infantry.
The following regiments participated in the campaign, for which a bar was awarded on April 28, 1870: 55th and 80th Foot; 2 batteries of Royal Artillery; 2nd Goorkas; 11th, 12th, 18th, 43rd, and 44th Bengal Infantry; 5th and 14th Bengal Cavalry; 19th, 29th, and 30th Punjab Infantry.
Looshai.—The introduction of tea-planting into Assam, and the consequent immigration of Europeans, encouraged the predatory hill tribes of the vicinity to extend their depredations, and the Looshai expedition had to be organised to punish the tribes which had been making incursions into the fertile districts at the foot of the mountains. Two columns were sent into the district. One under General Bouchier, composed of native troops with artillery sappers, advanced from Cachar, and so harassed the Looshais that they sued for peace, but it was hardly agreed to before they attacked the British column and wounded the commander. The right column, which had set out from Chittagong, joining hands with the left, assailed the stronghold of Lungvel, and taking it by storm burnt it. The payment of an indemnity was then agreed to, likewise the residence of Government agents in the Looshai villages.
Looshai.—The introduction of tea planting in Assam and the resulting influx of Europeans encouraged the nearby hill tribes to increase their raids. This led to the organization of the Looshai expedition to punish the tribes that had been invading the fertile areas at the base of the mountains. Two units were sent into the region. One, led by General Bouchier and made up of local troops along with artillery sappers, moved in from Cachar and pressured the Looshais to seek peace. However, just as the agreement was made, they launched an attack on the British column, injuring the commander. The other unit, which had departed from Chittagong, linked up with the first and assaulted the stronghold of Lungvel, capturing and burning it. An indemnity was eventually agreed upon, along with the establishment of Government representatives in the Looshai villages.
The troops engaged in the operations, which extended from December 1871 to February 1872, were native troops only: 2nd and 4th Goorkas; 22nd and 27th Punjab Infantry; 42nd and 44th Assam Infantry; a battery of Peshawar Mountain Artillery; two companies of Sappers and Miners, and 100 Native Police. The troops were under the command of British officers.
The soldiers involved in the operations, which lasted from December 1871 to February 1872, were all local troops: the 2nd and 4th Goorkas; the 22nd and 27th Punjab Infantry; the 42nd and 44th Assam Infantry; a battery of Peshawar Mountain Artillery; two companies of Sappers and Miners, and 100 Native Police. The troops were commanded by British officers.
ABYSSINIAN WAR
In January 1864 Theodore "The Negus," or Emperor of Abyssinia, fancying himself insulted by the British Government, imprisoned the British Consul,[Pg 190] Captain Cameron, together with the Europeans resident in his territory. Mr. Hormuzd Rassam, with Lieutenant Prideaux and Dr. Blane, was sent by the British Government to obtain the release of the prisoners, but they also were incarcerated, and it ultimately became necessary to send an expedition to secure the release of the prisoners. The Resident at Aden, Colonel Merewether, commanding a reconnoitring party, landed at Mulkutto in Annesley Bay, where he established a base, and, entering into friendly relationship with the local chiefs and tribesmen, prepared the way for the army which under Sir Robert Napier was to march on Magdala and effect the release of the captives.
In January 1864, Theodore "The Negus," or Emperor of Abyssinia, feeling insulted by the British Government, imprisoned the British Consul, Captain Cameron, along with the Europeans living in his territory. Mr. Hormuzd Rassam, along with Lieutenant Prideaux and Dr. Blane, was sent by the British Government to secure the prisoners' release, but they were also captured. It ultimately became necessary to send an expedition to free the prisoners. The Resident at Aden, Colonel Merewether, led a reconnaissance team that landed at Mulkutto in Annesley Bay, where he set up a base and established friendly relations with the local chiefs and tribesmen, paving the way for the army that, under Sir Robert Napier, was to march on Magdala and rescue the captives.
The force at the command of Sir Robert was about 4,000 British and 8,000 Indian troops, with a transport service and camp followers numbering about 14,000. How splendidly this mass of men was organised, and led with remarkable rapidity across a most difficult country, was a military feat reflecting the greatest credit upon the Indian veteran, who was rewarded with the peerage of Magdala. With this intrepid warrior they had, on scant rations, and each soldier carrying accoutrements, etc., weighing 55 lb., scaled "mountains and descended precipices ... traversed along the face of deep ravines, where a false step was death!" scorched by the intense sun by day, and chilled to the bone by the cold night air. But the valley of Bachelo was reached; the three brigades formed into one, and then the fighting commenced, when, after descending 3,800 feet, the army attempted to ascend the other side of the ravine, but the 4th with their Sniders—in use for the first time in warfare—and the Rocket Battery of the Naval Brigade, did excellent service; and one body of the enemy being disposed of, the other, amounting to about 5,000 men who made a rush at those in charge of the convoy, was practically decimated by the fire from the battery under Colonel Penn and the Sniders of the infantry. It is said that in one hour each man had discharged ninety rounds[Pg 191] of ammunition! Then the guns and rockets were directed upon Magdala, the capital standing 9,000 feet above sea-level. Theodore made overtures for peace, released the captives, and sent a present of sheep and cattle in token of submission; but the fortress was stormed on Easter Monday, April 13th, 1867, the 33rd with the Engineers leading the way, with the 45th in support. The fortress taken, it was discovered that Theodore—deserted by his men—had committed suicide. The fortifications having been destroyed and the huts burned, the troops returned to Mulkutto, and before the end of June 1867 the British force had left Africa.
The force under Sir Robert included about 4,000 British and 8,000 Indian troops, along with a transport service and camp followers totaling around 14,000. The way this large group was organized and led so swiftly through such a challenging terrain was a remarkable military achievement, earning great credit for the Indian veteran, who was granted the title of Magdala. With this fearless leader, they faced tough conditions on limited rations, each soldier carrying gear weighing 55 lbs, scaled "mountains and descended cliffs ... crossed along the edges of deep ravines, where one misstep meant death!" They fought the intense sun during the day and were chilled to the bone by the cold night air. However, they reached the valley of Bachelo; the three brigades came together, and the fighting began. After descending 3,800 feet, the army tried to climb the other side of the ravine. The 4th brigade, equipped with their Sniders—used for the first time in battle—and the Rocket Battery of the Naval Brigade, performed exceptionally well; after one group of the enemy was taken out, another group of about 5,000 men charged the convoy, but they were largely wiped out by the fire from Colonel Penn's battery and the infantry's Sniders. It’s said that within one hour, each soldier fired ninety rounds of ammunition! Next, the guns and rockets were aimed at Magdala, the capital situated 9,000 feet above sea level. Theodore sought peace, released the captives, and sent a gift of sheep and cattle as a sign of submission; however, the fortress was stormed on Easter Monday, April 13th, 1867, with the 33rd leading the charge and the 45th providing support. Once the fortress was captured, it was found that Theodore—abandoned by his men—had taken his own life. After destroying the fortifications and burning the huts, the troops returned to Mulkutto, and by the end of June 1867, the British force had departed Africa.
The following troops were engaged: 4th, 26th, 33rd, 45th; Royal Artillery and Engineers; 3rd Dragoon Guards, and the following Indian regiments: 1st, 2nd, 3rd, 10th, 18th, 21st, 25th, and 27th Bombay Infantry; Bombay and Madras Sappers and Miners; 3rd Bombay Cavalry; 10th and 12th Bengal Cavalry; Scinde Horse and a Naval Brigade (see Naval Section).
The following troops were involved: 4th, 26th, 33rd, 45th; Royal Artillery and Engineers; 3rd Dragoon Guards, and these Indian regiments: 1st, 2nd, 3rd, 10th, 18th, 21st, 25th, and 27th Bombay Infantry; Bombay and Madras Sappers and Miners; 3rd Bombay Cavalry; 10th and 12th Bengal Cavalry; Scinde Horse, and a Naval Brigade (see Naval Section).
Abyssinia Medal.—By a general order dated March 1st, 1869, a medal was granted to all Her Majesty's British and Indian forces, naval and military, who took part in the operations in Abyssinia under Sir Robert Napier between October 4th, 1867, and April 19th, 1868. This is a very distinctive silver medal, being considerably smaller than the others issued. On the obverse, within a beaded circle, is the bust of Queen Victoria facing left, crowned and veiled, encircled by a star of nine points with the letters of the word ABYSSINIA between the angles. The portrait of the Queen is similar to that on the New Zealand medal. On the reverse, within a beaded circle surrounded by a wreath of laurel tied at the base, the recipient's name, rank, and regiment or ship are stamped in relief in the centre. The Indian troops had their names and regiments generally engraved, but I have several in my possession with the names stamped in relief, and also in intaglio. The medal is suspended from a silver swivel ring attached to a crown soldered[Pg 192] on to the top of the medal, which is 1¼ in. in diameter, by means of 1½ in. wide ribbon of red, with broad white borders.
Abyssinia Medal.—In a general order dated March 1st, 1869, a medal was awarded to all of Her Majesty's British and Indian forces, both naval and military, who participated in the operations in Abyssinia under Sir Robert Napier from October 4th, 1867, to April 19th, 1868. This is a unique silver medal, notably smaller than others issued. On the front, within a beaded circle, is a bust of Queen Victoria looking left, crowned and veiled, surrounded by a nine-pointed star with the letters of the word ETHIOPIA between the points. The Queen's portrait resembles that on the New Zealand medal. On the back, within a beaded circle surrounded by a laurel wreath tied at the base, the recipient's name, rank, and regiment or ship are embossed in the center. The Indian troops usually had their names and regiments engraved, but I have several that have names stamped in relief and also in intaglio. The medal hangs from a silver swivel ring attached to a crown soldered[Pg 192] on the top of the medal, which is 1¼ inches in diameter, by a 1½-inch wide red ribbon with broad white borders.
ASHANTEE, 1873-4
There had been troubles on the Hinterland and in the West Coast settlements as far back as 1824 and 1826, and again in 1863; but the more serious outbreak of hostilities occurred in 1873, when the Ashantees crossed the River Prah, and, attacking the Assims and Fantees, opened a road for themselves to Elmina and Cape Coast Castle, and in company with the Elminas attempted to capture Fort Elmina, but were beaten off. A force of 20,000 Ashantees, however, sat down before Mampon, 10 miles from the British forts, and there they remained until the advent of Sir Garnet (afterwards Viscount) Wolseley in October 1874, when they abandoned their camp, and fell back behind the Prah. A small force was sent to Elmina to disperse the natives, which it did, while the main force, composed of the 23rd Royal Welsh Fusiliers, the 42nd Black Watch, and 2nd 60th Rifles, pressed forward over the Prah—which the Ashantees asserted no white man could cross—over the Adansi Hills, and across the Bahrein River on to Amoaful, where 20,000 Ashantees under General Amanquatia stubbornly fought for five hours before giving way, and then desultory fighting continued for at least six hours more before the enemy actually retreated, having lost their General and considerably over 2,000 men. In this stubborn fight the 42nd, which had led the attack, and repeatedly charged the enemy, lost Major Baird, who was mortally wounded, and had 7 officers and 104 men placed hors de combat by wounds.
There had been issues in the Hinterland and West Coast settlements dating back to 1824 and 1826, and again in 1863; but the more serious outbreak of conflict occurred in 1873 when the Ashantees crossed the River Prah. They attacked the Assims and Fantees, creating a path for themselves to Elmina and Cape Coast Castle, and, allied with the Elminas, tried to capture Fort Elmina but were repelled. A force of 20,000 Ashantees then encamped outside Mampon, 10 miles from the British forts, and stayed there until Sir Garnet (later Viscount) Wolseley arrived in October 1874, at which point they abandoned their camp and retreated behind the Prah. A small force was dispatched to Elmina to disperse the locals, which they accomplished, while the main force, made up of the 23rd Royal Welsh Fusiliers, the 42nd Black Watch, and the 2nd 60th Rifles, advanced over the Prah—which the Ashantees claimed no white man could cross—over the Adansi Hills, and across the Bahrein River to Amoaful, where 20,000 Ashantees led by General Amanquatia fiercely resisted for five hours before giving ground. Desultory fighting continued for at least six more hours before the enemy actually retreated, having lost their General and significantly over 2,000 men. In this fierce battle, the 42nd, which had led the attack and charged the enemy multiple times, lost Major Baird, who was mortally wounded, and suffered 7 officers and 104 men injured.

BRONZE STAR FOR ASHANTI, 1896.
BRONZE STAR FOR ASHANTI, 1896.

INDIA 1895 MEDAL FOR THREE CAMPAIGNS.
INDIA 1895 MEDAL FOR THREE CAMPAIGNS.

MAYOR'S STAR FOR DEFENCE OF KIMBERLEY.
MAYOR'S STAR FOR DEFENSE OF KIMBERLEY.
Hewing their way through the dense bush, constantly assailed on all sides by the natives, the army pushed on in three columns, and after passing the village of Egginassie encountered considerable opposition, and later stormed the village of Bequah, where Lord Gifford earned his Victoria Cross. In effecting the bridging of the Ordah, severe skirmishing took place, and at Ordah-su a lengthy battle was fought, the village being ultimately carried and held by the Rifles. In this battle the ill-fated Wauchope, who later met his death at Magersfontein, was severely wounded when serving with the 42nd. Forcing its way onward, with the pipers of the Black Watch playing at its head, the army entered Commassie practically unopposed, and the reign of the barbarous King Koffi Calcali came to an end, a reign in which "murder, pure and simple, monotonous massacre of bound men," was the "one employment of the King, and the one spectacle of the populace."
Carving their way through the thick jungle, constantly attacked from all sides by the locals, the army continued forward in three columns. After passing the village of Egginassie, they faced significant resistance and later attacked the village of Bequah, where Lord Gifford earned his Victoria Cross. While crossing the Ordah River, there were intense skirmishes, and at Ordah-su, a prolonged battle took place, ultimately leading to the Rifles capturing and holding the village. In this battle, the unfortunate Wauchope, who would later lose his life at Magersfontein, was seriously wounded while serving with the 42nd. Pushing onward, with the pipers of the Black Watch leading the way, the army entered Commassie nearly without opposition, marking the end of the brutal reign of King Koffi Calcali—a reign characterized by "murder, pure and simple, monotonous massacre of bound men," which was the "one occupation of the King, and the only spectacle for the people."
In the march on Commassie 80 European officers and men were killed, and 261 officers and men wounded, but the number of deaths from disease was very great. The grim spectre of disease is always more to be feared than the bullets of an enemy. In this war Captain (afterwards Lieutenant-Colonel) Reginald Sartorius, who had accompanied the column from Accra in the advance on Commassie, but did not reach there until it was abandoned, earned the V.C. for a daring ride of 55 miles across country in order to communicate with the General Commanding, and at Abogov, under a heavy fire, carrying a wounded Houssa soldier into cover. For his services Sir Garnet Wolseley was offered a baronetcy, which he declined, but accepted a grant of £25,000.
In the march on Commassie, 80 European officers and soldiers were killed, and 261 were injured, but the number of deaths from disease was extremely high. The grim threat of illness is always more to be feared than enemy gunfire. During this war, Captain (later Lieutenant-Colonel) Reginald Sartorius, who had accompanied the column from Accra towards Commassie but arrived only after it had been abandoned, earned the Victoria Cross for a brave 55-mile ride across the country to communicate with the General in command, and at Abogov, while under heavy fire, he carried a wounded Houssa soldier to safety. For his efforts, Sir Garnet Wolseley was offered a baronetcy, which he turned down, but he accepted a grant of £25,000.
The troops engaged were the 23rd Royal Welsh Fusiliers; 42nd Black Watch; 2nd Batt. 60th Rifles; 150 Royal Engineers; 2nd West India Regiment; Houssa Artillery and a Naval Brigade.
The troops involved were the 23rd Royal Welsh Fusiliers, 42nd Black Watch, 2nd Battalion 60th Rifles, 150 Royal Engineers, 2nd West India Regiment, Houssa Artillery, and a Naval Brigade.
The Ashantee Medal.—By a general order dated June 1st, 1874, Her Majesty granted a medal to her naval and military forces who had been employed on the Gold Coast under Sir Garnet Wolseley during the operations against the King of Ashantee from June 9th, 1873, to February 4th, 1874, with a bar inscribed[Pg 194] COMMASSIE to those who were present at Amoaful, and the actions between that place and Commassie, including its capture, and to those who during the five days of those actions were engaged on the north of the Prah in maintaining and protecting the communications of the main army. This medal has since been given for a number of expeditions in Central Africa, and on the East and West Coast. The recipient's name and regiment, or ship, and the date 1873-4, are engraved in square Roman capitals on the edge of the medal, and blacked in for the campaign 1873-4, but after that date the names are found impressed as well as engraved. On the obverse is the diademed head of Queen Victoria facing left, with plain veil falling over the back of the crown behind, surrounded by the legend VICTORIA REGINA. On the truncation L. C. WYON. The reverse, by Sir Edward Poynter, P.R.A., represents British troops fighting natives in the bush, and while it may be alleged to pictorially represent something of the difficulties met with by the troops—which I do not consider it does—it cannot be said to fulfil the requirements of a decoration for personal wear. The medal, which is 1⅖ in. in diameter, with a straight clasp and claw clip arrangement, fastened by a rivet through the medal, is suspended from a ribbon 1¼ in. wide, yellow with black borders, and two narrow black stripes. The bars are plain, with a raised straight border.
The Ashantee Medal.—In a general order dated June 1, 1874, Her Majesty awarded a medal to her naval and military forces who served on the Gold Coast under Sir Garnet Wolseley during operations against the King of Ashantee from June 9, 1873, to February 4, 1874. This medal includes a bar inscribed[Pg 194] COMMASSIE for those who were present at Amoaful and the battles between there and Commassie, including its capture, as well as for those who spent five days in the northern Prah area maintaining and protecting the main army's communications. This medal has since been awarded for various expeditions in Central Africa and along the East and West Coasts. The recipient's name and regiment or ship, along with the date 1873-4, are engraved in square Roman capitals along the edge of the medal, filled in for the 1873-4 campaign; after that date, names are both impressed and engraved. On the front, the diademed head of Queen Victoria faces left, with a simple veil falling over the back of her crown, surrounded by the inscription QUEEN VICTORIA. On the truncation is L. C. WYON. The reverse, designed by Sir Edward Poynter, P.R.A., depicts British troops fighting natives in the bush. While it might be argued that this illustration conveys some of the challenges faced by the troops—which I do not believe it does—it cannot be considered appropriate for a decoration meant for personal wear. The medal is 1⅖ inches in diameter, with a straight clasp and claw clip fastened by a rivet through the medal, suspended from a ribbon that is 1¼ inches wide, yellow with black borders and two narrow black stripes. The bars are plain, with a raised straight edge.
Perak.—Perak, on the western side of the Malay Peninsula, had been independent of Siam since 1882, but the sovereignty of the State had been in dispute. In order to put an end to the constant feuds, the offer of Ismail, one of the claimants, to surrender the sovereignty to Britain was accepted, and Mr. Birch was appointed British Resident in Perak city. Ismail a few months later, desirous of securing the throne, attacked the Residency and murdered the Resident. The neighbouring Rajahs joined with him, and it became necessary to dispatch a punitive expedition. A party of troops and a Naval Brigade therefore proceeded[Pg 195] up the Perak River, destroyed the village of Passir Sala, and captured 6 guns, while General Colbourne's column marched through the jungle, so "dense and dark that during all the time not a vestige of sun or sky was visible overhead," and during the advance (on Kintra) the troops—1,300 men of the 80th and a naval brigade from the "Modeste" and "Ringdove"—"were without cover of any kind, and slept in the damp dewy open." On the capture of Kintra, the Maharajah Lela and Ismail fled into the jungle; meantime Brigadier-General Ross, with a detachment of the Buffs and some Goorkas, stormed Kotah Lama and burned it. On January 19th Ismail was decisively worsted, and on March 22nd he was captured and sent to Singapore, and the districts which had been the scene of constant conflict became, under British rule, prosperous and contented.
Perak.—Perak, on the western side of the Malay Peninsula, had been independent from Siam since 1882, but there was a dispute over the state's sovereignty. To end the ongoing feuds, Ismail, one of the claimants, offered to surrender sovereignty to Britain, which was accepted, and Mr. Birch was appointed as the British Resident in Perak city. A few months later, wanting to secure the throne, Ismail attacked the Residency and murdered the Resident. The neighboring Rajahs joined him, leading to the need for a punitive expedition. A group of troops and a Naval Brigade proceeded[Pg 195] up the Perak River, destroyed the village of Passir Sala, and captured six guns, while General Colbourne's column marched through the jungle, which was “so dense and dark that not a trace of sun or sky was visible overhead.” During the advance on Kintra, the troops—1,300 men from the 80th and a naval brigade from the "Modeste" and "Ringdove"—“were without any kind of cover and slept in the damp, dewy open." After capturing Kintra, Maharajah Lela and Ismail fled into the jungle; meanwhile, Brigadier-General Ross, with a detachment of the Buffs and some Gurkhas, stormed Kotah Lama and burned it. On January 19th, Ismail suffered a decisive defeat, and on March 22nd, he was captured and sent to Singapore. The districts that had been sites of constant conflict became prosperous and content under British rule.
The troops engaged were: 1st Batt. 3rd; detachments of the 10th and 80th; Royal Artillery and Engineers; a Naval Brigade, and detachments of Indian troops.
The troops involved were: 1st Batt. 3rd; detachments of the 10th and 80th; Royal Artillery and Engineers; a Naval Brigade, and detachments of Indian troops.
An issue of the India General Service Medal 1854 was authorised with a bar for PERAK on September 1st, 1879, for the campaign from November 2nd to March 20th, 1875-6, and by a general order issued in 1881 to those who had been engaged between November 27th and December 10th, 1874.
An issue of the India General Service Medal 1854 was approved with a bar for PERAK on September 1st, 1879, for the campaign from November 2nd to March 20th, 1875-6, and by a general order issued in 1881 to those who had been involved between November 27th and December 10th, 1874.
Jowaki.—Living on the hills of the Afghan frontier, the Jowakis, a branch of the Afridis, long had a bad reputation as marauders, disturbing, robbing, and slaughtering the inhabitants of the Peshawar Valley; finally they attacked a British outpost, and it became necessary to teach them a serious lesson. A force composed of the 9th and 51st Regiments, and two companies of the 4th Rifle Brigade, with Royal Engineers, Artillery, and Indian regiments, was therefore sent against the hillmen under the command of Generals Keyes and Ross. The Jowaki villages, fortified Sangars and crops, were destroyed, and on December 1st, 1877, the strong[Pg 196]hold of Jummoo was taken with little opposition. By the end of January 1878 the Jowakis sued for peace; unwilling, however, to accept the terms imposed, the hostilities were resumed, but after a crushing charge by the Bengal Cavalry, on February 15th, their spirit was damped, and they unconditionally accepted the terms laid down for peace.
Jowaki.—Living in the hills along the Afghan border, the Jowakis, a branch of the Afridis, had a long-standing reputation as raiders, bothering, robbing, and killing the people of the Peshawar Valley. Eventually, they attacked a British outpost, making it necessary to teach them a serious lesson. A force made up of the 9th and 51st Regiments, along with two companies of the 4th Rifle Brigade, Royal Engineers, Artillery, and Indian regiments, was sent against the hillmen under the command of Generals Keyes and Ross. The Jowaki villages, fortified positions, and crops were destroyed, and on December 1st, 1877, the stronghold of Jummoo was captured with little resistance. By the end of January 1878, the Jowakis sought peace; however, unwilling to accept the imposed terms, hostilities resumed. But after a devastating charge by the Bengal Cavalry on February 15th, their resolve was broken, and they unconditionally accepted the peace terms.
By another order dated March 1st, 1879, a medal with bar for JOWAKI was awarded to the troops who took part in the operations between November 9th, 1877, and January 19th, 1878.
By another order dated March 1, 1879, a medal with a bar for JOWAKI was awarded to the troops who participated in the operations from November 9, 1877, to January 19, 1878.
The troops engaged were the 9th and 51st; two companies 4th Batt. 60th; two companies Royal Engineers; a battery of Field and a battery of Royal Horse Artillery; 20th, 22nd, and 27th Punjab Infantry; 14th Sikhs; 17th Bengal Cavalry.
The troops involved were the 9th and 51st; two companies from the 4th Battalion, 60th; two companies of Royal Engineers; a field battery and a Royal Horse Artillery battery; the 20th, 22nd, and 27th Punjab Infantry; the 14th Sikhs; and the 17th Bengal Cavalry.
Campaign against Galekas and Gaikas.—On September 25th, 1877, the Galekas attacked the old allies of the British, the Fingoes, and a party of mounted police at Guadana, but were repulsed. Troops were immediately sent to the scene of hostilities, Kreli's country was invaded and his kraal burnt, and a stiff fight was made at Umzintzani before crossing the Krei. The Connaught Rangers then proceeded to the front, with 50 mounted men of the 24th, and the bandsmen of that regiment as gunners with a 7-pounder gun and Naval Brigades from the "Active" and "Florence." The Galekas, who had joined forces with the Gaikas under Sandilli, were badly beaten at Nynnuxa, but rallied in the Chickaba Valley, where the British column attacked them on January 14th, 1878, and drove them off with considerable loss in men and cattle. On February 25th General Thesiger (later Lord Chelmsford) took over the command from Sir Arthur Cunningham, and Sandilli's force was defeated in the Amotala Mountains by the column under Colonel (now Field-Marshal Sir Evelyn) Wood. In succeeding skirmishes Sandilli was killed; then the Galeka chief, Kreli, surrendered, and an amnesty was proclaimed on[Pg 197] June 28th, 1878, for all who had taken part in the war except the sons of Sandilli.
Campaign against Galekas and Gaikas.—On September 25, 1877, the Galekas attacked their longtime British allies, the Fingoes, along with a group of mounted police at Guadana, but they were pushed back. Troops were quickly dispatched to the conflict zone, Kreli's territory was invaded, and his village was burned. A tough battle occurred at Umzintzani before crossing the Krei. The Connaught Rangers then moved to the front lines, accompanied by 50 mounted men from the 24th, and the band members of that regiment served as gunners with a 7-pounder gun, along with Naval Brigades from the "Active" and "Florence." The Galekas, who had allied with the Gaikas under Sandilli, suffered a heavy defeat at Nynnuxa but regrouped in the Chickaba Valley. There, on January 14, 1878, the British column attacked them, pushing them back with significant losses in both men and cattle. On February 25, General Thesiger (later Lord Chelmsford) took command from Sir Arthur Cunningham, and Sandilli's forces were defeated in the Amotala Mountains by a column led by Colonel (now Field-Marshal Sir Evelyn) Wood. In subsequent skirmishes, Sandilli was killed; then Kreli, the Galeka chief, surrendered, and an amnesty was announced on[Pg 197] June 28, 1878, for everyone involved in the war except Sandilli's sons.
The Griqua Campaign.—Meanwhile an outbreak in Griqualand West had to be suppressed, and this was done by the colonial troops, without the assistance of the regulars, but not until several sharp engagements between the Griquas and the Colonials had been fought between June 11th and July 20th, 1878, when an amnesty was declared and the war was at an end.
The Griqua Campaign.—In the meantime, there was an uprising in Griqualand West that needed to be dealt with. This was handled by the colonial troops, without help from the regulars, but not before a number of intense skirmishes occurred between the Griquas and the Colonials from June 11th to July 20th, 1878, after which an amnesty was declared and the conflict came to an end.
The Basuto War.—Following closely on the suppression of the rising in Griqualand came the Basuto War, occasioned by the refusal of Morosi and his son Dodo, chief of the Baphutis, to pay the hut tax. Morosi had fortified an almost inaccessible mountain near the Orange River, and thither, after a skirmish with the Cape Mounted Rifles, he gathered his people, and for nine months defied the forces and artillery ranged against him in his mountain fastness, which with only one accessible side he had, with considerable skill, fortified and loopholed for musketry fire. After many futile attempts to storm the place Morosi was killed, and what was considered to be an impregnable mountain fortress was taken, and the fortifications blown up. Then it was decided to disarm the natives, and some hard fighting took place against the rebel chief Letherodi, and the rising was not stamped out until the Imperial and Colonial forces in the field totalled 15,000 men. In April 1878 an amnesty was proclaimed, and although the Basutos had been badly defeated they gained practically all they asked for prior to the rising.
The Basuto War.—Right after the uprising in Griqualand was put down, the Basuto War began, triggered by Morosi and his son Dodo, the chief of the Baphutis, refusing to pay the hut tax. Morosi had fortified a nearly unreachable mountain near the Orange River, where he gathered his people after a skirmish with the Cape Mounted Rifles. For nine months, he resisted the forces and artillery that faced him from his mountain stronghold, which he had skillfully fortified and loopholed for rifle fire on its only accessible side. After many unsuccessful attempts to storm the location, Morosi was killed, and what was thought to be an impregnable mountain fortress was captured, with the fortifications destroyed. Then, it was decided to disarm the natives, leading to intense fighting against the rebel chief Letherodi. The uprising wasn’t fully subdued until the Imperial and Colonial forces in the field reached a total of 15,000 men. In April 1878, an amnesty was announced, and even though the Basutos had suffered a significant defeat, they received almost everything they had asked for before the uprising.
THE ZULU WAR
Then a war was entered upon which was to alternately bring disaster and as frequently demonstrate the stern inflexibility of the white man. Zululand, to the north-east of Natal, produced the finest and bravest black warriors against whom Britain has fought. Chaka on becoming chief in 1810 organised the tribe[Pg 198] on a martial basis, and to his determined and ruthless efforts to establish a military despotism the splendid fighting qualities of the Zulu were due. Our story commences with the recognition of Cetewayo as King of the Zulus by the British Government in 1872. His father Panda had reverted to the peaceful pastoral pursuits of the tribe, but Cetewayo determined to again organise his countrymen as a military nation, and with such success did he do this that he felt himself in a position to defy white authority. The seizure of two women on British territory, claimed as the runaway wives of a chief, and the refusal of Cetewayo to make reparation for the incursion into British territory, led to the invasion of Zululand on January 11th, 1879. It was decided to invade the country by three columns. The first, or southern column, under Colonel Pearson of the Buffs, was composed of the 2nd Batt. Buffs; six companies of the 99th; 100 Mounted Infantry; 19th Hussars; Royal Artillery with 4 guns; 170 Seamen and Marines from H.M.S. "Active," with a Gatling gun and Rocket Battery; Mounted Colonial Volunteers, and about 1,000 natives. The second, or central column, under Colonel Glyn of the 24th, comprised seven companies of the 1st Batt. and the 2nd Batt. 24th Regiment; Royal Artillery with 2 7-pounders; Natal Mounted Police; Mounted Colonial Volunteers, and 1,000 natives. The third, or northern column, under Colonel Evelyn Wood, consisted of the 1st Batt. 13th; the 90th Regiment; Royal Artillery with 4 7-pounders; 100 Mounted Infantry; 200 Frontier Light Horse; 100 local Volunteers; a body of Boers under Commandant Piet Uys, and 5,000 Swazies.
Then a war began that would alternately bring disaster and often prove the relentless determination of the white man. Zululand, located to the northeast of Natal, produced the finest and bravest black warriors against whom Britain fought. When Chaka became chief in 1810, he organized the tribe[Pg 198] on a military basis, and it was due to his determined and ruthless efforts to establish a military dictatorship that the Zulu's remarkable fighting skills emerged. Our story starts with the British Government recognizing Cetewayo as King of the Zulus in 1872. His father, Panda, had returned to the peaceful farming lifestyle of the tribe, but Cetewayo aimed to reorganize his countrymen as a military nation again. He succeeded so well that he felt he could challenge white authority. The taking of two women on British territory, claimed as the runaway wives of a chief, and Cetewayo's refusal to make amends for the incursion into British territory led to the invasion of Zululand on January 11, 1879. It was decided to invade the country with three columns. The first, or southern column, led by Colonel Pearson of the Buffs, included the 2nd Battalion Buffs; six companies of the 99th; 100 Mounted Infantry; 19th Hussars; Royal Artillery with four guns; 170 Seamen and Marines from H.M.S. "Active," with a Gatling gun and Rocket Battery; Mounted Colonial Volunteers, and about 1,000 natives. The second, or central column, under Colonel Glyn of the 24th, consisted of seven companies of the 1st Battalion and the 2nd Battalion 24th Regiment; Royal Artillery with two 7-pounders; Natal Mounted Police; Mounted Colonial Volunteers, and 1,000 natives. The third, or northern column, under Colonel Evelyn Wood, included the 1st Battalion 13th; the 90th Regiment; Royal Artillery with four 7-pounders; 100 Mounted Infantry; 200 Frontier Light Horse; 100 local Volunteers; a group of Boers under Commandant Piet Uys, and 5,000 Swazies.

MEDAL FOR ASHANTI, 1900.
Medal for Ashanti, 1900.

MEDAL FOR TIBET, 1903-4.
Medal for Tibet, 1903-04.

| (Obverse.) | (Reverse.) |
| MEDAL AWARDED FOR NATAL NATIVE REBELLION. | |
On January 22nd a body of about 6,000 Zulus were defeated at Inyezane by Colonel Pearson's force, which then marched on to Ekowe (Etschowe), where a depot was formed without opposition, but on the same day the central column, which had crossed the river at Rorke's Drift, where a detachment of the 24th was left, met with overwhelming disaster at the isolated hill of Isandhlwana. Lord Chelmsford, with Colonel Glyn, had marched out leaving one company of the 2nd 24th, and five companies of the 1st 24th, with 70 artillerymen and 2 guns, mounted police, volunteers, and native friendlies, to defend the unfortified camp, and while he was reconnoitring in the south-west the Zulu impi of 14,000 attacked the camp at Isandhlwana, where the men, standing back to back, faced the fearful odds until almost every white man had fallen where he stood. A Zulu chief afterwards said, "They turned back to back and fought till they died. Not one tried to escape."
On January 22nd, about 6,000 Zulus were defeated at Inyezane by Colonel Pearson's force, which then moved on to Ekowe (Etschowe), where they set up a supply depot without any resistance. However, the same day, the central column that had crossed the river at Rorke's Drift, leaving behind a detachment of the 24th, faced a devastating loss at the isolated hill of Isandhlwana. Lord Chelmsford, along with Colonel Glyn, had marched out, leaving one company of the 2nd 24th and five companies of the 1st 24th, along with 70 artillerymen, 2 guns, mounted police, volunteers, and local allies, to defend the unfortified camp. While he was scouting in the southwest, a Zulu force of 14,000 attacked the camp at Isandhlwana, where the soldiers, standing back to back, faced overwhelming odds until nearly every white man had fallen in place. A Zulu chief later remarked, "They stood back to back and fought until they died. Not one tried to escape."
In this desperate struggle Lieutenants Coghill and Melville made a gallant attempt to save the colours of the 24th, and with their precious charge essayed to swim the Buffalo, but Melville's horse being killed Coghill returned to assist him, and his horse being also shot the colours fell into the river, from which they were rescued ten days later. The brave officers were found dead side by side. For this gallant effort the Victoria Cross was posthumously conferred upon the two officers. Around the fatal hill of Isandhlwana 50 British officers, and over 800 non-commissioned officers and men, met their death; the five entire companies of the 1st 24th were annihilated, and 90 men of the 2nd Battalion killed.
In this desperate struggle, Lieutenants Coghill and Melville made a brave attempt to save the colors of the 24th, and with their precious burden tried to swim across the Buffalo River. However, when Melville's horse was killed, Coghill went back to help him. When Coghill's horse was also shot, the colors fell into the river, where they were rescued ten days later. The courageous officers were found dead side by side. For this heroic effort, both officers were awarded the Victoria Cross posthumously. Around the tragic hill of Isandhlwana, 50 British officers and over 800 non-commissioned officers and soldiers lost their lives; the five entire companies of the 1st 24th were wiped out, along with 90 men from the 2nd Battalion.
Rorke's Drift.—Meanwhile on that fatal day the little force which had been left under Lieutenant Bromhead at Rorke's Drift to guard 35 sick men and the stores, had performed prodigies of valour. About 80 men kept at bay 3,000 Zulus from 5 o'clock on the afternoon of the 22nd until 4 a.m. on the 23rd. Again and again the Zulus tried to rush the hastily improvised fort; they set fire to a building which had been converted into a hospital, and forced the devoted band into the inner defences. Half a dozen times they rushed the meagre entrenchments, but were forced back, until at last on the morning of the 23rd they retired, leaving 370 dead around that well-kept post.[Pg 200] The gallant men who defied that army lost 17 killed and 2 wounded, 5 of the sick men being burnt to death despite the strenuous efforts of their comrades to rescue them.
Rorke's Drift.—Meanwhile, on that tragic day, the small group left under Lieutenant Bromhead at Rorke's Drift to protect 35 sick men and the supplies displayed incredible bravery. About 80 soldiers held off 3,000 Zulus from 5 p.m. on the 22nd until 4 a.m. on the 23rd. Time and again, the Zulus attempted to storm the makeshift fort; they set fire to a building that had been turned into a hospital, pushing the determined defenders back to the inner defenses. They charged the limited fortifications several times but were pushed back each time, until finally, on the morning of the 23rd, they retreated, leaving 370 dead around that well-defended post.[Pg 200] The brave men who stood against that army lost 17 killed and 2 wounded, with 5 of the sick men burning to death despite their comrades' desperate attempts to save them.
Eight Victoria Crosses.—In this glorious defence, in which every man was a hero, eight Victoria Crosses were earned: Lieutenant G. Bromhead of the 24th, Lieutenant J. M. R. Chard, R.E., for their brilliant defence; Corporal W. Allen, Privates F. Hitch, Hy. Hook, John Williams, and W. and R. Jones, for their gallant defence of the hospital, and holding it against the enemy while the patients were removed. Corporal Allen and Private Hitch were wounded, but when no longer able to fight served out ammunition to their comrades through that terrible night.
Eight Victoria Crosses.—In this incredible defense, where every man was a hero, eight Victoria Crosses were awarded: Lieutenant G. Bromhead of the 24th, Lieutenant J. M. R. Chard, R.E., for their outstanding defense; Corporal W. Allen, Privates F. Hitch, Hy. Hook, John Williams, and W. and R. Jones, for their brave defense of the hospital and for holding it against the enemy while the patients were evacuated. Corporal Allen and Private Hitch were injured, but even when they could no longer fight, they distributed ammunition to their comrades throughout that dreadful night.
Towards the end of March Lord Chelmsford proceeded to the relief of Ekowe, at the same time instructing Colonel Evelyn Wood to advance on the Zlobani, or Inholbani, mountain, a precipitous and deeply wooded stronghold which he determined to attack. Dividing his force into two columns under Colonel Russell and Colonel (later General Sir Redvers) Buller, he attacked the place on the early morning of March 28th. Buller gained the summit without much opposition, but Russell discovered that an immense impi of Zulus was attempting to cut off the former's retreat, which unfortunately became a rout, as the struggling mass of men were compelled to face the assegais of the Zulus with little opportunity of retaliating. Buller, who was one of the last to leave the "Devil's Pass," won the V.C. for saving the lives of two officers and a trooper during the retreat, which would have had more disastrous results but for Russell's perception and assistance.
Towards the end of March, Lord Chelmsford moved to rescue Ekowe, while also instructing Colonel Evelyn Wood to advance on the Zlobani, or Inholbani, mountain, a steep and heavily wooded stronghold that he planned to attack. He split his forces into two columns under Colonel Russell and Colonel (later General Sir Redvers) Buller and launched an attack early in the morning on March 28th. Buller reached the summit with little opposition, but Russell realized that a huge Zulu force was trying to cut off Buller's retreat, which unfortunately turned into a rout as the chaotic mass of men had to face the Zulu assegais with very few chances to fight back. Buller, one of the last to leave the "Devil's Pass," earned the Victoria Cross for saving the lives of two officers and a trooper during the retreat, which could have ended much worse if not for Russell's insight and help.
Next day the entrenched camp at Kambula was attacked by a force of 25,000 Zulus, but after four hours' fighting, in which assegai frequently clashed with British bayonet, they made off with Colonels Buller and Russell in hot pursuit, and the humiliation of the previous day was avenged, over 3,000 Zulus[Pg 201] being killed. Meanwhile, Lord Chelmsford, with 3,000 soldiers and sailors, and 2,500 friendlies, was attacked on his way to Ekowe by a Zulu impi under Dabulamanzi, the half-brother of Cetewayo, at Ginghilova; but after one and a half hour's fighting, during which the Zulus rushed right up to the muzzles of the British rifles, they were driven off with the loss of about 1,000 men. Two days later Ekowe was relieved, and the post abandoned. By this time considerable reinforcements had arrived from England, among the officers being the Prince Imperial of France, who on June 1st, while reconnoitring with Lieutenant Carey of the 98th Regiment and 6 troopers, was killed by a party of Zulus. On July 3rd, Buller, with 500 cavalrymen, was attacked after crossing the White Umvolosi River by nearly 5,000 Zulus, and in this affair Lord William Beresford of the 9th Lancers gained the V.C. for the rescue of a dismounted trooper, and Lieutenant Lysons and Private E. Fowler of the 2nd Cameronians also gained the coveted distinction for their bravery.
The next day, the fortified camp at Kambula was attacked by a force of 25,000 Zulus. After four hours of fighting, where assegai often clashed with British bayonets, the Zulus fled with Colonels Buller and Russell hot on their heels, avenging the humiliation of the previous day with over 3,000 Zulus killed. Meanwhile, Lord Chelmsford, along with 3,000 soldiers and sailors and 2,500 allies, was ambushed on his way to Ekowe by a Zulu impi led by Dabulamanzi, the half-brother of Cetewayo, at Ginghilova. After an hour and a half of fighting, during which the Zulus charged right up to the barrels of the British rifles, they were driven away, suffering about 1,000 casualties. Two days later, Ekowe was relieved, and the post was abandoned. By then, significant reinforcements had arrived from England, including the Prince Imperial of France. On June 1st, while scouting with Lieutenant Carey of the 98th Regiment and 6 troopers, he was killed by a group of Zulus. On July 3rd, Buller, with 500 cavalrymen, was attacked after crossing the White Umvolosi River by nearly 5,000 Zulus. In this engagement, Lord William Beresford of the 9th Lancers received the V.C. for rescuing a dismounted trooper, and Lieutenant Lysons and Private E. Fowler of the 2nd Cameronians also earned the prestigious honor for their bravery.
Ulundi.—Next day the battle of Ulundi was fought, and despite the repeated charges of the Zulu army of over 15,000 men, the British square remained unbroken, until the enemy gave way after forty minutes' desperate endeavour, and then the 17th Lancers under Colonel Drury Lowe cut them up as they fled. The capture of the King's kraal at Ulundi practically ended the war, although for over a fortnight he eluded the vigilance of his pursuers. On August 28th he was captured, and on September 1st, 1879, the Zulu chiefs accepted the conditions laid down by the British Government. During this campaign 76 officers and 1,007 men were killed; 37 officers and 206 men wounded; 17 officers and 330 men died of disease, while 1,286 were invalided home.
Ulundi.—The next day, the battle of Ulundi took place, and even with repeated attacks from the Zulu army of over 15,000 men, the British square held strong until the enemy broke after forty minutes of fierce fighting. Then, the 17th Lancers, led by Colonel Drury Lowe, charged and routed them as they fled. The capture of the King’s kraal at Ulundi essentially marked the end of the war, although he managed to avoid capture for more than two weeks. On August 28th, he was caught, and on September 1st, 1879, the Zulu chiefs accepted the terms set by the British Government. During this campaign, 76 officers and 1,007 men lost their lives; 37 officers and 206 men were wounded; 17 officers and 330 men died from disease, while 1,286 were sent home due to injuries.
Basuto War, 1878-9.—Sekukuni, who had allied himself with Cetewayo and defied the Colonial Government, stating that the country was his, and he was ready for war, caused trouble by raiding a friendly[Pg 202] chief; an expedition was therefore organised to proceed against him, but owing to the need for the concentration of British troops in Zululand, operations were suspended. When, however, Cetewayo had been captured, Sir Garnet Wolseley, who had succeeded Lord Chelmsford in the command, proceeded to attack the strongholds of Sekukuni on November 28th, 1879, and the "Fighting Koppie" was taken after a desperate struggle, during which the chief escaped, but was captured a few days later and taken prisoner to Pretoria. Thus came to an end a succession of wars during the severe trials of which the finest attributes of the British soldier were repeatedly called forth.
Basuto War, 1878-9.—Sekukuni, who teamed up with Cetewayo and challenged the Colonial Government, claiming the land was his and he was ready for battle, stirred up trouble by raiding a friendly chief; an expedition was organized to go after him, but due to the need to concentrate British troops in Zululand, operations were paused. However, once Cetewayo was captured, Sir Garnet Wolseley, who took over from Lord Chelmsford in command, launched an attack on Sekukuni's strongholds on November 28th, 1879, and the "Fighting Koppie" was taken after a fierce struggle, during which the chief managed to escape but was captured a few days later and taken to Pretoria as a prisoner. Thus ended a series of wars during which the best qualities of the British soldier were consistently put to the test.
The troops engaged from 1877-9 were, in 1877-8-9: 24th, 88th, 90th, 94th; 1878-9: 13th, 80th, 83rd; 1879: 2nd Batt. 3rd; 4th, 21st, 57th, 58th; 3rd Batt. 60th; 3rd Batt. 91st, 97th, 99th; and Naval Brigades.
The troops involved from 1877-79 were, in 1877-78-79: 24th, 88th, 90th, 94th; 1878-79: 13th, 80th, 83rd; 1879: 2nd Batt. 3rd; 4th, 21st, 57th, 58th; 3rd Batt. 60th; 3rd Batt. 91st, 97th, 99th; and Naval Brigades.
The Zulu Medal.—For these campaigns a medal similar to that awarded for the Kaffir wars was given to the participants, the only difference being the substitution of a Zulu shield and assegais for the date in the exergue of the reverse. The ribbon is the same. The bars are similar to those given with the I.G.S. 1854 medal, and do not record specific actions, but periods of service. Those serving for three years received the bar inscribed 1877-8-9; two years, 1877-8 or 1878-9; or for one year, 1879. A single bar only was issued with each medal.
The Zulu Medal.—For these campaigns, a medal similar to the one awarded for the Kaffir wars was given to the participants. The only difference was the replacement of the date on the back with a Zulu shield and assegais. The ribbon is the same. The bars are similar to those given with the I.G.S. 1854 medal and do not indicate specific actions, but rather periods of service. Those who served for three years received the bar inscribed 1877-8-9; those who served for two years received either 1877-8 or 1878-9; and those who served for one year received 1879. Only one bar was issued with each medal.
AFGHANISTAN, 1878-80
The British had by military and monetary assistance helped Shere Ali on to the throne of Afghanistan in 1869, and, naturally, took umbrage at the overtures made to Russia—the refusal to accept a British Resident at Cabul, the honoured reception of a Russian envoy, and finally the signing of a treaty which placed the Ameer of Afghanistan under the guardianship of Russia.[Pg 203] A mission was consequently sent to Cabul, but it was stopped at Ali Musjid, at the entrance to the Khyber Pass, by threats of attack if it dared to proceed any farther. Sir Nevill Chamberlain, therefore, thought it prudent to return to Peshawar, and on November 21st, 1878, war was declared. Afghanistan was then invaded, and the Ameer declared a Jehad, or holy war, against the British.
The British had supported Shere Ali in becoming the ruler of Afghanistan in 1869 through military and financial aid, so they naturally took offense at his efforts to reach out to Russia—the refusal to allow a British Resident in Kabul, the warm welcome given to a Russian envoy, and finally the signing of a treaty that put the Ameer of Afghanistan under Russia's protection.[Pg 203] As a result, a mission was sent to Kabul, but it was halted at Ali Musjid, the entrance to the Khyber Pass, due to threats of attack if it tried to go further. Sir Nevill Chamberlain decided it was better to return to Peshawar, and on November 21st, 1878, war was declared. Afghanistan was subsequently invaded, and the Ameer called for a Jehad, or holy war, against the British.
Ali Musjid.—The same day the fort of Ali Musjid, armed with 22 guns, was attacked, and the enemy abandoned it after some smart fighting. The column under General Sir S. Browne then pushed on to Jellalabad, having lost in the attack 2 officers and 35 men killed.
Ali Musjid.—On the same day, the fort of Ali Musjid, equipped with 22 guns, was attacked, and the enemy withdrew after some intense fighting. The unit led by General Sir S. Browne then advanced towards Jellalabad, having lost 2 officers and 35 men in the attack.
The troops engaged at Ali Musjid, on November 21st, 1878, were the 17th, 51st; 4th Batt. 60th; 81st; four Batteries of Artillery; 10th Hussars, and the following native regiments: 1st Sikhs; 4th Goorkas; 6th, 14th, 20th, 27th, and 45th Bengal Infantry; Bengal Sappers and Miners and 11th Bengal Lancers.
The troops involved at Ali Musjid on November 21st, 1878, were the 17th, 51st; 4th Batt. 60th; 81st; four Artillery Batteries; 10th Hussars, and the following native regiments: 1st Sikhs; 4th Gurkhas; 6th, 14th, 20th, 27th, and 45th Bengal Infantry; Bengal Sappers and Miners; and 11th Bengal Lancers.
Peiwar Kotal.—Major-General (later Field-Marshal Lord) Frederick Roberts, V.C., with the Kurram Field Force, crossed the Thall the same day as General Browne had captured Ali Musjid, and advancing up the Kurram Valley garrisoned Fort Azim, and then proceeded to attack Peiwar Kotal; but finding it too strong to assault in front, General Roberts decided upon a daring march of 10 miles in order to turn the Afghan position, and this he carried out in a masterly and successful manner while the heavy snowstorms made the intense cold less endurable. The attack was successfully delivered, the Afghan defence turned, and then Brigadier-General Cobbe hammered away at the enemy's front with his artillery while Roberts advanced against the main body; and after a contest which fiercely raged for seven hours, the Afghans made off, leaving their tents standing and the whole of their baggage; 6 field and 11 mountain guns were captured, and so distressed was Shere Ali with the defeat that he fled to Balkh,[Pg 204] where he died while awaiting permission to make an asylum in Russia. The British losses were: 2 officers killed, and General Cobbe wounded; 90 European and Indian soldiers killed or wounded. In this battle Major J. Cook, of the Bengal Staff Corps, gained the Victoria Cross by charging the enemy and rescuing Major Galbraith, who was attacked by an Afghan. During the operations at Cabul this gallant officer was killed.
Peiwar Kotal.—Major-General (later Field-Marshal Lord) Frederick Roberts, V.C., with the Kurram Field Force, crossed the Thall the same day General Browne captured Ali Musjid, and moved up the Kurram Valley to secure Fort Azim. He then decided to attack Peiwar Kotal, but found it too strong for a direct assault. General Roberts opted for a bold 10-mile maneuver to outflank the Afghan position, executing it skillfully despite the severe cold and heavy snowstorms. The attack was a success; they outmaneuvered the Afghan defenses. Brigadier-General Cobbe pounded the enemy's front with artillery while Roberts advanced on the main force. After a fierce seven-hour battle, the Afghans retreated, leaving their tents and all their supplies behind. They lost 6 field guns and 11 mountain guns, and Shere Ali was so devastated by the defeat that he fled to Balkh, [Pg 204] where he died while waiting for permission to seek asylum in Russia. The British suffered: 2 officers killed, and General Cobbe wounded; 90 European and Indian soldiers were killed or injured. In this battle, Major J. Cook of the Bengal Staff Corps earned the Victoria Cross for charging the enemy and rescuing Major Galbraith, who was under attack from an Afghan. During the operations at Cabul, this brave officer was killed.
The troops engaged were the 8th and 72nd, a squadron 10th Hussars, and the following native regiments: 2nd and 5th Punjab Infantry; 5th Goorkas; 23rd and 29th Bengal Infantry, and 12th Bengal Cavalry.
The troops involved were the 8th and 72nd, a squadron of the 10th Hussars, and the following local regiments: 2nd and 5th Punjab Infantry; 5th Gurkhas; 23rd and 29th Bengal Infantry, and 12th Bengal Cavalry.
Charasia.—On the death of Shere Ali, his son Yakoub Khan, who had been imprisoned by his father, ascended the throne, and, recognising the futility of the contest, agreed by the treaty of Gandamak to vest the control of his country in the Indian Government, to allow a British Resident at Cabul, and to accept a subsidy of six lakhs of rupees while the Khyber Pass was to be controlled by us, and the Kurram, Pishi, and Sibi Passes were to be attached to the Indian Empire. On June 17th, 1879, Sir Louis Cavagnari set out with his secretary, Mr. Jenkins, and Dr. Kelly, and an escort of 25 cavalry and 50 infantry of the Guides under Lieutenant Hamilton. Cabul was reached on July 24th, and on the night of September 2nd the Residency was attacked, and after a gallant defence Sir Louis and his officers and almost all the escort were murdered. This outrage necessitated prompt action, and General Roberts hurried up from Simla. Pushing past Peiwar Kotal, the Shaturgardan Pass was occupied before the enemy could reach it. At Kushi the Ameer rode into camp and said that he had been dethroned by his rebellious troops. No one believed him. Pressing as rapidly as possible on to Cabul, Sir Frederick Roberts found that the Afghan army occupied a very strong position at Charasia. On October 6th he stormed the place, and after a determined defence the Afghans fled towards Cabul in great confusion, leaving behind them 20 guns and 2 standards. Next day the British army marched on Cabul, and entered with the band of the 67th playing at its head; by October 8th General Roberts was occupying the fortified cantonments of Sherpur, in which he found 73 guns. The British losses were 20 killed and 70 wounded.
Charasia.—After Shere Ali died, his son Yakoub Khan, who had been imprisoned by him, took the throne. Realizing the hopelessness of the situation, he agreed through the treaty of Gandamak to hand over control of his country to the Indian Government. He also allowed a British Resident in Cabul and accepted a subsidy of six lakhs of rupees, while we took control of the Khyber Pass and incorporated the Kurram, Pishi, and Sibi Passes into the Indian Empire. On June 17th, 1879, Sir Louis Cavagnari left with his secretary, Mr. Jenkins, Dr. Kelly, and a 25-cavalry and 50-infantry escort of the Guides under Lieutenant Hamilton. They arrived in Cabul on July 24th, and that night, September 2nd, the Residency was attacked. After a brave defense, Sir Louis and his officers, along with almost all the escort, were killed. This atrocity required immediate action, prompting General Roberts to rush from Simla. He moved past Peiwar Kotal and secured the Shaturgardan Pass before the enemy could reach it. At Kushi, the Ameer came into camp and claimed he had been overthrown by his rebellious troops. No one believed him. Moving quickly toward Cabul, Sir Frederick Roberts discovered that the Afghan army was in a very strong position at Charasia. On October 6th, he launched an attack, and after a determined defense, the Afghans retreated in chaos towards Cabul, abandoning 20 guns and 2 standards. The next day, the British army marched on Cabul, entering with the band of the 67th leading the way. By October 8th, General Roberts was occupying the fortified cantonments of Sherpur, where he found 73 guns. The British casualties included 20 killed and 70 wounded.


INDIA GENERAL SERVICE MEDALS, 1908.
INDIA GENERAL SERVICE MEDALS, 1908.


SILVER MEDAL FOR SUDAN, 1910.
SILVER MEDAL FOR SUDAN, 1910.
The regiments engaged were the 67th, 72nd, and 92nd; one battery Royal Horse Artillery; one battery Royal Field Artillery; two Mountain Batteries, and 9th Lancers. Native regiments: 5th Goorkas; 5th Punjab Infantry; 5th Punjab Cavalry; 12th Bengal Cavalry; 14th Bengal Lancers; Bengal Sappers and Miners.
The regiments involved were the 67th, 72nd, and 92nd; one battery of the Royal Horse Artillery; one battery of the Royal Field Artillery; two Mountain Batteries, and the 9th Lancers. Native regiments included the 5th Goorkas; 5th Punjab Infantry; 5th Punjab Cavalry; 12th Bengal Cavalry; 14th Bengal Lancers; and the Bengal Sappers and Miners.
Cabul.—Once inside the city the army was practically shut in, for the whole country was hostile to the British. Colonel Sir Hugh Gough, V.C., relieved the Shaturgardan garrison, and the lines of communication were directed to Gandamak and the Khyber. Throughout December General Roberts was kept busy with continual fighting; during this time, in an engagement with the Kohistanee on December 11th, the 9th Lancers suffered severely, and for rescuing some of the unfortunate troopers who had fallen into a deep ditch the Rev. J. W. Adams was awarded the V.C. Standing up to his waist in water, and under a heavy fire, he stuck to his task until the Afghans were within a stone's throw of him. On this unfortunate day three guns had to be spiked and abandoned. After this affair the Afghans made direct for Cabul, but were checked on their advance on Sherpur by the steady conduct of the 72nd Highlanders. On the 14th the Asmai heights were occupied by the enemy, but after a determined fight they were driven off; almost immediately, however, a force of over 15,000 Afghans, led by Moollahs shouting "Allah Ya Allah!" dashed with reckless impetuosity upon the place, and, despite the utmost gallantry on the part of the British troops, a portion of the position and a couple of guns had to be abandoned. Then the increasing number of[Pg 206] the enemy compelled the concentration of the army within the cantonments of Sherpur, which were fortified to resist siege, and by the intuition of Sir Frederick Roberts had been well provisioned to sustain the defenders.
Cabul.—Once the army entered the city, they were basically trapped, as the entire country was against the British. Colonel Sir Hugh Gough, V.C., relieved the garrison at Shaturgardan, and the lines of communication were set towards Gandamak and the Khyber. Throughout December, General Roberts was occupied with constant fighting; during this time, in a battle with the Kohistanee on December 11th, the 9th Lancers faced heavy losses, and for rescuing some of the unfortunate soldiers who had fallen into a deep ditch, Rev. J. W. Adams was awarded the V.C. Standing waist-deep in water and under heavy fire, he continued his task until the Afghans were almost on top of him. On that unfortunate day, three guns had to be spiked and left behind. After this engagement, the Afghans headed straight for Cabul but were held back in their advance on Sherpur by the steadfastness of the 72nd Highlanders. On the 14th, the enemy took over the Asmai heights, but after a fierce battle, they were driven off; however, almost immediately, a force of over 15,000 Afghans, led by Moollahs shouting "Allah Ya Allah!" charged recklessly toward the position, and despite the remarkable bravery of the British troops, part of the position and a couple of guns had to be abandoned. The growing number of[Pg 206] enemy forces forced the concentration of the army within the fortified cantonments of Sherpur, which, thanks to Sir Frederick Roberts’ foresight, were well-stocked to support the defenders.
At 6 o'clock on the morning of December 23rd, 1879, just before the day broke, 30,000 Afghans flung themselves at the British defences, and maintained the assault until 1 o'clock, then realising that further efforts were fruitless, and suffering from heavy losses, they began to retire, when the cavalry sallied forth and put them to rout. In this defence 2 officers and 8 men were killed, and 5 officers—including Colonel Gough—and 41 men wounded. It is estimated that the Afghans had 3,000 men placed hors de combat. During the night the enemy melted away, and when General Gough arrived with reinforcements not an Afghan was to be seen. Cabul was then reoccupied.
At 6 AM on December 23rd, 1879, just before dawn, 30,000 Afghans launched an attack on the British defenses and kept up the assault until 1 PM. Realizing that further attempts were pointless and suffering heavy losses, they began to pull back, at which point the cavalry charged out and drove them off. In this defense, 2 officers and 8 soldiers were killed, and 5 officers—including Colonel Gough—and 41 soldiers were wounded. It's estimated that the Afghans had 3,000 men taken out of the fight. During the night, the enemy disappeared, and when General Gough arrived with reinforcements, not a single Afghan could be seen. Cabul was then retaken.
The regiments engaged were the 9th, 67th; 72nd Seaforth Highlanders; 92nd Gordon Highlanders; 9th Lancers. Native regiments: 2nd, 4th, and 5th Goorkas; 5th Punjab Infantry; 23rd and 28th Bengal Infantry; 12th Bengal Cavalry, and 14th Bengal Lancers; 5th Punjab Cavalry; two batteries Punjab Artillery, and Bengal Sappers and Miners.
The units involved were the 9th, 67th, and 72nd Seaforth Highlanders; 92nd Gordon Highlanders; and 9th Lancers. Local regiments included the 2nd, 4th, and 5th Goorkas; 5th Punjab Infantry; 23rd and 28th Bengal Infantry; 12th Bengal Cavalry; and 14th Bengal Lancers; along with the 5th Punjab Cavalry; two batteries of Punjab Artillery; and Bengal Sappers and Miners.
Ahmed Khel.—General Sir Donald Stewart set out from Kandahar in April 1880 to occupy Ghuznee, and to open up communication with General Roberts at Cabul. On April 19th he met the enemy, 15,000 strong, at Ahmed Khel, 23 miles south of Ghuznee. There a mad charge of 4,000 Ghazis threatened to exterminate Stewart's little force, but standing firm they withstood the shock of the fanatics, who as they rushed at the rallying squares of Britisher, Sikh, Punjabis, and Bengalese, were mowed down by their steady fire. In this conflict, lasting only one hour, 1,000 Ghazis were killed, but of the British force only 17 were killed, and 6 officers with 120 men wounded. Marching on to Ghuznee, they reached the city on the 20th. Sir Donald[Pg 207] Stewart then assumed command at Cabul, and Abdul Rahman was recognised as Ameer.
Ahmed Khel.—General Sir Donald Stewart left Kandahar in April 1880 to take control of Ghuznee and to establish communication with General Roberts in Cabul. On April 19th, he encountered the enemy, which numbered 15,000, at Ahmed Khel, 23 miles south of Ghuznee. There, a reckless charge of 4,000 Ghazis threatened to wipe out Stewart's small force, but they held their ground and absorbed the attack from the fanatics, who, as they surged towards the regrouped British, Sikh, Punjabis, and Bengalese squares, were cut down by their consistent gunfire. This battle, which lasted only an hour, resulted in 1,000 Ghazis being killed, while the British force suffered only 17 deaths, with 6 officers and 120 men wounded. Continuing on to Ghuznee, they arrived in the city on the 20th. Sir Donald[Pg 207] Stewart then took command at Cabul, and Abdul Rahman was acknowledged as Ameer.
The regiments engaged at Ahmed Khel were 59th; 2nd 60th Rifles, and a battery of artillery; native regiments; 2nd Sikhs; 15th, 19th, and 25th Bengal Infantry; 19th Bengal Lancers, and 1st Punjab Cavalry.
The regiments involved at Ahmed Khel were the 59th; 2nd 60th Rifles, and a battery of artillery; native regiments; 2nd Sikhs; 15th, 19th, and 25th Bengal Infantry; 19th Bengal Lancers, and 1st Punjab Cavalry.
March to "Kandahar."—When Abdul Rahman, who had been living in Russian Turkestan, returned to Cabul, and his authority appeared to be established, the British army was ordered back to India. They were, however, delayed by the determination of Ayoub Khan, a younger brother of the deposed Ameer, to make a bid for the Ameership, and he set out with the object of seizing Candahar, which had been left in the command of General Primrose with a garrison of about 3,000 men, including the 7th Fusiliers, the 66th, and a number of native troops. To check the advance of the Afghans, about 2,000 men were sent out with 6 guns under General Burrowes as far as the Helmund, but encountering an enormous army at Maiwand he assumed the defensive in a bad position, and the Ghazis drove the British troops from the field with the loss of the colours of the 66th and 2 guns. Thirteen hundred of the British force lay dead on the field. The remnants of that unfortunate army got back to Candahar after suffering great privations, and General Primrose concentrated his troops in the citadel, where they were hemmed in by the enemy, and from August 11th to the 31st waited for relief.
March to "Kandahar."—When Abdul Rahman, who had been living in Russian Turkestan, returned to Kabul and seemed to have established his authority, the British army received orders to head back to India. However, they were delayed by Ayoub Khan, the younger brother of the deposed Ameer, who was determined to claim the title of Ameer for himself. He set out to seize Kandahar, which was under the command of General Primrose and had a garrison of about 3,000 men, including the 7th Fusiliers, the 66th, and several native troops. To halt the advance of the Afghans, about 2,000 men were sent out with 6 guns under General Burrowes as far as the Helmund, but they encountered a massive army at Maiwand and took a defensive position in a poor location. The Ghazis pushed the British troops off the field, resulting in the loss of the colors of the 66th and 2 guns. Thirteen hundred members of the British force were killed in the conflict. The remaining troops of that unfortunate army managed to retreat to Kandahar after enduring significant hardships, and General Primrose gathered his forces in the citadel, where they were surrounded by the enemy and waited for rescue from August 11th to the 31st.
General Sir Frederick Roberts then offered to march on Candahar, and with 10,000 men and 8,000 camp followers set out on August 8th to march over 300 miles through a mountainous and hostile country. His army consisted of the 2nd 60th Rifles; 72nd and 92nd Highlanders; 9th Lancers; three Batteries of Artillery; 2nd, 4th, and 5th Goorkas; 2nd and 3rd Sikh Infantry; 15th Sikhs; 24th and 25th Punjab Infantry; 23rd Pioneers; 3rd Bengal and 3rd Punjab Cavalry, and Central India Horse, formed into three brigades under[Pg 208] Brigadiers Baker, Macgregor, and Macpherson. Ghuznee was reached on August 15th; on the 23rd Kelat-i-Ghilzie was relieved, and after a rest the force marched on to Candahar, and by August 27th was in communication with General Primrose. In face of the relieving force Ayoub Khan withdrew to the hills, and General Roberts entered Candahar on the 31st.
General Sir Frederick Roberts then decided to march on Candahar, and with 10,000 troops and 8,000 camp followers, he set out on August 8th to cover over 300 miles through a mountainous and hostile region. His army was made up of the 2nd 60th Rifles; 72nd and 92nd Highlanders; 9th Lancers; three Batteries of Artillery; 2nd, 4th, and 5th Goorkas; 2nd and 3rd Sikh Infantry; 15th Sikhs; 24th and 25th Punjab Infantry; 23rd Pioneers; 3rd Bengal and 3rd Punjab Cavalry, and Central India Horse, organized into three brigades under[Pg 208] Brigadiers Baker, Macgregor, and Macpherson. Ghuznee was reached on August 15th; on the 23rd, Kelat-i-Ghilzie was relieved, and after a break, the force continued on to Candahar, reaching out to General Primrose by August 27th. Facing the relieving forces, Ayoub Khan retreated to the hills, and General Roberts entered Candahar on the 31st.
Battle of "Kandahar."—Wasting no time, he made a reconnaissance, and driving the enemy at the point of the bayonet from several of their positions, proceeded next morning to give battle to Ayoub. The village of Gundi was carried by the 92nd Highlanders and the 2nd Goorkas; the 3rd Sikhs and the 5th Goorkas, working round the end of the Pie Paimal, carried several villages, and despite the tigerish fighting of the Ghazis the village of Pie Paimal was taken at noon, and then the final stand was made by the enemy; but they could not withstand the charge of the 92nd Highlanders and Goorkas, and four hours after the battle commenced the Afghans were in full flight, leaving behind them 31 guns including the 2 Royal Horse Artillery 9-pounders taken at Maiwand. In front of one of their tents lay the bleeding body of Lieutenant Maclaine of the Royal Horse Artillery, who, taken prisoner at Maiwand, had been reserved for the indignity of having his throat cut when his foes were beaten and release seemed imminent. The 72nd Highlanders suffered most severely in the battle of "Kandahar," losing among their dead Colonel Brownlow. Two other officers were killed, and 11 wounded, the loss in men being 46 killed and 200 wounded.
Battle of "Kandahar."—Without delay, he conducted a reconnaissance, pushing the enemy out of several positions at the point of a bayonet, and prepared to confront Ayoub the next morning. The 92nd Highlanders and the 2nd Goorkas captured the village of Gundi; the 3rd Sikhs and the 5th Goorkas maneuvered around the edge of Pie Paimal, taking several villages. Despite fierce fighting from the Ghazis, Pie Paimal was captured by noon, marking the enemy's last stand. However, they couldn't hold back the charge of the 92nd Highlanders and Goorkas, and four hours after the battle began, the Afghans were in full retreat, abandoning 31 guns, including the 2 Royal Horse Artillery 9-pounders taken at Maiwand. In front of one of their tents lay the wounded body of Lieutenant Maclaine of the Royal Horse Artillery, who, captured at Maiwand, had been marked for execution when his enemies were defeated and freedom seemed near. The 72nd Highlanders suffered the heaviest casualties in the battle of "Kandahar," losing their commanding officer, Colonel Brownlow, among the dead. Two other officers were killed, and 11 were wounded, with the total loss in men amounting to 46 killed and 200 wounded.
The following troops were engaged at "Kandahar" on September 1st, 1880: 7th, 60th, 66th, 72nd, and 92nd; three batteries artillery and 9th Lancers. Native regiments: 1st, 4th, 19th, 28th, and 29th Bombay Infantry; 2nd and 3rd Sikhs; 2nd, 4th, and 5th Goorkas; 15th, 23rd, 24th, and 25th Bengal Infantry; 3rd Bengal, 3rd Bombay, and 3rd Punjab Cavalry; 3rd Scinde Horse; Poona and Central India Horse.
The following troops were involved at "Kandahar" on September 1st, 1880: 7th, 60th, 66th, 72nd, and 92nd; three artillery batteries and the 9th Lancers. Native regiments: 1st, 4th, 19th, 28th, and 29th Bombay Infantry; 2nd and 3rd Sikhs; 2nd, 4th, and 5th Goorkas; 15th, 23rd, 24th, and 25th Bengal Infantry; 3rd Bengal, 3rd Bombay, and 3rd Punjab Cavalry; 3rd Scinde Horse; Poona and Central India Horse.

CONSPICUOUS SERVICE CROSS.
Conspicuous Service Cross.

DISTINGUISHED SERVICE ORDER.
Distinguished Service Award.

DISTINGUISHED SERVICE CROSS.
Distinguished Service Cross.
A medal without bar was given to the following regiments: 12th, 14th, 15th, 17th, 25th, 31st, 53rd, 63rd; 6th Dragoon Guards; 8th and 15th Hussars. A number of men of the 65th were engaged as signallers, and took part in several of the actions.
A medal without a bar was awarded to the following regiments: 12th, 14th, 15th, 17th, 25th, 31st, 53rd, 63rd; 6th Dragoon Guards; 8th and 15th Hussars. Several members of the 65th served as signallers and participated in various actions.
The Afghan Medal.—With the Afghan medal, which was granted on March 19th, 1881, were issued six bars for ALI MUSJID, PEIWAR KOTAL, CHARASIA, AHMED KHEL, KABUL, and KANDAHAR. The medal bears on the obverse a crowned head of Queen Victoria, which is not truncated like her effigies on the other medals, but the shoulders are couped by the bevel of the medal, which is 1⅖ in. in diameter. The bust is surrounded by the legend VICTORIA REGINA ET IMPERATRIX. This obverse is the fourth of the series facing page 188. On the reverse a column of Anglo-Indian soldiery is depicted on the march; an officer leads the way, accompanied by an infantrymen; an elephant bearing a mounted gun on its back makes the central feature, with native cavalry to fill up the foreground of a picture which has a fortress-capped mountain for background. AFGHANISTAN is impressed above in raised letters, and the date 1878-9-80 in the exergue. The names of the British recipients were engraved in rather squat Roman capitals, but the medals given to native troops were generally engraved in slanting writing letters. The suspenders to this medal are straight, like the General Service medals, the bars rather broad with square ends; the ribbon, 1¼ in. wide, is green with broad dark-red edges.
The Afghan Medal.—The Afghan medal, awarded on March 19th, 1881, came with six bars for ALI MOSQUE, PEIWAR KOTAL, CHARASIA, AHMED KHEL, Kabul, and Kandahar. The front of the medal features a crowned portrait of Queen Victoria, which isn’t cropped like her images on other medals, but the shoulders are cut off by the edge of the medal, which is 1⅖ inches in diameter. The bust is surrounded by the inscription QUEEN VICTORIA AND EMPRESS. This front design is the fourth in the series facing page 188. The back shows a group of Anglo-Indian soldiers on the move; an officer leads the way, followed by an infantry soldier; an elephant carrying a mounted gun is the central feature, with native cavalry filling the foreground against a mountain topped with a fortress in the background. AFGHANISTAN is embossed above in raised letters, with the date 1878-9-80 at the bottom. The names of British recipients were engraved in somewhat chunky Roman capitals, while the medals for native troops were generally inscribed in slanting script. The suspender for this medal is straight, similar to the General Service medals, with broad bars that have square ends; the ribbon, 1¼ inches wide, is green with broad dark-red edges.
Star for Kabul-Kandahar, 1880.—Her Majesty also bestowed a bronze decoration on the troops who accompanied Major-General Sir Frederick Roberts on his 318-mile march from Kabul to Kandahar. It was subsequently granted to the troops which then composed the garrison of Kelat-i-Ghilzie, and who accompanied the force from that place to Kandahar. The decoration is a five-pointed radiated star, with small balls between the inner angles, and was made from[Pg 210] the bronze guns taken at the battle of Kandahar on September 1st. In the centre is the Imperial monogram V.R.I., encircled by a band, with raised border inscribed KABUL TO KANDAHAR, having 1880 below with a twig of laurel on either side. At the top is the Imperial crown, from which is a ring for suspension. The reverse is plain with a hollow centre, round the edge of which the name and regiment of the British recipient are indented in skeleton block letters. But those given to the native troops were generally engraved in a sloping script, as on the India 1895 medal, and occasionally in block capitals. The ribbon, 1½ in. wide, is of the rainbow pattern, but unwatered.
Star for Kabul-Kandahar, 1880.—Her Majesty also awarded a bronze decoration to the troops who traveled with Major-General Sir Frederick Roberts on his 318-mile march from Kabul to Kandahar. It was later awarded to the troops stationed at Kelat-i-Ghilzie, who also accompanied the force from there to Kandahar. The decoration is a five-pointed star with radiating points, featuring small balls between the inner angles, made from[Pg 210] the bronze cannons captured during the battle of Kandahar on September 1st. The center displays the Imperial monogram V.R.I., surrounded by a band, with a raised border inscribed Kabul to Kandahar, and 1880 beneath it, flanked by a laurel twig on each side. At the top is the Imperial crown, which has a ring for hanging. The back is plain with a hollow center, around the edge of which the name and regiment of the British recipient are engraved in skeleton block letters. In contrast, those awarded to native troops were usually inscribed in a slanted script, like on the India 1895 medal, and sometimes in block capitals. The ribbon, 1½ in. wide, features a rainbow pattern but is unwatered.
THE EGYPTIAN CAMPAIGNS
In 1882, owing to the rebellion of Arabi Pasha, British troops and ships were sent to Egypt. The bombardment of Alexandria took place on July 11th, followed by the decisive battle of Tel-el-Kebir, on September 13th. During this campaign the famous midnight charge of the heavy brigade at Kassasin took place. The British army of about 11,000 infantry, seamen, and marines, 2,000 cavalry, with 60 guns, marched on Tel-el-Kebir, under Sir Garnet Wolseley, who finding the rebel entrenchments reaching at least 4 miles from the canal out into the desert, and that his force would have to attack without a scrap of cover, decided to make a night march from Kassasin to get within charging distance of the enemy's position. The march was directed by Lieutenant Rawson, R.N., who steered by the stars, and the "monotonous tramp, the sombre lines, the dimly discerned sea of desert faintly lighted by the stars, were at once ghostly and impressive." When about 300 yards from the enemy's trenches the Highland Brigade, just before daybreak, rushed forward, and with a cheer went over the trenches, where after a stubborn resistance of about half an hour the rebels fled in confusion towards Zagazig, and[Pg 211] the capture of Arabi at Cairo concluded the war. Nine British officers and 48 men were killed, 27 officers and 385 men wounded or missing. For his brilliant conduct of the war Sir Garnet Wolseley was raised to the peerage.
In 1882, due to the rebellion led by Arabi Pasha, British troops and ships were dispatched to Egypt. The bombardment of Alexandria occurred on July 11th, followed by the key battle of Tel-el-Kebir on September 13th. During this campaign, the notable midnight charge of the heavy brigade at Kassasin took place. The British army, consisting of about 11,000 infantry, seamen, and marines, along with 2,000 cavalry and 60 guns, marched on Tel-el-Kebir under the command of Sir Garnet Wolseley. He discovered that the rebel entrenchments extended at least 4 miles from the canal into the desert and realized that his troops would have to attack without any cover. He decided to conduct a night march from Kassasin to get within charging distance of the enemy's position. The march was led by Lieutenant Rawson, R.N., who navigated by the stars, and the "monotonous tramp, the dreary lines, the dimly visible sea of desert faintly illuminated by the stars, were both eerie and impressive." When they were about 300 yards from the enemy's trenches, the Highland Brigade charged forward just before dawn, cheering as they crossed the trenches, where, after a fierce resistance lasting about half an hour, the rebels retreated in panic towards Zagazig, and the capture of Arabi in Cairo marked the end of the war. Nine British officers and 48 men were killed, and 27 officers and 385 men were wounded or missing. For his outstanding leadership during the war, Sir Garnet Wolseley was elevated to the peerage.
The following troops were engaged at Tel-el-Kebir: One batt. Grenadiers, Coldstreams, and Scots Fusilier Guards; 18th, 42nd, 46th, 60th, 72nd, 74th, 75th, 79th, 84th, and 87th; detachments of the 1st and 2nd Life Guards and Royal Horse Guards; 4th and 7th Dragoon Guards; 19th Hussars; a batt. of Marines; Marine Artillery, and a brigade of Seamen. The following Indian troops were also engaged: 7th Bengal and 20th Punjab Infantry; 29th Beloochees; 2nd, 6th, and 13th Bengal Cavalry.
The following troops were involved at Tel-el-Kebir: One battalion of Grenadiers, Coldstreams, and Scots Fusilier Guards; 18th, 42nd, 46th, 60th, 72nd, 74th, 75th, 79th, 84th, and 87th; detachments of the 1st and 2nd Life Guards and Royal Horse Guards; 4th and 7th Dragoon Guards; 19th Hussars; a battalion of Marines; Marine Artillery, and a brigade of Seamen. The following Indian troops were also involved: 7th Bengal and 20th Punjab Infantry; 29th Beloochees; 2nd, 6th, and 13th Bengal Cavalry.
Egyptian Medal, 1882.—The medal is a simple one, 1⅖ in. in diameter, depending from a suspender like that on the Ashantee medal; the ribbon is 1¼ in. wide alternately blue and white, three blue stripes and two white. On the obverse is the same Queen's head as on the Ashantee medal, but the reverse has a well-modelled Sphinx, with EGYPT in block letters above and 1882 in the exergue, while bars were given for the two engagements, ALEXANDRIA 11TH JULY and TEL-EL-KEBIR. They are wide and square, and set rather far apart, as in the Afghan medal of 1878-80. The names are engraved on the edge in slanting Roman capitals; in a few instances the naming is done in upright capitals.
Egyptian Medal, 1882.—This medal is straightforward, measuring 1⅖ inches in diameter, hanging from a suspender similar to that on the Ashantee medal. The ribbon is 1¼ inches wide, featuring alternating blue and white stripes, with three blue and two white. On the front, it displays the same Queen's head as the Ashantee medal, but the back showcases a well-crafted Sphinx, with Egypt in block letters above and 1882 at the bottom. Bars were awarded for the two engagements, ALEXANDRIA JULY 11 and TEL-EL-KEBIR. These bars are wide and square, spaced apart like those on the Afghan medal of 1878-80. The names are engraved on the edge in slanted Roman capitals; in a few cases, the engraving is done in upright capitals.
The Khedive's Star.—Prince Twefik gave to all who took part in the campaign a bronze star of five points bearing on the obverse in the centre a front view of the Sphinx, behind which are three pyramids in the distance encircled by a band bearing the inscription EGYPT 1882, and below in Arabic characters "The Khedive of Egypt" and the year of the Hegira "1299." On the reverse within a raised border is the Khedive's monogram T.M. (Twefik Muhammad), surmounted by a crown with crescent and star above. The star is[Pg 212] suspended from a laureated bar bearing a crescent and star by means of a dark-blue ribbon 1½ in. wide.
The Khedive's Star.—Prince Twefik awarded a bronze star to everyone who participated in the campaign. The star has five points, with a front view of the Sphinx at the center on the front, three pyramids visible in the background, and surrounded by a band that says Egypt 1882. Below, in Arabic, it reads "The Khedive of Egypt" along with the year of the Hegira "1299." On the back, within a raised border, is the Khedive's monogram T.M. (Twefik Muhammad), topped with a crown featuring a crescent and star. The star hangs from a laurel-decorated bar with a crescent and star, connected by a dark-blue ribbon that is 1½ inches wide.
Against the Dervishes.—Quite a different type of enemy were the followers of the Mahdi, who after practically exterminating the Egyptian army of 7,000 men led by Hicks Pasha, and under the generalship of the slave-trader, Osman Digna, had made short work of Baker Pasha's 5,000 Egyptians at El-Teb on February 1st, 1884, met at the same place on the 29th, and fought the force of 4,000 men which Major-General Graham had got together. The battle, which was of a determined character (see also page 321), the brunt falling on the "Black Watch," the 65th, and Naval Brigade, resulted in the defeat of the Arabs with a loss of 2,000 killed; 22 British officers and 167 men were killed or wounded. For this battle those who already possessed the Egyptian medal received the bar inscribed EL-TEB.
Against the Dervishes.—The followers of the Mahdi were a completely different kind of enemy. After nearly wiping out the Egyptian army of 7,000 men led by Hicks Pasha, and under the command of slave trader Osman Digna, they quickly defeated Baker Pasha's 5,000 Egyptians at El-Teb on February 1st, 1884. They returned to the same location on the 29th and confronted a force of 4,000 men that Major-General Graham had assembled. The battle, which was intense (see also page 321), primarily involved the "Black Watch," the 65th, and the Naval Brigade. It resulted in a defeat for the Arabs, with 2,000 killed; 22 British officers and 167 men were killed or wounded. For this battle, those who already had the Egyptian medal were awarded the bar inscribed EL-TEB.
The following troops were engaged at El-Teb: "Black Watch"; Gordon Highlanders; Irish Rifles; King's Royal Rifle Corps; 1st Batt. York and Lancaster Regiment; 100 Royal Engineers; 126 artillerymen; 328 men of 10th Hussars; 410 of 19th Hussars; 125 Mounted Infantry; Marine Light Infantry and Marine Artillery, and a Naval Brigade of 162 men.
The following troops were involved at El-Teb: "Black Watch"; Gordon Highlanders; Irish Rifles; King's Royal Rifle Corps; 1st Batt. York and Lancaster Regiment; 100 Royal Engineers; 126 artillery soldiers; 328 men from the 10th Hussars; 410 from the 19th Hussars; 125 Mounted Infantry; Marine Light Infantry and Marine Artillery, along with a Naval Brigade of 162 men.
Tamaai.—Fourteen days later the British force again met the Mahdi's hosts, and at Tamaai routed the Arabs with a loss of over 3,000. It was at this battle that a few Arabs first got into the British square. The "Black Watch," whose quick movement on being ordered to charge, left a gap between themselves and the York and Lancaster Regiment, losing Major Aitken, 8 sergeants, and 50 men killed, 3 officers and 26 men wounded. The British losses were 5 officers and 104 men killed, and 8 officers and 120 men wounded or missing. (See also Naval Section, page 322.)
Tamaai.—Fourteen days later, the British forces clashed again with the Mahdi's troops at Tamaai, defeating the Arabs with over 3,000 casualties. It was during this battle that a few Arabs managed to break into the British square. The "Black Watch," after being ordered to charge, created a gap between themselves and the York and Lancaster Regiment, resulting in the loss of Major Aitken, 8 sergeants, and 50 men killed, along with 3 officers and 26 men wounded. The British losses totaled 5 officers and 104 men killed, and 8 officers and 120 men wounded or missing. (See also Naval Section, page 322.)
The following troops were engaged at Tamaai: "Black Watch"; Gordon Highlanders; Royal Irish Fusiliers; York and Lancaster Regiment; King's Royal Rifle Corps; Artillery; 26th Company Royal Engineers; a[Pg 213] squadron of the 10th and 19th Hussars; Royal Marines and a Naval Brigade.
The following troops were involved at Tamaai: "Black Watch"; Gordon Highlanders; Royal Irish Fusiliers; York and Lancaster Regiment; King's Royal Rifle Corps; Artillery; 26th Company Royal Engineers; a[Pg 213] squadron of the 10th and 19th Hussars; Royal Marines and a Naval Brigade.
A bar for TAMAAI was given for this battle, and to those who took part in that of El-Teb also a bar bearing the words EL-TEB—TAMAAI. The battle of Suakin on March 27th brought the first Soudan War to a close. Those who landed at Suakin or Trinkitat between February 19th and March 26th, and had taken part in the 1882 campaign, were granted the bar for SUAKIN 1884. It was further approved that a bar be issued to all those who were actually present at either or both of the actions on February 29th and March 13th; this bar to be inscribed EL-TEB—TAMAAI for those who were in both actions, and EL-TEB or TAMAAI for those who were in one or the other, but not both.
A bar for TAMAAI was awarded for this battle, and to those who participated in the El-Teb battle as well, a bar inscribed with EL-TEB—TAMAAI. The battle of Suakin on March 27th marked the end of the first Sudan War. Those who landed at Suakin or Trinkitat between February 19th and March 26th and took part in the 1882 campaign were given the bar for Suakin 1884. It was also approved that a bar be issued to everyone who was actually present at either or both of the events on February 29th and March 13th; this bar would say EL-TEB—TAMAAI for those who were part of both events, and EL-TEB or TAMAAI for those who participated in one or the other, but not both.
To Relieve Gordon.—The Mahdi, however, was not conquered; he had merely run away to fight another day. The defence of Khartoum for ten months by General Gordon, and the belated and unsuccessful attempts to relieve him, are matters of history which will not be easily forgotten; but for our purpose they recall the gallant Britisher who refused to yield, and the splendid efforts which were made by the officers and men who went up the Nile in 1884-5. They started from Cairo in September under Lord Wolseley, and reached Dongola early in November, when the gallant Sir Herbert Stewart started off with his little army of 1,600 men to reach Khartoum, by first marching 170 miles and then travelling 100 miles by steamer.
To Relieve Gordon.—The Mahdi, however, was not defeated; he had just retreated to fight another day. The defense of Khartoum for ten months by General Gordon, along with the late and unsuccessful attempts to rescue him, are historical events that will not be easily forgotten. However, for our purposes, they remind us of the brave British man who refused to surrender and the incredible efforts made by the officers and men who ascended the Nile in 1884-5. They left Cairo in September under Lord Wolseley and reached Dongola by early November, when the courageous Sir Herbert Stewart set off with his small army of 1,600 men to reach Khartoum, first marching 170 miles and then traveling 100 miles by steamer.
Abu Klea.—It was during this march that the battle of Abu Klea—"where the rifles jammed and the shoddy bayonets twisted like tin"—was fought on January 17th, 1885, and the survivors of the little band of about 1,200 who took part received the bar ABU KLEA. Here the genial giant Colonel Fred Burnaby was thrown from his horse in riding outside the square to assist some skirmishers, and killed as he lay on the ground, and here Lord Charles Beresford had many hair-breadth escapes from death (see page 325),[Pg 214] while the Arabs achieved the remarkable feat of breaking a British square and getting inside, killing the wounded and a number of camels ere they were themselves dispatched. This, one of the most strenuous of the battles in the Sudan, resulted in a loss to the enemy of over 2,000, and to the British of 9 officers killed and 9 wounded (2 dying of their wounds), 65 non-coms. and men killed, and 85 wounded; but the enemy were still active, and as Sir Herbert Stewart marched on he found his way to the Nile barred by them, so a zareba was formed at Abu Kru, and here he was mortally wounded. The enemy were driven off; the harassed troops pressed on, reached the Nile, and heard that Khartoum had fallen! Their pluck, perseverance, and privations were in vain. In the fight between Abu Klea and the river 1 officer and 22 men were killed, and 8 officers and 90 men wounded; this was called the battle of Gubat, but no bar was given for it.
Abu Klea.—It was during this march that the battle of Abu Klea—"where the rifles jammed and the cheap bayonets twisted like tin"—took place on January 17th, 1885, and the survivors of the small group of about 1,200 who participated received the bar ABU KLEA. Here, the friendly giant Colonel Fred Burnaby was thrown from his horse while riding outside the square to help some skirmishers and was killed as he lay on the ground. Also, here Lord Charles Beresford had multiple close calls with death (see page 325),[Pg 214] while the Arabs managed the remarkable feat of breaking a British square and getting inside, killing the wounded and several camels before they were themselves eliminated. This, one of the most intense battles in the Sudan, resulted in over 2,000 enemy casualties, while the British lost 9 officers killed and 9 wounded (2 dying from their wounds), along with 65 soldiers killed and 85 wounded; however, the enemy remained active, and as Sir Herbert Stewart marched on, he found his path to the Nile blocked by them. Consequently, a zareba was established at Abu Kru, where he was mortally wounded. The enemy was driven off; the beleaguered troops continued, reached the Nile, and learned that Khartoum had fallen! Their bravery, determination, and hardships were in vain. In the clash between Abu Klea and the river, 1 officer and 22 men were killed, alongside 8 officers and 90 men wounded; this was referred to as the battle of Gubat, but no bar was awarded for it.
The following troops were engaged at Abu-Klea: Sussex Regiment; Mounted Infantry; Royal Artillery and Royal Engineers; Heavy Camel Corps; 19th Hussars, and a Naval Brigade.
The following troops were involved at Abu-Klea: Sussex Regiment; Mounted Infantry; Royal Artillery and Royal Engineers; Heavy Camel Corps; 19th Hussars, and a Naval Brigade.
Kirbekan.—During the campaign the battle of Kirbekan was fought on February 10th, and Major-General Earle, the General in Command, killed in a manner which calls to mind Forbes Mitchell's description of how Hodson, of Hodson's Horse, met his death. The battle had been won, but odd parties of survivors were being routed out; the General, despite warnings, went up to a stone hut full of Arabs, and essayed to enter it, but was shot dead. Needless to say his death was avenged—indeed, of the force of 2,000 Lord Wolseley said "scarcely any can have escaped." Two colonels were also killed at this battle, which raged for five hours. The "Black Watch" lost Lieutenant-Colonel Coveney killed, and Lieutenant-Colonel Wauchope wounded. The bar inscribed KIRBEKAN was well earned. It should be noted that no medal for this campaign is genuine which has a single bar inscribed[Pg 215] Kirbekan; it was only given in combination with the bar THE NILE 1884-85. There are, of course, other combinations, but these were due to the fact that the recipient had taken part in the earlier campaigns. Four-bar medals are rather rare, and five-bar medals very uncommon.
Kirbekan.—During the campaign, the battle of Kirbekan took place on February 10th, where Major-General Earle, the General in Command, was killed in a way that recalls Forbes Mitchell's account of how Hodson of Hodson's Horse met his end. The battle had been won, but scattered groups of survivors were still being rounded up; the General, despite warnings, approached a stone hut filled with Arabs and attempted to enter it, but was shot dead. Unsurprisingly, his death was avenged—indeed, of the 2,000-strong force, Lord Wolseley remarked that “scarcely any can have escaped.” Two colonels were also killed in this battle, which lasted for five hours. The "Black Watch" lost Lieutenant-Colonel Coveney killed, and Lieutenant-Colonel Wauchope was wounded. The bar inscribed KIRBEKAN was well deserved. It should be noted that no medal for this campaign is authentic unless it has a bar inscribed [Pg 215] Kirbekan; it was only awarded in combination with the bar THE NILE 1884-85. There are, of course, other combinations, but these were due to the recipient having participated in the earlier campaigns. Medals with four bars are quite rare, and those with five bars are very uncommon.
The following troops were engaged at Kirbekan: South Staffordshire Regiment; 1st Batt. Black Watch, squadron 19th Hussars; 2 gun crews of artillery; small naval detachment with maxim gun—about 1,200 men.
The following troops were involved at Kirbekan: South Staffordshire Regiment; 1st Batt. Black Watch, squadron 19th Hussars; 2 gun crews of artillery; small naval detachment with Maxim gun—about 1,200 men.
The following troops received the bar for the Nile: "Black Watch"; Gordon and Cameron Highlanders; 18th Royal Irish; Duke of Cornwall's Light Infantry; Royal West Kent Regiment; Essex Regiment; South Staffordshire Regiment; 19th Hussars; Heavy Camel Corps, and a Naval Brigade.
The following troops received the bar for the Nile: "Black Watch"; Gordon and Cameron Highlanders; 18th Royal Irish; Duke of Cornwall's Light Infantry; Royal West Kent Regiment; Essex Regiment; South Staffordshire Regiment; 19th Hussars; Heavy Camel Corps, and a Naval Brigade.
To Recover the Sudan.—The fall of Khartoum led to the organisation of another campaign in order to recover the Sudan from the power of Osman Digna, and for this arduous campaign those who did not receive the new Egyptian medal had a bar added to the one they possessed for SUAKIN 1885. During this campaign a New South Wales contingent of 800 took part. A battle which came as a surprise, and resulted in heavy losses, was fought on March 22nd, 1885, and for this a bar inscribed TOFREK was given. The only entire regiment present was the 1st Batt. Royal Berkshire. The losses of the Hadenowas were over 1,500; the British lost 5 officers and 94 men killed, 6 officers and 136 men wounded, 1 officer and 70 men missing, and of the Indian contingent 120 were killed or wounded.
To Recover the Sudan.—The fall of Khartoum led to the organization of another campaign to reclaim the Sudan from Osman Digna's control. For this challenging campaign, those who didn't receive the new Egyptian medal had a bar added to the one they already owned for Suakin 1885. During this campaign, a contingent of 800 from New South Wales participated. A surprise battle that resulted in heavy losses was fought on March 22, 1885, for which a bar inscribed TOFREK was awarded. The only complete regiment present was the 1st Batt. Royal Berkshire. The losses for the Hadenowas exceeded 1,500; the British lost 5 officers and 94 men killed, 6 officers and 136 men wounded, 1 officer and 70 men missing, while 120 members of the Indian contingent were killed or wounded.
The following troops were present at Tofrek: the Berkshire Regiment; a detachment of Royal Engineers; a squadron of the 5th Lancers and 20th Hussars; a battalion of Marines; a Naval Brigade, and an Indian Brigade.
The following troops were present at Tofrek: the Berkshire Regiment; a group of Royal Engineers; a squadron of the 5th Lancers and 20th Hussars; a battalion of Marines; a Naval Brigade, and an Indian Brigade.
By a General Order dated September 1st, 1885, a medal of the 1882 pattern was granted to all Her Majes[Pg 216]ty's forces employed in the operations in the Sudan, in commemoration of their arduous labours in the ascent of the Nile, and their gallantry in the operations which ensued, and also for the operations in the Eastern Sudan in the vicinity of Suakin; and Her Majesty further approved of the issue of the following bars: THE NILE 1884-85, ABU KLEA, KIRBEKAN, SUAKIN 1885, and TOFREK. A General Order dated June 1st, 1886, signified that the Egyptian medal be granted to the troops engaged in the operations of the Upper Nile who had not previously received it.
By a General Order dated September 1st, 1885, a medal of the 1882 design was awarded to all of Her Majesty's forces involved in the operations in Sudan, honoring their hard work in the ascent of the Nile and their bravery in the subsequent operations, as well as for the missions in Eastern Sudan near Suakin. Her Majesty also approved the issuance of the following bars: THE NILE 1884-85, ABU KLEA, KIRBEKAN, SUAKIN 1885, and TOFREK. A General Order dated June 1st, 1886, indicated that the Egyptian medal would be awarded to the troops involved in the Upper Nile operations who had not received it previously.
Gemaizah, 1888.—The neighbourhood of Suakin was again the scene of battle when, on December 20th, 1888, the Dervishes advanced on the place with the determination to invest it. General Grenfell, however, forced the issue, and on December 20th, 1888, after one and a half hour's fighting, totally routed them; for this battle the bar for GEMAIZAH 1888 was awarded by an Army Order in January 1890, and the medal to all who were employed at, or south of, Korosko on August 3rd, 1889.
Gemaizah, 1888.—The area around Suakin became the site of conflict again on December 20th, 1888, when the Dervishes launched an attack with the intent to seize it. However, General Grenfell took decisive action, and after an hour and a half of fighting on December 20th, 1888, he completely defeated them. For this battle, the bar for GEMAIZAH 1888 was awarded by an Army Order in January 1890, along with medals for all who served at or south of Korosko on August 3rd, 1889.
The following troops were engaged at Gemaizah: King's Own Scottish Borderers; the Welsh Regiment; Royal Irish Rifles; 137 officers and men 20th Hussars; Mounted Infantry; 17 officers and men of the 24th Company Royal Engineers; Naval Brigade of men from H.M.S. "Starling" and "Racer," and Egyptian troops.
The following troops were involved at Gemaizah: King's Own Scottish Borderers; the Welsh Regiment; Royal Irish Rifles; 137 officers and men from the 20th Hussars; Mounted Infantry; 17 officers and men from the 24th Company Royal Engineers; Naval Brigade of personnel from H.M.S. "Starling" and "Racer," and Egyptian troops.
Toski.—After this battle the expedition was withdrawn, and the Sudan was left to the mercy of the Dervishes, Suakin alone being held by the British and Egyptians. Ever on the war-path, the followers of the Mahdi resolved to invade Egypt, and were actually permitted to penetrate northwards for about 50 miles. At Toski, however, they were seriously encountered by Sir F. Grenfell, the Sirdar of the Egyptian Army, and on August 3rd a terrific but comparatively bloodless battle for the British and Egyptians was fought. The Dervishes, however, were routed, and almost every[Pg 217] leader was killed. For this battle a bar inscribed TOSKI 1889 was awarded to all troops who were present at the action. Men who had received bars for former Egyptian campaigns, on receiving new ones, returned the old ones to the Commissary-General of Ordnance, Woolwich Arsenal; the rivets of all genuine medal bars are, therefore, always the same. The names and regiments are usually engraved in slanting Roman letters, but those given to the navy are generally stamped in rather large skeleton upright Roman letters.
Toski.—After this battle, the expedition was pulled back, leaving the Sudan at the mercy of the Dervishes, with only Suakin held by the British and Egyptians. Always ready for war, the followers of the Mahdi decided to invade Egypt and were actually allowed to advance north for about 50 miles. However, at Toski, they faced a serious challenge from Sir F. Grenfell, the leader of the Egyptian Army, and on August 3rd, a fierce but relatively bloodless battle took place for the British and Egyptians. The Dervishes were defeated, and nearly every leader was killed. For this battle, a bar inscribed TOSKI 1889 was awarded to all troops who participated. Soldiers who had received bars for earlier Egyptian campaigns returned their old ones to the Commissary-General of Ordnance at Woolwich Arsenal when they got new ones; the rivets on all genuine medal bars are, therefore, always the same. Names and regiments are usually engraved in slanted Roman letters, but those awarded to the navy are typically stamped in larger upright Roman letters.
The following were engaged at Toski: 98 officers, non-commissioned officers, and men of the 20th Hussars, and Egyptian troops.
The following were involved at Toski: 98 officers, non-commissioned officers, and soldiers of the 20th Hussars, along with Egyptian troops.
Tokar.—The battle of Tokar was fought in 1890, but the British silver medal was not awarded for this engagement. The Egyptian Government, however, issued a bar inscribed in Arabic characters "Tokar" and "1308 H" (TOKAR 1890), to be worn with the Egyptian Star, which, except for variations in the date, had been awarded to all who took part in the campaigns. Officers and men from the "Dolphin" and "Sandfly" received this star and British officers who were serving with the Egyptian Army.
Tokar.—The battle of Tokar took place in 1890, but the British silver medal wasn’t given for this battle. However, the Egyptian Government issued a bar inscribed in Arabic with "Tokar" and "1308 H" (TOKAR 1890), which was worn with the Egyptian Star. This star, aside from the date differences, was awarded to everyone who participated in the campaigns. Officers and soldiers from the "Dolphin" and "Sandfly" received this star, as well as British officers who were serving with the Egyptian Army.
The Khedive's Star.—For the first campaign the Star bears in Arabic and English EGYPT 1882; for the campaigns of 1884 and 1885 EGYPT 1884-6; but for the campaigns 1888-9, which include the fighting round Suakin and up the Nile, the Star was issued without a date.
The Khedive's Star.—For the first campaign, the Star has in Arabic and English EGYPT 1882; for the campaigns of 1884 and 1885 EGYPT 1884-1886; but for the campaigns of 1888-9, which include the fighting around Suakin and up the Nile, the Star was issued without a date.
Riel's Rebellion.—Whilst we were busy in Egypt, "Riel's Rebellion" was engineered in 1885 among the half-breeds and Indians on the North-West Territories. It was a nine-days' wonder, but nevertheless a troublesome one. Riel was attacked at Batoche on May 11th, defeated by General Middleton, and after trial executed.
Riel's Rebellion.—While we were occupied in Egypt, "Riel's Rebellion" broke out in 1885 among the Métis and Indigenous peoples in the North-West Territories. It was a brief but significant event that caused a lot of trouble. Riel was confronted at Batoche on May 11th, defeated by General Middleton, and executed after a trial.
By Militia General Orders dated September 18th, 1885, the Canadian troops which took part in suppressing the rebellion were awarded a medal inscribed on the reverse in fancy letters NORTH-WEST CANADA 1885, the[Pg 218] date being placed in the centre, with North-West above and Canada below, and the whole surrounded by a wreath of maple leaves, the terminals of which are at the bottom of the medal. The obverse is the same as the Egyptian 1882 medal, and the bar similar to that used with that medal. One bar for SASKATCHEWAN was issued with the medal to those who took part in that engagement. The medals were issued unnamed, but they are found both engraved and impressed; the ribbon is blue-grey, with two red stripes.
By Militia General Orders dated September 18th, 1885, the Canadian troops that participated in putting down the rebellion were awarded a medal with the inscription on the back in fancy letters Northwest Canada 1885. The date is centered with North-West above and Canada below, all surrounded by a wreath of maple leaves, with the ends at the bottom of the medal. The front design is the same as the Egyptian 1882 medal, and the bar is similar to that used with that medal. One bar for Saskatchewan was awarded with the medal to those who were involved in that engagement. The medals were issued without names, but they can be found both engraved and impressed; the ribbon is blue-grey with two red stripes.
The Canada Medal.—In January 1899 the Home Government approved of the issue of a medal by the Canadian Government to the Imperial Forces and Canadian Militia which had taken part in the campaigns occasioned by the Fenian Raids, and in the Red River expedition, 1870, so ably organised by Viscount Wolseley. This medal, which I illustrate facing page 148, had the recipient's name and regimental number, as well as the regiment, generally impressed in square block letters. The obverse is as on the Egyptian 1882 medal. The ribbon is of scarlet, with a broad white stripe down the centre. When the medals were struck in 1899, 16,120 were issued; of these only 365 had the single bar for RED RIVER; 150 were issued with the two bars FENIAN RAID 1866 and RED RIVER 1870; 30 only were issued with the combination of RED RIVER 1870 and FENIAN RAID 1870, and twenty with three bars for FENIAN RAID 1866, FENIAN RAID 1870, and RED RIVER 1870.
The Canada Medal.—In January 1899, the Home Government approved a medal to be issued by the Canadian Government for the Imperial Forces and Canadian Militia who participated in the campaigns triggered by the Fenian Raids and the Red River expedition of 1870, which was expertly organized by Viscount Wolseley. This medal, which I illustrate facing page 148, had the recipient's name and regimental number, along with the regiment, typically engraved in square block letters. The front is similar to the Egyptian 1882 medal. The ribbon is red with a broad white stripe down the center. When the medals were minted in 1899, 16,120 were issued; out of these, only 365 had the single bar for Red River; 150 were issued with the two bars FENIAN RAID 1866 and Red River 1870; only 30 were issued with the combination of Red River 1870 and FENIAN RAID 1870, and twenty with three bars for FENIAN RAID 1866, FENIAN RAID 1870, and Red River 1870.
Annexation of Burma.—Britain also became involved in another Burmese War while the Egyptian campaigns were proceeding. King Theebaw, who commenced his reign in a murderous manner, impelled by the financial straits into which his extravagance had led him, began to extort money from British subjects, and moreover laughed at the demand that a British agent should be installed at Mandalay, expressing his contempt for the "barbarians" in a very decided and provocative manner. As a result an expedition under Major-General (afterwards Sir H.[Pg 219] N. D.) Prendergast, V.C., was sent into the country; the dethronement of the King was declared by the British, Minhla was stormed and carried, and the victorious troops marched to Mandalay, where Theebaw and his army surrendered. On January 1st, 1886, Lord Dufferin proclaimed the annexation of Burma. The British troops had plenty of work, however, after this, for the dacoits gave a deal of trouble; several pitched battles were fought, and the country remained in an unsettled state for some time. Medals and bars were given for two periods during this expedition and long-drawn guerilla warfare. For the first period the Indian General Service Medal 1854 was awarded, with a bar inscribed BURMA 1885-87, and it is noteworthy that for the first time a medal of bronze was given to all authorised camp followers. To those who took part in the second period of fighting a bar for BURMA 1887-89 was awarded; the bars only, in both instances, being given where the soldier already possessed the medal.
Annexation of Burma.—Britain also got involved in another Burmese War while the campaigns in Egypt were ongoing. King Theebaw, who started his reign with violence and driven by the financial troubles caused by his own extravagance, began to extort money from British citizens and openly mocked the demand for a British agent to be stationed in Mandalay, showing his disdain for the "barbarians" in a very clear and provocative way. As a result, an expedition led by Major-General (later Sir H.[Pg 219] N. D.) Prendergast, V.C., was sent into the country; the British declared the King’s dethronement, Minhla was attacked and seized, and the victorious troops advanced to Mandalay, where Theebaw and his forces surrendered. On January 1st, 1886, Lord Dufferin announced the annexation of Burma. However, British troops had plenty of challenges afterward, as dacoits caused significant trouble; several intense battles were fought, and the country remained unstable for some time. Medals and bars were awarded for two phases during this expedition and prolonged guerilla warfare. For the first phase, the Indian General Service Medal 1854 was awarded, with a bar inscribed Myanmar 1885-87, and it’s notable that for the first time, a bronze medal was given to all authorized camp followers. Those who participated in the second phase of fighting received a bar for BURMA 1887-89; the bars were only awarded in both cases to soldiers who already had the medal.
The following regiments took part in the Burma campaign, 1885-7: Royal West Surrey Regiment; Liverpool Regiment; Somerset Light Infantry; Royal Welsh Fusiliers; Hampshire Regiment; Yorkshire Light Infantry; Royal Munster Fusiliers; 1st Battery 1st Brigade East Division; 5th Battery 1st Brigade South Division; 7th Battery 1st Brigade North Division; 8th Battery 1st Brigade London Division; 9th Battery 1st Brigade Cinque Ports Division Artillery. The following native regiments were also engaged: 1st, 2nd, 5th, 11th, 12th, 13th, 15th, 16th, 18th, 26th, 27th, 44th Bengal Infantry; 3rd, 12th, 13th, 15th, 16th, 17th, 21st, 23rd, 25th, 27th Madras Infantry; 1st Madras Pioneers; 1st, 5th, 7th, 23rd, 25th, 27th Bombay Infantry; 3rd Goorkas; 2nd and 3rd Infantry Hyderabad Contingent; 1st, 3rd, 4th, 6th Companies Madras Sappers and Miners; 2nd, 4th, and 5th Companies Bengal Sappers and Miners; 2nd Company Bombay Sappers; 1st Madras and 1st Bombay[Pg 220] Lancers; 2nd Squadron 2nd Madras Cavalry; 3rd Cavalry Hyderabad Contingent; 7th Bengal Cavalry; No. 1 Bombay Mountain Battery; No. 4 Punjab Mountain Battery.
The following regiments participated in the Burma campaign from 1885 to 1887: Royal West Surrey Regiment; Liverpool Regiment; Somerset Light Infantry; Royal Welsh Fusiliers; Hampshire Regiment; Yorkshire Light Infantry; Royal Munster Fusiliers; 1st Battery, 1st Brigade East Division; 5th Battery, 1st Brigade South Division; 7th Battery, 1st Brigade North Division; 8th Battery, 1st Brigade London Division; 9th Battery, 1st Brigade Cinque Ports Division Artillery. The following native regiments were also involved: 1st, 2nd, 5th, 11th, 12th, 13th, 15th, 16th, 18th, 26th, 27th Bengal Infantry; 3rd, 12th, 13th, 15th, 16th, 17th, 21st, 23rd, 25th, 27th Madras Infantry; 1st Madras Pioneers; 1st, 5th, 7th, 23rd, 25th, 27th Bombay Infantry; 3rd Goorkas; 2nd and 3rd Infantry Hyderabad Contingent; 1st, 3rd, 4th, 6th Companies Madras Sappers and Miners; 2nd, 4th, and 5th Companies Bengal Sappers and Miners; 2nd Company Bombay Sappers; 1st Madras and 1st Bombay[Pg 220] Lancers; 2nd Squadron 2nd Madras Cavalry; 3rd Cavalry Hyderabad Contingent; 7th Bengal Cavalry; No. 1 Bombay Mountain Battery; No. 4 Punjab Mountain Battery.
Naga, 1879-80.—To those engaged in the operations against the Nagas, an uncivilised race of hillmen in the north-east of Assam, during March 1875, December 1879, and January 1880, a bar inscribed NAGA 1879-80 was awarded. Only British officers and native troops received this medal or bar, and it has so far been seldom met with in England. The medals realise in the sale-room, according to condition, anything between 10s. and 30s. apiece.
Naga, 1879-80.—For those involved in operations against the Nagas, a tribal group of hill people in the northeast of Assam, during March 1875, December 1879, and January 1880, a bar engraved NAGA 1879-80 was issued. Only British officers and local troops received this medal or bar, and it has been quite rare in England. The medals sell at auction, depending on their condition, for anywhere between £0.50 and £1.50 each.
The Naga expeditionary force comprised the 42nd, 43rd, and 44th Goorkas; 18th Bengal Native Infantry, with the crews of two mountain guns.
The Naga expeditionary force included the 42nd, 43rd, and 44th Gurkhas; 18th Bengal Native Infantry, along with the crews of two mountain guns.
Sikkim, 1888.—Another expedition into Sikkim became necessary in March 1888, owing to an attempt on the part of the Thibetans to annex the district which lies to the north of Darjeeling. The British field force under Colonel (afterwards General) T. Graham had to march over rough mountain tracks, and through dense jungle, where pestilent leeches, attaching themselves to man and beast, added to the hardships of the campaign. It was not until September 24th that any really big action was fought, and that was decisive; the Thibetan army of 10,000 men being attacked on the Tukola ridge, and within a short time totally routed by the British force of 2,000 with comparatively little loss to the victors.
Sikkim, 1888.—Another expedition into Sikkim became necessary in March 1888 because the Tibetans attempted to annex the area north of Darjeeling. The British field force, led by Colonel (later General) T. Graham, had to navigate rough mountain paths and dense jungles, where bothersome leeches clung to both people and animals, adding to the campaign's challenges. It wasn't until September 24th that a major battle occurred, which was decisive; the Tibetan army of 10,000 was attacked on the Tukola ridge and quickly defeated by the British force of 2,000, with relatively few losses on the victors' side.
The force engaged in this campaign was mainly composed of Goorkas, the 32nd Bengal Pioneers, and two companies of the 2nd Batt. Derbyshire Regiment. The bar for SIKKIM 1888 was added to the medal already won by those who had taken part in the Indian wars, and the medal with bar was granted to those who did not possess one. Bronze medals with the bar were awarded to authorised followers.
The troops involved in this campaign were mainly made up of Gurkhas, the 32nd Bengal Pioneers, and two companies of the 2nd Battalion Derbyshire Regiment. The bar for Sikkim 1888 was added to the medal already earned by those who had participated in the Indian wars, and the medal with bar was given to those who didn't have one. Bronze medals with the bar were awarded to authorized followers.
The Black Mountain Expedition.—In 1888 a punitive[Pg 221] expedition under Brigadier-General M'Queen, C.B., was sent into the Hazara or Black Mountain district on the left bank of the Indus, beyond the north-west frontier of India, to punish Khan Khel and to chastise the Azakis and Hassanzais for the murder on June 18th of Major Battye, Captain Thurston, and a number of the native surveying party which they led. The district lies in a perfect maze of mountains, on the crags and precipices of which watch-towers and villages were perched, frequently 9,000 feet above sea-level; indeed, the Northumberland Fusiliers and the Kybeerees actually carried the Gorapher Peak 9,500 feet above sea-level, thus establishing a record in altitude for an assault by British troops. The expedition entered the district from two directions, and the fourth column concentrating on October 1st prepared to act on the offensive. On the 4th they proceeded against the enemy, who was found in great force—official figures say 4,000—at the village of Kotkai, which, built upon a great mass of broken rocks on a steep spur, was defended by well-built sangars, but this was taken after some hard fighting, in which the 18th Royal Irish met a charge of Ghazis, who rushed from cover and surprised the Irishmen, but they "went at them with a will, bayoneting or shooting every Ghazi within reach." In this rush 88 fanatics paid the penalty of their madness.
The Black Mountain Expedition.—In 1888, a punitive[Pg 221] expedition led by Brigadier-General M'Queen, C.B., was sent into the Hazara or Black Mountain district on the left bank of the Indus, beyond the north-west frontier of India, to punish Khan Khel and to retaliate against the Azakis and Hassanzais for the murders on June 18th of Major Battye, Captain Thurston, and several members of the native surveying party they commanded. The district is a complicated maze of mountains, with watch-towers and villages perched on crags and cliffs, often 9,000 feet above sea level; indeed, the Northumberland Fusiliers and the Kybeerees successfully captured Gorapher Peak, which stands at 9,500 feet, setting a record for altitude in an assault by British troops. The expedition entered the district from two directions, and the fourth column, concentrating on October 1st, prepared to take the offensive. On the 4th, they moved against the enemy, who was found in large numbers—official figures say 4,000—at the village of Kotkai, which was built on a mass of broken rocks on a steep spur, defended by well-structured sangars. After intense fighting, the village was captured, where the 18th Royal Irish faced a charge of Ghazis, who came rushing from cover and caught the Irishmen by surprise. However, they “went at them with determination, bayoneting or shooting every Ghazi within reach.” In this encounter, 88 fanatics paid the price for their recklessness.
Leaving the 29th Punjab Infantry in possession of Kotkai as an advance post, the expedition pushed on and blew up the hill fortress of Maidan; meanwhile the other column had been pressing forward from the Agror Valley, climbing mountains and destroying watch-towers and hostile villages, so that the pressure of the two forces, together with the losses they had sustained, compelled the hillmen to sue for peace, promising better behaviour in the future, and paying the heavy indemnities imposed. In this campaign, which concluded on November 9th, the Hazara field force lost 2 officers mortally wounded, and about 100 men killed and wounded.
Leaving the 29th Punjab Infantry occupying Kotkai as a forward base, the expedition continued and blew up the hill fortress of Maidan; meanwhile, the other unit was advancing from the Agror Valley, scaling mountains and destroying watchtowers and enemy villages. The pressure from both forces, combined with the losses they had suffered, forced the hillmen to seek peace, promising to behave better in the future and paying the hefty fines imposed. In this campaign, which wrapped up on November 9th, the Hazara field force lost 2 officers who were mortally wounded, and around 100 men were killed and wounded.
The following regiments were engaged in the Hazara or Black Mountain expedition: 1st Batt. Northumberland Fusiliers; 1st Batt. Suffolk Regiment; 2nd Batt. Royal Irish Regiment; 2nd Batt. Sussex Regiment; 2nd Batt. Seaforth Highlanders; 240 men of the Scottish Division Royal Artillery; 4th Goorkas; 3rd, 14th, and 45th Sikhs; 4th, 24th, and 29th Punjab Infantry; 4th Bengal Native Infantry; 34th Pioneers; 15th Bengal Cavalry, and a Native Mountain Battery.
The following regiments participated in the Hazara or Black Mountain expedition: 1st Battalion Northumberland Fusiliers; 1st Battalion Suffolk Regiment; 2nd Battalion Royal Irish Regiment; 2nd Battalion Sussex Regiment; 2nd Battalion Seaforth Highlanders; 240 men from the Scottish Division Royal Artillery; 4th Goorkas; 3rd, 14th, and 45th Sikhs; 4th, 24th, and 29th Punjab Infantry; 4th Bengal Native Infantry; 34th Pioneers; 15th Bengal Cavalry, and a Native Mountain Battery.
Hazara, 1888.—To those not already in possession of the India medal it was awarded with the bar HAZARA 1888, while the bar was added to the medals of those who already possessed the I.G.S. 1854 medal. Bronze medals were awarded to the followers.
Hazara, 1888.—For those who didn't have the India medal yet, it was awarded with the bar HAZARA 1888, and the bar was added to the medals of those who already had the I.G.S. 1854 medal. Bronze medals were given to the followers.
Chin-Lushai, 1889-90.—In February 1889 an attack was made upon another surveying party under Lieutenant Stewart, in which he and his men were killed. A punitive expedition was consequently formed to proceed against the tribes inhabiting the Chin Hills and Lushai. The expedition advanced on November 15th in two columns, Brigadier-General Symons proceeding against the Chin tribes, and Colonel Tregear against the Lushais. The little forces had to make their way through the roadless and pestilent jungle, which caused the troops much suffering from disease, until, having destroyed the enemy's villages and crops, and captured a few stockades, the chiefs of the tribes thought it expedient to submit, which they did, and on April 30th, 1890, the expedition was disbanded.
Chin-Lushai, 1889-90.—In February 1889, another surveying team led by Lieutenant Stewart was attacked, resulting in the deaths of him and his men. A punitive mission was therefore organized to take action against the tribes living in the Chin Hills and Lushai. The mission started on November 15th, split into two groups: Brigadier-General Symons moved against the Chin tribes, while Colonel Tregear targeted the Lushais. The small forces had to navigate through the difficult and unhealthy jungle, which caused significant suffering from disease among the troops. Eventually, after destroying the enemy's villages and crops and capturing a few stockades, the tribe chiefs decided it was in their best interest to surrender. They did so, and the mission was officially disbanded on April 30th, 1890.
The following troops took part in the expedition: those under General Symons were the King's Own Scottish Borderers, detachments of the 1st Cheshire Regiment and the Norfolk Regiment, who with the 2nd Batt. 4th and 24th Goorkas, and two companies of the Queen's Own Madras Sappers and Miners, constituted the Burma Field Force. The native troops under Brigadier Tregear consisted of the 2nd Goorkas, 3rd and 9th Bengal Infantry, 28th Bombay Pioneers, and one company of Bengal Sappers and Miners. The[Pg 223] India Medal 1854 with bar for CHIN-LUSHAI 1889-90 was given to those who did not already possess the medal, while to those already issued the bar was added. A bronze medal and bar was given to all authorised camp followers.
The following troops took part in the expedition: those under General Symons included the King's Own Scottish Borderers, detachments of the 1st Cheshire Regiment and the Norfolk Regiment, who, along with the 2nd Batt. 4th and 24th Goorkas, and two companies of the Queen's Own Madras Sappers and Miners, made up the Burma Field Force. The native troops under Brigadier Tregear were the 2nd Goorkas, 3rd and 9th Bengal Infantry, 28th Bombay Pioneers, and one company of Bengal Sappers and Miners. The[Pg 223] India Medal 1854 with a bar for CHIN-LUSHAI 1889-90 was awarded to those who didn’t already have the medal, while those who did received the bar. A bronze medal and bar were given to all authorized camp followers.
Samana, 1891.—The Meeranzies, a Pathan tribe, forgetful of the lesson given them by Sir Neville Chamberlain in 1855, again caused considerable trouble in 1891, and Sir William Lockhart marched from Kohat on April 5th to chastise them. Being defeated with considerable losses at Mastaon, they were glad to submit, and by May 25th the war was concluded, and native troops were left to garrison Samana. The British losses in this expedition were over 100 officers and men killed and wounded.
Samana, 1891.—The Meeranzies, a Pathan tribe, ignored the lesson taught to them by Sir Neville Chamberlain in 1855 and caused significant issues again in 1891. Sir William Lockhart set out from Kohat on April 5th to deal with them. After suffering considerable losses at Mastaon, they agreed to submit. By May 25th, the conflict was over, and local troops were assigned to garrison Samana. The British suffered more than 100 casualties, including officers and men killed and wounded.
The following regiments were engaged: 1st Batt. King's Royal Rifles, two companies of the 2nd Batt. Manchester Regiment and No. 3 Mountain Battery of the Royal Artillery; 1st, 2nd, 4th, 5th, and 6th Punjab Infantry; 3rd Sikh Infantry; 1st Batt. 5th Goorkas; 15th Sikhs; 19th, 22nd, 27th, and 29th Bengal Infantry; 23rd Punjab Pioneers; 19th Bengal Lancers; Bengal Sappers and Miners, and No. 3 Peshawar Mountain Battery.
The following regiments were involved: 1st Battalion King's Royal Rifles, two companies from the 2nd Battalion Manchester Regiment, and No. 3 Mountain Battery of the Royal Artillery; 1st, 2nd, 4th, 5th, and 6th Punjab Infantry; 3rd Sikh Infantry; 1st Battalion 5th Goorkas; 15th Sikhs; 19th, 22nd, 27th, and 29th Bengal Infantry; 23rd Punjab Pioneers; 19th Bengal Lancers; Bengal Sappers and Miners, and No. 3 Peshawar Mountain Battery.
The India Medal 1854, with bar for SAMANA 1891, was awarded for this campaign; bronze medals with bar being given to authorised followers.
The India Medal 1854, with a bar for SAMANA 1891, was awarded for this campaign; bronze medals with the bar were given to authorized followers.
Hazara, 1891.—In 1891 trouble again broke out in the Black Mountain district, and another punitive expedition under Major-General Ellis was necessary in order to compel that respect for British authority which it was believed the campaign that had only concluded about sixteen months previously had succeeded in achieving. The expedition set out on March 12th, and took a couple of months to bring the tribes to their senses. On May 16th they surrendered unconditionally, hostilities were concluded, and the troops returned.
Hazara, 1891.—In 1891, trouble erupted again in the Black Mountain district, and another military campaign led by Major-General Ellis was needed to enforce respect for British authority, which it was thought had been established by a campaign that had just finished around sixteen months earlier. The mission began on March 12th and took a couple of months to bring the tribes to their senses. On May 16th, they surrendered without conditions, hostilities ended, and the troops came back.
The Hazara Field Force of 1891 comprised the[Pg 224] 1st Royal Welsh Fusiliers; 2nd Seaforth Highlanders; 1st King's Royal Rifles; 6 men of the 2nd Manchester; Nos. 1 and 9 Mountain Batteries of the Royal Artillery; 4th Sikh Infantry; 5th Goorkas; 11th, 19th, 27th, 28th, and 37th Bengal Infantry; Bengal Sappers and Miners; 32nd Punjab Pioneers; Infantry of the Guides Corps, and the 2nd Derajat Mountain Battery. The I.G.S. 1854 Medal was given in silver to the troops, and in bronze to authorised camp followers, with bar inscribed HAZARA 1891. Those already in possession of the medal had the bar attached thereto.
The Hazara Field Force of 1891 included the [Pg 224] 1st Royal Welsh Fusiliers; 2nd Seaforth Highlanders; 1st King's Royal Rifles; 6 men from the 2nd Manchester; Nos. 1 and 9 Mountain Batteries of the Royal Artillery; 4th Sikh Infantry; 5th Goorkas; 11th, 19th, 27th, 28th, and 37th Bengal Infantry; Bengal Sappers and Miners; 32nd Punjab Pioneers; Infantry of the Guides Corps, and the 2nd Derajat Mountain Battery. The I.G.S. 1854 Medal was awarded in silver to the troops and in bronze to authorized camp followers, with a bar inscribed HAZARA 1891. Those who already had the medal received the bar attached to it.
Burma, 1889-92.—During the years 1889-90-1-2 a series of expeditions was organised to put down disturbances in Burma and Lushai; for the services rendered by the various forces the India Medal 1854, with bars for BURMA 1889-92 and LUSHAI 1889-92, were issued to the troops who took part in the following expeditions: The Pokhau expedition from April 16th to May 16th, 1889; Touhon expedition from September 17th, 1889, to April 1890; Chinbok Column, January 1st to 20th, 1890; Thetta Column, January 1st to 4th, 1891; Chinbok Column, January 8th to February 14th, 1891; Morneik Column, January 27th to March 28th, 1891; Wuntho Field Force, February 18th to May 7th, 1891; Tlang-Tlang Column, March 29th to April 3rd, 1891; Baungshe Column, December 25th, 1891, to February 29th, 1892; Irrawaddy Column, December 15th, 1891, to April 18th, 1892; North-Eastern Column, December 15th, 1891, to April 7th, 1892.
Burma, 1889-92.—Between 1889 and 1892, a number of expeditions were organized to address disturbances in Burma and Lushai. For their service, the troops who participated in the following expeditions were awarded the India Medal 1854, with bars for Burma 1889-1892 and Lushai 1889-92: The Pokhau expedition from April 16 to May 16, 1889; the Touhon expedition from September 17, 1889, to April 1890; the Chinbok Column from January 1 to 20, 1890; the Thetta Column from January 1 to 4, 1891; the Chinbok Column from January 8 to February 14, 1891; the Morneik Column from January 27 to March 28, 1891; the Wuntho Field Force from February 18 to May 7, 1891; the Tlang-Tlang Column from March 29 to April 3, 1891; the Baungshe Column from December 25, 1891, to February 29, 1892; the Irrawaddy Column from December 15, 1891, to April 18, 1892; and the North-Eastern Column from December 15, 1891, to April 7, 1892.
Lushai, 1889-92.—The medal with bar LUSHAI 1889-92 was awarded to the officers and men comprising the Lushai Expeditionary Force from January 11th to May 5th, 1889; the relieving force under Lieutenants Swinton, Cole, and Watson, which went to the assistance of the forts Ayal and Changsil when attacked by the Lushais, September 9th to December 9th, 1890; the expedition under Captain Hutchinson against the Jacopa Village to avenge the attack on Mr. Murray, February 20th to March 3rd, 1891; the expedition under Captain Lock from March 1st to June 1892, necessitated by the general rising of the Eastern Lushais, and the attack at Lalbura upon a force under Mr. M. Cabe; also the force under Captain Shakespear, which advanced into the South Lushai hills between March 16th and May 13th, 1892. All dates are inclusive.
Lushai, 1889-92.—The medal with bar Lushai 1889-92 was awarded to the officers and men of the Lushai Expeditionary Force from January 11 to May 5, 1889; the relieving force led by Lieutenants Swinton, Cole, and Watson, which assisted the forts Ayal and Changsil when they were attacked by the Lushais, from September 9 to December 9, 1890; the expedition under Captain Hutchinson against Jacopa Village to retaliate for the attack on Mr. Murray, from February 20 to March 3, 1891; the expedition under Captain Lock from March 1 to June 1892, needed due to the general uprising of the Eastern Lushais, and the assault on a force led by Mr. M. Cabe at Lalbura; as well as the force under Captain Shakespear, which moved into the South Lushai hills between March 16 and May 13, 1892. All dates are inclusive.

ROYAL NAVAL RESERVE.
Royal Naval Reserve.

H.E.I. CO.'S MERITORIOUS SERVICE MEDAL.
H.E.I. CO.'S MERITORIOUS SERVICE MEDAL.

EDWARDIAN ARMY.
EDWARDIAN ARMY.
LONG SERVICE AND GOOD CONDUCT MEDALS.
LONG SERVICE AND GOOD CONDUCT MEDALS.
Two divisions took part in this campaign, and European troops participated only with the Burma section. 1st King's Own Scottish Borderers, and detachments of 1st Batt. Cheshire and Norfolk Regiments. The native troops were: 2nd Batt. 4th and the 42nd Goorkas; two companies of the Queen's Own Madras Sappers and Miners. The troops engaged with the Chittagong column were: 2nd Goorkas, 3rd and 9th Bengal Infantry; 28th Bombay Pioneers, and a company of Bengal Sappers and Miners.
Two divisions were involved in this campaign, with European troops only joining the Burma section. The 1st King's Own Scottish Borderers, along with detachments from the 1st Battalion Cheshire and Norfolk Regiments, participated. The native troops included the 2nd Battalion 4th and the 42nd Goorkas, plus two companies of the Queen's Own Madras Sappers and Miners. The troops that engaged with the Chittagong column were the 2nd Goorkas, 3rd and 9th Bengal Infantry, 28th Bombay Pioneers, and a company of Bengal Sappers and Miners.
North-East Frontier, 1891.—Early in 1891 the British Resident at Manipur was attacked, and columns from Tamu on March 28th, Silchar on April 15th, and Kohmia on April 20th were sent forward to secure the submission of the Rajah and the punishment of those responsible for the attack on the Resident. The Rajah submitted to the terms laid down, and by May 7th, 1891, the campaign was brought to a conclusion.
North-East Frontier, 1891.—In early 1891, the British Resident in Manipur was attacked. Columns from Tamu on March 28th, Silchar on April 15th, and Kohmia on April 20th were dispatched to ensure the Rajah's surrender and to punish those who were responsible for the attack on the Resident. The Rajah agreed to the terms provided, and by May 7th, 1891, the campaign was concluded.
The Manipur Field Force consisted of about 300 of the 4th King's Royal Rifles; 1st Batt. 2nd Goorkas; 2nd Batt. 4th Goorkas; detachments of the 42nd, 43rd, and 44th Goorkas; 18th Bengal Infantry, and the 8th Bengal Mountain Battery. For this expedition the bar for the N.E. FRONTIER 1891 was added to the India General Service Medal 1854.
The Manipur Field Force was made up of around 300 soldiers from the 4th King's Royal Rifles, 1st Battalion 2nd Goorkas, 2nd Battalion 4th Goorkas, detachments from the 42nd, 43rd, and 44th Goorkas, the 18th Bengal Infantry, and the 8th Bengal Mountain Battery. For this mission, the bar for the N.E. Frontier 1891 was added to the India General Service Medal 1854.
Hunza, 1891.—Lieutenant-Colonel Algernon Durand had foreseen that trouble was brewing, and made very praiseworthy efforts not only to circumvent it, but to ensure that should hostilities occur he would be in a position to defend himself against the robbers and slave-dealers who surrounded him. An attack had[Pg 226] been made on the Chalt garrison, and further trouble was anticipated when Durand informed the chiefs of Hunza and Nagar, without referring to their misconduct, that the British intended having free access to their territory in order that "all requisite arrangements might be made for holding the frontier, and that unless they complied with our demands troops would enter their country, and make roads in spite of them." The tribesmen armed, and "confident in the strength of their defiles ... and to defeat Kashmir troops as of yore," they collected, and Colonel Durand concentrated at Chalt, from whence on November 29th an ultimatum was sent to the chiefs; but the envoy was insulted and robbed of his horse, so the British force crossed the Hunza River on December 1st by a temporary bridge thrown by Captain Aylmer, V.C., and the war which Colonel Durand had striven to prevent commenced, and with a little force of 1,000 men and 2 guns he opposed himself to about 5,000 or 6,000 men.
Hunza, 1891.—Lieutenant-Colonel Algernon Durand had predicted that trouble was coming and made commendable efforts not only to avoid it but also to ensure that if conflict arose, he would be ready to defend himself against the robbers and slave traders surrounding him. An attack had[Pg 226] occurred on the Chalt garrison, and more trouble was expected when Durand informed the leaders of Hunza and Nagar, without mentioning their wrongdoings, that the British planned to have unrestricted access to their territory so that "all necessary arrangements could be made for securing the frontier, and that unless they complied with our demands, troops would enter their land and build roads regardless of their wishes." The tribesmen armed themselves, "confident in the strength of their defiles ... and to defeat Kashmir troops as in the past," they gathered, and Colonel Durand collected his forces at Chalt, from where on November 29th an ultimatum was sent to the chiefs; however, the envoy was insulted and robbed of his horse, prompting the British forces to cross the Hunza River on December 1st using a temporary bridge made by Captain Aylmer, V.C. Consequently, the war that Colonel Durand had tried to prevent began, and with a small force of 1,000 men and 2 guns, he faced around 5,000 to 6,000 men.
The force was made up of 180 of the 5th Goorkas, 400 Goorkas and Dogras of the Kashmir Bodyguard, 250 Dogras of the Kashmir Raga Pertab Regiment, 150 Punyali levies, and the commander's personal escort—20 men of the 20th Punjab Infantry. The only Europeans present were officers. The forts of Nilt were assaulted and captured after very desperate fighting, in which Captain Aylmer and Colonel Durand were severely wounded, and in the moment of victory the command passed out of the latter's hand. In two hours the place was captured, but owing to the failure to advance 4 British officers had been lost, and nearly 40 men killed and wounded after the successful assault. The cliff opposite Nilt, a very difficult position, was next scaled after "a little Dogra sepoy named Nagdu one night succeeded in climbing 1,200 feet up the cliff, and found a practicable path." Then the place was stormed by the men under the command of Captain Colin Mackenzie of the Seaforths; Lieutenant Manners-Smith led a little body of Kashmir troops up a cliff 1,000[Pg 227] feet high, and within two days Nagar was occupied, and the Hunza chief with Uzr Khan fled across the frontier. It is noteworthy that from the men of the district against whom we had fought, Colonel Durand raised the Hunza-Nagar levies who later fought so well for us.
The force consisted of 180 members of the 5th Goorkas, 400 Goorkas and Dogras from the Kashmir Bodyguard, 250 Dogras from the Kashmir Raga Pertab Regiment, 150 Punyali levies, and the commander's personal escort—20 men from the 20th Punjab Infantry. The only Europeans present were the officers. The forts of Nilt were attacked and captured after intense fighting, where Captain Aylmer and Colonel Durand were seriously injured, and in the moment of victory, command shifted from the latter. The location was captured in two hours, but due to a failure to advance, 4 British officers were lost, and nearly 40 men were killed or wounded following the successful assault. The cliff opposite Nilt, a very challenging position, was scaled next after "a little Dogra sepoy named Nagdu successfully climbed 1,200 feet up the cliff one night and found a possible path." Then the location was stormed by the men under Captain Colin Mackenzie of the Seaforths; Lieutenant Manners-Smith led a small group of Kashmir troops up a cliff 1,000 feet high, and within two days Nagar was occupied, leading to the Hunza chief, along with Uzr Khan, fleeing across the border. It's noteworthy that from the local men we fought against, Colonel Durand raised the Hunza-Nagar levies who later fought bravely for us.
In this little hard-fought campaign three Victoria Crosses were won, by Captain (now Major-General C. B.) Aylmer, Lieutenant (now Major) Boisragon, and Lieutenant (now Lieutenant-Colonel C. I. E.) Manners-Smith, while several of the native troops earned the Order of Merit for their gallantry and devotion.
In this small but hard-fought campaign, three Victoria Crosses were awarded to Captain (now Major-General C. B.) Aylmer, Lieutenant (now Major) Boisragon, and Lieutenant (now Lieutenant-Colonel C. I. E.) Manners-Smith, while several of the local troops received the Order of Merit for their bravery and dedication.
For this arduous expedition the I.G.S. Medal 1854, with bar for HUNZA 1891, was issued to those participants who had not already received the medal for other services. Those who possessed the medal received the bar only.
For this challenging expedition, the I.G.S. Medal 1854, with a bar for Hunza 1891, was awarded to participants who hadn't already received the medal for other services. Those who already had the medal only received the bar.
East and West Africa.—A great deal of fighting had been forced upon us by the African tribes, against whom expeditions or columns had been sent from 1887 to 1892. First against the Yonnie Tribe, when the coloured men of the 1st West India Regiment fought side by side with men from the crews of H.M.S. "Acorn," "Icarus," and "Rifleman," from November 13th, 1887, to January 2nd, 1888. Next an expedition had to be sent up the Gambia River, the men of H.M.S. "Swallow" composing the force which operated between December 29th, 1891, and February 5th, 1892. Then the 1st West India Regiment again took the field on March 8th, 1892, against Tambi, men of H.M.S. "Alecto," "Race," "Sparrow," "Thrust," and "Widgeon" co-operating, and in the same year the native troops took part in the expedition against Toniataba, and in the expedition against the Jebus. For these services a medal similar to that issued for the Ashantee War was granted on November 1st, 1892, but, as in the case of the Zulu War medal, dates upon the bars are the only indication of the particular service, or services, rendered. Three bars were sanctioned, 1887-8, 1891-2, and 1892, so that the last bar was issued for three different expeditions. This is known as the East and[Pg 228] West Africa medal, but it was not a distinct issue, for those who possessed the Ashantee medal were only given the bar or bars. The ribbon is the same as used for suspension with the Ashantee medal, and the names were either engraved or impressed on the edge of the medal.
East and West Africa.—A lot of fighting was forced upon us by the African tribes, against whom expeditions or columns were sent from 1887 to 1892. First, there was action against the Yonnie Tribe, where the soldiers of the 1st West India Regiment fought alongside men from the crews of H.M.S. "Acorn," "Icarus," and "Rifleman" from November 13, 1887, to January 2, 1888. Next, an expedition had to be launched up the Gambia River, consisting of the men from H.M.S. "Swallow," who operated between December 29, 1891, and February 5, 1892. Then, the 1st West India Regiment was back in action on March 8, 1892, against Tambi, with the support of men from H.M.S. "Alecto," "Race," "Sparrow," "Thrust," and "Widgeon." In the same year, native troops participated in the expedition against Toniataba and in the operation against the Jebus. For these contributions, a medal similar to the one awarded for the Ashantee War was issued on November 1, 1892, but, like the Zulu War medal, the dates on the bars are the only indication of the specific service or services rendered. Three bars were authorized: 1887-8, 1891-2, and 1892, so the last bar represented three different expeditions. This medal is known as the East and[Pg 228] West Africa medal, but it wasn’t a new issue; those who already had the Ashantee medal only received the bar or bars. The ribbon is the same as that used for suspension with the Ashantee medal, and the names were either engraved or stamped on the edge of the medal.
Central Africa Medal.—In 1895 a series of operations were found necessary in Central Africa, and to decorate the native troops engaged the same medal was awarded without bars. It was, however, suspended from a brown, white, and black ribbon, 1¾ in. wide, by means of a swivel ring, so that the ribbon was run through the ring as in the case of the Abyssinian medal. This slight distinction, and the issue of a new ribbon, constitutes the medal a distinct decoration, and those who had already received the West African medal were entitled to it. It, moreover, distinguishes the Central Africa medal from the East and West Africa medal, which again had name bars added for WITU 1890 to the crews of ten of H.M. ships; LIWONDI 1893 to 3 officers and 34 men of H.M.S. "Herald" and "Mosquito"; WITU AUGUST 1893 to 200 seamen and 36 marines; JUBA RIVER 1893 to 1 officer and 40 men of the "Blanche"; LAKE NYASSA 1893 to 100 Sikhs and parties of men from H.M.S. "Adventurer" and "Pioneer"; a bar inscribed 1893-94 was issued to those who took part in the operations against the Sofas from November 1893 to January 1894; GAMBIA 1894 was inscribed on the bar to 50 of the 1st W.I.R. and parties of seamen and marines from four of H.M. ships; BRASS RIVER 1895 to men of four of H.M. ships, and NIGER 1897 to the troops taking part in the expedition to Egbon, Bida, and Ilorin or garrisoning Fort Goldie and Lokoja from January 6th to February 25th, 1897. The bars are square and set somewhat far apart; the name and rating, etc., of the recipient impressed on the edge.
Central Africa Medal.—In 1895, a series of operations were deemed necessary in Central Africa, and to honor the native troops involved, the same medal was awarded without bars. However, it was hung from a brown, white, and black ribbon, 1¾ in. wide, using a swivel ring, allowing the ribbon to be threaded through the ring similar to the Abyssinian medal. This minor distinction, along with the introduction of a new ribbon, makes the medal a separate decoration, and those who had already received the West African medal were eligible for it. Additionally, it sets the Central Africa medal apart from the East and West Africa medal, which featured name bars for WITU 1890 to the crews of ten of H.M. ships; LIWONDI 1893 to 3 officers and 34 men of H.M.S. "Herald" and "Mosquito"; WITU August 1893 to 200 seamen and 36 marines; Juba River 1893 to 1 officer and 40 men of the "Blanche"; Lake Nyassa 1893 to 100 Sikhs and groups from H.M.S. "Adventurer" and "Pioneer"; a bar labeled 1893-94 was issued to those who participated in operations against the Sofas from November 1893 to January 1894; Gambia 1894 was inscribed on the bar for 50 of the 1st W.I.R. and groups of seamen and marines from four of H.M. ships; Brass River 1895 for men of four of H.M. ships, and NIGER 1897 for the troops involved in the expedition to Egbon, Bida, and Ilorin or garrisoning Fort Goldie and Lokoja from January 6th to February 25th, 1897. The bars are square and spaced apart, with the name and rank of the recipient engraved on the edge.
Between January 1894 and April 1898 a series of operations and expeditions was found necessary against various chiefs in British Central Africa, and for these a bar inscribed CENTRAL AFRICA 1894-1898 was added to[Pg 229] the Central Africa medal, which when issued in 1895 had a swivel ring instead of a clasp. When the bars were added in 1899 the straight-bar clasp with claw clutch—as used with the first issue of this medal, the Ashantee—replaced the swivel ring.
Between January 1894 and April 1898, a series of operations and expeditions became necessary against various chiefs in British Central Africa. For these, a bar inscribed Central Africa 1894-1898 was added to[Pg 229] the Central Africa medal, which had a swivel ring instead of a clasp when it was issued in 1895. When the bars were added in 1899, the straight-bar clasp with claw clutch—like the one used with the first issue of this medal, the Ashantee—replaced the swivel ring.
Ashanti, 1896.—In 1895 trouble in Ashantee necessitated the sending of a small force, comprising the 2nd Batt. of the West Yorkshire Regiment, and a composite battalion made up of 20 men of each of the three Guards Regiments, and the following eight regiments: 1st Yorkshire Light Infantry, 1st Leinster Regiment, 1st Northumberland Fusiliers, 2nd Royal Irish Fusiliers, 2nd Devons, 2nd Shropshire Light Infantry, 3rd Batt. Royal Rifles, 2nd Batt. Rifle Brigade, together with the necessary detachments of Artillery, Engineers, Army Service, Ordnance, and Medical Corps. For this campaign against King Prempeh, a very distinctive decoration was given: a St. Andrew's Cross bisects the corners of a four-pointed star, over which is a circular centre containing the Imperial crown surrounded by a plain band inscribed ASHANTI above, and 1896 below. On the back, in raised letters, is the inscription FROM THE QUEEN. The star is suspended from a yellow ribbon, with rather broad black stripes near the edges, by means of a ring; it was issued unnamed, but the Colonel of the Yorkshires had the name of each of his men and that of the regiment engraved upon their stars.
Ashanti, 1896.—In 1895, issues in Ashantee required sending a small force, consisting of the 2nd Battalion of the West Yorkshire Regiment and a combined battalion made up of 20 men from each of the three Guards Regiments, along with the following eight regiments: 1st Yorkshire Light Infantry, 1st Leinster Regiment, 1st Northumberland Fusiliers, 2nd Royal Irish Fusiliers, 2nd Devons, 2nd Shropshire Light Infantry, 3rd Battalion Royal Rifles, and 2nd Battalion Rifle Brigade, along with the necessary detachments of Artillery, Engineers, Army Service, Ordnance, and Medical Corps. For this campaign against King Prempeh, a unique decoration was awarded: a St. Andrew's Cross bisects the corners of a four-pointed star, with a circular center featuring the Imperial crown surrounded by a plain band inscribed ASHANTI above and 1896 below. On the back, in raised letters, it says FROM THE QUEEN. The star hangs from a yellow ribbon, with broad black stripes near the edges, attached by a ring; it was issued without names, but the Colonel of the Yorkshires had the name of each of his men and their regiment engraved on their stars.
West African Medal.—For their services against Mwele a number of men from four of H.M. ships were awarded the West African medal, but, instead of a bar, MWELE 1895-6 was impressed on the edge, on either side of the clasp claw, together with the name and ship of the recipient. Those already in possession of the medal had Mwele and the date engraved on the edge. The 24th and 26th Bombay Infantry were also engaged, and they likewise received the medal: the latter have the names, etc., engraved in slanting script like India 1895 medals. A bar for NIGER 1897 was issued later,[Pg 230] and in 1898 bars for BENIN 1897 were issued to men from nine of H.M. ships, and a bar for DAWKITA 1897 was also added for the members of the Gold Coast Constabulary who took part in the defence of Dawkita. In 1899 authority was given to add the bar for SIERRA LEONE 1898-99 to the East and West Africa medal for those engaged in the country between February 1898 and March 1899. Men of the West African Rifles and 1st West India Regiment were engaged, also some Royal Garrison Artillerymen. The name and date are arranged in two lines, and the bar is consequently rather wider than the others. The named edges are engraved in capital Roman letters, but some issued to Europeans are impressed. In 1900 it was decided to issue four more bars, and to revert to the use of dates instead of names; these bars cover 1896-8, 1897-8, 1898, and 1899. In the following year the bar inscribed 1896-99 was issued to those who had been employed in the northern parts of the Gold Coast, or in the hinterland of Lagos; later those who had been engaged in the Kadima and Munchi expeditions were awarded the medal and bar for 1900.
West African Medal.—For their service against Mwele, several men from four of H.M. ships were awarded the West African medal, but instead of a bar, MWELE 1895-1896 was engraved on the edge, on both sides of the clasp claw, along with the recipient's name and ship. Those who already had the medal had Mwele and the date engraved on the edge. The 24th and 26th Bombay Infantry were also involved and received the medal as well; the latter had their names, etc., engraved in slanted script similar to the India 1895 medals. A bar for NIGER 1897 was issued later,[Pg 230] and in 1898, bars for Benin, 1897 were issued to men from nine of H.M. ships, along with a bar for DAWKITA 1897 that was given to members of the Gold Coast Constabulary who participated in the defense of Dawkita. In 1899, permission was granted to add the bar for Sierra Leone 1898-99 to the East and West Africa medal for those engaged in the region from February 1898 to March 1899. Members of the West African Rifles and 1st West India Regiment participated, along with some Royal Garrison Artillerymen. The name and date are arranged in two lines, making the bar relatively wider than the others. The named edges are engraved in capital Roman letters, but some issued to Europeans are impressed. In 1900, it was decided to issue four more bars and to return to the use of dates instead of names; these bars cover 1896-8, 1897-8, 1898, and 1899. The following year, the bar inscribed 1896-99 was given to those who had served in the northern parts of the Gold Coast or in the hinterland of Lagos; later, those involved in the Kadima and Munchi expeditions were awarded the medal and bar for 1900.
The Relief of Chitral.—Early in 1895 the war cloud was gathering in Chitral; the Nizam-ul-Mulk, the nominee of the British, had been shot at the instigation of his supposedly idiot half-brother, Amir-ul-Mulk, and the Indian Government was in no great haste to recognise the succession attained in such a way, especially as the Mehtar indulged in the most savagely murderous deeds. Later came the news to Surgeon-Major (afterwards Sir George) Robertson that on the night of January 22nd Umra Khan had crossed the Lowari Pass into Chitral territory with 3,000 or 4,000 followers, demanding that Amir-ul-Mulk should join him. Then Robertson made up his mind to reach Chitral, and occupy the fort in the valley, as speedily as possible. The little force pressed on, many an unfortunate man getting frost-bitten during the terribly cold nights. An ultimatum was then sent to Umra Khan, indicating that he must at once leave Chitralis territory. Of[Pg 231] course he did not; one or two unfortunate affairs happened—the disaster at Mastuj and at the Koragh defile, where a number of the surviving Sikhs, after existing without food or water for seven or eight days, were cajoled, by the promise of life, from the little sangars in which they had taken refuge, and then cruelly murdered. The gallant defence of Rashun under Edwardes and Fowler, until they were captured by the cunning of Muhammad Isa, must be mentioned en passant.
The Relief of Chitral.—In early 1895, tensions were rising in Chitral; the Nizam-ul-Mulk, the British-appointed leader, had been assassinated at the behest of his supposedly foolish half-brother, Amir-ul-Mulk, and the Indian Government was not in a rush to acknowledge a succession achieved in such a brutal manner, especially since the Mehtar was committing horrific acts of violence. Later, Surgeon-Major (later Sir George) Robertson learned that on the night of January 22nd Umra Khan had crossed the Lowari Pass into Chitral with 3,000 to 4,000 supporters, demanding that Amir-ul-Mulk join him. Robertson decided to get to Chitral and take control of the fort in the valley as quickly as possible. The small force pushed forward, with many soldiers suffering from frostbite in the bitterly cold nights. An ultimatum was then sent to Umra Khan, stating that he must immediately leave Chitral territory. Naturally, he did not comply; there were one or two tragic incidents—the disaster at Mastuj and the Koragh defile, where several surviving Sikhs, having gone without food or water for seven or eight days, were lured from their makeshift shelters with promises of safety, only to be ruthlessly killed. The brave defense of Rashun by Edwardes and Fowler, until they were captured through the cleverness of Muhammad Isa, should be noted en passant.
On March 27th the famous march to Chitral began, and to join up with the force marching from India Colonel J. G. Kelly set out with his little force of 400 of the 32nd Pioneers and 40 Kashmir Sappers, with two mountain guns, from Gupis. Laboriously climbing the hill tracks, a foot deep in snow, until almost snowblind, his men reached Ghizr, 10,000 feet above sea-level, where a body of Hunza-Nagar levies were encamped. These he added to his force; then Kelly endeavoured to push through the great carpet of snow 3 feet thick. It was of no avail, for the pitiless snow blinded his men, and he had to return to Ghizr until it stopped, which it did on April 3rd. Of the heroic march of these men, of the difficulties they faced and undauntedly overcame, one is tempted to write at great length, but Sir George Robertson does fitting justice to this party of his rescuers in "Chitral, the Story of a Minor Siege."
On March 27th, the famous march to Chitral began, and to connect with the force coming from India, Colonel J. G. Kelly set out with his small group of 400 from the 32nd Pioneers and 40 Kashmir Sappers, along with two mountain guns, from Gupis. They laboriously climbed the hill tracks, a foot deep in snow, until they were almost snowblind. His men reached Ghizr, 10,000 feet above sea level, where a group of Hunza-Nagar levies were camped. He added them to his force, then Kelly tried to push through the thick carpet of snow that was 3 feet deep. It was no use, as the relentless snow blinded his men, and he had to return to Ghizr until it cleared, which it did on April 3rd. One could easily write extensively about the heroic march of these men, the challenges they faced and fearlessly overcame, but Sir George Robertson does a great job of honoring this group of rescuers in "Chitral, the Story of a Minor Siege."
The main force from India under Major-General Sir Robert Low advanced across the Malakund Pass after a smart fight on April 3rd, in which the Gordons and Scottish Borderers, "racing for the honour of their regiments ... swarmed over the Dechoities at a wonderful speed, and breathless but triumphant had crowned the pass by 2 o'clock, the 60th Rifles being close up." Here the British force lost 11 killed, and 47 wounded. The Jandol Valley was attacked on April 17th, and occupied next day. On the 19th General Gatacre started with a couple of battalions and some guns for[Pg 232] Dir and Chitral; pushing across the rugged Janbatai ridge, he learned that the garrison of Chitral was almost at its last gasp—and five days' march lay between him and his goal! He therefore asked permission from Sir Robert Low to make a dash for Chitral with 500 of the Buffs, a few native sappers, and a couple of mountain guns; but when sanction was obtained it was learned that Kelly had reached Chitral, and that there was no need to hurry.
The main force from India, led by Major-General Sir Robert Low, moved through the Malakund Pass after a fierce battle on April 3rd. In that fight, the Gordons and Scottish Borderers, "racing for the honor of their regiments... swarmed over the Dechoities at incredible speed, and out of breath but victorious, they took the pass by 2 o'clock, with the 60th Rifles close behind." The British force lost 11 men killed and 47 wounded. The Jandol Valley was attacked on April 17th and occupied the next day. On the 19th, General Gatacre set out with a couple of battalions and some guns for[Pg 232] Dir and Chitral. As he crossed the rugged Janbatai ridge, he learned that the garrison of Chitral was nearly out of resources—and there were five days' march between him and his destination! He then asked Sir Robert Low for permission to rush to Chitral with 500 of the Buffs, a few native sappers, and a couple of mountain guns; but once he got the go-ahead, he discovered that Kelly had already reached Chitral, so there was no need to hurry.
The Defence of Chitral.—Meanwhile Surgeon-Major Robertson had "directed" by a gesture Amir-ul-Mulk to leave the Mehtarship, and had raised in his stead his little brother Shuja-ul-Mulk. Then on March 3rd an unfortunate and desperate fight took place, in which Surgeon Whitchurch earned the V.C. by one of the most unselfish actions on record, and some devoted Goorkas gained the Order of Merit for the rescue of a mortally wounded officer. On March 4th the siege began in earnest, and preparations were made for the defence. Within the walls were 550 persons to be fed; to defend the place about "340 riflemen, but, excluding those in hospital, only 83 Sikhs—good shots, and trustworthy soldiers," and 52 Chitralis. How well they held the fort until the enemy melted away on April 18th, 1895, is one of the glorious records of British pluck and Indian devotion and gallantry. During the siege, and the reconnaissance of March 3rd, 41 were killed, and 62 wounded, the latter including the commander.
The Defence of Chitral.—Meanwhile, Surgeon-Major Robertson gestured for Amir-ul-Mulk to step down from the Mehtarship and appointed his younger brother Shuja-ul-Mulk instead. Then on March 3rd, a tragic and desperate battle unfolded, during which Surgeon Whitchurch earned the Victoria Cross for one of the most selfless acts recorded, and some brave Goorkas received the Order of Merit for rescuing a mortally wounded officer. On March 4th, the siege began in earnest, and preparations were made for the defense. Within the walls, there were 550 people to feed; to hold the position, there were about 340 riflemen, but excluding those in the hospital, only 83 Sikhs—skilled marksmen and reliable soldiers—and 52 Chitralis. The determination with which they held the fort until the enemy retreated on April 18th, 1895, is a remarkable testament to British courage and Indian loyalty and bravery. During the siege and the reconnaissance on March 3rd, 41 were killed, and 62 were wounded, including the commander.
The following took part in the defence: Sir George Robertson, K.C., S.I., and 6 officers; Surgeon-Captain H. F. Whitchurch, 90 of the 14th Sikhs, 300 of the 16th Punjabis, and 4th Kashmir Rifles, assisted by about 40 servants and followers, who likewise received the India Medal 1895, with bar for the DEFENCE OF CHITRAL 1895. It is noteworthy that the new medal is thicker than the one it replaced, and weighs 1¼ oz. instead of 1 oz.
The following were involved in the defense: Sir George Robertson, K.C., S.I., and 6 officers; Surgeon-Captain H. F. Whitchurch, 90 from the 14th Sikhs, 300 from the 16th Punjabis, and the 4th Kashmir Rifles, helped by around 40 servants and followers, who also received the India Medal 1895, with a bar for the Defense of Chitral 1895. It's worth mentioning that the new medal is thicker than the one it replaced and weighs 1¼ oz. instead of 1 oz.
The India Medal, 1895.—For the Defence and Relief of Chitral it was decided to issue a new India medal, and[Pg 233] as a result that illustrated facing page 192 was designed "to commemorate the military operations in, and on the frontier of, India, and to be in future known as 'The India Medal 1895.'" The bars are the same in design as those used on the old India medal.
The India Medal, 1895.—To honor the Defense and Relief of Chitral, a new India medal was created, and[Pg 233] the illustrated page 192 was designed "to commemorate the military operations in, and on the frontier of, India, and will henceforth be known as 'The India Medal 1895.'" The bars have the same design as those used on the old India medal.
In 1898 another bar was awarded to those who had taken part in the operations on the North-West Frontier between June 10th, 1897, and April 6th, 1898, and to those who formed the Tirah expeditionary force which proceeded beyond Kohat or Peshawar between October 1897 and April 6th, 1898. This bar was inscribed PUNJAB FRONTIER 1897-8. In 1897, as a result of the efforts of fanatical priests, the hillmen in the Tochi Valley made an attack upon a British officer and his escort, and then, following an outbreak in the Swat Valley, Malakand was attacked by thousands of the natives, but through the gallant efforts of the little garrison the place was held until the arrival of the relieving force. The troops who took part in the defence and relief of Malakand and Chakdara received the bar inscribed MALAKAND 1897. During the same year it was found necessary to again take up arms against the Pathan Meeranzies, and the troops engaged received the bar for SAMANA 1897. In August 1897 the Afridis, Mohmands, and Orakzais combined against the British, and troops were sent to the frontier. That portion of the Tirah expeditionary force which was also engaged beyond Kohat and Peshawar, likewise the Kurram Movable Column and the Peshawar Column, between October 1897 and the early part of April 1898, received the bar for the TIRAH 1897-98. This campaign is made famous by the storming of the heights of Dargai, and the coolness of Piper Findlater of the Gordon Highlanders, who continued to play his pipes when a bullet had crippled him. He was awarded the V.C.
In 1898, another bar was given to those who participated in the operations on the North-West Frontier from June 10, 1897, to April 6, 1898, as well as to those who were part of the Tirah expeditionary force that moved beyond Kohat or Peshawar between October 1897 and April 6, 1898. This bar was marked with PUNJAB FRONTIER 1897-98. In 1897, due to the actions of fanatic priests, the hillmen in the Tochi Valley attacked a British officer and his escort. Following an outbreak in the Swat Valley, Malakand was assaulted by thousands of locals, but thanks to the brave efforts of the small garrison, the location was held until the arrival of the relief force. The troops who defended and relieved Malakand and Chakdara received the bar inscribed MALAKAND 1897. That same year, it became necessary to take up arms again against the Pathan Meeranzies, and those troops received the bar for SAMANA 1897. In August 1897, the Afridis, Mohmands, and Orakzais united against the British, prompting the deployment of troops to the frontier. The segment of the Tirah expeditionary force that also operated beyond Kohat and Peshawar, along with the Kurram Movable Column and the Peshawar Column, between October 1897 and early April 1898, received the bar for TIRAH 1897-98. This campaign is renowned for the assault on the heights of Dargai and the composure of Piper Findlater from the Gordon Highlanders, who continued to play his pipes even after being shot. He was awarded the V.C.
The following troops were engaged in the various forces employed: the Mohmand Field Force comprised, in the 1st Brigade, 2nd Batt. Argyll and Sutherland Highlanders; 1st Punjab Infantry; 1st Sikhs; 33rd[Pg 234] Bengal Infantry; 2nd Company of the Bengal Sappers and Miners; 6 guns of the Peshawar Battery, and a detachment of the Hospital Staff. The 2nd Brigade included the Somerset Light Infantry; 3rd Batt. Rifle Brigade; 6th Bengal Infantry; 14th Sikhs; 25th Punjab Infantry; a squadron of the 1st Punjab Cavalry; 13th Bengal Lancers; 4 guns of the 6th Bombay Mountain Battery, and 51st Field Battery.
The following troops were involved in the different forces deployed: the Mohmand Field Force consisted of, in the 1st Brigade, the 2nd Battalion Argyll and Sutherland Highlanders; the 1st Punjab Infantry; the 1st Sikhs; the 33rd Bengal Infantry; the 2nd Company of the Bengal Sappers and Miners; 6 guns from the Peshawar Battery, and a detachment of the Hospital Staff. The 2nd Brigade included the Somerset Light Infantry; the 3rd Battalion Rifle Brigade; the 6th Bengal Infantry; the 14th Sikhs; the 25th Punjab Infantry; a squadron from the 1st Punjab Cavalry; the 13th Bengal Lancers; 4 guns from the 6th Bombay Mountain Battery, and the 51st Field Battery.
The Malakand Field Force comprised, in the 1st Brigade, 1st Somerset Light Infantry; 2nd Batt. 1st Goorkas, and the 21st Bengal Infantry. The 2nd Brigade included 2nd Oxfordshire Light Infantry; a regiment of the Imperial Service Troops; 9th Goorkas; 37th Bengal Infantry; 28th Bombay Infantry; two squadrons 11th Bengal Lancers, and the 13th Bengal Lancers; 3rd Mountain Battery of the R.A.; No. 5 Bombay Mountain Battery; No. 8 Bengal Mountain Battery; No. 4 and No. 5 Companies Bengal Sappers and Miners. The 3rd Brigade consisted of 1st Royal West Surrey Regiment; two squadrons of the 4th Dragoon Guards and 11th Hussars; K Battery Royal Horse Artillery; No. 1 Mountain Battery R.A.; 22nd and 39th Bengal Infantry; No. 3 Company Bengal Sappers and Miners; two squadrons of the 11th Bengal Lancers.
The Malakand Field Force included, in the 1st Brigade, the 1st Somerset Light Infantry; 2nd Battalion 1st Goorkas, and the 21st Bengal Infantry. The 2nd Brigade featured the 2nd Oxfordshire Light Infantry; a regiment of Imperial Service Troops; 9th Goorkas; 37th Bengal Infantry; 28th Bombay Infantry; two squadrons of the 11th Bengal Lancers, and the 13th Bengal Lancers; the 3rd Mountain Battery of the Royal Artillery; No. 5 Bombay Mountain Battery; No. 8 Bengal Mountain Battery; and No. 4 and No. 5 Companies of Bengal Sappers and Miners. The 3rd Brigade was made up of the 1st Royal West Surrey Regiment; two squadrons of the 4th Dragoon Guards and 11th Hussars; K Battery Royal Horse Artillery; No. 1 Mountain Battery Royal Artillery; 22nd and 39th Bengal Infantry; No. 3 Company Bengal Sappers and Miners; and two squadrons of the 11th Bengal Lancers.
The Samana Force comprised, in the 1st Brigade, 1st Royal West Kent Regiment; 24th and 31st Punjab Infantry; 45th Sikhs. Included in the 2nd Brigade were 1st Buffs; 35th Sikhs; 38th Dogras; Guides Infantry; two squadrons 11th Bengal Lancers; 5th Bengal Mounted Battery; 5th Company of Bengal Sappers and Miners. The 3rd Brigade was made up of 1st Batt. Queen's; No. 1 Battery R.A.; 22nd Punjab Infantry; 38th Bengal Infantry; 39th Gahrwalis; 3rd Company Bengal Sappers and Miners; half company of Madras Sappers; a squadron of the 10th Bengal Lancers, and 2 of the 11th.
The Samana Force included, in the 1st Brigade, the 1st Royal West Kent Regiment; the 24th and 31st Punjab Infantry; and the 45th Sikhs. In the 2nd Brigade were the 1st Buffs; the 35th Sikhs; the 38th Dogras; the Guides Infantry; two squadrons of the 11th Bengal Lancers; the 5th Bengal Mounted Battery; and the 5th Company of Bengal Sappers and Miners. The 3rd Brigade consisted of the 1st Battalion of the Queen's; No. 1 Battery R.A.; the 22nd Punjab Infantry; the 38th Bengal Infantry; the 39th Gahrwalis; the 3rd Company of Bengal Sappers and Miners; half a company of Madras Sappers; one squadron of the 10th Bengal Lancers; and two of the 11th.
The Tirah Field Force was made up of two divisions of two brigades each. The 1st Division comprised:[Pg 235] 2nd Devons; 2nd Yorkshire Regiment; 1st Royal West Surrey; 2nd Royal Irish; No. 1 Mountain Battery R.A.; 2nd Batt. 1st Goorkas; 2nd Batt. 4th Goorkas; 3rd Sikh Infantry; 28th Bombay Infantry; 30th Bengal Infantry; Kapurthala Infantry; two squadrons of 18th Bengal Cavalry; No. 1 Kohat Mountain Battery; No. 2 Derajat Mountain Battery; 3rd and 4th Companies Bombay Sappers and Miners; Maler Kotla Sappers. The 2nd Division included: 1st Gordons; 1st Dorsets; 1st Northamptons; 2nd King's Own Borderers; Nos. 8 and 9 Batteries R.A.; 1st Batt. 2nd and 3rd Goorkas; 36th Bengal Infantry; Jhind Infantry; 21st Madras Infantry; two squadrons 18th Bengal Lancers; No. 4 Company Madras Sappers and Miners; Sirmoor Sappers.
The Tirah Field Force consisted of two divisions, each with two brigades. The 1st Division included: [Pg 235] 2nd Devons; 2nd Yorkshire Regiment; 1st Royal West Surrey; 2nd Royal Irish; No. 1 Mountain Battery R.A.; 2nd Batt. 1st Goorkas; 2nd Batt. 4th Goorkas; 3rd Sikh Infantry; 28th Bombay Infantry; 30th Bengal Infantry; Kapurthala Infantry; two squadrons of 18th Bengal Cavalry; No. 1 Kohat Mountain Battery; No. 2 Derajat Mountain Battery; 3rd and 4th Companies Bombay Sappers and Miners; Maler Kotla Sappers. The 2nd Division included: 1st Gordons; 1st Dorsets; 1st Northamptons; 2nd King's Own Borderers; Nos. 8 and 9 Batteries R.A.; 1st Batt. 2nd and 3rd Goorkas; 36th Bengal Infantry; Jhind Infantry; 21st Madras Infantry; two squadrons of 18th Bengal Lancers; No. 4 Company Madras Sappers and Miners; Sirmoor Sappers.
The lines of communication were kept by the 22nd and 39th Bengal Infantry; 2nd Batt. 2nd Goorkas; 2nd Punjab Infantry; 3rd Bengal Cavalry; Jeypore and Gwalior Transport Corps.
The lines of communication were maintained by the 22nd and 39th Bengal Infantry, 2nd Battalion 2nd Gurkhas, 2nd Punjab Infantry, 3rd Bengal Cavalry, Jeypore, and Gwalior Transport Corps.
The Kurram Column consisted of: 4 guns 3rd Field Battery R.A.; 12th Bengal Infantry; Nabha Infantry; Central India Horse; 6th Bengal Cavalry.
The Kurram Column included: 4 guns from the 3rd Field Battery R.A.; 12th Bengal Infantry; Nabha Infantry; Central India Horse; 6th Bengal Cavalry.
The Peshawar Column was composed of: 2nd Royal Inniskilling Fusiliers; 2nd Oxford Light Infantry; 3rd Mountain Battery R.A.; 57th Field Battery R.A.; 9th and 45th Bengal Infantry; 9th Bengal Cavalry; No. 5 Company Bengal Sappers and Miners.
The Peshawar Column was made up of: 2nd Royal Inniskilling Fusiliers; 2nd Oxford Light Infantry; 3rd Mountain Battery R.A.; 57th Field Battery R.A.; 9th and 45th Bengal Infantry; 9th Bengal Cavalry; No. 5 Company Bengal Sappers and Miners.
In reserve was the Rawul Pindi Brigade, composed of: 2nd Yorkshire Light Infantry; 1st Duke of Cornwall's Light Infantry; 2nd Hyderabad Infantry; 27th Bombay Infantry, and the Jodhphur Lancers.
In reserve was the Rawul Pindi Brigade, made up of: 2nd Yorkshire Light Infantry; 1st Duke of Cornwall's Light Infantry; 2nd Hyderabad Infantry; 27th Bombay Infantry, and the Jodhpur Lancers.
Matabeleland, 1893.—The first Matabele War, which broke out in 1893, will always be remembered for the brave but unavailing stand made by Major Wilson's little band at the Shangani River. Then Lobengula was defeated, and things settled down—as they generally did in South Africa—for a time, for within three years a second Matabele War had to be contended with until by December 31st, 1896, the natives in Rhodesia[Pg 236] had been quietened again. In this latter war Prince Alexander of Teck took part with his regiment, the 7th Hussars.
Matabeleland, 1893.—The first Matabele War, which started in 1893, will always be remembered for the courageous yet unsuccessful stand made by Major Wilson's small group at the Shangani River. After that, Lobengula was defeated, and things calmed down—as they usually did in South Africa—for a while, but within three years a second Matabele War emerged, and by December 31st, 1896, the locals in Rhodesia[Pg 236] had been pacified once again. In this second war, Prince Alexander of Teck participated with his regiment, the 7th Hussars.
Bechuanaland.—At Christmastide a rebellion broke out at Pokwani in Bechuanaland, about 40 miles north of Kimberley. The Cape Mounted Police and the Diamond Fields Police set out on Christmas Eve to deal with the recalcitrant natives, and after manœuvring in the pouring rain all Christmas Day, the chief's stronghold was attacked and carried on Boxing Day, and the rising was entirely crushed by December 27th, 1896. For this short campaign the Cape Government, with the approval of the Home Government, issued a medal in 1900 to those who had participated in this and other campaigns against the natives, and bars were issued for service in Basutoland in 1880-1, and Transkei, 1880-1, including Griqualand East and Tembuland.
Bechuanaland.—During Christmas, a rebellion broke out at Pokwani in Bechuanaland, about 40 miles north of Kimberley. The Cape Mounted Police and the Diamond Fields Police set out on Christmas Eve to deal with the defiant locals, and after maneuvering in the pouring rain all Christmas Day, they attacked the chief's stronghold on Boxing Day and fully crushed the uprising by December 27th, 1896. For this brief campaign, the Cape Government, with the approval of the Home Government, issued a medal in 1900 to those who participated in this and other campaigns against the locals, along with bars for service in Basutoland in 1880-1 and Transkei, 1880-1, including Griqualand East and Tembuland.
The Cape of Good Hope General Service Medal.—The medal awarded is entitled the Cape of Good Hope General Service Medal; it is 17∕16 in. in diameter, and bears on the obverse the bust of Queen Victoria facing left, with the inscription VICTORIA REGINA ET IMPERATRIX. On the reverse are the arms of Cape Colony, and the motto SPES CONA. It is suspended from a 1¼ in. blue ribbon, with a broad yellow stripe down the centre. The bars issued with the medal are, reading upwards from the medal, BASUTOLAND, TRANSKEI, BECHUANALAND. The only soldiers connected with the Imperial forces who received this medal with any of the bars were officers serving with the Colonial troops. A medal with the single bar "Transkei" has realised £3 2s. 6d. in the sale-room; with two bars, "Transkei" and "Basutoland," £2 15s. The medals are generally engraved in rather large square Roman capitals.
The Cape of Good Hope General Service Medal.—The medal awarded is called the Cape of Good Hope General Service Medal; it has a diameter of 17∕16 inches and features on the front the bust of Queen Victoria facing left, with the inscription QUEEN VICTORIA AND EMPRESS. On the back are the arms of Cape Colony and the motto SPES CONA. It hangs from a 1¼ inch blue ribbon with a wide yellow stripe down the center. The bars issued with the medal, listed from the medal upwards, are Basin Land, TRANSKEI, Botswana. The only soldiers associated with the Imperial forces who received this medal with any of the bars were officers serving with the Colonial troops. A medal with the single bar "Transkei" has sold for £3 2s. 6d. in an auction; with two bars, "Transkei" and "Basutoland," it fetched £2 15s. The medals are typically engraved in fairly large square Roman capitals.
The Dongola Expedition.—The Dongola expedition took place in 1896, and for this the Khedive of Egypt ordered a medal to be issued to all the British and native troops who served at, and south of, Sarras between March 30th and September 23rd, 1896, and[Pg 237] at Suakin under Brigadier-General Egerton during the same period. Two bars were awarded; one inscribed HAFIR for services south of Fareia on September 29th, and the other FIRKET for those engaged south of Akashen on June 7th, each name being inscribed in English and Arabic on a single bar. The medal bears on the reverse an oval shield, charged with three crescents, and stars above, backed by a trophy of arms and flags, and a panel below bearing an inscription in Arabic reading "The recovery of the Sudan, 1314 H." On the obverse is the cypher of the Khedive Abbas Hilmi II, and 1314 H.—A.D. 1897. It is suspended from an orange-coloured watered ribbon, with a broad blue stripe down the centre, by means of a straight clasp. The medal was issued unnamed; bronze medals without bars were issued to camp followers and non-combatants. This being a foreign decoration it was necessary for Queen Victoria to give her troops permission to wear the medal. The first British regiment to receive it was the 1st Batt. North Staffordshires. Later the following regiments received the medal without bars, which were added afterwards: 1st Seaforth and Cameron Highlanders; half a battalion of the 1st Lincolns; 21st Lancers; a detachment of the 16th Company Eastern Division R.A.; 32nd Field Battery R.A.; 2nd Company Royal Engineers. To those who took part in the operations at and about Kerma, on the Nile, in 1897, the Khedive's medal was given with a bar inscribed SUDAN 1897, and to those who were engaged at and near Assouan and Abu-Hamed the medal with bar for ABU-HAMED was awarded; the bars only being issued to those already in possession of the medal.
The Dongola Expedition.—The Dongola expedition happened in 1896, and for this, the Khedive of Egypt ordered a medal to be issued to all British and local troops who served at or south of Sarras from March 30th to September 23rd, 1896, and[Pg 237] at Suakin under Brigadier-General Egerton during the same time. Two bars were awarded; one marked HAFIR for services south of Fareia on September 29th, and the other FIRKET for those involved south of Akashen on June 7th, with each name shown in English and Arabic on a single bar. The medal has an oval shield on the back, featuring three crescents and stars above, backed by a trophy of arms and flags, and a panel below with an Arabic inscription reading "The recovery of the Sudan, 1314 H." On the front is the cypher of Khedive Abbas Hilmi II, along with 1314 H.—1897 A.D.. It hangs from an orange-colored watered ribbon with a broad blue stripe down the center, held by a straight clasp. The medal was issued unnamed; bronze medals without bars were given to camp followers and non-combatants. Since this was a foreign decoration, Queen Victoria had to give her troops permission to wear the medal. The first British regiment to receive it was the 1st Batt. North Staffordshires. Later, the following regiments received the medal without bars, which were added later: 1st Seaforth and Cameron Highlanders; half a battalion of the 1st Lincolns; 21st Lancers; a detachment of the 16th Company Eastern Division R.A.; 32nd Field Battery R.A.; 2nd Company Royal Engineers. Those who participated in the operations at and around Kerma, on the Nile, in 1897, were awarded the Khedive's medal with a bar marked Sudan 1897, and those involved at and near Assouan and Abu-Hamed received the medal with the bar for ABU-HAMED; the bars were only given to those who already had the medal.
Matabeleland, 1893, and Rhodesia, 1896.—In 1896 Queen Victoria authorised the granting of a medal by the British South Africa Company to its own forces and details from British regiments and the local Mounted Rifles and Police. All who took part in hostilities between October 16th and Christmas Eve 1893 were[Pg 238] awarded the medal for MATABELELAND, and those only of the Queen's officers who had received permission to take part in the operations were allowed to accept and wear the medal. It is 17∕16 in. in diameter, and has on the reverse a representation of the British lion boldly charging, though wounded in the chest with an assegai. In the exergue, in tall thin Roman capitals, is BRITISH SOUTH AFRICA COMPANY, and above either MATABELELAND 1893 or RHODESIA 1896. On the obverse is a rather poor effigy of Queen Victoria. The suspender is very ornate, the rose, shamrock, and thistle having been used in a weak sort of manner to decorate it. This clasp or suspender is the most unsuitable and least beautiful of any in the whole series. The ribbon, 1-1\4 in. wide, is composed of three blue and four yellow stripes. It is the first instance of a chartered company being authorised to award a medal since the H.E.I. Co. gave the Mutiny medal. A bar for Rhodesia 1896 was given to those already in possession of the medal. The bar for MASHONALAND 1897 was added the following year, but those who did not possess the medal were awarded one with the name and date on the reverse as explained above. In this campaign the only Imperial troops employed were detachments of the 2nd Hampshires and the 7th Hussars.
Matabeleland, 1893, and Rhodesia, 1896.—In 1896, Queen Victoria approved the awarding of a medal by the British South Africa Company to its own forces, along with details from British regiments and the local Mounted Rifles and Police. Everyone who participated in the hostilities from October 16th to Christmas Eve 1893 was[Pg 238] awarded the MATABELELAND medal, and only those Queen's officers who had received permission to join the operations were allowed to accept and wear it. The medal is 17∕16 inches in diameter and features a depiction of the British lion boldly charging on the reverse, despite being wounded in the chest by an assegai. In the exergue, in tall thin Roman capitals, is British South Africa Company, and above that, either MATABELELAND 1893 or RHODESIA 1896. The front displays a rather poor likeness of Queen Victoria. The suspender is quite ornate, with the rose, shamrock, and thistle used decoratively in a rather lackluster manner. This clasp or suspender is considered the least suitable and least attractive of any in the entire series. The ribbon, 1-1\4 inches wide, consists of three blue and four yellow stripes. This was the first case of a chartered company being authorized to award a medal since the H.E.I. Co. presented the Mutiny medal. A bar for Rhodesia 1896 was given to those who already had the medal. The bar for Mashonaland 1897 was added the following year, but those who did not have the medal received one with the name and date on the reverse as noted above. In this campaign, the only Imperial troops involved were detachments from the 2nd Hampshires and the 7th Hussars.
Regiments Engaged.—Among those who received the medal for Matabeleland were a company of the 2nd W. Riding Regiment; 1 officer and 18 men of the 1st Batt. "Black Watch"; 3 men of the 2nd York and Lancaster Regiment; a detachment of the 3rd Dragoon Guards; Cape Mounted Rifles and British Bechuanaland Police. Those entitled to wear the medal for services in Rhodesia between March 24th and December 31st, 1896, were details of the 2nd, 3rd, and 4th Royal Rifles; 2nd and 4th Rifle Brigade; 1st Royal Irish; 1st Royal Dublin Fusiliers; 2nd Royal Irish Fusiliers; 1st Derbys; 1st Leicesters; 2nd Norfolks; 2nd Hampshires; 2nd Royal West Kent; 2nd W. Riding Regiment; 2nd York and Lancasters;[Pg 239] 24th, 25th, and 26th Western Division Royal Artillery; Army Ordnance and Army Service Corps. The 7th Hussars was the only cavalry regiment employed.
Regiments Engaged.—Among those who received the medal for Matabeleland were a company of the 2nd W. Riding Regiment; 1 officer and 18 men from the 1st Batt. "Black Watch"; 3 men from the 2nd York and Lancaster Regiment; a detachment of the 3rd Dragoon Guards; Cape Mounted Rifles and British Bechuanaland Police. Those eligible to wear the medal for their service in Rhodesia between March 24th and December 31st, 1896, included details from the 2nd, 3rd, and 4th Royal Rifles; 2nd and 4th Rifle Brigade; 1st Royal Irish; 1st Royal Dublin Fusiliers; 2nd Royal Irish Fusiliers; 1st Derbys; 1st Leicesters; 2nd Norfolks; 2nd Hampshires; 2nd Royal West Kent; 2nd W. Riding Regiment; 2nd York and Lancasters;[Pg 239] 24th, 25th, and 26th Western Division Royal Artillery; Army Ordnance and Army Service Corps. The 7th Hussars was the only cavalry regiment involved.
THE SUDAN
The battles of Toski in 1889, or Tokar in 1890, did not settle the unrest in Egypt. It smouldered and again broke into serious flame in 1897. Thanks, however, to the admirable organisation of the Egyptian army by Earl (then Sir Herbert) Kitchener, and the prompt measures which he took to deal with the Dervishes, the British flag and the Egyptian crescent soon flew over what remained of the Residency of Khartoum. Before, however, this was achieved the battles of the Atbara and Omdurman had to be fought, and for these bars bearing the legends THE ATBARA and KHARTOUM were issued with the medal to those who took part in the fights.
The battles of Toski in 1889 and Tokar in 1890 didn’t resolve the unrest in Egypt. It simmered and flared up again in 1897. However, thanks to the excellent organization of the Egyptian army by Earl (then Sir Herbert) Kitchener, and the quick actions he took to confront the Dervishes, the British flag and the Egyptian crescent soon flew over what was left of the Residency of Khartoum. Before this could happen, though, the battles of the Atbara and Omdurman had to be fought, and for these conflicts, bars inscribed with the names The Atbara and KHARTOUM were awarded along with the medal to those who participated in the fights.
The Atbara.—The battle of the Atbara was fought on the morning of Good Friday 1898, the attack of the Anglo-Egyptian army of about 12,000 men being made at sunrise after a night march, during which the troops had plodded across the desert from Umdabieh in brilliant moonlight; they halted just before 5 o'clock for a rest, during which they shiveringly discussed the prospects of the battle, for if the days are scorching in the Sudan, the nights are icily cold. Then the squares formed, and the army marched forward to battle. At first the artillery played upon Mahmud's camp, but the Dervishes seemed to take little heed of it, for it is said it was fully half an hour before they began to reply with their rifles. Then at 7.30 a.m. the great guns stopped; the bugles rang out "Advance!" and as the pipers played "The March of the Cameron Men," the infantry advanced to the attack. Again the enemy took little heed, until the Cameron men reached the top of the ridge overlooking the zareba, and then the rifles of the Dervishes rang out, but they could not stop the Camerons' onslaught; followed by the Lincolns, the Seaforths, and the Warwicks, they went[Pg 240] clean through the zareba. General Gatacre and Private Cross of the Camerons distinguished themselves by being the first in. The onslaught of the British and Sudanese was irresistible, and whoever could of the fighting Dervishes rushed riverward. Osman Digna again decamped, but a number of other leaders, including Mahmud, were either killed or taken prisoners; 4,000 Dervishes were taken prisoners, and 3,000 killed. The Camerons lost Captain Finlay and Urquhart, and the Seaforths Lieutenant Gore, the three Scots officers falling as they led their men into the zareba; 18 men were also killed, and 88 wounded. Fourteen native officers were killed, while the native regiments also lost 50 killed, and 319 wounded. The Sirdar at the conclusion of the battle highly complimented the Colonel of the Camerons upon the steadiness of their advance in face of the fire which greeted them at the zareba.
The Atbara.—The battle of the Atbara took place on the morning of Good Friday in 1898, when the Anglo-Egyptian army, consisting of about 12,000 soldiers, launched their attack at sunrise after a night march across the desert from Umdabieh under the bright moonlight. They stopped just before 5 o'clock to rest, shivering as they discussed the battle ahead, since hot days in the Sudan are followed by frigid nights. Then the troops formed squares and moved forward into battle. Initially, the artillery targeted Mahmud's camp, but the Dervishes seemed to ignore it, as it reportedly took them half an hour to start firing back with their rifles. At 7:30 a.m., the heavy guns fell silent; the bugles sounded "Advance!" and as the pipers played "The March of the Cameron Men," the infantry moved in for the attack. Again, the enemy paid little attention until the Cameron men reached the top of the ridge overlooking the zareba, at which point the Dervish rifles opened fire, yet they couldn't halt the Camerons' charge; followed by the Lincolns, the Seaforths, and the Warwicks, they surged straight through the zareba. General Gatacre and Private Cross of the Camerons distinguished themselves by being the first to enter. The British and Sudanese onslaught was unstoppable, and any of the fighting Dervishes who could got away towards the river. Osman Digna retreated once more, but several other leaders, including Mahmud, were either killed or captured; 4,000 Dervishes were taken prisoner, and 3,000 were killed. The Camerons lost Captain Finlay and Urquhart, while the Seaforths lost Lieutenant Gore, with all three Scottish officers falling as they led their men into the zareba; 18 men were also killed, and 88 were wounded. Fourteen native officers died, and the native regiments suffered 50 killed and 319 wounded. The Sirdar praised the Colonel of the Camerons for their impressive advance despite the fire they encountered at the zareba.
Omdurman.—This battle quieted the Dervishes until August, when preparations were made to give them the coup de grâce. This happened on September 2nd, 1898, at Omdurman—made famous by the maiden charge of the 21st Lancers under Captain Martin against enormous odds—when the enemy lost 11,000 killed, 16,000 wounded, and 4,000 made prisoners. The British infantry division was again commanded by General Gatacre, the Brigadiers being Generals Wauchope and Lyttleton. The 1st Brigade consisted of the Camerons, Seaforths, Lincolns, and Warwicks, and a Maxim Battery. The 2nd Brigade comprised 1st Grenadier Guards; 1st Northumberland Fusiliers; 2nd Lancashire Fusiliers, and 2nd Rifle Brigade. Macdonald, Maxwell, and Lewis again commanded three brigades of the Egyptian army, and Collinson Bey a fourth. There were 7,500 Britishers, and 12,000 Egyptians.
Omdurman.—This battle put an end to the Dervishes until August, when plans were made to finish them off. This took place on September 2nd, 1898, at Omdurman—made famous by the first charge of the 21st Lancers under Captain Martin against overwhelming odds—when the enemy suffered 11,000 killed, 16,000 wounded, and 4,000 captured. The British infantry division was again led by General Gatacre, with Brigadiers Generals Wauchope and Lyttleton. The 1st Brigade included the Camerons, Seaforths, Lincolns, and Warwicks, along with a Maxim Battery. The 2nd Brigade consisted of the 1st Grenadier Guards, 1st Northumberland Fusiliers, 2nd Lancashire Fusiliers, and 2nd Rifle Brigade. Macdonald, Maxwell, and Lewis again led three brigades of the Egyptian army, and Collinson Bey led a fourth. There were 7,500 British soldiers and 12,000 Egyptians.

VICTORIAN VOLUNTEER OFFICER'S DECORATION.
Victorian Volunteer Officer’s Medal.

EDWARDIAN COLONIAL AND AUXILIARY FORCES DECORATION.
EDWARDIAN COLONIAL AND AUXILIARY FORCES DECORATION.
On April 2nd the Dervish army advanced against the British, their front extending for about 3 miles. The British formed an obtuse angle, and at 6.30 a.m. opened fire upon the advancing hosts with such precision that hundreds were mown down, but the Dervishes did not falter. As Steevens said, "No white troops could have faced that torrent for five minutes, but the Baggara and the blacks came on." There was no fear; the black-eyed houris were waiting with outstretched arms to receive such doughty warriors. Still they could not stand against their foe, but they retired with such caution that they were able to re-form. The pressure of their well-drilled enemy, however, was too great, and they began to flee. The bravest of them, however, planted their standards as rallying-points, and stood their ground until they were killed; the others appeared to be making for Omdurman, 5 miles from the scene of battle, and to prevent this the 21st Lancers were ordered to charge. They hacked their way through the dense mass of men who feared nothing. Then the Khalifa's stalwarts made a last effort, but Macdonald's Sudanese steadily met the onslaught; repulsed it, sent the Dervishes flying in all directions, and the battle of Omdurman was won. Mahdism was worsted, but Osman Digna had again eluded the victors. At last Khartoum was taken, the captives set free, and the dominion of the rebel slave-trader overthrown.
On April 2nd, the Dervish army advanced against the British, their front stretching for about 3 miles. The British formed an obtuse angle, and at 6:30 a.m. they opened fire on the advancing forces with such accuracy that hundreds were struck down, yet the Dervishes did not waver. As Steevens noted, "No white troops could have faced that torrent for five minutes, but the Baggara and the blacks kept coming." There was no fear; the dark-eyed houris were waiting with open arms to welcome such brave warriors. Still, they could not withstand their enemy, but they withdrew with enough caution to regroup. The pressure from their well-trained opponent, however, was overwhelming, and they began to retreat. The bravest among them planted their standards as rallying points and held their ground until they were killed; the others appeared to be heading for Omdurman, 5 miles from the battlefield, and to stop this, the 21st Lancers were ordered to charge. They cut their way through the dense mass of men who feared nothing. Then the Khalifa's fighters made one last push, but Macdonald's Sudanese steadily countered the attack, drove the Dervishes back in all directions, and the Battle of Omdurman was won. Mahdism was defeated, but Osman Digna once again escaped the victors. At last, Khartoum was taken, the captives were freed, and the reign of the rebel slave trader was overthrown.
Khartoum.—To those who took part in this battle, which ended in the taking of Khartoum, a bar for KHARTOUM was added to the Khedive's medal, and a bar for GEDAREF to all engaged in the capture of the place, and the fighting which followed in the district.
Khartoum.—For everyone who participated in this battle, which resulted in the capture of Khartoum, a bar for KHARTOUM was added to the Khedive's medal, and a bar for GEDAREF was awarded to all involved in taking the location, along with the subsequent fighting in the area.
The following British regiments were engaged in the campaign: 1st Grenadier Guards; 1st Seaforth and 1st Cameron Highlanders; 1st Warwicks; 1st Northumberland Fusiliers; 2nd Lancashire Fusiliers; 1st Lincolns; 2nd Rifle Brigade; a detachment of 1st Royal Irish Fusiliers, with 4 Maxim guns; 16th Company Eastern Division R.A.; 32nd and 37th Field Batteries R.A.; 21st Lancers; a detachment of Royal Engineers; Army Service and Army Ordnance Corps; Royal Army Medical Corps.
The following British regiments were involved in the campaign: 1st Grenadier Guards; 1st Seaforth and 1st Cameron Highlanders; 1st Warwicks; 1st Northumberland Fusiliers; 2nd Lancashire Fusiliers; 1st Lincolns; 2nd Rifle Brigade; a group from 1st Royal Irish Fusiliers with 4 Maxim guns; 16th Company Eastern Division R.A.; 32nd and 37th Field Batteries R.A.; 21st Lancers; a team from Royal Engineers; Army Service and Army Ordnance Corps; Royal Army Medical Corps.
Sudan, 1899, and Gedid.—Early in 1900 a bar bearing the record SUDAN 1899 was awarded to those who had[Pg 242] taken part in the second Dongola campaign, and a medal with bar for GEDID was issued to those who were engaged in the actions at that place on November 22nd and 24th, 1899, which resulted in the defeat of the Khalifa Abdulla El Taaishi. Bronze medals were issued to the civilian syces and authorised camp followers. The number of bars issued with the Khedive's Sudan medal varies from one to eight, but it is seldom that European soldiers received medals with more than two bars. European officers in some instances received more, but Major-General Sir Archibald Hunter, I think, has the distinction of possessing one bearing six bars.
Sudan, 1899, and Gedid.—Early in 1900, a bar marked Sudan 1899 was given to those who had participated in the second Dongola campaign, and a medal with a bar for GEDID was issued to those involved in the events at that location on November 22nd and 24th, 1899, which led to the defeat of Khalifa Abdulla El Taaishi. Bronze medals were awarded to the civilian syces and authorized camp followers. The number of bars awarded with the Khedive's Sudan medal ranges from one to eight, but it’s rare for European soldiers to receive medals with more than two bars. European officers sometimes received more, but Major-General Sir Archibald Hunter holds the distinction of having one with six bars.
Three Later Bars.—In 1905 and 1906 it was decided to add three more bars to the Khedive's Sudan medal, one for BAHR-EL-GHAZEL 1900-2 for services rendered in the reconquest of that province; one for JEROK for operations in the Blue Nile province against Wad-el-Mahmud in 1904; one for NYAM-NYAM to those employed against the Nyam-Nyam tribesmen in the province of Bahr-el-Ghazel in 1905.
Three Later Bars.—In 1905 and 1906, it was decided to add three more bars to the Khedive's Sudan medal: one for BAHR-EL-GHAZEL 1900-02 for the services provided during the reconquest of that province; one for JEROK for the operations in the Blue Nile province against Wad-el-Mahmud in 1904; and one for Yummy for those involved against the Nyam-Nyam tribesmen in the Bahr-el-Ghazel province in 1905.
Queen's Sudan Medal.—In March 1899 Her Majesty Queen Victoria approved of a new medal being struck to commemorate the military operations in connection with the reconquest of the Sudan. The medal, 1⅖ in. in diameter, in silver was granted to all officers, warrant officers, non-commissioned officers, and men of the British, Indian, and Egyptian forces, and native allies who were employed in the military operations in Egypt resulting in the capture of Abu-Hamed, the reconquest of the Province of Berber, the defeat of Emir Mahmud's army on the Atbara, and the final operations resulting in the overthrow of the Khalifa's troops at Khartoum. Civilian syces, civilian servants of officers, and authorised followers were entitled to the medal in bronze. No bars were issued with this medal. On the obverse is a half-length effigy of Queen Victoria, facing left, crowned, with a lace veil flowing behind, on which a small Imperial crown is placed, wearing the Ribbon and Star of the Order of the Garter, the Royal Order of[Pg 243] Victoria and Albert, and the Imperial Order of the Crown of India, holding a sceptre in her right hand. Legend, VICTORIA REGINA ET IMPERATRIX. On the reverse is a figure of a winged Victory seated, having a palm-branch in her outstretched right hand, and a laurel wreath in her left. There are two flags behind on either side—the British being on the left and the Khedive's to the right; beneath on the pedestal which supports the figure is the word SUDAN in intaglio, the space beneath the pedestal being filled by the decorative disposition of three lilies of the Nile in leaf. This is, in my opinion, the most symbolic and beautiful medal issued since Wyon took for his model a Greek coin, and based his figure of Victory—which adorns the Waterloo medal—upon it. The name of the recipient, together with his rank and regiment, was generally engraved upon the edge of the medal in neat Roman capitals. I have seen some with the lettering impressed in very small Roman capitals. The medal is suspended by a straight bar from a black and yellow ribbon 1¼ in. wide, divided down the centre by a narrow crimson stripe.
Queen's Sudan Medal.—In March 1899, Her Majesty Queen Victoria approved a new medal to commemorate the military operations involved in the reconquest of the Sudan. The medal, 1⅖ inches in diameter and made of silver, was awarded to all officers, warrant officers, non-commissioned officers, and soldiers of the British, Indian, and Egyptian forces, as well as native allies who participated in the military actions in Egypt that led to the capture of Abu-Hamed, the reconquest of the Province of Berber, the defeat of Emir Mahmud's army at the Atbara, and the final operations that resulted in the defeat of the Khalifa's troops in Khartoum. Civilian syces, civilian servants of officers, and authorized followers were eligible for the bronze version of the medal. No bars were issued with this medal. The front features a half-length image of Queen Victoria, facing left, crowned, with a lace veil flowing behind that holds a small Imperial crown, wearing the Ribbon and Star of the Order of the Garter, the Royal Order of [Pg 243] Victoria and Albert, and the Imperial Order of the Crown of India, holding a scepter in her right hand. The inscription reads, QUEEN VICTORIA AND EMPRESS. The back displays a figure of a winged Victory seated, holding a palm branch in her outstretched right hand and a laurel wreath in her left. Two flags are positioned behind her— the British flag on the left and the Khedive's on the right; beneath the pedestal that supports the figure is the word SUDAN engraved in intaglio, with decorative arrangements of three lilies of the Nile in leaves filling the space below the pedestal. This medal is, in my view, the most symbolic and beautiful medal issued since Wyon used a Greek coin as a model for his figure of Victory on the Waterloo medal. The recipient's name, rank, and regiment were typically engraved on the edge of the medal in neat Roman capitals. I have seen some with the lettering in very small Roman capitals. The medal hangs from a straight bar attached to a black and yellow ribbon that is 1¼ inches wide, divided down the center by a narrow crimson stripe.
East and Central Africa Medal.—A medal to replace the old one with swivel ring was issued to those who took part in the troubles which occurred in the Uganda Protectorate during 1897 and 1898. The medal, 1⅖ in. in diameter, had on the obverse the same bust of Queen Victoria as the Sudan medal, and on the reverse Britannia with the British lion beside her, holding out in her left hand a palm branch and a scroll toward the rising sun, and in her right a trident. In the exergue, in Roman capitals, is the denomination EAST AND CENTRAL AFRICA. The medal for Somaliland 1902-4 (illustrated facing page 296) is the same but for the inscription in the exergue. Two bars were issued with the medal, LUBWA'S and UGANDA 1897-8. A bar with the date 1898 was issued to those who fought against the Ogaden Somalis from April to August 1898, and a bar for UGANDA 1899 was awarded to those[Pg 244] employed in the military operations against Kabarega in the Protectorate between March and May 1899. The ribbon, 1¼ in. wide, is half red and yellow, and the names, etc., of recipients are impressed or engraved on the edge in light Roman capitals.
East and Central Africa Medal.—A new medal was issued to replace the old one with a swivel ring for those who participated in the unrest in the Uganda Protectorate during 1897 and 1898. The medal, 1⅖ in. in diameter, features the same bust of Queen Victoria on the front as the Sudan medal, and on the back, it shows Britannia with the British lion beside her, holding a palm branch and a scroll toward the rising sun in her left hand, and a trident in her right. The exergue displays the inscription East and Central Africa in Roman capitals. The Somaliland medal from 1902-4 (illustrated facing page 296) is identical except for the inscription on the exergue. Two bars were issued with the medal: LUBWA'S and UGANDA 1897-98. A bar with the date 1898 was given to those who fought against the Ogaden Somalis from April to August 1898, and a bar for UGANDA 1899 was awarded to those[Pg 244] involved in military operations against Kabarega in the Protectorate from March to May 1899. The ribbon, 1¼ in. wide, is half red and half yellow, and the names of recipients are impressed or engraved on the edge in light Roman capitals.
Royal Niger Co.'s Medal.—For participation in military operations in the Niger Company's territories during the period of 1886 to 1897 the Company awarded a silver medal to the members of its executive staff, and bronze medals to the natives. The names of the recipients were impressed upon the silver medals, but the native's number only was indented upon the edge of the bronze medals issued to those who were actually serving on December 31st, 1899. These medals, which were struck by Messrs. Spink & Son, bear on the obverse the diademed bust of Queen Victoria, and on the reverse a shield bearing a Y-shaped elevation, with the words ARS, JUS, PAX; behind the shield is a trophy of arms and flags. This medal, 1½ in. in diameter, is suspended from a ribbon 1½ in. wide, composed of three equal stripes of yellow, black, and white, by means of a straight clasp. The bars, 1⅖ in. long by 3∕10 in. wide, have the record NIGERIA 1886-1897 attached to the silver medals, but NIGERIA only on the bronze.
Royal Niger Co.'s Medal.—For taking part in military operations in the Niger Company's territories from 1886 to 1897, the Company awarded a silver medal to its executive staff and bronze medals to the locals. The names of the recipients were engraved on the silver medals, while only the recipient's number was marked on the edge of the bronze medals given to those who were actively serving on December 31, 1899. These medals, produced by Messrs. Spink & Son, feature on the front the crowned bust of Queen Victoria, and on the back a shield with a Y-shaped design, along with the words Arts, Justice, Peace; behind the shield is a trophy of arms and flags. This medal, 1½ inches in diameter, hangs from a ribbon 1½ inches wide made of three equal stripes of yellow, black, and white, attached with a straight clasp. The bars, 1⅖ inches long and 3∕10 inches wide, have the inscription NIGERIA 1886-1897 on the silver medals, but only NIGERIA on the bronze.
Ashanti, 1900.—After the rebellion of certain native tribes had been quelled, and the siege of Kumassi raised, King Edward VII approved of a medal—the first bearing his effigy—being issued to those who had taken part in the operations, and a bar inscribed KUMASSI also to those who had defended or relieved the city. On the obverse is the bemedalled bust of King Edward in Field-Marshal's uniform, which was used later on the South Africa medal 1901-2; on the reverse is modelled a lion looking toward the left of the medal, where the rising sun is depicted behind a hill. The lion is statant gardent in front of an African shield, whereon are two assegais, one being significantly broken; below is a plain panel with the word ASHANTI. The ribbon is alternately black and green—three black and two green stripes. The suspender is straight, and the names, etc., of recipients—mostly native soldiery—indented in small block letters on the edge of the medal, a few were issued engraved. The Flying Column was composed of 100 of the West African Regiment, 250 of the 2nd Central African Regiment, 350 West African Frontier Force, and 40 Sierra Leone Police with 2 guns. Some men of the 3rd W.I.R. also received the medal with bar for Kumassi.
Ashanti, 1900.—After the uprising of certain local tribes had been suppressed, and the siege of Kumassi ended, King Edward VII approved the creation of a medal—the first featuring his image—for those who participated in the operations, along with a bar inscribed Kumasi for those who defended or relieved the city. On the front is a decorated bust of King Edward in Field-Marshal's uniform, which was later used on the South Africa medal 1901-2. The back features a lion facing the left side of the medal, with the rising sun depicted behind a hill. The lion stands guard in front of an African shield, which has two assegais, one of which is notably broken; below is a plain panel with the word ASHANTI. The ribbon consists of alternating black and green—three black stripes and two green stripes. The suspender is straight, and the names, etc., of recipients—mostly local soldiers—are printed in small block letters on the edge of the medal; a few were issued engraved. The Flying Column was made up of 100 members of the West African Regiment, 250 of the 2nd Central African Regiment, 350 from the West African Frontier Force, and 40 from the Sierra Leone Police with 2 guns. Some men from the 3rd W.I.R. also received the medal with the Kumassi bar.

KING EDWARD'S MILITIA LONG SERVICE MEDAL.
KING EDWARD'S MILITIA LONG SERVICE MEDAL.

KING EDWARD'S MILITIA LONG
SERVICE AND GOOD CONDUCT
MEDAL.
(Reverse.)
KING EDWARD'S MILITIA LONG SERVICE AND GOOD CONDUCT MEDAL.
(Reverse.)

KING GEORGE'S TERRITORIAL EFFICIENCY MEDAL.
King George's Efficiency Medal.
CHINA, 1900
The Chinese society known as Boxers had been for some time engaged in agitating against foreigners, but did not become generally known to the English-speaking race until the murder of an Anglican missionary, the Rev. Sidney Brooks, on December 31st, 1899. They first, about a century ago, selected the title of I Ho Ch'uan, or Fist of Righteous Harmony; the society was, however, suppressed by Imperial edict, but, like most associations which have a strong religious or political basis, it was not exterminated, and as the political interference of certain missionary enthusiasts became more daring their activities again burst forth. They determined to destroy the foreigner and all his works, so that their countrymen might pursue their own ways, and work out their own salvation. All very laudable, in a way, but the patriots degenerated into bloodthirsty fanatics, and as the Chinese authorities were unable to deal with the rebels against Imperial authority—or indeed, as some say, appeared to make covert cause with them—it became necessary for the principal Powers to send troops to suppress the disturbances and protect the lives and property of their subjects. Great Britain, France, Germany, America, Japan, and Russia sent troops, which took part in the military and naval operations in the North of China and the Yangtse Valley from June 10th to December 31st, 1900. The most stirring events in the campaign were the defence of the Legations in Pekin[Pg 246] from June 10th to August 14th, and the relief of Pekin between the same dates.
The Chinese group known as the Boxers had been stirring up anti-foreigner sentiment for a while but didn't catch the attention of the English-speaking world until the murder of Anglican missionary Rev. Sidney Brooks on December 31, 1899. About a century ago, they initially called themselves I Ho Ch'uan, or Fist of Righteous Harmony. Although the society was banned by an imperial decree, like many organizations with a strong religious or political foundation, it wasn't completely wiped out. As missionary activities grew bolder, they resurfaced. Their goal was to eliminate foreigners and their influence, allowing their fellow countrymen to follow their own paths and achieve their own redemption. This was noble in theory, but the patriots turned into violent zealots. Meanwhile, the Chinese authorities struggled to handle the rebels against imperial rule—or, as some allege, even appeared to secretly support them. Consequently, it became necessary for the major powers to deploy troops to quell the unrest and safeguard their citizens' lives and property. Great Britain, France, Germany, the United States, Japan, and Russia sent forces, participating in military and naval operations in northern China and the Yangtze Valley from June 10 to December 31, 1900. The most dramatic moments of the campaign included the defense of the Legations in Beijing from June 10 to August 14 and the relief of Beijing during the same period.
Defence of Legations.—On Sunday, June 10th, 1900, the Summer Legation at the Hills was burnt down, and from that time onward no one dared leave the city, while inside the Europeans lived in constant fear of the Chinese inhabitants, for within the very walls the German Minister actually took prisoner a fully dressed and armed Boxer. The Boxers and Imperial troops attacked the city again and again, until it became necessary for the Europeans and their servants to take refuge in the various Legations, and then on June 20th the siege began in earnest. Eighteen officers and 389 men, assisted by 100 volunteers, formed the combined force, and they had with them four guns of uncertain quality. It has been said by Dr. Morrison that the Japanese had only 100 rounds of ammunition per man, the Italians 120, the Russians 145, and the rest at most 300 rounds per man. On the first day the Austrians, for some unexplained reason, abandoned their Legation, and thus weakened the general defence by leaving a corner of the square open to the enemy. Then the Belgian Legation was burnt, and on the morning of June 22nd the Americans, Austrians, Germans, Italians, Russians, and Japanese began to retire on the British Legation, but the masterly activity of Sir Claude MacDonald induced the French and Austrians to return to the French Legation, and the others to resume their posts, thus preventing a catastrophe. The fear of fire was ever present with the besieged, for again and again buildings were ignited, and but for the well-organised fire committee would have helped the investing Boxers to make short work of the defence. Meanwhile the enemy vigorously attacked the Legations, and bombarded the city until a somewhat peaceable period ensued during an armistice which, however, hardly raised the hopes of the besieged, for news had reached them that the European powers believed them to have been massacred.
Defense of Legations.—On Sunday, June 10th, 1900, the Summer Legation at the Hills was burned down, and from that point on, no one dared to leave the city. Inside, Europeans lived in constant fear of the Chinese residents, as the German Minister even captured a fully dressed and armed Boxer within the walls. The Boxers and Imperial troops repeatedly attacked the city, forcing Europeans and their servants to seek refuge in the various Legations, and on June 20th, the siege began in earnest. Eighteen officers and 389 men, along with 100 volunteers, made up the combined force, equipped with four unreliable guns. Dr. Morrison reported that the Japanese had only 100 rounds of ammunition per man, the Italians 120, the Russians 145, and the others at most 300 rounds per man. On the first day, for reasons unknown, the Austrians abandoned their Legation, weakening the overall defense by leaving a corner of the square exposed to the enemy. The Belgian Legation was then burned, and on the morning of June 22nd, the Americans, Austrians, Germans, Italians, Russians, and Japanese began to retreat to the British Legation. However, the strategic efforts of Sir Claude MacDonald encouraged the French and Austrians to return to the French Legation and prompted the others to go back to their posts, preventing a disaster. The threat of fire loomed over the besieged, as buildings were set ablaze repeatedly, and without the well-organized fire committee, the attacking Boxers might have easily overwhelmed the defense. Meanwhile, the enemy aggressively attacked the Legations and shelled the city until a somewhat peaceful period occurred during an armistice, which, however, barely raised the spirits of the besieged as they had learned that the European powers believed they had been massacred.
On August 10th the spirits of the defenders were greatly raised by the receipt of messages from the relief force, and the knowledge gained that the Japanese and American troops had defeated the enemy near Pei Ts'ang on the 5th, and had occupied Yang Ts'un next day, while the allied forces of America, Britain, and Russia were marching on from that place, and hoped to reach Pekin by the 13th or 14th. This news was conveyed in a letter from the Japanese Colonel Shiba, and it was indeed prophetic, for at 2 o'clock on August 14th the Sikhs marched on to the lawn of the British Legation, followed by General Gaselee and his staff, and then, the work of clearing the enemy out of the environs having been completed by the Sikhs, the relief of the Legations was effected.
On August 10th, the spirits of the defenders were greatly lifted by messages from the relief force, along with the news that Japanese and American troops had defeated the enemy near Pei Ts'ang on the 5th and occupied Yang Ts'un the next day. Meanwhile, the allied forces from America, Britain, and Russia were advancing from that location and hoped to reach Beijing by the 13th or 14th. This information was shared in a letter from Japanese Colonel Shiba, and it turned out to be prophetic, as at 2 o'clock on August 14th, the Sikhs marched onto the lawn of the British Legation, followed by General Gaselee and his staff. Once the Sikhs had completed their work of clearing the enemy from the area, the relief of the Legations was accomplished.
Medal for China, 1900.—Queen Victoria had decided that those who had taken part in the campaign should be awarded a medal to commemorate their labours. Her decease, however, delayed the consummation of her desire, but in January 1902 the late King Edward gave the necessary instructions for the striking of the medal. It was decided to use the same reverse as on the China medal of 1842, and to revert to the dating of the exergue, so that 1900 appears thereon. On the obverse is the same bust of Queen Victoria as appears on the South African medal. Instead of the strange suspender issued with the second China medal, a straight clasp was used, and in place of the old fishtail bar the straight type was utilised. Three bars were issued with the medal: one with TAKU FORTS to those who were engaged in the Peiho River in the capture of the Forts on June 17th, 1900; one for the DEFENCE OF LEGATIONS to those who took part in the defence; and one for the RELIEF OF PEKIN to those who took part in the operations at or beyond Taku between June 10th and August 14th inclusive, which resulted in the relief of the city and Legations. The names of the recipients were mostly impressed upon the edge of the medal in light Roman capitals, and the same[Pg 248] type of ribbon as supplied for the 1842 medals was used for suspension.
Medal for China, 1900.—Queen Victoria decided that everyone who participated in the campaign should receive a medal to recognize their efforts. However, her passing delayed this decision, but in January 1902, the late King Edward instructed the production of the medal. It was agreed to use the same reverse design as the China medal of 1842 and to change the exergue date back to 1900. The obverse features the same bust of Queen Victoria found on the South African medal. Instead of the unusual suspender that came with the second China medal, a straightforward clasp was used, and instead of the old fishtail bar, a straight type was utilized. Three bars were issued with the medal: one with TAKU FORTS for those who were involved in the capture of the Forts at the Peiho River on June 17th, 1900; one for the Protection of Embassies for those who took part in the defense; and one for the PEKING RELIEF for those engaged in the operations at or beyond Taku from June 10th to August 14th, which led to the relief of the city and Legations. The names of the recipients were mostly engraved on the edge of the medal in light Roman capitals, and the same [Pg 248] type of ribbon used for the 1842 medals was employed for suspension.
The following regiments were engaged: 2nd Batt. Royal Welsh Fusiliers; 12th Field Battery R.A.; 1st and 14th Sikhs; 3rd Madras N.I.; 4th Goorkas; 2nd, 7th, and 26th Bengal Infantry; 22nd and 30th Bombay N.I.; 24th Punjab Infantry; 1st Madras Pioneers; No. 2 Company Bombay Sappers; No. 3 Company Madras Sappers; No. 4 Company Bengal Sappers, and 1st Bengal Lancers. A Naval Brigade from thirty-six of H.M. ships also participated in the campaign, but most naval medals were awarded without bars, consequently those with bars are scarce, particularly those awarded to men of the Naval Brigade who had previously fought in the Boer War, scaled the Tugela Heights, and taken part in the Relief of Ladysmith.
The following regiments were involved: 2nd Battalion Royal Welsh Fusiliers; 12th Field Battery R.A.; 1st and 14th Sikhs; 3rd Madras N.I.; 4th Gurkhas; 2nd, 7th, and 26th Bengal Infantry; 22nd and 30th Bombay N.I.; 24th Punjab Infantry; 1st Madras Pioneers; No. 2 Company Bombay Sappers; No. 3 Company Madras Sappers; No. 4 Company Bengal Sappers, and 1st Bengal Lancers. A Naval Brigade from thirty-six of H.M. ships also took part in the campaign, but most naval medals were given without bars, making those with bars rare, especially those awarded to members of the Naval Brigade who had previously fought in the Boer War, scaled the Tugela Heights, and participated in the Relief of Ladysmith.
THE BOER WAR
Little over a decade has passed since the South African, or Boer War, was brought to a close, so that it is hardly necessary for me to enter into details of the fighting, since so many will readily call to mind the events which led up to the ultimatum from the Boer Government in October 1899, and the necessity for Britain to place in the field the largest army ever sent out of England—about 200,000 men, which makes the army of 30,000 that fought under Viscount Wolseley in Egypt look very insignificant. During the first seven months of the war the battles of Talana Hill, Elandslaagte, Belmont, Modder River, Tugela Heights, Paardeberg and Driefontein, and many another battle had been fought and won; the sad disaster at Magersfontein had taken place, and the oft-wounded Wauchope killed. Ladysmith and Kimberley had been gallantly defended and relieved, and the siege of Wepener raised. Two hundred and eighteen British officers and 2,062 soldiers had been killed in action; 53 officers and 492 men had died of their wounds; 64 officers and 2,028[Pg 249] men had died of disease, and 664 officers and 9,225 men had been wounded. Indeed, a grand total of 24,253 officers and men had been killed or placed hors de combat. During the war Great Britain and her colonies lost in action 5,774 officers and men, and 16,168 by disease, while of those sent home 508 succumbed to their wounds or disease, 22,829 were wounded, and 5,879 were invalided out of the service.
Little over a decade has passed since the South African, or Boer War, ended, so it's hardly necessary for me to go into detail about the fighting, since many will easily remember the events that led up to the ultimatum from the Boer Government in October 1899, and the need for Britain to send out the largest army ever from England—about 200,000 men, which makes the army of 30,000 that fought under Viscount Wolseley in Egypt seem quite small. During the first seven months of the war, the battles of Talana Hill, Elandslaagte, Belmont, Modder River, Tugela Heights, Paardeberg, and Driefontein, among many others, had been fought and won; the tragic disaster at Magersfontein had occurred, resulting in the death of the often-injured Wauchope. Ladysmith and Kimberley had been courageously defended and relieved, and the siege of Wepener had been lifted. Two hundred and eighteen British officers and 2,062 soldiers had been killed in action; 53 officers and 492 men had died from their wounds; 64 officers and 2,028 men had died from disease, and 664 officers and 9,225 men had been wounded. In total, 24,253 officers and men had been killed or rendered hors de combat. During the war, Great Britain and her colonies lost 5,774 officers and men in action and 16,168 to disease, while of those sent home, 508 succumbed to their wounds or disease, 22,829 were wounded, and 5,879 were discharged from service.
Cape Colony.—There is a mistaken idea that the single bar for CAPE COLONY is not worth consideration as an engagement bar, but as a matter of fact many a brave fellow found a billet for a Boer bullet in the north of Cape Colony during the early days of the war, as the casualty records of certain regiments show. It is true, however, that many a man never got within miles of the enemy, and had to be content with the "donkey work" of looking after things for those at the front, while some whose bars include that for Cape Colony only landed for a day or two, and were then transported by sea to the fighting area. NATAL on a bar means, as every one knows, service in the zone where Buller did so much hard fighting—indeed, it was the Boer invasion of Natal on October 12th, 1899, that necessitated the defence of Ladysmith, and occupied the efforts of the Natal Field Force during 1900.
Cape Colony.—There's a common misconception that the single bar for Cape Colony isn't worth considering as an engagement bar. However, many brave individuals met their fate from Boer bullets in the northern part of Cape Colony during the early days of the war, as the casualty records of certain regiments indicate. It is true that many soldiers never came within miles of the enemy and had to settle for the "donkey work" of supporting those at the front. Some who earned the bar for Cape Colony only spent a day or two on land before being taken by sea to the combat zone. NATAL on a bar signifies, as everyone knows, service in the area where Buller fought fiercely—indeed, it was the Boer invasion of Natal on October 12th, 1899, that led to the defense of Ladysmith and demanded the efforts of the Natal Field Force throughout 1900.
The Queen's Medal.—Twenty-six bars were issued in connection with the Queen's medal. Many think this constitutes a record, and it does for one campaign, but twenty-eight were issued with the Military General Service medal which was awarded in 1847; this, however, covered a series of campaigns. No less than 230 bars were issued with the Naval General Service medal also authorised in 1847, but these were obviously to cover a series of operations and campaigns. The bars for the Boer War are as follows, ranged in chronological order: CAPE COLONY, NATAL, RHODESIA, RELIEF OF MAFEKING, DEFENCE OF KIMBERLEY, TALANA, ELANDSLAAGTE, DEFENCE OF LADYSMITH, BELMONT, MODDER RIVER,[Pg 250] TUGELA HEIGHTS, RELIEF OF KIMBERLEY, PAARDEBERG, ORANGE FREE STATE, RELIEF OF LADYSMITH, DRIEFONTEIN, WEPENER, DEFENCE OF MAFEKING, TRANSVAAL, JOHANNESBURG, LAING'S NEK, DIAMOND HILL, WITTEBERGEN, BELFAST, SOUTH AFRICA 1901, SOUTH AFRICA 1902. The latter two were issued to those who, although engaged during the period for which the King's Medal was awarded, were nevertheless not entitled to it by the terms of the grant. Talana, where General Penn Symonds was killed on October 20th, 1899, was the first general engagement, and Belfast, fought on August 26th and 27th, 1900, the last. The bars should read upwards from the medal in the order arranged above.
The Queen's Medal.—Twenty-six bars were issued in relation to the Queen's medal. Many believe this sets a record, and while it does for a single campaign, twenty-eight were awarded with the Military General Service medal given in 1847, which covered multiple campaigns. In total, 230 bars were issued with the Naval General Service medal also authorized in 1847, but these were clearly meant to represent a series of operations and campaigns. The bars for the Boer War are listed here in chronological order: CAPE COLONY, NATAL, Zimbabwe, MAFEKING RELIEF, DEFENSE OF KIMBERLEY, TALANA, ELANDSLAAGTE, Defense of Ladysmith, BELMONT, Modder River, [Pg 250] Tugela Heights, KIMBERLEY RELIEF, PAARDEBERG, Free State Province, Relief of Ladysmith, DRIEFONTEIN, Wepener, DEFENSE OF MAFEKING, TRANSVAAL, JOHANNESBURG, Laing's Nek, DIAMOND HILL, Wittenberg, BELFAST, South Africa 1901, South Africa 1902. The last two were given to those who, while involved during the period for which the King's Medal was awarded, were not entitled to it under the terms of the grant. Talana, where General Penn Symonds was killed on October 20th, 1899, was the first major battle, and Belfast, fought on August 26th and 27th, 1900, was the last. The bars should be displayed above the medal in the order listed.
This medal by G. W. De Saulles is 1⅖ in. in diameter, and has on the obverse the bust of Her Majesty Queen Victoria (as shown in the illustration facing page 176). On the reverse is a spirited figure of Britannia, grasping the Union Jack in her left hand, while with her right she offers the laurel wreath to the army which marches past:
This medal by G. W. De Saulles is 1⅖ inches in diameter and features on the front a bust of Her Majesty Queen Victoria (as shown in the illustration facing page 176). On the back is a dynamic figure of Britannia, holding the Union Jack in her left hand, while with her right she presents a laurel wreath to the army marching by:
"Brothers in arms, but competitors in fame."
Behind her in the distance is a man-of-war in Table Bay, and in the foreground, lying to the left, her shield and trident; above is SOUTH AFRICA. It is noteworthy that the Army Order specifically mentions not only the Colonial and Indian forces, but nurses and nursing sisters. Bronze medals without bars were given to non-enlisted men of whatever nationality who drew military pay, and to authorised camp followers. The ribbon has a broad centre stripe of orange, with dark blue and red stripes at the sides. The names, etc., were mostly indented in skeleton block letters, some tall and some square, but many were engraved in slanting Roman capitals. The first medals awarded, including those issued to the Canadian contingent, had the date 1899-1900 printed on the field to the right of Britannia, but this, of course, quickly rubbed off when the medal was worn. Medals, however, in[Pg 251] mint condition, are sometimes found with the date still clearly showing.
Behind her in the distance is a man-of-war in Table Bay, and in the foreground, lying to the left, are her shield and trident; above is SOUTH AFRICA. It’s important to note that the Army Order specifically includes not only the Colonial and Indian forces but also nurses and nursing sisters. Bronze medals without bars were awarded to non-enlisted men of any nationality who received military pay, as well as to authorized camp followers. The ribbon features a wide center stripe of orange, with dark blue and red stripes on the sides. The names, etc., were mostly engraved in skeleton block letters, some tall and some square, but many were inscribed in slanting Roman capitals. The first medals issued, including those given to the Canadian contingent, had the date 1899-1900 printed on the field to the right of Britannia, but this, of course, quickly wore off when the medal was used. Medals, however, in [Pg 251] mint condition, are sometimes found with the date still clearly visible.
The King's Medal.—In October 1902 His Majesty King Edward VII authorised the issue of a medal bearing his effigy, with the legend EDWARDVS VII REX IMPERATOR, to all those who had served for eighteen months at the front, and were still serving on January 1st, 1902, or had completed such term before June 1st, 1902—that is, just one month after the terms of surrender were signed. The reverse of this medal is the same as the Queen's, but on the obverse is the bust of King Edward in Field-Marshal's uniform. Two bars were given; SOUTH AFRICA 1901 and SOUTH AFRICA 1902. The ribbon is composed of three equal stripes of green, white, and orange, and the names are mostly indented or engraved in the same manner as the Queen's medal.
The King's Medal.—In October 1902, His Majesty King Edward VII approved the creation of a medal featuring his image, with the inscription EDWARD VII KING EMPEROR, for anyone who served for eighteen months at the front and was still serving on January 1st, 1902, or had finished that term before June 1st, 1902—that is, just one month after the surrender terms were signed. The back of this medal is identical to the Queen's, but the front displays a bust of King Edward in Field-Marshal's uniform. Two bars were awarded: SOUTH AFRICA 1901 and SOUTH AFRICA 1902. The ribbon consists of three equal stripes of green, white, and orange, and the names are mostly indented or engraved in the same style as the Queen's medal.
The Mediterranean Medal.—A medal bearing the legend MEDITERRANEAN to the right of Britannia, but otherwise exactly the same as the Queen's South African medal, was awarded to those who garrisoned the Mediterranean forts during the South African War; no bars were issued with this. It is worn with the Queen's ribbon, and the names, etc., are generally indented. Those engaged in this work were mostly Militia units, who volunteered for service abroad during the war.
The Mediterranean Medal.—A medal featuring the word MEDITERRANEAN to the right of Britannia, but otherwise identical to the Queen's South African medal, was given to those who manned the Mediterranean forts during the South African War; no bars were included with this. It is worn with the Queen's ribbon, and the names, etc., are usually indented. Most of the people involved in this duty were Militia units who volunteered for service overseas during the war.
Kimberley Star.—The Mayor of Kimberley presented to all those who took part in its defence a silver six-pointed star, but it should be particularly noticed that only those bearing the hall-mark, including the date-mark a, are genuine. The ribbon is red, white, and blue in the centre, edged with black on one side and yellow on the other. The stars were issued unnamed, and generally depended from an ornamental suspender, but the one illustrated facing page 192 was issued as depicted.
Kimberley Star.—The Mayor of Kimberley awarded a silver six-pointed star to everyone who participated in its defense, but it’s important to note that only the ones with the official hall-mark and the date-mark a are authentic. The ribbon features red, white, and blue in the center, bordered with black on one side and yellow on the other. The stars were given without individual names and typically hung from a decorative suspender, but the one shown on the opposite page 192 was issued as shown.
The following troops were engaged during the campaign:
The following troops were involved in the campaign:
Cavalry.—One squadron each of the 1st and 2nd[Pg 252] Life Guards and Horse Guards; 1st, 2nd, 3rd, 4th, 5th, 6th, and 7th Dragoon Guards; 1st Dragoons; Scots Greys; 3rd and 4th Hussars; 5th Lancers; 6th Dragoons; 7th and 8th Hussars; 9th Lancers; 10th and 11th Hussars; 12th Lancers; 13th, 14th, and 15th Hussars; 16th and 17th Lancers; 18th, 19th, and 20th Hussars; and the 21st Lancers.
Cavalry.—One squadron each of the 1st and 2nd[Pg 252] Life Guards and Horse Guards; 1st, 2nd, 3rd, 4th, 5th, 6th, and 7th Dragoon Guards; 1st Dragoons; Scots Greys; 3rd and 4th Hussars; 5th Lancers; 6th Dragoons; 7th and 8th Hussars; 9th Lancers; 10th and 11th Hussars; 12th Lancers; 13th, 14th, and 15th Hussars; 16th and 17th Lancers; 18th, 19th, and 20th Hussars; and the 21st Lancers.
Infantry.—Grenadier, Scots, and Coldstream Guards, and the following Regiments of the Line: Bedfordshire, Berkshire, Border, Cheshire, Cornwall Light Infantry, Derbyshire, Devonshire, Dorsetshire, Durham Light Infantry, Essex, Royal Fusiliers, Gloucestershire, Hampshire, East Kent, West Kent, King's Royal Rifle Corps, Lancashire Fusiliers, East Lancashire, South Lancashire, Loyal North Lancastrian, Royal Lancashire, Liverpool, Leicestershire, Lincoln, Manchester, Middlesex, Norfolk, Northampton, Northumberland Fusiliers, Oxford Light Infantry, Rifle Brigade, Shropshire Light Infantry, Somersetshire Light Infantry, North and South Staffordshire, Suffolk, Sussex, East and West Surrey Regiments, Warwickshire, Wiltshire, Worcestershire, Yorkshire, Yorkshire Light Infantry, East also West Yorkshire, York and Lancaster, and West Riding Regiments, Argyll and Sutherland Highlanders, Royal Highlanders ("Black Watch"), Cameron, Seaforth and Gordon Highlanders, King's Own Scottish Rifles, Royal Scots Fusiliers, Scottish Rifles, Highland Light Infantry, Royal Irish Fusiliers, Royal Dublin Fusiliers, Inniskilling also Munster Fusiliers, Royal Irish, Royal Irish Rifles, Leinster, Connaught Rangers, South Wales Borderers, Royal Welsh Fusiliers.
Infantry.—Grenadier, Scots, and Coldstream Guards, and the following Regiments of the Line: Bedfordshire, Berkshire, Border, Cheshire, Cornwall Light Infantry, Derbyshire, Devonshire, Dorsetshire, Durham Light Infantry, Essex, Royal Fusiliers, Gloucestershire, Hampshire, East Kent, West Kent, King's Royal Rifle Corps, Lancashire Fusiliers, East Lancashire, South Lancashire, Loyal North Lancastrian, Royal Lancashire, Liverpool, Leicestershire, Lincoln, Manchester, Middlesex, Norfolk, Northampton, Northumberland Fusiliers, Oxford Light Infantry, Rifle Brigade, Shropshire Light Infantry, Somersetshire Light Infantry, North and South Staffordshire, Suffolk, Sussex, East and West Surrey Regiments, Warwickshire, Wiltshire, Worcestershire, Yorkshire, Yorkshire Light Infantry, East also West Yorkshire, York and Lancaster, and West Riding Regiments, Argyll and Sutherland Highlanders, Royal Highlanders ("Black Watch"), Cameron, Seaforth and Gordon Highlanders, King's Own Scottish Rifles, Royal Scots Fusiliers, Scottish Rifles, Highland Light Infantry, Royal Irish Fusiliers, Royal Dublin Fusiliers, Inniskilling also Munster Fusiliers, Royal Irish, Royal Irish Rifles, Leinster, Connaught Rangers, South Wales Borderers, Royal Welsh Fusiliers.
Volunteers.—Thirty-two Battalions of Imperial Yeomanry, City Volunteer Battalions, Companies, and Corps.
Volunteers.—Thirty-two Battalions of Imperial Yeomanry, City Volunteer Battalions, Companies, and Corps.
Royal Garrison Artillery.—Eastern Division: 5th, 6th, and 10th Companies; Southern Division: 14th 15th, 16th, and 36th Companies; Western Division: 2nd, 6th, 10th, 14th, 15th, 17th, and 23rd Companies.
Royal Garrison Artillery.—Eastern Division: 5th, 6th, and 10th Companies; Southern Division: 14th, 15th, 16th, and 36th Companies; Western Division: 2nd, 6th, 10th, 14th, 15th, 17th, and 23rd Companies.
Royal Horse Artillery.—A, G, J, M, O, P, Q, R, T, U, and V Batteries.
Royal Horse Artillery.—A, G, J, M, O, P, Q, R, T, U, and V Batteries.

VICTORIAN MILITARY LONG SERVICE MEDAL.
Victorian Military Long Service Medal.

NAVAL DISTINGUISHED SERVICE MEDAL INSTITUTED BY HIS MAJESTY KING GEORGE V OCTOBER 1914.
NAVAL DISTINGUISHED SERVICE MEDAL ESTABLISHED BY HIS MAJESTY KING GEORGE V IN OCTOBER 1914.
This medal is illustrated from lead squeezes specially taken for illustration in this book. The medal depends from a straight suspender as used with the Naval Long Service Medals.
This medal is shown using lead squeezes specifically taken for illustration in this book. The medal hangs from a straight suspender, similar to what's used with the Naval Long Service Medals.
Royal Field Artillery.—2nd, 4th, 5th, 7th, 8th, 9th, 13th, 14th, 17th, 18th, 19th, 20th, 21st, 28th, 37th, 38th, 39th, 42nd, 43rd, 44th, 53rd, 61st, 62nd, 63rd, 64th, 65th, 66th, 67th, 68th, 69th, 73rd, 74th, 75th, 76th, 77th, 78th, 79th, 81st, 82nd, 83rd, 84th, 85th, 86th, 87th, and 88th Batteries.
Royal Field Artillery.—2nd, 4th, 5th, 7th, 8th, 9th, 13th, 14th, 17th, 18th, 19th, 20th, 21st, 28th, 37th, 38th, 39th, 42nd, 43rd, 44th, 53rd, 61st, 62nd, 63rd, 64th, 65th, 66th, 67th, 68th, 69th, 73rd, 74th, 75th, 76th, 77th, 78th, 79th, 81st, 82nd, 83rd, 84th, 85th, 86th, 87th, and 88th Batteries.
Royal Engineers, Army Service and Army Ordnance Corps, Army Veterinary and Army Pay Departments, and R.A. Medical Corps.
Royal Engineers, Army Service and Army Ordnance Corps, Army Veterinary and Army Pay Departments, and R.A. Medical Corps.
Irregular Corps.—Imperial Light Horse, South African Light Horse, Cape Mounted Rifles, Kitchener's Fighting Scouts, Thorneycroft's Horse, Brabant's Horse, Bethune's Horse, British South African Police, South African Constabulary, National Scouts (Boers), Scottish Horse, Lumsden's Horse and Strathcona's Horse, New South Wales Military Forces, Imperial Bushmen, New Zealand Mounted Rifles and Rough Riders, Queensland Mounted Infantry, South Australian Mounted Infantry and Bushmen's Contingent, Tasmanian Infantry, Artillery, and Bushmen, Victorian Infantry, Victorian Mounted Infantry, Cameron's Scouts, West Australian Contingent, Royal Canadian Dragoons and Batteries of Field Artillery, Canadian Mounted Rifles, Canadian Scouts, Ceylon Mounted Infantry, Bechuanaland Rifles, Border Horse, and Mounted Rifles, also Scouts, Brabant's Scouts, British South Africa Police, Cape Cavalry Brigade, Cape Colony Cyclist Corps, Cape Garrison Artillery, Cape Medical Staff Corps, Cape Mounted Rifle Club, Cape Police, 1st City (Grahamstown) Volunteers, Colonial Defence Force, Commander-in-Chief's Bodyguard, Dennison's Scouts, Diamond Field Artillery, Diamond Field Horse, District Mounted Rifles, Driscoll's Scouts, Duke of Edinburgh's Own Volunteer Rifles, Durban Light Infantry, East Griqualand Mounted Rifle Volunteers, Eastern Province Horse, French's Scouts, Frontier Mounted Rifles, Gatacre's Scouts, Griqualand East Mounted Rifle Volunteers, Herbert District Mounted Rifles, Herschell Mounted Volunteers, Imperial Light Horse and Light Infantry, Johannesburg[Pg 254] Mounted Rifles, Kaffrarian Rifles, Kenny's Scouts, Kimberley Regiment, Kimberley Mounted Corps and Light Horse, Kimberley Rifles, Kitchener's Horse, Kuysna Rangers, Komgha Mounted Volunteers, Loch's Horse, Lovat's Scouts, Maritzani Mounted Irregulars, Marshal's Horse, Merre's Scouts, Military Foot Police, Modder River District Mounted Rifles, Namaqualand Border Scouts, Natal Volunteers, Natal Mounted Infantry, Nesbitt's Horse, New England Mounted Rifles, Orpen's Horse, Pioneer Railway Regiment, Prince Alfred's Own Cape Artillery, Prince Alfred's Volunteer Guard, Prince of Wales's Light Horse, Queenstown Rifle Volunteers, Rand Rifles, Rimington's Guides, Roberts's Light Horse, Rundle's Colonial Scouts, Rhodesian Regiment, Scottish Horse, South African Constabulary, South Rhodesian Volunteers, Steinaeker's Horse, Stellenbosch Mounted Infantry, Tembuland Mounted Rifle Corps, Transkei Mounted Rifles, Uitenhage Volunteer Rifles, and the Umvoti, Utrecht, Victoria, and Vryburg Mounted Rifles, Warwick's Scouts, Western Light Horse, and Western Province Mounted Rifles.
Irregular Corps.—Imperial Light Horse, South African Light Horse, Cape Mounted Rifles, Kitchener's Fighting Scouts, Thorneycroft's Horse, Brabant's Horse, Bethune's Horse, British South African Police, South African Constabulary, National Scouts (Boers), Scottish Horse, Lumsden's Horse and Strathcona's Horse, New South Wales Military Forces, Imperial Bushmen, New Zealand Mounted Rifles and Rough Riders, Queensland Mounted Infantry, South Australian Mounted Infantry and Bushmen's Contingent, Tasmanian Infantry, Artillery, and Bushmen, Victorian Infantry, Victorian Mounted Infantry, Cameron's Scouts, West Australian Contingent, Royal Canadian Dragoons and Batteries of Field Artillery, Canadian Mounted Rifles, Canadian Scouts, Ceylon Mounted Infantry, Bechuanaland Rifles, Border Horse, and Mounted Rifles, also Scouts, Brabant's Scouts, British South Africa Police, Cape Cavalry Brigade, Cape Colony Cyclist Corps, Cape Garrison Artillery, Cape Medical Staff Corps, Cape Mounted Rifle Club, Cape Police, 1st City (Grahamstown) Volunteers, Colonial Defence Force, Commander-in-Chief's Bodyguard, Dennison's Scouts, Diamond Field Artillery, Diamond Field Horse, District Mounted Rifles, Driscoll's Scouts, Duke of Edinburgh's Own Volunteer Rifles, Durban Light Infantry, East Griqualand Mounted Rifle Volunteers, Eastern Province Horse, French's Scouts, Frontier Mounted Rifles, Gatacre's Scouts, Griqualand East Mounted Rifle Volunteers, Herbert District Mounted Rifles, Herschell Mounted Volunteers, Imperial Light Horse and Light Infantry, Johannesburg[Pg 254] Mounted Rifles, Kaffrarian Rifles, Kenny's Scouts, Kimberley Regiment, Kimberley Mounted Corps and Light Horse, Kimberley Rifles, Kitchener's Horse, Kuysna Rangers, Komgha Mounted Volunteers, Loch's Horse, Lovat's Scouts, Maritzani Mounted Irregulars, Marshal's Horse, Merre's Scouts, Military Foot Police, Modder River District Mounted Rifles, Namaqualand Border Scouts, Natal Volunteers, Natal Mounted Infantry, Nesbitt's Horse, New England Mounted Rifles, Orpen's Horse, Pioneer Railway Regiment, Prince Alfred's Own Cape Artillery, Prince Alfred's Volunteer Guard, Prince of Wales's Light Horse, Queenstown Rifle Volunteers, Rand Rifles, Rimington's Guides, Roberts's Light Horse, Rundle's Colonial Scouts, Rhodesian Regiment, Scottish Horse, South African Constabulary, South Rhodesian Volunteers, Steinaeker's Horse, Stellenbosch Mounted Infantry, Tembuland Mounted Rifle Corps, Transkei Mounted Rifles, Uitenhage Volunteer Rifles, and the Umvoti, Utrecht, Victoria, and Vryburg Mounted Rifles, Warwick's Scouts, Western Light Horse, and Western Province Mounted Rifles.
Town Guards.—The Aliwal North, Barkly East, Barkly West, Boshof, Burgherdorn, Campbell Town, Colesburg, Cradock, Dordrecht District, Douglas, East London, Grahamstown, Griquatown, Hopetown, Hoppesia, Indwe, Jamestown, Kimberley, King Williamstown, Klipdam, Kokstad, Kuruman, Lady Grey, Molteno, Naauwpoort, Port Elizabeth, Queenstown, Qumbu, Starkstroom, Steynsburg, Stormburg, T'somo, Uitenhage, Vryburg, and Warrenton.
Town Guards.—The Aliwal North, Barkly East, Barkly West, Boshof, Burgherdorn, Campbell Town, Colesburg, Cradock, Dordrecht District, Douglas, East London, Grahamstown, Griquatown, Hopetown, Hoppesia, Indwe, Jamestown, Kimberley, King Williamstown, Klipdam, Kokstad, Kuruman, Lady Grey, Molteno, Naauwpoort, Port Elizabeth, Queenstown, Qumbu, Starkstroom, Steynsburg, Stormburg, T'somo, Uitenhage, Vryburg, and Warrenton.
Africa General Service Medal.—In June 1902 it was decided to strike a medal to take the place of the two which had hitherto been awarded for service in Central, also East and West, Africa. It was to be known as the Africa General Service Medal. The obverse is the same as the King's South Africa medal, but on the reverse is the figure of Britannia, with a lion beside her, as on the East and West African medal illustrated facing page 296, but with AFRICA in the exergue. The ribbon is yellow,[Pg 255] with two narrow green stripes touching the broad black edging. Bronze medals were issued to camp followers. Numerous bars have been issued with this medal: NIGERIA for operations carried on in the early-part of 1900, and in December of the same year, also in August and September 1901; S. NIGERIA for operations in March, April, and May, 1901, and for JUBALAND to those who were in the small force sent against the truculent Ogaden Somalis between November 1900 and the end of April 1901. Only 465 silver and 26 bronze medals were issued, and these mostly to the 16th Bombay Cavalry. The other recipients of the medal and bar were sailors and marines from three of H.M. ships. The bar for SOMALILAND 1901 was issued to those who were engaged there during May, June, and July 1901, and a bar for UGANDA 1900 to those who were engaged in the Uandi country during the period between July and October 1900. Only 5 officers and 1 British non-commissioned officer received the bar, and only 373 other bars were issued—268 to the 4th King's African Rifles, and 105 to Indian soldiers. To the 24th Punjab Infantry, which was engaged in different districts between August 1899 and December 1900, a bar inscribed B. C. A. 1899-1900—meaning British Central Africa 1899-1900—was awarded. The bar for GAMBIA was granted to a detachment of the 2nd King's African Rifles, four companies of the 3rd W.I.R., and the crews of three of H.M. ships who were engaged in the operations between January and March 1901. The bar for ARO 1901-1902 was issued to those who were engaged against the Aro tribe between November 1901 and March 1902. Fourteen British officers and the crew of H.M. "Thrush," with 1,830 native soldiers, composed the Aro Field Force. The bar for LANGO 1901 was awarded to those members of the 4th King's African Rifles who were engaged against the Sudanese mutineers and the Langos between April and August 1901. To those engaged in the Bornu expedition, from February to May 1902, and in the Kontagora[Pg 256] expedition in February 1902, the bar for N. NIGERIA 1902 was issued (the same bar was given to those who were serving at Argungu and on convoy duty), and to those who were engaged in Nigeria between July 1902 and June 1903. In April 1905 a bar was issued inscribed N. NIGERIA 1903 to those who had taken part in the Kano-Sokoto campaign. To this medal it was decided to add the bar SOMALILAND 1902-04, and one for JIDBALLI to those engaged in the operations between January 1902 and May 1904.
Africa General Service Medal.—In June 1902, it was decided to create a new medal to replace the two that had previously been awarded for service in Central, East, and West Africa. This medal would be called the Africa General Service Medal. The front is the same as the King's South Africa medal, but the back features the figure of Britannia with a lion next to her, similar to the East and West African medal shown on page 296, but with AFRICA in the exergue. The ribbon is yellow,[Pg 255] with two narrow green stripes next to a broad black edge. Bronze medals were awarded to camp followers. Many bars have been issued with this medal: NIGERIA for operations carried out in early 1900, as well as December of that year, and in August and September 1901; S. Nigeria for operations in March, April, and May 1901, and Jubaland for those who were part of the small force sent against the difficult Ogaden Somalis from November 1900 to the end of April 1901. Only 465 silver and 26 bronze medals were awarded, most of which went to the 16th Bombay Cavalry. Other recipients of the medal and bar included sailors and marines from three of H.M. ships. The bar for Somaliland 1901 was given to those engaged there during May, June, and July 1901, and a bar for UGANDA 1900 was awarded to those involved in the Uandi country from July to October 1900. Only 5 officers and 1 British non-commissioned officer received the bar, and only 373 other bars were issued—268 to the 4th King's African Rifles and 105 to Indian soldiers. The 24th Punjab Infantry, active in various districts from August 1899 to December 1900, received a bar labeled B. C. A. 1899-1900—meaning British Central Africa 1899-1900. The bar for Gambia was awarded to a detachment of the 2nd King's African Rifles, four companies of the 3rd W.I.R., and the crews of three of H.M. ships who participated in operations between January and March 1901. The bar for ARO 1901-1902 was given to those involved against the Aro tribe from November 1901 to March 1902. Fourteen British officers and the crew of H.M. "Thrush," along with 1,830 native soldiers, made up the Aro Field Force. The bar for LANGO 1901 was awarded to members of the 4th King's African Rifles who fought against the Sudanese mutineers and the Langos from April to August 1901. Those involved in the Bornu expedition from February to May 2002 and in the Kontagora[Pg 256] expedition in February 1902 received the bar for N. Nigeria 1902 (the same bar was awarded to those serving at Argungu and on convoy duty), along with those active in Nigeria from July 1902 to June 1903. In April 1905, a bar inscribed N. Nigeria 1903 was given to participants in the Kano-Sokoto campaign. For this medal, it was also decided to add the bar SOMALILAND 1902-1904, and one for JIDBALLI for those involved in operations between January 1902 and May 1904.
The only fairly complete regiment engaged in the campaign was the 1st Hampshire, and this, together with detachments of the Norfolks, Yorkshires, and Rifle Brigade, and units of the Royal Engineers and Army Service Corps, formed the only English Corps engaged. The rest of the expedition included the 1st, 2nd, 3rd, and 5th King's African Rifles; Bikanir Camel Corps; Kajawa Corps; Gudabursi Horse; Rajputs; Sikhs; Punjabees and Indian Mounted Infantry; also the crews of fourteen H.M. ships.
The only fairly complete regiment involved in the campaign was the 1st Hampshire, and this, along with detachments from the Norfolks, Yorkshires, and Rifle Brigade, as well as units from the Royal Engineers and Army Service Corps, made up the only English Corps participating. The rest of the expedition included the 1st, 2nd, 3rd, and 5th King's African Rifles; Bikanir Camel Corps; Kajawa Corps; Gudabursi Horse; Rajputs; Sikhs; Punjabees and Indian Mounted Infantry; plus the crews of fourteen H.M. ships.

(Reverse.)
(Reverse.)
EGYPTIAN MEDAL FOR BRAVERY.
EGYPTIAN MEDAL OF VALOR.

THE MILITARY CROSS.
THE MILITARY CROSS.

(Obverse.)
(Front.)
EGYPTIAN MEDAL FOR BRAVERY.
EGYPTIAN MEDAL OF VALOR.
Nigeria, 1902-6.—At the battle of Jidballi the Mullah's army of 5,000 men were defeated by this little force, over 1,000 of the enemy being killed. The loss in British officers was great; Captain Lister of the 10th Hussars, heir to Lord Ribbledale, and 2 others being killed, and 9 wounded. In 1905 the bar for S. NIGERIA 1902-03 was issued to those who were engaged in South Nigeria between July 1902 and June 1903, against the Iris and the Omonoha and Ebima tribesmen, and in the operations against the Chief Adukukaiku of Igarra. In 1906 it was decided to give the same bar to those who took part in the expedition in the Afikpo district between December 1902 and January 1903. In April 1905 a bar was issued inscribed S. NIGERIA 1903 to those who had taken part in the operations between April and July 27th, 1903. In 1906 it was decided that the war should be issued to those who had taken part in the expeditions in the Ebegga country west of Anan. In April 1905 an Army Order set forth that a bar was to be issued to N. NIGERIA 1903, and granted to those who took part in the Sokoto-Burmi operations between April 15th and July 27th, 1903. In January 1906 a bar for N. NIGERIA 1903-04 was authorised for distribution among the 700 native soldiers and carriers engaged in the operations in the Bassa Province between December 1903 and March 1904. A bar for N. NIGERIA 1904 was granted to those who took part in four little expeditions, and S. NIGERIA 1903-04 to those employed in the expedition between December 1903 and January 1904 against the towns of Osca, Oriri, and N'doto. The bar for S. NIGERIA 1904 was added for a series of five expeditions, and a further addition to the Nigerian clasps was made in June 1906 by the approval of one inscribed S. NIGERIA 1904-05, given for operations between November 1894 and February 1895 in the Ibibio and Kwa countries. The bar for S. NIGERIA 1905 was awarded to members of the force which operated in the Kwale district between October 10th and 18th, 1905, both dates inclusive. The bar for S. NIGERIA 1905-06 was issued to those who took part in the Bende-Onitsha Hinterland expedition, and the bar for N. NIGERIA 1906 was given to those who took part in the operations against the Satiru rebels and the Emir of Hadeija. The bar for KISSI 1905 was awarded to those engaged in that district from March to June 1905, and for NANDI 1905-06 to those employed in that neighbourhood between October 1905 and July 1906, making a total of twenty-seven bars to this medal, and indicating the constant vigilance and discipline which is necessary to maintain the outposts of our Empire.
Nigeria, 1902-6.—At the battle of Jidballi, the Mullah's army of 5,000 men was defeated by this small force, with over 1,000 enemy casualties. The loss among British officers was significant; Captain Lister of the 10th Hussars, who was the heir to Lord Ribbledale, and two others were killed, and nine were wounded. In 1905, the bar for S. Nigeria 1902-03 was awarded to those who served in South Nigeria between July 1902 and June 1903, against the Iris and the Omonoha and Ebima tribesmen, as well as in the operations against Chief Adukukaiku of Igarra. In 1906, it was decided to extend the same bar to participants in the expedition in the Afikpo district between December 1902 and January 1903. In April 1905, a bar inscribed S. Nigeria 1903 was awarded to those involved in operations between April and July 27th, 1903. In 1906, it was decided that the war bar should be awarded to those who participated in expeditions in the Ebegga region west of Anan. An Army Order issued in April 1905 stated that a bar would be given for N. Nigeria 1903 to those involved in the Sokoto-Burmi operations between April 15th and July 27th, 1903. In January 1906, a bar for N. Nigeria 1903-04 was authorized for distribution to the 700 native soldiers and carriers who participated in the operations in the Bassa Province from December 1903 to March 1904. A bar for N. Nigeria 1904 was granted to those who took part in four small expeditions, and S. Nigeria 1903-04 was awarded to those involved in the expedition between December 1903 and January 1904 against the towns of Osca, Oriri, and N'doto. The bar for S. Nigeria 1904 was added for a series of five expeditions, and in June 1906, one inscribed S. Nigeria 1904-05 was approved for operations between November 1894 and February 1895 in the Ibibio and Kwa countries. The bar for S. Nigeria 1905 was awarded to the members of the force that operated in the Kwale district from October 10th to 18th, 1905, inclusive. The bar for S. Nigeria 1905-06 was issued to those who took part in the Bende-Onitsha Hinterland expedition, and the bar for N. Nigeria 1906 was awarded to those involved in operations against the Satiru rebels and the Emir of Hadeija. The bar for KISSI 1905 was given to those engaged in that district from March to June 1905, and NANDI 1905-06 was awarded to those assigned in that area from October 1905 to July 1906, making a total of twenty-seven bars for this medal, highlighting the ongoing vigilance and discipline required to maintain the outposts of our Empire.
East Africa, 1902.—The medal with bar for EAST AFRICA 1902 was awarded to all officers and men composing the Maruka patrol, which reached the Maruka district on September 4th, 1902, and operated in the district until October 25th, 1902, both dates inclusive.
East Africa, 1902.—The medal with a bar for EAST AFRICA 1902 was given to all officers and men of the Maruka patrol who arrived in the Maruka district on September 4th, 1902, and worked in the area until October 25th, 1902, including both dates.
East Africa, 1904.—The medal with bar EAST AFRICA 1904 was issued to all officers and men composing[Pg 258] the Iraini patrol, which entered the Iraini country on February 13th, 1904, and patrolled it between that date and March 17th, both dates inclusive.
East Africa, 1904.—The medal with bar EAST AFRICA 1904 was awarded to all officers and soldiers of[Pg 258] the Iraini patrol, which entered the Iraini territory on February 13th, 1904, and patrolled it until March 17th, including both dates.
East Africa, 1905.—The medal with bar for EAST AFRICA 1905 was issued to all officers and men who took part in the operations in and near Sotik, from May 31st to July 12th, 1905, both dates inclusive, also to the officers and men composing the Kissi patrol, which entered the Kissi country on September 1st, 1905, and patrolled it until October 9th, 1905, both dates inclusive.
East Africa, 1905.—The medal with the bar for EAST AFRICA 1905 was awarded to all officers and soldiers who participated in the operations in and around Sotik from May 31 to July 12, 1905, including both dates. It was also given to the officers and soldiers of the Kissi patrol, who entered the Kissi region on September 1, 1905, and patrolled there until October 9, 1905, including both dates.
East Africa, 1906.—The medal with bar EAST AFRICA 1906 was awarded to all officers and men composing the Embo patrol, which entered the Embo country on June 18th, 1906, and operated there until July 19th, 1906, both dates inclusive.
East Africa, 1906.—The medal with the bar EAST AFRICA 1906 was given to all officers and soldiers in the Embo patrol, which entered the Embo region on June 18, 1906, and operated there until July 19, 1906, including both dates.
West Africa, 1906.—The medal with bar WEST AFRICA 1906 was issued to all officers and men composing the Owa column, which left Asaba on June 9th, 1906, and operated against the people of Owa until the restoration of peace and the breaking-up of the column on August 3rd, 1906, both dates inclusive.
West Africa, 1906.—The medal with the bar WEST AFRICA 1906 was awarded to all the officers and soldiers of the Owa column, which departed from Asaba on June 9th, 1906, and engaged with the people of Owa until peace was restored and the column was disbanded on August 3rd, 1906, with both dates included.
The medal with bar WEST AFRICA 1906 was also awarded to all officers and men who operated in the Chibuk country between November 12th and December 4th, 1906, both dates inclusive.
The medal with bar West Africa 1906 was also given to all officers and soldiers who served in the Chibuk region from November 12 to December 4, 1906, including both dates.
West Africa, 1908.—An Army Order issued in July 1910, with the approval of His Majesty King George V, granted a bar inscribed W. AFRICA 1908 to the forces who took part in the fighting in and near the Soukwala Valley on December 11th, 1908, and between December 24th and 31st, 1908, both dates inclusive.
West Africa, 1908.—An Army Order issued in July 1910, with the approval of His Majesty King George V, granted a bar inscribed W. Africa 1908 to the forces who participated in the battles in and around the Soukwala Valley on December 11, 1908, and between December 24 and 31, 1908, including both dates.
I.G.S., 1903.—This medal, precisely similar on the reverse, except for the deletion of the date, to the India General Service Medal 1895, bears on the obverse the same bust of King Edward as on the South Africa medal. The ribbon is the same, also the suspender. With this new issue the bar for WAZIRISTAN 1901-2[Pg 259] was given to those who took an active part in the Mahsud Waziri blockade between November 1901 and November 1902. To those holding the 1895 medal the bar only was issued. Bronze medals were given to authorised camp followers.
I.G.S., 1903.—This medal is identical on the back, except for the removal of the date, to the India General Service Medal 1895. It features the same bust of King Edward on the front as the South Africa medal. The ribbon and suspender are also the same. With this new issue, the bar for Waziristan 1901-1902[Pg 259] was awarded to those who actively participated in the Mahsud Waziri blockade between November 1901 and November 1902. Those who already held the 1895 medal were only issued the bar. Bronze medals were given to authorized camp followers.
Only three English soldiers received the medal—men of the Cheshires who were employed as signallers. The troops engaged were: 1st, 3rd, and 4th Sikhs; 2nd, 4th, 5th, and 22nd Punjabis; 1st, 3rd, and 5th Punjab Cavalry; Sappers and Miners.
Only three English soldiers received the medal—men from the Cheshires who worked as signallers. The troops involved were: 1st, 3rd, and 4th Sikhs; 2nd, 4th, 5th, and 22nd Punjabis; 1st, 3rd, and 5th Punjab Cavalry; Sappers and Miners.
Natal Native Rebellion.—In 1908 the Natal Government awarded a silver medal to those who took part in suppressing the native rebellion in 1906. The medal, which was supplied by the Goldsmiths & Silversmiths Company, bears on the obverse a portrait bust of King Edward VII facing to the right, encircled by the legend EDWARDVS VII REX IMPERATOR. On the reverse Natali is represented holding the sword of justice in her right hand, and a palm branch in her left, supported and protected by Britannia, who holds in her left hand the orb of empire. In the exergue is the word NATAL. A broad plain bar is inscribed ·1906· with a large dot on either side. The names, etc., are impressed in light square block capitals, and the ribbon for suspension is a deep red, with black edges. The medal illustrated facing page 198 was issued to the local white forces, including the Natal Horse Corps and about 350 chiefs and leading natives.
Natal Native Rebellion.—In 1908, the Natal Government awarded a silver medal to those who helped suppress the native rebellion in 1906. The medal, provided by the Goldsmiths & Silversmiths Company, features a bust of King Edward VII facing right, surrounded by the inscription EDWARD VII KING EMPEROR. On the reverse side, Natali is depicted holding the sword of justice in her right hand and a palm branch in her left, being supported and protected by Britannia, who holds the orb of empire in her left hand. The word NATAL appears in the exergue. A broad plain bar has the inscription ·1906· with a large dot on either side. The names and other details are impressed in light square block capitals, and the ribbon for hanging is deep red with black edges. The medal illustrated facing page 198 was awarded to the local white forces, including the Natal Horse Corps and about 350 chiefs and prominent natives.
Tibet, 1903-4.—Owing to the non-fulfilment of treaty obligations on the part of the Tibetans, Colonel Younghusband was sent by the Indian Government with a military escort to the seat of Tibetan authority. For some little time he made peaceful progress, until, on arriving at Hot Springs, General Macdonald's force of 1,600 men, with 4 field and 2 Maxim guns, found it necessary to attack the Tibetans, and drove them out of their position. Then, when they had gathered round their Lhassa General, the political agent, Colonel Younghusband, together with Brigadier Macdonald,[Pg 260] their staffs, and some Sikhs, went forward to parley with them, and despite the attitude of the Tibetans, the officers dismounted; some began to eat sandwiches, others to take photographs. Suddenly the Tibetans turned upon the ring of Sikhs which surrounded them; all was soon confusion, but the discipline of the Sikhs, and the coolness of the officers, saved the situation, and within ten minutes the flower of the Tibetan army was demolished, despite the grim determination of those composing it, for they disdained to run away, but solemnly marched off as the fight became too hot for them.
Tibet, 1903-4.—Due to the Tibetans not fulfilling their treaty obligations, Colonel Younghusband was sent by the Indian Government with a military escort to the center of Tibetan authority. For a while, he made peaceful progress until, upon reaching Hot Springs, General Macdonald's force of 1,600 troops, equipped with 4 field and 2 Maxim guns, found it necessary to engage the Tibetans and pushed them out of their position. After that, when they had gathered around their Lhasa General, Colonel Younghusband, along with Brigadier Macdonald, [Pg 260] their staffs, and some Sikhs, went forward to negotiate with them. Despite the Tibetans' attitude, the officers got off their horses; some started eating sandwiches, while others took photographs. Suddenly, the Tibetans attacked the ring of Sikhs surrounding them; chaos ensued, but the discipline of the Sikhs and the composure of the officers saved the day. Within ten minutes, the elite of the Tibetan army was defeated, even though its members had no intention of fleeing; they solemnly marched away as the fight became too intense for them.
The medal for the Tibet Mission 1903-4 bears on the reverse the fortress-capped hill of Potala a Lhassa, with TIBET 1903-4 beneath it, and to those engaged in the mission about Gyantse a bar inscribed GYANTSE was awarded. The obverse is the same as the I.G.S. 1903 medal. The ribbon is dark red edged with green, with two white stripes. It is noteworthy that with this and the medal I shall next describe the old curled suspenders, as on the Sutlej medals, are used.
The medal for the Tibet Mission 1903-4 has on the back the fortress-topped hill of Potala in Lhassa, with Tibet 1903-1904 underneath it, and for those involved in the mission around Gyantse, a bar inscribed GYANTSE was awarded. The front is the same as the I.G.S. 1903 medal. The ribbon is dark red with green edges and two white stripes. It’s worth noting that, along with this medal and the next one I will describe, the old curled suspenders, like those on the Sutlej medals, were used.
The Tibet Force comprised the Royal Fusiliers; a detachment of the Norfolks; a Mountain Battery of the R.A.; 8th Goorkas; 40th Pathans; Queen's Own Sappers and Miners, and the 6th Mule Corps.
The Tibet Force included the Royal Fusiliers, a detachment from the Norfolks, a Mountain Battery of the R.A., the 8th Goorkas, the 40th Pathans, the Queen's Own Sappers and Miners, and the 6th Mule Corps.
I.G.S. 1908.—A new medal in place of the 1903 I.G.S., and destined to be known as the I.G.S. Medal 1908, was awarded by an Army Order in December 1908. It has a pictorial design on the reverse, somewhat similar to the above-mentioned medal, and reminding one of the old Ghuznee Medal. It was issued in 1910 to those who had been engaged on the North-West Frontier between February 14th and May 31st, 1908. The obverse bears the bust of King Edward VII in Field-Marshal's uniform, encircled with the legend EDWARDVS VII KAISAR-I-HIND. On the reverse is a fort on a hill-top backed by mountains, and beneath, forming the exergue, an ornamental tablet overlaid by olive and oak branches bearing the word INDIA. The[Pg 261] bar bears NORTH-WEST FRONTIER 1908. This medal was designed by Mr. Richard Garbe, R.B.S. It was awarded to both the troops and followers, and was the last issued during the reign of Edward the Peacemaker. (See facing page 204.)
I.G.S. 1908.—A new medal to replace the 1903 I.G.S., which would be known as the I.G.S. Medal 1908, was awarded by an Army Order in December 1908. It features a design on the back that is somewhat similar to the previously mentioned medal and reminiscent of the old Ghuznee Medal. It was issued in 1910 to those who had served on the North-West Frontier between February 14th and May 31st, 1908. The front shows the bust of King Edward VII in Field-Marshal's uniform, surrounded by the phrase EDWARD VII EMPEROR OF INDIA. On the back is a fort on a hilltop set against mountains, and below that, there’s an ornate tablet decorated with olive and oak branches featuring the word INDIA. The[Pg 261] bar reads NORTH-WEST FRONTIER 1908. This medal was designed by Mr. Richard Garbe, R.B.S. It was awarded to both the troops and their supporters and was the last medal issued during the reign of Edward the Peacemaker. (See facing page 204.)
The regiments engaged in the campaign were: the Gordon and Seaforth Highlanders; Royal Irish Rifles and Royal Munster Fusiliers; the Northumberland Fusiliers and Warwickshire Regiment; 10th Hussars; 71st Company R.G.A.; 6 guns of the 18th and 80th Batteries R.F.A.; 62nd and 75th Batteries R.F.A.; 2nd, 3rd, 8th, 21st, 22nd, 23rd, and 28th Mountain Batteries, and Nos. 1 and 7 British Field Hospital; 1st, 4th, 5th, and 6th Goorkas; 19th, 20th, 21st, 22nd, 25th, 28th, 29th, 30th, and 33rd Punjabees; 15th, 23rd, 34th, 45th, 53rd, 54th, 55th, 57th, and 59th Sikhs; 40th Pathans; Queen's Own Corps of Guides Infantry; Cavalry of the Q.O. Guides; 21st Cavalry; 19th and 37th Lancers; Sappers and Miners, and 5 Native Field Hospitals.
The regiments involved in the campaign were: the Gordon and Seaforth Highlanders; Royal Irish Rifles and Royal Munster Fusiliers; the Northumberland Fusiliers and Warwickshire Regiment; 10th Hussars; 71st Company R.G.A.; 6 guns from the 18th and 80th Batteries R.F.A.; 62nd and 75th Batteries R.F.A.; 2nd, 3rd, 8th, 21st, 22nd, 23rd, and 28th Mountain Batteries; and Nos. 1 and 7 British Field Hospital; 1st, 4th, 5th, and 6th Goorkas; 19th, 20th, 21st, 22nd, 25th, 28th, 29th, 30th, and 33rd Punjabees; 15th, 23rd, 34th, 45th, 53rd, 54th, 55th, 57th, and 59th Sikhs; 40th Pathans; Queen's Own Corps of Guides Infantry; Cavalry of the Q.O. Guides; 21st Cavalry; 19th and 37th Lancers; Sappers and Miners; and 5 Native Field Hospitals.
Abor, 1911-12.—The massacre of Mr. Williamson and his party necessitated the dispatch of a punitive force, which under Major-General Hamilton Bower, C.B., entered the Abor country in October 1911, and for seven months, under the most trying physical difficulties, operations were pursued. "The paths were quite unfit for use by laden carriers," and progress was exceedingly slow, but as usual the regiments pressed on to their destination, and, after inflicting punishment on the culpable villagers who had been party to the massacre, captured and brought to trial those immediately responsible for the murders. An important result of the operations was the breaking down of the power of the Kebang-Rotung group of villages, and the freeing of the Lakhimpur districts north of the Brahmaputra from Abor aggression. For his services in this campaign General Bower was made K.C.B., and the following officers Companions of the D.S.O.: Majors James Davidson, M.D., James Alban Wilson,[Pg 262] Edward G. Vaughan, Ernest H. Scott Cullen, M.V.O., and Lieutenant Miles A. Claude Kennedy.
Abor, 1911-12.—The massacre of Mr. Williamson and his team required the deployment of a punitive force, which, led by Major-General Hamilton Bower, C.B., entered the Abor territory in October 1911. For seven months, despite extremely challenging physical conditions, operations continued. "The paths were completely unsuitable for use by heavily loaded carriers," and progress was very slow. However, as usual, the regiments pushed on to their objective and, after punishing the villagers involved in the massacre, captured those directly responsible for the murders and brought them to trial. A key outcome of the operations was the dismantling of the Kebang-Rotung group of villages' power and the liberation of the Lakhimpur districts north of the Brahmaputra from Abor aggression. For his contributions to this campaign, General Bower was honored with the K.C.B. title, and the following officers received the D.S.O. distinction: Majors James Davidson, M.D., James Alban Wilson, [Pg 262] Edward G. Vaughan, Ernest H. Scott Cullen, M.V.O., and Lieutenant Miles A. Claude Kennedy.
Among the regiments taking part in the expedition were the 1st Batt. 8th Goorka Rifles, on whom the brunt of the fighting fell—medals of this regiment have realised from £2 10s. to £3 in the sale-room; 1st Co. (King George's Own) Sappers and Miners, to whose skill and energy "the success of the expedition was largely due"; 1st Batt. King Edward's Own Goorka Rifles; 32nd Sikh Pioneers, who did excellent work on the line of communications; dismounted detachment Assam Valley Light Horse; Supply and Transport Corps; Lakhimpur Military Police; 5 Nagar Carrier Corps.
Among the regiments involved in the expedition were the 1st Battalion, 8th Gurkha Rifles, which bore the majority of the fighting—medals from this regiment have sold for between £2.50 and £3; 1st Company (King George's Own) Sappers and Miners, whose skill and effort were a major reason for the expedition's success; 1st Battalion, King Edward's Own Gurkha Rifles; 32nd Sikh Pioneers, who performed exceptionally well along the lines of communication; a dismounted detachment of Assam Valley Light Horse; Supply and Transport Corps; Lakhimpur Military Police; and the 5 Nagar Carrier Corps.
The medal, although described as the India General Service Medal 1908, has on the reverse the crowned bust of King George V truncated by the edge of the medal, a spray of laurel covering the truncation, and the legend GEORGIVS V KAISAR-I-HIND on a raised band surrounding the effigy. This was given to those who served at or beyond Kobo between October 6th, 1911, and April 20th, 1912, both dates inclusive. The medals are engraved in a coarse kind of script—each letter being separate—or in a loose running hand. Officers and men already in possession of the India General Service Medal 1908 received the clasp only.
The medal, known as the India General Service Medal 1908, features on the back the crowned profile of King George V, which is cut off by the edge of the medal. A laurel spray covers the truncation, with the words GEORGE V, EMPEROR OF INDIA on a raised band surrounding his image. This medal was awarded to those who served at or beyond Kobo from October 6th, 1911, to April 20th, 1912, including both dates. The medals are engraved in a rough style of writing—each letter separate—or in a loose cursive. Officers and soldiers who already had the India General Service Medal 1908 received only the clasp.
SUDAN, 1910
By a Special Army Order, dated from Headquarters, Khartoum, June 12th, 1911, His Highness the Khedive approved of a new medal being struck to commemorate military operations in the Atwot district and granted to the troops (including Government police and Jehadia) who took part in the operations under the command of El Kaimakam W. J. St. J. Harvey Bey, against the Atwot Dinkas in the Atwot district of the Bahr el-Ghazal Province. The medal in silver was granted[Pg 263] to all troops who formed part of the columns operating in the district between February 9th and March 17th, 1910, both dates inclusive, or who were disembarked at Sheikh Tombe, Aliah district, Mongalla province, between March 29th and April 4th, 1910, both dates inclusive.
By a Special Army Order from Headquarters, Khartoum, dated June 12th, 1911, His Highness the Khedive approved the creation of a new medal to honor military operations in the Atwot district, which was awarded to the troops (including Government police and Jehadia) who participated in the operations led by El Kaimakam W. J. St. J. Harvey Bey against the Atwot Dinkas in the Atwot district of the Bahr el-Ghazal Province. The silver medal was awarded[Pg 263] to all troops who were part of the columns operating in the district from February 9th to March 17th, 1910, both dates included, or who were disembarked at Sheikh Tombe, Aliah district, Mongalla province, from March 29th to April 4th, 1910, both dates included.
Atwot.—The bar inscribed ATWOT in English and Arabic was granted to all troops taking part, and the following non-combatants were entitled to the medal and bar in silver, who participated under the same conditions as the troops: Government Civil employees; engineers of steamers; Raises of steamers; Sheikhs; Armed Guides; whilst non-combatants, i.e. Civilian Syces of Officers, Civilian Servants of Officers, and Transport Drivers, were granted the medal in bronze without bar.
Atwot.—The bar marked ATWOT in English and Arabic was awarded to all troops involved, and the following non-combatants also qualified for the silver medal and bar, participating under the same conditions as the troops: Government civil employees; engineers of steamers; crew members of steamers; Sheikhs; Armed Guides; while non-combatants, i.e. civilian syces of officers, civilian servants of officers, and transport drivers, received the bronze medal without the bar.
South Kordofan.—To those who took part in the operations in Southern Kordofan under the command of El Lewa Asser Pasha, against Jebel Tagoi, between November 10th and 19th, 1910, inclusive, or who formed part of the column operating against Jebels Katla and Tima, under the command of El Kaimakam Conry Bey, D.S.O., between November 27th and December 19th, 1910, both dates inclusive, the silver medal with bar inscribed in English and Arabic S. KORDOFAN 1910 was granted, and to those already in possession of the medal, the bar. The Government police were included in the troops, and therefore received the medal and bar. The following non-combatants were also entitled to the medal and bar in silver: Government Civil employees; Sheikhs, and Armed Guides, whilst the bronze medal without bar was granted to Civilian Syces of Officers, Civilian Servants of Officers, and Transport Drivers.
South Kordofan.—To those who participated in the operations in Southern Kordofan under the command of El Lewa Asser Pasha against Jebel Tagoi from November 10th to 19th, 1910, or who were part of the column operating against Jebels Katla and Tima under the command of El Kaimakam Conry Bey, D.S.O., from November 27th to December 19th, 1910, both dates included, the silver medal with a bar inscribed in English and Arabic S. Kordofan 1910 was awarded. Those who already had the medal received the bar. The Government police were included in the forces and thus also received the medal and bar. The following non-combatants were also eligible for the silver medal and bar: Government Civil employees, Sheikhs, and Armed Guides, while the bronze medal without a bar was awarded to Civilian Syces of Officers, Civilian Servants of Officers, and Transport Drivers.
Sudan, 1912.—To the troops, including Sudan Government police, who took part in the operations against the Beir and Anuak tribes, the medal with bar inscribed SUDAN 1912 in English and Arabic was awarded. Those entitled had taken part in the Pibor reconnaissance under[Pg 264] the command of El Bimbashi Dickinson between October 12th and December 25th, 1911, both dates inclusive, or had formed part of the columns operating against the Beir tribe under the command of El Miralai Drake Bey, between the dates stated below, both dates inclusive:
Sudan, 1912.—To the troops, including the Sudan Government police, who participated in the operations against the Beir and Anuak tribes, the medal with the bar inscribed SUDAN 1912 in English and Arabic was awarded. Those eligible had taken part in the Pibor reconnaissance under [Pg 264] the command of El Bimbashi Dickinson between October 12th and December 25th, 1911, both dates included, or had been part of the columns operating against the Beir tribe under the command of El Miralai Drake Bey, between the dates stated below, both dates included:
I. Northern Column under the command of El Bimbashi Dickinson, December 26th, 1911, to March 15th, 1912.
I. Northern Column under the command of El Bimbashi Dickinson, December 26, 1911, to March 15, 1912.
II. Central Column under the command of El Miralai Drake Bey, December 31st, 1911, to March 15th, 1912.
II. Central Column under the command of El Miralai Drake Bey, December 31, 1911, to March 15, 1912.
III. Southern Column under the command of El Kaimakam Arden Bey, January 1st to February 3rd, 1912.
III. Southern Column led by El Kaimakam Arden Bey, January 1 to February 3, 1912.
The column operating against the Anuak tribe under the command of El Miralai Leveson Bey, D.S.O., between March 4th and April 12th, 1912, both dates inclusive. The medal and bar in silver was awarded to Government Civil employees, Sheikhs, and Armed Guides, although classed as non-combatants; whilst the medal in bronze without bar was again awarded to Civilian Syces of Officers, Civilian Servants of Officers, and Transport Drivers.
The column operating against the Anuak tribe, led by El Miralai Leveson Bey, D.S.O., took place between March 4 and April 12, 1912, including both dates. The silver medal and bar were awarded to government civil employees, sheikhs, and armed guides, even though they were considered non-combatants. Meanwhile, the bronze medal without a bar was awarded to civilian syces of officers, civilian servants of officers, and transport drivers.
Sudan Medal, 1910.—The medal, 1⅞ in. in diameter, bears on the obverse the cypher of the Khedive Abbas Hilmi El Thani (Abbas II) and the date Hegira 1328. On the reverse, modelled by Richard Garbe, R.B.S., is a lion standing in the attitude of attention, with its fore paws resting upon a small panel bearing the record SUDAN above the exergue, in which is a Sudanese shield and spears. Forming the background to the lion is the Nile within its banks, with the sun rising and casting its rays over the sky and sparkling the water of the river. The suspender is like that employed on the South African medal, and the bars, ⅛ in. wide and riveted the same distance apart, are of the same character. The photograph (facing page 204) illustrating the medal[Pg 265] does not properly depict the disposition of the bars, as they are unfixed, the medal with loose bars having been kindly placed at my disposal for the purpose of illustration herein by the Military Secretary of the Egyptian Army. The ribbon of watered silk, 1¼ in. wide, is black with a narrow edge of green and an under, outer edging of red.
Sudan Medal, 1910.—The medal, 1⅞ in. in diameter, features on the front the cypher of Khedive Abbas Hilmi El Thani (Abbas II) along with the date Hegira 1328. On the back, designed by Richard Garbe, R.B.S., there is a lion standing at attention, with its front paws resting on a small panel that displays the word SUDAN above the exergue, which includes a Sudanese shield and spears. The background shows the Nile within its banks, with the sun rising and casting its rays across the sky and reflecting off the river water. The suspender resembles that used on the South African medal, and the bars, which are ⅛ in. wide and riveted the same distance apart, have a similar style. The photograph (facing page 204) illustrating the medal[Pg 265] does not accurately show the arrangement of the bars, as they are unattached; the medal with loose bars was generously provided for this illustration by the Military Secretary of the Egyptian Army. The ribbon is made of watered silk, 1¼ in. wide, and is black with a narrow green edge and a red outer edging.
NAVAL WAR MEDALS
I have given military war medals preference over those awarded for naval service, not because I do not recognise the first line of defence as worthy of priority, for, as I have pointed out, the first medals of which we have any record were probably given as mementoes of, or as rewards for, the defeat of the Armada, but because the variety given for land service is considerably greater, and, in many instances, as a naval contingent also participated, it enabled me to deal with the historical aspect out of hand, a necessity which the concise nature of the book demands.
I have prioritized military war medals over those awarded for naval service, not because I don’t see the first line of defense as deserving priority—after all, as I've noted, the first medals we have records of were likely given as keepsakes or rewards for the defeat of the Armada—but because the range of medals for land service is much broader. In many cases, since a naval contingent was also involved, it allowed me to address the historical context more easily, which is necessary given the succinct nature of the book.
The Armada Medals.—The story of gallant Drake, Frobisher, and Hawkins is perennially fresh in the minds of every Briton, and how the wind came to their aid and practically destroyed the 120 mighty galleons of Spain, while the flower of her nobility, with 30,000 men, were killed in battle or drowned. I have already referred en passant to the medals issued in the latter part of the sixteenth century. The "Ark-in-Flood," a very handsome oval medal, is one of the most striking of the Elizabethan series (see facing page 270), and a particularly fine one is in the possession of W. R. Parker-Jervis, Esq., who inherited it from his aunt, Lady Forester. The medal was given to Lord Uppingham after the defeat of the Armada in 1588, and it is on record, in a book at Woburn Abbey, that this medal was awarded to Admirals and Commanders who took part in the battle, and was worn by them as a badge. Pinkerton states that it was given, in gold and silver, to Marine Commanders as a mark of royal approbation, and I think we have sufficient evidence that it was given to the leading spirits of the Armada. This medal differs in several respects from the one described on page 2, for while on the one referred to above there are rays behind the head of Elizabeth and it is framed in laurel leaves with a twist of rope as suspender, that referred to in the beginning of the book has only the simple beaded border, the only embellishment being a fancy scroll on either side of a double ring suspender, and the motto reads ELIZABETH · D · G · ANGLIE · F · ET · HI · REG. It will be noted on comparison that the stops between the letters in the Uppingham medal are round instead of diamond-shape as on the simpler medal. James I, as I have previously described, issued a medal very similar. These were, it may be presumed, suspended from the neck, but medallions were sometimes worn in the hat.
The Armada Medals.—The tale of the brave Drake, Frobisher, and Hawkins is always fresh in the minds of every Brit, especially how the wind helped them and nearly annihilated the 120 powerful galleons of Spain, while 30,000 of its nobility were either killed in battle or drowned. I've already mentioned en passant the medals issued in the late sixteenth century. The "Ark-in-Flood," a very attractive oval medal, stands out among the Elizabethan series (see facing page 270), and a particularly impressive one belongs to W. R. Parker-Jervis, Esq., who got it from his aunt, Lady Forester. This medal was presented to Lord Uppingham after the defeat of the Armada in 1588, and it’s noted in a book at Woburn Abbey that this medal was awarded to Admirals and Commanders who participated in the battle and was worn by them as a badge. Pinkerton states that it was given, in gold and silver, to Marine Commanders as a mark of royal approval, and I think we have enough evidence that it was awarded to the key figures of the Armada. This medal differs in several ways from the one described on page 2, because while the one mentioned above has rays behind Elizabeth's head and is framed in laurel leaves with a twist of rope as the suspension, the one addressed at the start of the book has only a simple beaded border, with the only decoration being a fancy scroll on either side of a double ring suspender, and the motto reads ELIZABETH D. G. ANGLIE F. ET HI REG. A comparison will show that the stops between the letters in the Uppingham medal are round instead of diamond-shaped like those on the simpler medal. James I, as I have noted before, issued a very similar medal. These were likely worn around the neck, though medallions were sometimes displayed in hats.

COMMONWEALTH MEDAL FOR DUTCH WARS, 1653.
COMMONWEALTH MEDAL FOR DUTCH WARS, 1653.

ELIZABETHAN NAVAL MEDAL.
ELIZABETHAN NAVAL MEDAL.
Drake's Medal.—This handsome medal, given to Sir Francis Drake by Queen Elizabeth after his voyage round the world, now in the possession of the descendants of the famous commander at Nutwell Court, Devonshire, is a characteristic example of the Elizabethan jeweller's art. The frame, set with diamonds and rubies, and enamelled in various colours, forms a handsome setting for the fine cameo cut in onyx, and attributed to Valerio Vincenteno. Two heads are carved thereon, one representing Europe cut in the lower strata of white, while out of the upper strata of black the head of a negro has been fashioned. Set in the reverse is a beautiful miniature of Queen Elizabeth by the famous painter Nicholas Hilliard, with the date Anno Dom: 1575 Regni 20. From the badge depends a cluster of baroque pearls connecting a pear-shaped drop with the main body of the badge. The virgin Queen also presented the intrepid mariner with a jewelled star of twelve points; rubies set in the rays, and diamonds and opals in the circular centre surrounding an orb indicative of sovereignty. Loops are attached for fixing on to the coat.
Drake's Medal.—This beautiful medal, awarded to Sir Francis Drake by Queen Elizabeth after his journey around the world, is now owned by the descendants of the famous commander at Nutwell Court, Devonshire. It's a prime example of Elizabethan jewelry craftsmanship. The frame, adorned with diamonds and rubies and enamelled in various colors, creates a stunning backdrop for the exquisite cameo carved from onyx, attributed to Valerio Vincenteno. The cameo features two heads: one depicting Europe, carved in the lower layer of white, and the other, the head of a Black man, shaped from the upper layer of black. On the reverse side is a lovely miniature of Queen Elizabeth by the renowned painter Nicholas Hilliard, dated Anno Dom: 1575 Regni 20. From the badge hangs a cluster of baroque pearls linking a pear-shaped drop to the main part of the badge. The Virgin Queen also gifted the brave sailor a jeweled star with twelve points, featuring rubies in the rays, and diamonds and opals in the circular center surrounding an orb symbolizing sovereignty. Loops are attached for fastening it to a coat.
Charles I Naval Medals.—Charles I issued a medal[Pg 268] which, because of its size, could not have been intended as a personal decoration, but rather to commemorate the launching of the famous three-decker, the "Royal Sovereign," in 1637. On the obverse is a portrait in profile of the King looking left: it varies, however, and on one the monarch is represented with a ruff round the neck, and a jewel depending from stars on the shoulder; and on the other he is represented in armour, with long curling hair over a turn-down collar. Around the bust is the motto CAROLVS ◆ I ◆ D ◆ G ◆ MAG ◆ BRITAIN ◆ FRAN ◆ ET ◆ HIB ◆ REX. On the truncation is 1639. The medal is in silver 2·35 in. in diameter, and is by Nicholas, Bristol. On the reverse is the "Royal Sovereign" under full sail, and to the left tiny promontories with forts thereon; around the ship is the inscription NEC ◆ META ◆ MIHI ◆ QVÆ ◆ TERMINVS ◆ ORBI. A smaller medal, probably for naval service, was likewise issued with the same inscription. It was not, however, a small replica of the medal just described, although it bore the same effigy of King Charles I on the obverse, and a ship in full sail on the reverse, for the actual design and modelling differ.
Charles I Naval Medals.—Charles I issued a medal[Pg 268] which, due to its size, was likely not meant as a personal decoration, but rather to celebrate the launch of the famous three-decker, the "Royal Sovereign," in 1637. The front features a profile portrait of the King facing left; however, there are variations, with one showing the monarch wearing a ruff around his neck and a jewel hanging from stars on his shoulder, and another depicting him in armor, with long curly hair falling over a turned-down collar. Surrounding the bust is the motto CAROLUS ◆ I ◆ D ◆ G ◆ MAG ◆ BRITAIN ◆ FRANCE ◆ AND ◆ HIBERNIA ◆ KING. The year 1639 is marked on the truncation. The medal is silver, measuring 2.35 inches in diameter, and was created by Nicholas in Bristol. The reverse displays the "Royal Sovereign" under full sail, with small promontories and forts to the left; surrounding the ship is the inscription NEC ◆ META ◆ MIHI ◆ QVÆ ◆ TERMINUS ◆ ORB. A smaller medal, likely for naval service, was also issued with the same inscription. However, it was not a miniature version of the previously described medal, even though it featured the same effigy of King Charles I on the front and a ship in full sail on the back, as the actual design and modeling differ.
Commonwealth Naval Medals.—Although I have stated that the Dunbar medal was the first campaign medal to be distributed to military officers and men of all ranks, the Navy holds the distinction of being the first to be honoured in this way, for in June 1649 it was decided to issue rewards to the officers and men who had "done good service at sea." The medal, designed by Thomas Simon, has on the obverse the Parliament in session, and on the reverse two distinctive cartouches, depending from the stock of an anchor. The one to the left bears the St. George's Cross for England, and that on the right the Harp for Ireland; a rope attached to the anchor is disposed so as to form a decorative surrounding by the arrangement of three twists; above is the word MERUISTI. On the stock of the anchor are the medallist's initials T. S. An order of the Council of State records that Simon was granted the use of the press in the[Pg 269] Tower of London on condition that he did not use it for any other purpose than that of striking these medals, and he had to enter into a surety for £500 that he would "make no unlawful use of the presse."
Commonwealth Naval Medals.—Although I mentioned that the Dunbar medal was the first campaign medal awarded to military officers and personnel of all ranks, the Navy was the first to receive this honor. In June 1649, it was decided to issue rewards to the officers and crew who had "done good service at sea." The medal, designed by Thomas Simon, features the Parliament in session on the front, and on the back, two distinct scrolls hanging from the stock of an anchor. The left one displays St. George's Cross for England, while the right one shows the Harp for Ireland; a rope connected to the anchor is arranged to create a decorative effect with three twists. Above this is the word MERUISTI. On the stock of the anchor are the medallist's initials T. S. An order from the Council of State states that Simon was allowed to use the press in the [Pg 269] Tower of London, provided he only used it for minting these medals, and he had to secure a £500 bond to ensure he "made no unlawful use of the presse."
Wyard Medal.—Robert Wyard of the "Adventure," with 22 guns, was on the night of July 31st, 1650, bold enough to engage six royalist frigates, and after fighting a whole day made them sheer off. Wyard received a gold medal, which I illustrate, valued at £50, and his officers and men medals varying in value from £5 to 10s. The obverse of the medal is as that above described. The reverse shows the "Adventure" engaging two of the royalist frigates with the other ships in the distance. Above is the inscription SERVICE ◆ DON ◆ AGAINST ◆ SIX ◆ SHIPS ◆ IVLY ◆ Y ◆ XXXI ◆ & AVGVST ◆ Y ◆ 1 ◆ 1650. The medal is oval, 1·6 in. by 1·35 in., and was struck in gold and silver. (See facing page 270.)
Wyard Medal.—Robert Wyard of the "Adventure," equipped with 22 guns, was brave enough on the night of July 31st, 1650, to take on six royalist frigates. After battling for an entire day, he forced them to retreat. Wyard was awarded a gold medal, valued at £50, which I illustrate here, while his officers and crew received medals worth between £5 and 10s. The front of the medal is as described above. The back depicts the "Adventure" engaging two of the royalist frigates, with the other ships in the background. Above is the inscription SERVICE ◆ DON ◆ AGAINST ◆ SIX ◆ SHIPS ◆ IVLY ◆ Y ◆ XXXI ◆ & AVGVST ◆ Y ◆ 1 ◆ 1650. The medal is oval, measuring 1.6 in. by 1.35 in., and was made from gold and silver. (See facing page 270.)
THE DUTCH WARS
For the victories over the Dutch some fine medals were struck. Probably the most interesting is the gold medal awarded to the Admirals who participated in the war and in the decisive battle fought on July 31st, 1653.
For the victories over the Dutch, some impressive medals were created. Probably the most interesting is the gold medal given to the Admirals who took part in the war and in the decisive battle fought on July 31, 1653.
On February 28th, 1653, Generals Blake, Deane, and Monk defeated the Dutch fleet under Admirals Van Tromp and De Rutzer, and after a three-days' fight defeated them off Portland. In this engagement soldiers served for the first time on board ship, and the Marines came into existence. At the beginning of June the Dutch admirals were again defeated by the English Generals Deane, Penn, and Monk; but although the English did not lose a ship, General Deane was killed in the action. The English then followed the Dutch to their own coasts, and on July 31st the enemy was badly beaten after a terrific fight in which they lost 26 ships, their Admiral, Van Tromp, and about 6,000 men. The English losses were 2 ships and 1,300[Pg 270] men killed and wounded. The English Parliament was not slow to reward the victors, for on August 8th it was resolved to award Generals Blake and Monk gold chains valued at £300 apiece; to Vice-Admiral Penn and Rear-Admiral Lawson chains of the value of £100, and to the four staff officers chains worth £40 each for their brilliant services. The money was ordered to be deducted from the £2,000 voted, and the balance spent in the issue of medals among the officers of the fleet.
On February 28, 1653, Generals Blake, Deane, and Monk defeated the Dutch fleet led by Admirals Van Tromp and De Rutzer, and after a three-day battle, they overcame them off Portland. This was the first time soldiers served on board ships, marking the creation of the Marines. At the beginning of June, the Dutch admirals faced another defeat by English Generals Deane, Penn, and Monk; although the English didn't lose any ships, General Deane was killed in the fight. The English then pursued the Dutch to their own coasts, and on July 31, the enemy suffered a heavy defeat after a fierce battle in which they lost 26 ships, their Admiral Van Tromp, and around 6,000 men. The English losses were 2 ships and 1,300[Pg 270] men killed and wounded. The English Parliament quickly rewarded the victors, as on August 8, it was decided to award Generals Blake and Monk gold chains worth £300 each; Vice-Admiral Penn and Rear-Admiral Lawson received chains valued at £100, and the four staff officers were given chains worth £40 each for their outstanding service. The funds were to be taken from the £2,000 budgeted, with the remainder allocated for medals for the fleet officers.
Types of Medal.—Four types of medal were issued. One with a broad border of naval trophies having on the obverse to left and right cartouches bearing the Arms of Holland and Zealand, and on the reverse in place thereof side drums. The obverse bears an anchor from the stock of which are suspended three elaborate shields bearing St. George's Cross, St. Andrew's Cross, the Irish Harp, and "the Armes of the Com̃on wealth." A cable attached to the anchor encircles the whole in a decorative manner. On the reverse is depicted a naval battle; a ship sinking in the foreground has on the stern the medallist's surname, and on the prow of another is T.S., while on the lower wing of the anchor on the obverse is the monogram T.S., so that Thomas Simon made quite sure that we should know who was responsible for the medal, which, with the elaborate border, is 2·2 in. by 2 in. with a ring for suspension. Three of the larger medals are known to be in existence. The medal given to the four staff officers was 2 in. by 1·8 in., and the obverse and reverse are the same; but the border on both sides is of laurel as the one illustrated. One of these medals, presented to Captain William Haddock, who commanded the "America," was purchased by Messrs. Spink at auction for £430 in May 1908; it had realised £105 in 1879.
Types of Medal.—Four types of medals were issued. One features a wide border of naval trophies, with the front showing cartouches on the left and right that display the Arms of Holland and Zealand. On the back, these cartouches are replaced with side drums. The front also has an anchor, from which hang three detailed shields displaying St. George's Cross, St. Andrew's Cross, the Irish Harp, and "the Arms of the Commonwealth." A cable attached to the anchor wraps around the whole thing decoratively. The reverse shows a naval battle; in the foreground, a ship is sinking, displaying the surname of the medallist on the stern, while the prow of another ship bears T.S. Additionally, the lower wing of the anchor on the front has the monogram T.S., making it clear that Thomas Simon was responsible for the medal. The medal, with its intricate border, measures 2.2 inches by 2 inches and has a ring for suspension. Three of the larger medals are known to exist. The medal awarded to the four staff officers measured 2 inches by 1.8 inches, and both sides are the same; however, the borders on both sides are made of laurel like the one illustrated. One of these medals, given to Captain William Haddock, who commanded the "America," was sold by Messrs. Spink at auction for £430 in May 1908; it had previously sold for £105 in 1879.
Gold Medals for Officers.—Gold medals with a plain border, but with the same obverse and reverse as those described, were given to officers of the fleet; and I might here remark that if a copy of this rare medal comes under the notice of collectors, they should look for the surname and initials, which forgers have generally overlooked.
Gold Medals for Officers.—Gold medals with a simple border, but featuring the same front and back as those mentioned, were awarded to fleet officers; and I should note that if a collector comes across a copy of this rare medal, they should check for the surname and initials, which forgers often miss.

(Reverse.)
(Reverse.)
THE WYARD MEDAL, 1650.
THE WYARD MEDAL, 1650.

ARMADA MEDAL AWARDED TO LORD UPPINGHAM.
ARMADA MEDAL AWARDED TO LORD UPPINGHAM.

(Obverse.)
(Front.)
THE WYARD MEDAL, 1650.
THE WYARD MEDAL, 1650.
Seamen's Medals.—To the seamen was awarded a small oval medal 0·95 in. by 0·85 in. also by Simon. Like the other medals it has a ring for suspension, and bears on the obverse an anchor from the stock of which depends two shields bearing respectively the Cross of St. George and the Irish Harp, encircled by a cable which runs round the whole. Above the stock is MERUISTI (Thou hast merited), and on the reverse the House of Commons as on the Dunbar medal.
Seamen's Medals.—The seamen were awarded a small oval medal measuring 0.95 inches by 0.85 inches, also created by Simon. Like the other medals, it has a ring for suspension and features an anchor on the front. From the anchor, two shields hang, displaying the Cross of St. George and the Irish Harp, all surrounded by a cable that encircles the entire design. Above the anchor, it reads MERUISTI (You have earned it), and on the back, it displays the House of Commons, just like the Dunbar medal.
The Triumph Medal.—During the fight on July 31st Admiral Robert Blake's old flagship (he was ashore owing to a wound) caught fire, and many of the men jumped overboard; but those who remained extinguished the fire and saved the ship. For this service the officers and those who had stuck to the ship were awarded a special medal with the obverse and reverse as on the other medals, but with the inscription engraved above the battle scene: FOR EMINENT SERVICE IN SAVING Y TRIUMPH FIRED IN FIGHT Wh Y DVCH IN IVLY 1653. This medal is 1·6 in. by 1·4 in.
The Triumph Medal.—During the battle on July 31st, Admiral Robert Blake's old flagship (he was ashore due to a wound) caught fire, and many of the men jumped overboard; but those who stayed on board put out the fire and saved the ship. For this act of bravery, the officers and those who remained with the ship were awarded a special medal with the front and back like the other medals, but with the inscription above the battle scene: FOR OUTSTANDING SERVICE IN SAVING Y TRIUMPH ENGAGED IN BATTLE Wh Y DVCH IN JULY 1653. This medal measures 1.6 inches by 1.4 inches.
Blake's Jewel.—On May 28th, 1657, the House of Commons voted £5,000 for a jewel to be "bestowed on General Blake" for his service in destroying the Spanish fleet off Teneriffe on April 20th. The jewel, supposed to have been a ring, was dispatched to Blake, but whether he received it or not is uncertain, although, as he died within sight of Plymouth on August 7th, 1657, it is quite probable that he did.
Blake's Jewel.—On May 28th, 1657, the House of Commons voted £5,000 for a jewel to be "given to General Blake" for his service in defeating the Spanish fleet off Teneriffe on April 20th. The jewel, which was thought to be a ring, was sent to Blake, but it's unclear if he actually received it. However, since he died within sight of Plymouth on August 7th, 1657, it’s quite likely that he did.
Charles II Medals.—In October 1665 Charles II had proclaimed that a definite percentage of the value of prizes should be paid to those who captured them from the Dutch, and that a portion of the proceeds should be set aside to help the widows of those who died in battle, to assist the sick and wounded, and to provide medals for those who performed special service.
Charles II Medals.—In October 1665, Charles II announced that a specific percentage of the value of captured prizes should be given to those who took them from the Dutch, and that part of the proceeds should be reserved to support the widows of soldiers who died in battle, to help the sick and injured, and to provide medals for those who showed exceptional service.
War was again declared against the Dutch on Feb[Pg 272]ruary 22nd, 1665, and on June 3rd the Dutch fleet under Admirals Evertzen and Opdam was engaged and defeated off Lowestoft by the English fleet under Prince Rupert, the Duke of York, and Admirals Lawson and Penn. Opdam was killed when his ship was blown up, and two other Dutch admirals were killed. Twenty ships were sunk or taken by the British ere the Dutch made off, and through carelessness were permitted to escape. In the engagement the capable Vice-Admiral Lawson was killed, also Vice-Admiral Sansome, likewise the Earls of Marlborough, Portland, and Falmouth, and Lord Muskerry. To commemorate the victory, medals were issued in gold and silver. One bore on the obverse the bust of the King with his titles, and on the reverse the Island of Great Britain and the legend QUATUOR MARIA VINDICO. A smaller medal has on the obverse a triumphal chariot drawn by sea-horses, with the King seated therein, and the legend ET PONTUS SERVIET. These medals were not apparently issued as decorations; but the fine oval medal by Thomas Rawlins was probably destined for that purpose; it was struck in copper and 1·6 in. by 1·5 in. in size. It was also struck in gold and in silver. It bears on the obverse the truncated bust of Charles II in armour, looking to the left, and around the effigy is the inscription CAROLVS · II · D : G : M : BR : FR : ET · H : REX., and on the reverse a warship with a flag on the mainmast bearing the King's initials C R. This side bears the legend NOS · PENSES · IMPERIVM.
War was declared against the Dutch again on February 22nd, 1665, and on June 3rd, the Dutch fleet led by Admirals Evertzen and Opdam was engaged and defeated off Lowestoft by the English fleet commanded by Prince Rupert, the Duke of York, along with Admirals Lawson and Penn. Opdam was killed when his ship exploded, and two other Dutch admirals also lost their lives. Twenty ships were either sunk or captured by the British before the Dutch managed to escape, due to carelessness. In the battle, the skilled Vice-Admiral Lawson was killed, along with Vice-Admiral Sansome, the Earls of Marlborough, Portland, and Falmouth, and Lord Muskerry. To celebrate the victory, medals were created in gold and silver. One featured on the front the bust of the King with his titles, and on the back, the Island of Great Britain with the inscription QUATUOR MARIA VINDICO. A smaller medal had on the front a triumphal chariot pulled by sea-horses, with the King seated inside, and the inscription ET PONTUS WILL SERVE. These medals were apparently not issued as awards; however, the fine oval medal by Thomas Rawlins was likely intended for that purpose; it was made of copper and measured 1.6 inches by 1.5 inches. It was also produced in gold and silver. On the front, it displays the truncated bust of Charles II in armor, facing left, with the inscription around the portrait CHARLES II, by the Grace of God, King of Britain, France, and Ireland. On the back, there is a warship with a flag on the mainmast displaying the King's initials C R. This side has the inscription Thoughts on Empire.
In 1665 Charles II caused to be struck a large circular silver medal 2 in. in diameter with the motto PRO TALIBVS AVSIS (For such enterprises) in the exergue of the reverse, whereon is depicted a battle at sea with a wreck in the foreground and Charles II habited as a Roman general looking on at the engagement. The medal by Rœttier is a fine example of his workmanship, and a few very fine specimens are still extant. This medal, illustrated facing page 272, was probably intended to be commemorative of the victories of either the first or second Dutch wars; but as it is undated it may have been issued to commemorate either or both. It is 2 in. in diameter. Another medal by Rœttier was struck during the reign of Charles II to commemorate the service of James Duke of York; but this, again, is commemorative rather than decorative.
In 1665, Charles II had a large circular silver medal made that is 2 inches in diameter. It features the motto FOR TALIBAN SUPPORTERS (For such enterprises) on the bottom side. The reverse side depicts a sea battle with a shipwreck in the foreground, and Charles II dressed as a Roman general observing the fight. The medal, created by Rœttier, is a great example of his craftsmanship, and a few exceptional specimens still exist. This medal, shown opposite page 272, was likely meant to commemorate the victories from either the first or second Dutch wars; however, since it has no date, it may have been issued to celebrate either or both. It measures 2 inches in diameter. Another medal by Rœttier was created during Charles II’s reign to honor the service of James, Duke of York; however, this one is more commemorative than decorative.

CHARLES II SILVER NAVAL MEDAL.
Charles II Silver Naval Medal.
Several battles were fought ere in 1667 peace was declared with the Dutch. It was not, however, of long duration, for in March 1672 war again broke out, and several battles were fought before peace was finally signed on February 9th, 1674.
Several battles were fought before peace was declared with the Dutch in 1667. However, this peace didn't last long, as war broke out again in March 1672, and several battles were fought before peace was finally signed on February 9th, 1674.
La Hogue, 1692.—For this brilliant victory over the French by the combined English and Dutch fleets, under Admiral Russell, following a battle which waged for five days, several medals designed by Rœttier were ordered to be struck by Queen Mary, who expressed her satisfaction in the result of the conflict—which secured the throne of England to her and William, and shattered the hopes of James II—by distributing £30,000 among the soldiers and sailors who had been engaged in the battle, and ordering medals for officers. The most important medal, 1·95 in. in diameter, was struck in gold and silver; it bears on the obverse the busts of William III and Mary II, the king habited in Roman armour and wearing long hair, the Queen simply draped. Around the conjoined busts is the inscription GVL : ET. MAR : D : G : B : F : ET · H : REX · REGINA; and on the reverse the representation of the French Admiral's flagship, "Le Soliel Royal," in flames. This ship was, with three others, driven ashore and set on fire by English fire-ships. Above the scene is the legend NOX · NVLLA · SECVTA · EST (No night followed), and in the exergue PVGN : NAV : INT : ANG : ET · FR : 21 · MAY · 1692. One of the medals in gold, together with a chain of the value of £50, was presented to Captain John Tupper "for the good services performed by him" when in a dense fog he sailed through the French fleet and brought the news of their presence to Admiral Russell at Spithead.
La Hogue, 1692.—This stunning victory over the French by the combined English and Dutch fleets, led by Admiral Russell, followed a battle that lasted five days. Queen Mary ordered several medals designed by Rœttier to be struck in honor of this achievement. She expressed her satisfaction with the conflict's outcome—which secured the throne of England for her and William and dashed the hopes of James II—by distributing £30,000 among the soldiers and sailors involved in the battle and ordering medals for the officers. The most significant medal, measuring 1.95 inches in diameter, was produced in gold and silver; it features on the front the busts of William III and Mary II, with the king dressed in Roman armor and having long hair, while the Queen is simply draped. Surrounding the joined busts is the inscription GVL: ET. MAR: D: G: B: F: ET · H: REX · REGINA; on the back is the depiction of the French Admiral's flagship, "Le Soliel Royal," engulfed in flames. This ship, along with three others, was driven ashore and set on fire by English fire-ships. Above the scene is the phrase NOX · NVLLA · SECVTA · EST (No night followed), and in the exergue PVGN : NAV : INT : ANG : ET · FR : 21 · MAY · 1692. One gold medal, along with a chain worth £50, was awarded to Captain John Tupper "for the good services performed by him" when he navigated through the French fleet in thick fog and alerted Admiral Russell at Spithead.
After this glorious victory Mary founded Greenwich[Pg 274] Hospital as a home for seamen who had been disabled in the service of their country.
After this glorious victory, Mary established Greenwich[Pg 274] Hospital as a home for sailors who had been disabled while serving their country.
Special Gold Medals.—A number of gold medals and chains were awarded during this reign for service at sea, and, although there is no data to go upon, it may be assumed that the obverse of the medals was struck from the die used for the La Hogue medal described; the reverse being left plain for an inscription, as is the case with the gold medal awarded to Captain Peter Jolliffe, Master of the "Sea Adventure" hoy, which bears on the reverse "His Maties' Gift as a Reward to Peter Jollif, of Poole, for his good service agt the enemy in retaking a Ketch of Weymouth from a French Privateer, and chaceing the said Privateer on Shoar near Lulworth in ye Isle of Purbeck, where shee was broken in pieces, 1694."
Special Gold Medals.—Several gold medals and chains were given out during this reign for service at sea. Although there isn't any specific data available, we can assume that the front of the medals was made from the same die used for the La Hogue medal described earlier; the back was left blank for an inscription, similar to the gold medal awarded to Captain Peter Jolliffe, Master of the "Sea Adventure" hoy, which has the inscription on the back: "His Maties' Gift as a Reward to Peter Jollif, of Poole, for his good service against the enemy in retaking a Ketch of Weymouth from a French Privateer, and chasing the said Privateer on shore near Lulworth in the Isle of Purbeck, where she was broken in pieces, 1694."
War Medals for Fishermen.—During the reign of William and Mary medals were not only given to those actually engaged in the profession of soldier or seaman, but to fishermen and merchant sailors who performed gallant deeds. Among the recipients was William Thompson, the master of a fishing-smack, who, with one man and a boy armed with a couple of small guns and a few muskets, attacked, on May 30th, 1695, a French privateer armed with two guns and manned by sixteen seamen, which he defeated and captured after two hours' fighting. For this service he was awarded a gold chain and medal of the value of £50, and allowed to retain the vessel he had conquered.
War Medals for Fishermen.—During the reign of William and Mary, medals were awarded not just to soldiers and sailors, but also to fishermen and merchant sailors who showed bravery. One such recipient was William Thompson, the captain of a fishing boat, who, along with one man and a boy armed with a couple of small guns and some muskets, attacked a French privateer that had two guns and was crewed by sixteen sailors on May 30th, 1695. After two hours of fighting, he defeated and captured the privateer. For his bravery, he received a gold chain and a medal worth £50, and he was allowed to keep the vessel he had captured.
As far as can be ascertained, no medals for land service were issued during the reigns of William and Mary, 1689-94, and William III 1694-1702.
As far as we can tell, no medals for land service were awarded during the reigns of William and Mary, 1689-94, and William III 1694-1702.
Queen Anne.—For the brilliant attack on Vigo, October 12th, 1702, Queen Anne caused medals to be struck for distribution among the officers of the fleet who had taken part in the victory. Vice-Admiral Hopson was made a knight, and granted a pension for his particular service. The medal bears on the obverse the bust of the Queen, as on the medal described here[Pg 275]after, and on the reverse a representation of the engagement, with the date.
Queen Anne.—For the impressive attack on Vigo, October 12th, 1702, Queen Anne had medals made to distribute to the officers of the fleet who participated in the victory. Vice-Admiral Hopson was knighted and awarded a pension for his specific service. The medal features on the front the bust of the Queen, similar to the medal described here[Pg 275]after, and on the back, it shows a depiction of the engagement, along with the date.
Lampriere Gold Medal.—Captain James Lampriere was, in 1703, awarded a gold medal, and probably a chain also, as there is a ring for suspension, as
Lampriere Gold Medal.—Captain James Lampriere was awarded a gold medal in 1703, and likely a chain as well, since there’s a ring for suspension, as
"Her Majties reward to Capt. James Lampriere for his Zeal to her Service, and his Successful Conducting ye Squadron commanded by Rear Admiral Dilkes, who destroyed a considerable number of ye Enemy's Merchant Ships under convey of 3 Men of War on their own coast."
"Her Majesty's reward to Captain James Lampriere for his dedication to her service and his successful leadership of the squadron commanded by Rear Admiral Dilkes, who destroyed a significant number of the enemy's merchant ships while protected by 3 warships on their own coast."
This inscription is engraved in writing characters upon the reverse of the gold medal, with the Arms of Lampriere below, with the motto TRUE · TO · MY · TRUST · on a ribbon. On the obverse is the bust of Queen Anne, facing left, wearing the Royal Crown with a row of pearls in her hair, and round her neck the Collar and Star of the order of the Garter, surrounded by the legend ANNA · DEI · GRATIA · MAG : BRITAN : FRA : ET · HIB : REGINA.
This inscription is engraved in text on the back of the gold medal, featuring the Arms of Lampriere below, with the motto TRUE TO MY TRUST on a ribbon. On the front is the bust of Queen Anne, facing left, wearing the Royal Crown adorned with a row of pearls in her hair, and around her neck is the Collar and Star of the Order of the Garter, surrounded by the inscription ANNA, BY THE GRACE OF GOD, QUEEN OF GREAT BRITAIN, FRANCE, AND IRELAND.
Granville, 1703.—It is said that gold medals were presented to Rear-Admiral Dilkes and his officers for their success near Granville in Normandy in July 1703; but there is no official record of their being granted. But to Captain Thomas Legge, who distinguished himself under Rear-Admiral Dilkes in the same year a gold medal was specially struck to commemorate his gallantry, and Campbell states in his "Naval History" that "The Queen ... ordered gold medals to be struck on this occasion and delivered to the Rear-Admiral and all his officers," and Lampriere was one of the officers.
Granville, 1703.—It's reported that gold medals were awarded to Rear-Admiral Dilkes and his officers for their achievements near Granville in Normandy in July 1703; however, there's no official record of them being issued. On the other hand, a gold medal was specially created for Captain Thomas Legge, who stood out under Rear-Admiral Dilkes that same year to honor his bravery. Campbell mentions in his "Naval History" that "The Queen ... ordered gold medals to be minted on this occasion and given to the Rear-Admiral and all his officers," and Lampriere was one of those officers.
Capture of Gibraltar.—Medals were struck in this reign to celebrate the capture of Gibraltar by Sir G. Rooke in 1704; but they were not, as far as I can ascertain, issued as decorations.
Capture of Gibraltar.—Medals were minted during this reign to commemorate the capture of Gibraltar by Sir G. Rooke in 1704; however, to the best of my knowledge, they were not issued as awards.
A few medals were struck and given to pilots and fishermen; five to the crew of the "Leonora" in[Pg 276] consideration of their courage and resolution in driving the Frenchmen (13 who had been placed as a prize crew on the captured ship to pilot her to France) then aboard her "off the Quarter-deck, and bringing the said shipp into England."
A few medals were made and awarded to pilots and fishermen; five were given to the crew of the "Leonora" in [Pg 276] acknowledgment of their bravery and determination in driving the Frenchmen (13 who had been set as a prize crew on the captured ship to steer her to France) off her "Quarter-deck" and successfully bringing the ship into England.
Boy's Medal for Gallantry.—In Dr. Payne's collection is a unique specimen of a Queen Anne medal awarded to a boy for conspicuous gallantry. On the obverse is the laureated bust of Queen Anne, facing left, draped, with a row of pearls about the shoulders, with the legend ANNA D : G : MAG : BRI : FR : ET HIB : REG :. The medal, which is 2·75 in. in diameter, has a raised border of laurel leaves and roses, and a ring for suspension. On the reverse is the inscription engraved in writing characters:
Boy's Medal for Gallantry.—In Dr. Payne's collection is a unique example of a Queen Anne medal awarded to a boy for exceptional bravery. On the front side, there is a bust of Queen Anne, adorned with a laurel wreath, facing left, draped, and surrounded by a pearl necklace, with the inscription ANNA D : G : MAG : BRI : FR : ET HIB : REG :. The medal, which is 2.75 inches in diameter, features a raised border of laurel leaves and roses, along with a ring for hanging. On the back, there is an inscription engraved in script:
"Her Majties reward to Robert Taylor Boy of ye Mary Galley, for his Zeal and Courage at ye taking of ye French Privateer Jacques La Blonde of Dunkirk."
"Her Majesty's reward to Robert Taylor, Boy of the Mary Galley, for his enthusiasm and bravery in the capture of the French privateer Jacques La Blonde from Dunkirk."
This medal, illustrated facing page 276, is one of the few struck during the reign of Queen Anne "to give all due Encouragement to the Valour and Fidelity of Her Subjects serving aboard any of Her Majesties Ships of War or Privateers." The cost of providing the medals, it was further ordered, was to be paid out of Her Majesty's share of prizes. This declaration, made on June 1st, 1702, in the first year of her reign, differs from the Act of 1692, which directed that they were to be provided out of a tenth part set aside for that special purpose.
This medal, shown on page 276, is one of the few created during Queen Anne's reign "to give proper encouragement to the bravery and loyalty of her subjects serving on any of Her Majesty's warships or privateers." It was also ordered that the cost of producing the medals would be paid from Her Majesty's share of prize money. This announcement, made on June 1st, 1702, in the first year of her reign, is different from the Act of 1692, which stated that they were to be funded from a tenth of the money set aside for that specific purpose.
George I.—During the reign of George I there is on record the award in 1715 of a gold enamelled jewel and £1,000 sterling to Captain Matthew Martin, Commander of the "Marlborough," for his gallant defence of his ship against three French ships-of-war in the Bay of Bengal, and getting her safely to Fort St. George in 1712. The medal, it will be observed, was awarded for an action in the reign of George's predecessor. It bore on the obverse the Arms of the East India Company, and was enamelled and set with diamonds; on the reverse was an inscription recording the services for which it was awarded. No official decoration was awarded for the victory of Sir George Byng over the Spanish fleet off Cape Passaro in the Mediterranean on July 31st, 1718, although a silver medal was struck to commemorate the event.
George I.—During George I's reign, records indicate that in 1715, Captain Matthew Martin, Commander of the "Marlborough," was awarded a gold enamelled jewel and £1,000 sterling for his brave defense of his ship against three French warships in the Bay of Bengal, successfully bringing her to Fort St. George in 1712. It’s worth noting that the medal was given for an action that took place during the reign of George's predecessor. The front featured the Arms of the East India Company and was enamelled and adorned with diamonds; the back had an inscription detailing the services for which it was awarded. No official decoration was given for Sir George Byng's victory over the Spanish fleet off Cape Passaro in the Mediterranean on July 31st, 1718, although a silver medal was created to commemorate the event.

SILVER MEDAL AWARDED BY QUEEN ANNE TO A BOY FOR CONSPICUOUS GALLANTRY.
SILVER MEDAL AWARDED BY QUEEN ANNE TO A BOY FOR OUTSTANDING BRAVERY.
George II.—Commemorative medals were also struck in connection with the taking of Puerto Bello, in the Caribbean Sea, by Admiral Vernon with six ships in 1739. The city had about 10,000 inhabitants, and Vernon got possession of the place within forty-eight hours and destroyed the fortifications. There are several "Vernon" medals in existence, varying in size and shape, in white metal, bronze, and silver; but most have on the reverse "He took Porto Bello with Six Ships only." It is by no means certain that any of these medals were issued as official decorations.
George II.—Commemorative medals were also made to mark the capture of Puerto Bello in the Caribbean Sea by Admiral Vernon with six ships in 1739. The city had around 10,000 residents, and Vernon took control of the area within forty-eight hours, destroying the fortifications. There are several "Vernon" medals that exist, varying in size and shape, made of white metal, bronze, and silver; however, most display the phrase "He took Porto Bello with Six Ships only" on the back. It is not entirely clear if any of these medals were issued as official honors.
Callis Gold Medal.—In 1742 a gold medal and chain of the value of £100 was awarded to Captain Smith Callis, R.N., for his gallant service in taking the "Duke" fireship into the Port of St. Tropez in Provence, on June 14th, and burning five Royal Spanish galleys which had fired upon the blockading fleet. On the obverse of the medal, which is 2·1 in. in diameter, George II, laureated and attired as a Roman Emperor, is represented in the act of presenting a medal to an officer. Under the group, at the top of the plain exergue, is the medallist's name T. PINGO F:. Above all on a ribbon is PRO TALIBVS AVSIS (For such enterprise), and on the reverse five galleys in shore with a squadron of ships-of-war preparing to attack, and in the exergue OB. V. TRIREM. HISPAN. A. S. CALLIS. COMBVST. V. IVLII. MDCCXLII. The date on the medal is the day on which the information was given of the successful venture; but the actual driving into port of the galleys, and the successful attack by the "Duke," was on June 14th. It is believed that the medal in silver[Pg 278] was awarded to the other officers who took part in the general affair.
Callis Gold Medal.—In 1742, a gold medal and chain worth £100 was awarded to Captain Smith Callis, R.N., for his brave service in bringing the "Duke" fireship into the Port of St. Tropez in Provence on June 14th, where he burned five Royal Spanish galleys that had attacked the blockading fleet. On the front of the medal, which is 2.1 inches in diameter, George II, crowned and dressed like a Roman Emperor, is depicted presenting a medal to an officer. Below the image, at the top of the plain exergue, is the medallist's name T. PINGO F:. Above it, on a ribbon, is PRO TALIBVS AVSIS (For such enterprise), and on the back, there are five galleys on shore with a squadron of warships getting ready to attack. In the exergue, it reads OB. V. TRIREM. HISPAN. A. S. CALLIS. COMBVST. V. IVLII. MDCCXLII. The date on the medal marks the day when the news of the successful mission was received; however, the actual entry of the galleys into port and the successful attack by the "Duke" occurred on June 14th. It is believed that a silver medal[Pg 278] was given to the other officers who participated in the overall event.
Hornby Medal and Chain.—By a decision of the King given at the Court held at Kensington on September 18th, 1744, a gold medal and chain of the value of £100 was granted to Captain Richard Hornby, of the "Wrightson and Isabella" of Sunderland, and a bounty of £5 to each of his five men, and 40s. to each of his three boys, for having engaged a French privateer armed with ten carriage and eight swivel guns, and manned by 75 seamen, and, after a contest renewed again and again over a period of five hours, sinking the French vessel. A gold medal of the value of one hundred guineas was also awarded to Captain Phillips of the "Alexander" privateer for the capture of a large French vessel in St. Martin's Road off the Isle of Rhe. There were 230 men on board the ship of 22 guns, and Phillips's crew numbered 150, but he successfully boarded the vessel and brought her into port, when it was discovered that she was H.M.S. "Solebay," which the enemy had captured a couple of years previously.
Hornby Medal and Chain.—By a decision from the King made at the Court held at Kensington on September 18th, 1744, a gold medal and chain worth £100 were awarded to Captain Richard Hornby of the "Wrightson and Isabella" of Sunderland. Additionally, a bounty of £5 was given to each of his five men, and 40s. to each of his three boys, for their engagement with a French privateer armed with ten carriage guns and eight swivel guns, manned by 75 seamen. After a battle that lasted over five hours with repeated clashes, they managed to sink the French vessel. A gold medal valued at one hundred guineas was also awarded to Captain Phillips of the "Alexander" privateer for capturing a large French vessel in St. Martin's Road off the Isle of Rhe. The ship had 230 men onboard and was equipped with 22 guns, while Phillips's crew consisted of 150. He successfully boarded the vessel and brought it into port, only to discover it was H.M.S. "Solebay," which had been captured by the enemy a couple of years earlier.
Louisbourg, 1758.—For the taking of Louisbourg on July 26th, 1753, a medal was awarded to those who distinguished themselves upon land under Generals Amherst and Wolfe, and at sea under Admiral Boscawen. The Navy's participation in the affair was to attack and cut out the two ships, the "Bienfaisant" of 64 guns, and "La Prudente" of 74 guns, which had been left for fighting purposes after some others had been sunk to obstruct the entrance to the harbour. The boats from the British fleet set out on their task at midnight on July 25th, cut the cable under a heavy fire, and having boarded the ships proceeded to tow them out. "La Prudente" grounded and had to be burned; but the smaller vessel was successfully got out and added to the British fleet. The medals, by T. Pingo, with rings for suspension, were struck in gold, silver, and bronze. Four specimens of the gold medal are known[Pg 279] to exist—one which was in the Montague collection, another which was sold at Sotheby's in 1895, and those awarded to Sir Alexander Schomberg, great-grandfather of Lieutenant-Colonel Schomberg, R.M.L.I., and to Senior Midshipman (afterwards Sir George) Young.
Louisbourg, 1758.—For the capture of Louisbourg on July 26th, 1753, a medal was given to those who excelled on land under Generals Amherst and Wolfe, and at sea under Admiral Boscawen. The Navy's role in the operation was to attack and seize the two ships, the "Bienfaisant" with 64 guns and "La Prudente" with 74 guns, which had been left for combat after some others were sunk to block the harbor entrance. The boats from the British fleet began their mission at midnight on July 25th, cut the cable under heavy fire, and managed to board the ships and tow them out. "La Prudente" ran aground and had to be burned; however, the smaller ship was successfully taken and added to the British fleet. The medals, designed by T. Pingo, had suspension rings and were made in gold, silver, and bronze. Four gold medal specimens are known to exist—one from the Montague collection, another sold at Sotheby's in 1895, and the ones awarded to Sir Alexander Schomberg, great-grandfather of Lieutenant-Colonel Schomberg, R.M.L.I., and to Senior Midshipman (later Sir George) Young.[Pg 279]
"The Glorious" 1st of June.—The reign of George III produced a long record of brilliant achievements by the British Navy. When he ascended the throne, in October 1760, Britain was still at war with France and continued to be so almost the whole time he reigned; but it was not until "The Glorious" 1st of June 1794, when Admiral Lord Howe gained his great victory off Ushant, that medals were awarded, and a regulation medal instituted for naval services. Hearing that the French fleet had sailed for Brest, Howe put to sea to meet it, and having sighted the enemy on the morning of May 28th, gave chase. A smart action ensued which was renewed next day; but heavy fog put an end to fighting until the 31st. On June 1st both fleets prepared for battle: the engagement commenced, and the French line was soon broken in several places; but the French seamen fought with great courage. The furious nature of the British attack, however, was too determined, and the enemy sailed away, such of the ships as could, having 10 dismasted and 7 taken by the English fleet, the "Vengeur" going down with 200 of her crew as she was being towed away. The British Admiral's flagship, the "Queen Charlotte," was badly injured, also the "Brunswick," "Defence," and "Marlborough." It is understood that the 2nd and detachments of the 25th and 69th Foot served as Marines on board the ships which fought on that glorious 1st of June.
"The Glorious" 1st of June.—The reign of George III marked a notable period of achievements for the British Navy. When he became king in October 1760, Britain was still engaged in war with France, a conflict that lasted most of his reign. However, it wasn't until "The Glorious" 1st of June 1794, when Admiral Lord Howe celebrated a significant victory off Ushant, that medals were issued, and a standard medal for naval service was established. Upon learning that the French fleet had departed for Brest, Howe set sail to confront it. After spotting the enemy on the morning of May 28th, he gave chase. A fierce battle broke out, continuing the next day; however, heavy fog halted the fighting until the 31st. On June 1st, both fleets got ready for battle: the confrontation began, and the French line quickly broke in several spots; yet the French sailors fought bravely. Despite their courage, the relentless British assault forced the enemy to retreat, with only some ships escaping, while 10 were dismasted and 7 captured by the British fleet, the "Vengeur" sinking with 200 of her crew as she was towed away. The British Admiral's flagship, the "Queen Charlotte," suffered major damage, as did the "Brunswick," "Defence," and "Marlborough." It’s reported that the 2nd and units of the 25th and 69th Foot served as Marines on the ships that fought on that glorious 1st of June.
The vessels engaged were H.M. ships "Queen Charlotte," "Royal Sovereign," "Royal George," "Barfleur," "Bellerophon," "Impregnable," "Queen," "Cæsar," "Culloden," "Defence," "Glory," "Gibraltar," "Invincible," "Majestic," "Leviathan,"[Pg 280] "Marlborough," "Montague," "Ramillies," "Russell," "Orion," "Thunderer," "Tremendous," "Audacious," "Alfred," "Brunswick," and "Valiant," the frigates "Aquilon," "Latona," "Phæton," "Niger," "Southampton," "Venus," "Charon," and "Pegasus," the sloops "Comet" and "Incendiary," and the cutters "Ranger" and "Rattler."
The ships involved were H.M. ships "Queen Charlotte," "Royal Sovereign," "Royal George," "Barfleur," "Bellerophon," "Impregnable," "Queen," "Cæsar," "Culloden," "Defence," "Glory," "Gibraltar," "Invincible," "Majestic," "Leviathan,"[Pg 280] "Marlborough," "Montague," "Ramillies," "Russell," "Orion," "Thunderer," "Tremendous," "Audacious," "Alfred," "Brunswick," and "Valiant," the frigates "Aquilon," "Latona," "Phæton," "Niger," "Southampton," "Venus," "Charon," and "Pegasus," the sloops "Comet" and "Incendiary," and the cutters "Ranger" and "Rattler."
Naval Gold Medal instituted.—On June 13th Lord Howe reached Spithead, and the King and Queen at a levee held on the Admiral's flagship presented him with a sword set with diamonds in the hilt and a gold chain with a gold medal attached thereto. At the same time gold chains were presented by His Majesty to the two vice-admirals, three rear-admirals, and the captain of the fleet with the intimation that gold medals for suspension would be distributed to the principal officers when they had been struck. These were distributed on November 9th, 1796. The obverses of both medals are the same as illustrated facing this page; but whereas on the larger medal the name of the recipient and the event for which the medal was awarded are encircled by a struck wreath of laurel and oak, the reverse of the smaller one is plain except for the inscription. The larger medal was worn by the admirals suspended from the neck by the gold chain referred to, and the other flag officers hung theirs by means of a white ribbon with dark-blue edges, which became the ribbon for the N.G.S. medal when issued in 1847. The captains' medals, the smaller size, were dependent from a ring and bar made from wire and suspended by the white, blue-edged ribbon through the third or fourth button-hole on the left side of their coats. Although Lord Howe's fleet consisted of twenty-five ships of the line, as well as frigates, only fourteen medals were awarded to his captains, i.e. to those whom he had particularly mentioned in dispatches.
Naval Gold Medal established.—On June 13th, Lord Howe arrived at Spithead, where the King and Queen presented him with a diamond-studded sword and a gold chain with a gold medal attached during a levee held on the Admiral's flagship. At the same time, His Majesty awarded gold chains to the two vice-admirals, three rear-admirals, and the fleet captain, with the promise that gold medals would be given to the main officers once they were made. These medals were distributed on November 9th, 1796. The front sides of both medals are the same as shown on the page opposite; however, on the larger medal, the recipient's name and the event for which it was awarded are surrounded by a struck wreath of laurel and oak, while the back of the smaller one is plain except for the inscription. The admirals wore the larger medal suspended from their necks by the mentioned gold chain, and the other flag officers displayed theirs on a white ribbon with dark-blue edges, which became the ribbon for the N.G.S. medal when issued in 1847. The captains' medals, which were smaller, were attached to a ring and bar made from wire and hung from the white, blue-edged ribbon through the third or fourth buttonhole on the left side of their coats. Although Lord Howe's fleet included twenty-five ships of the line, as well as frigates, only fourteen medals were awarded to his captains, i.e. to those he specifically mentioned in dispatches.


WILLIAM III SILVER MEDAL FOR LA HOGUE, 1692.
WILLIAM III SILVER MEDAL FOR LA HOGUE, 1692.

GOLD MEDAL FOR "THE GLORIOUS FIRST OF JUNE."
GOLD MEDAL FOR "THE GLORIOUS FIRST OF JUNE."
Awarded to Captain James (later Admiral Rt. Hon. Lord) Gambier.
Awarded to Captain James (later Admiral Rt. Hon. Lord) Gambier.
This medal bears on the obverse an antique galley on the prow of which Victory is represented in the act of alighting and placing a wreath upon the head of Britannia, who stands with her right foot on a Greek helmet; she holds in her left hand a spear; beside her is an oval shield whereon is depicted the Union Jack. The larger medal is 2 in. in diameter and the smaller one 1·3 in. Both sizes were struck in gold, and the medal became a general award to naval officers who had distinguished themselves in great naval victories until 1815, and it is noteworthy that the only officers below the rank of post captain who earned the captains' medal were Lieutenant Pinfold of the "Ajax" and Lieutenant Stockham of the "Thunderer," who in the absence of their captains commanded their ships at Trafalgar; but they were not given the medal until they had reached the rank of post captain. It was ultimately awarded to Captain Mounsey of the "Bonne Citoyenne" for the capture of "La Furieuse" on July 16th, 1809. The total number of gold medals issued was 140, of which eight were admirals' medals awarded with chains; flag officers' were issued with broad ribbons for suspension from the neck, and 117 of the captains' size, as illustrated, for suspension between the third and fourth buttonholes of their coats. Gold chains were only given with the admirals' medals for June 1st.
This medal features an ancient galley on the front, with Victory depicted as she descends to place a wreath on Britannia's head. Britannia stands with her right foot on a Greek helmet and holds a spear in her left hand. Next to her is an oval shield displaying the Union Jack. The larger medal is 2 inches in diameter and the smaller one is 1.3 inches. Both sizes were made of gold, and the medal became a standard award for naval officers who distinguished themselves in major naval victories until 1815. Notably, the only officers below the rank of post captain to receive the captains' medal were Lieutenant Pinfold of the "Ajax" and Lieutenant Stockham of the "Thunderer," who commanded their ships at Trafalgar in the absence of their captains; however, they did not receive the medal until they were promoted to post captain. Eventually, Captain Mounsey of the "Bonne Citoyenne" was awarded it for capturing "La Furieuse" on July 16, 1809. A total of 140 gold medals were issued, eight of which were admirals' medals awarded with chains; flag officers received theirs with broad ribbons to hang from the neck, and 117 medals of the captains' size, as shown, were for suspension between the third and fourth buttonholes of their coats. Gold chains were only given with the admirals' medals for June 1st.
The vessels engaged were H.M. ships "Queen Charlotte," "Royal Sovereign," "Royal George," "Barfleur," "Bellerophon," "Impregnable," "Cæsar," "Culloden," "Defence," "Gibraltar," "Glory," "Invincible," "Leviathan," "Marlborough," "Majestic," "Montague," "Orion," "Ramillies," "Russell," "Tremendous," "Thunderer," "Valiant," "Alfred," "Audacious," "Brunswick," and the frigates "Aquilon," "Charon," "Latona," "Phæton," "Southampton," "Niger," "Pegasus," the sloops "Incendiary" and "Comet," and the cutters "Rattler" and "Ranger."
The ships involved were H.M. ships "Queen Charlotte," "Royal Sovereign," "Royal George," "Barfleur," "Bellerophon," "Impregnable," "Cæsar," "Culloden," "Defence," "Gibraltar," "Glory," "Invincible," "Leviathan," "Marlborough," "Majestic," "Montague," "Orion," "Ramillies," "Russell," "Tremendous," "Thunderer," "Valiant," "Alfred," "Audacious," "Brunswick," and the frigates "Aquilon," "Charon," "Latona," "Phæton," "Southampton," "Niger," "Pegasus," the sloops "Incendiary" and "Comet," and the cutters "Rattler" and "Ranger."
St. Vincent, 1797.—On St. Valentine's Day, 1797, the battle of St. Vincent was fought between the Spanish fleet of 27 ships of the line and 8 frigates under Admiral Don Josef de Cordova, and 20 British[Pg 282] ships of the line, 2 sloops, and a cutter which had been cruising off the coasts of Spain and Portugal to prevent the fleets of France, Spain, and Holland—which countries had entered into an alliance against Great Britain—from combining. Sir John Jervis commanded; his flagship was the "Victory." Passing through the two divisions of the Spanish fleet, he cut off nine of the enemies' vessels: the Spaniards then attempted to break the British line; but the effort was frustrated, two of the enemy's ships striking their colours. This action, which only lasted four hours, resulted in the loss of four ships to the enemy, Commodore Horatio Nelson of the "Captain," 74 guns, having taken the "San Josef" of 112 guns, and the "San Nicolas" of 80 guns.
St. Vincent, 1797.—On St. Valentine's Day, 1797, the battle of St. Vincent was fought between the Spanish fleet of 27 ships of the line and 8 frigates under Admiral Don Josef de Cordova, and 20 British[Pg 282] ships of the line, 2 sloops, and a cutter that had been patrolling off the coasts of Spain and Portugal to prevent the fleets of France, Spain, and Holland—countries that had formed an alliance against Great Britain—from joining forces. Sir John Jervis was in command; his flagship was the "Victory." As he moved through the two divisions of the Spanish fleet, he cut off nine of the enemy's ships: the Spaniards then tried to break the British line, but their attempt was unsuccessful, resulting in two of their ships striking their colors. This engagement, which lasted only four hours, led to the loss of four ships for the enemy, with Commodore Horatio Nelson of the "Captain," 74 guns, capturing the "San Josef," which had 112 guns, and the "San Nicolas," which had 80 guns.
In this battle Nelson by his intrepid action placed himself in the front rank of commanders, and his bravery and dash were rewarded by the Order of the Bath, and his advancement to the rank of Rear-Admiral. In the fight off Cape St. Vincent he not only attacked at close quarters the "Santissima Trinidad," a great galleon of 112 guns, but with the aid of the "Culloden" (Captain Trowbridge), which gallantly began the fight, he fought for nearly an hour this great ship and four other galleons which had come to her assistance, until the "Blenheim" (Captain Frederick) and the "Excellent" (Captain Collingwood) came to assist the English, when Nelson ran the "Captain" alongside the "San Nicolas," quickly sprang through one of the stern cabin windows, and leading his men across the Spaniard's deck, boldly boarded the "San Josef," on the quarter-deck of which he soon received the swords of the conquered officers. By 5 o'clock the Spaniards were in retreat, having lost to their enemy four of their finest vessels, and, besides receiving a blow to their naval power, had considerably minimised their value to the French in their effort to command the Channel, and upset the calculations of the Dutch. For the victory Sir John Jervis was created Earl of St. Vincent,[Pg 283] and awarded a pension of £3,000 per annum, while the unfortunate Spanish Admiral was dismissed in disgrace.
In this battle, Nelson's fearless actions put him at the forefront of commanders, and his bravery was recognized with the Order of the Bath and his promotion to Rear-Admiral. During the fight off Cape St. Vincent, he not only engaged closely with the "Santissima Trinidad," a massive galleon with 112 guns, but he also fought alongside the "Culloden" (Captain Trowbridge), which bravely started the battle. For nearly an hour, they battled this huge ship along with four other galleons that came to her aid. When the "Blenheim" (Captain Frederick) and the "Excellent" (Captain Collingwood) arrived to support the British, Nelson maneuvered the "Captain" next to the "San Nicolas," quickly jumped through one of the stern cabin windows, and, leading his men across the Spaniard's deck, boldly boarded the "San Josef," where he soon received the surrendered swords of the defeated officers. By 5 o'clock, the Spaniards were retreating, having lost four of their finest vessels, which dealt a blow to their naval strength and significantly reduced their value to the French in their efforts to control the Channel, throwing the Dutch's plans into disarray. For this victory, Sir John Jervis was made Earl of St. Vincent,[Pg 283] and awarded an annual pension of £3,000, while the unfortunate Spanish Admiral was dismissed in disgrace.
The vessels engaged were: H.M. ships "Victory," "Britannia," "Barfleur," "Blenheim," "Prince George," "Captain," "Goliath," "Excellent," "Egmont," "Culloden," "Colossus," "Diadem," "Namur," "Orion," "Irresistible," and the frigates "Dido," "Lively," "Minerva," "Niger," and "Southampton," sloops "Bon Citoyenne" and "Raven," and the cutter "Fox."
The ships involved were: H.M. ships "Victory," "Britannia," "Barfleur," "Blenheim," "Prince George," "Captain," "Goliath," "Excellent," "Egmont," "Culloden," "Colossus," "Diadem," "Namur," "Orion," "Irresistible," and the frigates "Dido," "Lively," "Minerva," "Niger," and "Southampton," along with the sloops "Bon Citoyenne" and "Raven," and the cutter "Fox."
Camperdown.—When the battle of Camperdown was fought on October 11th, 1797, Great Britain was in the unfortunate position of standing isolated among the nations of Europe, and still concerned with the series of mutinies which had broken out in her fleet owing to the poor pay and bad food meted out to the seamen who had served their country so well. As a consequence Britain was, had her enemies but realised it, in a very precarious position. Fortunately Admiral Duncan had "a way with him," which enabled him, by a combination of firmness and reasoning power, to get his men into such a frame of mind as to state in writing that there was not a man on board the "Venerable" "but would lose the last drop of blood in his body before they (the enemy) should obtain any victory over us, therefore, honoured sir, we once more implore your gracious pardon." Fortunately Duncan's ability to deal with the mutineers enabled him, at least, to have a fleet of some pretensions wherewith to meet the enemy. Meanwhile the mutiny at the Nore had been suppressed, "Admiral" Richard Parker, the leader, hanged, and some effort made to remedy the grievances of the seamen while Duncan had been hoodwinking the Dutch.
Camperdown.—When the battle of Camperdown took place on October 11th, 1797, Great Britain found itself isolated among the nations of Europe and still dealing with a wave of mutinies in its fleet due to poor pay and terrible food given to the sailors who had served their country faithfully. As a result, Britain was, if her enemies realized it, in a very risky situation. Fortunately, Admiral Duncan had a way of connecting with his men that combined firmness and reasoning, allowing him to inspire them to declare in writing that every man on board the "Venerable" was willing to give his last drop of blood before the enemy could claim any victory over them; thus, they humbly requested his gracious pardon once again. Luckily, Duncan’s ability to manage the mutineers meant he could still command a fleet capable of facing the enemy. Meanwhile, the mutiny at the Nore had been put down, “Admiral” Richard Parker, the leader, was hanged, and some attempts were made to address the sailors' grievances while Duncan had been cleverly outmaneuvering the Dutch.
On October 9th, 1817, Duncan set sail from Yarmouth Roads with 20 ships, 4 cutters, and a lugger, to meet the Dutch fleet which had at last left the Texel. Just before noon on the 11th, Duncan signalled to his ships "clear for action and close," and by half-past 12[Pg 284] Vice-Admiral Onslow, in the "Monarch," had got through the enemy's line and engaged Vice-Admiral Reyntier. Admiral Duncan engaged the "Vyrheid," the Dutch Admiral's flagship, and after a hard fight lasting until 2 o'clock, De Winter only struck his ship to the "Venerable" when he was the only unwounded man on the quarter-deck of his mastless ship. It is significant of Duncan's character and manliness that when his opponent offered his sword he refused to take it, saying "rather a brave man's hand than his sword." On October 16th the victorious Admiral anchored off the Nore with the eleven ships he had taken, and next day King George raised him to the Peerage with the titles of Baron Duncan of Lundie and Viscount Duncan of Camperdown.
On October 9th, 1817, Duncan set sail from Yarmouth Roads with 20 ships, 4 cutters, and a lugger, to meet the Dutch fleet, which had finally left the Texel. Just before noon on the 11th, Duncan signaled his ships to "clear for action and close," and by 12:30[Pg 284], Vice-Admiral Onslow, in the "Monarch," had gotten through the enemy's line and engaged Vice-Admiral Reyntier. Admiral Duncan engaged the "Vyrheid," the Dutch Admiral's flagship, and after a tough fight lasting until 2 o'clock, De Winter only lowered his ship's flag to the "Venerable" when he was the only unwounded man on the quarter-deck of his mastless ship. It's significant of Duncan's character and bravery that when his opponent offered his sword, he refused to take it, saying, "rather a brave man's hand than his sword." On October 16th, the victorious Admiral anchored off the Nore with the eleven ships he had captured, and the next day, King George elevated him to the Peerage with the titles of Baron Duncan of Lundie and Viscount Duncan of Camperdown.
The vessels engaged were: H.M. ships "Venerable," "Ardent," "Adamant," "Agincourt," "Bedford," "Belliqueux," "Brackel," "Lancaster," "Monarch," "Montague," "Monmouth," "Powerful," "Russell," "Director," "Isis," "Veteran," "Triumph," the frigates "Beaulieu," "Circe," and "Martin," the cutters "Active," "Diligent," "King George," "Rose," and the lugger "Speculator."
The ships involved were: H.M. ships "Venerable," "Ardent," "Adamant," "Agincourt," "Bedford," "Belliqueux," "Brackel," "Lancaster," "Monarch," "Montague," "Monmouth," "Powerful," "Russell," "Director," "Isis," "Veteran," "Triumph," the frigates "Beaulieu," "Circe," and "Martin," the cutters "Active," "Diligent," "King George," "Rose," and the lugger "Speculator."
The Nile.—For over a year hardly a British man-of-war had passed into the Mediterranean until Rear-Admiral Sir Horatio Nelson, with Captain Trowbridge, entered with his fleet to frustrate the pretensions of Napoleon. There were 13 74-gun ships and 1 of 50 guns; but before the action commenced on August 1st, 1798, the former had been reduced to 12 by the grounding of the "Culloden." The French fleet was of equal proportions; but included several heavier ships: "L'Orient," the flagship, a magnificent three-decker carrying 120 guns, and three others with 80 guns apiece. The French fleet was moored on the edge of a shoal in a compact line running north-west by south-east. Captain Foley, with the "Goliath," led the way between the front ships and Aboukir Island, thus executing a manœuvre which the French Admiral had thought impracticable. Five ships thus engaged the enemy on the port or land side, while the "Vanguard," followed up by other ships, made for the centre of the line. At half-past 6 in the evening the battle commenced, and by 8 o'clock 8 British ships and an equal number of French were engaged in one of the most deadly struggles in naval history.
The Nile.—For over a year, hardly a British warship had entered the Mediterranean until Rear-Admiral Sir Horatio Nelson, along with Captain Trowbridge, arrived with his fleet to counter Napoleon's ambitions. There were 13 ships with 74 guns and 1 ship with 50 guns; but before the action began on August 1st, 1798, the number of 74-gun ships was reduced to 12 because the "Culloden" ran aground. The French fleet was similarly sized but included several larger ships: "L'Orient," the flagship, was a stunning three-decker with 120 guns, plus three other ships each armed with 80 guns. The French fleet was anchored along the edge of a shoal in a tight formation running northwest to southeast. Captain Foley, aboard the "Goliath," led the charge between the front ships and Aboukir Island, executing a maneuver the French Admiral had thought impossible. Five British ships engaged the enemy from the port or land side, while the "Vanguard," followed by additional ships, moved toward the center of the line. The battle began at 6:30 p.m., and by 8 p.m., 8 British ships and an equal number of French were involved in one of the most intense battles in naval history.
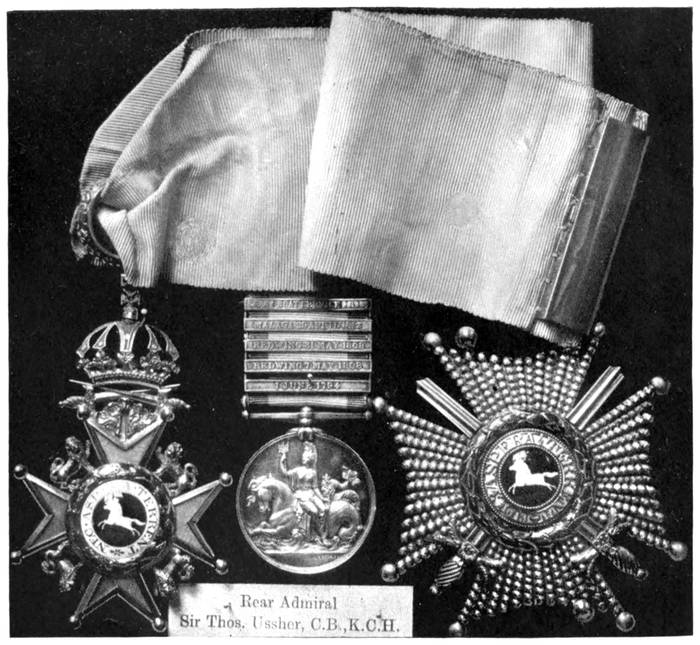
NAVAL GENERAL SERVICE MEDAL AND KNIGHT COMMANDER'S HANOVER BADGE AND STAR.
NAVAL GENERAL SERVICE MEDAL AND KNIGHT COMMANDER'S HANOVER BADGE AND STAR.
Awarded to Rear-Admiral Sir Thomas Ussher, C.B., K.C.H.
Awarded to Rear-Admiral Sir Thomas Ussher, C.B., K.C.H.
Early in the contest the French Admiral, de Brueys, had been badly wounded, but, gallant sailor that he was, refused to go below, and met his death about this time by a shot that almost cut him in two: even then his resolute spirit refused to yield, and death only gave his comrades the power to remove his maimed body. At 9 o'clock his ship, "L'Orient," was seen to blaze out; but her determined crew stuck to their guns and fired them until they were literally scorched out of their places—and then the great ship blew up. So awful was the scene that the gunners of both fleets were apparently too dazed to fire again for about a quarter of an hour. Meantime a French lad won undying fame by his devotion to his father, the Commodore of "L'Orient," and his name has been immortalised by a British poetess, Mrs. Hemans, who has so well portrayed the story of the little ten-year-old lad who refused to leave his mortally wounded father, and despite the fact that, as a French writer states, "the English seamen made the most strenuous efforts to save the young Casabianca," he went down to his death with the father he loved so well.
Early in the battle, the French Admiral, de Brueys, was seriously injured, but being the brave sailor he was, he refused to go below deck and ultimately met his end when a cannonball nearly cut him in half. Even then, his determined spirit wouldn't give in, and it took death for his comrades to carry away his mangled body. At 9 o'clock, his ship, "L'Orient," was seen bursting into flames; however, her resolute crew continued to fire their guns until they were literally burned from their mounts—then the massive ship exploded. The scene was so horrifying that the gunners of both fleets seemed too stunned to fire again for about fifteen minutes. In the meantime, a French boy gained eternal fame for his loyalty to his father, the Commodore of "L'Orient," and his story has been immortalized by the British poetess, Mrs. Hemans, who beautifully captured the tale of the little ten-year-old boy who refused to leave his mortally wounded father. Despite the fact that, as a French writer noted, "the English sailors made every effort to save the young Casabianca," he went down to his death alongside the father he loved so dearly.
Just before "L'Orient" blew up, Nelson received a severe wound on the forehead which was for a time thought likely to prove mortal; but on hearing that the great vessel had blown up, he gave orders for the launching of the only boat so that the unfortunate survivors of the explosion might be rescued. The night with its horrors had exhausted the fleets, and firing gradually ceased until the day broke at 4 o'clock: by then 6 French ships had hauled down their colours and two were aground, while the "Ton[Pg 286]nant," commanded by the bravest of brave seamen, Captain Dupetit-Thouars, showed fight to the last, for her seamen were filled with the spirit of their dead captain, who had his colours nailed to the mast, and when wounded unto death refused to yield. Such courage as his must be infectious. With both arms and a leg shot away, seated in a tub of bran, this defiant and gallant Frenchman commanded his ship until the conqueror of all—Death—claimed the victory.
Just before "L'Orient" exploded, Nelson suffered a serious head injury that was initially thought to be deadly. However, upon hearing that the massive ship had blown up, he ordered the launch of the only boat to rescue the unfortunate survivors of the explosion. The horrors of the night had worn out the fleets, and the firing slowly stopped until dawn broke at 4 o'clock. By that time, 6 French ships had lowered their flags, and two were grounded, while the "Ton[Pg 286]nant," led by the bravest of brave sailors, Captain Dupetit-Thouars, fought until the end, as her crew was inspired by their fallen captain, who had his colors nailed to the mast and, when mortally wounded, refused to surrender. Such bravery must be contagious. With both arms and a leg shot off, sitting in a tub of bran, this defiant and courageous Frenchman commanded his ship until the ultimate conqueror—Death—claimed the victory.
Only 2 French ships-of-war and 2 frigates escaped. The flagship and the "Arteruise" had blown up, 2 were aground, a frigate had been sunk when Rear-Admiral Villeneuve endeavoured to get away with the badly damaged "Tonnant" and 3 others. Of these the "Timeleon" grounded, and after her crew had got ashore, her captain burnt her; the "Tonnant" was captured; and only the "Guillaume Tell" and the "Genereux," which had hardly taken any part in the conflict, escaped with the frigates "Justice" and "Diane." Not a British vessel went down, but all showed severe evidence of the fight that had been waged on that August day in 1798. The victory was due not only to the excellent seamanship of Nelson, who was raised to the peerage as Baron Nelson of the Nile, and of Burnham Thorpe, for what Lord St. Vincent described as "the greatest achievement the history of the world can produce," but to the superb gunnery of his men, who served their guns with such rapidity and precision that their opponents were absolutely outclassed.
Only 2 French warships and 2 frigates managed to escape. The flagship and the "Arteruise" blew up, 2 were stuck on the shore, and a frigate sank when Rear-Admiral Villeneuve tried to flee with the badly damaged "Tonnant" and 3 others. Of these, the "Timeleon" ran aground, and after her crew got to safety, her captain set her on fire; the "Tonnant" was captured; and only the "Guillaume Tell" and the "Genereux," which barely participated in the battle, got away along with the frigates "Justice" and "Diane." No British vessel went down, but all showed clear signs of the fierce battle that took place on that August day in 1798. The victory was not only due to Nelson's outstanding seamanship—who was elevated to the peerage as Baron Nelson of the Nile and of Burnham Thorpe, for what Lord St. Vincent called "the greatest achievement the history of the world can produce"—but also to the exceptional marksmanship of his crew, who operated their guns with such speed and accuracy that they completely outclassed their opponents.
The ships engaged in the battle were the "Vanguard," "Bellerophon," "Orion," "Audacious," "Culloden," "Defiance," "Zealous," "Minotaur," "Goliath," "Alexander," "Majestic," "Leander," "Theseus," "Swiftsure," and the sloop "Mutine."
The ships involved in the battle were the "Vanguard," "Bellerophon," "Orion," "Audacious," "Culloden," "Defiance," "Zealous," "Minotaur," "Goliath," "Alexander," "Majestic," "Leander," "Theseus," "Swiftsure," and the sloop "Mutine."
Davison's Medal for the Nile.—As a souvenir of this historic sea-fight Mr. Alexander Davison, Lord Nelson's prize agent, presented to every officer and seaman of Nelson's fleet a medal; gold to captains[Pg 287] and lieutenants, silver to warrant officers, bronze gilt to petty officers, bronze to seamen and marines. The medal, which is 117∕20 in. in diameter, is illustrated facing page 288. Upon the edge is impressed FROM ALEXANDER DAVISON ESQ., ST. JAMES SQUARE, A TRIBUTE OF REGARD. The medals were issued unnamed, but many had their names and the name of their ship also engraved above the sky-line on the reverse. The medals, modelled by C. H. Kuchler, were highly prized by all who received them, from Nelson—who wrote very gratefully to Davison—to the seamen, many of whom had the medals mounted in gold or silver frames and wore them suspended from a broad blue ribbon. This is the first instance of a medal given by a private individual being accepted and worn in the Service.
Davison's Medal for the Nile.—As a keepsake from this historic sea battle, Mr. Alexander Davison, Lord Nelson's prize agent, gave every officer and sailor in Nelson's fleet a medal: gold for captains and lieutenants, silver for warrant officers, gilt bronze for petty officers, and bronze for sailors and marines. The medal is 117∕20 inches in diameter and is shown facing page 288. The edge is inscribed with FROM ALEXANDER DAVISON Esq., ST. JAMES SQUARE, A TOKEN OF RESPECT. The medals were issued without names, but many had their names and the names of their ships engraved above the skyline on the back. The medals, designed by C. H. Kuchler, were highly valued by everyone who received them, from Nelson—who expressed his sincere gratitude to Davison—to the sailors, many of whom had their medals set in gold or silver frames and wore them on a wide blue ribbon. This is the first time a medal awarded by a private individual has been accepted and worn in the Service.
Copenhagen.—This battle, fought on April 2nd, 1801, will long be remembered for the gallant conduct of Nelson, who, when Admiral Sir Hyde Parker signalled "leave off action," placed his glass to his blind eye and saying, "I really do not see the signal!" ordered his own signal for close action to be kept flying. Had it not have been for this daring disregard of orders, Copenhagen would have been among the failures of our navy, instead of one of its most glorious victories, for it was one of the most stubborn fights on record. For five hours Britons and Danes fought with equal courage and determination. For five hours they fought with equal success, and it was only through the pertinacity of Nelson that the fortune of war fell to Britain. This battle has a double significance, for not only did Nelson prove his great capacity as a seaman, but also gave further evidence of his humane character; for when the stubborn spirit of the Danes was likely to lead to useless bloodshed he appealed "to the brothers of Englishmen—the Danes," to recognise the fact that they were beaten, and so prevent unnecessary carnage.
Copenhagen.—This battle, fought on April 2nd, 1801, will long be remembered for the courageous actions of Nelson, who, when Admiral Sir Hyde Parker signaled "stop fighting," raised his glass to his blind eye and said, "I really don’t see the signal!" He then ordered his signal for close action to be kept up. If it hadn’t been for this bold defiance of orders, Copenhagen would have been considered a failure for our navy rather than one of its greatest victories, as it was one of the toughest battles recorded. For five hours, the British and Danes fought with equal bravery and resolve. They fought with equal success for those five hours, and it was only due to Nelson's persistence that victory ultimately went to Britain. This battle holds a double significance, as Nelson not only showcased his exceptional skill as a seaman but also demonstrated his humane nature; when the fierce spirit of the Danes threatened to lead to unnecessary bloodshed, he appealed "to the brothers of Englishmen—the Danes," urging them to recognize that they were defeated, thus preventing needless carnage.
It was an action which he knew would be misunderstood and misrepresented, but he did not falter. Fortu[Pg 288]nately his message was received by the Crown Prince in the spirit in which it was sent, and the battle of Copenhagen, "the most terrible of all" his engagements, was added to the laurels of the immortal and gentle Nelson, although because Nelson requested the cessation of hostilities, the Danes regarded it as a drawn battle.
It was an action he knew would be misunderstood and misrepresented, but he didn't hesitate. Fortunately, his message was received by the Crown Prince in the spirit it was intended, and the battle of Copenhagen, "the most terrible of all" his engagements, was added to the honors of the unforgettable and kind Nelson. However, since Nelson requested a stop to the fighting, the Danes saw it as a tie.
The following ships were engaged: "Elephant," (Vice-Admiral Nelson's flagship), "Defiance," "Edgar," "Monarch," "Bellona," "Ganges," "Russell," "Agamemnon," "Ardent," "Polyphemus," "Glatton," "Isis," "Amazon," "Alcméne," "Blanche," "Désirée," "Jamaica," sloops "Arrow," "Dart," "Cruiser," and "Harpy," bomb vessels "Discovery," "Explosion," "Hecla," "Sulphur," "Terror," "Volcano," and "Zebra," and the brigs "Otter" and "Zephyr."
The following ships were involved: "Elephant" (Vice-Admiral Nelson's flagship), "Defiance," "Edgar," "Monarch," "Bellona," "Ganges," "Russell," "Agamemnon," "Ardent," "Polyphemus," "Glatton," "Isis," "Amazon," "Alcméne," "Blanche," "Désirée," "Jamaica," and the sloops "Arrow," "Dart," "Cruiser," and "Harpy," as well as the bomb vessels "Discovery," "Explosion," "Hecla," "Sulphur," "Terror," "Volcano," and "Zebra," along with the brigs "Otter" and "Zephyr."
Trafalgar.—Napoleon having placed the crown of Italy upon his head (May 6th, 1805), within a fortnight declared Genoa and the Ligurian Republic part of the French Empire. He then had hopes that Admiral De Villeneuve would successfully escort the "Army of England," then encamped at Boulogne, across the Channel. His plans were, however, frustrated by the engagement forced upon Villeneuve by Admiral Sir Robert Calder off Ferrol, while Napoleon, charging his Admiral with cowardice, caused him to leave the harbour of Cadiz on October 19th, 1805, and the epoch-making battle off Cape Trafalgar was the result. Owing to light winds, Villeneuve did not make the Atlantic until the next day, and then his combined fleet of 33 French and Spanish ships of the line, 5 French frigates, and 2 brigs, were sighted off Cape Trafalgar by Nelson's look-out ships. It was not until next day, however, that the fleets formed in battle array. At 6.30 a.m. the British ships cleared for action. The English fleet comprised 27 sail of the line, 4 frigates, a cutter and a schooner. Lord Nelson led the Weather or Northern Division in his flagship the "Victory," while Vice-Admiral Collingwood led the Lee or Southern Division. Just before noon the famous signal "England expects every man to do his duty" was run up, and the battle began. "Engage the enemy more closely" was the only other signal given by the British Admiral, and that was when the enemy's ship "Fougueux" had opened fire upon the "Royal Sovereign"; then followed a series of contests between the French and British ships, which reflect the greatest credit upon the seamen of both nations.
Trafalgar.—After Napoleon crowned himself King of Italy on May 6th, 1805, he quickly declared Genoa and the Ligurian Republic as part of the French Empire within two weeks. He was optimistic that Admiral De Villeneuve would successfully lead the "Army of England," stationed at Boulogne, across the Channel. However, Villeneuve was engaged in a battle with Admiral Sir Robert Calder off Ferrol, which disrupted Napoleon's plans. Blaming his Admiral for cowardice, Napoleon forced Villeneuve to leave the port of Cadiz on October 19th, 1805, which led to the significant battle off Cape Trafalgar. Due to light winds, Villeneuve's fleet didn't reach the Atlantic until the next day, at which point his combined force of 33 French and Spanish ships of the line, 5 French frigates, and 2 brigs were spotted off Cape Trafalgar by Nelson's lookout ships. It wasn't until the following day that the fleets arranged themselves for battle. At 6:30 a.m., the British ships prepared for action, consisting of 27 ships of the line, 4 frigates, a cutter, and a schooner. Lord Nelson commanded the Weather or Northern Division from his flagship, the "Victory," while Vice-Admiral Collingwood led the Lee or Southern Division. Just before noon, the famous signal "England expects every man to do his duty" was raised, and the battle commenced. The only other signal given by the British Admiral was "Engage the enemy more closely," issued when the enemy ship "Fougueux" opened fire on the "Royal Sovereign." This was followed by a series of intense confrontations between the French and British ships, showcasing the remarkable skill of the seamen from both nations.

DAVISON'S MEDAL FOR THE VICTORY OF THE NILE, 1798.
DAVISON'S MEDAL FOR THE VICTORY AT THE NILE, 1798.
Nelson, being desirous of engaging the French Admiral's flagship, came upon the "Bucentaure" at 12.30 p.m., when she fired upon the British flagship, but, unheedful of the shot from this and seven other ships, the "Victory" ploughed her way ahead in order to break the enemy's line. For three-quarters of an hour her guns refused to bark, though her men were falling fast from the shots which broke through her sides, and tore her sails to shreds; but at 1 o'clock the "Victory" closely engaged the "Bucentaure," and so well were the British shots placed that 20 of the enemy's guns were soon dismounted and, according to a French estimate, 400 seamen were killed. Leaving the "Bucentaure" the "Victory" engaged the "Redoubtable" at ten minutes past 1, and the rigging of the two ships fouling, they were locked in a deadly embrace. Then the crews of the two vessels fought with exceeding gallantry, for both were led by brave men, and the "Redoubtable's" captain cheered his men on to board the "Victory"; indeed, he lowered his main-yard on to the "Victory's" deck, and his men made a brave effort to capture her, but those daring Frenchmen who gained her decks paid for their effort with their lives; not, however, before they had placed 30 of the "Victory's" crew hors de combat.
Nelson, eager to engage the French Admiral's flagship, encountered the "Bucentaure" at 12:30 p.m. It fired upon the British flagship, but ignoring the shots from this and seven other ships, the "Victory" pushed ahead to break the enemy's line. For 45 minutes, its guns remained silent, even as its men suffered heavy casualties from the shots that penetrated its sides and shredded its sails. At 1 o'clock, "Victory" was in close combat with the "Bucentaure," and the British shots were so well aimed that 20 of the enemy's guns were quickly taken out, resulting in an estimated 400 French seamen killed. After leaving the "Bucentaure," the "Victory" engaged the "Redoubtable" at 1:10, and as the rigging of both ships became entangled, they were locked in a fierce struggle. The crews of both vessels fought bravely, led by courageous commanders, with the captain of the "Redoubtable" rallying his men to board the "Victory." He even lowered his main-yard onto the "Victory's" deck, and his crew made a valiant attempt to capture her. However, those daring Frenchmen who reached the deck paid with their lives; still, they managed to take 30 of the "Victory's" crew hors de combat.
Death of Nelson.—Meanwhile, one of the sharpshooters in the mizzen-top of the "Redoubtable" had given Viscount Nelson his death wound. At half-past one the fatal bullet passed through his shoulder and[Pg 290] spine, but Britain's greatest admiral lived long enough to learn that the victory was his, and he died at 4.30 p.m. satisfied that he had done his duty. By 5.30 p.m. 18 of the enemy's ships had struck their colours, and the survivors of the fight were making the best of their way to Cadiz, but a gale coming on, the British fleet with its prizes stood out to sea, where some of the prizes foundered with their crews; others were driven ashore and wrecked, while four were retaken by the enemy, so that by the time the triumphant fleet sailed into Gibraltar Bay it only retained 4 prizes. The victory of Trafalgar had, however, made Britain indisputable mistress of the seas, destroyed the sea power of France and Spain, and, while it added to the laurels of British seamen, gave to Nelson a glorious death and secured for him a resting-place in Westminster Abbey.
Death of Nelson.—Meanwhile, a sharpshooter in the mizzen-top of the "Redoubtable" had dealt Viscount Nelson his fatal injury. At 1:30 PM, the deadly bullet pierced his shoulder and[Pg 290]spine, but Britain’s greatest admiral lived long enough to hear that victory was his. He passed away at 4:30 PM, content that he had fulfilled his duty. By 5:30 PM, 18 enemy ships had lowered their flags, and the remaining fighters were trying to make their way to Cadiz. However, a storm arose, causing the British fleet and its captured ships to head out to sea, where some of the prizes sank with their crews, others were washed ashore and wrecked, and four were retaken by the enemy. Thus, when the victorious fleet arrived in Gibraltar Bay, it held on to only 4 captured ships. The victory at Trafalgar had, nonetheless, established Britain as the undisputed ruler of the seas, shattered the naval power of France and Spain, and, while it added to the honors of British seamen, provided Nelson with a glorious death and secured him a resting place in Westminster Abbey.
The following ships were engaged in the battle: "Victory," "Royal Sovereign," "Temeraire," "Britannia," "Conqueror," "Neptune," "Agamemnon," "Leviathan," "Ajax," "Africa," "Minotaur," "Orion," "Belleisle," "Mars," "Thunderer," "Spartiate," "Bellerophon," "Achille," "Colossus," "Polyphemus," "Revenge," "Dreadnought," "Swiftsure," "Defence," "Defiance," "Prince" and "Tonnant." "Naiad," "Sirius," "Euryalus" and "Phœbe" frigates. The cutter "Entreprenaute" and the schooner "Pickle."
The following ships took part in the battle: "Victory," "Royal Sovereign," "Temeraire," "Britannia," "Conqueror," "Neptune," "Agamemnon," "Leviathan," "Ajax," "Africa," "Minotaur," "Orion," "Belleisle," "Mars," "Thunderer," "Spartiate," "Bellerophon," "Achille," "Colossus," "Polyphemus," "Revenge," "Dreadnought," "Swiftsure," "Defence," "Defiance," "Prince," and "Tonnant." "Naiad," "Sirius," "Euryalus," and "Phoebe" frigates. The cutter "Entreprenaute" and the schooner "Pickle."
Gold Medal for Trafalgar.—As already stated, the gold medal instituted by George III to reward the officers of Lord Howe's fleet who took part in the action on "The Glorious" June 1st, 1794, was afterwards awarded for all great naval victories, and among those who received them were Nelson's officers—from post-captains upwards—who took part in the battle of Trafalgar. The gold medal was awarded for 18 different actions, the last award being for the fight between the "Endymion" frigate of 48 guns and the American 50-gun frigate "President" on January 15th, 1815. See facing page 280 for smaller type of medal as[Pg 291] awarded to James (afterwards Right Hon. Admiral Lord James) Gambier of the "Defence" for June 1st, 1794.
Gold Medal for Trafalgar.—As already mentioned, the gold medal created by George III to honor the officers of Lord Howe's fleet who participated in the battle on "The Glorious" June 1st, 1794, was later given for all significant naval victories. Among those who received it were Nelson's officers—from post-captains up—who were involved in the Battle of Trafalgar. The gold medal was awarded for 18 different engagements, with the last one given for the clash between the "Endymion" frigate of 48 guns and the American 50-gun frigate "President" on January 15th, 1815. See facing page 280 for the smaller type of medal, as[Pg 291] awarded to James (later Right Hon. Admiral Lord James) Gambier of the "Defence" for June 1st, 1794.

HORATIUS COUNT NELSON, K.B. DUKE OF BRONTE
HORATIUS COUNT NELSON, K.B. DUKE OF BRONTE
Boulton's Trafalgar Medal.—To commemorate the last and greatest of Nelson's victories, Matthew Boulton, the partner of James Watt of the famous Soho Works near Birmingham, decided to strike medals and present one to each participant in the fight. The medal, 19∕10 in. in diameter, bears on the obverse a fine bust of Nelson, with the inscription surrounding it HORATIO VISCOUNT NELSON. K.B. DUKE OF BRONTE. On the reverse the battle is represented en cameo, with the famous signal on a ribbon running with the line of the medal, and in the exergue TRAFALGAR OCT. 21 1805. On the edge of the medal is the inscription TO THE HEROES OF TRAFALGAR FROM M. BOULTON. The medal was struck in silver for the senior officers, and in pewter for distribution among the junior officers and seamen. The intrinsic value of the medal did not, however, appeal to many of the recipients of the pewter variety, and they either refused them or threw them overboard. Those who retained them wore them suspended from a blue ribbon. A few were struck in bronze as proofs.
Boulton's Trafalgar Medal.—To honor the last and greatest of Nelson's victories, Matthew Boulton, who was James Watt's partner at the famous Soho Works near Birmingham, decided to create medals and give one to each participant in the battle. The medal, 19∕10 in. in diameter, features a detailed bust of Nelson on the front, surrounded by the inscription HORATIO VISCOUNT NELSON, K.B., DUKE OF BRONTE. The back showcases the battle depicted en cameo, with the famous signal on a ribbon running along the line of the medal, and below it, the inscription TRAFALGAR OCT 21, 1805. The edge of the medal carries the inscription TO THE HEROES OF TRAFALGAR FROM M. BOULTON. The medal was made in silver for the senior officers and in pewter for distribution to junior officers and sailors. However, the actual value of the pewter medals didn't impress many of the recipients, who either refused them or tossed them overboard. Those who kept them wore them on a blue ribbon. A few medals were made in bronze as proofs.
Davison's Trafalgar Medal.—This medal, generally supposed to have been struck at the instance of Mr.[Pg 292] Alexander Davison for distribution among the surviving members of the crew of the "Victory," has on the obverse a shield bearing the arms of Nelson, encircled by a garter inscribed TRIA · JUNCTO · IN · UNO · ensigned by a bust of Viscount Nelson, with a laurel branch to the left, and a palm branch to the right, and on a scroll beneath the shield PALMAM QUI MERUIT FERAT and the double inscription ADMIRAL LORD NELSON D. OF BRONTE NATUS SEP. 29TH 1758. HOSTE DEVICTO REQUIEVIT OCT. 21ST 1805 and ENGLAND EXPECTS EVERY MAN WILL DO HIS DUTY. On the reverse is a man-of-war with sails furled, and above THE LORD IS A MAN OF WAR. EXODUS C 15 V 3, whilst below is VICTORY OFF TRAFALGAR OVER THE COMBINED FLEETS OF FRANCE & SPAIN OCT 21 1805. Beneath the man-of-war is HALLIDAY FECIT. The medals, 2 in. in diameter, were struck in pewter or white metal, and were sometimes framed by the recipients in gold, silver, or gilt metal rims, with a loop for suspension from a blue ribbon.
Davison's Trafalgar Medal.—This medal is generally believed to have been created at the request of Mr.[Pg 292] Alexander Davison for distribution among the surviving crew members of the "Victory." On the front, it features a shield displaying Nelson's arms, surrounded by a garter inscribed TRIA · JUNCTO · IN · UNO ·, topped with a bust of Viscount Nelson, with a laurel branch on the left and a palm branch on the right. Below the shield is a scroll that reads To the deserving goes the palm., along with the double inscription Admiral Lord Nelson, Duke of Bronte, born September 29, 1758. Defeated the enemy, passed away October 21, 1805. and ENGLAND EXPECTS EVERY MAN TO DO HIS DUTY.. On the back, there is an armed ship with furled sails, and above it is The Lord is a warrior. Exodus 15:3, while below it says VICTORY AT TRAFALGAR AGAINST THE COMBINED FLEETS OF FRANCE & SPAIN OCT 21 1805. Underneath the ship is HALLIDAY MADE IT. The medals, measuring 2 inches in diameter, were made of pewter or white metal, and recipients sometimes framed them in gold, silver, or gilt metal rims, with a loop for hanging from a blue ribbon.
The Official Medal.—It was not until June 1st, 1847, that it was made known by a General Order that Her Majesty Queen Victoria had commanded that a medal should be struck, not only to commemorate the battle of Trafalgar, but to recognise the services rendered by her fleets and armies from 1793 to 1815. The medal was ready for distribution in January 1849, and later the naval services for which it might be awarded were extended to 1840. The admitted claims totalled 20,900.
The Official Medal.—It wasn't until June 1, 1847, that a General Order announced that Her Majesty Queen Victoria had ordered a medal to be created, not just to honor the battle of Trafalgar, but also to recognize the contributions of her fleets and armies from 1793 to 1815. The medal was ready for distribution in January 1849, and later, the naval services eligible for it were expanded to include 1840. The total claims accepted amounted to 20,900.

(Reverse.)
(Reverse.)
NAVAL GENERAL SERVICE MEDAL.
Naval General Service Medal.

SULTAN'S MEDAL FOR ACRE.
Sultan's Medal for Acre.

(Obverse.)
(Front side.)
NAVAL GENERAL SERVICE MEDAL.
NAVAL GENERAL SERVICE MEDAL.
The Naval General Service Medal.—Two hundred and thirty bars were issued with the medal, which bore upon the obverse the bust of Queen Victoria, as on the Military General Service medal, and the legend VICTORIA REGINA, with the date 1848 below, and on the reverse a figure of Britannia seated upon a sea-horse holding in her right hand a trident, and in the left an olive branch. The medal, by Wyon, is suspended by a straight clasp from a white ribbon with blue edges, and the recipient's name is impressed upon the edge of the medal in Roman capitals of the same character as those used for the M.G.S. medal. Officers and warrant officers only had their rank described, and in the arrangement of the bars the first action was placed nearest the medal. Although so many bars were issued with the medal, six is the most awarded to any one man. Dr. Payne has in his collection two with five bars; one awarded to Thos. Hewitt, midshipman, for 1 JUNE 1794—12 OCTR 1798—4 FEB BOAT SERVICE 1804—CENTAUR 26 AUGT 180'—ALGIERS, and another awarded to Capt. (afterwards Rear-Admiral Sir Thomas) Ussher, Kt., C.B., K.C.H., illustrated facing page 284, which also includes 1 JUNE 1794—REDWING 7 MAY 1808—REDWING 31ST MAY 1808—MAGALA 29TH APRIL 1812—2 MAY BOAT SERVICE 1813. This is a particularly rare set of bars, for only seven of the second were issued, five of the third, seven of the fourth, and forty-nine of the fifth.
The Naval General Service Medal.—Two hundred and thirty bars were issued with the medal, which featured the bust of Queen Victoria on the front, like the Military General Service medal, along with the inscription QUEEN VICTORIA and the year 1848 below it. On the back, there is a figure of Britannia sitting on a sea-horse, holding a trident in her right hand and an olive branch in her left. The medal, designed by Wyon, hangs from a straight clasp attached to a white ribbon with blue edges, and the recipient's name is engraved on the edge of the medal in Roman capitals that match those used for the M.G.S. medal. Only officers and warrant officers had their rank indicated, and when arranged, the first action is placed closest to the medal. Although many bars were issued with the medal, six is the highest number awarded to any one person. Dr. Payne has two medals in his collection with five bars; one awarded to Thos. Hewitt, midshipman, for 1 June 1794—12 October 1798—4 February Boat Service 1804—Centaur 26 August 180—Algiers, and another awarded to Capt. (later Rear-Admiral Sir Thomas) Ussher, Kt., C.B., K.C.H., shown facing page 284, which also features 1 JUNE 1794—REDWING 7 MAY 1808—REDWING 31 MAY 1808—MAGALA 29 APRIL 1812—2 MAY BOAT SERVICE 1813. This is an especially rare set of bars, as only seven of the second were issued, five of the third, seven of the fourth, and forty-nine of the fifth.
Bars awarded with the Naval General Service Medal, listing the names of the actions on it.
Nymph, 18 June 1793. 4 issued. Capture of the French frigate "Cleopatre." Captain E. Pellew, who commanded the "Nymph," was knighted.
Nymph, June 18, 1793. 4 issued. Capture of the French frigate "Cleopatre." Captain E. Pellew, who was in charge of the "Nymph," was knighted.
Crescent, 20 Oct. 1793. 12 issued. Capture of the French frigate "Reunion," which was added to the British Navy under the same name.
Crescent moon, Oct. 20, 1793. 12 issued. Capture of the French frigate "Reunion," which was incorporated into the British Navy under the same name.
Zebra, 7 March 1794. 2 issued. Running the "Zebra" sloop alongside the bastion of Fort Royal at Martinique, and storming and capturing the fort.
Zebra, 7 March 1794. 2 issued. Maneuvering the "Zebra" sloop next to the bastion of Fort Royal in Martinique and launching an attack to take over the fort.
Carysfort, 29 May 1794. None issued. Recapture of the "Caster."
Carysfort, May 29, 1794. None issued. Recapture of the "Caster."
1 June 1794 ("The Glorious First of June"). 576 issued. Defeat of the French fleet by Lord Howe, capture of 6 sail of the line and 1 sunk. 58 vessels (for list of principal vessels engaged see page 279).
1 June 1794 ("The Glorious First of June"). 576 issued. The French fleet was defeated by Lord Howe, with 6 ships of the line captured and 1 sunk. 58 vessels (for a list of the main ships involved, see page 279).
Romeny, 17 June 1794. 2 issued. Capture of French frigate "Sybille."
Romney, 17 June 1794. 2 issued. Capture of the French frigate "Sybille."
Blanche, 4 Jan. 1795. 5 issued. At the end of the[Pg 294] conflict she had a crew of 190. Capture of the French frigate "Pique."
Blanche, Jan. 4, 1795. 5 issued. By the end of the [Pg 294] conflict, she had a crew of 190. Capture of the French frigate "Pique."
Lively, 13 March 1795. 3 issued. Capture of the French frigate "Tourterelle."
Energetic, March 13, 1795. 3 issued. Capture of the French frigate "Tourterelle."
14 March 1795. 111 issued. Action with French fleet, and capture of 2 sail of the line. 22 vessels under Vice-Admiral Hotham were engaged.
14 March 1795. 111 issued. Engagement with the French fleet and capture of 2 ships of the line. 22 vessels under Vice-Admiral Hotham were involved.
Astræa, 10 April 1795. 2 issued. Capture of the French frigate "Gloire."
Astræa, April 10, 1795. 2 issued. Capture of the French frigate "Gloire."
| Thetis, 17 May 1795. 3 issued. | Action with four French ships, and capture of "La Raison" and "Prevoyante." |
| Cavalry officer, 17 May 1795. 1 issued. |
Mosquito, 9 June 1795. None issued. This was not due to delay in issuing medals, but to the loss of the captain and crew of the "Mosquito" soon after. Action with, and capture of, privateer.
Mosquito, June 9, 1795. None issued. This wasn’t because there was a delay in issuing medals, but rather because the captain and crew of the "Mosquito" were lost shortly after. Action with, and capture of, privateer.
17 June 1795. 38 issued. Brilliant repulse by Vice-Admiral Cornwallis, of a fleet four times superior in force. 7 vessels engaged.
17 June 1795. 38 issued. Vice-Admiral Cornwallis achieved a stunning victory against a fleet four times larger. 7 ships were involved.
23 June 1795. 201 issued. Action under Admiral Lord Bridport with French fleet, and capture of 3 sail of the line; the "Formidable" became the British ship "Belleisle" and the "Tigre" was also added under its own name. The "Alexander" was a recapture. 29 vessels engaged.
23 June 1795. 201 issued. Action under Admiral Lord Bridport against the French fleet, resulting in the capture of 3 ships of the line; the "Formidable" became the British ship "Belleisle" and the "Tigre" was also added under its own name. The "Alexander" was recaptured. 29 vessels were involved.
| Dido, 23 June 1795. 1 only issued. | Action with the French frigates "Minerve" and "Artemise," and capture of the former. |
| Lowestoft, 24 June 1795. 6 issued. |
Spider, 25 Aug. 1795. 1 only issued. Action with 2 French brigs, and capture of 1. This medal realised £33 at the Gaskill sale.
Spider, August 25, 1795. Only 1 issued. Engagement with 2 French brigs, resulting in the capture of 1. This medal fetched £33 at the Gaskill sale.
Port Spergui, 17 March 1796. 4 issued to survivors of the "Diamond," "Liberty," and "Aristocrat." Destroying the batteries at Port Spergui, and destroying the corvette "Etourdie," 4 brigs, 2 sloops, and 1 lugger.
Port Spergui, March 17, 1796. 4 issued to survivors of the "Diamond," "Liberty," and "Aristocrat." Taking out the batteries at Port Spergui, and sinking the corvette "Etourdie," 4 brigs, 2 sloops, and 1 lugger.
Indefatigable, 20 April 1796. 6 issued. Capture of French frigate "Virginia," in the English Channel.
Tireless, April 20, 1796. 6 issued. Capture of the French frigate "Virginia" in the English Channel.
| Unicorn, 8 June 1796. 4 issued. | Action with the three French frigates "La Tribune," "La Tamise," (formerly the British ship "Thames") and "La Legere," and capture of the two former. Captain William of the "Unicorn" was knighted. |
| Santa Margarita, 8 June 1796. 3 issued. |
Southampton, 9 June 1796. 4 issued. Capture of French corvette "Utile."
Southampton, June 9, 1796. 4 issued. Capture of the French corvette "Utile."
Dryad, 13 June 1796. 7 issued. Capture of the French frigate "Proserpine," which became H.M.S. "Amelia."
Dryad, June 13, 1796. 7 issued. Capture of the French frigate "Proserpine," which became H.M.S. "Amelia."
Terpsichore, 13 Oct. 1796. 3 issued. Capture of the Spanish frigate "Mahonesa."
Dance, Oct. 13, 1796. 3 issued. Capture of the Spanish frigate "Mahonesa."
Lapwing, 8 Dec. 1796. 2 issued. Action with French ship "Décieux" and brig "Vaillante," and capture of the former. 1 medal sold for £21 on July 24th, 1914.
Lapwing, Dec. 8, 1796. 2 issued. Engaged with the French ship "Décieux" and the brig "Vaillante," resulting in the capture of the former. 1 medal was sold for £21 on July 24, 1914.
| Minerva, 19 Dec. 1796. 5 issued. | Capture of Spanish frigate "Santa Sabina" by the "Minerve," and action between "Blanche" and "Ceres." |
| Blanche, 19 Dec. 1796. 2 issued. |
| Tireless, 13 Jan. 1797. 8 issued. | Destruction of French "74," "Droits de L'Homme," off the coast of France. The "Amazon" went ashore and her crew were made prisoners. |
| Amazon Prime, 13 Jan. 1797. 6 issued. |
St. Vincent, 14 Feb. 1797. 363 issued. Action with the Spanish fleet, and capture of 4 sail of the line. 23 ships engaged (for list see page 283).
St. Vincent, Feb 14, 1797. 363 issued. Engagement with the Spanish fleet, resulting in the capture of 4 ships of the line. 23 ships involved (for list see page 283).
San Fiorenzo, 8 March 1797. 7 issued. Capture of[Pg 296] "Resistance" and "Constance." The first named became the "Fisgard."
San Fiorenzo, 8 March 1797. 7 issued. Capture of[Pg 296] "Resistance" and "Constance." The first one was renamed to "Fisgard."
Nymphe, 8 March 1797. 6 issued.
Nymph, March 8, 1797. 6 issued.
Camperdown, 11 Oct. 1797. 332 issued. Battle of Camperdown, when Admiral Duncan defeated the Dutch fleet. 25 vessels engaged (for list see page 283).
Camperdown, 11 Oct. 1797. 332 issued. Battle of Camperdown, when Admiral Duncan defeated the Dutch fleet. 25 vessels engaged (for list see page 283).
Phœbe, 21 Dec. 1797. 7 issued. Capture of the French frigate "Néréide," which was added to the British Navy under the same name.
Phoebe, 21 Dec. 1797. 7 issued. Capture of the French frigate "Néréide," which was incorporated into the British Navy with the same name.
Mars, 21 April 1798. 26 issued. Capture of French 74, "L'Hercule." In this severe action the "Mars" lost her captain, Alexander Hood.
Mars, April 21, 1798. 26 issued. Capture of the French 74, "L'Hercule." In this intense battle, the "Mars" lost her captain, Alexander Hood.
Isle St. Marcou, 6 May 1798. 3 issued. Action at the Island of Marcou. 2 boats engaged.
Isle St. Marcou, May 6, 1798. 3 issued. Action at the Island of Marcou. 2 boats involved.
Lion, 15 July 1798. 21 issued. Action with 4 Spanish frigates and capture of the "Santa Dorotea," which was added to the British Navy under the same name.
Lion, 15 July 1798. 21 issued. Engagement with 4 Spanish frigates and capture of the "Santa Dorotea," which was incorporated into the British Navy under the same name.
Nile, 1 Aug. 1798. 351 issued. Battle of the Nile. 15 ships engaged (for list see page 286).
Nile River, Aug. 1, 1798. 351 issued. Battle of the Nile. 15 ships engaged (for the list, see page 286).
Espoir, 7 Aug. 1798. 1 issued. Action with and capture of a Genoese pirate, the "La Guria."
Hope, Aug. 7, 1798. 1 issued. Engagement with and capture of a Genoese pirate, the "La Guria."
12 Oct. 1798. 81 issued. Action under Sir J. B. Warren with a French squadron, and capture of the "Hoche" "74"—which became the "Donegal"—and 2 frigates. 8 ships engaged.
12 Oct. 1798. 81 issued. Action under Sir J. B. Warren with a French squadron, and capture of the "Hoche" "74"—which became the "Donegal"—and 2 frigates. 8 ships engaged.
Fisgard II, 20 Oct. 1799. 9 issued. Capture of the French frigate "L'Immortalite."
Fisgard II, October 20, 1799. 9 issued. Capture of the French frigate "L'Immortalite."
Sybille, 28 Feb. 1799. 12 issued. Capture of the French frigate "La Forte," after a stern fight in which a detachment of the Scotch Brigade which was on board the "Sybille" took part.
Sybille, Feb 28, 1799. 12 issued. Capture of the French frigate "La Forte" after a fierce battle where a group from the Scotch Brigade on board the "Sybille" participated.
Telegraph, 18 March 1799. None issued. Capture of "L'Hirondelle II."
Text message, March 18, 1799. None published. Capture of "L'Hirondelle II."

BALTIC MEDAL.
BALTIC MEDAL.

NAVAL MEDAL FOR BEST SHOT.
NAVAL MEDAL FOR TOP MARKSMAN.

AFRICA GENERAL SERVICE MEDAL, 1902.
AFRICA GENERAL SERVICE MEDAL, 1902.
Acre, 30 May 1799. 42 issued. The record on the bar for this affair is ACRE, 30 MAY 1799; but as the French raised the siege on May 20th, and Bonaparte retreated leaving 23 cannon, the bar is wrongly inscribed, but it is nevertheless official. The bar was awarded to those who assisted the Turkish fleet to defend "Acre" from the French attack, the ships taking part under Commodore Sir Henry Smith being the "Theseus," "Tigre," and "Alliance."
Acre, May 30, 1799. 42 issued. The official record for this event is Acre, May 30, 1799; however, since the French lifted the siege on May 20th and Bonaparte retreated, leaving behind 23 cannons, the record is inaccurately documented, but it remains official. The bar was awarded to those who helped the Turkish fleet defend "Acre" from the French attack, with the ships involved under Commodore Sir Henry Smith being the "Theseus," "Tigre," and "Alliance."
Schiermonikoog, 12 Aug. 1799. 10 issued.
Schiermonnikoog, August 12, 1799. 10 issued.
Arrow, 13 Sept. 1799. 2 issued. Action and capture of "Draak" and "Gier." 2 vessels. The other boat was the "Wolverine," but no bar was issued for that.
Arrow, 13 Sept. 1799. 2 issued. Action and capture of "Draak" and "Gier." 2 vessels. The other boat was the "Wolverine," but no bar was issued for that.
Surprise with Hermione, 25 Oct., 1799. 7 issued. Boarding and recapturing the "Hermione." For this dashing exploit Captain Hamilton was knighted.
Surprise! with Hermione Granger, Oct 25, 1799. 7 issued. Boarding and recapturing the "Hermione." For this bold act, Captain Hamilton was knighted.
Speedy, 6 Nov. 1799. 3 issued. Action with 10 Spanish gunboats and 2 schooners, and successful defence of convoy.
Quick, Nov. 6, 1799. 3 issued. Engaged with 10 Spanish gunboats and 2 schooners, and successfully defended the convoy.
Courier, 22 Nov. 1799. 3 issued. Action with and capture of the "Guerrier."
Delivery service, Nov 22, 1799. 3 issued. Engagement with and capture of the "Guerrier."
Viper, 26 Dec. 1799. 2 issued. Capture of French brig "Furet."
Viper, Dec 26, 1799. 2 issued. Capture of the French brig "Furet."
| Fairy, 5 Feb. 1800. 4 issued. | Action with and capture of the French frigate "Pallas," which became H.M.S. "Pique." |
| Harpy, 5 Feb. 1800. 4 issued. |
Peterel, 21 March 1800. 2 issued. Capture of "La Ligurienne."
Petrel, March 21, 1800. 2 issued. Capture of "La Ligurienne."
| Penelope, 30 March 1800. 11 issued. | Night action with "Guillaume Tell"; the "Lion" and "Foudroyant" were also engaged and actually captured the vessel, which was added to the British Navy as H.M.S. "Malta," but no award was made to the surviving crews of these ships. |
| Vinciego, 30 March 1800. 2 issued. |
Desirée, 8 July 1800. 23 issued. Boarding and capturing the French frigate "Desirée," and other French vessels. 18 vessels engaged.
Desiree, July 8, 1800. 23 issued. Boarding and taking control of the French frigate "Desirée," along with other French ships. 18 vessels involved.
Seine, 20 Aug. 1800. 9 issued. Capture of French frigate "Vengeance," between Porto Rico and San Domingo.
Seine River, Aug 20, 1800. 9 issued. Capture of the French frigate "Vengeance," between Puerto Rico and Santo Domingo.
Phœbe, 19 Feb. 1801. 7 issued. Capture of French frigate "Africaine," which became H.M.S. "Amelia."
Phoebe, 19 Feb. 1801. 7 issued. Capture of the French frigate "Africaine," which became H.M.S. "Amelia."
Egypt. 626 issued for services on Coast of Egypt. 117 vessels were engaged.
Egypt. 626 issued for services on the coast of Egypt. 117 vessels were involved.
Copenhagen, 1801. 589 issued. 38 vessels engaged.
Copenhagen, 1801. 589 published. 38 ships involved.
Speedy, 6 May. 7 issued. Capture of the "Gamo."
Fast, May 6. 7 released. Capture of the "Gamo."
Gut of Gibraltar, 12 July 1801. 152 issued. 10 ships engaged. Action with the French squadrons in the "Gut of Gibraltar," and destruction of 2 Spanish ships of 122 guns each, and capture of the "St. Antonio" "74." For his services as commander of the British squadron Sir J. Saumarez was made a K.C.B. and given a pension of £1,200 a year.
Gibraltar Strait, July 12, 1801. 152 issued. 10 ships involved. Conflict with the French squadrons in the "Gut of Gibraltar," resulting in the destruction of 2 Spanish ships with 122 guns each, and the capture of the "St. Antonio" "74." For his services as commander of the British squadron, Sir J. Saumarez was appointed a K.C.B. and awarded a pension of £1,200 a year.
Sylph, 28 Sept. 1801. 2 issued. Action with the "Artemise."
Air spirit, September 28, 1801. 2 issued. Engagement with the "Artemise."
Pasley, 28 Oct. 1801. 3 issued. Capture of the Spanish ship "Virgen del Rosatio."
Pasley, Oct. 28, 1801. 3 issued. Capture of the Spanish ship "Virgen del Rosatio."
| Scorpion, 31 March 1804. 1 issued. | Action with and capture of vessels in the Ville road. |
| Beaver, 31 March 1804. None issued. |
Centurion, 18 Sept. 1804. 11 issued. Action with the line-of-battle ship "Marengo," and frigates "Atalante" and "Semillante."
Centurion, Sept. 18, 1804. 11 issued. Engagement with the battleship "Marengo," and the frigates "Atalante" and "Semillante."
| Arrow, 3 Feb. 1805. 8 issued. | For the protection of 28 British merchant ships, when attacked by 2 French frigates. |
| Acheron, 3 Feb. 1805. 2 issued. |
San Fiorenzo, 14 Feb. 1805. 11 issued. Capture of the French frigate "Psyche."
San Fiorenzo, Feb 14, 1805. 11 issued. Capture of the French frigate "Psyche."
Phœnix, 10 Aug. 1805. 25 issued. Capture of French frigate "Didon." The vessel became H.M.S. "Didon."
Phoenix, August 10, 1805. 25 issued. Capture of the French frigate "Didon." The ship was renamed H.M.S. "Didon."
Trafalgar. 1,710 issued. 33 vessels engaged (see page 290).
Trafalgar. 1,710 issued. 33 ships participated (see page 290).
4 Nov. 1805. 298 issued. 8 vessels engaged. Capture of 4 sail of French line-of-battle ships.
4 Nov. 1805. 298 issued. 8 vessels involved. Captured 4 French battleships.
St. Domingo. 410 issued. Battle of "St. Domingo," and capture and destruction of 4 sail of the line. 11 vessels were engaged.
Santo Domingo. 410 issued. Battle of "St. Domingo," and capture and destruction of 4 warships. 11 vessels were involved.
| Amazon.com, 13 March 1806. 27 issued. | Capture of " Marengo" and "Belle Poule." |
| London, 13 March 1806. 28 issued. |
Pique, 26 March 1806. 7 issued. Capture of the French brigs "Phæton " and "Voltigeur."
Interest, March 26, 1806. 7 issued. Capture of the French brigs "Phæton" and "Voltigeur."
Sirius, 17 April 1806. 12 issued. Action with French flotilla at Civita Vecchia, and capture of the "Bergere."
Sirius, April 17, 1806. 12 issued. Engagement with the French flotilla at Civita Vecchia and capture of the "Bergere."
Blanche, 19 July 1806. 22 issued. Capture of the "Guerrière." For this deed Captain Lavie was knighted.
Blanche, July 19, 1806. 22 issued. Capture of the "Guerrière." For this achievement, Captain Lavie was knighted.
| Arethusa, 23 Aug. 1806. 6 issued. | Capture of Spanish frigate "Pomone." |
| Anson, 23 Aug. 1806. |
Curaçoa, 1 Jan. 1807. Taking of Curaçoa. 4 vessels engaged—"Arson," "Arethusa," "Fisgard," and "Latona."
Curaçao, Jan 1, 1807. Capture of Curaçao. 4 ships involved—"Arson," "Arethusa," "Fisgard," and "Latona."
Pickle, 3 Jan. 1807. 1 issued. Capture of the French privateer "La Favorite."
Pickle, Jan. 3, 1807. 1 issued. Capture of the French privateer "La Favorite."
Hydra, 6 Aug. 1807. 10 issued. In the harbour of Bergur, attack of batteries, and capture of "L'Eugene," "Rosario," and "Caroline."
Hydra, Aug. 6, 1807. 10 issued. In the harbor of Bergur, attack on the batteries, and capture of "L'Eugene," "Rosario," and "Caroline."
Comus, 15 Aug. 1807. 10 issued. Capture of the Danish frigate "Frederickscoarn."
Comus, Aug. 15, 1807. 10 issued. Capture of the Danish frigate "Frederickscoarn."
Louisa, 28 Oct. 1807. 1 issued. Action with and defeat of a French privateer.
Louisa, October 28, 1807. 1 issued. Encounter and defeat of a French privateer.
Carrier, 4 Nov. 1807. 1 issued. Capture of the French cutter "L'Actif."
Carrier, Nov. 4, 1807. 1 issued. Capture of the French cutter "L'Actif."
Ann, 24 Nov. 1807. None issued. Action with 10 Spanish gunboats.
Ann, Nov 24, 1807. None released. Encounter with 10 Spanish gunboats.
Sappho, 2 March 1808. 5 issued. Capture of the Danish brig "Admiral Yawl."
Sappho, March 2, 1808. 5 issued. Capture of the Danish brig "Admiral Yawl."
San Fiorenzo, 8 March 1808. 16 issued. Capture of the French frigate "Piedmontaise." The British[Pg 300] commander, Captain Hardinge, was killed, and a monument to his memory erected in St Paul's Cathedral at the public expense.
San Fiorenzo, 8 March 1808. 16 issued. Capture of the French frigate "Piedmontaise." The British [Pg 300] commander, Captain Hardinge, was killed, and a memorial in his honor was built in St Paul's Cathedral at the public's expense.
Emerald, 13 March 1808. 12 issued. Destruction of the batteries at Vivero and war vessels.
Emerald, March 13, 1808. 12 issued. Destruction of the batteries at Vivero and war ships.
Childers, 14 March 1808. 4 issued. Captain Wilson and a crew of 65 participated in this affair. Action with the Danish brig "Lougen."
Childers, March 14, 1808. 4 issued. Captain Wilson and a crew of 65 took part in this event. Encounter with the Danish brig "Lougen."
| Nassau, 22 March 1808. 37 issued. | Destruction of Danish line-of-battle ship "Prince Christian Frederic." 2 ships engaged. |
| Grand, 22 March 1808. 25 issued. |
Off Rota, 4 April 1808. 20 issued. Fight with gunboats and convoy. "Alceste," "Mercury," and "Grasshopper" engaged.
Off Schedule, April 4, 1808. 20 issued. Battle with gunboats and convoy. "Alceste," "Mercury," and "Grasshopper" were involved.
| Grasshopper, 24 April 1808. 1 issued. | Action with and destruction of Spanish ships and gunboats at Faro. 2 vessels engaged. |
| Quick, 24 April 1808. 1 issued. |
Redwing, 7 May 1808. 7 issued. Action with Spanish gunboats and destroying them.
Redwing, May 7, 1808. 7 issued. Engaged with Spanish gunboats and destroyed them.
Virginie, 19 May 1808. 21 issued. Capture of Dutch frigate "Guelderland."
Virginie, May 19, 1808. 21 issued. Capture of the Dutch frigate "Guelderland."
Redwing, 31 May 1808. 5 issued. Destroying Tarifa Battery near Cape Trafalgar, and taking 2 vessels.
Redwing, May 31, 1808. 5 issued. Destroying Tarifa Battery near Cape Trafalgar and capturing 2 vessels.
Seahorse wh Bandere la Zaffere, 6 July 1808. 35 issued. Capture of the Turkish frigate "Badere Zaffer."
Seahorse with Bandere la Zaffere, 6 July 1808. 35 issued. Capture of the Turkish frigate "Badere Zaffer."
Comet, 11 Aug. 1808. 5 issued. Action with three French brigs, and capture of the "Sylphe." This became H.M.S. "Seagull."
Comet, Aug. 11, 1808. 5 issued. Engaged with three French brigs and captured the "Sylphe." This became H.M.S. "Seagull."
| Centaur, 26 Aug. 1808. 38 issued. | Fight with Russian fleet and capture of 74-gun ship "Sewolod." |
| Unyielding, 26 Aug. 1808. 45 issued. |
Cruizer, 1 Nov. 1808. 4 issued. Action with Danish flotilla off Gottenburgh and capture of brig-of-war.
Cruiser, Nov. 1, 1808. 4 issued. Engagement with the Danish flotilla off Gothenburg and capture of a war brig.
Amethyst with Thetis, 10 Nov. 37 issued. Capture[Pg 301] of French frigate "Thetis" by Captain Seymour, who was knighted for his prowess.
Amethyst with Thetis, November 10, 1837, issued. Capture[Pg 301] of the French frigate "Thetis" by Captain Seymour, who was knighted for his skill.
Off the Pearl Rock, 13 Dec. 1808. Action with batteries and French boats. 6 vessels engaged.
Off Pearl Rock, Dec. 13, 1808. Action with batteries and French boats. 6 vessels involved.
Onyx, 1 Jan. 1809. 6 issued. Recapture from Dutch of the brig "Manly."
Onyx, Jan. 1, 1809. 6 issued. Recaptured from the Dutch, the brig "Manly."
Confiance, 14 Jan. 1809. 8 issued. Taking of Cayenne.
Confidence, Jan. 14, 1809. 8 issued. Capture of Cayenne.
Martinique. 523 issued. Capture of Martinique. 43 vessels engaged.
Martinique. 523 issued. Capture of Martinique. 43 vessels involved.
| Horatio, 10 Feb. 1809. 14 issued. | Capture of the French frigate "Junon," which was added to the British Navy under the same name. |
| Supreme, 10 Feb. 1809. 2 issued. |
Amethyst, 5 April. 28 issued. Capture of French frigate "Niemen."
Amethyst, April 5. 28 issued. Capture of the French frigate "Niemen."
12 April. 646 issued. Fight with French squadron and destruction of ships in Basque Road. 35 ships engaged.
12 April. 646 issued. Battle with the French squadron and destruction of ships in Basque Road. 35 ships involved.
| Pompée, 17 June 1809. 17 issued. | Chase and capture of French ship of the line "Hautpoult" which became H.M.S. "Abercromby." 3 vessels engaged. This action took place on April 17 and not as stated on the bars. |
| Castor, 17 June 1809. 4 issued. | |
| Recruit, 17 June 1809. 3 issued. |
| Cyane, 25 and 27 June 1809. 5 issued. | Action with "Ceres," and capture of 18 gunboats, and destruction of 4. Captain Staines, commander of the "Cyane," was knighted. |
| L'Espoir, 25 and 27 June 1809. 5 issued. |
Bonne Citoyenne with Furieuse. 12 issued. Capture of French frigate "La Furieuse," July 6th, 1809. Captain Mounsey received the Naval Gold Medal for this exploit, as already explained.
Good Citizen with Angry. 12 issued. Capture of the French frigate "La Furieuse," July 6th, 1809. Captain Mounsey received the Naval Gold Medal for this achievement, as already explained.
Diana, 11 Sept. 1809. 3 issued. Capture of Dutch brig "Zephyr."
Diana, Sept. 11, 1809. 3 released. Capture of the Dutch brig "Zephyr."
Anse-le-barque, 18 Dec. 1809. 42 issued. Storming batteries of Anse-le-barque, and capture of "Loire" and "Seine" frigates. 9 vessels engaged.
Anse-le-barque, Dec. 18, 1809. 42 issued. Storming the batteries of Anse-le-barque and capturing the "Loire" and "Seine" frigates. 9 vessels engaged.
Cherokee, 10 Jan. 1810. 4 issued. Capture of the French lugger "L'Aimable Nelly."
Cherokee, Jan. 10, 1810. 4 issued. Capture of the French boat "L'Aimable Nelly."
Scorpion, 12 Jan. 1810. 12 issued. Capture of the French brig "L'Oreste."
Scorpion, Jan. 12, 1810. 12 issued. Capture of the French brig "L'Oreste."
Guadaloupe. 509 issued. Capture of Guadaloupe, January and February 1810. 50 vessels engaged.
Guadeloupe. 509 issued. Capture of Guadaloupe, January and February 1810. 50 ships involved.
Thistle, 10 Feb. 1810. None issued. Capture of the Dutch corvette "Havik."
Thistle, Feb 10, 1810. None released. Capture of the Dutch corvette "Havik."
| Grumpy, 24 April 1810. 1 issued. | Capture of the French privateer "Alcide." |
| Company, 24 April 1810. 1 issued. |
Sylvia, 26 April 1810. 1 issued. Capture of the Dutch brig "Echo," in the Straits of Sunda.
Sylvia, April 26, 1810. 1 issued. Capture of the Dutch brig "Echo" in the Sunda Straits.
Spartan, 2 May 1810. 32 issued. Action with the French frigate "Ceres," and consorts, and capture of the corvette "Sparviéve."
Spartan, May 2, 1810. 32 were issued. Engaged with the French frigate "Ceres" and allies, and captured the corvette "Sparviéve."
Royalist, May and June 1810. 3 issued. Action in the Channel with and capture of 6 armed French ships.
Royalist, May and June 1810. 3 issued. Action in the Channel involving the capture of 6 armed French ships.
Amanthea, 25 July. 29 issued. Action with gunboats, and capture and destruction of a number of transports at Amanthea. "Thames," "Pilot," "Weasel" engaged.
Amanthea, July 25. 29 issued. Action with gunboats, capturing and destroying several transports at Amanthea. "Thames," "Pilot," and "Weasel" were involved.
Banda Neira. 69 issued. Capture of the Island of "Banda Neira," 9 Aug. 1810. 3 boats engaged.
Banda Neira. 69 issued. Capture of "Banda Neira" Island, August 9, 1810. 3 boats involved.
| Boudica, 18 Sept. 1810. 16 issued. | Action with French squadron and capture of the French frigate "Venus" and recapture of the British frigate "Ceylon." "Boadicea," "Otter," and "Staunch" engaged. The "Venus" was added to the British Navy as the "Néréide." |
| Otter, 18 Sept. 1810. 8 issued. | |
| Steadfast, 18 Sept. 1810. 2 issued.[Pg 303] |
Briseis, 14 Oct. 1810. 2 issued. Capture of the French privateer "Sans-Souci."
Briseis, Oct. 14, 1810. 2 issued. Capture of the French privateer "Sans-Souci."
Lissa. 130 issued. Action with French squadron and capture of frigates off Lissa, March 13th, 1811. 4 vessels engaged.
Lissa. 130 issued. Engagement with the French squadron and capture of frigates off Lissa, March 13, 1811. 4 vessels involved.
Anholt, 27 March 1811. 40 issued. Action in defence of Anholt Island when attacked by Danes.
Anholt Island, March 27, 1811. 40 issued. Defense action of Anholt Island during the attack by the Danes.
Arrow, 6 April 1811. None issued. Action with "Chassemarées" and batteries off the French coast.
Arrow, April 6, 1811. None released. Engagement with "Chassemarées" and shore batteries near the French coast.
Off Tamatave, 20 May 1811. 79 issued. Action with French frigates and capture of "Renommée" and "Néréide"; the vessels became H.M.S. "Java" and "Madagascar." "Astree," "Galatea," "Phœbe," and "Racehorse" engaged.
Off Toamasina, May 20, 1811. 79 issued. Engagement with French frigates and the capture of "Renommée" and "Néréide"; the ships were renamed H.M.S. "Java" and "Madagascar." "Astree," "Galatea," "Phœbe," and "Racehorse" were involved.
Hawke, 18 Aug. 1811. 6 issued. Capture of the 16-gun French brig "Heron" and convoy.
Hawke, Aug. 18, 1811. 6 issued. Capture of the 16-gun French brig "Heron" and its convoy.
Java, 715 issued. Capture of Java, August and September 1811. 25 vessels engaged.
Java, 715 released. Capture of Java, August and September 1811. 25 ships involved.
| Skylark, 11 Nov. 1811. 2 issued. | Action with Boulogne flotilla of 12 gun-brigs and capture of 1. |
| Locusts, 11 Nov. 1811. 2 issued. |
Pelagosa, 29 Nov. 1811. 64 issued. Action with French frigates "Pauline" and "Pomone" and capture of same. "Alceste," "Active," and "Unitie" engaged.
Pelagosa, Nov 29, 1811. 64 issued. Battle with French frigates "Pauline" and "Pomone" and their capture. "Alceste," "Active," and "Unitie" were involved.
| Winning with Rivoli. | Capture of the French "74" "Rivoli," February 22nd, 1812. The "Victorious" lost 27 killed and 99 wounded, but the "Weasel" did not have a man injured. Captain Talbot of the "Victorious" was made K.C.B., and the "Rivoli" became a British war vessel. |
| Weasel, 22 Feb. 1812. 6 issued. | |
| Note that the bars are named differently for same engagement. | |
| Rosario, 27 March 1812. 6 issued. | Capture of 2 French brigs-of-war off Dieppe. Two vessels engaged. |
| Griffin, 27 March 1812. 3 issued. |
| Northumberland, 22 May 1812. 62 issued. | Destruction of the French frigates "Arienne" and "Andromache" and a brig. 2 vessels engaged. |
| Growler, 22 May 1812. 4 issued. |
Magala, 29 May 1812. 17 issued. Capture of French privateers "Brave" and "Napoleon," at Malaga. The date of the action was 29 April. 4 vessels engaged.
Magala, May 29, 1812. 17 issued. Capture of French privateers "Brave" and "Napoleon" at Malaga. The action took place on April 29. 4 vessels were involved.
Off Mardoe, 6 July 1812. 48 issued. Destruction of 2 Danish frigates and 2 brigs. 4 British boats engaged—"Calypso," "Dictator," "Flamer," and "Podargus."
Off Mardoe, July 6, 1812. 48 issued. Destruction of 2 Danish frigates and 2 brigs. 4 British boats involved—"Calypso," "Dictator," "Flamer," and "Podargus."
Sealark, 21 July 1812. 4 issued. Capture of the French privateer "Ville de Caen."
Sealark, July 21, 1812. 4 issues. Captured the French privateer "Ville de Caen."
Royalist, 29 Dec. 1812. 3 issued. Capture of the French privateer lugger "La Ruse."
Royal supporter, Dec. 29, 1812. 3 issued. Capture of the French privateer lugger "La Ruse."
Weasel, 22 April 1813. 6 issued. Destruction of 6 French gunboats in the Adriatic.
Weasel, April 22, 1813. 6 issued. Destruction of 6 French gunboats in the Adriatic.
Shannon with Chesapeake. 49 issued. Capture of American frigate "Chesapeake," on 1 June 1813.
Shannon with Chesapeake Bay. 49 issued. Capture of the American frigate "Chesapeake," on June 1, 1813.
Pelican, 14 Aug. 1813. 4 issued. Capture of the American brig "Argus."
Pelican, Aug. 14, 1813. 4 issued. Capture of the American brig "Argus."
St. Sebastian, Aug. and Sept. 1813. 292 issued. 16 vessels engaged (see page 53).
St. Sebastian, Aug. and Sept. 1813. 292 issued. 16 vessels involved (see page 53).
Thunder, 9 Oct. 1813. 7 issued. Capture of the French privateer "Neptune."
Thunder, Oct. 9, 1813. 7 issued. Capture of the French privateer "Neptune."
Gluckstadt, 5 Jan. 1814. 45 issued. Capture of the fortress of Gluckstadt. 6 ships and 8 gunboats engaged.
Gluckstadt, January 5, 1814. 45 issued. Capture of the Gluckstadt fortress. 6 ships and 8 gunboats were involved.
| Respectable, 16 Jan. 1814. 31 issued. | Capture of the French frigates "Alcméne" and "Iphigénia," which were added to the Navy as H.M.S. "Gloire" and "Dunira." |
| Cyane, 16 Jan. 1814. 18 issued. |

EARL ST. VINCENT'S MEDAL, 1800.
EARL ST. VINCENT'S MEDAL, 1800.
Presented by Admiral Earl St. Vincent to the petty officers, seamen, and marines of his flagship the "Ville de Paris" for loyalty and good conduct.
Presented by Admiral Earl St. Vincent to the petty officers, seamen, and marines of his flagship the "Ville de Paris" for loyalty and good conduct.
Eurotas, 25 Feb. 1814. 32 issued. Capture of the French frigate "Glorinde," which became H.M.S. "Burma."
Eurotas, Feb. 25, 1814. 32 issued. Capture of the French frigate "Glorinde," which was renamed H.M.S. "Burma."
Hebrus with L'Etoile, 27 March 1814. Capture of French frigate "L'Etoile."
Hebrus with The Star, 27 March 1814. Capture of the French frigate "L'Etoile."
| Phoebe, 28 March 1814. 28 issued. | Capture of the American frigates "Essex" and "Essex Junior." |
| Angel, 28 March 1814. 10 issued. |
The Potomac, 17 Aug. 1814. 107 issued. Daring navigation of the Potomac River and destruction of shipping in the Potomac. 8 vessels engaged.
The Potomac River, 17 Aug. 1814. 107 issued. Bold navigation of the Potomac River and destruction of shipping in the Potomac. 8 vessels involved.
Endymion with President, 15 Jan. 1815. Capture of the American frigate "President."
Endymion with President, January 15, 1815. Capture of the American frigate "President."
Gaieta, 24 July. 89 issued. Attack and reduction of Gaieta. "Malta" and "Berwick" engaged.
Gaieta, July 24. 89 issued. Attack and capture of Gaieta. "Malta" and "Berwick" were involved.
Algiers. 1,362 issued. Battle of Algiers. 27 Aug. 1816. 22 vessels engaged. See page 307.
Algiers. 1,362 issued. Battle of Algiers. August 27, 1816. 22 ships involved. See page 307.
Navarino. 1,137 issued. Battle of "Navarino," Oct. 20th, 1827. 11 ships engaged. See page 309.
Navarino. 1,137 issued. Battle of "Navarino," Oct. 20, 1827. 11 ships involved. See page 309.
Syria. 6,877 issued. (Quite a number of these were used for fraudulent purposes, bars being manufactured bearing the records of rare bars and substituted for the common Syria.) Capture of "Acre," Nov. 1840, and operations with it on the coast of Syria. 32 ships engaged. See page 310.
Syria. 6,877 issued. (Many of these were used fraudulently, with bars created that mimicked the records of rare bars and replaced the standard Syria bars.) Capture of "Acre," November 1840, and operations involving it along the coast of Syria. 32 ships were involved. See page 310.
Bars awarded for Boat Actions
The boat actions commemorated by these bars cover a number of brilliant actions performed by boats' crews in cutting out, and in some instances actually recovering, British vessels lost to the enemy, or capturing enemies' vessels.
The boat actions honored by these bars highlight several impressive feats carried out by the crews of boats in cutting out, and in some cases actually retrieving, British vessels that were lost to the enemy, or capturing enemy vessels.
15 March 1793. 1 only issued. 17 March 1794. 30 issued. 29 May 1797. 3 issued. 9 June 1799. 4 issued. 20 Dec. 1799. 3 issued. 29 July 1800. 4 issued. 29 Aug. 1800. 26 issued. 27 Oct. 1800. 5 issued. 21 July 1801. 9 issued. 27 June 1803. 5 issued. 4 Nov. 1803. 1 issued. 4 Feb. 1804. 10 issued. 4 June 1805.[Pg 306] 10 issued. 16 July 1806. 51 issued. 2 Jan. 1807. 2 issued. 21 Jan. 1807. 9 issued. 19 April 1807. 1 issued. 13 Feb. 1808. 3 issued. 10 July 1808. 8 issued. 11 Aug. 1808. 12 issued. 28 Nov. 1808. 2 issued. 7 July 1809. 33 issued. 14 July 1809. 8 issued. 25 July 1809. 35 issued. 27 July 1809. 10 issued. 29 July 1809. 11 issued. 28 Aug. 1809. 14 issued. 1 Nov. 1809. 117 issued. 13 Dec. 1809. 10 issued. 13 Feb. 1810. 17 issued. 1 May 1810. 18 issued. 28 June 1810. 24 issued. 27 Sept. 1810. 34 issued. 4 Nov. 1810. 2 issued. 23 Nov. 1810. 66 issued. 24 Dec. 1810. 6 issued. 4 May 1811. 10 issued. 30 July 1811. 4 issued. 2 Aug. 1811. 10 issued. 20 Sept. 1811. 8 issued. 4 Dec. 1811. 18 issued. 4 April 1812. 4 issued. 1 Sept. 1812, 18 Sept. 1812. 24 issued for these 2 clasps. 17 Sept. 1812. 11 issued. 29 Sept. 1812. 26 issued. 6 Jan. 1813. 21 issued. 21 March 1813. 6 issued. 28 April 1813. 2 issued. April and May 1813. 54 issued. 2 May 1813. 49 issued. 8 April 1814. 23 issued. 24 May 1814. 11 issued. 3 and 6 Sept. 1814. 1 only issued. 14 Dec. 1814. 117 issued.
15 March 1793. 1 issued. 17 March 1794. 30 issued. 29 May 1797. 3 issued. 9 June 1799. 4 issued. 20 Dec. 1799. 3 issued. 29 July 1800. 4 issued. 29 Aug. 1800. 26 issued. 27 Oct. 1800. 5 issued. 21 July 1801. 9 issued. 27 June 1803. 5 issued. 4 Nov. 1803. 1 issued. 4 Feb. 1804. 10 issued. 4 June 1805.[Pg 306] 10 issued. 16 July 1806. 51 issued. 2 Jan. 1807. 2 issued. 21 Jan. 1807. 9 issued. 19 April 1807. 1 issued. 13 Feb. 1808. 3 issued. 10 July 1808. 8 issued. 11 Aug. 1808. 12 issued. 28 Nov. 1808. 2 issued. 7 July 1809. 33 issued. 14 July 1809. 8 issued. 25 July 1809. 35 issued. 27 July 1809. 10 issued. 29 July 1809. 11 issued. 28 Aug. 1809. 14 issued. 1 Nov. 1809. 117 issued. 13 Dec. 1809. 10 issued. 13 Feb. 1810. 17 issued. 1 May 1810. 18 issued. 28 June 1810. 24 issued. 27 Sept. 1810. 34 issued. 4 Nov. 1810. 2 issued. 23 Nov. 1810. 66 issued. 24 Dec. 1810. 6 issued. 4 May 1811. 10 issued. 30 July 1811. 4 issued. 2 Aug. 1811. 10 issued. 20 Sept. 1811. 8 issued. 4 Dec. 1811. 18 issued. 4 April 1812. 4 issued. 1 Sept. 1812, 18 Sept. 1812. 24 issued for these 2 clasps. 17 Sept. 1812. 11 issued. 29 Sept. 1812. 26 issued. 6 Jan. 1813. 21 issued. 21 March 1813. 6 issued. 28 April 1813. 2 issued. April and May 1813. 54 issued. 2 May 1813. 49 issued. 8 April 1814. 23 issued. 24 May 1814. 11 issued. 3 and 6 Sept. 1814. 1 only issued. 14 Dec. 1814. 117 issued.
The last two bars are for actions in the war with America.
The last two bars are for actions in the war with America.
Algiers.—For this battle, fought on August 27th, 1816, 1,362 medals with a single bar, or combined with others, were issued. The action was brought about by the piratical depredations of the Algerines, and the enslavement of Christians by them. Lord Exmouth sailed for the port with 5 ships of the line and 8 smaller vessels, being joined at Gibraltar by 6 Dutch frigates under Admiral Van de Capellen. They appeared before Algiers on August 26th, and proposed certain terms to the Dey, which were not accepted, so next day they commenced to bombard the city. The Algerine fleet was destroyed, and the Dey accepted the terms he had refused. Over 1,200 Christian slaves were freed, and a promise given that piracy and slavery should cease. For a time the promise was kept, but in 1830[Pg 307] the French had to take strong steps to deal with the Algerines, and in the end Algeria became a French colony.
Algiers.—For this battle, fought on August 27, 1816, 1,362 medals with a single bar, or combined with others, were issued. The conflict was sparked by the piracy of the Algerians and their enslavement of Christians. Lord Exmouth set sail for the port with 5 ships of the line and 8 smaller vessels, and at Gibraltar he was joined by 6 Dutch frigates under Admiral Van de Capellen. They arrived before Algiers on August 26 and proposed specific terms to the Dey, which were not accepted. The next day, they began to bombard the city. The Algerian fleet was destroyed, and the Dey accepted the terms he had initially refused. Over 1,200 Christian slaves were freed, and a promise was made that piracy and slavery would end. For a while, the promise was upheld, but in 1830[Pg 307], the French had to take strong measures to deal with the Algerians, and ultimately Algeria became a French colony.
Exmouth Gold Medal.—As a reward for his services, Admiral Lord Exmouth was created a Viscount, and received from the Prince Regent a large gold medal, bearing on the obverse the bust of the Prince Regent encircled by TO TAME THE PROUD, THE FETTER'D SLAVE TO FREE. THESE ARE IMPERIAL ARTS, AND WORTHY THEE, and in the exergue PRINCE GEORGE REGENT. On the reverse is a representation of the bombardment, and in the exergue ALGIERS BOMBARDED ITS FLEET DESTROYED AND CHRISTIAN SLAVERY EXTINGUISHED, AUGUST 27TH, 1816. Only 4 medals of this kind were struck.
Exmouth Gold Medal.—In recognition of his services, Admiral Lord Exmouth was made a Viscount and received a large gold medal from the Prince Regent. The front features a bust of the Prince Regent surrounded by TO TAME THE PROUD, TO FREE THE FETTERED SLAVE. THESE ARE IMPERIAL ARTS, AND THEY ARE WORTHY OF YOU., and at the bottom, it reads PRINCE GEORGE REGENCY. The back shows a depiction of the bombardment, with the inscription ALGIERS BOMBARDED, FLEET DESTROYED, AND CHRISTIAN SLAVERY ELIMINATED, AUGUST 27, 1816 at the bottom. Only 4 medals of this type were created.
The following ships were engaged in the bombardment: the flagship "Queen Charlotte," "Impregnable," "Leander," "Superb," "Minden," "Albion," "Severn," "Glasgow," "Hebrus," "Granicus," and the sloops "Mutine," "Cordelia," "Heron," "Britomart," and "Jasper," and the following bomb vessels "Fury," "Infernal," "Beelzebub," "Hecla," and three vessels for transport, ordnance, and dispatch. Eighty-four men of the 1st Batt. Royal Sappers and Miners served as marines on the flagship and the "Impregnable."
The following ships were involved in the bombardment: the flagship "Queen Charlotte," "Impregnable," "Leander," "Superb," "Minden," "Albion," "Severn," "Glasgow," "Hebrus," "Granicus," and the sloops "Mutine," "Cordelia," "Heron," "Britomart," and "Jasper," along with the bomb vessels "Fury," "Infernal," "Beelzebub," "Hecla," and three ships for transport, ordnance, and dispatch. Eighty-four men from the 1st Batt. Royal Sappers and Miners served as marines on the flagship and the "Impregnable."
Ava.—To those officers and seamen who took part in the Burmese War of 1824-6, the Army of India Medal, described on page 133 as having been awarded to officers and soldiers, was also awarded with a bar for AVA. Dr. Payne has in his collection medals with this bar awarded to a junior captain of the Bombay Marine, with his name impressed, likewise one awarded to a man of the H.E.I. Co.'s "Asseeghur," and one to an ordinary seaman of the "Boadicea" with the name engraved.
Ava.—For the officers and sailors who participated in the Burmese War of 1824-6, the Army of India Medal, mentioned on page 133, which was awarded to officers and soldiers, also came with a bar for AVA. Dr. Payne has in his collection medals featuring this bar that were awarded to a junior captain of the Bombay Marine, with his name engraved, as well as one given to a man from the H.E.I. Co.'s "Asseeghur," and another to an ordinary seaman of the "Boadicea," also with the name engraved.
The following ships' crews took part: H.M.S. "Liffey," "Larne," "Slaney," "Avachne," "Sophie," "Satellite," "Diana," "Tees," "Alligator," and "Mercury," and the H.E.I. Co.'s "Thetis" and "Teignmouth." These were later joined after the capture of Martaban by the crews of the "Boadicea" and "Champion."
The following ships' crews participated: H.M.S. "Liffey," "Larne," "Slaney," "Avachne," "Sophie," "Satellite," "Diana," "Tees," "Alligator," and "Mercury," along with the H.E.I. Co.'s "Thetis" and "Teignmouth." After the capture of Martaban, they were later joined by the crews of the "Boadicea" and "Champion."
Navarino.—This battle was fought on October 20th, 1827. 1,137 Naval General Service Medals bearing the bar for NAVARINO were issued. In 1821 the Greeks had revolted against the Turks, and the latter treated them with ruthless barbarity, murdering in cold blood the inhabitants of Morea and laying waste the country. To put an end to this state of affairs, Great Britain, France, and Russia signed a treaty to ensure the independence of the Greeks, and in September 1827 Vice-Admiral Cordington sailed with the British fleet to Navarino, in the harbour of which the Turco-Egyptian fleet was at anchor. He was joined later by the French and Russian fleets, and an ultimatum was then sent to Ibrahim Pasha to the effect that the barbarities and the ravagings were to cease, and this he agreed to pending communication with the Grand Vizier at Constantinople, but because the allied fleets refused passage to some of his ships from the harbour of Navarino he again resorted to his fiendish practices. The British Admiral thereupon determined to take his ships into the harbour, and anchor near the Turco-Egyptian fleet.
Navarino.—This battle took place on October 20th, 1827. A total of 1,137 Naval General Service Medals with the bar for NAVARINO were awarded. In 1821, the Greeks revolted against the Turks, who responded with extreme cruelty, coldly murdering the people of Morea and devastating the land. To end this situation, Great Britain, France, and Russia signed a treaty to secure Greek independence. In September 1827, Vice-Admiral Cordington led the British fleet to Navarino, where the Turco-Egyptian fleet was anchored. He was later joined by the French and Russian fleets, and an ultimatum was sent to Ibrahim Pasha demanding that the atrocities and destruction stop. He agreed to this while waiting to communicate with the Grand Vizier in Constantinople, but when the allied fleets blocked some of his ships from leaving the harbor of Navarino, he returned to his brutal ways. The British Admiral then decided to move his ships into the harbor and anchor near the Turco-Egyptian fleet.
On October 20th, followed by the French and Russian squadrons, Admiral Cordington entered the harbour and anchored close to the hostile fleet, when fire was opened by the Turks upon a ship's boat, killing the lieutenant in charge and several of his men. The "Dartmouth" then opened fire, and the battle commenced. The batteries of the fortress of Navarino then began to fire on the combined fleets, but so bad was the aim of the enemy's gunners that they did as much damage to their friends as to their foes. For four hours the fight continued with great vigour, and had it not been for the splendid co-operation of the French and Russian fleets it is doubtful whether the issue would have been satisfactory to lovers of freedom. It is noteworthy, however, that the French Admiral's flagship was only saved from grappling by a Turkish fireship through the speedy assistance given by the British brig "Rose" and some boats of the Russian fleet. The British losses were 75 killed, and 197 wounded. The French lost 43 killed, and 144 wounded, and the Russians 59 killed, and 139 wounded, while the enemy—according to his own estimate—had thousands killed.
On October 20th, Admiral Cordington, followed by the French and Russian squadrons, entered the harbor and anchored near the enemy fleet. The Turks then opened fire on a ship's boat, killing the lieutenant in charge and several of his crew. The "Dartmouth" retaliated, and the battle began. The fortress batteries at Navarino started firing on the combined fleets, but the enemy gunners were so inaccurate that they caused as much damage to their own side as to the enemy. The fight raged for four hours with intense energy, and without the excellent cooperation of the French and Russian fleets, it’s uncertain whether freedom supporters would have been satisfied with the outcome. Notably, the French Admiral's flagship was saved from being boarded by a Turkish fireship thanks to the quick help from the British brig "Rose" and some Russian boats. The British suffered 75 killed and 197 wounded, the French had 43 killed and 144 wounded, and the Russians reported 59 killed and 139 wounded, while the enemy claimed thousands of their own had been killed.

WILLIAM IV.
WILLIAM IV.

(Reverse.)

EDWARD VII.
(Obverse.)
EDWARD VII.
(Front.)
NAVAL LONG SERVICE AND GOOD CONDUCT MEDALS.
NAVAL LONG SERVICE AND GOOD CONDUCT MEDALS.
The following British ships were engaged: the flagship "Asia," "Albion," "Genoa," "Glasgow," "Cambrian," "Dartmouth," and "Talbot," and the brigs "Brisk," "Mosquito," "Philomel," and "Rose." There were 4 French ships of the line, a frigate and a schooner, and 5 Russian ships of the line and 3 frigates.
The following British ships were involved: the flagship "Asia," "Albion," "Genoa," "Glasgow," "Cambrian," "Dartmouth," and "Talbot," along with the brigs "Brisk," "Mosquito," "Philomel," and "Rose." There were 4 French ships of the line, a frigate, and a schooner, as well as 5 Russian ships of the line and 3 frigates.
Hereafter the history of the British Navy and its engagements was, until 1914, confined to the bombardment of ports, or combined with that of the army in land service.
Hereafter, the history of the British Navy and its engagements was, until 1914, limited to bombarding ports or working together with the army in land operations.
Syria.—Mehemet Ali, Pasha of Egypt, had in 1839 defeated the Turkish armies and made himself master of Syria, and, as has happened often since, Great Britain went to the sick man's aid, co-operating with Austria, Russia, and Prussia, to compel the recalcitrant Pasha to accept the Vice-Royalty and be satisfied with the governorship of Syria for his lifetime. An ultimatum was sent to him and his generals to the effect that Syria was to be restored to the government of the Sultan of Turkey within twenty-one days, but as no notice was taken of the demand, a squadron of British ships blockaded Alexandria, in the harbour of which the Egyptian fleet was at anchor, while the other portion of the fleet, under Admiral Sir Robert Stopford, bombarded Beyrout. Meanwhile, the towns on the coast of Syria had been retaken, Tyre captured on September 24th and Sidon on the 27th. Concentrating at Acre, the Egyptians were worsted there on November 2nd, and the war was brought to a conclusion by Mehemet Ali accepting the terms he had originally refused.
Syria.—In 1839, Mehemet Ali, the Pasha of Egypt, defeated the Turkish armies and took control of Syria. As has happened many times since, Great Britain stepped in to assist the struggling Ottoman Empire, working with Austria, Russia, and Prussia to force the defiant Pasha to accept the Vice-Royalty and settle for the governorship of Syria for his lifetime. An ultimatum was sent to him and his generals demanding that Syria be returned to the Sultan of Turkey within twenty-one days. When they ignored the demand, a fleet of British ships blockaded Alexandria, where the Egyptian fleet was docked, while part of the fleet, led by Admiral Sir Robert Stopford, bombarded Beyrout. In the meantime, the coastal towns of Syria were recaptured, with Tyre falling on September 24th and Sidon on the 27th. Gathering at Acre, the Egyptians suffered defeat there on November 2nd, and the conflict ended when Mehemet Ali accepted the terms he had initially rejected.
The following ships were engaged in the operations upon the coast of Syria in the years 1840-41: "Princess Charlotte," "Powerful," "Revenge," "Bellerophon," "Thunderer," "Ganges," "Benbow," "Edinburgh," "Hastings," "Vanguard," "Rodney," "Asia," "Implacable," "Cambridge," "Pique," "Castor," "Dido," "Carysfort," "Talbot," "Daphne," "Cyclops," "Wasp," "Magicienne," "Vesuvius," "Gorgon," "Hazard," "Phœnix," "Hydra," "Stromboli," "Medea," "Zebra," and "Hecate."
The following ships were involved in operations along the coast of Syria in the years 1840-41: "Princess Charlotte," "Powerful," "Revenge," "Bellerophon," "Thunderer," "Ganges," "Benbow," "Edinburgh," "Hastings," "Vanguard," "Rodney," "Asia," "Implacable," "Cambridge," "Pique," "Castor," "Dido," "Carysfort," "Talbot," "Daphne," "Cyclops," "Wasp," "Magicienne," "Vesuvius," "Gorgon," "Hazard," "Phoenix," "Hydra," "Stromboli," "Medea," "Zebra," and "Hecate."
The bar for SYRIA was given with the Naval General Service medal for these operations.
The bar for SYRIA was awarded with the Naval General Service medal for these actions.
China, 1840-2.—In this war, already described on pages 98 and 99, the following ships' crews were engaged: in 1840 "Melville," "Blenheim," "Wellesley," "Blonde," "Druid," "Conway," "Volage," "Larne," "Alligator," "Pylades," "Modeste," "Cruiser," "Nimrod," "Algerine," "Columbine," "Rattlesnake," and the following ships' crews of the Honourable East India Company: "Atalanta," "Queen," "Enterprise," "Calliope," "Madagascar," "Samarang," "Herald," and "Nemesis"; the latter, a well-armed iron steamer, created great terror amongst the Chinese, who named it the "devil ship." The following ships were added from time to time to the fleet: H.M.S. "Cornwallis," "Endymion," "Vindictive," "North Star," "Cambrian," "Hazard," "Pelican," "Harlequin," "Clio," "Wanderer," "Wolverine," "Hebe," "Serpent," "Royalist," "Plover," "Starling," "Driver," "Vixen," and the hospital ship "Minden," likewise the H.E.I. Co.'s steamers "Auckland," "Akbar," "Memnon," "Hooghley," "Proserpine," "Pluto," "Sesostris," "Medusa," and "Phlegethon."
China, 1840-2.—In this war, already described on pages 98 and 99, the following ships' crews were engaged: in 1840 "Melville," "Blenheim," "Wellesley," "Blonde," "Druid," "Conway," "Volage," "Larne," "Alligator," "Pylades," "Modeste," "Cruiser," "Nimrod," "Algerine," "Columbine," "Rattlesnake," and the following ships' crews of the Honourable East India Company: "Atalanta," "Queen," "Enterprise," "Calliope," "Madagascar," "Samarang," "Herald," and "Nemesis"; the latter, a well-armed iron steamer, created great terror among the Chinese, who named it the "devil ship." The following ships were added from time to time to the fleet: H.M.S. "Cornwallis," "Endymion," "Vindictive," "North Star," "Cambrian," "Hazard," "Pelican," "Harlequin," "Clio," "Wanderer," "Wolverine," "Hebe," "Serpent," "Royalist," "Plover," "Starling," "Driver," "Vixen," and the hospital ship "Minden," as well as the H.E.I. Co.'s steamers "Auckland," "Akbar," "Memnon," "Hooghley," "Proserpine," "Pluto," "Sesostris," "Medusa," and "Phlegethon."
Scinde, 1843.—The same medal as awarded to the army was awarded to the naval force taking part in the campaign. One hundred and ten medals were issued to the Indus Flotilla, and of these 40 were to[Pg 311] Europeans. For Hyderabad 115 medals were issued to the crews of H.E.I. Co.'s "Comet," "Meteor," and "Nimrod." Medals were given to naval men for Meeanee 1843, Hyderabad 1843, and Meeanee-Hyderabad 1843 (see pages 107-109).
Scinde, 1843.—The same medal awarded to the army was also given to the navy participating in the campaign. A total of 110 medals were issued to the Indus Flotilla, with 40 going to[Pg 311] Europeans. For Hyderabad, 115 medals were awarded to the crews of H.E.I. Co.'s "Comet," "Meteor," and "Nimrod." Medals were distributed to naval personnel for Meeanee 1843, Hyderabad 1843, and Meeanee-Hyderabad 1843 (see pages 107-109).
Punjab, 1848-9.—A brigade of seamen, 100 strong with 7 officers, from the Indian Navy under Commander F. T. Powell, served at the Siege of Mooltan, and it is noteworthy that this was the first occasion upon which seamen served so far away from their ships. Medals were awarded with and without bar for Mooltan.
Punjab, 1848-9.—A brigade of 100 seamen, led by 7 officers from the Indian Navy under Commander F. T. Powell, participated in the Siege of Mooltan. It's significant that this was the first time seamen operated so far from their ships. Medals were awarded with and without a bar for Mooltan.
Second China War.—The squadron of British ships engaged under Rear-Admiral Sir Michael Seymour in 1856-60, in the operations already described on pages 98-100, included the flagship "Calcutta," "Sybille," "Pique," "Winchester," "Encounter," "Bittern," "Hornet," "Comus," "Racehorse," "Barracouta," "Sampson," "Coromandel," "Nankin," "Esk," "Elk," "Amethyst," "Sanspareil," "Cruiser," "Acorn," "Niger," "Inflexible," and a number of gunboats. In the attack on the Taku Forts, August 21st, 1860, the only naval co-operation was made by the gunboats "Clown," "Drake," "Woodcock," and "Janus." Bars were awarded for FATSHAN 1857 (navy only), CANTON 1857, TAKU FORTS 1858 (navy only), TAKU FORTS 1860, and PEKIN 1860. These medals were issued to the navy unnamed, and very few seamen appear to have troubled about having their medals engraved. Many issued to the Indian Navy and some of the marines were, however, impressed in capital Roman letters.
Second China War.—The fleet of British ships led by Rear-Admiral Sir Michael Seymour from 1856 to 1860, in the operations already detailed on pages 98-100, included the flagship "Calcutta," "Sybille," "Pique," "Winchester," "Encounter," "Bittern," "Hornet," "Comus," "Racehorse," "Barracouta," "Sampson," "Coromandel," "Nankin," "Esk," "Elk," "Amethyst," "Sanspareil," "Cruiser," "Acorn," "Niger," "Inflexible," and several gunboats. In the attack on the Taku Forts on August 21st, 1860, the only naval support came from the gunboats "Clown," "Drake," "Woodcock," and "Janus." Bars were awarded for Foshan 1857 (navy only), Canton 1857, TAKU FORTS 1858 (navy only), TAKU FORTS 1860, and PEKING 1860. These medals were given to the navy without names, and very few sailors seemed to have cared about getting their medals engraved. However, many awarded to the Indian Navy and some marines were stamped in capital Roman letters.
Pegu.—To those seamen and marines who took part in the second Burmese War, 1852-3, the India General Service Medal 1854 was awarded with the bar for PEGU, which, by the way, is somewhat smaller than the other bars issued with this medal (see pages 137-138). The following ships' crews were engaged: H.M.S. "Fox," "Rattler," "Serpent," "Sphinx," "Salamander," "Hermes," "Winchester," and a gunboat, together with the H.E.I. Co.'s boats "Berenice,"[Pg 312] "Bhagerutee," "Moofuffer," "Feroze," "Zenobia," "Sesostris," "Medusa," "Pluto," "Proserpine," "Phlegethon," "Soane," "Spy," "Tenasserim," "Mahanuddy," "Fire Queen," "Enterprise," "Indus," "Krishna," "Luckea," "Damoodah," "Sutledge," and "Lord Wm. Bentinck."
Pegu.—To the sailors and marines who participated in the second Burmese War, 1852-3, the India General Service Medal 1854 was awarded with the bar for PEGU, which is actually a bit smaller than the other bars issued with this medal (see pages 137-138). The following ship crews were involved: H.M.S. "Fox," "Rattler," "Serpent," "Sphinx," "Salamander," "Hermes," "Winchester," and a gunboat, along with the H.E.I. Co.'s boats "Berenice,"[Pg 312] "Bhagerutee," "Moofuffer," "Feroze," "Zenobia," "Sesostris," "Medusa," "Pluto," "Proserpine," "Phlegethon," "Soane," "Spy," "Tenasserim," "Mahanuddy," "Fire Queen," "Enterprise," "Indus," "Krishna," "Luckea," "Damoodah," "Sutledge," and "Lord Wm. Bentinck."
South Africa, 1853.—This medal, as previously explained, was awarded to cover all the wars and operations that had taken place in South Africa between 1834 and 1853. No bar was issued with the medal, and the only means of discovering when a recipient was engaged is by looking up the period during which his regiment, or ship, was engaged; but this is not quite so easy in the case of naval medals, as the name and rank only are impressed upon them in Roman capitals in the same type as was used on the Naval General Service medal. The third Kaffir War was the first in which the navy took part, and from the end of 1850 to March 1853 a small naval brigade composed of seamen and marines from the following ships were engaged ashore: "Castor," "Dee," "Grecian," "Hermes," "Penguin," "Pantaloon," "Gladiator," "Orestes," "Rhadamanthus" and "Styx."
South Africa, 1853.—This medal, as mentioned before, was awarded to cover all the wars and operations that occurred in South Africa from 1834 to 1853. No bar was issued with the medal, and the only way to find out when a recipient was involved is by checking the period during which their regiment or ship was active; however, this isn't as straightforward for naval medals, as only the name and rank are engraved on them in Roman capitals, similar to the style used on the Naval General Service medal. The third Kaffir War was the first in which the navy participated, and from late 1850 to March 1853, a small naval brigade made up of seamen and marines from the following ships were engaged on land: "Castor," "Dee," "Grecian," "Hermes," "Penguin," "Pantaloon," "Gladiator," "Orestes," "Rhadamanthus," and "Styx."
CRIMEAN WAR
During the early stages of the war the combined British and French fleets were co-operating in Kavarna Bay, and on April 5th anchored before Odessa, when the Russian commandant firing upon H.M.S. "Furious," which was carrying a flag of truce, the following ships were ordered to open fire on the batteries on April 22nd, 1854. H.M.S. "Furious," "Terrible," "Retribution," "Niger," "Arethusa," and 3 French vessels. The fort was blown up, and the shipping destroyed. Later the "Firebrand" and the "Fury" destroyed the Russian batteries at Sulina, and then with the rest of the fleet took part in the bombardment of Sebastopol.
During the early days of the war, the British and French fleets were working together in Kavarna Bay. On April 5th, they anchored off Odessa when the Russian commandant fired upon H.M.S. "Furious," which was displaying a flag of truce. As a result, the following ships were ordered to open fire on the batteries on April 22nd, 1854: H.M.S. "Furious," "Terrible," "Retribution," "Niger," "Arethusa," and three French vessels. The fort was destroyed, and the shipping was wrecked. Later, the "Firebrand" and the "Fury" took out the Russian batteries at Sulina and then joined the rest of the fleet in the bombardment of Sebastopol.
Sebastopol.—The following ships were engaged in[Pg 313] the bombardment of Sebastopol on October 17th, 1854: "Albion," "Britannia," "London," "Agamemnon," "Queen," "Firebrand," "Niger," "Furious," "Trafalgar," "Retribution," "Vesuvius," "Rodney," "Bellerophon," "Highflyer," "Spitfire," "Arethusa," "Cyclops," "Triton," "Lynx," "Sphinx," "Tribune," "Terrible," "Sampson," and "Sanspareil." In the bombardment 44 were killed and 264 wounded on board the British ships, the "Albion" and the "Agamemnon" suffering most heavily. The French fleet lost about 200 killed and wounded. Prior to the bombardment a naval brigade of 1,050 seamen, under the command of Captain Lushington, landed with 50 heavy guns, and demonstrated their aptitude, and their right to the name of "handymen," by constructing their own batteries and being ready to take the defensive long before the artillerymen had their guns in position. The success of the attack on the Malakoff tower was in no small measure due to the assistance of the naval brigade with their heavy guns. In the assault on the Redan the naval brigade also played a conspicuous and daring part, as the casualty list showed, for out of 120 men 14 were killed and 46 wounded.
Sebastopol.—The following ships were involved in[Pg 313] the bombardment of Sebastopol on October 17th, 1854: "Albion," "Britannia," "London," "Agamemnon," "Queen," "Firebrand," "Niger," "Furious," "Trafalgar," "Retribution," "Vesuvius," "Rodney," "Bellerophon," "Highflyer," "Spitfire," "Arethusa," "Cyclops," "Triton," "Lynx," "Sphinx," "Tribune," "Terrible," "Sampson," and "Sanspareil." In the bombardment, 44 were killed and 264 wounded on board the British ships, with the "Albion" and the "Agamemnon" suffering the most. The French fleet lost about 200 killed and wounded. Before the bombardment, a naval brigade of 1,050 seamen, led by Captain Lushington, landed with 50 heavy guns and proved their skills and justified the title of "handymen" by building their own batteries and being ready to defend long before the artillerymen had their guns set up. The success of the attack on the Malakoff tower was largely due to the support of the naval brigade with their heavy guns. In the assault on the Redan, the naval brigade also took a prominent and brave role, as the casualty list showed, with 14 killed and 46 wounded out of 120 men.
Azoff.—The following ships were engaged in the expedition which, together with 3 French men-o'-war and 20 frigates, sailed on May 22nd, 1855, for the Sea of Azoff, blowing up en route the works and magazines at Kertch, and destroying Yenikale: H.M.S. "Agamemnon," "Algiers," "Hannibal," "St. Jean d'Acre," "Princess Royal," "Royal Albert," and 27 frigates. The bar for AZOFF was awarded to the officers and crews of the following ships: "Vesuvius," "Stromboli," "Miranda," "Swallow," "Curlew," "Beagle," "Lynx," "Ardent," "Viper," "Snake," "Medina," "Recruit," "Arrow," "Clinker," "Boxer," "Grinder," "Fancy," "Sulina," "Weser," "Jasper," and "Cracker"; also the first and second launches of the "Agamemnon," "Hannibal," "Algiers," "St. Jean d'Acre," "Princess Royal," and the "Royal Albert."
Azoff.—The following ships took part in the expedition that, along with 3 French warships and 20 frigates, set sail on May 22nd, 1855, for the Sea of Azoff, blowing up en route the works and storage facilities at Kertch, and destroying Yenikale: H.M.S. "Agamemnon," "Algiers," "Hannibal," "St. Jean d'Acre," "Princess Royal," "Royal Albert," and 27 frigates. The bar for AZOFF was awarded to the officers and crews of the following ships: "Vesuvius," "Stromboli," "Miranda," "Swallow," "Curlew," "Beagle," "Lynx," "Ardent," "Viper," "Snake," "Medina," "Recruit," "Arrow," "Clinker," "Boxer," "Grinder," "Fancy," "Sulina," "Weser," "Jasper," and "Cracker"; also the first and second launches of the "Agamemnon," "Hannibal," "Algiers," "St. Jean d'Acre," "Princess Royal," and the "Royal Albert."
During these operations Lieutenant (afterwards Admiral Sir) E. Commerell of the "Weser" gained the Victoria Cross for his intrepid conduct while engaged in destroying stores on the shore of the Sivash.
During these operations, Lieutenant (later Admiral Sir) E. Commerell of the "Weser" earned the Victoria Cross for his brave actions while working to destroy supplies on the shore of the Sivash.
The Baltic Medal.—For their services in connection with the blockade of the Baltic, Queen Victoria commanded in 1856 that a medal should be struck and issued to the officers, seamen, and marines who had been engaged in the Baltic from March 1854 to August 1855, during which period they had blockaded Bomarsund, attacked and captured it, and bombarded and destroyed Sveaborg. Two officers and 90 sappers and miners who served aboard the flagship and at Bomarsund were also awarded the medal, which bears on the obverse the same bust of Queen Victoria as on the medals previously described, and on the reverse the seated figure of Britannia, holding a trident in her right hand, with a naval gun and pile of shot, flags, and a naval coronet beside her, and behind in the distance the fort of Bomarsund to the left, and Sveaborg to the right; above all is BALTIC, and in the exergue 1854-55. The medal, by L. C. Wyon, is 1⅖ in. in diameter, and depends from a yellow ribbon 1¼ in. wide with blue edges, by means of a curled suspender similar to the Sutlej type. The medals were issued unnamed, except in the case of the officers and sappers mentioned above, and theirs were issued with their names impressed.
The Baltic Medal.—For their services related to the blockade of the Baltic, Queen Victoria ordered in 1856 that a medal be created and awarded to the officers, seamen, and marines who participated in the Baltic from March 1854 to August 1855. During this time, they blockaded Bomarsund, attacked and captured it, and bombarded and destroyed Sveaborg. Two officers and 90 sappers and miners who served on the flagship and at Bomarsund also received the medal, which features on the front the same portrait of Queen Victoria as the previously described medals, and on the back, a seated figure of Britannia holding a trident in her right hand, accompanied by a naval gun and a pile of cannonballs, flags, and a naval crown next to her. In the background, you can see Bomarsund to the left and Sveaborg to the right; above it all is BALTIC, and in the exergue 1854-55. The medal, designed by L. C. Wyon, is 1⅖ in. in diameter and hangs from a yellow ribbon 1¼ in. wide with blue edges, using a curled suspender similar to the Sutlej type. The medals were issued with no names, except for the officers and sappers mentioned above, whose names were stamped on theirs.
The following ships were employed in the Baltic: H.M.S. "Duke of Wellington,*" "Saint George," "Neptune," "Princess Royal," "Royal George,*" "Saint Jean d'Acre," "Majestic,*" "Nile,*" "James Watt,*" "Prince Regent," "Cæsar,*" "Monarch," "Boscawen," "Cumberland," "Cressy,*" "Blenheim,*" "Hogue,*" "Edinburgh,*" "Amphion,*" "Arrogant,*" "Ajax,*" "Euryalus,*" "Imperieuse,*" "Cruiser," "Odin," "Dauntless," "Archer," "Leopard," "Valorous," "Desperate," "Magicienne," "Vulture," "Dragon," "Porcupine," "Bulldog," "Conflict," "Driver," "Hec[Pg 315]la," "Basilisk," "Rosamund," "Lightning," "Alban," and H.M. Hospital Ship "Belleisle."
The following ships were used in the Baltic: H.M.S. "Duke of Wellington," "Saint George," "Neptune," "Princess Royal," "Royal George," "Saint Jean d'Acre," "Majestic," "Nile," "James Watt," "Prince Regent," "Cæsar," "Monarch," "Boscawen," "Cumberland," "Cressy," "Blenheim," "Hogue," "Edinburgh," "Amphion," "Arrogant," "Ajax," "Euryalus," "Imperieuse," "Cruiser," "Odin," "Dauntless," "Archer," "Leopard," "Valorous," "Desperate," "Magicienne," "Vulture," "Dragon," "Porcupine," "Bulldog," "Conflict," "Driver," "Hec[Pg 315]la," "Basilisk," "Rosamund," "Lightning," "Alban," and H.M. Hospital Ship "Belleisle."
After the recall of Sir Charles Napier, who was censured for not attacking Sveaborg, a fleet was dispatched to the Baltic under Rear-Admiral Hon. R. Dundas. It included the ships named above marked with an asterisk, and the "Calcutta," "Colossus," "Orion," "Cornwallis," "Exmouth," "Russell," "Hawk," "Pembroke," "Hastings," "Retribution," "Falcon," "Esk," "Tartar," "Cossack," "Archer," "Harrier," and "Pylades," with a number of smaller vessels and gunboats. During the second operations in the Baltic, Lieutenant Dowell of the Marine Artillery gained the V.C. for leading a volunteer crew in a boat from the "Ruby," and taking the cutter of the "Arrogant" in tow when she was swamped after the explosion of her magazine during an attack on some vessels at Viborg.
After Sir Charles Napier was recalled and criticized for not attacking Sveaborg, a fleet was sent to the Baltic under Rear-Admiral Hon. R. Dundas. It included the ships listed above with an asterisk, along with the "Calcutta," "Colossus," "Orion," "Cornwallis," "Exmouth," "Russell," "Hawk," "Pembroke," "Hastings," "Retribution," "Falcon," "Esk," "Tartar," "Cossack," "Archer," "Harrier," and "Pylades," as well as several smaller vessels and gunboats. During the second operations in the Baltic, Lieutenant Dowell of the Marine Artillery was awarded the V.C. for leading a volunteer crew from the "Ruby" and towing the cutter of the "Arrogant" after it was swamped following the explosion of its magazine during an attack on vessels at Viborg.
The following vessels took part in the attack on Sveaborg: H.M.S. "Duke of Wellington," "Arrogant," "Euryalus," "Exmouth," "Cornwallis," "Cossack," "Pembroke," "Merlin," "Vulture," "Dragon," "Locust," "Volcano," "Lightning," "Hastings," "Amphion," "Edinburgh," "Magicienne," "Geyser," "Eolus," "Belleisle," "Cruiser," "Princess Alice," and the gunboats and mortar vessels "Redwing," "Lark," "Magpie," "Starling," "Skylark," "Stork," "Drake," "Redbreast," "Weasel," "Badger," "Mastiff," "Snapper," "Biter," "Growler," "Pincher," "Porpoise," "Snap," "Blazer," "Dapper," "Pelter," "Pickle," "Havock," "Prompt," "Manly," "Sinbad," "Beacon," "Carron," and "Grappler."
The following vessels participated in the attack on Sveaborg: H.M.S. "Duke of Wellington," "Arrogant," "Euryalus," "Exmouth," "Cornwallis," "Cossack," "Pembroke," "Merlin," "Vulture," "Dragon," "Locust," "Volcano," "Lightning," "Hastings," "Amphion," "Edinburgh," "Magicienne," "Geyser," "Eolus," "Belleisle," "Cruiser," "Princess Alice," and the gunboats and mortar vessels "Redwing," "Lark," "Magpie," "Starling," "Skylark," "Stork," "Drake," "Redbreast," "Weasel," "Badger," "Mastiff," "Snapper," "Biter," "Growler," "Pincher," "Porpoise," "Snap," "Blazer," "Dapper," "Pelter," "Pickle," "Havock," "Prompt," "Manly," "Sinbad," "Beacon," "Carron," and "Grappler."
Naval Brigade in Crimea.—Some of the naval brigade in the Crimea received medals with three clasps for BALAKLAVA, INKERMANN, and SEBASTOPOL; others two clasps for INKERMANN and SEBASTOPOL, or BALAKLAVA and SEBASTOPOL. Others, showing they had fought per mare, per terras, three clasps for AZOFF, BALAKLAVA, and SEBASTOPOL, or AZOFF, INKERMANN, and SEBASTOPOL.[Pg 316] The only single bars are for AZOFF or SEBASTOPOL. Some of the marines who fought ashore received the whole four clasps for land service as awarded to soldiers. The medals issued to the navy were generally unnamed, but I have in my possession a few named with the same impressed lettering as on the medals issued to the army. The sailors and marines who fought in the Crimea were also awarded the Turkish medal described on page 152, while fifty of them received the Sardinian medal described on page 153.
Naval Brigade in Crimea.—Some members of the naval brigade in Crimea received medals with three clasps for Balaclava, INKERMANN, and Sebastopol; others received two clasps for INKERMANN and SEBASTOPOL, or Balaclava and SEBASTOPOL. Others, demonstrating that they had fought per mare, per terras, earned three clasps for AZOFF, BALACLAVA, and SEBASTOPOL, or AZOFF, INKERMANN, and SEBASTOPOL.[Pg 316] The only single bars are for AZOFF or SEBASTOPOL. Some of the marines who fought on land received a complete set of four clasps for their service, just like the soldiers. The medals given to the navy were mostly unnamed, but I have a few that are named with the same lettering as those issued to the army. The sailors and marines who fought in Crimea were also awarded the Turkish medal mentioned on page 152, while fifty of them received the Sardinian medal noted on page 153.
INDIAN MUTINY
The deeds of the "Pearl" and "Shannon" Brigades during the Indian Mutiny have always impressed students of the war, and collectors have invariably been found willing to pay relatively high prices for medals without a bar if awarded to a man of the "Pearl" Brigade of 250 men, because of the splendid work they did in no less than twenty engagements. The "Shannon" Brigade was composed of 410 seamen and marines from that vessel, under the command of Captain W. Peel, who landed with six 68-pounders—which were employed for the first time as field pieces—eight 24-pounders, a battery of 8 rockets, and 2 howitzers, also some of the crew of the "Pearl," together with 120 sailors recruited from merchant ships. At Allahabad part of the "Shannon's" company was left to garrison the place, the rest marching to Cawnpore. Near Futtehgur 100 men of the naval brigade, co-operating with 450 soldiers, defeated a force of 4,000 mutineers and captured 2 guns. In November the brigade was attacking and assisting in the capture of the Martinière, and later breached the walls of the Secundrabagh and Shah Nujeef at Lucknow. In this daring work Lieutenant (afterwards Admiral Sir) M. Salmon and three of his men won the V.C. In January the brigade took part in the battle of Kallee Nudee, and in March 1858 was again at Lucknow storming the Dilkoosha and breaching the Martinière,[Pg 317] where Captain Peel was wounded. He died on March 27th from an attack of smallpox, just when his gallantry had earned for him a knighthood. With the capture of Lucknow the work of the "Shannon" brigade was finished, and on September 15th she sailed for home. Five hundred and thirty medals were issued to men of the "Shannon" and 232 to men of the "Pearl." Three hundred Europeans of the Indian Marine also received the medals without bars; this medal was generally inscribed INDIAN NAVAL BRIGADE.
The actions of the "Pearl" and "Shannon" Brigades during the Indian Mutiny have always impressed those studying the war, and collectors are usually willing to pay relatively high prices for medals without a bar if they were awarded to a member of the "Pearl" Brigade of 250 men, due to the outstanding work they accomplished in no less than twenty battles. The "Shannon" Brigade was made up of 410 seamen and marines from that ship, commanded by Captain W. Peel, who landed with six 68-pounders—used as field guns for the first time—eight 24-pounders, a battery of 8 rockets, and 2 howitzers, along with some crew members from the "Pearl," and 120 sailors recruited from merchant ships. At Allahabad, part of the "Shannon's" company stayed to guard the area, while the rest marched to Cawnpore. Near Futtehgur, 100 men from the naval brigade, working together with 450 soldiers, defeated a force of 4,000 mutineers and seized 2 guns. In November, the brigade was involved in attacking and helping to capture the Martinière, and later breached the walls of the Secundrabagh and Shah Nujeef at Lucknow. In this bold operation, Lieutenant (later Admiral Sir) M. Salmon and three of his men earned the V.C. In January, the brigade participated in the battle of Kallee Nudee, and in March 1858, they were back at Lucknow assaulting the Dilkoosha and breaching the Martinière,[Pg 317] where Captain Peel was wounded. He passed away on March 27th from an attack of smallpox, just as his bravery had earned him a knighthood. With the capture of Lucknow, the work of the "Shannon" brigade concluded, and on September 15th, they sailed home. Five hundred and thirty medals were issued to members of the "Shannon," and 232 to members of the "Pearl." Three hundred Europeans from the Indian Marine also received the medals without bars; this medal was typically inscribed Indian Naval Brigade.
Persia, 1857.—The crews of the following ships of the Indian Navy received the medal with bar for PERSIA: "Ajdaha," "Assyria," "Assaye," "Berenice," "Clive," "Comet," "Constance," "Euphrates," "Falkland," "Ferooz," "Hugh Lindsay," "Lady Falkland," "Napier," "Nitocris," "Planet," "Punjab," "Semiramis," "Victoria."
Persia, 1857.—The crews of the following ships of the Indian Navy were awarded the medal with bar for IRAN: "Ajdaha," "Assyria," "Assaye," "Berenice," "Clive," "Comet," "Constance," "Euphrates," "Falkland," "Ferooz," "Hugh Lindsay," "Lady Falkland," "Napier," "Nitocris," "Planet," "Punjab," "Semiramis," "Victoria."
New Zealand.—I have already described at some length the extended operations in New Zealand between 1845 and 1866. In these operations the navy on many occasions took an important part, particularly the crew of H.M.S. "Hazard" at the beginning of the war in 1845. The ships' crews engaged in 1845-7 were H.M.S. "Hazard," "North Star," "Castor," "Elphinstone," "Racehorse," "Osprey."
New Zealand.—I have already described in detail the various operations in New Zealand from 1845 to 1866. The navy played a significant role during these efforts, especially the crew of H.M.S. "Hazard" at the start of the war in 1845. The ships involved from 1845 to 1847 included H.M.S. "Hazard," "North Star," "Castor," "Elphinstone," "Racehorse," and "Osprey."
New Zealand, 1845-6-7.—The ships engaged during this period were H.M.S. "Castor," "Calliope," "Driver," "Elphinstone," H.E.I. Co.'s "Hazard," "Inflexible," "North Star," "Osprey," and "Racehorse."
New Zealand, 1845-6-7.—The ships involved during this time were H.M.S. "Castor," "Calliope," "Driver," "Elphinstone," H.E.I. Co.'s "Hazard," "Inflexible," "North Star," "Osprey," and "Racehorse."
New Zealand, 1860-6.—Members of the crews of the following ships received the medal for this period, although after August 1864, following the Gate Pa affair—in which Samuel Mitchell, captain of the foretop of H.M.S. "Harrier," gained the V.C.—the navy was not actively employed: H.M.S. "Brisk," "Cordelia," "Curaçoa," "Eclipse," "Esk," "Falcon," "Harrier," "Himalaya," "Iris," "Miranda," "Niger," "Pelorus," and "Victoria" (see page 186 for description of medal).
New Zealand, 1860-6.—Crew members from the following ships received the medal during this time, although after August 1864, following the Gate Pa incident—in which Samuel Mitchell, the captain of the foretop of H.M.S. "Harrier," earned the V.C.—the navy was not actively involved: H.M.S. "Brisk," "Cordelia," "Curaçoa," "Eclipse," "Esk," "Falcon," "Harrier," "Himalaya," "Iris," "Miranda," "Niger," "Pelorus," and "Victoria" (see page 186 for description of medal).
Abyssinia.—In the Abyssinian campaign (1867-8), already referred to on pages 189-191 a naval brigade consisting of 83 men, with twelve 12-pounder rocket tubes, commanded by Commander Fellowes of H.M.S. "Dryad," took part, forming part of the first division under General Staveley. Men of the "Octavia," "Dryad," "Spiteful," and "Satellite" took part.
Abyssinia.—In the Abyssinian campaign (1867-8), already mentioned on pages 189-191 a naval brigade made up of 83 men, equipped with twelve 12-pounder rocket tubes, led by Commander Fellowes of H.M.S. "Dryad," participated as part of the first division under General Staveley. Crew members from the "Octavia," "Dryad," "Spiteful," and "Satellite" were involved.
Ashantee.—In this campaign (1873-4) seamen and marines from H.M.S. "Argus," "Encounter," "Barracouta," "Druid," "Seagull," "Simoom," "Rattlesnake," and "Beacon" were employed ashore and afloat, while the gunboats "Bittern," "Decoy," and "Merlin" were actually engaged on the coast.
Ashantee.—During this campaign (1873-4), sailors and marines from H.M.S. "Argus," "Encounter," "Barracouta," "Druid," "Seagull," "Simoom," "Rattlesnake," and "Beacon" were utilized both on land and at sea, while the gunboats "Bittern," "Decoy," and "Merlin" were actively involved along the coast.
Perak.—The crews of H.M. gunboats "Charybdis" and "Hart" were employed in the operations against the Malays during 1875, and the crews of H.M.S. "Egeria," and the gunboats "Fly," "Philomel," "Ringdove," "Thistle," and the corvette "Modeste" in 1876. The I.G.S. Medal 1854, with bar for PERAK, was issued following a General Order of September 1st, 1879. The officers and crews of H.M.S. "Egeria" and the gunboats "Hart" and "Charybdis" received the medal for their services up the Lakut and Lingie Rivers. The naval medals are named in squat, sloping Roman capitals.
Perak.—The crews of H.M. gunboats "Charybdis" and "Hart" were involved in the operations against the Malays during 1875, and the crews of H.M.S. "Egeria," along with the gunboats "Fly," "Philomel," "Ringdove," "Thistle," and the corvette "Modeste," participated in 1876. The I.G.S. Medal 1854, with a bar for PERAK, was awarded following a General Order on September 1st, 1879. The officers and crews of H.M.S. "Egeria" and the gunboats "Hart" and "Charybdis" received the medal for their services on the Lakut and Lingie Rivers. The naval medals are inscribed in short, sloping Roman letters.
South Africa, 1877-8.—Sailors and marines from the following ships were engaged at different periods in the various wars in South Africa from 1877 to 1879 (see pages 196-202): H.M.S. "Active," "Boadicea," "Euphrates," "Forester," "Himalaya," "Orontes," "Shah," "Tamar," and "Tenedos."
South Africa, 1877-8.—Sailors and marines from the following ships participated at various times in the different wars in South Africa from 1877 to 1879 (see pages 196-202): H.M.S. "Active," "Boadicea," "Euphrates," "Forester," "Himalaya," "Orontes," "Shah," "Tamar," and "Tenedos."
In the campaign against the Galekas and Gaikas in 1877-8 two small naval brigades composed of men from H.M.S. "Active" and "Florence" were engaged, and both did excellent work with their rocket batteries.
In the campaign against the Galekas and Gaikas in 1877-8, two small naval brigades made up of men from H.M.S. "Active" and "Florence" were involved, and both performed exceptionally well with their rocket batteries.
Zulu War, 1879.—In this war a naval brigade of 170 seamen and marines from H.M.S. "Active" were attached to the third column under Colonel Pearson. They were under the command of Captain Campbell,[Pg 319] and had with them two 7-pounders, a Gatling gun, and two rocket tubes. A brigade from H.M.S. "Boadicea," "Shah," and "Tenedos" marched with the relieving force to Ekowe. At the expiration of the war the naval brigade was warmly thanked by General Sir Garnet (later Viscount) Wolseley for the services they had rendered.
Zulu War, 1879.—In this conflict, a naval brigade of 170 sailors and marines from H.M.S. "Active" joined the third column led by Colonel Pearson. They were commanded by Captain Campbell,[Pg 319] and brought along two 7-pounder cannons, a Gatling gun, and two rocket tubes. A brigade from H.M.S. "Boadicea," "Shah," and "Tenedos" marched with the reinforcement force to Ekowe. After the war ended, General Sir Garnet (later Viscount) Wolseley expressed his gratitude to the naval brigade for their contributions.
EGYPTIAN WARS
Alexandria, 1882.—In this campaign the navy played an important part—indeed, it was opened by the bombardment of Alexandria on July 11th, 1882, the fortifications of which had been strengthened, and the garrison increased by the rebel Arabi Pasha in anticipation of the allied fleets of Britain and France acting on the offensive. Noticing the preparations which Arabi was making, Admiral Sir Beauchamp Seymour called upon him to desist, and as no notice was taken of his demand, or of his ultimatum that unless work was stopped on the fortifications the place would be bombarded, he prepared his ships for action. Meanwhile the French fleet had left the harbour. The British steamed out, and took up a position facing the outer forts; at half-past 6 on July 11th the British ships cleared for action, and the bombardment began by the "Alexandra" firing a shell into Fort Ada. The fort responded, and then the duel between the ships' guns of the British fleet and those of the fort began. In a couple of hours Fort Marsa-el-Kanat was blown up, and very shortly after, nearly all the guns in Fort Mex were silenced. At half-past 10 an attack was made upon the Lighthouse Fort, and within a couple of hours the Ras-el-Tin batteries were silenced.
Alexandria, 1882.—In this campaign, the navy played a crucial role—indeed, it kicked off with the bombardment of Alexandria on July 11th, 1882, where the fortifications had been reinforced and the garrison boosted by the rebel Arabi Pasha in anticipation of the allied fleets from Britain and France going on the offensive. Noticing the preparations Arabi was making, Admiral Sir Beauchamp Seymour called on him to stop, and when his demand was ignored, along with his ultimatum that unless the work on the fortifications ceased, the place would be bombed, he readied his ships for action. Meanwhile, the French fleet had left the harbor. The British ships moved out and positioned themselves facing the outer forts; at 6:30 PM on July 11th, the British ships were ready for action, and the bombardment began when the "Alexandra" fired a shell into Fort Ada. The fort responded, and then the duel between the guns of the British fleet and those of the fort commenced. Within a couple of hours, Fort Marsa-el-Kanat was blown up, and shortly after, nearly all the guns in Fort Mex were silenced. At 10:30 AM, an attack was launched on the Lighthouse Fort, and within a couple of hours, the Ras-el-Tin batteries were silenced.
The Plucky "Condor."—Meantime Fort Marabout had been the scene of a memorable action on the part of Lord Charles Beresford. Noticing that the rifled guns of the fort were dropping their shot very near to the ships anchored at about 4,500 yards, viz. the "Monarch," "Penelope," and "Temeraire,"[Pg 320] he steamed the gunboat "Condor" within range, and by his daring action in pounding away at the fort for two hours diverted the enemy's fire, and thus materially assisted in the reduction of Fort Mex. The "Condor" was assisted in its plucky work by the gunboats "Beacon," "Bittern," and "Cygnet," which the Admiral had sent to help in the work, and so enabled her to be the means of silencing the guns of the fort by 2 p.m. Three hours later all firing ceased, and the battle of Alexandria was won with comparatively small loss to the fleet, the "Alexandra" suffering most from the effects of the enemy's guns. On this vessel gunner Israel Harding won the V.C. for throwing water over a live shell, which had pierced the side of the ship, and then picking it up and placing it in a tub of water; this hero rose to be chief gunner before he retired. A force of sailors and marines were landed, and engaged in keeping order. The successful Admiral became Lord Alcester, and received a grant of £25,000.
The Brave "Condor."—Meanwhile, Fort Marabout was the site of a significant action led by Lord Charles Beresford. He noticed that the rifled guns of the fort were hitting dangerously close to the ships anchored about 4,500 yards away, namely the "Monarch," "Penelope," and "Temeraire,"[Pg 320] so he moved the gunboat "Condor" within range. By boldly attacking the fort for two hours, he redirected the enemy's fire and greatly aided in the capture of Fort Mex. The "Condor" received support from the gunboats "Beacon," "Bittern," and "Cygnet," which the Admiral had dispatched to assist, enabling her to silence the fort's guns by 2 p.m. Three hours later, all firing stopped, and the Battle of Alexandria was won with relatively few losses for the fleet, with the "Alexandra" suffering the most from enemy fire. On this ship, gunner Israel Harding earned the Victoria Cross for extinguishing a live shell that had penetrated the vessel's side, then retrieving it and placing it in a tub of water; this hero eventually rose to chief gunner before retiring. A contingent of sailors and marines was landed to maintain order. The successful Admiral became Lord Alcester and was awarded £25,000.
The ships engaged in the bombardment of Alexandria were the flagship "Alexandra," "Sultan," "Invincible," "Inflexible," "Temeraire," "Monarch," "Penelope," "Superb," and the gunboats "Beacon," "Bittern," "Condor," "Cygnet," "Decoy," and the dispatch vessel "Helicon."
The ships involved in the bombardment of Alexandria were the flagship "Alexandra," "Sultan," "Invincible," "Inflexible," "Temeraire," "Monarch," "Penelope," "Superb," and the gunboats "Beacon," "Bittern," "Condor," "Cygnet," "Decoy," and the dispatch vessel "Helicon."
Tel-el-Kebir.—In the operations leading up to the battle of Tel-el-Kebir, a number of seamen were engaged; several strategic points were seized by them, and several minor but vital engagements won by them. Lieutenant Wyatt Rawson, R.N., who guided the Highland Brigade across the desert to Tel-el-Kebir by his correct reading of the stars, was the first to enter the entrenchments—alas! to meet his death shortly after. In the battle of Tel-el-Kebir a naval brigade of 250 men, with 6 Gatling guns, took part; also marine artillery and marines. The latter, attached to General Graham's brigade, were placed in the front line, and suffered somewhat heavily, but the naval brigade did not lose a man.
Tel-el-Kebir.—During the operations leading up to the battle of Tel-el-Kebir, a number of sailors were involved; they captured several strategic points and won a few minor but crucial engagements. Lieutenant Wyatt Rawson, R.N., who skillfully navigated the Highland Brigade across the desert to Tel-el-Kebir by accurately reading the stars, was the first to enter the trenches—unfortunately, he met his end shortly afterward. In the battle of Tel-el-Kebir, a naval brigade of 250 men, equipped with 6 Gatling guns, participated, along with marine artillery and marines. The marines, attached to General Graham's brigade, were positioned in the front line and suffered some losses, but the naval brigade did not lose a single man.

First type.
First type.

Republican Variety.
Republican Diversity.
CROSS OF THE LÉGION D'HONNEUR.
Légion d'Honneur Cross.
For the bombardment of Alexandria the Egyptian Medal 1882 with a bar inscribed ALEXANDRIA JULY 11 1882 was awarded to the officers, seamen, and marines, and for TEL-EL-KEBIR to those who took part in that decisive battle (see facing page 160 for medal, also the Khedive's Star which was issued by Prince Tewfik); the naval medals were named.
For the bombardment of Alexandria, the Egyptian Medal 1882 with a bar inscribed ALEXANDRIA, July 11 1882 was awarded to the officers, sailors, and marines, and for TEL-EL-KEBIR to those who took part in that decisive battle (see facing page 160 for the medal, also the Khedive's Star which was issued by Prince Tewfik); the naval medals were named.
El-Teb.—When the Mahdi incited the Sudanese to rise against the Khedive in 1883, and practically gained control over the entire Sudan, it became necessary, as I have already explained, to send a British force to deal with the Mahdi and his principal lieutenant Osman Digna. In the war in the Sudan the men of the navy again distinguished themselves by their cheery willingness and ability. At Suakin, Admiral Sir William Hewitt's brigade of sailors and marines was landed from the "Decoy," "Euryalus," "Ranger," and "Sphinx" to defend the place, which they did quite successfully against Osman Digna. On February 1st, 1884, Osman Digna's force practically annihilated the army of 5,000 Egyptian troops at El-Teb under Valentine Baker Pasha (at one time Colonel of the 10th Hussars).
El-Teb.—When the Mahdi encouraged the Sudanese to rise up against the Khedive in 1883 and almost took control of all of Sudan, it became necessary, as I’ve already mentioned, to send a British force to confront the Mahdi and his main assistant Osman Digna. In the Sudan war, the naval personnel once again stood out for their enthusiastic willingness and capability. At Suakin, Admiral Sir William Hewitt’s brigade of sailors and marines was deployed from the "Decoy," "Euryalus," "Ranger," and "Sphinx" to defend the location, which they did quite successfully against Osman Digna. On February 1st, 1884, Osman Digna's forces nearly wiped out the army of 5,000 Egyptian troops at El-Teb led by Valentine Baker Pasha (formerly Colonel of the 10th Hussars).
The work this undisciplined force set out to accomplish was then taken in hand by Major-General Graham, and the army with which he proceeded towards Tokar included 13 officers and 150 sailors, with 6 machine guns, under the command of Commander Rolfe, likewise about 400 marines and marine artillerymen under Colonel Tuson. At El-Teb on the morning of February 29th, 1884, the British force advanced in square, over the sickening area where the previous battle had taken place, to attack the Mahdists, who had entrenched themselves upon a narrow ridge about a mile in length. The Arabs opened fire, but the guns of the seamen and artillerymen proving too warm for them, they came forward to meet the advancing square, upon which they fell in their fanatical manner, which was as mad as it was grand. The fire of the naval machine guns[Pg 322] stopped their rush, and then their position was taken, but the brunt of the fighting had fallen upon the naval brigade—as well as the "Black Watch" and the "York and Lancasters"—"who contributed materially to the success of the action," in which they lost an officer and 3 men killed, but one naval officer gained the V.C. when the Mahdists almost penetrated the corner of the square and attempted to spear some of the seamen; Captain A. K. Wilson's sword was broken in his gallant effort, and himself would have fallen but for the timely action of some of the 65th (York and Lancasters). The British lost 4 officers and 26 men killed, and 160 officers and men wounded, ere the village of El-Teb had been taken, and the enemy made off in the direction of Tokar, which was taken next day. Those who took part in this action had the bar for EL-TEB added to their Egyptian medal, or, if this was their first experience of Egyptian warfare, the medal without the date, but with the bar for El-Teb, was awarded.
The work that this unorganized group set out to do was taken over by Major-General Graham, and the army he led towards Tokar included 13 officers and 150 sailors with 6 machine guns, led by Commander Rolfe, as well as about 400 marines and marine artillerymen under Colonel Tuson. At El-Teb on the morning of February 29th, 1884, the British force advanced in formation across the grim site of the previous battle to engage the Mahdists, who had entrenched themselves on a narrow ridge about a mile long. The Arabs opened fire, but the guns from the sailors and artillery were too overwhelming, causing them to rush towards the advancing formation, attacking in their typical fervent style, which was chaotic yet impressive. The fire from the naval machine guns[Pg 322] halted their assault, and then their position was taken, but most of the fighting fell to the naval brigade—as well as the "Black Watch" and the "York and Lancasters"—"who significantly contributed to the success of the action," during which they lost one officer and 3 men. However, one naval officer earned the Victoria Cross when the Mahdists nearly broke through the corner of the square and tried to spear some of the sailors; Captain A. K. Wilson's sword shattered in his brave effort, and he would have been lost if it weren't for the prompt actions of some of the 65th (York and Lancasters). The British lost 4 officers and 26 men killed, and 160 officers and men wounded, by the time the village of El-Teb was captured, and the enemy fled towards Tokar, which was taken the next day. Those who participated in this battle received a bar for EL-TEB added to their Egyptian medal, or if this was their first experience in Egyptian warfare, they were awarded the medal without a date, but with the bar for El-Teb.
Tamaai.—This battle, which took place on March 13th, 1884, again afforded the "handymen" an opportunity of demonstrating their worth. Undismayed by what should have been a salutary lesson at El-Teb, the Mahdists began to preach a strenuous crusade against the infidel. It became necessary, therefore, to again set in motion the force which had returned to Suakin, and to march on Tamaai, where the Arabs had concentrated their forces. On the evening of the 12th the army, in two squares, halted a couple of miles from Tamaai, and it was thought there was little possibility of a night attack, but at 1 a.m. the enemy began to fire upon the British camp, and continued to do so all through the night, until at 8 o'clock the army, arranged in two brigades, advanced—the first under General (later Sir) Redvers Buller, and the second under General Davis, in which the naval brigade and marines were included. The latter, after the skirmishers had fallen back, met the enemy with a rattling fire from their machine guns and rifles, and then the "Black Watch,"[Pg 323] charging the enemy with considerable impetuosity, left a gap in the formation through which the tribesmen rushed, and all was soon confusion—friend and foe being so mixed, and all so closely packed together, that they could hardly use their weapons; and when they had extricated themselves, hand-to-hand fighting of a most ferocious character took place. In this unfortunate episode the naval guns had to be abandoned for a time, with the loss of 3 lieutenants and several men. Buller's brigade coming up turned the tables, and the guns were retaken and turned upon the fleeing Mahdists. The troops then marched upon Tamaai, took possession of the place next day, and destroyed it together with Osman Digna's camp. In this battle 5 officers and 101 men were killed, and 8 officers and 103 men wounded, but the Mahdists had lost over 3,000 killed.
Tamaai.—This battle, which happened on March 13, 1884, gave the "handymen" another chance to prove their worth. Unfazed by what should have been a crucial lesson at El-Teb, the Mahdists started pushing for a vigorous fight against the infidels. It became necessary to mobilize the forces that had returned to Suakin and march on Tamaai, where the Arabs had gathered their troops. On the evening of the 12th, the army, formed into two squares, stopped a couple of miles from Tamaai, and it seemed unlikely there would be a night attack. However, at 1 a.m., the enemy began firing on the British camp and continued throughout the night. By 8 o'clock, the army, organized into two brigades, advanced—the first led by General (later Sir) Redvers Buller, and the second by General Davis, which included the naval brigade and marines. After the skirmishers fell back, they confronted the enemy with a robust barrage from their machine guns and rifles, then the "Black Watch,"[Pg 323] charged the enemy fiercely, creating a gap in the formation through which the tribesmen surged, leading to chaos—friends and foes were mixed together so tightly that they could barely use their weapons. Once they managed to break free, intense hand-to-hand combat broke out. During this unfortunate incident, the naval guns had to be temporarily abandoned, resulting in the loss of 3 lieutenants and several men. Buller's brigade arrived to turn the tide, retaking the guns and using them against the fleeing Mahdists. The troops then marched on Tamaai, took control of the area the next day, and destroyed it along with Osman Digna's camp. In this battle, 5 officers and 101 men were killed, and 8 officers and 103 men were wounded, but the Mahdists lost over 3,000 killed.
For this engagement a bar inscribed TAMAAI was issued, and to those who had also taken part in the previous battle of El-Teb one inscribed EL-TEB—TAMAAI.
For this event, a bar engraved TAMAAI was issued, and to those who had also participated in the earlier battle of El-Teb, one inscribed EL-TEB—TAMAAI was given.
Suakin, 1884.—Undaunted Osman Digna still managed to preach his holy war, and secure thousands of adherents to his banner. Within four miles of the disastrous defeat which he had suffered he successfully got together, at Tamanieb, about 2,000 fighting men, but General Graham did not give him much rope, and immediately set out to meet him. Leaving Suakin on March 25th, he marched with a force which included marines to meet the Mahdists. To guard Suakin in the absence of General Graham and his troops, a force of 200 seamen was landed; the enemy did not, however, come to close grips, and after driving them off on March 27th, and destroying their camp, the troops returned to Suakin, after a very trying time, in which owing to the intense heat many fell victims to sunstroke. Suakin was then garrisoned with a small body of troops, including a battalion of marines, and after the rest of the troops had retired to Cairo, or returned to England, they had[Pg 324] to defend the place for several months, during which time the officers and crews of the "Albacore," "Briton," "Coquette," "Myrmidon," "Sphinx," "Tyne," and "Woodlark" were kept busy in assisting the defenders. For these services a clasp inscribed SUAKIN 1884 was issued.
Suakin, 1884.—Fearless Osman Digna continued to promote his holy war and attracted thousands of followers to his cause. Just four miles from the disastrous defeat he had faced, he successfully gathered about 2,000 fighters at Tamanieb. However, General Graham didn't give him much leeway and quickly set out to confront him. Leaving Suakin on March 25th, he marched with a force that included marines to engage the Mahdists. To protect Suakin while General Graham and his troops were away, a force of 200 sailors was landed; the enemy did not engage closely, and after driving them off on March 27th and destroying their camp, the troops returned to Suakin after a challenging period, during which many succumbed to sunstroke due to the intense heat. Suakin was then garrisoned by a small contingent of troops, including a battalion of marines, and after the remaining troops had retreated to Cairo or returned to England, they had[Pg 324] to defend the area for several months. During this time, the officers and crews of the "Albacore," "Briton," "Coquette," "Myrmidon," "Sphinx," "Tyne," and "Woodlark" were kept busy helping the defenders. For these efforts, a clasp inscribed Suakin 1884 was awarded.
The Nile, 1884-5.—The valiant defence of Khartoum by General Gordon ultimately forced upon the British Government the task of attempting to relieve him, and his few European comrades. The expedition was organised to take the field under General Wolseley; and as special efforts were to be made to use the Nile as a water road for the troops, 300 boats of a special type were built, and 500 Canadian boatmen (Voyageurs) and 300 Kroomen were recruited to navigate them. It is said of the Voyageurs that some of them "hardly knew the stern of a boat from the bow," and "when they saw the Cataracts went sick."
The Nile, 1884-5.—The courageous defense of Khartoum by General Gordon eventually pushed the British Government to try to save him and his few European companions. The mission was set up to operate under General Wolseley, and since special efforts were to be made to use the Nile as a water route for the troops, 300 specially designed boats were constructed. Additionally, 500 Canadian boatmen (Voyageurs) and 300 Kroomen were hired to navigate them. It's said that some of the Voyageurs "barely knew the stern of a boat from the bow," and that "when they saw the Cataracts, they got sick."
It will be remembered that Lord Wolseley offered a prize of £100 to the first regiment to reach Debbeh in boats, and the 1st Royal Irish won it.
It will be noted that Lord Wolseley offered a prize of £100 to the first regiment to arrive at Debbeh by boat, and the 1st Royal Irish claimed it.
In this expedition a naval brigade composed of men from the Mediterranean fleet commanded by Captain (afterwards Admiral) Lord Charles Beresford was prominently engaged. Of the difficulties that had to be encountered in navigating the Nile much could be written, for the work was not accomplished without considerable loss of life, and before the expedition reached Dongola 10 of the Canadians and 40 of the troops had been drowned.
In this expedition, a naval brigade made up of men from the Mediterranean fleet, led by Captain (later Admiral) Lord Charles Beresford, played a significant role. There is a lot to say about the challenges faced while navigating the Nile, as the task was completed with considerable loss of life. By the time the expedition arrived in Dongola, 10 Canadians and 40 troops had drowned.

| SECOND CLASS PRUSSIAN ORDER OF MERIT. | HESSIAN MEDAL FOR 1814-15. | AUSTRIAN CROSS FOR 1813-14. |
Abu-Klea.—At the beginning of January 1885 Lord Wolseley, becoming apprehensive for the safety of General Gordon, ordered General Sir Herbert Stewart to press forward across the desert with about 1,600 men to Metammeh on the Nile, and from there to make for Khartoum—about 100 miles up the river—in Gordon's steamers. After a march of 100 miles the force rested on January 12th at Jadkul; refreshed, the troops marched on until on January 16th they fell in with the enemy about 4 miles from Abu-Klea. A zareba was formed, and the men lay down to rest, which intermittent firing made almost impossible. At 9 o'clock on the morning of January 17th, leaving the camels and wounded inside the zareba, the force advanced towards the enemy's position; the naval brigade under Lord Charles Beresford formed the centre of the near face of the square: they had with them a Gardner gun. After a march of 2 miles the skirmishers were forced back on the square by the rush of thousands of Mahdists, horse and foot, who came up to within 400 feet of the partly formed square. "The terrible rain of bullets poured into them by the mounted infantry, and the Guards, stayed them not," for, as Lord Charles Beresford relates, "they were tearing down upon us with a roar like the roar of the sea, an immense, surging wave of white-slashed black forms brandishing bright spears and long flashing swords; and all were chanting, as they leaped and ran, the war song of their faith.... These things we heard and saw in a flash, as the formidable wave swept steadily nearer."
Abu-Klea.—In early January 1885, Lord Wolseley, concerned about General Gordon's safety, ordered General Sir Herbert Stewart to advance across the desert with approximately 1,600 men to Metammeh on the Nile, and from there to proceed to Khartoum—around 100 miles upriver—using Gordon's steamers. After marching 100 miles, the force took a break on January 12th at Jadkul; refreshed, the troops continued until January 16th when they encountered the enemy about 4 miles from Abu-Klea. A zareba was established, and the men tried to rest, but intermittent firing made it nearly impossible. At 9 a.m. on January 17th, leaving the camels and wounded inside the zareba, the force moved toward the enemy’s position; the naval brigade under Lord Charles Beresford formed the center of the near face of the square, equipped with a Gardner gun. After a 2-mile march, the skirmishers were pushed back into the square by a surge of thousands of Mahdists, both mounted and on foot, who advanced to within 400 feet of the partially formed square. "The terrible rain of bullets fired by the mounted infantry and the Guards did not stop them," as Lord Charles Beresford recounted, "they were coming down on us with a noise like the roar of the sea, a massive, surging wave of black figures with white slashes, brandishing bright spears and long shining swords; and all were chanting their war song as they jumped and ran.... We heard and saw these things in an instant as the fearsome wave moved steadily closer."
Meanwhile Lord Charles had ordered the Gardner gun to be run outside the square to the left flank, and he laid the gun himself to make sure. As he fired, he states, "I saw the enemy mown down in rows, dropping like ninepins.... I was putting in most effective work on the leading ranks, and had fired about thirty rounds, when the gun jammed." Then Lord Charles, with the captain of the gun, William Rhodes, chief boatswain's mate, "set to work to try and unscrew the feed-plate in order to clear the barrel, or to take out its lock. The next moment the enemy were on top of us. The feed plate dropped on my head, knocking me under the gun and across its trail." Rhodes was instantly killed by a spear thrust, as was also the armourer, Walter Miller. On struggling to his feet, Lord Charles was "carried bodily backwards by the tremendous impact of the rush, right upon the front rank of the men of No. 4 Company, who stood like rocks." So great was[Pg 326] the pressure that the front ranks could not use rifle or bayonet for a few moments; then the pressure forcing the white men back enabled the rear rank to fire over their heads into the mass of the Arabs. "The Arabs fell in heaps, whereupon the front rank, the pressure upon them relaxing, fired, and fought hand to hand with the bayonet, cursing as the rifles jammed and the shoddy bayonets twisted like tin." The men of the naval brigade joined in the furious hand-to-hand fighting—indeed, all round this was the feature of the fight at Abu-Klea, the heavy Camel Regiment, Scots Greys, Royals, and 5th Dragoon Guards desperately fighting in the square, while the Royal Sussex kept the enemy at bay with their steady fire. Every Arab who penetrated the square was killed; outside their comrades wavered, and then sullenly retired, until at half-past 2 the battle was won.
Meanwhile, Lord Charles ordered the Gardner gun to be moved outside the square to the left flank, and he personally aimed the gun to ensure accuracy. As he fired, he said, "I saw the enemy cut down in rows, dropping like bowling pins.... I was doing the most effective work on the front lines and had fired about thirty rounds when the gun jammed." Then Lord Charles, along with the captain of the gun, William Rhodes, chief boatswain's mate, "started to try and unscrew the feed plate to clear the barrel or take out its lock. The next moment, the enemy was upon us. The feed plate fell on my head, knocking me under the gun and across its trail." Rhodes was instantly killed by a spear thrust, as was the armorer, Walter Miller. As Lord Charles struggled to his feet, he was "carried backwards by the tremendous force of the rush, right onto the front line of the No. 4 Company men, who stood firm." The pressure was so great that the front ranks couldn't use their rifles or bayonets for a few moments; then, as the pressure forced the white men back, the rear rank was able to fire over their heads into the mass of Arabs. "The Arabs fell in heaps, and as the pressure on the front rank eased, they fired and fought hand-to-hand with bayonets, cursing as the rifles jammed and the cheap bayonets bent like tin." The men of the naval brigade joined in the fierce close combat—indeed, all around, that was the defining feature of the fight at Abu-Klea, with the heavy Camel Regiment, Scots Greys, Royals, and 5th Dragoon Guards desperately defending the square, while the Royal Sussex kept the enemy at bay with their steady fire. Every Arab who got into the square was killed; outside, their comrades faltered, and then retreated sullenly, until at half-past 2, the battle was won.
Of the naval brigade 8 were killed and 7 wounded out of the 40 who went into action. Among the killed were Lieutenants Alfred Piggott and R. E. de Lisle. Every man handling the Gardner gun outside the square was killed excepting Lord Charles Beresford, whose providential escape has enabled us to learn the graphic details of the desperate battle of Abu-Klea, which, as Colonel the Hon. Reginald Talbot (who commanded the heavy Camel Regiment at the battle) wrote, "was an Inkermann on a small scale." I have already described the fight towards the river, and the fact that the expedition had been undertaken in vain—for Khartoum had fallen. The bar for ABU-KLEA was issued to all the survivors.
Of the naval brigade, 8 were killed and 7 wounded out of the 40 who went into action. Among the dead were Lieutenants Alfred Piggott and R. E. de Lisle. Every man operating the Gardner gun outside the square was killed, except for Lord Charles Beresford, whose lucky escape allowed us to learn the vivid details of the intense battle of Abu-Klea, which, as Colonel the Hon. Reginald Talbot (who led the heavy Camel Regiment at the battle) noted, "was an Inkermann on a small scale." I’ve already described the fight near the river and pointed out that the expedition had been in vain—because Khartoum had fallen. The bar for ABU-KLEA was issued to all the survivors.
Suakin, 1885.—In the fight at Hasheen, 14 miles from Suakin, on March 20th, 1885, a naval brigade and marines from the fleet in the Red Sea took part and were awarded the bar for SUAKIN.
Suakin, 1885.—In the battle at Hasheen, 14 miles from Suakin, on March 20, 1885, a naval brigade and marines from the fleet in the Red Sea participated and were awarded the bar for SUAKIN.
Tofrek.—At daybreak on March 22nd, 1885, a force again marched out from Suakin under Major-General Sir John McNeill, V.C.; included was a naval brigade made up of men from the "Condor," "Carysfort,"[Pg 327] "Coquette," "Dolphin," and "Sphinx," with two Gardner guns, under Commander Domville, also a battalion of marines. The object of the force was to construct zarebas, which were to be garrisoned by the 49th Regiment. The troops, having made good progress with their work, were taking things rather easily—some were breakfasting—when the sudden appearance of the enemy caused great confusion. Roaring camels, screaming mules, and frightened camp followers helped to make the confusion worse confounded as the Arabs hewed their way through the terrified animals and the helpless camp followers. The soldiers hastily rushed for their rifles, and endeavoured to form squares, into one of which, formed by the marines, about 60 Arabs forced their way, but never got out again. Again the Gardner guns jammed, and the unfortunate seamen had a bad time, as the howling Dervishes rushed into their zareba. In half an hour, however, the fight subsided, but not until a naval lieutenant and 6 men had been killed, and a number wounded. After this battle the men of the naval brigade returned to their ships, and the troops evacuated Suakin.
Tofrek.—At dawn on March 22nd, 1885, a force once again marched out from Suakin under Major-General Sir John McNeill, V.C.; included was a naval brigade made up of men from the "Condor," "Carysfort,"[Pg 327] "Coquette," "Dolphin," and "Sphinx," along with two Gardner guns, commanded by Domville, and a battalion of marines. The purpose of the force was to set up zarebas, which were to be garrisoned by the 49th Regiment. The troops, having made good progress with their work, were taking it easy—some were having breakfast—when the sudden appearance of the enemy caused chaos. Roaring camels, screaming mules, and scared camp followers added to the confusion as the Arabs charged through the terrified animals and the helpless camp followers. The soldiers quickly grabbed their rifles and tried to form squares, into one of which, formed by the marines, about 60 Arabs forced their way, but they never got out again. Once again, the Gardner guns jammed, and the unfortunate sailors had a tough time as the howling Dervishes stormed into their zareba. In half an hour, however, the fighting died down, but not before a naval lieutenant and 6 men had been killed, with several others wounded. After this battle, the naval brigade returned to their ships, and the troops evacuated Suakin.
The Egyptian medal, described on page 211, with the bar for TOFREK, was awarded to the sailors and marines who took part in the battle.
The Egyptian medal, described on page 211, with the bar for TOFREK, was given to the sailors and marines who participated in the battle.
Bars for Second Sudan War.—To those who had taken part in the war in the vicinity of Suakin in the Eastern Sudan the Egyptian medal was awarded with five bars. Those already in possession of the medal received the bars to which their services entitled them. All who served south of Assouan on or before March 7th, 1885, received the medal with a bar for THE NILE 1884-5, if not already in possession of one; likewise those who served at Suakin from March 27th, 1884, to May 14th, 1885. A bar inscribed ABU-KLEA was issued to all who took part in the fight on January 17th, 1885. A bar inscribed KIRBEKAN was awarded to those who took part in the action on February 10th, 1885, in which a small naval brigade was present with a Maxim gun.[Pg 328] A bar with the record SUAKIN 1885 was issued to those who participated in the operations round that place between March 1st and May 14th, 1885, and a bar with TOFREK to those who took active part in the action on March 22nd, 1885. It should be particularly noted that no medals bearing single bars for ABU-KLEA, KIRBEKAN, or TOFREK were issued, and that these should be in conjunction with either SUAKIN 1885, or in the case of ABU-KLEA or KIRBEKAN with THE NILE 1884-5. Medals without bars were issued to the troops who were located in Egypt but did not participate in any of the engagements. The medals are boldly named in Roman capitals.
Bars for Second Sudan War.—For those who participated in the war near Suakin in Eastern Sudan, the Egyptian medal was awarded with five bars. Those who already had the medal received the bars corresponding to their service. Everyone who served south of Assouan on or before March 7th, 1885, got the medal with a bar for THE NILE 1884-85 if they didn't already have one; similarly, those who served at Suakin from March 27th, 1884, to May 14th, 1885, received the same. A bar labeled ABU-KLEA was given to all who fought on January 17th, 1885. A bar named KIRBEKAN was awarded to participants in the action on February 10th, 1885, during which a small naval brigade equipped with a Maxim gun was present.[Pg 328] A bar with the label SUAKIN 1885 was issued to those who took part in operations around that area from March 1st to May 14th, 1885, and a bar inscribed TOFREK was awarded to those engaged in the action on March 22nd, 1885. It's important to highlight that no medals were issued with single bars for ABU-KLEA, KIRBEKAN, or TOFREK, and that these should be combined with either SUAKIN 1885, or in the cases of ABU-KLEA or KIRBEKAN, with The Nile 1884-85. Medals without bars were given to troops stationed in Egypt who did not engage in any of the battles. The medals are prominently named in Roman capitals.
To those who were engaged at or to the south of Wady Haifa between November 30th, 1885, and January 11th, 1886, the medal without bar was given to those who had not already earned one, and, although the battle of Ginnis was fought during this period, no bar was issued to those who were not presented with a medal. The Khedive's star was also given to those who took part in these operations.
To those who were involved at or south of Wady Haifa between November 30, 1885, and January 11, 1886, the medal without bar was awarded to those who hadn’t already received one. Although the battle of Ginnis occurred during this time, no bar was given to those who didn’t receive a medal. The Khedive's star was also awarded to those who participated in these operations.
Gemaizah.—In 1888 Suakin was once again the centre of warfare, but the Mahdists were acting on the offensive by endeavouring to invest the place. General Grenfell therefore decided to march out and attack them. In the action, which took place on December 20th, 1888, the navy co-operated by firing from the Nile, H.M.S. "Racer" shelling the enemy's trenches, and H.M.S. "Starling" the wells; the crews of these boats were entitled to the bar for GEMAIZAH.
Gemaizah.—In 1888, Suakin was once again the center of conflict, with the Mahdists taking the initiative to besiege the area. General Grenfell decided to march out and confront them. In the battle that occurred on December 20, 1888, the navy assisted by firing from the Nile, with H.M.S. "Racer" bombarding the enemy's trenches and H.M.S. "Starling" targeting the wells; the crews of these ships were entitled to the bar for GEMAIZAH.
Tokar, 1890.—To the officers and men of H.M.S. "Dolphin" and "Sandfly," engaged in transport duty, and to the British officers who commanded the Egyptian army, the Khedive's bronze star without date, but with the record in Arabic characters TOKAR 1890 on the suspender, was awarded. This is an interesting star, and more valued than the other Khedive's, because it is the decoration for the services rendered, no bars[Pg 329] being issued for attachment to the silver Egyptian medal, or medals awarded.
Tokar, 1890.—To the officers and crew of H.M.S. "Dolphin" and "Sandfly," who were on transport duty, and to the British officers in charge of the Egyptian army, the Khedive's bronze star was awarded without a date but carries the inscription in Arabic characters TOKAR 1890 on the suspender. This star is noteworthy and considered more prestigious than the other Khedive's decorations because it recognizes the actual services performed, as no bars[Pg 329] are issued for attachment to the silver Egyptian medal or any medals awarded.
Burma, 1885-7.—To the crews of H.M.S. "Bacchante," "Woodlark," "Osprey," "Ranger," "Mariner," "Turquoise," and "Sphinx," which took part in the third Burma War, that resulted in the disposition of Theebaw and the annexation of Burma, the medal with the bar for BURMA 1885-7, as described on page 138, was granted. Those awarded to the navy were generally impressed in tall upright Roman capitals.
Burma, 1885-7.—To the crews of H.M.S. "Bacchante," "Woodlark," "Osprey," "Ranger," "Mariner," "Turquoise," and "Sphinx," who participated in the third Burma War, which led to the removal of Theebaw and the annexation of Burma, the medal with the bar for Burma 1885-87, as detailed on page 138, was awarded. The medals given to the navy were typically designed with tall upright Roman capitals.
West Africa Medal.—The boats' crews of H.M.S. "Acorn," "Icarus," and "Rifleman" co-operated with the 1st W.I.R. in the operations from November 13th, 1887, to January 2nd, 1888, against the Yonnie tribes who had raided British territory in the vicinity of Sierra Leone. The medal, with bar 1887-8, was granted for this expedition.
West Africa Medal.—The crews of H.M.S. "Acorn," "Icarus," and "Rifleman" worked together with the 1st W.I.R. in operations from November 13th, 1887, to January 2nd, 1888, against the Yonnie tribes that had invaded British territory near Sierra Leone. The medal, with bar 1887-8, was awarded for this expedition.
Witu, 1890.—The crews of H.M.S. "Boadicea," "Brisk," "Conquest," "Cossack," "Humber," "Kingfisher," "Pigeon," "Redbreast," and "Turquoise," together with marines who took part in the expedition under Rear-Admiral D. Freemantle, C.B., to punish the Sultan of Witu for the murder of nine Germans in his territory, received the medal with the bar inscribed WITU 1890.
Witu, 1890.—The crews of H.M.S. "Boadicea," "Brisk," "Conquest," "Cossack," "Humber," "Kingfisher," "Pigeon," "Redbreast," and "Turquoise," along with the marines who participated in the mission under Rear-Admiral D. Freemantle, C.B., to punish the Sultan of Witu for the murder of nine Germans in his territory, were awarded the medal with the bar inscribed WITU 1890.
1891-2.—The crews of H.M.S. "Alecto," "Racer," "Sparrow," "Thrush," and "Widgeon" received the medal with bar inscribed 1891-2 for their expedition against the robber chief Fodi Cabba, up the Gambia River, from December 29th, 1891, to February 5th, 1892.
1891-2.—The crews of H.M.S. "Alecto," "Racer," "Sparrow," "Thrush," and "Widgeon" were awarded the medal with a bar marked 1891-2 for their mission against the thief leader Fodi Cabba, along the Gambia River, from December 29, 1891, to February 5, 1892.
1892.—The bar with 1892 was awarded to those bluejackets and marines who co-operated with the 1st W.I.R. in the expedition against Tambi from March 8th, 1892, to April 11th, 1892. The naval brigade consisted of men from H.M.S. "Alecto," "Racer," "Sparrow," "Thrush," and "Widgeon." The bar inscribed 1892 was also awarded with the medal to the naval brigade from H.M.S. "Alecto," "Racer," and "Sparrow," who co-operated with the 1st W.I.R. in the expedition which[Pg 330] ended in the capture and destruction of the town and fort of Toniataba. The operations extended from March 12th to April 30th, 1892.
1892.—The bar with 1892 was awarded to those sailors and marines who worked with the 1st W.I.R. during the expedition against Tambi from March 8th, 1892, to April 11th, 1892. The naval brigade included personnel from H.M.S. "Alecto," "Racer," "Sparrow," "Thrush," and "Widgeon." The bar marked 1892 was also given along with the medal to the naval brigade from H.M.S. "Alecto," "Racer," and "Sparrow," who collaborated with the 1st W.I.R. in the expedition that[Pg 330] resulted in the capture and destruction of the town and fort of Toniataba. The operations lasted from March 12th to April 30th, 1892.
Liwondi, 1893.—A bar inscribed LIWONDI 1893 was awarded to 34 men of H.M.S. "Herald" and "Mosquito," who with a Nordenfelt gun marched under Lieutenant-Commander Carr of the latter vessel to the relief of H.M. Commissioner, Mr. H. Johnston, on the Shire River, Central Africa, between February and March 1893, when they routed the chief Liwondi. Only 29 medals were issued.
Liwondi, 1893.—A bar bearing the inscription LIWONDI 1893 was awarded to 34 men from H.M.S. "Herald" and "Mosquito," who marched under Lieutenant-Commander Carr from the latter ship to support H.M. Commissioner, Mr. H. Johnston, on the Shire River in Central Africa, between February and March 1893, during which they defeated the chief Liwondi. Only 29 medals were given out.
Witu August, 1893.—This bar, with the West Africa medal, was granted to about 200 men from H.M.S. "Blanche," "Swallow," and "Sparrow," who were landed under the command of Captain Geo. Robert Lindley, and with the assistance of Zanzibar and Sudanese troops punished the chief Fumo Omari. Two hundred and fifty medals were issued.
Witu August, 1893.—This bar, along with the West Africa medal, was awarded to about 200 men from H.M.S. "Blanche," "Swallow," and "Sparrow," who were deployed under the command of Captain Geo. Robert Lindley, and, with the help of Zanzibar and Sudanese troops, dealt with the chief Fumo Omari. A total of 250 medals were issued.
Juba River, 1893.—The bar for JUBA RIVER 1893 was awarded to about 40 men of H.M.S. "Blanche," who volunteered to proceed up the River Juba to release two Englishmen who were besieged by a force of Somalis, August 25th, 1893. They were commanded by Lieutenant Price Vaughan Lewis, R.N. Forty bars were issued for this expedition.
Juba River, 1893.—The bar for Juba River 1893 was given to around 40 men from H.M.S. "Blanche," who volunteered to head up the River Juba to rescue two Englishmen who were surrounded by a group of Somalis on August 25th, 1893. They were led by Lieutenant Price Vaughan Lewis, R.N. Forty bars were issued for this mission.
Lake Nyassa, 1893.—The bar for LAKE NYASSA 1893 was awarded to 36 men of the "Adventurer" and "Pioneer," two screw steamers of 35 tons, who were engaged against Makaujira and other chiefs, and in the bombardment of Okuirka in Nyassaland in 1893. One hundred and one Sikhs, who were also engaged, received the Central Africa medal, with clip and ring as described on page 228. Thirty-six medals with this bar were issued.
Lake Nyassa, 1893.—The bar for LAKE NYASSA 1893 was awarded to 36 men from the "Adventurer" and "Pioneer," two 35-ton screw steamers, who participated in operations against Makaujira and other chiefs, as well as in the bombardment of Okuirka in Nyassaland in 1893. One hundred and one Sikhs involved in these efforts received the Central Africa medal, complete with clip and ring as detailed on page 228. A total of thirty-six medals with this bar were issued.
Gambia, 1894.—The bar for GAMBIA 1894 was awarded to the naval brigade from H.M.S. "Alecto," "Magpie," "Raleigh," "Satellite," and "Widgeon," which landed early in February at Bathurst on the River Gambia, West Coast of Africa, to operate against Fodi Selah,[Pg 331] a slave-raiding chief. The expedition, which lasted from February 22nd to March 11th, 1894, only achieved its object of punishing the chief after surmounting considerable difficulties, and surviving much hard fighting, during which 2 lieutenants and 17 men were killed, and nearly 50 officers and men—mostly of the "Magpie" and "Raleigh"—had been wounded. Surgeon Bowden won the D.S.O. during this expedition.
Gambia, 1894.—The bar for Gambia 1894 was awarded to the naval brigade from H.M.S. "Alecto," "Magpie," "Raleigh," "Satellite," and "Widgeon," which landed early in February at Bathurst on the River Gambia, West Coast of Africa, to operate against Fodi Selah,[Pg 331] a slave-raiding chief. The expedition, which lasted from February 22nd to March 11th, 1894, only accomplished its goal of punishing the chief after overcoming significant challenges and enduring intense fighting, during which 2 lieutenants and 17 men were killed, and nearly 50 officers and men—mostly from the "Magpie" and "Raleigh"—were wounded. Surgeon Bowden was awarded the D.S.O. for his actions during this expedition.
1893-4.—It is noteworthy that those men of the 1st W.I.R. who were also engaged received the medal with bar for 1893-4, instead of the bar for GAMBIA 1894; a very definite distinction is thus made between the military and the naval medal.
1893-4.—It’s important to note that the men of the 1st W.I.R. who were also involved received the medal with a bar for 1893-4, instead of the bar for Gambia 1894; this creates a clear distinction between the military and the naval medal.
Benin River, 1894.—The bar for BENIN RIVER 1894 was issued to those sailors and marines of H.M.S. "Alecto," "Philomel," "Phœbe," and "Widgeon" who, assisted by Houssas, fought against the chief Náná, the terror of the inhabitants of the Benin River, whom he had plundered for a number of years. The steam launch of the "Alecto," while steaming up the narrow creek leading to the stronghold Brohemie, on August 25th, was fired upon by a concealed battery, the steersman shot dead, and every man on board wounded. In this unfortunate affair Chief Petty Officer Crouch and Leading Stoker Joseph Perkins earned the Conspicuous Gallantry Medal for their exceeding bravery. On September 18th Brohemie was attacked and captured, and the expedition proceeded to another fortified town three miles distant, and this also was captured, together with Nana's war canoes, which had helped him so much in his depredations. Brohemie was then placed under the Niger Coast Protectorate. Commander Heugh and Lieutenants Hickley and Gore-Browne gained the D.S.O. in these operations.
Benin River, 1894.—The medal for Benin River 1894 was awarded to the sailors and marines of H.M.S. "Alecto," "Philomel," "Phœbe," and "Widgeon" who, with the help of Houssas, fought against Chief Náná, who had been a nightmare for the people living along the Benin River, having plundered them for several years. The steam launch of the "Alecto," while moving up the narrow creek toward the stronghold Brohemie on August 25th, came under fire from a hidden battery, the steersman was shot dead, and everyone on board was injured. In this unfortunate incident, Chief Petty Officer Crouch and Leading Stoker Joseph Perkins were awarded the Conspicuous Gallantry Medal for their exceptional bravery. On September 18th, Brohemie was attacked and taken, and the expedition moved to another fortified town three miles away, which was also captured, along with Nana's war canoes, which had greatly aided him in his raids. Brohemie was then placed under the Niger Coast Protectorate. Commander Heugh and Lieutenants Hickley and Gore-Browne received the D.S.O. for their involvement in these operations.
Brass River, 1895.—The bar for BRASS RIVER 1895 was awarded to the men from H.M.S. "Barrosa," "Saint George," "Thrush," and "Widgeon" who took part in the attack on Nimbi, the stronghold of King[Pg 332] Koko and other native chiefs, from February 17th to March 26th, 1895.
Brass River, 1895.—The award for BRASS RIVER 1895 went to the men from H.M.S. "Barrosa," "Saint George," "Thrush," and "Widgeon" who participated in the assault on Nimbi, the fortress of King[Pg 332] Koko and other local leaders, from February 17th to March 26th, 1895.
Benin River, 1897.—Those sailors and marines who landed from the following ships were awarded the bar for BENIN RIVER 1897: H.M.S. "Alecto," "Barrosa," "Forte," "Magpie," "Philomel," "Phœbe," "Saint George," "Theseus" and "Widgeon"; about 1,400 officers and men took part.
Benin River, 1897.—The sailors and marines who landed from the following ships were awarded the bar for Benin River 1897: H.M.S. "Alecto," "Barrosa," "Forte," "Magpie," "Philomel," "Phœbe," "Saint George," "Theseus," and "Widgeon"; approximately 1,400 officers and men participated.
Sierra Leone, 1898-9.—The bar for SIERRA LEONE 1898-9 was awarded to those who landed from H.M.S. "Alecto," "Blonde," and "Fox," likewise the Colonial boat "Countess of Derby," and took part in the boat expedition up the river and were actually under fire. The men from H.M.S. "Blonde" were engaged in the Sherboro neighbourhood from May 1st to 15th, and with the men from the "Alecto" on the Boom Kittam River next day. Those belonging to the "Fox" and the "Countess of Derby" were engaged on the Brempé River between May 11th and 14th, 1898. This bar is wider than the others previously issued, as the inscription is in two lines.
Sierra Leone, 1898-9.—The bar for Sierra Leone 1898-1899 was given to those who landed from H.M.S. "Alecto," "Blonde," and "Fox," as well as the colonial boat "Countess of Derby," and participated in the boat expedition up the river while actually coming under fire. The crew from H.M.S. "Blonde" operated in the Sherboro area from May 1st to 15th, and alongside the crew from the "Alecto" on the Boom Kittam River the following day. Those associated with the "Fox" and the "Countess of Derby" were active on the Brempé River between May 11th and 14th, 1898. This bar is wider than previous ones because the inscription is in two lines.
Mwele, 1895-6.—By an Admiralty Order dated January 1st, 1897, a further grant of the West Africa medal was sanctioned, and the medal awarded to those who had taken part in the operations against Mwele, the stronghold of the rebel chief Sheik Mbarnok Bin Rashid, which was captured on August 17th, 1895. No bar was issued for this affair, the name and date MWELE 1895 being engraved on the edge of the medal in slanting Roman capitals, together with the name, etc., of the recipient. Those already in possession of the medal had MWELE 1895 engraved after their name. The little force comprised men from H.M.S. "Barrosa," "Phœbe," "Racoon," and "Saint George," and the 24th and 26th Bombay Infantry—their medals had MWELE impressed on one side of the claw of the suspender and 1895 on the other side—who also received the medal, while camp followers were given the medal in bronze. This medal is described on page 228.
Mwele, 1895-6.—By an Admiralty Order dated January 1st, 1897, a further grant of the West Africa medal was approved, and the medal was given to those who participated in the operations against Mwele, the stronghold of the rebel chief Sheik Mbarnok Bin Rashid, which was captured on August 17th, 1895. No bar was issued for this event, and the name and date MWELE 1895 were engraved on the edge of the medal in slanted Roman letters, along with the recipient's name, etc. Those who already had the medal had MWELE 1895 engraved after their name. The small force included men from H.M.S. "Barrosa," "Phœbe," "Racoon," and "Saint George," as well as the 24th and 26th Bombay Infantry—their medals had MWELE impressed on one side of the suspension claw and 1895 on the other side—who also received the medal, while camp followers were awarded the medal in bronze. This medal is described on page 228.

THE IRON CROSS.
THE IRON CROSS.

AUSTRIAN ORDER OF THE IRON CROWN.
AUSTRIAN ORDER OF THE IRON CROWN.

PRUSSIAN MEDAL FOR DISTINCTION. IN SERVICE, 1825.
PRUSSIAN MEDAL FOR DISTINCTION. IN SERVICE, 1825.

AUSTRIAN OFFICER'S GILT CROSS.
Austrian officer's gold cross.
Central Africa, 1895.—Payne has in his collection the only Central African 1895 medal believed to have been issued to the navy. It was awarded to Lieutenant J. S. Brogden, R.M.L.I., who afterwards became Captain R.N.
Central Africa, 1895.—Payne has in his collection the only Central African 1895 medal thought to have been issued to the navy. It was awarded to Lieutenant J. S. Brogden, R.M.L.I., who later became Captain R.N.
BOER WAR
During the Boer War a naval contingent was employed, and their assistance in the defence and relief of Ladysmith is one of the outstanding features of that long conflict. The men of H.M.S. "Powerful," who helped in the defence of Ladysmith under Captain (afterwards Admiral Sir) Percy Scott, R.N., whose genius was such a material asset to the beleaguered, did excellent work, while the naval brigade which took part in the Natal campaign and the relief of Ladysmith made splendid efforts. It comprised 39 officers and 403 men of the Royal Navy, and 2 officers and 50 men of the Natal Naval Volunteers, who during the fighting leading up to the relief, on February 28th, 1900, had fired 4,000 rounds of ammunition from the 4·7-inch guns, and 12,000 rounds from the 12-pounder quick-firing guns.
During the Boer War, a naval unit was deployed, and their support in the defense and relief of Ladysmith is one of the remarkable highlights of that prolonged conflict. The crew of H.M.S. "Powerful," who assisted in the defense of Ladysmith under Captain (later Admiral Sir) Percy Scott, R.N., whose brilliance was a significant advantage to those under siege, did outstanding work. The naval brigade that participated in the Natal campaign and the relief of Ladysmith made excellent contributions. It consisted of 39 officers and 403 men from the Royal Navy, along with 2 officers and 50 men from the Natal Naval Volunteers, who during the combat leading up to the relief on February 28th, 1900, had fired 4,000 rounds from the 4.7-inch guns and 12,000 rounds from the 12-pounder quick-firing guns.
Bars Gained by Navy.—The officers and men of H.M.S. "Powerful" received the bar for the DEFENCE OF LADYSMITH. The bar for the RELIEF OF LADYSMITH was awarded to officers and men from H.M.S. "Terrible" and "Philomel." Men from the latter ships also took part in the battle of the TUGELA HEIGHTS. The sailors from the "Philomel," in addition to the bars already mentioned, received those for ORANGE FREE STATE and LAING'S NEK, while men from the "Monarch" and "Doris" were awarded bars for BELMONT, MODDER RIVER, PAARDEBERG, DRIEFONTEIN, DIAMOND HILL, and BELFAST. Men from H.M.S. "Naiad" fought in, and received bars for, CAPE COLONY, TRANSVAAL, WITTEBERGEN, and SOUTH AFRICA 1902.
Bars Gained by Navy.—The officers and crew of H.M.S. "Powerful" were awarded the bar for the Defense of Ladysmith. The bar for the Relief of Ladysmith was given to officers and crew from H.M.S. "Terrible" and "Philomel." Crew members from those ships also participated in the battle of the Tugela Heights. The sailors from the "Philomel," in addition to the bars already mentioned, received awards for Free State Province and Laing's Nek, while crew from the "Monarch" and "Doris" were awarded bars for BELMONT, Modder River, PAARDEBERG, DRIEFONTEIN, Diamond Hill, and BELFAST. Crew members from H.M.S. "Naiad" fought in, and received bars for, Cape Colony, TRANSVAAL, Wittenberg, and SOUTH AFRICA 1902.
Medals with bars to the navy are rare, and those with more than two particularly so. A leading stoker[Pg 334] of H.M.S. "Doris" received, in addition to those mentioned above as awarded to men from his ship, the rare one for WEPENER, but though this bar to the navy was afterwards recalled, Dr. Payne has this rare medal with this and six other bars in his collection.
Medals with bars for the navy are hard to come by, and especially those with more than two are very rare. A leading stoker[Pg 334] from H.M.S. "Doris" received, in addition to the ones mentioned that were awarded to men from his ship, the uncommon one for Wepener. Although this bar for the navy was later recalled, Dr. Payne has this rare medal along with this and six other bars in his collection.
The crews of the following ships received the medal: H.M.S. "Barracouta," "Barrossa," "Beagle," "Blonde," "Doris," "Dwarf," "Fearless," "Forte," "Gibraltar," "Magicienne," "Magpie," "Monarch," "Naiad," "Niobe," "Partridge," "Pearl," "Pelorus," "Philomel," "Powerful," "Racoon," "Rambler," "Rattler," "Redbreast," "Sappho," "Sybille," "Tartar," "Terpsichore," "Terrible," "Thesis," "Thrush," and "Widgeon."
The crews of the following ships received the medal: H.M.S. "Barracouta," "Barrossa," "Beagle," "Blonde," "Doris," "Dwarf," "Fearless," "Forte," "Gibraltar," "Magicienne," "Magpie," "Monarch," "Naiad," "Niobe," "Partridge," "Pearl," "Pelorus," "Philomel," "Powerful," "Racoon," "Rambler," "Rattler," "Redbreast," "Sappho," "Sybille," "Tartar," "Terpsichore," "Terrible," "Thesis," "Thrush," and "Widgeon."
Africa General Service Medal.—This medal, described on page 254, was awarded to the army and navy. It was instituted by King Edward VII to commemorate and recognise the naval and military operations in East Central and West Africa, and on its institution the East and West and Central Africa medals were no longer issued.
Africa General Service Medal.—This medal, described on page 254, was awarded to the army and navy. It was established by King Edward VII to honor and acknowledge the naval and military operations in East Central and West Africa, and after it was established, the East, West, and Central Africa medals were no longer issued.
Jubaland.—The medal with bar for JUBALAND for the operations against the Ogaden Somalis, from November 16th, 1900, to April 30th, 1901, was awarded to the officers and men of the Royal Navy and marines from H.M.S. "Magicienne," "Terpsichore," and "Scout."
Jubaland.—The medal with bar for Jubaland for the operations against the Ogaden Somalis, from November 16, 1900, to April 30, 1901, was awarded to the officers and men of the Royal Navy and marines from H.M.S. "Magicienne," "Terpsichore," and "Scout."
Gambia, 1901.—Those members of the crews of H.M. ships who had received the Africa General Service medal with the bar for JUBALAND were not entitled to this bar.
Gambia, 1901.—The crew members of H.M. ships who received the Africa General Service medal with the bar for Jubaland were not eligible for this bar.
Aro, 1901-2.—The crew of H.M.S. "Thrush" took part in the operations against the Aro tribe from November 15th, 1901, to March 23rd, 1902 (see also page 255). The naval recipients of the medal with the bar for ARO 1901-2 were 53 of the crew of the "Thrush," and 3 officers and 27 sailors belonging to the Protectorate gunboat "Jackdaw."
Aro, 1901-2.—The crew of H.M.S. "Thrush" participated in the operations against the Aro tribe from November 15, 1901, to March 23, 1902 (see also page 255). The naval recipients of the medal with the bar for ARO 1901-02 included 53 crew members from the "Thrush," along with 3 officers and 27 sailors from the Protectorate gunboat "Jackdaw."
Somaliland, 1902-4.—In this campaign men belonging to the following ships participated in the expedition[Pg 335] under Colonel Rochfort, C.B., C.M.G., and were entitled to this bar: H.M.S. "Cossack," "Dryad," "Fox," "Highflyer," "Harrier," "Hussar," "Hyacinth," "Mohawk," "Merlin," "Naiad," "Perseus," "Porpoise," "Pomone," and "Redbreast" (see also page 256).
Somaliland, 1902-4.—In this campaign, men from the following ships took part in the expedition[Pg 335] led by Colonel Rochfort, C.B., C.M.G., and were eligible for this bar: H.M.S. "Cossack," "Dryad," "Fox," "Highflyer," "Harrier," "Hussar," "Hyacinth," "Mohawk," "Merlin," "Naiad," "Perseus," "Porpoise," "Pomone," and "Redbreast" (see also page 256).
Somaliland, 1908-10.—This bar was awarded with the medal to those who took part in the campaign. Men from H.M.S. "Hyacinth" and "Proserpine" were engaged.
Somaliland, 1908-10.—This bar was given to those who participated in the campaign. Men from H.M.S. "Hyacinth" and "Proserpine" were involved.
Transport Medal.—King Edward VII, on his birthday, November 9th, 1903, instituted a medal which was granted as a special recognition of the magnificent work done, and for the nautical skill and perfect efficiency shown, by those who were engaged in connection with the Transport Service during the China and South Africa campaigns. On the obverse is the bust of King Edward VII, facing left, in the uniform of an Admiral of the Fleet, wearing his orders and decorations, and the legend EDWARDVS VII REX IMPERATOR. On the reverse, in the foreground, is a large liner ("Ophir") ploughing through the sea; above is a map of the world on Mercator's projection, which embraces the British Empire from the West Indies to New Zealand, but, owing to the circular form of the medal, omits the North American Continent; below is the legend OB PATRIAM MILITIBUS PER MARE TRANSVECTIS ADJUTAM. The medal, 1⅖ in. in diameter, is suspended by means of a straight swivel bar from a red ribbon, with two blue stripes each ¼ in. broad. The names are impressed round the edge of the medal in capital letters. The official announcement of the issue stated that the "Transport Medal shall be granted in future wars to the Officers of the Mercantile Marine serving in the transports" whenever a war medal is granted for the campaign. These medals have realised from £2 to £4 each at public auction.
Transport Medal.—On his birthday, November 9th, 1903, King Edward VII established a medal to honor the outstanding work and impressive nautical skills demonstrated by those involved in the Transport Service during the campaigns in China and South Africa. The front features a bust of King Edward VII facing left, dressed in Admiral of the Fleet uniform, adorned with his orders and medals, along with the inscription EDWARD VII KING EMPEROR. The reverse side shows a large ship ("Ophir") cutting through the waves; above it is a Mercator projection map of the world that includes the British Empire from the West Indies to New Zealand, but excludes North America due to the circular shape of the medal; below is the inscription HELPING THE COUNTRY BY TRANSPORTING TROOPS ACROSS THE SEA. The medal measures 1⅖ in. in diameter and is attached by a straight swivel bar to a red ribbon featuring two blue stripes, each ¼ in. wide. The names are engraved around the edge of the medal in capital letters. The official announcement of the award stated that the "Transport Medal shall be granted in future wars to the Officers of the Mercantile Marine serving in the transports" whenever a war medal is issued for the campaign. These medals have sold for between £2 and £4 each at public auctions.
MERITORIOUS SERVICE MEDALS
Under this heading I might have placed several of those earlier medals which were awarded when campaign medals had not been instituted, but the record for our purpose may begin with the institution of the Meritorious Service Medal on December 19th, 1845, when Her Majesty Queen Victoria decreed that a sum of not more than £2,000 per annum should be set aside for the payment of rewards in the form of annuities not exceeding £20, to sergeants recommended by the Commander-in-Chief in recognition of meritorious or distinguished services. The sum for disbursement was increased to £4,000 in June 1853. This medal bears on the obverse the diademed head of Queen Victoria, with the legend VICTORIA REGINA, and generally has the date of institution in the exergue, but in some of the earlier, and in the later issues also, the date is omitted. On the reverse (as illustrated facing page 136) is the inscription FOR MERITORIOUS SERVICE, surmounted by a crown, and encircled by a broad wreath of laurel. The suspender is of the same pattern as that issued with the India 1854 medal, and the decoration depends from a red ribbon 1¼ in. wide when worn by military sergeants, and a blue ribbon by sergeants of marines, who in 1849 were also granted the medal. Until November 1902 this medal could not be worn with the L.S. and G.C. medal. These medals realise from £3 to £4 10s. in the sale-room.
Under this heading, I could have included several earlier medals awarded before campaign medals were created, but for our purposes, we can start with the establishment of the Meritorious Service Medal on December 19th, 1845. On that day, Her Majesty Queen Victoria ordered that a maximum of £2,000 per year be allocated for rewards in the form of annuities not exceeding £20, given to sergeants recommended by the Commander-in-Chief for their meritorious or distinguished services. This amount for distribution was raised to £4,000 in June 1853. The medal features the diademed head of Queen Victoria on the front, with the inscription QUEEN VICTORIA, and usually includes the date of establishment in the exergue; however, in some earlier and later versions, the date is left out. On the back (as shown on the facing page 136), there is the inscription FOR OUTSTANDING SERVICE, topped by a crown and surrounded by a wide laurel wreath. The ribbon holder is similar to that of the India 1854 medal, and the decoration hangs from a 1¼ inch wide red ribbon for military sergeants and a blue ribbon for marines, who were also awarded the medal in 1849. Until November 1902, this medal could not be worn alongside the L.S. and G.C. medal. These medals sell for between £3 and £4 10s. in auction rooms.

SILVER CROSS FOR SAN SEBASTIAN, 1846.
SILVER CROSS FOR SAN SEBASTIAN, 1846.
Awarded to Staff-Surgeon Chas. Benson Brearey, M.D.
Awarded to Staff-Surgeon Chas. Benson Brearey, M.D.

IRON CROSS FOR SAN SEBASTIAN, 1836.
IRON CROSS FOR SAN SEBASTIAN, 1836.
Awarded to Staff-Surgeon John Callender.
Awarded to Staff Surgeon John Callender.
H.E.I. Co.'s Meritorious Service Medal.—On May 20th, 1848, the Governor-General of India instituted a medal for meritorious service for distribution among the East India Company's troops. On the obverse is the bust of Queen Victoria as on the war medals of the period, with the date 1848 in the exergue, and on the reverse the arms of the Company encircled by the inscription FOR MERITORIOUS SERVICE. The medal is 1¼ in. in diameter, and was suspended by a scroll clasp as used with the Sutlej medal by a red ribbon 1¼ in. wide. The name of the recipient was engraved in a neat running hand upon the edge of the medal. The issue of this medal was discontinued when the English variety was instituted. These medals have realised from £3 10s. to £5.
H.E.I. Co.'s Meritorious Service Medal.—On May 20, 1848, the Governor-General of India established a medal for outstanding service to be awarded to the East India Company's troops. On the front is a portrait of Queen Victoria, similar to the war medals of that time, with the date 1848 at the bottom, and on the back are the arms of the Company surrounded by the inscription FOR EXCEPTIONAL SERVICE. The medal has a diameter of 1¼ inches and was attached with a scroll clasp, like that used with the Sutlej medal, on a red ribbon 1¼ inches wide. The recipient's name was neatly engraved on the edge of the medal. The issuance of this medal was stopped when the English version was introduced. These medals have sold for between £3 10s. and £5.
Distinguished Conduct Medal.—The next in chronological order is the medal for Distinguished Conduct in the Field, and was instituted on December 4th, 1854, as an indication of the "Sovereign's sense of the distinguished service and gallant conduct in the field of the army then serving in the Crimea." It was awarded to non-commissioned officers and privates only, and has since been given for gallant service in many other campaigns. By the decree the medal could be awarded after selection by the commanding officer. Originally a gratuity went with the medal, but that was discontinued in 1862. In 1881 it was decided that a bar bearing the full date of the action for which it was awarded should be given to a recipient who had again distinguished himself.
Distinguished Conduct Medal.—The next one in order is the medal for Distinguished Conduct in the Field, which was established on December 4th, 1854, as a recognition of the "Sovereign's appreciation for the outstanding service and brave actions in the field of the army serving in the Crimea." It was awarded to non-commissioned officers and privates only, and has since been given for courageous service in many other campaigns. According to the decree, the medal could be awarded following a selection by the commanding officer. Initially, a monetary reward accompanied the medal, but that was stopped in 1862. In 1881, it was decided that a bar showing the exact date of the action for which it was awarded should be given to recipients who distinguished themselves again.
The obverse is like the Queen Victoria Long Service Medal, and on the reverse is the inscription FOR DISTINGUISHED CONDUCT IN THE FIELD. The same kind of clasp as used with the Meritorious Service Medal is employed for suspension by a red ribbon with a broad blue stripe down the centre. The first medals issued had the name, rank, regiment, etc., impressed or engraved upon the edge in Roman capitals, but the modern medals are engraved, and generally bear the date of the action, while those issued during the reign of King Edward VII were impressed in small block capitals.
The front looks like the Queen Victoria Long Service Medal, and on the back, it has the inscription FOR EXCEPTIONAL PERFORMANCE IN THE FIELD. It’s suspended with the same type of clasp used for the Meritorious Service Medal, hanging from a red ribbon with a wide blue stripe down the middle. The first medals issued had the name, rank, regiment, and so on stamped or engraved on the edge in Roman capitals, but today’s medals are engraved and usually include the date of the action. The medals given during King Edward VII's reign had the details impressed in small block capitals.
Conspicuous Gallantry Medal.—This medal was instituted on August 13th, 1855, as a reward to petty officers, sailors, non-commissioned officers, and privates in the marines who had distinguished themselves in the Crimean War. With it gratuities were given ranging from £5 to £15. In 1874, after the Ashantee War, it was again decided to issue the medal, and to grant annuities to chief and first-class petty officers, and sergeants of marines, whenever the annual grant authorised by the Treasury had not been exceeded. This medal has the same obverse as the Meritorious Service Medal, and the reverse is practically the same, except for the inscription, which is FOR CONSPICUOUS GALLANTRY. The first medals issued were struck from the same die as the Meritorious Service Medal, the second and third lines being erased, and the words CONSPICUOUS GALLANTRY engraved in Roman capitals. The suspender in the first issue was the same as that used with the sister medal for the army, but in the second issue, which commenced in 1874, a straight bar was used for suspension from a blue ribbon with a broad white stripe down the centre. The names on these medals are engraved in capital Roman letters like the naming on the Distinguished Conduct Medal.
Conspicuous Gallantry Medal.—This medal was established on August 13, 1855, as a reward for petty officers, sailors, non-commissioned officers, and privates in the marines who had shown exceptional bravery during the Crimean War. Along with it, cash rewards were given that ranged from £5 to £15. After the Ashantee War in 1874, it was decided to issue the medal again and to provide annuities to chief and first-class petty officers and sergeants of marines, as long as the annual budget approved by the Treasury was not exceeded. This medal features the same front as the Meritorious Service Medal, and the back is almost identical, except for the inscription, which reads FOR OUTSTANDING BRAVERY. The first medals issued were made from the same die as the Meritorious Service Medal, with the second and third lines removed and the words OBVIOUS BRAVERY engraved in Roman capitals. The suspender for the first issue was identical to that used with the corresponding medal for the army, but in the second issue, which started in 1874, a straight bar was used for suspension from a blue ribbon with a wide white stripe down the center. The names on these medals are engraved in capital Roman letters like those on the Distinguished Conduct Medal.
The medal issued during the reign of King Edward VII bore upon the obverse the same bust of His Majesty in Admiral's uniform as is used on the Naval Long Service and Good Conduct medals granted by him. These medals realise from £3 10s. to £5, but a medal of the first issue, together with the Baltic medal awarded to George Belding of H.M.S. "Firefly," realised £59.
The medal issued during King Edward VII's reign featured the same bust of His Majesty in Admiral's uniform on the front side as seen on the Naval Long Service and Good Conduct medals awarded by him. These medals sell for between £3 10s. and £5, but a first issue medal, along with the Baltic medal given to George Belding of H.M.S. "Firefly," sold for £59.
The Victoria Cross.—This coveted decoration was first suggested by the Prince Consort, and Queen Victoria being desirous of taking into her royal consideration a means of adequately rewarding the individual gallant services, either of officers of the lower grades in the naval and military service, or of warrant[Pg 339] and petty officers, seamen, and marines, ordained by Royal Warrant on June 29th, 1856, that "the cross shall only be awarded to those officers or men who have served us in the presence of the enemy, and shall have performed some signal act of valour or devotion to their country." With the cross an annuity of £10 is awarded to warrant officers, seamen and marines, non-commissioned officers, and privates, and for each additional bar £5 per annum is added to the annuity. In July 1898, owing to the unfortunate condition to which a recipient had been reduced, and so induced to sell his cross, it was decided that the Home Secretary might, in his discretion, increase the annuity to £50. On April 23rd, 1881, the warrant was revised to enable officers of any grade to receive the medal, and on August 8th, 1902, King Edward sanctioned the posthumous award of the cross, and of its issue to relatives of deceased men who had earned it; prior to this the brave fellows' names had been gazetted only. The new regulation was retrospective, so that the surviving representatives of men who had earned the cross as long ago as the Indian Mutiny received the bronze token of their relative's valour.
The Victoria Cross.—This prestigious medal was first proposed by the Prince Consort, and Queen Victoria wanted to create a way to properly reward the brave actions of lower-ranking officers in the navy and military, as well as warrant and petty officers, seamen, and marines. This was established by Royal Warrant on June 29th, 1856, stating that "the cross shall only be awarded to those officers or men who have served us in the presence of the enemy and have performed some significant act of valor or devotion to their country." Along with the cross, an annuity of £10 is given to warrant officers, seamen, marines, non-commissioned officers, and privates, and for each additional bar, an extra £5 per year is added to the annuity. In July 1898, due to the unfortunate circumstances faced by a recipient who was forced to sell his cross, it was decided that the Home Secretary could, at his discretion, increase the annuity to £50. On April 23rd, 1881, the warrant was revised to allow officers of any rank to receive the medal, and on August 8th, 1902, King Edward approved the posthumous awarding of the cross, as well as its issuance to the families of deceased individuals who had earned it; before this, only the names of those brave individuals had been published. The new regulation was retroactive, ensuring that the surviving family members of men who earned the cross during the Indian Mutiny received the bronze emblem of their loved one's bravery.
The cross (facing page 136) carries with it the right to append V.C. after the recipient's name.
The cross (facing page 136) comes with the privilege of adding V.C. after the recipient's name.
The cross is made from captured cannon, and is not, as is generally and wrongly described, a Maltese cross, but a cross patée. It bears in the centre of the obverse the royal crest of a lion passant gardant upon the British crown, with a ribbon inscribed FOR VALOUR in a semicircle beneath it, the ends tucked under the raised edge. The cross has a pierced semicircular lug, through which a simple link is run to attach the cross to the laureated suspender by a V. The obverse has raised edges like the front, but the centre is circular. The name, rank, regiment or ship to which the recipient was attached is engraved upon the back of the suspender, and the record of the act which gained the decoration inside the circle on the back of the cross. The cross[Pg 340] is suspended by a dark-red ribbon, 1½ in. wide, by military recipients, and by a dark-blue ribbon by naval recipients. The cross, owing to the fact that it is cast and chased, has often been copied, and I have had in my possession one which, but for its size, would have deceived experts, but it had the faults of all cast copies, having shrunk in the casting, and this is the one way of telling a fraud, although it generally needs the genuine article for comparison. The V.C. has realised in the sale-room from £43 for a lieutenant's won in the Mutiny to £175 for a private's won before Sebastopol.
The cross is made from captured cannons and is not, as is commonly and incorrectly stated, a Maltese cross, but a cross patée. It features the royal crest of a lion walking and looking back on the British crown in the center of the front, with a ribbon that says FOR VALOR in a semicircle beneath it, with the ends tucked under the raised edge. The cross has a pierced semicircular lug, through which a simple link is attached to connect the cross to the laureated suspender by a V. The front has raised edges like the top, but the center is circular. The name, rank, regiment, or ship of the recipient is engraved on the back of the suspender, and the record of the action that earned the decoration is inside the circle on the back of the cross. The cross[Pg 340] is hung by a dark-red ribbon, 1½ inches wide, for military recipients, and by a dark-blue ribbon for naval recipients. The cross, being cast and chased, has often been copied, and I once had one that, except for its size, would have fooled experts; however, it had the flaws typical of all cast copies, notably shrinking during casting, which is the main way to identify a fake, although it usually requires the genuine article for comparison. The V.C. has sold for prices ranging from £43 for a lieutenant's awarded during the Mutiny to £175 for a private's awarded before Sebastopol.
The only Victoria Cross awarded for gallant services not in "the presence of the enemy" was given to Private Timothy O'Hea for extinguishing a fire in an ammunition van during the Fenian Raid in Canada, 1866. It sold in August 1900 for £50.
The only Victoria Cross awarded for brave actions not "in the presence of the enemy" was given to Private Timothy O'Hea for putting out a fire in an ammunition van during the Fenian Raid in Canada in 1866. It sold in August 1900 for £50.
The Albert Medal.—The Albert Medal, commonly called "The Civilian's Victoria Cross," was originally instituted by Queen Victoria under a Royal Warrant dated March 7th, 1866, as a reward for heroic actions performed in saving life at sea. On April 12th, 1867, the Warrant was revoked by a second which instituted two new decorations respectively styled The Albert Medal of the First Class and The Albert Medal of the Second Class, the original Warrant instituting one class only. Ten years later, on April 30th, 1877, Her Majesty Queen Victoria signed another Warrant which extended the decorations to cases of gallantry in saving life on land.
The Albert Medal.—The Albert Medal, often referred to as "The Civilian's Victoria Cross," was originally established by Queen Victoria through a Royal Warrant dated March 7th, 1866, to honor heroic actions in saving lives at sea. On April 12th, 1867, this Warrant was replaced by a new one that created two new decorations known as The Albert Medal of the First Class and The Albert Medal of the Second Class, as the original Warrant had introduced only one class. A decade later, on April 30th, 1877, Queen Victoria signed another Warrant that expanded the decorations to recognize acts of bravery in saving lives on land.

BRONZE MEDAL GIVEN BY LEOPOLD, GRAND DUKE OF BADEN, "TO THE BRAVE ARMY OF LIBERATION," 1849.
BRONZE MEDAL AWARDED BY LEOPOLD, GRAND DUKE OF BADEN, "TO THE BRAVE ARMY OF LIBERATION," 1849.

BRONZE MEDAL GIVEN BY LEOPOLD, GRAND DUKE OF BADEN, "FOR FAITHFUL SERVICE IN WAR."
BRONZE MEDAL AWARDED BY LEOPOLD, GRAND DUKE OF BADEN, "FOR DEDICATED SERVICE IN WAR."

SILVER MEDAL FOR SAN SEBASTIAN, 1836.
SILVER MEDAL FOR SAN SEBASTIAN, 1836.
By the Warrant of April 12th, 1867, it was ordained that the Albert Medal of the First and Second Classes, severally inscribed "For Gallantry in Saving Life at Sea," should be made only on a recommendation by the President of the Board of Trade; and in the Warrant dated April 30th, 1877, it was ordained that the award of the Albert Medal of the First and Second Classes, inscribed "For Gallantry in Saving Life on Land," should be made only on a recommendation by the First Lord of the Treasury. On September 13th, 1881, an amended Warrant was issued, ordaining that the award of the Albert Medal should be made only on a recommendation by the Principal Secretary of State for the Home Department, "Providing always that the preliminary steps and inquiry concerning the award of the Albert Medals severally inscribed 'For Gallantry in Saving Life at Sea' be, as heretofore, with the President of the Board of Trade." By Warrant dated April 30th, 1877, it was ordained that a register of the names of those who received the Albert Medal for Saving Life at Sea should be kept at the office of the Board of Trade. By Warrant dated Whitehall, March 24th, 1891, the previous Warrants bearing the dates April 30th, 1877, and September 13th, 1881, respectively, were amended, and it was ordained that the award of the Albert Medal for Saving Life at Sea should be made only on a recommendation of the Principal Secretary of State for the Home Department, "Provided always that the preliminary steps and inquiry concerning the award shall, if the award be to any one belonging to the Royal Navy or the Royal Marines, be with the Lords Commissioners of the Admiralty, and in other cases with the President of the Board of Trade." Further, that a register of the names of those persons belonging to the Royal Navy or Royal Marines, upon whom the Albert Medal for Saving Life at Sea shall have been conferred, shall be kept at the offices of the Lords Commissioners of the Admiralty. (See group facing p. 184.)
By the Warrant of April 12th, 1867, it was established that the Albert Medal of the First and Second Classes, each marked "For Gallantry in Saving Life at Sea," should only be awarded based on a recommendation from the President of the Board of Trade. In the Warrant dated April 30th, 1877, it was established that the award of the Albert Medal of the First and Second Classes, marked "For Gallantry in Saving Life on Land," should also only be given based on a recommendation from the First Lord of the Treasury. On September 13th, 1881, an updated Warrant was issued, stating that the award of the Albert Medal should be made only upon a recommendation from the Principal Secretary of State for the Home Department, "Provided that the initial steps and inquiries regarding the award of the Albert Medals marked 'For Gallantry in Saving Life at Sea' remain, as before, with the President of the Board of Trade." By Warrant dated April 30th, 1877, it was also established that a register of the names of those who received the Albert Medal for Saving Life at Sea should be maintained at the Board of Trade office. By Warrant dated Whitehall, March 24th, 1891, the earlier Warrants dated April 30th, 1877, and September 13th, 1881, were amended, and it was established that the award of the Albert Medal for Saving Life at Sea should be made only upon a recommendation from the Principal Secretary of State for the Home Department, "Provided that the initial steps and inquiries concerning the award shall, if the award is for anyone in the Royal Navy or Royal Marines, be conducted with the Lords Commissioners of the Admiralty, and in other cases with the President of the Board of Trade." Additionally, a register of the names of those in the Royal Navy or Royal Marines, who have been awarded the Albert Medal for Saving Life at Sea, shall be kept at the offices of the Lords Commissioners of the Admiralty. (See group facing p. 184.)
Distinguished Service Order.—By a Royal Warrant dated September 6th, 1866, Her Majesty Queen Victoria instituted the Distinguished Service Order for the purpose of recognising the special services of commissioned officers of the Army and Navy, likewise the Indian and Colonial Naval and Military Forces.
Distinguished Service Order.—By a Royal Warrant dated September 6, 1866, Her Majesty Queen Victoria established the Distinguished Service Order to recognize the exceptional services of commissioned officers in the Army and Navy, as well as the Indian and Colonial Naval and Military Forces.
The badge consists of a gold cross patée, convexed, the ground enamelled white, leaving an edge of gold; on the obverse, in the centre, within two sprigs of laurel, enamelled green, is the Imperial Crown in[Pg 342] gold, upon a red enamelled ground. On the reverse is the monogram V.R.I. within two branches of laurel, also upon a red enamelled ground. The badge is worn suspended from the left breast by a red ribbon edged with blue, 1 in. in width, from a gold laureated bar 1⅕ in. wide, fastened to the badge by two gold loops, and having a similar gold laureated bar with brooch attachment above. The award carries with it the right to append the letters D.S.O. after the recipient's name. (See facing page 208.)
The badge features a gold cross with flared ends, slightly curved, set against a white enameled background with a gold border. On the front, in the center and surrounded by two green enameled laurel sprigs, is the Imperial Crown in gold, against a red enameled backdrop. On the back, the monogram V.R.I. is displayed within two laurel branches, also on a red enameled background. The badge is worn on the left side of the chest, hanging from a red ribbon with blue edges, 1 inch wide, attached to a gold laurel bar that is 1⅕ inches wide. This bar is connected to the badge by two gold loops and has a similar gold laurel bar with a brooch attachment above it. Receiving this award allows the recipient to add the letters D.S.O. after their name. (See facing page 208.)
The New Zealand Cross.—This was instituted by Order in Council at the Government House, Wellington, March 10th, 1869, and afterwards sanctioned by Her Majesty as "a Decorative Distinction to be conferred on members of the Militia, Volunteers, or Armed Constabulary, who may particularly distinguish themselves by their bravery in action, or devotion to their duty while on service." The conditions are almost exactly similar to those for the Victoria Cross, and the recipient received an annual pension of £10.
The New Zealand Cross.—This was established by Order in Council at Government House, Wellington, on March 10th, 1869, and later approved by Her Majesty as "a Decorative Distinction to be awarded to members of the Militia, Volunteers, or Armed Constabulary, who particularly stand out for their bravery in action, or dedication to their duty while on service." The conditions are nearly identical to those for the Victoria Cross, and the recipient received an annual pension of £10.
It is a silver Maltese cross, with bright silver double borders, having a six-pointed gold star on each arm. In the centre, in a circle, NEW ZEALAND surrounded by a wreath of laurel in gold. The cross is surmounted by a gold crown and attached to a crimson ribbon—1½ in. wide—by a silver bar ornamented with laurel, in gold, connected by a V and ring, in silver, with the top of the crown. The name of the recipient and the date of the action should be engraved on the back of the cross. Clasps may be added for additional acts of bravery or devotion. The clasp to be a silver bar across the ribbon, having a plain surface burnished and inscribed with the date of the occurrence for which the bar is given, and the name of the action—if any. Twenty-one officers and men have received this decoration. These crosses have realised from £15 to £25.
It is a silver Maltese cross with shiny silver double borders, featuring a six-pointed gold star on each arm. In the center, inside a circle, NZ is surrounded by a gold laurel wreath. The cross is topped with a gold crown and attached to a 1½ inch wide crimson ribbon by a silver bar decorated with laurel in gold, linked by a V and ring in silver to the top of the crown. The recipient's name and the date of the action should be engraved on the back of the cross. Clasps can be added for extra acts of bravery or devotion. The clasp is a silver bar across the ribbon, with a plain polished surface engraved with the date of the event for which the bar is awarded and the name of the action—if applicable. Twenty-one officers and men have received this decoration. These crosses have sold for between £15 and £25.
India Distinguished Service Medal.—This medal was instituted on June 28th, 1907, by an Army Order published in Simla as a reward for both commissioned[Pg 343] and non-commissioned officers of the regular and other forces in India. It bears on the obverse the bust of King Edward VII, and on the reverse a laurel wreath encircling the words FOR DISTINGUISHED SERVICE. The medal, 1⅖ in. in diameter, is ordered to be worn immediately to the right of all war medals, suspended by a red ribbon 1¼ in. wide, with blue edges ⅜ in. wide. This medal may be conferred by the Viceroy of India.
India Distinguished Service Medal.—This medal was established on June 28, 1907, by an Army Order published in Simla as a reward for both commissioned and non-commissioned officers of the regular and other forces in India. It features the bust of King Edward VII on the front, and on the back, a laurel wreath surrounding the words FOR EXCEPTIONAL SERVICE. The medal is 1⅖ inches in diameter and is worn immediately to the right of all war medals, suspended by a red ribbon that is 1¼ inches wide, with blue edges that are ⅜ inch wide. This medal can be awarded by the Viceroy of India.
Conspicuous Service Cross.—This cross was instituted by King Edward VII on June 28th, 1901, as a reward for "distinguished service before the enemy," for bestowal upon warrant officers and subordinate officers of the fleet who do not hold commissions in the navy. No person can be nominated for the cross unless his services shall have been marked by a special mention of his name in dispatches by the Admiral, or senior naval or military officer commanding the squadron or detached force.
Conspicuous Service Cross.—This cross was established by King Edward VII on June 28, 1901, as a recognition for "distinguished service in front of the enemy," awarded to warrant officers and subordinate officers of the fleet who are not commissioned officers in the navy. No one can be nominated for the cross unless their services have been specifically mentioned by name in dispatches by the Admiral or the senior naval or military officer in charge of the squadron or detached force.
The cross (facing page 208) is of silver, patée in form, and convex. It bears on the obverse the monogram E.R.I. surrounded by a raised border, surmounted by the imperial crown, with ring for suspension from a blue ribbon with a white stripe down the centre like that used for the Conspicuous Gallantry Medal. The reverse is plain. The recipient has the right to append the letters C.S.C. to his name.
The cross (facing page 208) is made of silver, shaped like a pattee cross, and is curved. On the front, it features the monogram E.R.I. set within a raised border and topped with an imperial crown. There's a ring for hanging it from a blue ribbon with a white stripe in the center, similar to the one used for the Conspicuous Gallantry Medal. The back is plain. The recipient is allowed to add the letters C.S.C. to their name.
Indian Order of Merit.—This reward of valour takes chronological precedence over those decorations already described. It was instituted by the H.E.I. Co. in 1837, to reward personal bravery without any reference to length of service or good conduct, and is the Sepoy's Victoria Cross (facing page 136.)
Indian Order of Merit.—This bravery award comes before the other decorations mentioned. It was established by the H.E.I. Co. in 1837 to recognize personal courage without considering length of service or good behavior, and it serves as the Sepoy's Victoria Cross (facing page 136.)
It is divided into three classes and is awarded to native officers and men for distinguished conduct in the field. On the advancement from one class to another the star is surrendered to the Government, and the superior class substituted, but in the event of the death of the recipient his relatives retain the decoration. The order carries with it an increase of[Pg 344] one-third in the pay of the recipient, and in the event of his death the allowance is continued to his widow for three years. The First Class consists of a star of eight points, 1⅗ in. in diameter, having in the centre a ground of dark-blue enamel bearing crossed swords in gold, within a gold circle, and the inscription REWARD OF VALOUR, the whole being surmounted by two wreaths of laurel in gold. The Second Class star is of silver, with the wreaths of laurel in gold; and the Third Class entirely of silver. The decoration is suspended from a simple loop and bar from a dark-blue ribbon 1½ in. in width with red edges, bearing a gold or silver buckle according to class.
It is divided into three classes and is awarded to native officers and soldiers for outstanding conduct in the field. When moving up from one class to another, the star is given back to the Government, and a higher class is provided; however, if the recipient passes away, their family keeps the decoration. The order comes with a pay increase of[Pg 344] one-third for the recipient, and if he dies, the allowance continues to his widow for three years. The First Class features an eight-point star, 1⅗ in. in diameter, with a dark-blue enamel center showing crossed gold swords within a gold circle and the inscription BRAVERY REWARD, topped with two gold laurel wreaths. The Second Class star is silver, with gold laurel wreaths, and the Third Class is made entirely of silver. The decoration hangs from a simple loop and bar attached to a dark-blue ribbon 1½ in. wide with red edges, featuring a gold or silver buckle depending on the class.
The Indian Order of Merit realises from £2 10s. to £8 8s. in the sale-room according to class and action for which it was awarded. It is noteworthy, however, that in June 1900 the following prices were paid in the auction-room: First Class, £58; Second Class, £40; and Third Class, £35. When the order is unnamed, as it was issued, and there is no record of the services for which it was earned, prices invariably range lower than these.
The Indian Order of Merit typically sells for between £2 10s and £8 8s in the auction room, depending on the class and the action for which it was awarded. However, it's interesting to note that in June 1900, the following prices were achieved at auction: First Class, £58; Second Class, £40; and Third Class, £35. When the order is unassigned, as it was issued, and there’s no record of the services for which it was awarded, the prices usually fall below these amounts.
Order of British India.—This order was instituted at the same time as the Order of Merit, to reward native commissioned officers for long and faithful service in the Indian Army. Since 1878, however, any person, European or native, holding a commission in a native regiment, became eligible for admission to the Order without reference to creed or colour. The First Class consists of a gold eight-pointed radiated star 1½ in. in diameter. The centre is occupied by a lion statant gardant upon a ground of light-blue enamel, within a dark-blue band inscribed ORDER OF BRITISH INDIA, and encircled by two laurel wreaths of gold. A gold loop and ring are attached to the crown for suspension from a broad ornamental band 9∕10 in. in diameter, through which the ribbon, once blue, now red, is passed for suspension from the neck. The Second Class is 17∕10 in. in diameter with dark-blue[Pg 345] enamelled centre; there is no crown on this class, and the suspender is formed of an ornamental gold loop. The reverse is plain in both classes. The First Class carries with it the title Sirdar Bahadur, and an additional allowance of two rupees a day; and the second the title of Bahadur, and an extra allowance of one rupee per day.
Order of British India.—This order was established alongside the Order of Merit to honor native commissioned officers for their long and dedicated service in the Indian Army. Since 1878, however, anyone, whether European or native, holding a commission in a native regiment, became eligible for admission to the Order regardless of creed or color. The First Class features a gold eight-pointed star that measures 1½ in. in diameter. The center showcases a lion standing guard on a light-blue enamel background, surrounded by a dark-blue band that reads British India Order, and is encircled by two gold laurel wreaths. A gold loop and ring attach to the crown for suspension from a broad ornamental band measuring 9∕10 in. in diameter, through which the ribbon, once blue and now red, is threaded for wearing around the neck. The Second Class is 17∕10 in. in diameter with a dark-blue enamel center; this class has no crown, and the suspension is made of an ornamental gold loop. The back is plain for both classes. The First Class comes with the title Sirdar Bahadur and an additional allowance of two rupees a day, while the Second Class confers the title of Bahadur and an extra allowance of one rupee per day.
India Meritorious Service Medal.—This was instituted on July 27th, 1888, and on receipt of the medal the order states "a non-commissioned officer must surrender his Long Service and Good Conduct medal"; but on being promoted to a commission he may retain the M.S. medal, but the annuity attached to it will cease. On the obverse is the diademed bust of Queen Victoria facing left, with a veil falling over the crown behind, encircled by the legend VICTORIA KAISAR-I-HIND. On the reverse is a wreath of lotus leaves enclosing a wreath of palm tied at the base, having a star beneath; between the two wreaths is the inscription FOR MERITORIOUS SERVICE. Within the palm wreath is the word INDIA. The medal, 1⅖ in. in diameter, is suspended from a scroll by means of a red ribbon 1¼ in. wide.
India Meritorious Service Medal.—This was established on July 27th, 1888, and upon receiving the medal, it is stated in the order that "a non-commissioned officer must give up his Long Service and Good Conduct medal"; however, if he is promoted to a commissioned rank, he can keep the M.S. medal, but the annuity that comes with it will stop. On the front is the diademed bust of Queen Victoria facing left, with a veil draping over the crown behind, surrounded by the inscription VICTORIA QUEEN OF INDIA. On the back is a wreath of lotus leaves encircling a palm wreath tied at the base, with a star underneath; between the two wreaths is the phrase FOR OUTSTANDING SERVICE. Inside the palm wreath is the word INDIA. The medal, 1⅖ in. in diameter, is suspended from a scroll by a red ribbon that is 1¼ in. wide.
The medals issued during the reigns of Queen Victoria's successors bear on the obverse their bust in profile with the legend altered to EDWARDVS or GEORGIVS. The Victoria medals have realised from £3 3s. to £4 10s., and those of King Edward £4 to £5.
The medals created during the reigns of Queen Victoria's successors feature their profile bust on the front, with the name changed to EDWARD or GEORGE. The Victoria medals have sold for between £3 3s. and £4 10s., while those of King Edward have ranged from £4 to £5.
Egyptian Medal for Bravery.—As a means of rewarding N.C.O.'s and men of the Egyptian Army who distinguish themselves on the field of battle, the Khedive Abbas II instituted in May 1913 the silver medal illustrated. It is 1⅞ in. in diameter and depends from a pale-blue ribbed ribbon and a suspender of the same pattern as the British Distinguished Conduct Medal. It bears on the obverse the cypher of Abbas Hilmi El Thani (Abbas II) and on the reverse in the upper half of the field FOR BRAVERY, and in the lower half in Arabic characters EL SHAHAMA, which is the equivalent of the English lettering above it.
Egyptian Medal for Bravery.—To honor N.C.O.s and soldiers of the Egyptian Army who stand out on the battlefield, Khedive Abbas II established a silver medal in May 1913. The medal is 1⅞ inches in diameter and hangs from a pale-blue ribbed ribbon, featuring a suspender similar to that of the British Distinguished Conduct Medal. On the front, it has the cypher of Abbas Hilmi El Thani (Abbas II), while the back displays FOR COURAGE in the upper half and, in Arabic characters, EL SHAHAMA in the lower half, which corresponds to the English inscription above.
Distinguished Service Cross.—As already explained[Pg 346] on page 343, His Majesty King Edward VII instituted the Conspicuous Service Cross in 1901 to reward "distinguished service before the enemy" on the part of warrant or acting warrant officers and subordinate officers of His Majesty's Fleet who do not hold naval commissions. On October 14th, 1914, the Lords Commissioners of the Admiralty—being "of opinion that it would be desirable to enable the said Cross to be granted also to commissioned officers" of the Navy below the rank of Lieutenant-Commander "for meritorious or distinguished services in cases where those services may not be considered sufficient to warrant the appointment of such officers to the Distinguished Service Order"—memorialised His Majesty King George V, who graciously approved of the suggestion that the Cross be in future designated the Distinguished Service Cross with the right to the recipient to append the letters D.S.C. to his name. The Cross is identical with the Conspicuous Service Cross, illustrated on page 208, except in the change of the Royal Cypher, G.R.I. replacing E.R.I. on the obverse. The ribbon, from which the decoration is suspended is dark blue with a broad white stripe down the centre. The decoration, facing page 208, is made by Messrs. Garrard & Co.
Distinguished Service Cross.—As already explained[Pg 346] on page 343, King Edward VII established the Conspicuous Service Cross in 1901 to honor "distinguished service before the enemy" by warrant or acting warrant officers and subordinate officers of His Majesty's Fleet who do not hold naval commissions. On October 14, 1914, the Lords Commissioners of the Admiralty believed it would be beneficial to allow the Cross to be awarded to commissioned officers of the Navy below the rank of Lieutenant-Commander "for meritorious or distinguished services in situations where those services may not be deemed sufficient for appointment to the Distinguished Service Order"—they formally proposed this to King George V, who kindly approved that the Cross be renamed the Distinguished Service Cross, allowing recipients to add the letters D.S.C. to their names. The Cross is the same as the Conspicuous Service Cross, illustrated on page 208, except that the Royal Cypher has changed from E.R.I. to G.R.I. on the front. The ribbon from which the decoration hangs is dark blue with a wide white stripe down the center. The decoration, facing page 208, is made by Messrs. Garrard & Co.
Naval Distinguished Service Medal.—In response to a memorial from the Lords Commissioners of the Admiralty, His Majesty King George V decided at the Court held at Buckingham Palace on October 14th, 1914, to institute a medal for courageous service in war by chief petty officers, petty officers, and men of His Majesty's Navy, and by non-commissioned officers and men of His Majesty's Corps of Royal Marines, and all other persons holding corresponding positions in His Majesty's Service afloat, in cases where the award of the Conspicuous Service Medal would be inappropriate (Her Majesty Queen Victoria having instituted it as an award for pre-eminent bravery in action with the enemy), the Distinguished Service Medal will be awarded to such men "as may at any time[Pg 347] show themselves to the fore in action, and set an example of bravery and resource under fire without performing acts of such pre-eminent bravery as would render them eligible for the Conspicuous Gallantry Medal."
Naval Distinguished Service Medal.—In response to a request from the Lords Commissioners of the Admiralty, His Majesty King George V decided at the Court held at Buckingham Palace on October 14th, 1914, to create a medal for courageous service in war for chief petty officers, petty officers, and men of His Majesty's Navy, as well as for non-commissioned officers and men of His Majesty's Corps of Royal Marines, and others in equivalent positions in His Majesty's Service at sea, in situations where awarding the Conspicuous Service Medal would not be appropriate (Her Majesty Queen Victoria had established it as an award for exceptional bravery in combat with the enemy). The Distinguished Service Medal will be granted to those men "who may at any time[Pg 347] demonstrate exceptional performance in action and set an example of bravery and quick thinking under fire without engaging in acts of such remarkable bravery as would qualify them for the Conspicuous Gallantry Medal."
The design of the Naval Distinguished Service Medal is the same as the Conspicuous Gallantry Medal, except that the suspender is straight and the obverse bears the profile of His Majesty King George V and the reverse FOR DISTINGUISHED SERVICE. The decoration is suspended by a dark-blue ribbon, 1¼ in. wide, with two broad white stripes down the centre divided by a thin dark-blue stripe. (See page 252 for squeezes, the medal not being struck at time of going to press.)
The design of the Naval Distinguished Service Medal is the same as the Conspicuous Gallantry Medal, except that the suspender is straight, and the front features the profile of His Majesty King George V, while the back has FOR OUTSTANDING SERVICE. The medal hangs from a dark-blue ribbon, 1¼ in. wide, with two broad white stripes in the center separated by a thin dark-blue stripe. (See page 252 for squeezes, as the medal was not struck at the time of going to press.)
The Military Cross.—Following the institution of the Cross and medal above described, His Majesty King George V, by a Royal Warrant published as a supplement to the London Gazette on December 31st, 1914, announced that he had instituted a new decoration to be known as The Military Cross for distinguished service in time of war. The decoration consists of a silver cross, having on each arm the Imperial Crown, and bearing in the centre the letters G.R.I. The Royal Warrant states that "No person shall be eligible for this decoration unless he is a captain, a commissioned officer of a lower grade, or a warrant officer in Our army, or Our Indian or Colonial Military Forces, and the Cross shall be awarded only to officers of the above ranks on recommendation by the Principal Secretary of State for War," and that "The Cross shall be worn immediately after all Orders and before all decorations and medals (the Victoria Cross alone excepted), and shall be worn on the left breast pendant from a riband 1⅜ in. in width which shall be in colour white with a purple stripe." The Cross does not carry with it any individual preference or entitle the recipient to use any letters after his name. The list of first recipients of the decoration was published the same day, included in the list being Lieutenant Dimmer, K.R.R.C., a ranker, who has also the distinction of winning the V.C. in the European War now waging.
The Military Cross.—After the establishment of the Cross and medal mentioned above, King George V announced through a Royal Warrant published as a supplement to the London Gazette on December 31, 1914, that he had created a new decoration called The Military Cross, awarded for distinguished service during wartime. The decoration is a silver cross, with the Imperial Crown on each arm and the letters G.R.I. in the center. The Royal Warrant specifies that "No individual can be eligible for this decoration unless they are a captain, a commissioned officer of a lower rank, or a warrant officer in Our army, or Our Indian or Colonial Military Forces, and the Cross will only be awarded to officers of these ranks upon the recommendation of the Principal Secretary of State for War," and that "The Cross must be worn immediately after all Orders and before all decorations and medals (except for the Victoria Cross) and should be worn on the left breast, hanging from a ribbon 1⅜ in. wide, which will be white with a purple stripe." The Cross does not confer any personal preference or allow the recipient to use any letters after their name. The list of the first recipients of the decoration was published the same day, and included Lieutenant Dimmer, K.R.R.C., a ranker who also has the distinction of having won the V.C. in the ongoing European War.
LONG SERVICE MEDALS
MILITARY LONG SERVICE MEDALS
The institution of the Long Service and Good Conduct medal is due to an order of King William IV., who notified his intention to establish it in an Order to the Secretary of War on July 30th, 1830. In it His Majesty states that "discharged soldiers receiving a gratuity for meritorious conduct shall be entitled to wear a medal having on one side the words FOR LONG SERVICE AND GOOD CONDUCT, and on the other in relief the King's Arms, with the name and rank of the soldier, and the year, inscribed on the medal." Those entitled to the medal "must have completed twenty-one years of actual service in the Infantry, or twenty years in the Cavalry, never have been convicted by Court Martial, and must have borne an irreproachable character, or have particularly distinguished themselves in the service." The medal, designed by Pistrucci, was suspended from a dark-crimson ribbon by means of a steel bar attached to a steel clip which gripped the medal as on the Waterloo medal. This medal is sometimes found, however, with a ring through which the ribbon is passed. The name, rank, and regiment and the year of discharge were impressed in large capital Roman letters round the edge of the medal. On the accession of Queen Victoria the Arms of Hanover were omitted. About 1851 a silver scroll suspender replaced the steel clip, and in the new die the lettering on the reverse was cut smaller and the date was omitted. By a warrant dated January 16th, 1860, the grant of the medal was extended to non-commissioned officers on the permanent staff of the Militia. Since 1874 the names and rank of the recipients have been engraved on the edge of the medal. The earlier medals realise from 10s. to £1, and the later ones from 5s. to 7s. 6d. each, according to rank and condition.
The Long Service and Good Conduct medal was established by an order from King William IV, who announced his intention to create it in a directive to the Secretary of War on July 30, 1830. In this order, His Majesty states that "discharged soldiers receiving a gratuity for meritorious conduct shall be entitled to wear a medal featuring on one side the words FOR LONG SERVICE AND GOOD CONDUCT, and on the other side, the King's Arms in relief, along with the name and rank of the soldier, and the year, inscribed on the medal." To qualify for the medal, "soldiers must have completed twenty-one years of actual service in the Infantry, or twenty years in the Cavalry, must never have been convicted by Court Martial, and must have maintained an irreproachable character, or have especially distinguished themselves in the service." The medal, designed by Pistrucci, was hung from a dark crimson ribbon using a steel bar attached to a steel clip, similar to the Waterloo medal. However, it can also be found with a ring through which the ribbon is threaded. The name, rank, regiment, and year of discharge were engraved in large capital Roman letters around the edge of the medal. When Queen Victoria took the throne, the Arms of Hanover were removed. Around 1851, a silver scroll suspender replaced the steel clip, and in the new design, the lettering on the reverse was made smaller, and the date was omitted. By a warrant dated January 16, 1860, the medal was made available to non-commissioned officers on the permanent staff of the Militia. Since 1874, the names and ranks of the recipients have been engraved on the edge of the medal. The earlier medals sell for between 10s. and £1, and the later ones range from 5s. to 7s. 6d. each, depending on rank and condition.

(Reverse.)
(Reverse.)

(Obverse.)
(Front.)
FRENCH MEDAL FOR MEXICO, 1862-3.
French Medal for Mexico, 1862-3.

(Obverse.)
(Front.)

(Reverse.)
(Reverse.)
FRENCH MEDAL FOR TONKIN, 1883-5.
FRENCH MEDAL FOR TONKIN, 1883-5.
King Edward Long Service Medal.—On the accession of King Edward VII., the obverse of the Military Long Service and Good Conduct medal was altered, and the effigy of King Edward, with the legend EDWARDVS VII REX IMPERATOR substituted for the trophy of arms with the shield of Great Britain in the centre.
King Edward Long Service Medal.—When King Edward VII. came to the throne, the front of the Military Long Service and Good Conduct medal was changed. The portrait of King Edward, along with the words EDWARD VII KING EMPEROR, replaced the trophy of arms that had the shield of Great Britain in the center.
King George's Long Service Medal.—The same alteration has been made in this latest issue; the bust of H.M. King George V., takes the place of King Edward, and the legend being slightly altered so far as the name is concerned.
King George's Long Service Medal.—The same change has been made in this latest issue; the bust of H.M. King George V now replaces King Edward, and the wording has been slightly modified regarding the name.
NAVAL LONG SERVICE MEDALS
William IV Naval Long Service.—King William IV instituted by Order in Council dated August 24th, 1831, a medal for Long Service and Good Conduct to men of the navy. It was at first granted for not less than twenty-one years' service; but this was subsequently reduced to twenty. It bears on the obverse an anchor surmounted by a crown, encircled by a wreath of oak leaves tied with a ribbon at the base. On the reverse is a blank space within a beaded circle in the centre for the recipient's name, rating, ship, and length of service, and running with the edge of the medal FOR LONG SERVICE AND GOOD CONDUCT. The medal, 17∕20 in. in diameter, was issued with a silver ring passed through the medal, which was suspended from a narrow blue ribbon; but many of the recipients had a wire suspender made to take a broad ribbon for attachment to the breast. Only about 450 of these medals were issued. (See facing page 308.) They realise from £1 5s. to £2 2s. according to condition.
William IV Naval Long Service.—King William IV established by Order in Council dated August 24th, 1831, a medal for Long Service and Good Conduct to members of the navy. Initially, it was awarded for a minimum of twenty-one years of service; however, this was later changed to twenty years. The front features an anchor topped with a crown, surrounded by a wreath of oak leaves tied with a ribbon at the bottom. The back has a blank area within a beaded circle in the center for the recipient's name, rating, ship, and length of service, and around the edge of the medal is FOR LONG SERVICE AND GOOD CONDUCT. The medal, 17∕20 in. diameter, was issued with a silver ring attached to the medal, which hung from a narrow blue ribbon; however, many recipients had a wire suspender made to secure a broader ribbon for wearing on the breast. Only about 450 of these medals were awarded. (See facing page 308.) They sell for between £1 5s. and £2 2s. depending on their condition.
Victorian Naval Long Service.—On the accession of Queen Victoria a larger and thicker medal was instituted. It bears on the obverse the bust of Queen Victoria, as on the military medals, and on the reverse a line-[Pg 350]of-battle ship at anchor, surrounded by a cable tied at the base in a reef knot, encircled by FOR LONG SERVICE AND GOOD CONDUCT. In the earlier medals the recipient's name, rank, etc., were engraved, and the medal bore on the obverse 1848—very few were issued thus—and the bar for suspension was nearly half as wide again, 1⅗ in. by 17∕10 in., as those on the later medals. The later medals are mostly impressed in capital letters, and are suspended from a clasp which takes a 1¼ in. ribbon of blue with white edges. The earlier medals realise about 10s., and the later ones about 5s. to 6s.
Victorian Naval Long Service.—When Queen Victoria came to the throne, a larger and thicker medal was created. It features the bust of Queen Victoria on the front, just like the military medals, and on the back, there’s a line-of-battle ship at anchor, surrounded by a cable tied at the bottom in a reef knot, with the words FOR LONG SERVICE AND GOOD CONDUCT around it. In the earlier medals, the recipient's name, rank, etc., were engraved, and the front displayed 1848—very few were issued this way—and the suspension bar was almost 50% wider, measuring 1⅗ in. by 17∕10 in., compared to the later medals. The later medals are mostly stamped in capital letters and are hung from a clasp that holds a 1¼ in. ribbon of blue with white edges. The earlier medals are valued at about 10s., while the later ones are worth around 5s. to 6s.
India, 1859.—The H.E.I. Co. issued a medal in 1859 to men of the old Indian Local European Service for "long service and good conduct"; but none were issued to the H.E.I. Co.'s navy! About 100 were issued to men in the three Presidencies before the mistake was discovered. The medal bears on the obverse the diademed head of Queen Victoria as generally used at this time on all war medals, and on the reverse FOR LONG SERVICE AND GOOD CONDUCT. Above the wording is a crown, and below an anchor surrounded by two oak branches. The medal, 1⅗ in. in diameter, was suspended by a red ribbon 13∕10 in. wide by a scroll suspender. The names were impressed on the edges.
India, 1859.—The H.E.I. Co. issued a medal in 1859 to men of the old Indian Local European Service for "long service and good conduct"; however, none were given to the H.E.I. Co.'s navy! About 100 were awarded to men in the three Presidencies before the error was realized. The medal features on the front the crowned head of Queen Victoria, which was commonly used at this time on all war medals, and on the back FOR LONG SERVICE AND GOOD CONDUCT. Above the text is a crown, and below is an anchor surrounded by two oak branches. The medal, 1⅗ in. in diameter, was attached with a red ribbon 13∕10 in. wide by a scroll suspender. The names were engraved on the edges.
Edward VII Naval Long Service.—The obverse of this medal bears the bust of the King in Admiral's uniform, and the legend EDWARDVS VII REX IMPERATOR, and the recipient's name, rank, and ship are impressed upon the edge. (See facing page 308.) The reverse is as that of the Victoria variety. It realises, according to condition and rank, 5s. to 10s.
Edward VII Naval Long Service.—The front of this medal features the King’s profile in an Admiral’s uniform, along with the inscription EDWARD VII KING EMPEROR. The recipient's name, rank, and ship are engraved on the edge. (See facing page 308.) The back is the same as the Victoria version. Its value ranges from 5s. to 10s.
George V Naval Long Service.—The medal issued during the reign of our present Sovereign His Majesty King George V is in all respects the same as the above mentioned, except that his bust in Admiral's uniform adorns the obverse, and GEORGIVS takes the place of EDWARDVS. The recipients' names are indented in block capitals.
George V Naval Long Service.—The medal given out during the reign of our current Sovereign, His Majesty King George V, is identical to the one mentioned above, except that his bust in Admiral's uniform appears on the front, and GEORGE replaces EDWARD. The recipients' names are indented in all caps.
Volunteer, Militia, and Territorial Medals.—I also illustrate representative oval medals issued by King Edward and King George to the Militia, Territorials, and Special Reserve, for Long Service, Good Conduct and Efficiency. These are named in light skeleton block capitals. The Victoria Volunteer Officer's Long Service and the Edwardian Colonial and Auxiliary Forces Officer's Long Service Medals, illustrated facing page 240, were issued unnamed.
Volunteer, Militia, and Territorial Medals.—I also showcase representative oval medals given by King Edward and King George to the Militia, Territorials, and Special Reserve, for Long Service, Good Conduct, and Efficiency. These are inscribed in light skeleton block capitals. The Victoria Volunteer Officer's Long Service and the Edwardian Colonial and Auxiliary Forces Officer's Long Service Medals, illustrated on the opposite page 240, were issued without names.
Naval Best Shot.—The fine medal illustrated facing page 296 was instituted by His late Majesty King Edward as a reward for excellence in Naval Gunnery, and although, like Volunteer Long Service Medals, it can hardly be classed among war medals, the importance of encouraging good gunnery has been well demonstrated in the war now in progress, where our gunners have made wonderful hits at a range of eight or more miles. The obverse of this medal bears the bust of King Edward in Admiral's uniform, as does also that of the Naval Reserve Medal facing page 224.
Naval Best Shot.—The impressive medal shown on page 296 was created by His late Majesty King Edward as a recognition for exceptional skill in Naval Gunnery. While it may not be considered a war medal like the Volunteer Long Service Medals, the significance of promoting skilled gunnery has been clearly displayed in the ongoing war, where our gunners have achieved remarkable hits at distances of eight miles or more. The front of this medal features a portrait of King Edward in Admiral's uniform, similar to the Naval Reserve Medal shown on page 224.
I have not herein considered the large number of regimental medals, or those awarded by officers to their men for prowess in war or excellence of conduct in the ranks; these, together with the old Volunteer medals of the eighteenth century, are too numerous for adequate treatment in a volume such as this, and as I have restricted my pages to war medals of an official nature, only including those private ones which have great historical interest, I must leave the consideration of these to the time when I may find leisure to treat of them as they deserve.
I haven't included the many regimental medals or those given by officers to their troops for bravery in battle or outstanding behavior; these, along with the old Volunteer medals from the eighteenth century, are so numerous that I can't cover them adequately in a book like this. Since I've limited my pages to official war medals and only included private ones of significant historical interest, I have to leave a discussion of these for a later time when I can properly address them.
I have endeavoured, while making my book helpful, to make it also interesting, for I am of opinion that those who do not generally take more than a mere handling interest in the things they sell lose more than half the interest which a business life affords, while those who simply take a pleasure in the mere possession of the things they collect fail to understand the true meaning and value of the collector's spirit.
I have tried, while making my book useful, to make it interesting too, because I believe that those who don’t usually take more than a passing interest in the things they sell miss out on more than half the enjoyment that a business life offers. Meanwhile, those who only enjoy owning the things they collect don’t grasp the real meaning and value of the collector’s spirit.
HOW MEDALS ARE NAMED
I append a few sketches and notes which may be helpful, together with the facts I have given, to those who collect or sell the golden medallions, the bright discs of silver, or the intrinsically valueless but precious bronze crosses or stars which have adorned the breasts of the brave.
I’ve included some sketches and notes that might be useful, along with the information I’ve provided, for those who collect or sell the gold medallions, shiny silver discs, or the seemingly worthless but cherished bronze crosses or stars that have decorated the chests of the brave.
First let me state that any re-engraved medal is comparatively valueless, and that those who purchase high-priced medals should not trust to their own judgment, but employ the services of those experts and dealers who possess the necessary technical knowledge and have at their command the means of identification.
First, let me say that any re-engraved medal is relatively worthless, and those who buy expensive medals shouldn't rely on their own judgment but should seek help from experts and dealers who have the technical knowledge and tools for identification.
The names on the Waterloo medals were impressed
with Roman capitals like
![]() ROBERTS or MURPHY, so
large that they left little margin between the edge of
the medal and the top and bottom of the letters.
ROBERTS or MURPHY, so
large that they left little margin between the edge of
the medal and the top and bottom of the letters.
The names on the Waterloo medals were engraved in Roman capitals like ![]() ROBERTS or MURPHY, so large that there was barely any space between the edge of the medal and the top and bottom of the letters.
ROBERTS or MURPHY, so large that there was barely any space between the edge of the medal and the top and bottom of the letters.
The Peninsular, or Military General Service, medal had
the names indented in Roman capitals as follows:
![]() STEWARD. The same type was used on the Naval
General Service and the Army of India medals, also the
Mutiny medal.
STEWARD. The same type was used on the Naval
General Service and the Army of India medals, also the
Mutiny medal.
The Peninsular, or Military General Service, medal had the names engraved in Roman capitals as follows:
![]() STEWARD. The same style was used on the Naval General Service and the Army of India medals, as well as the Mutiny medal.
STEWARD. The same style was used on the Naval General Service and the Army of India medals, as well as the Mutiny medal.
On the Afghan medal of 1842, for Candahar, Ghuznee,
and Cabul, the same kind of Roman capitals were
used, but sometimes rather larger and narrower, and
the down-strokes somewhat lighter: these medals were
not always impressed, and many were engraved in this
style
![]() John and others in a light script.
John and others in a light script.
On the Afghan medal of 1842, for Candahar, Ghuznee, and Cabul, similar Roman capitals were used, but sometimes they were larger and narrower, and the down-strokes were a bit lighter. These medals weren't always stamped, and many were engraved in this style
![]() John and others in a light script.
John and others in a light script.
The Punjab medals for 1849 were indented in the same style as the M.G.S. medal; but on many of the Sutlej medals the rather taller type of Roman capital was used.
The Punjab medals for 1849 were designed in the same style as the M.G.S. medal; however, many of the Sutlej medals featured a slightly taller type of Roman capital.
The South Africa 1853 medals were named with the same letters as the M.G.S. medals.
The South Africa 1853 medals were named using the same letters as the M.G.S. medals.

MEDAL TO PAPAL BRIGADE FOR 1860 CAMPAIGN.
MEDAL TO PAPAL BRIGADE FOR 1860 CAMPAIGN.

PRUSSIAN BRONZE CROSS FOR KÖNIG GRÄTZ (SADO WA), 1866.
PRUSSIAN BRONZE CROSS FOR KÖNIG GRÄTZ (SADO WA), 1866.

GENEVA CROSS FOR FRANCO-GERMAN WAR, 1870-1.
GENEVA CROSS FOR FRANCO-GERMAN WAR, 1870-1.
On those of the Crimean medals which were returned for naming the same type was used, but the letters were rather more openly spaced. Some were also impressed in large and others in small skeleton Roman, so, MURRAY, many were engraved in square Roman capitals, and others in upper and lower case upright block.
On the Crimean medals that were returned, the same type was used for naming, but the letters were spaced a bit more widely. Some were also stamped in large while others were in small skeleton Roman. So, MURRAY, many were engraved in square Roman capitals, and others in regular uppercase and lowercase block letters.
The India General Service medal, 1854, had the
names mostly impressed with the same type as the
M.G.S. medals up to Bhootan 1864-6; some, particularly
naval medals, were named in a smaller kind of Roman
capitals stamped closer together. The same type of
Roman capital was likewise used on the New Zealand
medals, while the China medals for 1857 and 1860,
which were only named for the army, had the names
indented in the same type. But the naming on the
China medal for 1842 was very characteristic, and
heavy Roman impressed capitals of a square nature,
like
![]() DUNCAN, were employed in the stamping, with
three long stars to fill the gap on either side between
the name and the lug of the suspender.
DUNCAN, were employed in the stamping, with
three long stars to fill the gap on either side between
the name and the lug of the suspender.
The India General Service medal from 1854 mostly had names engraved in the same style as the M.G.S. medals up to Bhootan from 1864 to 1866; some, especially naval medals, featured names in a smaller type of Roman capitals that were stamped closer together. The same Roman capital style was also used on the New Zealand medals, while the China medals for 1857 and 1860, which were only named for the army, had names indented in that same style. However, the naming on the China medal from 1842 was very distinctive, featuring heavy impressed Roman capitals that were square-shaped, like
![]() Duncan, with three long stars filling the space on either side between the name and the lug of the suspender.
Duncan, with three long stars filling the space on either side between the name and the lug of the suspender.
The Abyssinian medal is distinctive in its naming, the recipient's name and regiment being impressed in relief on the centre of the reverse, or, in the case of the Indian troops, in the same manner or struck incuse, while some are engraved.
The Abyssinian medal is unique in its naming, with the recipient's name and regiment raised on the center of the back, or for the Indian troops, either in the same way or impressed into the surface, while some are engraved.
The Canada General Service medal has the names indented in square block capitals, as BROCK, or in caps and lower case, as Boston. Some were engraved in square upright Roman capitals.
The Canada General Service medal has the names indented in square block capitals, like BROCK, or in caps and lowercase, like Boston. Some were engraved in square upright Roman capitals.
The home troops who received it had the regimental numbers impressed and not the territorial designations, as on the South African medals. The Naval medals were generally engraved in dwarfed Roman capitals.
The home troops who got it had the regimental numbers stamped on, not the territorial designations like those on the South African medals. The Naval medals were usually engraved in small Roman capitals.
The Ashantee medal for 1873-4 was engraved in
this style,
![]() BUCHANAN, 42ND. with the date
1873-74, after the regiment, but on the 1892 medals,
while the same style was used, it was engraved with
thinner down-strokes and was smaller.
BUCHANAN, 42ND. with the date
1873-74, after the regiment, but on the 1892 medals,
while the same style was used, it was engraved with
thinner down-strokes and was smaller.
The Ashantee medal for 1873-4 was designed in this style,
![]() BUCHANAN, 42nd. with the date 1873-74, after the regiment. However, for the 1892 medals, while the same style was used, the engraving had thinner down-strokes and was smaller.
BUCHANAN, 42nd. with the date 1873-74, after the regiment. However, for the 1892 medals, while the same style was used, the engraving had thinner down-strokes and was smaller.
When the I.G.S. medals, 1854 type, were first issued
the names were impressed similar to the M.G.S. medal;
but those medals awarded to the navy and the army
for Pegu have very small tall Roman capitals on the
edge; for Perak the names are engraved in sloping
Roman capitals like the Afghan medals described
below; or like the medals for the rest of the campaigns
with the exception of Jowaki, 1877-8, which
by the way was the first campaign medal to have the
date indicated on the bar, the names were generally
engraved as
![]() P. Murphy, and the same style of
script, but very lightly engraved, as
P. Murphy, and the same style of
script, but very lightly engraved, as
![]() Edward,
was used to name the I.G.S. 1895 medal. This light
and somewhat scratchy form of script was also employed
in a very characteristic manner, to name the
Punniar and Maharajpoor stars, and also some of the
first Cabul medals, 1842.
Edward,
was used to name the I.G.S. 1895 medal. This light
and somewhat scratchy form of script was also employed
in a very characteristic manner, to name the
Punniar and Maharajpoor stars, and also some of the
first Cabul medals, 1842.
When the I.G.S. medals, 1854 type, were first issued, the names were stamped like those on the M.G.S. medal. However, the medals given to the navy and army for Pegu have very small tall Roman capitals on the edge; for Perak, the names are engraved in sloping Roman capitals similar to the Afghan medals described below. For the rest of the campaigns, except for Jowaki, 1877-8, which was the first campaign medal to have the date indicated on the bar, the names were generally engraved as
![]() P. Murphy, and the same script style, but very lightly engraved, as
P. Murphy, and the same script style, but very lightly engraved, as
![]() Edward, was used for the I.G.S. 1895 medal. This light and somewhat scratchy style of script was also used in a very distinctive way to name the Punniar and Maharajpoor stars, as well as some of the first Cabul medals from 1842.
Edward, was used for the I.G.S. 1895 medal. This light and somewhat scratchy style of script was also used in a very distinctive way to name the Punniar and Maharajpoor stars, as well as some of the first Cabul medals from 1842.
The Burma 1885-7 medal is generally engraved in a light running hand; but I have seen several engraved in slightly sloping squat Roman letters, 2/SCOTS FUS: The script kind of naming was used on the 1887-9 and 1889-92 Burma medals, but some of the latter medals were engraved in a neat round hand.
The Burma 1885-7 medal is usually engraved in a light, flowing style; however, I have seen a few that are engraved in slightly slanted, bold Roman letters, 2nd Battalion Scots Fusiliers. This type of engraving was used on the 1887-9 and 1889-92 Burma medals, but some of the later medals were engraved in a clean round style.
The Naval medals awarded for Burma 1885-7 are mostly named with rather tall thin Roman capitals.
The naval medals given for Burma 1885-7 mostly feature somewhat tall, slim Roman capital letters.
The medals for Jowaki 1877-8 are impressed with Roman capitals after the character of M.G.S. lettering, and the regiments are generally described so, 2/9th Foot.
The medals for Jowaki 1877-8 are stamped with Roman capitals similar to the M.G.S. lettering, and the regiments are usually listed as such, 2/9th Foot.
The Afghan medals for 1878-9-80 were engraved
thus,
![]() RENDELL, or in the same style of letter but
upright, as were also the Egyptian medals of 1882
onward; but most of those issued to the Royal Marine
Light Infantry and seamen who took part in the Suakin
Expedition of 1885 were indented like this, HENRY.
This kind of type was also used for naming the King
Edward Naval Long Service medals. Some, however,[Pg 355]
were impressed in tall Roman capitals having thick
down-strokes.
RENDELL, or in the same style of letter but
upright, as were also the Egyptian medals of 1882
onward; but most of those issued to the Royal Marine
Light Infantry and seamen who took part in the Suakin
Expedition of 1885 were indented like this, HENRY.
This kind of type was also used for naming the King
Edward Naval Long Service medals. Some, however,[Pg 355]
were impressed in tall Roman capitals having thick
down-strokes.
The Afghan medals for 1878-9-80 were engraved like this,
![]() RENDELL, or in the same style of letters but upright, which was also how the Egyptian medals from 1882 onwards were designed; however, most of those given to the Royal Marine Light Infantry and sailors who participated in the Suakin Expedition of 1885 had indentations like this, HENRY. This type was also used for naming the King Edward Naval Long Service medals. Some, though, [Pg 355] were stamped in tall Roman capitals with thick down-strokes.
RENDELL, or in the same style of letters but upright, which was also how the Egyptian medals from 1882 onwards were designed; however, most of those given to the Royal Marine Light Infantry and sailors who participated in the Suakin Expedition of 1885 had indentations like this, HENRY. This type was also used for naming the King Edward Naval Long Service medals. Some, though, [Pg 355] were stamped in tall Roman capitals with thick down-strokes.
The engraving on the Egyptian medals awarded to some of the Indian troops, dooley bearers, and Indian transport department is in a very finely cut, neat script.
The engraving on the Egyptian medals given to some of the Indian troops, dooley bearers, and the Indian transport department is in a very finely cut, neat script.
Some of the Zulu War medals of 1878-9-80 were engraved in this way, SHEA, the letters being rather badly shaped and spaced, but most were engraved in the same style as the Afghan and Egyptian medals.
Some of the Zulu War medals from 1878-9-80 were engraved like this, SHEA, with the letters being somewhat poorly shaped and spaced, but most were engraved in the same style as the Afghan and Egyptian medals.
The Soudan medals were engraved in this style CURTIS, and some GORE.R.A.: some of the Queen's and Khedive's medals were impressed in very small Roman letters, thus MACPHERSON. In a few instances the Queen's medals, like the Khedive's, were issued unnamed, and the recipients had to have them engraved.
The Sudan medals were engraved in this style CURTIS, and some GORE.R.A.: some of the Queen's and Khedive's medals were stamped with very small Roman letters, like MACPHERSON. In a few cases, the Queen's medals, similar to the Khedive's, were issued without names, and the recipients had to get them engraved.
The medals granted for the Punjab Frontier are named with a rather coarse script.
The medals awarded for the Punjab Frontier have a rather rough script on them.
The engraving on the Hazara medal for 1888 has rather finer-cut strokes, and the naming on the Sikkim medal, 1888, is the same.
The engraving on the Hazara medal from 1888 features more detailed strokes, and the inscription on the Sikkim medal, also from 1888, is the same.
King Edward's medal for Waziristan, 1901-2, is engraved in the same style; but the medal for Chin-Lushai 1889-90 is named in a neat round hand.
King Edward's medal for Waziristan, 1901-2, is engraved in the same style; but the medal for Chin-Lushai 1889-90 is named in a neat round script.
The Maharajah of Kashmir's bronze medal for Chitral, 1895, is impressed in badly aligned and carelessly spaced block letters.
The Maharajah of Kashmir's bronze medal for Chitral, 1895, is stamped in poorly aligned and haphazardly spaced block letters.
The Cape of Good Hope medal is engraved in neat, squat, upright Roman capitals, and that for Natal is generally named in very lightly impressed upright skeleton block.
The Cape of Good Hope medal is engraved in neat, short, upright Roman capitals, while the one for Natal is usually labeled in very lightly impressed upright skeleton block letters.
The East and Central Africa medal with swivel ring is named in a light script; but the same medal with bar for Uganda, 1897-8, is engraved rather roughly in light Roman capitals.
The East and Central Africa medal with a swivel ring is named in a light script, but the same medal with a bar for Uganda, 1897-8, is engraved in a rough style using light Roman capitals.
But these medals are named in several ways. For Sierra Leone in square block capitals. With bar for 1891-2 the medal is named in slightly sloping Roman capitals, that for 1892 the same. That with bar for[Pg 356] 1897-8 named like the tall thin block letters used on some of the Boer War medals.
But these medals have several different names. For Sierra Leone, it's in square block capitals. The medal for 1891-2 is named in slightly sloping Roman capitals, and the one for 1892 is the same. The medal with a bar for 1897-8 is named using the tall, thin block letters seen on some of the Boer War medals.
The Boer War medals were generally indented with block capitals, either square, like HILL, or tall like this, HILL, or engraved in this style, F. HILL, 2/Linc Rqt:
The Boer War medals were usually marked with block letters, either square like HILL, or tall like this, HILL, or engraved in this style, F. HILL, 2/Linc Rqt:
King Edward's medal for Ashanti, 1900, is generally impressed in rather small skeleton block lettering.
King Edward's medal for Ashanti, 1900, is typically stamped in fairly small skeleton block lettering.
The China medal, 1900, is named—for the navy—with a bold but light kind of Roman capital, similar to that described on page 354 as used on the Suakin, 1885, medals.
The China medal from 1900 is named—for the navy—with a strong yet lightweight style of Roman capital, similar to what is mentioned on page 354 regarding the Suakin, 1885, medals.
The Tibet medal is generally named in a combination
of large and small Roman and script, as
![]() G.Hand,
1st.13Bn.r.
G.Hand,
1st.13Bn.r.
The Tibet medal is usually named using a mix of large and small Roman and script, as ![]() G.Hand, 1st 13B n. r.
G.Hand, 1st 13B n. r.
The Indian medal for 1908 is engraved in script, but so badly that one could not conceive an engraver's apprentice of one year's standing doing so badly.
The Indian medal for 1908 is inscribed in script, but it’s done so poorly that you wouldn’t expect even a beginner engraver with just a year of experience to mess it up like that.
King George's medal for Abor, 1911-12, is engraved in a rather crude script.
King George's medal for Abor, 1911-12, is engraved in a somewhat rough script.
The illustrations of the namings are mostly considerably enlarged to render comparison easier.
The illustrations of the names are mostly significantly enlarged to make comparison easier.

GERMAN MEDAL FOR FRANCO-PRUSSIAN WAR, 1870-1.
GERMAN MEDAL FOR FRANCO-PRUSSIAN WAR, 1870-1.

FRENCH MEDAL GIVEN TO VETERANS OF THE WAR OF 1870-1.
FRENCH MEDAL AWARDED TO VETERANS OF THE 1870-1 WAR.

FIRST CHILIAN WAR MEDAL, 1880.
FIRST CHILEAN WAR MEDAL, 1880.

SECOND CHILIAN WAR MEDAL, 1881.
SECOND CHILEAN WAR MEDAL, 1881.
SOME CONTINENTAL AND FOREIGN WAR MEDALS
A century ago the Prussians were our allies. Today the position is reversed, and we have hastened to assist the descendants of the brave men who routed the Prussians at Jena and the Austrians at Marengo, and so strenuously fought against our forefathers at Waterloo. I have already described most of the medals awarded for that famous battle, but there are others of an interesting character which were awarded for the campaigns of 1813, 1814, and 1815, when the various continental nations strove against the genius and power of Napoleon.
A hundred years ago, the Prussians were our allies. Now, the situation has flipped, and we've rushed to support the descendants of the brave soldiers who defeated the Prussians at Jena and the Austrians at Marengo, and who fought so hard against our ancestors at Waterloo. I've already talked about most of the medals given for that famous battle, but there are some other interesting medals given for the campaigns of 1813, 1814, and 1815, when the different European nations fought against the genius and might of Napoleon.
Prussian Oval Iron Medal for 1815.—This reminds
us of the fact that the exchange made by modern
German women of their gold wedding rings for those of
iron is simply a repetition of a sacrifice which the women
of Germany made during the Napoleonic Wars, when
they gave their gold jewellery and replaced it by delicately
made ornaments of iron, as visitors to the Victoria
and Albert Museum may see. The medals awarded
to the survivors of the wars were invariably of metal,
some, like our Victoria Cross, having been made from
captured cannon. This oval medal, however, is of
iron and bears on the obverse King Frederick William's
initials in German text capitals, surmounted by the
Prussian crown and underneath
![]() Fur Pflichirtreue im
Kreige (For faithful service in war); encircling the
whole is the legend
Fur Pflichirtreue im
Kreige (For faithful service in war); encircling the
whole is the legend
![]() Gott war mit uns, Ihm sey die
Ehre! (God was with us, to Him the honour). On the
reverse is a cross patée with rays issuant between the
arms and in the centre 1815. The medal is suspended[Pg 358]
from a white watered-silk ribbon with black and yellow
stripes close to the edges. It was awarded to non-combatants.
Gott war mit uns, Ihm sey die
Ehre! (God was with us, to Him the honour). On the
reverse is a cross patée with rays issuant between the
arms and in the centre 1815. The medal is suspended[Pg 358]
from a white watered-silk ribbon with black and yellow
stripes close to the edges. It was awarded to non-combatants.
Prussian Oval Iron Medal for 1815.—This reminds us that today’s German women exchanging their gold wedding rings for iron ones is simply a repeat of a sacrifice that German women made during the Napoleonic Wars. Back then, they traded in their gold jewelry for finely crafted iron ornaments, which you can see at the Victoria and Albert Museum. The medals given to the war survivors were usually made of metal, with some, like our Victoria Cross, being crafted from captured cannons. However, this oval medal is made of iron and features King Frederick William's initials in German text capitals on the front, topped with the Prussian crown. Below it is
![]() For loyalty in war (For faithful service in war); surrounding the entire medal is the inscription
For loyalty in war (For faithful service in war); surrounding the entire medal is the inscription
![]() God was with us; all the glory be to Him! (God was with us, to Him the honour). On the back, there is a cross patée with rays coming out between the arms and the year 1815 in the center. The medal hangs from a white watered-silk ribbon with black and yellow stripes near the edges. It was awarded to non-combatants.
God was with us; all the glory be to Him! (God was with us, to Him the honour). On the back, there is a cross patée with rays coming out between the arms and the year 1815 in the center. The medal hangs from a white watered-silk ribbon with black and yellow stripes near the edges. It was awarded to non-combatants.
Prussian Medals for 1813-15.—These were awarded
by King Frederick William III to all those of his subjects
who took part in the campaigns of 1813-14-15.
On the obverse are the initials F. W. surmounted by a
crown; below,
![]() Preussens tapfern Kriegern (To Prussia's
brave warriors), surrounded by the legend, with a
border,
Preussens tapfern Kriegern (To Prussia's
brave warriors), surrounded by the legend, with a
border,
![]() Gott war mit uns, Ihm sey die Ehre! (God was
with us, to Him the honour). On the reverse, within
a wreath of oak and laurel, tied with a ribbon at the
base, upon a cross patée with rays, 1815—the date of
the campaign. In the medals for 1813 and 1814 the
arms of the cross are rounded at the ends and terminate
at the medal rim. Indented round the edge, AUS
EROBERTEM GESCHUETZ (from the captured guns). See
page 52. The ribbon is yellow, flanked by stripes of
black and white.
Gott war mit uns, Ihm sey die Ehre! (God was
with us, to Him the honour). On the reverse, within
a wreath of oak and laurel, tied with a ribbon at the
base, upon a cross patée with rays, 1815—the date of
the campaign. In the medals for 1813 and 1814 the
arms of the cross are rounded at the ends and terminate
at the medal rim. Indented round the edge, AUS
EROBERTEM GESCHUETZ (from the captured guns). See
page 52. The ribbon is yellow, flanked by stripes of
black and white.
Prussian Medals for 1813-15.—These were awarded by King Frederick William III to all his subjects who participated in the campaigns of 1813-14-15. On the front, the initials F. W. are placed above a crown; below,
![]() Prussia's brave warriors (To Prussia's brave warriors), encircled by an inscription, along with a border,
Prussia's brave warriors (To Prussia's brave warriors), encircled by an inscription, along with a border,
![]() God was with us, to Him be the glory! (God was with us, to Him the honor). On the back, inside a wreath of oak and laurel, tied with a ribbon at the bottom, is a cross patée with rays, 1815—the year of the campaign. In the medals for 1813 and 1814, the arms of the cross are rounded at the ends and meet the edge of the medal. Indented around the edge, AUS EROBERTEM GESCHÜTZ (from the captured guns). See page 52. The ribbon is yellow, with black and white stripes on the sides.
God was with us, to Him be the glory! (God was with us, to Him the honor). On the back, inside a wreath of oak and laurel, tied with a ribbon at the bottom, is a cross patée with rays, 1815—the year of the campaign. In the medals for 1813 and 1814, the arms of the cross are rounded at the ends and meet the edge of the medal. Indented around the edge, AUS EROBERTEM GESCHÜTZ (from the captured guns). See page 52. The ribbon is yellow, with black and white stripes on the sides.
The Austrian Cross for 1813-14.—This is an interesting
decoration, for the Cross itself is enamelled green
in the basse-taille manner, the edge only being left to
show the metal, likewise the laurel wreath which connects
the arms of the Cross. On the obverse, across
the centre arms, is PRINCEPS ET PATRIA, on the upper
arm is the word GRATI, and on the lower arm FRANC
IMP AUG. On the reverse, across the centre arms, is
LIBERTATE ASSERTA, on the upper arm EUROPAE, and
on the lower MDCCCXIII
MDCCCXIV. It is suspended from a yellow
corded ribbon with very broad black edges.
The Austrian Cross for 1813-14.—This is an interesting decoration, as the Cross itself is enamelled green in the basse-taille style, with only the edge left showing the metal, as well as the laurel wreath that connects the arms of the Cross. On the front, across the center arms, is PRINCIPLES AND HOMELAND, with the word GRATITUDE on the upper arm, and FRANC IMP AUG on the lower arm. On the back, across the center arms, is Asserted Freedom, EUROPA on the upper arm, and 1813
1814 on the lower arm. It hangs from a yellow corded ribbon with very broad black edges.
Hessian Medal for 1814-15.—This is a bronze medal
1⅛ in. in diameter, bearing on the obverse in German
text capitals,
![]() K W II reinen tapfern Hessen, 1821, surmounted
by a crown, and encircled by a wreath of
conventionalised oak leaves. On the reverse in the
centre is a cross patée, the arms of which rest upon
a wreath of laurel. In the centre are the dates 1814
K W II reinen tapfern Hessen, 1821, surmounted
by a crown, and encircled by a wreath of
conventionalised oak leaves. On the reverse in the
centre is a cross patée, the arms of which rest upon
a wreath of laurel. In the centre are the dates 1814
1815.
Two tilting spears are arranged between the arms.
Over the top arm, and resting upon a circle enclosing[Pg 359]
a light wreath, is a helmet, around is the motto in
German text,
![]() Gott brach des feindes macht und Hessen
ward befreit. On the edge in Roman is impressed AUS
EROBERTEM GESCHUTZ (from captured guns). The medal
is suspended from a dark-blue ribbon with wide red
edges. (See facing page 324.)
Gott brach des feindes macht und Hessen
ward befreit. On the edge in Roman is impressed AUS
EROBERTEM GESCHUTZ (from captured guns). The medal
is suspended from a dark-blue ribbon with wide red
edges. (See facing page 324.)
Hessian Medal for 1814-15.—This is a bronze medal
1⅛ in. in diameter, featuring on the front in German
text capitals,
![]() K W II the pure and brave Hesse, 1821, topped
with a crown, and surrounded by a wreath of
stylized oak leaves. On the back in the
center is a cross patée, the arms of which rest upon
a wreath of laurel. In the center are the dates 1814
K W II the pure and brave Hesse, 1821, topped
with a crown, and surrounded by a wreath of
stylized oak leaves. On the back in the
center is a cross patée, the arms of which rest upon
a wreath of laurel. In the center are the dates 1814
1815.
Two jousting spears are positioned between the arms.
Over the top arm, and resting upon a circle enclosing[Pg 359]
a light wreath, is a helmet, around which is the motto in
German text,
![]() God broke the enemy's power, and Hesse was freed.. On the edge in Roman is engraved AUS
PROTECTED BY FORCE (from captured guns). The medal
is suspended from a dark-blue ribbon with wide red
edges. (See facing page 324.)
God broke the enemy's power, and Hesse was freed.. On the edge in Roman is engraved AUS
PROTECTED BY FORCE (from captured guns). The medal
is suspended from a dark-blue ribbon with wide red
edges. (See facing page 324.)
Légion d'Honneur.—The Order of the Légion d'Honneur was proposed on May 15th, 1802, by Napoleon Bonaparte when he was First Consul, as a reward for Military and Civil Services. The Legislative Assembly, however, was not favourably disposed, and it was not until four days later that the institution of the now famous Order was agreed to. Napoleon knew the value of a ribbon to stick in the coat. (See facing page 320.)
Légion d'Honneur.—The Order of the Légion d'Honneur was proposed on May 15, 1802, by Napoleon Bonaparte when he was First Consul, as a reward for military and civil services. The Legislative Assembly, however, was not supportive, and it wasn't until four days later that the establishment of the now-famous Order was approved. Napoleon understood the importance of a ribbon to pin on a coat. (See facing page 320.)
The Order was originally divided into three classes—Légionaries, Grand Officers, and Commanders. After the Coronation of Napoleon (July 14th, 1804) the first class of Grand Officers was divided into Knights of the Grand Eagle (as the highest) and Grand Officers. At present there are five classes of the Order: Knights of the Grand Cross, Grand Officers, Commanders, Officers, and Knights.
The Order was originally split into three classes—Légionaries, Grand Officers, and Commanders. After Napoleon's Coronation (July 14th, 1804), the first class of Grand Officers was divided into Knights of the Grand Eagle (the highest) and Grand Officers. Currently, there are five classes of the Order: Knights of the Grand Cross, Grand Officers, Commanders, Officers, and Knights.
The original Badge or Cross consists of a white enamelled badge with five double rays, with silver balls on the points, resting on a laurel and oak wreath, tied at the base, surmounted by an Imperial crown attached to the badge by a loop and ring, and has a ring for suspension from a crimson corded ribbon, 1½ in. wide.
The original Badge or Cross is a white enamel badge with five double rays and silver balls at the tips, set against a laurel and oak wreath tied at the bottom. It features an Imperial crown attached to the badge by a loop and ring, and it has a ring for hanging from a crimson corded ribbon that is 1½ inches wide.
Obverse: On a silver-gilt radiated centre, the laureated head of the Emperor Napoleon, facing right, surrounded by a blue enamelled band, with gilt borders, inscribed, in gold letters, NAPOLEON EMPEREUR DES FRANÇAIS. Reverse: Also on a silver-gilt centre of horizontal lines, the French Imperial eagle, surrounded by a blue enamelled band, with gilt borders, inscribed, HONNEUR ET PATRIE, with a sprig of laurel below.
Obverse: On a silver-gilt radiated center, the laureled head of Emperor Napoleon, facing right, surrounded by a blue enamel band with gold borders, inscribed in gold letters, NAPOLEON EMPEROR OF THE FRENCH. Reverse: Also on a silver-gilt center of horizontal lines, the French Imperial eagle, surrounded by a blue enamel band with gold borders, inscribed, Honor and Country, with a laurel sprig below.
The Cross for the Knight is in silver, and for the other classes in gold and of a larger size.
The cross for the Knight is silver, while for the other classes, it's gold and larger.
The Knights and Officers wear it at the button-hole[Pg 360] or on the left breast; the Commanders round the neck. The Grand Officers wear besides, upon the right breast, a silver Star, similar to that of the Grand Crosses; and at the button-hole the Cross in gold. The Knights of the Grand Cross wear a similar golden Cross, but larger, suspended by a ribbon across the right shoulder towards the left hip; and also, on the left breast, a silver Star.
The Knights and Officers wear it in their buttonhole[Pg 360] or on the left side of their chest; Commanders wear it around their neck. Grand Officers also display a silver Star on the right side of their chest, similar to the Grand Crosses; and a gold Cross in their buttonhole. The Knights of the Grand Cross wear a larger golden Cross, suspended by a ribbon across their right shoulder to the left hip; and also have a silver Star on the left side of their chest.
The Star is of silver, similar to the Cross, without the wreath, having rays between the angles, and in the centre, within a band inscribed HONNEUR ET PATRIE, the Imperial French eagle.
The star is silver, like the cross, without the wreath, featuring rays between the points, and in the center, inside a band that says Honor and Country, is the Imperial French eagle.
The first claim to the Order must begin with the lowest degree of Knights, as no degree can be passed over.
The initial claim to the Order has to start with the lowest rank of Knights, as no rank can be skipped.
The Republican Cross.—The Badge of the Légion d'Honneur, given by the Republic, bears on the obverse, facing right, a laureated female head symbolic of the Republic, and surrounded by the legend REPUBLIQUE FRANÇAISE, 1870. On the reverse in the centre are the crossed French flags, surrounded by the motto HONNEUR ET PATRIE. In place of the French Imperial crown which was employed as a suspender in the original badge or cross is an enamelled wreath, otherwise the general appearance of the decorations is the same.
The Republican Cross.—The Badge of the Légion d'Honneur, awarded by the Republic, features on the front, facing right, a female figure wearing a laurel crown, symbolizing the Republic, and surrounded by the inscription FRENCH REPUBLIC, 1870. On the back, in the center, are the crossed French flags, encircled by the motto Honor and Country. Instead of the French Imperial crown that was used as a suspender in the original badge or cross, there's an enamel wreath; otherwise, the overall look of the decorations remains the same.
Prussian Iron Cross, 1813.—The Order of the Prussian Iron Cross was instituted by King Frederick William III on March 10th, 1813, to reward those, either military or civil, who distinguished themselves in the war then being carried on. It was divided into three classes. The Grand Cross, which was double the size of the Knight's Cross, and was worn round the neck, was given exclusively for the gaining of a decisive battle, the conquest of an important position or place, or the brave defence of a fortress. The first class also wear upon the left breast, instead of a Star, a similar Cross or Badge. In the bestowal of the Cross, neither rank nor condition was regarded. (See facing page 332.)
Prussian Iron Cross, 1813.—The Order of the Prussian Iron Cross was established by King Frederick William III on March 10, 1813, to honor both military and civilian individuals who excelled during the ongoing war. It was divided into three classes. The Grand Cross, which was twice the size of the Knight's Cross and worn around the neck, was awarded exclusively for winning a decisive battle, capturing an important position, or valiantly defending a fortress. The first class also wears a similar Cross or Badge on the left breast instead of a Star. In awarding the Cross, neither rank nor status was considered. (See facing page 332.)
It was worn by the military with a black ribbon[Pg 361] with two white stripes near the edge; and by civilians with a white ribbon with black borders, and was suspended from a silver loop and ring. At the close of hostilities, the distribution of the Order ceased, but was revived on July 19th, 1870, for the war then about to commence with France. The decoration is a cast-iron Cross, in the form of a cross patée, with silver borders and mountings. There are three classes, both for military and civilians. Obverse: In the centre, within a silver milled border, three oak leaves; above, F. W. surmounted by the Prussian crown; below, 1813. The Cross awarded for the Franco-German War bears on the reverse: In the centre, also within a silver milled border, the initial W; above, is a crown; below, 1870.
It was worn by the military with a black ribbon[Pg 361] featuring two white stripes near the edge, and worn by civilians with a white ribbon with black borders, suspended from a silver loop and ring. At the end of the conflict, the distribution of the Order stopped, but it was revived on July 19th, 1870, for the upcoming war with France. The decoration is a cast-iron Cross shaped like a cross patée, with silver borders and mountings. There are three classes for both military personnel and civilians. On the front: In the center, surrounded by a silver milled border, are three oak leaves; above, F. W. topped by the Prussian crown; below, 1813. The Cross given for the Franco-German War has on the back: In the center, also within a silver milled border, the initial W; above, there is a crown; below, 1870.
For Distinction in Service.—In 1825, on the anniversary
of the battle of Waterloo, King Frederick
William III instituted a gold Cross for officers who had
served twenty-five years, bearing on the obverse the
initials,
![]() F. W. III, surmounted by a crown, and on
the reverse the number XXV. It was worn on the left
breast, suspended by a blue ribbon. See facing page 332.
For sub-officers and privates, silver buckles, 113∕20 by 9∕20 in.,
with the initials
F. W. III, surmounted by a crown, and on
the reverse the number XXV. It was worn on the left
breast, suspended by a blue ribbon. See facing page 332.
For sub-officers and privates, silver buckles, 113∕20 by 9∕20 in.,
with the initials
![]() F. W. III in relief, on a rough ground,
within a raised double border, worn on the left breast,
with brooch attachment, suspended by a blue ribbon
with yellow borders for twenty-one years' service; by
a blue ribbon with white and blue borders for fifteen
years' service; and by a blue ribbon with black borders
for nine years' service. Years of war service counted
double.
F. W. III in relief, on a rough ground,
within a raised double border, worn on the left breast,
with brooch attachment, suspended by a blue ribbon
with yellow borders for twenty-one years' service; by
a blue ribbon with white and blue borders for fifteen
years' service; and by a blue ribbon with black borders
for nine years' service. Years of war service counted
double.
For Distinction in Service.—In 1825, on the anniversary of the Battle of Waterloo, King Frederick William III established a gold Cross for officers who had served for twenty-five years. On the front, it featured the initials,
![]() F.W. III, topped with a crown, and on the back, it had the number XXV. It was worn on the left side of the chest, attached by a blue ribbon. See facing page 332. For sub-officers and privates, silver buckles measuring 113∕20 by 9∕20 in., displayed the initials
F.W. III, topped with a crown, and on the back, it had the number XXV. It was worn on the left side of the chest, attached by a blue ribbon. See facing page 332. For sub-officers and privates, silver buckles measuring 113∕20 by 9∕20 in., displayed the initials
![]() F.W. III in relief, set on a rough background, within a raised double border. These were worn on the left side of the chest, with brooch attachments, suspended by a blue ribbon with yellow borders for twenty-one years of service; by a blue ribbon with white and blue borders for fifteen years of service; and by a blue ribbon with black borders for nine years of service. Years of war service counted double.
F.W. III in relief, set on a rough background, within a raised double border. These were worn on the left side of the chest, with brooch attachments, suspended by a blue ribbon with yellow borders for twenty-one years of service; by a blue ribbon with white and blue borders for fifteen years of service; and by a blue ribbon with black borders for nine years of service. Years of war service counted double.
San Sebastian, 1836.—This medal was granted by the Spanish Government to the British Legion in Spain, who served under General Sir de Lacy Evans against the Carlists on the heights of St. Sebastian, on May 5th, 1836. It was given in silver to officers, and in white metal to privates. On the obverse, surrounded by the Collar of the Golden Fleece, within a circle, on a mottled ground, is a Lion, statant gardant. Above,[Pg 362] ESPAÑA; below, AGRADECIDA. On the reverse, in the centre of a cross of four arms, with plain, raised borders, having crowns in the angles, surrounded by a wreath of laurel, from which rays issue, 1836; around which is inscribed SAN SEBASTIAN 5 DE MAYO. Beneath, and to the right of the lower limb of the cross, I.D.
San Sebastian, 1836.—This medal was awarded by the Spanish Government to the British Legion in Spain, who fought under General Sir de Lacy Evans against the Carlists on the heights of St. Sebastian, on May 5th, 1836. It was given in silver to officers and in white metal to privates. On the front, surrounded by the Collar of the Golden Fleece, within a circle on a mottled background, is a Lion, standing and looking forward. Above, [Pg 362] SPAIN; below, THANKFUL. On the back, in the center of a cross with four arms, featuring plain, raised borders and crowns in the corners, surrounded by a laurel wreath from which rays emerge, is the year 1836; around it is inscribed SAN SEBASTIAN MAY 5. Below and to the right of the lower arm of the cross, ID
The medal, 1⅖ in. in diameter, is suspended by a ring passed through the medal, to which is attached a silver bar. The ribbon is 1½ in. wide, dark purple with two yellow stripes near the edges.
The medal, 1⅖ in. in diameter, is hanging from a ring that goes through the medal, which is connected to a silver bar. The ribbon is 1½ in. wide, dark purple with two yellow stripes along the edges.
Iron Cross for San Sebastian, 1836.—An iron Cross of four arms, with bright borders, with rays in the arms issuing from the centre, having four gold crowns between the arms. On the obverse, in the centre, in high relief, in gold, is a Lion, statant gardant, with a gold border, on which is inscribed in gold letters, HESPEINA AGRADECIDA. The whole within the Collar of the Golden Fleece, in bronze, the pendant Lamb being in gold. On the reverse, also in relief, within a laurel wreath of gold, SAN SEBASTIAN 5 DE MAYO in gold, having in the centre of a gold circle, 1836 in gold. The Cross, similar to that on the circular silver medal, is 11⁄20 in. in diameter, with a gold loop and gold ring for suspension.
Iron Cross for San Sebastian, 1836.—An iron Cross with four arms, featuring bright borders and rays coming from the center, has four gold crowns situated between the arms. On the front, centrally positioned in high relief and made of gold, is a Lion, standing and facing forward, surrounded by a gold border with the inscription in gold letters, GRATEFUL HESPEINA. The entire design is enclosed within the Collar of the Golden Fleece, made of bronze, with a gold pendant Lamb. On the back, also in relief, is a gold laurel wreath enclosing the text SAN SEBASTIÁN MAY 5 in gold, and at the center of a gold circle is the year 1836, also in gold. The Cross, which resembles the one on the circular silver medal, has a diameter of 11⁄20 in., and features a gold loop and gold ring for hanging.
Medal for Irun.—For the capture of the fort and town of Irun, in Spain, on May 17th, 1836, a gold medal was issued by the Spanish Government to the officers, and among the recipients was an English surgeon, whose medal is in Dr. Payne's collection. It is 11∕16 by 19∕20 of an inch and has a plain gold border. On the obverse, encircled by two oak leaves enamelled green, tied at the base with a ribbon enamelled white, is a tower enamelled white; behind which is a sword with a gold hilt, the blade enamelled blue, and above the tower on a dark blue enamelled ribbon the word IRUN standing up in gold. The whole is enamelled champlevé. On the reverse on a plain gold ground is enamelled in blue 17 DE MAYO DE 1837, encircled by the name and rank of the recipient, STAFF SURGEON B. A. L. SPAIN, C. B. BREAREY, M.D., M.R.C.S. The ribbon from which the[Pg 363] medal is suspended is black with red edges, symbolical of the blood spilt in capturing the fort and town, over which the black flag was waving, indicating that no quarter was being given.
Medal for Irun.—For the capture of the fort and town of Irun, in Spain, on May 17th, 1836, the Spanish Government issued a gold medal to the officers, including an English surgeon, whose medal is part of Dr. Payne's collection. It measures 11∕16 by 19∕20 of an inch and features a plain gold border. On the front, surrounded by two green enamelled oak leaves tied at the base with a white enamelled ribbon, is a white enamelled tower. Behind it is a sword with a gold hilt and a blue enamelled blade, and above the tower, on a dark blue enamelled ribbon, is the word IRUN in gold. The entire design is enamelled champlevé. On the back, on a plain gold background, is the date 17 DE MAYO DE 1837 in blue enamel, encircled by the recipient's name and title, Staff Surgeon B. A. L. Spain, C. B. Brearey, M.D., M.R.C.S. The ribbon from which the medal hangs is black with red edges, symbolizing the blood spilled during the capture of the fort and town, where the black flag was raised, indicating that no mercy was shown.
Staff Surgeon Brearey likewise received the Silver Cross for San Sebastian, 1836, and this also is in Dr. Payne's collection.
Staff Surgeon Brearey also received the Silver Cross for San Sebastian in 1836, and this is also in Dr. Payne's collection.
Silver Cross for San Sebastian, 1846.—This is a silver Cross of four arms, 11⁄20 in. in diameter, with plain, raised borders, with obverse and reverse the same as the medal, the words ESPAÑA AGRADECIDA being omitted on the obverse. (See facing page 336.)
Silver Cross for San Sebastian, 1846.—This is a silver Cross with four arms, 11⁄20 inches in diameter, featuring simple, raised borders. Both the front and back are the same as the medal, except the words GRATEFUL SPAIN are not included on the front. (See facing page 336.)
Russian Medal for Hungary, 1849.—The medal awarded to the Russian soldiers who took part in the Pacification of Hungary at the request of Austria in 1849, bears on the obverse the Russian double-headed eagle, surmounted by a crown, having a shield on its breast, encircled by a collar and badge, containing the figure of St. George and the Dragon. The eagle to the left is holding a baton in its claws, and the one to the right a globe with a cross above it. Above, the radiated Eye of Providence; encircling the whole, in Russian characters, GOD IS WITH US: HEAR, O YE PEOPLE, AND SUBMIT, FOR GOD IS WITH US. On the reverse, inscribed in Russian characters, is FOR THE PACIFICATION OF HUNGARY AND TRANSILVANIA, 1849. This is a small circular medal, 13∕20 in. in diameter, with plain, raised double borders. It is made in silver and bronze.
Russian Medal for Hungary, 1849.—The medal given to the Russian soldiers who participated in the Pacification of Hungary at Austria's request in 1849 features the Russian double-headed eagle on the front, topped with a crown, and a shield on its chest surrounded by a collar and badge that display St. George and the Dragon. The eagle on the left holds a baton in its claws, while the one on the right holds a globe topped with a cross. Above is the radiated Eye of Providence; surrounding it all, in Russian characters, GOD IS WITH US: LISTEN, EVERYONE, AND ACCEPT THIS TRUTH, FOR GOD IS WITH US. On the back, inscribed in Russian characters, is FOR THE PEACEKEEPING OF HUNGARY AND TRANSYLVANIA, 1849. This is a small circular medal, 13∕20 in. in diameter, with plain, raised double borders. It is made of silver and bronze.
For Zeal.—An interesting silver medal 1⅒ in. in diameter was issued by the Emperor Nicholas I. It bears on the obverse the bust of the young ruler facing right and his titles in Russian characters, and on the reverse, following the line of a ribbed border, the legend FOR ZEAL in Russian, a rope-like circle makes a central shield. The medal is 11∕16 in. in diameter.
For Zeal.—An interesting silver medal 1⅒ inches in diameter was issued by Emperor Nicholas I. It features the bust of the young ruler facing right along with his titles in Russian characters on the front, and on the back, following the line of a ribbed border, the words For Passion in Russian, surrounded by a rope-like circle that forms a central shield. The medal measures 11∕16 inches in diameter.
Médaille Militaire.—This, the French equivalent of the British Distinguished Conduct Medal, was founded in 1852 by Louis Napoleon, when President of the[Pg 364] French Republic. It is of silver, 1 in. in diameter, formed of a close band of laurel wreaths, encircling on the obverse the gilt bust of Louis Napoleon, facing left, with his name in gilt letters on a blue enamelled band. On the reverse, the wreath encircles a narrow band of blue enamel which borders the gilt centre bearing the legend VALEUR ET DISCIPLINE. The medal is surmounted by the French eagle, with outspread wings, and is suspended by an orange-coloured ribbon with green edges. After the Crimea, Louis, who had then become the Emperor Napoleon III, presented this medal to 500 British non-commissioned officers and men who had distinguished themselves in the campaign. (See facing page 132.)
Médaille Militaire.—This is the French equivalent of the British Distinguished Conduct Medal, established in 1852 by Louis Napoleon, while he was President of the [Pg 364] French Republic. It's made of silver, measuring 1 inch in diameter, featuring a close band of laurel wreaths. On the front, it displays the gilt bust of Louis Napoleon, facing left, with his name in gilt letters on a blue enamel band. On the back, the wreath surrounds a narrow band of blue enamel that borders the gilt center, which shows the words Value and Discipline. The medal is topped with the French eagle, wings spread, and hangs from an orange ribbon with green edges. After the Crimean War, Louis, who later became Emperor Napoleon III, awarded this medal to 500 British non-commissioned officers and soldiers who distinguished themselves in the campaign. (See facing page 132.)
The Republican variety bears the female head symbolic of the Republic on the obverse and the legend REPUBLIQUE FRANÇAIS * 1870 *; on the reverse is the inscription VALEUR ET DISCIPLINE. The medal is connected with the suspender by means of a trophy of French arms. The medal illustrated was won in France during the war now waging, by the late Sergeant Hunt.
The Republican version features a female figure that represents the Republic on the front, along with the inscription FRENCH REPUBLIC * 1870 *; on the back, it has the words Value and Discipline. The medal is attached to the suspender with a trophy of French arms. The medal shown was awarded in France during the current war to the late Sergeant Hunt.
Turkestan.—For the campaign in Turkestan the Emperor Alexander II gave a small silver medal 11∕16 in. in diameter which bears on the obverse the Emperor's initial A in ornamental cypher, surmounted by the Imperial crown and II arranged between the legs of the initial. The reverse bears in the centre the date 1857-1858-1859 encircled by an inscription in Russian explaining that it was awarded for the success of arms in Turkestan. (See facing page 364.)
Turkestan.—For the campaign in Turkestan, Emperor Alexander II awarded a small silver medal measuring 11∕16 inches in diameter. The front features the Emperor's initial "A" in an ornamental cipher, topped with the Imperial crown, and the Roman numeral II placed between the legs of the initial. The back displays the years 1857-1858-1859 in the center, surrounded by an inscription in Russian that states it was awarded for military success in Turkestan. (See facing page 364.)
Garibaldian Medal, 1860.—This medal was given in 1860 to the Garibaldians in Sicily by the Municipality of Palermo, and distributed to the troops by Garibaldi, November 4th, 1860, in the square fronting the Royal Palace, Naples.
Garibaldian Medal, 1860.—This medal was awarded in 1860 to the Garibaldians in Sicily by the Municipality of Palermo and handed out to the troops by Garibaldi on November 4, 1860, in the square in front of the Royal Palace in Naples.

- SILVER MEDAL "FOR ZEAL," AWARDED BY NICHOLAS I.
- SILVER MEDAL FOR CAUCASUS, 1859-64.
- BRONZE CROSS FOR CAUCASUS, 1864.
- SILVER MEDAL FOR TURKESTAN, 1857-8-9.
- BRONZE MEDAL FOR POLISH INSURRECTION, 1863-4.
RUSSIAN WAR DECORATIONS.
RUSSIAN WAR MEDALS.
On the obverse, within the words AI PRODI CUI FU DUCE GARIBALDI, is a spread eagle standing on a scroll, on which are the letters S.P.Q.P. Three stars below. All in relief. On the reverse, outside a circle of laurel leaves are the words MARSALA, CALATAFIMI, PALERMO. Within the circle, IL MUNICIPIO PALERMITANO RIVENDICATO MDCCCLX. A star is in the exergue. This is a small circular medal, 1⅕ in. in diameter, within a plain, raised double border, suspended by a silver loop and ring from a crimson ribbon, 1⅖ in. wide, with narrow yellow edges, on which is attached the Arms of Sicily in silver, bearing the words UNO DEI MIL.
On the front, within the words AI PRODI CUI FU LEADER GARIBALDI, there’s a spread eagle standing on a scroll, which has the letters S.P.Q.P. Three stars are below it. Everything is raised. On the back, outside a circle of laurel leaves are the words MARSALA, CALATAFIMI, PALERMO. Inside the circle, IL MUNICIPIO PALERMITANO RIVENDICATO MDCCCLX. A star is in the exergue. This is a small circular medal, 1⅕ in. in diameter, with a plain, raised double border, hanging by a silver loop and ring from a crimson ribbon, 1⅖ in. wide, with narrow yellow edges, to which is attached the Arms of Sicily in silver, displaying the words ONE OF A THOUSAND.
Papal States Campaign, 1860.—This medal was given by Pope Pius IX to his troops, including the Irish Brigade of Volunteers, who served under Major O'Reilly against Garibaldi. It was issued in gold to officers, and in silver and white metal to privates.
Papal States Campaign, 1860.—This medal was given by Pope Pius IX to his troops, including the Irish Brigade of Volunteers, who served under Major O'Reilly against Garibaldi. It was issued in gold to officers, and in silver and white metal to soldiers.
The obverse: An open ring formed by the body of a serpent—symbolic of eternity—on the head of which rests an inverted cross; around, on a plain band with simple, moulded edge is the motto, PRO PETRI SEDE▲ PIO · IX · P · M · A · XV▲. On the reverse, in the band, VICTORIA QVAE VINCIT MVNDVM FIDES NOSTRA *.
The front: An open ring shaped like a serpent—symbolic of eternity—with an inverted cross resting on its head; around it, on a simple band with a molded edge, is the motto, FOR THE SEAT OF ST. PETER ▲ PIUS IX · P · M · A · XV ▲. On the back, in the band, VICTORIA QVAE VINCIT MVNDVM FIDES NOSTRA.
This (facing page 352) is a circular medal, 1½ in. in diameter, with a plain, raised, double border, and a scroll bar and claw clip suspender, from a crimson ribbon, 1⅕ in. wide, with two white stripes, edged with yellow.
This (facing page 352) is a circular medal, 1½ inches in diameter, featuring a simple, raised double border, a scroll bar, and a claw clip suspender attached to a crimson ribbon that is 1⅕ inches wide, with two white stripes edged in yellow.
The Caucasus.—For services in the Caucasus between 1859-1864 the Emperor Alexander II granted a small silver medal 11∕16 in. in diameter bearing on the obverse his bust in profile facing left, and on the reverse across the centre is the date 1859-1864 encircled by an inscription in Russian characters stating that it is awarded for the subjugation of the Western Caucasus.
The Caucasus.—For services in the Caucasus between 1859-1864, Emperor Alexander II awarded a small silver medal 11∕16 inches in diameter. The front features his profile in left-facing bust, and the back displays the dates 1859-1864 in the center, surrounded by an inscription in Russian stating that it was awarded for the conquest of the Western Caucasus.
A bronze Cross, with crossed swords between the arms, to be attached to the uniform by means of a ring and bar attachment, was also awarded for the same campaign. It bears the explanatory inscription across the horizontal arms and Alexander's initial in Russian character surmounted by the Russian Imperial crown in the upper arm, and the date 1864 in the lower arm. In the circle which occupies the centre is the Russian[Pg 366] eagle. It is 19∕10 in. across the arms. (See facing page 364.)
A bronze cross, with crossed swords between the arms, was also given for the same campaign and attached to the uniform using a ring and bar. It has an explanatory inscription across the horizontal arms, along with Alexander's initial in Russian characters topped by the Russian Imperial crown on the upper arm, and the date 1864 on the lower arm. In the center, there is the Russian[Pg 366] eagle. It measures 19∕10 inches across the arms. (See facing page 364.)
The Polish Insurrection.—For the suppression of the Polish Insurrection a bronze medal, 11∕16 in. in diameter, was granted to the Russian troops. It is suspended from a ¾ in. ribbon composed of three equal stripes of white, yellow, and black, and bears on the obverse the two-headed Imperial eagle, surmounted by the Imperial crown, holding in its claws the orb and sceptre. On the reverse across the centre is the date 1863-1864 encircled by the inscription, in Russian, "For the suppression of the Polish Rebellion."
The Polish Insurrection.—To commemorate the suppression of the Polish Insurrection, a bronze medal measuring 11∕16 inches in diameter was awarded to the Russian troops. It hangs from a ¾ inch ribbon made up of three equal stripes of white, yellow, and black, and features on the front the two-headed Imperial eagle, topped with the Imperial crown, holding the orb and sceptre in its claws. On the back, across the center, is the date 1863-1864, surrounded by the inscription in Russian, "For the suppression of the Polish Rebellion."
Cross for König Grätz.—The Cross for König Grätz was awarded to the Prussian troops who fought against the Austrians during the sanguinary and disastrous seven weeks ("seven days") war in 1866. It was this short campaign which demonstrated the superiority of the needle gun or breech-loader, on the bolt principle, over the old-fashioned muzzle-loader used by the Austrians, who assert that they were defeated simply because it took them three or four times as long to load and fire their guns as it did the Prussians. In this fight, also called the battle of Sadowa, the Austrians lost 20,000 men placed hors de combat, and as many prisoners. The Prussian loss was 10,000.
Cross for König Grätz.—The Cross for König Grätz was awarded to the Prussian troops who fought against the Austrians during the bloody and disastrous seven-week ("seven days") war in 1866. This brief campaign showed the superiority of the needle gun, or breech-loader, based on the bolt principle, over the outdated muzzle-loader used by the Austrians, who claimed they were defeated simply because it took them three or four times longer to load and fire their guns than it did for the Prussians. In this fight, also known as the battle of Sadowa, the Austrians lost 20,000 men rendered hors de combat, along with as many prisoners. The Prussian loss was 10,000.
The Cross, which is 1⅖ in. in diameter, bears in the centre the Royal Cypher W.R., surrounded by the legend PREUSSEN SIEGRIECHEM HEERE (To Prussia's victorious army); on the upper arm of the Cross is the Prussian crown, on the right arm GOTT MIT IHM, and on the left WAR UNS SEI, on the bottom arm is DIE EHRE. On the reverse is the crowned Prussian eagle, resting upon a cannon; on the upper arm is KONIG-GRATZ, on the left DENZ, on the right, JULI, and on the lower arm, 1866. The ribbon is of black corded silk, 1 in. wide, with narrow stripes of white and orange at the side. (See facing page 352.)
The Cross, which is 1⅖ inches in diameter, features the Royal Cypher W.R. in the center, surrounded by the inscription Prussia conquers with the army (To Prussia's victorious army); on the top arm of the Cross is the Prussian crown, on the right arm GOD WITH HIM, and on the left WAR UNS SEI, with THE HONOR on the bottom arm. On the back is the crowned Prussian eagle, resting on a cannon; on the upper arm is KONIG-GRATZ, on the left DENZ, on the right JULI, and on the lower arm, 1866. The ribbon is made of black corded silk, 1 inch wide, with narrow stripes of white and orange on the sides. (See facing page 352.)
Geneva Cross, 1870-71.—This bears on the obverse a red enamelled Cross of four arms, with a silver[Pg 367] indented border in the centre in white enamel, with a plain silver edge. Reverse: On a silver perpendicular lined surface, within a raised silver double border, above, 1870; below, 1871; between, AUX BLESSÉS DES ARMÉES DE TERRE ET DE MER. The cross has a ring and loop for suspension from a white ribbon, 1½ in. wide, with a red cross in the centre. This Cross appears to be like the one worn by King Edward VII.
Geneva Cross, 1870-71.—On the front, it features a red enamel Cross with four arms, surrounded by a silver[Pg 367] indented border in the center with white enamel and a plain silver edge. On the back: There’s a silver vertical lined surface within a raised silver double border, with “1870” above, “1871” below, and in between, AUX BLESSÉS DES ARMÉES DE TERRE ET DE MER. The cross has a ring and loop for hanging from a white ribbon that is 1½ inches wide, featuring a red cross in the center. This Cross resembles the one worn by King Edward VII.
The Silver Cross, 1½ in. in diameter, bears on the obverse, above, 1870; below, 1871; between, SOCIÉTÉ FRANÇAISE DE SECOURS AUX BLESSÉS DES ARMÉES DE TERRE ET DE MER. The reverse is plain, with a simple border. Ribbon, the same as the above. The Bronze Cross is the same, 1½ in. in diameter, and is also suspended from the white ribbon with the Geneva Cross in the centre. (See facing page 352.)
The Silver Cross, 1½ inches in diameter, features on the front the year 1870 at the top and 1871 at the bottom, with the text FRENCH SOCIETY FOR AIDING INJURED MEMBERS OF THE ARMY AND NAVY in between. The back is plain, just with a simple border. The ribbon is the same as mentioned above. The Bronze Cross is identical, 1½ inches in diameter, and it too hangs from the white ribbon with the Geneva Cross at the center. (See facing page 352.)
French Medal for 1870-71.—The bronze medal recently awarded by the French Government to the survivors of the Franco-Prussian War of 1870-71 is what one might expect from an artistic nation. It is somewhat larger, however, than most French military medals. It bears on the obverse the helmeted and armour-clad bust of a woman, symbolising the Republic, with the legend REPUBLIQUE FRANÇAISE and on the reverse a finely arranged trophy of French arms, supporting the French tricolour, above a panel inscribed AUX DEFENSEURS DE LA PATRIE (To the defenders of the country). It is suspended by a green ribbon, with four black stripes of equal width. (See facing page 356.)
French Medal for 1870-71.—The bronze medal recently awarded by the French Government to the survivors of the Franco-Prussian War of 1870-71 is what you would expect from an artistic nation. However, it is somewhat larger than most French military medals. On the front, it features the bust of a helmeted and armored woman, representing the Republic, with the inscription FRENCH REPUBLIC, and on the back, there is a beautifully arranged trophy of French weapons supporting the French tricolor, above a panel that reads TO THE DEFENDERS OF THE HOMELAND (To the defenders of the country). It hangs from a green ribbon with four equal-width black stripes. (See facing page 356.)
German Medal for 1870-71.—After the conclusion
of the Franco-Prussian War the German Emperor distributed
circular medals of iron or bronze to combatants
and non-combatants who rendered service during the
campaign: the reverse of the medal explains whether
it was awarded to one or the other. On the obverse
of the medal granted to combatants is
![]() W, the initial
of Wilhelm, surmounted by the Prussian crown, and
underneath,
W, the initial
of Wilhelm, surmounted by the Prussian crown, and
underneath,
![]() Dem siegreichem Heere (To the victorious[Pg 368]
army), encircled by
Dem siegreichem Heere (To the victorious[Pg 368]
army), encircled by
![]() Gott war mit uns, Ihm sei die
Ehre (God was with us, to Him the honour). On
the reverse, surrounded by a laurel wreath, 1870
Gott war mit uns, Ihm sei die
Ehre (God was with us, to Him the honour). On
the reverse, surrounded by a laurel wreath, 1870
1871. On
the steel medals the wreath is of oak (on the medals
for 1813, 1814, 1815 the wreath is of laurel and oak),
but in each case the wreath overlays a cross patée
with rays issuant between the arms. On the edge is
sometimes impressed AUS EROBERTEM GESCHUETZ (From
captured guns). The same inscription is on the edge
of the bronze medals issued to combatants for the
campaigns of 1813-14 and 1815. The medal awarded
to non-combatants bears the inscription
![]() Fur Pflichittreue
im Kreige (For faithful service in war); there is no
inscription on the edge. The medal is suspended by a
ribbed silk ribbon, 1 in. wide, with a red stripe down
the centre, flanked by black and white stripes and
black edging. (See facing page 356.)
Fur Pflichittreue
im Kreige (For faithful service in war); there is no
inscription on the edge. The medal is suspended by a
ribbed silk ribbon, 1 in. wide, with a red stripe down
the centre, flanked by black and white stripes and
black edging. (See facing page 356.)
German Medal for 1870-71.—After the Franco-Prussian War ended, the German Emperor distributed circular medals made of iron or bronze to both soldiers and civilians who served during the campaign: the back of the medal indicates whether it was awarded to a combatant or a non-combatant. On the front of the medal given to combatants is
![]() W, the initial of Wilhelm, topped with the Prussian crown, and below,
W, the initial of Wilhelm, topped with the Prussian crown, and below,
![]() To the victorious army (To the victorious[Pg 368]
army), surrounded by
To the victorious army (To the victorious[Pg 368]
army), surrounded by
![]() God was with us; all the glory be to Him. (God was with us, to Him the honour). On the back, encircled by a laurel wreath, 1870
God was with us; all the glory be to Him. (God was with us, to Him the honour). On the back, encircled by a laurel wreath, 1870
1871. On the steel medals, the wreath is made of oak (for the medals from 1813, 1814, 1815, the wreath is made of laurel and oak), but in every case, the wreath overlays a cross patée with rays coming out between the arms. On the edge, it is sometimes stamped with AUS EROBERTEM GESCHUETZ (From captured guns). This same inscription is found on the edge of the bronze medals given to combatants from the campaigns of 1813-14 and 1815. The medal for non-combatants has the inscription
![]() Fur loyalty in war (For faithful service in war); there is no inscription on the edge. The medal hangs from a ribbed silk ribbon, 1 inch wide, with a red stripe down the center, bordered by black and white stripes along the edge. (See facing page 356.)
Fur loyalty in war (For faithful service in war); there is no inscription on the edge. The medal hangs from a ribbed silk ribbon, 1 inch wide, with a red stripe down the center, bordered by black and white stripes along the edge. (See facing page 356.)
Chili-Peruvian War, 1879-81.—On April 5th, 1879, war was declared against Peru by the Chilian Republic, it being alleged as a casus belli that the Government of Peru had made a treaty with Bolivia—Chili having strained relations with the latter country—which was antagonistic to Chili. This, however, as the terms of the treaty show, was merely a pretext for taking by force the province of Tarapaca with its mineral wealth and guano deposits. The battle of Tarapaca was fought on November 17th, 1879, and despite the gallant efforts of the Peruvian Army, the city was taken by the Chilians. The latter, under General Baquedano, landing an army farther north, fought the battle of TACNA on May 26th, 1880, the action commemorated upon the bar attached to the medal illustrated and shown above the bar for SAN FRANCISCO, fought on November 19th, 1879. The Bolivian and Peruvian force of 9,000 men under General Camero was decisively defeated by the Chilians, 14,000 strong, who followed up their success by capturing Arica on June 7th, 1880. Incidentally I might mention that the bars slip over the ribbon and bear on the back the date of the action. The campaign in Lima succeeded the annihilation of the Peruvian Army. In this the raw recruits and volunteers who fought for Peru made desperate struggles at Chorrillos on the 13th and at a final concerted struggle at MIRAFLORES on January 15th, 1881, but they were beaten, losing about 3,000 men killed and wounded (their opponents' losses were over 2,000), and despite the splendid defence of Lima, it was taken on the 17th; but its defender, General Caceres, struggled on with a guerilla warfare until October 1883, when the war was concluded upon terms which pressed very heavily upon the unfortunate Peruvians.
Chili-Peruvian War, 1879-81.—On April 5, 1879, the Chilian Republic declared war on Peru, claiming that the Peruvian Government had made a treaty with Bolivia—Chili having tense relations with that country—which was hostile to Chili. However, the treaty's terms reveal that this was just an excuse to seize the province of Tarapaca, known for its mineral wealth and guano deposits. The battle of Tarapaca occurred on November 17, 1879, and despite the brave efforts of the Peruvian Army, the city was captured by the Chilians. They, under General Baquedano, landed an army further north and fought the battle of TACNA on May 26, 1880, which is marked on the bar attached to the medal illustrated above for SAN FRANCISCO, fought on November 19, 1879. The Bolivian and Peruvian forces of 9,000 men, led by General Camero, were decisively defeated by the Chilians, who numbered 14,000, and they followed up their victory by capturing Arica on June 7, 1880. Incidentally, I should mention that the bars slide over the ribbon and have the date of the action stamped on the back. The campaign in Lima followed the destruction of the Peruvian Army. In this campaign, the raw recruits and volunteers who fought for Peru made desperate stands at Chorrillos on the 13th and in a final coordinated effort at MIRAFLORES on January 15, 1881, but they were defeated, suffering about 3,000 men killed and wounded (their opponents lost over 2,000), and despite a valiant defense of Lima, it fell on the 17th; however, its defender, General Caceres, continued to fight using guerrilla tactics until October 1883, when the war ended with terms that were very harsh for the unfortunate Peruvians.

GOLD MEDAL PRESENTED BY THE AMERICAN NATION TO ADMIRAL DEWEY FOR THE VICTORIOUS BATTLE OF MANILA BAY, 1898.
GOLD MEDAL PRESENTED BY THE AMERICAN NATION TO ADMIRAL DEWEY FOR THE VICTORIOUS BATTLE OF MANILA BAY, 1898.
The First Chilian Medal.—This was awarded to the participants in the first campaign, which, as the inscription on the reverse states, covered the inclusive period of DE 14 DE FEBRERO DE 1879 A 7 DE JUNIO DE 1880. This legend is on a blue enamelled ground, in the centre of the silver medal, bordered by a band of red. The five arms of the star are covered with scaling which forms the centre of the panels; the points are tipped with balls; conventional rays are issuant between the arms of the star. On the obverse, in the centre, is a laureated, Grecian head, symbolic of the Republic; it is gilt and encircled by a blue enamelled band bearing the legend CAMPAGNA A BOLIVIA I EL PERU. The decoration depends from a red, ribbed ribbon, and regulation brooches were issued with the medals for suspension.
The First Chilian Medal.—This was awarded to the participants in the first campaign, which, as stated on the back, took place from February 14, 1879 to June 7, 1880. This inscription is set on a blue enamel background in the center of the silver medal, surrounded by a band of red. The five points of the star are decorated with scaling that forms the center of the panels; the tips are adorned with balls; and conventional rays extend between the arms of the star. On the front, in the center, is a laureled, Grecian head, representing the Republic; it is gold-plated and surrounded by a blue enamel band that reads Campaign in Bolivia and Peru. The medal is hung from a red, ribbed ribbon, and regulation brooches were provided with the medals for attachment.
The Second Chilian Medal.—For the campaign which resulted in the capture of Lima a silver Cross with five arms was awarded. The terminals of the arms are protected by beads and the panelling is scaled as in the other decoration; issuant between the arms, three leaves of laurel. In the centre of the obverse and reverse is a gilt five-pointed star upon a radiated ground. On one side in a blue enamelled band is the record CAMPAGNA DE LIMA 1887, and on the other REPUBLICA DE CHILE. This decoration depends from a blue ribbon, from a regulation silver buckle brooch. (See facing page 356.)
The Second Chilian Medal.—For the campaign that led to the capture of Lima, a silver Cross with five arms was awarded. The tips of the arms are embellished with beads, and the paneling is designed like in the other decoration; emerging between the arms are three laurel leaves. In the center of both the front and back is a gold five-pointed star on a radiated background. One side features a blue enamel band with the inscription Lima Campaign 1887, and the other side shows Republic of Chile. This decoration hangs from a blue ribbon, attached to a standard silver buckle brooch. (See facing page 356.)
Tonkin, 1883-5.—The French medal for the China War of 1883-5 bears on the obverse, within a wreath of laurel, with ribbon entwined, the head of "the Republic," helmeted and laureated, with the word PATRIE on the forehead. Around, REPUBLIQUE FRANÇAISE. Below truncation is the artist's name, DANIEL DUPUIS. On the reverse, in the centre of a circle, within a similar wreath of laurel, are the battle names, SONTAY, BAC-NINH, FOU-TCHÉOU, FORMOSE, TUYEN-QUAN, PESCADORES. Around, TONKIN CHINE ANNAM, 1883-1885, below, with a dot on either side. This is a small circular silver medal, 13∕20 in. in diameter, with a ring and loop for suspension from a yellow ribbon, 1½ in. wide, with four light green stripes. (See facing page 348.)
Tonkin, 1883-5.—The French medal for the China War of 1883-5 features on the front, inside a laurel wreath with a ribbon wrapped around, the head of "the Republic," wearing a helmet and laurels, with the word NATION on the forehead. Surrounding it is FRENCH REPUBLIC. Below is the artist's name, DANIEL DUPUIS. On the back, in the center of a circle, within a similar laurel wreath, are the battle names, SONTAY, Bac Ninh, FOU-TCHÉOU, FORMOSE, TUYEN-QUAN, Fishermen. Surrounding it is Tonkin, China, Annam, 1883-1885, below, with a dot on either side. This is a small circular silver medal, 13∕20 in. in diameter, with a ring and loop for hanging from a yellow ribbon, 1½ in. wide, with four light green stripes. (See facing page 348.)
Spanish-American War.—Arising out of the difficulties between the Spanish and the Cubans, came the war between Spain and America and the opportunity for the United States Navy to demonstrate its power, with a squadron of only 6 ships, by destroying the fleet of 11 Spanish battleships in Manila Bay without the loss of a single man. I illustrate the remarkably fine medal which was presented by the American nation to Commodore George Dewey—Admiral Dewey, as he is known in Britain—and to the officers and men who served under him. The medal, designed by the famous American sculptor, Daniel Chester French, was struck by Messrs. Tiffany & Co. It bears on the obverse the bust of Admiral Dewey, and on the ground the following inscription, THE GIFT OF THE PEOPLE OF THE UNITED STATES TO THE OFFICERS AND MEN OF THE OCEATIC SQUADRON, UNDER THE COMMAND OF COMMODORE GEORGE DEWEY. On the reverse is a finely modelled figure of an American sailor, sitting on a naval gun, holding firmly across his knees the American flag, his left foot resting on a small panel upon which the name of the ship was engraved. Encircling all is the record IN MEMORY OF THE VICTORY OF MANILA BAY, MAY 1ST, 1898. (See facing page 368.)
Spanish-American War.—The conflict between the Spanish and the Cubans led to the war between Spain and the United States, giving the U.S. Navy a chance to showcase its strength. With just 6 ships, it successfully took out a fleet of 11 Spanish battleships in Manila Bay without losing a single sailor. I want to highlight the impressive medal awarded by the American nation to Commodore George Dewey—Admiral Dewey, as he's known in Britain—and to the officers and crew who served with him. The medal, created by the renowned American sculptor, Daniel Chester French, was produced by Tiffany & Co. It features a bust of Admiral Dewey on the front, along with the inscription, THE GIFT FROM THE PEOPLE OF THE UNITED STATES TO THE OFFICERS AND CREW OF THE OCEANIC SQUADRON, UNDER THE COMMAND OF COMMODORE GEORGE DEWEY. The reverse showcases a beautifully crafted figure of an American sailor sitting on a naval gun, securely holding the American flag across his knees, with his left foot on a small panel that bears the name of the ship. Surrounding it all is the inscription IN MEMORY OF THE VICTORY AT MANILA BAY, MAY 1, 1898. (See facing page 368.)
German South-West Africa.—The German medal for[Pg 371] South-West Africa, 1904-6, marks a departure on the part of the Germans in the application of art to the making of war medals. The severity which has usually distinguished them has disappeared, and we have in very low relief the richly helmeted head of Germania, surrounded by the inscription, SUDEWEST AFRICA 1904-06, and on the reverse the Imperial crown with ribbons surmounting the Gothic initial W. II, which is arranged above crossed swords, the whole being encircled by the inscription DEN SIEGREICHEN STREITERN. The medal was given in steel to non-combatants. The ribbon is white with a series of red horizontal lines down the centre, leaving a clear white margin, which is edged with black of an equal width, and to it is attached a gilt bar for services rendered in KALAHARI 1908. Like some of the medals awarded by American States, the bar is not attached to the medal, and is apt to get lost.
German South-West Africa.—The German medal for[Pg 371] South-West Africa, 1904-6, represents a shift in how the Germans approached the art of creating war medals. The usual strictness has faded away, revealing a beautifully detailed, helmeted head of Germania in very low relief, surrounded by the inscription, SOUTHWEST AFRICA 1904-06. On the reverse side is the Imperial crown with ribbons above the Gothic initial W. II, arranged over crossed swords, all encircled by the inscription THE VICTORIOUS WARRIORS. The medal was awarded in steel to non-combatants. The ribbon is white with a series of red horizontal lines down the center, leaving a clear white margin that is edged with black of the same width, and it has a gold bar attached for services rendered in Kalahari 1908. Similar to some medals awarded by American states, the bar is not attached to the medal and is likely to get lost.
The Serbo-Turkish War.—Of this medal, with 1912 in the centre, 400,000 were struck and distributed to the officers and men who took part in the Serbo-Turkish campaign. Five medals were struck in gold for the Court. On the obverse is the Serbian Eagle, encircled by a laurel wreath upon the leaves of which are struck incuse the names of the principal battles, reading downwards on the left: Kumanovo, Uesküb, Prilip, Adrianople, Welles, N. Pazar, Debar, Istip, Prizren et Medare; and reading downwards on the right: Monastir, Scutari, Ohrid, Dojran, Sjeniza, Tetovo, Ljesch, Elbassan, Durazzo, and Pristina. The names are in Serbian characters.
The Serbo-Turkish War.—This medal, with 1912 in the center, has 400,000 copies that were made and given to the officers and soldiers who participated in the Serbo-Turkish campaign. Five gold medals were created for the Court. On the front is the Serbian Eagle, surrounded by a laurel wreath, which has the names of the main battles engraved on the leaves. The names are listed down the left side: Kumanovo, Uesküb, Prilip, Adrianople, Welles, N. Pazar, Debar, Istip, Prizren, and Medare; and down the right side: Monastir, Scutari, Ohrid, Dojran, Sjeniza, Tetovo, Ljesch, Elbassan, Durazzo, and Pristina. The names are in Serbian characters.
On the reverse in the foreground is represented a piece of artillery captured from the Turks, with the sun in its splendour above, the date 1912 being inscribed on the orb itself, and running with the line of the medal above is the Serbian inscription, in native characters, signifying "Kossovo avenged," the field of Kossovo being the place where the Serbians lost their independence in 1389. The medal, which bears the[Pg 372] Swiss modeller's name, Hugeunin Frères, is suspended from a silk-woven ribbon, with the national colours, red, blue, and white, repeated perpendicularly six times.
On the back, in the foreground, there's a piece of artillery captured from the Turks, with the sun shining brightly above it, the date 1912 engraved on the sun itself, and along the line of the medal above is a Serbian inscription in native characters that means "Kossovo avenged." The field of Kossovo is where the Serbians lost their independence in 1389. The medal, which features the Swiss modeller's name, Hugeunin Frères, hangs from a silk-woven ribbon that has the national colors—red, blue, and white—repeated vertically six times.
The Serbo-Bulgarian War.—The medal issued for the war with the Bulgarians is in the form of a Cross—41 millimetres in dimension. This is a very plain, bronze, gilt Cross, bearing on the obverse the royal monogram and surmounted by the royal crown, and on the reverse the date 1913. The decoration is suspended from a red ribbon with an edging of black. Five hundred thousand of these Crosses were issued to the officers and men who took part in the campaign, and four Crosses were struck in gold for the Court.
The Serbo-Bulgarian War.—The medal created for the war with the Bulgarians is shaped like a Cross—41 millimeters in size. It's a simple, bronze, gilded Cross, displaying the royal monogram on the front and topped with the royal crown, while the back features the date 1913. The decoration hangs from a red ribbon with black trimming. Five hundred thousand of these Crosses were awarded to the officers and soldiers who participated in the campaign, and four gold Crosses were minted for the royal family.
"For Courage."—The third medal is for valour, and was awarded to those officers and men who particularly distinguished themselves in the two campaigns. On the obverse is a strong figure of Obilitch, a warrior revered by the Serbian people. He has been their national hero since 1389, the ideal and the eternal spirit which inspired and encouraged the Serbian people to live for the time when they could throw off the yoke of the Turk. Around the bust of Obilitch is the inscription, in Serbian characters, Miloch Obilitch, National Hero, 1389. It will be noticed that the crest or chimera which surmounts the helmet of the hero helps to give the connection between the shaped ring for suspension and the decoration. On the reverse is the cross of chivalry, and a wreath of laurel encircling the legend, in Serbian characters, "For Courage." Crossed swords fittingly fill the gaps between the arms of the cross. The medal, modelled by M. Henri Hugeunin, is 36 millimetres in diameter, is suspended from a red silk ribbon. Seven of these decorations (see facing page 376) were struck in gold, 101 in silver, 4,000 in silver-plated bronze, and 27,000 in bronze gilt.
"For Courage."—The third medal is for bravery and was given to the officers and soldiers who stood out during the two campaigns. The front features a strong image of Obilitch, a warrior honored by the Serbian people. He has been their national hero since 1389, embodying the ideal and the enduring spirit that motivated the Serbian people to strive for the time when they could free themselves from the Turkish oppression. Surrounding Obilitch's bust is the inscription, in Serbian characters, Miloch Obilitch, National Hero, 1389. It's notable that the crest or chimera sitting atop the hero's helmet helps connect the shaped ring for hanging the medal with the decoration itself. On the back is the cross of chivalry, accompanied by a laurel wreath surrounding the words, in Serbian characters, "For Courage." Crossed swords effectively fill the spaces between the arms of the cross. The medal, designed by M. Henri Hugeunin, is 36 millimeters in diameter and hangs from a red silk ribbon. Seven of these medals (see facing page 376) were made in gold, 101 in silver, 4,000 in silver-plated bronze, and 27,000 in gilt bronze.

FOR SERBO-TURKISH WAR, 1912.
For the Serbo-Turkish War, 1912.

FOR SERBO-BULGARIAN WAR, 1913.
FOR SERBO-BULGARIAN WAR, 1913.
SERBIAN MEDALS.
SERBIAN MEDALS.
The Sanatory Cross.—The "Sanatory Cross," which is bronze gilt and enamelled, and 40 millimetres at its greatest dimension, was distributed to those men and women who rendered service in the medical department during the two campaigns. On the obverse is the Serbian eagle on an enamelled ground, and on the reverse the inscription in Serbian characters, "For care to the wounded and sick." The inscription also stands out on an enamelled circle. Four thousand five hundred were issued with the sky-blue ribbon arranged in triangular form for men, and 3,500 in tie form for women. (See facing page 376.)
The Sanatory Cross.—The "Sanatory Cross," which is made of gilt bronze and enamel, measuring 40 millimeters at its largest point, was awarded to men and women who served in the medical department during the two campaigns. On the front, it features the Serbian eagle set against an enamel background, and on the back, there's an inscription in Serbian characters that reads, "For care to the wounded and sick." This inscription is also highlighted on an enamel circle. A total of four thousand five hundred were issued with a sky-blue ribbon styled in a triangular shape for men, and 3,500 for women in tie form. (See facing page 376.)
French Veteran's Medal.—An interesting medal is that worn by French veterans who are members of the SOCIÉTÉ DE SECOURS MUTUELS FRANÇAISE DES EX MILITAIRES. It bears this inscription in a circle, and on the reverse a trophy of arms. It is suspended from a wreath of laurel, tied with flying ribbons, by a ribbon into which is woven the colours of various war ribbons.
French Veteran's Medal.—An interesting medal is worn by French veterans who are members of the FRENCH MUTUAL AID SOCIETY FOR FORMER MILITARY PERSONNEL. It has this inscription in a circle, and on the back, there’s a trophy of arms. It hangs from a laurel wreath tied with flowing ribbons, attached by a ribbon that incorporates the colors of various campaign ribbons.
APPENDIX I
PISTRUCCI'S WATERLOO MEDAL
In the year 1819, when the battle of Waterloo was still fresh in the minds of every one, the Prince Regent, who became George IV, being desirous of fitly commemorating the event, conceived the idea of doing so by the striking of a medal which by reason of its magnificence would do justice to the great achievement of arms. To this end a competition among the great artists of the day was suggested to the Royal Academicians, but they unanimously selected Flaxman to execute the commission. He produced a design which, approved by his peers, was passed on to Benedetto Pistrucci, a Roman who succeeded T. Wyon as chief engraver at the Royal Mint. Signor Pistrucci, however, refused to cut the dies, on the grounds that his abilities and position placed him above that of a mere die cutter. His claims were acceded to; Flaxman's designs were abandoned, and Pistrucci was commissioned to prepare a modelled design, which was "instantly honoured by the fullest and most flattering approbation of" the Prince Regent. He thereupon received instructions to cut the dies for a fee of £3,500, the price being based upon the assumption that the design contained as much work as thirty ordinary-sized medals, and certainly a glance at the reduced photographs facing page 80—the medal is 5½ in. in diameter—will give some idea of the exceeding amount of work which the famous die cutter and gem carver put into his chef d'œuvre. The dies were finished in 1849; and of the great men who were to receive the medal in gold, the Duke of Wellington—the greatest of them all—was the only survivor when a lead impression was taken for submission to the Lords of the Treasury.
In 1819, just after the battle of Waterloo had made a lasting impression on everyone, the Prince Regent, who later became George IV, wanted to appropriately commemorate this event. He thought about creating a magnificent medal that would honor this significant military achievement. To accomplish this, a competition among the leading artists of the time was proposed to the Royal Academicians, but they all agreed on selecting Flaxman for the job. He created a design that was approved by his peers and passed on to Benedetto Pistrucci, a Roman who took over from T. Wyon as the chief engraver at the Royal Mint. However, Pistrucci refused to cut the dies, claiming that his skills and status were above that of a simple die cutter. His request was granted; Flaxman's designs were set aside, and Pistrucci was commissioned to create a modeled design, which earned him the highest praise from the Prince Regent. He then received the go-ahead to cut the dies for a fee of £3,500, based on the idea that his design was equivalent in work to thirty regular-sized medals. A quick look at the smaller photographs on page 80—the medal measures 5½ in. in diameter—will show the immense effort that the renowned die cutter and gem carver put into his chef d'œuvre. The dies were completed in 1849; among the distinguished individuals who were to receive the gold medal, the Duke of Wellington—the greatest of them all—was the only one still alive when a lead impression was made for submission to the Lords of the Treasury.
It is stated that the reason for the failure to strike from the massive dies was owing to the super difficulties which could not be overcome in any attempt to harden them. The[Pg 375] real reason may, however, be found in our altered relationship with the Continental nations, and in consequence thereof the Government of the day had no desire to do anything which might give offence to our ally in 1850. It was felt, however, that Pistrucci's masterpiece should not be kept from the public, and the Lords of the Treasury handed the matrices to a Mr. Johnson of Alexander Terrace, Bayswater, who prepared a number of electrotypes, a pair of which have been kindly lent me for illustration herein by my friend and late student, Cecil Thomas, who, like Pistrucci, is one of the very few craftsmen who are equally at home in the cutting of steel or gem stones.
It’s said that the failure to strike from the large dies was due to the extremely tough challenges that couldn't be overcome when trying to harden them. The[Pg 375] real issue, however, might lie in our changed relationship with the Continental nations, and as a result, the Government at that time didn’t want to do anything that could upset our ally in 1850. Nonetheless, it was believed that Pistrucci's masterpiece shouldn’t be kept from the public, so the Lords of the Treasury gave the matrices to a Mr. Johnson of Alexander Terrace, Bayswater, who created several electrotypes. My friend and former student, Cecil Thomas, has kindly lent me a pair of these for illustration here; he, like Pistrucci, is one of the very few craftsmen who can expertly work with both steel and gemstones.
The Official Description.—"Both sides of the medal are treated allegorically, except the central part of the obverse, which represents the busts of the four allied Sovereigns, the Prince Regent, Emperor of Austria, Emperor of Russia, and King of Prussia, grouped together in profile. Around this group of actual portraits the figures constitute an allegorical and mythological allusion to the treaty of peace which was consequent upon the great triumph on the field of battle. The summit of the surrounding groupings presents Apollo in his car restoring the day. The rainbow zephyr and Iris follow the chariot of the sun in succession, but the zephyr is tending towards the earth, and scattering flowers, as the emblem of peace and tranquillity.
The Official Description.—"Both sides of the medal are designed symbolically, except for the central part of the front, which features the busts of the four allied Sovereigns: the Prince Regent, the Emperor of Austria, the Emperor of Russia, and the King of Prussia, all shown in profile. Surrounding this group of actual portraits are figures that symbolize a mythological reference to the peace treaty that followed the significant victory on the battlefield. At the top of the surrounding figures is Apollo in his chariot bringing back the day. The rainbow, the zephyr, and Iris follow the sun's chariot in order, but the zephyr is directed towards the earth, scattering flowers as a symbol of peace and harmony.
"On the opposite side, the car of Apollo is seen closely approaching the constellation Gemini, personified, as usual, by a pair of graceful youths, indicating the month in which the great contest took place. Castor and Pollux, each armed with spears, are intended to elucidate the apotheosis of Wellington and Blucher. Themis, the goddess of justice, appears on earth, as in the Golden Age. This figure is placed in front of the profile busts of the Sovereigns, to show that Justice is a greater security to government than Power. The goddess is seated on a rock; a palm-tree waves over her head; she is prepared to reward virtue with its branches in one hand, and in the other holds a sword for the ready punishment of crime. Power is personified by a robust man of mature age, bearded, and armed with a club; he is seated under an oak-tree, and forms the corresponding figure, at the back of the group of busts of the Allied Sovereigns, to that of Justice facing it. Beneath Themis the Fates are introduced, to indicate that henceforward human[Pg 376] actions will be controlled by Justice alone. These actions and passions are represented by the Furies, which, being placed beneath the emblematical figure of Power, are subjected to its influence, and no longer suffered to quit the infernal regions, or Cimmerian caverns, in which, at the base of this side of the medal, the allegory is completed by the figure of Night, the mother of the Fates, receding into darkness from the ruling daylight of Phœbus' car on the summit.
"On the opposite side, Apollo's chariot is approaching the constellation Gemini, usually represented by a pair of elegant young men, signifying the month when the great contest occurred. Castor and Pollux, each holding spears, symbolize the elevation of Wellington and Blucher. Themis, the goddess of justice, appears on earth, as she did in the Golden Age. This figure is placed in front of the profile busts of the Sovereigns to show that Justice is a more significant security to government than Power. The goddess is seated on a rock; a palm tree sways over her head; she is ready to reward virtue with branches in one hand and holds a sword in the other for the swift punishment of crime. Power is personified by a robust middle-aged man with a beard, armed with a club; he is seated under an oak tree, corresponding to the figure of Justice facing it, situated behind the group of busts of the Allied Sovereigns. Beneath Themis, the Fates are introduced, indicating that from now on, human actions will be guided solely by Justice. These actions and emotions are represented by the Furies, who are placed beneath the emblematic figure of Power, subjected to its influence and no longer allowed to leave the infernal regions, or Cimmerian caves, completing the allegory at the base of this side of the medal with the figure of Night, the mother of the Fates, retreating into darkness from the ruling daylight of Phœbus' chariot at the top."
"The central group on the reverse consists of a couple of equestrian figures, classically treated, but having the countenances of Wellington and Blucher. They are full of action; the figure personifying the Hero of Waterloo is galloping in advance, and that of the veteran Blucher is rushing to the aid of his companion in glory, to complete the enemy's destruction. They are guided by a female figure of a flying Victory, placed between them, conducting their horses to the conflict. Quite detached from this central group, and forming a border round it, a composition of many figures represents the battle of the Giants. They are struck down by the thunder of Jupiter; the youngest ones, being the most daring in the assault of heaven, are the first to receive the Divine punishment. In their descent they tumble over one another in every variety of attitude—symbolical of the confusion of the defeated enemy. The number of the figures of the Giants is nineteen, illustrative of the nineteen years' duration of the war; and in grouping these figures they are represented following each other in succession."
"The main group on the back features a couple of horsemen, presented in a classic style, but with the faces of Wellington and Blucher. They are full of energy; the figure representing the Hero of Waterloo is racing ahead, while the veteran Blucher rushes to help his companion in victory, aiming to finish off the enemy. They are led by a female figure of a flying Victory, positioned between them, guiding their horses into battle. Separate from this central group, a border of many figures illustrates the battle of the Giants. They are struck down by Jupiter’s thunder; the youngest, being the boldest in challenging heaven, are the first to face Divine punishment. As they fall, they tumble over each other in various positions—symbolizing the chaos of the defeated enemy. There are nineteen Giant figures, representing the nineteen years of the war; and in their arrangement, they appear to trail after one another in succession."

MEDAL FOR COURAGE.
Courage Medal.

MEDAL FOR SERVICE TO THE WOUNDED.
MEDAL FOR SERVICE TO THE INJURED.
SERBIAN MEDALS.
SERBIAN MEDALS.
APPENDIX II
REGIMENTAL DESIGNATIONS
| Cavalry | ||
|---|---|---|
| Name. | Former Title. | Present Title. |
| Life Guards | 1st and 2nd | Same |
| Royal Horse Guards | The "Blues" | " |
| 1st Dragoon Guards | The King's | " |
| 2nd " " | Queen's Bays | " |
| 3rd " " | Prince of Wales' | " |
| 4th " " | Royal Irish | " |
| 5th " " | Princess Charlotte of Wales | " |
| 6th " " | Carabineers | " |
| 7th " " | Princess Royal's | " |
| 1st Dragoons | Royal | " |
| 2nd " | Royal North British (Scots Greys) | Royal Scots Greys |
| 3rd Hussars | Light Dragoons | The King's Own |
| 4th " | " " | The Queen's Own |
| 5th Lancers | Royal Irish | Same |
| 6th Dragoons | Inniskilling | " |
| 7th Hussars | Light Dragoons | The Queen's Own |
| 8th " | " " | King's Royal Irish |
| 9th Lancers | " " | The Queen's Royal |
| 10th Hussars | " " | Prince of Wales' Own Royal |
| 11th " | " " | Prince Albert's Own |
| 12th Lancers | " " | Prince of Wales' Royal |
| 13th Hussars | " " | None |
| 14th " | The King's | Same |
| 15th " | Light Dragoons | The King's |
| 16th Lancers | The Queen's | Same |
| 17th " | "Death or Glory Boys" | Duke of Cambridge's Own |
| 18th Hussars | Light Dragoons | Queen Mary's Own |
| 19th " | 1st Bengal European Cavalry | Princess of Wales' Own |
| 20th " | 2nd Bengal European Cavalry | |
| 21st Lancers | 3rd Bengal European Cavalry | Empress of India's [Pg 378] |
| Infantry | ||
| Grenadier Guards | 1st, 2nd, and 3rd Battns. | Same |
| Coldstream Guards | 1st and 2nd Battns. | " |
| Scots Fusilier Guards | 1st and 2nd Battns. | " |
| Irish Guards | " | |
| Welsh Guards | " | |
| 1st Regt. | The Royal | Royal Scots (Lothian Regt.) |
| 2nd " | Queen's Royal | Royal West Surrey Regt. |
| 3rd " | East Kent—The Buffs | East Kent Regt. |
| 4th " | King's Own Royal | Royal Lancaster Regt. |
| 5th " | Northumberland Fusiliers | Same |
| 6th " | Royal 1st Warwickshire | Royal Warwickshire Regt. |
| 7th " | Royal Fusiliers | City of London Regt. |
| 8th " | The King's | Liverpool Regt. |
| 9th " | East Norfolk | Norfolk Regt. |
| 10th " | North Lincolnshire | Lincolnshire Regt. |
| 11th " | North Devonshire | Devonshire Regt. |
| 12th " | East Suffolk | Suffolk Regt. |
| 13th " | Prince Albert's Light Inf. | Prince Albert's (Somersetshire Light Inf.) |
| 14th " | Buckinghamshire | Prince of Wales' Own (West Yorkshire Regt.) |
| 15th " | Yorkshire, East Riding | East Yorkshire Regt. |
| 16th " | The Bedfordshire | Bedfordshire Regt. |
| 17th " | Leicestershire | Leicestershire Regt. |
| 18th " | Royal Irish | Royal Irish Regt. |
| 19th " | 1st Yorkshire, N. Riding | Alexandra, Princess of Wales' Own (Yorkshire Regt.) |
| 20th " | East Devonshire | The Lancashire Fusiliers |
| 21st " | Royal North British Fus. | Royal Scots Fusiliers |
| 22nd " | The Cheshire | Cheshire Regt. |
| 23rd " | Royal Welsh Fusiliers | Same |
| 24th " | 2nd Warwickshire | South Wales Borderers |
| 25th " | King's Own Borderers | King's Own Scottish Borderers |
| N.B.—All the above Infantry Regiments had two Battalions. | ||
| 26th Regt. | The Cameronian | 1st Cameronians (Scottish Rifles) |
| 27th " | Inniskilling | 1st Royal Inniskilling Fusiliers |
| 28th " | North Gloucestershire | 1st Gloucestershire Regt. |
| 29th " | Worcestershire | 1st Worcestershire Regt. |
| 30th " | Cambridgeshire | 1st E. Lancashire Regt. |
| 31st " | Huntingdonshire | 1st E. Surrey Regt. |
| 32nd " | Cornwall Light Inf. | 1st Duke of Cornwall's Light Inf.[Pg 379] |
| 33rd Regt. | Duke of Wellington's | 1st West Riding Regt. |
| 34th " | Cumberland | 1st Border Regt. |
| 35th " | Royal Sussex | 1st Royal Sussex |
| 36th " | Herefordshire | 2nd Worcestershire Regt. |
| 37th " | North Hampshire | 1st Hampshire Regt. |
| 38th " | 1st Staffordshire | 1st S. Staffordshire Regt. |
| 39th " | Dorsetshire | 1st Dorsetshire Regt. |
| 40th " | 2nd Somersetshire | Prince of Wales' Volunteers 1st S. Lancashire Regt. |
| 41st " | The Welsh | 1st Welsh Regt. |
| 42nd " | Royal Highland (Black Watch) | 1st Black Watch (Royal Highlanders) |
| 43rd " | Monmouthshire Light Inf. | 1st Oxfordshire Light Inf. |
| 44th " | East Essex | 1st Essex Regt. |
| 45th " | Nottinghamshire (Sherwood Foresters) | 1st Sherwood Foresters (Derbyshire Regt.) |
| 46th " | South Devonshire | 2nd Duke of Cornwall's Light Inf. |
| 47th " | Lancashire | 1st Loyal N. Lancashire Regt. |
| 48th " | Northamptonshire | 1st Northamptonshire Regt. |
| 49th " | Princess Charlotte of Wales' (Herts) | 1st Royal Berks Regt. |
| 50th " | The Queen's Own | 1st Royal W. Kent Regt. |
| 51st " | 2nd Yorkshire, West Riding (King's Own Light Infantry) | 1st King's Own (Yorkshire Light Inf.) |
| 52nd " | Oxfordshire Light Inf. | 2nd Oxfordshire Light Inf. |
| 53rd " | Shropshire | 1st The King's (Shropshire Light Inf.) |
| 54th " | West Norfolk | 2nd Dorsetshire |
| 55th " | Westmoreland | 2nd The Border |
| 56th " | West Essex | 2nd Essex |
| 57th " | West Middlesex | 1st Duke of Cambridge's Own (Middlesex) |
| 58th " | Rutlandshire | 2nd Northamptonshire |
| 59th " | 2nd Nottinghamshire | 2nd East Lancashire |
| 60th " (4 Battns.) | King's Royal Rifle Corps | Same |
| 61st " | South Gloucestershire | 2nd Gloucestershire |
| 62nd " | Wiltshire | 1st Duke of Edin. (Wilts) |
| 63rd " | West Suffolk | 1st Manchester |
| 64th " | 2nd Staffordshire | 1st Prince of Wales' (N. Staffs) |
| 65th " | 2nd Yorkshire, North Riding | 1st York and Lancaster |
| 66th " | Berkshire | 2nd Princess Charlotte of Wales' (Royal Berks)[Pg 380] |
| 67th Regt. | South Hampshire | 2nd Hampshire |
| 68th " | Durham Light Inf. | 1st Durham Light Inf. |
| 69th " | South Lincolnshire | 2nd Welsh |
| 70th " | Surrey | 2nd East Surrey |
| 71st " | Highland Light Inf. | 1st Highland Light Inf. |
| 72nd " | Duke of Albany's Own Highlanders | 1st Seaforth Highlanders, Ross-shire Buffs (Duke of Albany's) |
| 73rd " | Perthshire | 2nd Black Watch (Royal Highlanders) |
| 74th " | Highland Regt. | 2nd Highland Light Inf. |
| 75th " | Stirlingshire Regt. | 1st Gordon Highlanders |
| 76th " | None | 2nd Duke of Wellington's (W. Riding) |
| 77th " | East Middlesex | 2nd Duke of Cambridge's Own (Middlesex) |
| 78th " | Highland Regt. (Ross-shire Buffs) | 2nd Seaforth Highlanders (Ross-shire Buffs), Duke of Albany's |
| 79th " | Cameron Highlanders | Queen's Own Cameron Highlanders |
| 80th " | Staffordshire Volunteers | 2nd South Staffordshire |
| 81st " | Loyal Lincoln Volunteers | 2nd Loyal N. Lancaster |
| 82nd " | Prince of Wales' Volunteers | 2nd Prince of Wales' Volunteers (South Lancaster) |
| 83rd " | County Dublin | 1st Royal Irish Rifles |
| 84th " | York and Lancaster | 2nd York and Lancaster |
| 85th " | Bucks Volunteers (King's Light Inf.) | 2nd The King's (Shropshire Light Inf.) |
| 86th " | Royal County Down | 2nd Royal Irish Rifles |
| 87th " | Royal Irish Fusiliers | 1st Princess Victoria's (Royal Irish Fusiliers) |
| 88th " | Connaught Rangers | 1st Connaught Rangers |
| 89th " | Princess Victoria's | 2nd Princess Victoria's (Royal Irish Fusiliers) |
| 90th " | Perthshire Volunteers (Light Inf.) | 2nd Cameronians (Scottish Rifles) |
| 91st " | Argyllshire Highlanders | 1st Princess Louise's (Argyll and Sutherland Highlanders) |
| 92nd " | Gordon Highlanders | 2nd Gordon Highlanders |
| 93rd " | Sutherland Highlanders | 2nd Princess Louise's (Argyll and Sutherland Highlanders) |
| 94th " | None | 2nd Connaught Rangers |
| 95th " | Derbyshire | 2nd Sherwood Foresters (Derbyshire) |
| 96th " | None | 2nd Manchester |
| 97th Regt. | Earl of Ulster's | 2nd Queen's Own (Royal W. Kent) |
| 98th " | None | 2nd Prince of Wales' (N. Staffordshire) |
| 99th " | Lanarkshire | 2nd Duke of Edinburgh's(Wilts) |
| 100th " | Prince of Wales' Royal Canadians | 1st Prince of Wales' (Leinster Royal Canadians) |
| 101st " | Royal Bengal Fusiliers | 1st Royal Munster Fusiliers |
| 102nd " | Royal Madras " | 1st Royal Dublin Fusiliers |
| 103rd " | Royal Bombay " | 2nd Royal Dublin Fusiliers |
| 104th " | 2nd Bengal Fusiliers | 2nd Royal Munster Fusiliers |
| 105th " | 2nd Madras Light Inf. | 2nd King's Own (Yorks Light Inf.) |
| 106th " | 2nd Bombay " " | 2nd Durham Light Inf. |
| 107th " | 3rd Bengal Inf. | 2nd Royal Sussex |
| 108th " | 3rd Madras Light Inf. | 2nd Royal Inniskilling Fusiliers |
| 109th " | 3rd Bombay " " | 2nd Prince of Wales' Leinster (Royal Canadians) |
| Rifle Brigade (4 Battns.) | 95th (Rifle Corps) Regt. | Prince Consort's Own |
| [Since the outbreak of war the number of battalions in all Regiments has been considerably increased.] | ||

GREEK MEDAL FOR GRECO-TURKISH
WAR, 1913.
(Obverse.)
GREEK MEDAL FOR GRECO-TURKISH WAR, 1913.
(Front.)

GERMAN MEDAL FOR SOUTH-WEST AFRICA, 1904-6.
GERMAN MEDAL FOR SOUTH-WEST AFRICA, 1904-6.

GREEK MEDAL FOR GRECO-TURKISH
WAR, 1913.
(Reverse.)
GREEK MEDAL FOR GRECO-TURKISH WAR, 1913.
(Reverse.)
APPENDIX III
SALE PRICES
The following short record of average values is based upon auction prices realised during the last twelve years. It is difficult to standardise values, as so many factors are involved in the valuation of war medals. Not only rarity, but condition; not only the number issued, but the importance of the engagement in which they were earned, are taken into consideration by most collectors. Then there are periods during which there is a "slump," and prices do not rule so high. High prices are invariably obtained for the first medals placed upon the market even when, as in the case of the Boer War, it was known that thousands would be issued. Medals for South Africa which sold in 1903 for £1 5s. have now a fairly regular price of about 10s. if in good condition. In 1902 the Khedive's Sudan medal with bar for Khartoum realised £3 15s.; it is now valued at about 7s. 6d. in the sale-room. In the same year the Mayor of Kimberley's siege medal (a star of silver) sold for £6 15s.; it now realises from 10s. to £1. The last new British war medal to be issued, that for Abor, realised as much as four guineas in the sale-room when it first appeared; it dropped in a few weeks to three guineas. A Military General Service medal with the single bar for "Roleria" has fetched as much as £21—and as little as £3 3s., but this was due to the fact that the latter was faked, i.e. some bars had been removed, the medal roll showing that the man whose name was impressed on the edge had served in five engagements, and his medal originally had that record.
The following brief record of average values is based on auction prices achieved over the past twelve years. It's tough to standardize values because so many factors go into evaluating war medals. Collectors consider not only rarity and condition but also the number issued and the significance of the battles for which they were awarded. There are times when prices dip, and high prices aren't as common. First medals released onto the market usually fetch high prices, even when, as in the case of the Boer War, it was known that thousands would be made available. Medals for South Africa that sold for £1 5s. in 1903 now typically go for around 10s. if they are in good condition. In 1902, the Khedive's Sudan medal with the bar for Khartoum sold for £3 15s.; today it's valued at around 7s. 6d. That same year, the Mayor of Kimberley's siege medal (a silver star) sold for £6 15s.; it now goes for between 10s. to £1. The latest British war medal to be issued, for Abor, originally fetched as much as four guineas in auction when it first came out; it quickly dropped to three guineas within a few weeks. A Military General Service medal with the single bar for "Roleria" has sold for as much as £21—and as little as £3 3s.—but that lower price was because the latter was a fake; some bars had been removed, and the medal roll indicated that the person whose name was engraved on the edge had served in five battles, and his medal originally reflected that.
On the other hand, because of its exceeding rarity as well as the gallant conditions under which it was earned, the M.G.S. medal with bar for "Benevente" has realised £34. Bars issued with the Army of India medal for "Ava" and "Bhurtpoor" are the most frequently met with,[Pg 383] but these realise high prices at auction. At the Gaskell sale a medal with single bar for "Defence of Delhi" sold for £20, a single bar for "Corygaum" £35 (but one of these bars has realised as much as £100), two bars for "Assaye" and "Argaum" £33. Three bars for "Allighur," "Argaum," and "Gawilghur" realised £40, and £60 was paid for one with bars for "Allighur," "Battle of Delhi," and "Laswarree." The "Mutiny" medal has realised as much as £38, the price for which a four-bar medal from the Gaskell Collection sold at auction; but three-bar medals sell at auction for from £2 2s. to £3 3s., and single bars for "Defence of Lucknow" for as little as £1 16s.; but at the present time there is an inclination to pay more for Mutiny medals, and the conditions under which they were earned warrant it. In the later Indian wars the bar issued for the North-East Frontier 1891, owing to the great interest taken in the Manipur Expedition, realised from £3 to £4, but this bar, which is attached to the I.G.S. 1854 Medal, sells for about a quarter of that sum now. The Waterloo medal, to one of the 42nd (Black Watch), has sold at auction for as much as £15, and £20 has been paid for one awarded to the 27th Regiment (Inniskillings); but a poor specimen has found a purchaser at as low as £1 10s.
On the other hand, because of its extreme rarity and the brave conditions under which it was earned, the M.G.S. medal with bar for "Benevente" has fetched £34. Bars issued with the Army of India medal for "Ava" and "Bhurtpoor" are the most commonly found,[Pg 383] but they sell for high prices at auction. At the Gaskell sale, a medal with a single bar for "Defence of Delhi" sold for £20, a single bar for "Corygaum" sold for £35 (though one of these bars has sold for as much as £100), and two bars for "Assaye" and "Argaum" went for £33. Three bars for "Allighur," "Argaum," and "Gawilghur" sold for £40, and £60 was paid for one with bars for "Allighur," "Battle of Delhi," and "Laswarree." The "Mutiny" medal has fetched as much as £38, the price at which a four-bar medal from the Gaskell Collection sold at auction; however, three-bar medals auction for between £2 2s. and £3 3s., and single bars for "Defence of Lucknow" can go for as little as £1 16s.; currently, there is a trend to pay more for Mutiny medals, which is justified by the circumstances under which they were earned. In the later Indian wars, the bar issued for the North-East Frontier in 1891, due to the significant interest in the Manipur Expedition, went for £3 to £4, but this bar, which is attached to the I.G.S. 1854 Medal, now sells for about a quarter of that amount. The Waterloo medal awarded to someone in the 42nd (Black Watch) has sold at auction for as much as £15, and £20 has been paid for one awarded to the 27th Regiment (Inniskillings); however, a poor example has sold for as low as £1 10s.
Great care should be taken to examine the bars and ensure that they have not been tampered with. No medal that has been re-engraved is worth taking into consideration, unless it is one with rare bars which show no signs of faking. Medals with genuine bars, even though the name has been erased from the edge of the medal, realise good prices, and to complete a collection are very useful when named medals fetch very high prices.
Great care should be taken to check the bars and make sure they haven't been tampered with. No medal that has been re-engraved is worth considering, unless it has rare bars that show no signs of being faked. Medals with genuine bars, even if the name has been erased from the edge of the medal, can still sell for good prices, and they are very helpful for completing a collection, especially when named medals go for very high prices.
| Waterloo Medals | |||||||
|---|---|---|---|---|---|---|---|
| Infantry | |||||||
| £ | s. | d. | £ | s. | d. | ||
| 1st Guards (Grenadier) | 2 | 2 | 0 | to | 3 | 15 | 0 |
| 2nd Guards (Coldstreams) | 2 | 0 | 0 | to | 3 | 10 | 0 |
| 2nd Battn. 3rd Guards (Scots Guards) and M.G.S. medal. Two bars: Vittoria and St. Sebastian | 8 | 5 | 0 | ||||
| 2nd Battn. 3rd Guards (Scots Guards) | 2 | 6 | 0 | to | 3 | 10 | 0 |
| 14th Foot | 2 | 4 | 0 | ||||
| 23rd Foot (Royal Welsh Fusiliers) | 3 | 10 | 0 | ||||
| 27th Foot (Inniskillings) | 1 | 10 | 0 | to | 20 | 0 | 0[Pg 384] |
| 27th Foot. Private Sale | 25 | 0 | 0 | ||||
| 30th Foot (Sergeant) | 12 | 0 | 0 | ||||
| 33rd Foot | 3 | 5 | 0 | ||||
| 42nd Foot (Black Watch). (Has sold for £15.) | 4 | 0 | 0 | to | 6 | 6 | 0 |
| 44th Foot (2nd Battn.) | 10 | 0 | 0 | ||||
| 52nd Foot (1st Battn.) | 2 | 10 | 0 | ||||
| 54th Foot | 5 | 5 | 0 | ||||
| 73rd Foot (now 2nd Black Watch) | 4 | 0 | 0 | to | 7 | 15 | 0 |
| 79th Foot (1st Battn.) (Paymaster-Sergeant) | 14 | 0 | 0 | ||||
| 79th Foot (Camerons) | 8 | 5 | 0 | ||||
| 95th Foot (Rifles) (Captain) | 12 | 0 | 0 | ||||
| Royal Waggon Train (Officer). Private Sale | 20 | 5 | 0 | ||||
| Royal Horse Guards (Officer). Private Sale | 25 | 0 | 0 | ||||
| Cavalry | |||||||
| 2nd Life Guards | 5 | 15 | 0 | ||||
| 2nd or R.N. British Dragoons (Scots Greys) | 3 | 0 | 0 | to | 6 | 0 | 0 |
| 6th or Inniskilling Dragoons | 5 | 0 | 0 | ||||
| 7th Hussars | 2 | 0 | 0 | to | 6 | 0 | 0 |
| 10th Royal Hussars | 4 | 5 | 0 | ||||
| 11th Light Dragoons | 4 | 0 | 0 | ||||
| 15th King's Hussars | 2 | 18 | 0 | ||||
| 23rd Light Dragoons | 2 | 17 | 6 | ||||
| 1st Light Dragoons (K.G.L.) | 2 | 14 | 0 | to | 3 | 10 | 0 |
| King's German Artillery (Gunner) | 4 | 0 | 0 | ||||
| Hussars, Prinz Regt., Hanoverian Waterloo | 1 | 13 | 0 | ||||
| Landwehr Battn., Verden, Hanoverian Waterloo | 1 | 16 | 0 | ||||
| Gold Peninsular Medal for Salamanca | |||||||
| With bars for Orthes and Toulouse, awarded to Major Beatty, of 7th Regt. (Royal Fusiliers) | 115 | 0 | 0 | ||||
 THE MÉDAILLE MILITAIRE. Awarded to Sir John French and non-commissioned officers and men of the British Army.[Pg 385] |
|||||||
| Military General Service Medals, 1801 to 1814 | |||||||
| 1st Foot Guards. Three bars: St. Sebastian, Nivelle, Nive | 2 | 8 | 0 | ||||
| 1st Foot Guards. One bar: Barossa, 1811 | 3 | 12 | 6 | ||||
| 1st Foot Guards. One bar: St. Sebastian, 1813 | 3 | 15 | 0 | ||||
| 2nd Coldstream Guards (Captain). Four bars: Roleria, Vimiera, Corunna, Talavera. | 15 | 0 | 0 | ||||
| 1st Foot (Royal Scots). One bar: Martinique. | 12 | 15 | 0 | ||||
| 3rd Foot (Lieutenant). Five bars: Pyrenees, Nivelle, Nive, Orthes, Toulouse. | 9 | 0 | 0 | ||||
| 5th Foot (Sergeant). Nine bars | 18 | 0 | 0 | ||||
| 5th Foot. One bar: Roleria. Private Sale | 37 | 0 | 0 | ||||
| 6th Foot. One bar: Orthes, 1814. | 6 | 0 | 0 | ||||
| 6th Foot. One bar: Vittoria, 1813. | 2 | 10 | 0 | ||||
| 6th Foot. Three bars | 7 | 0 | 0 | ||||
| 7th Foot. Twelve bars (verified) | 36 | 0 | 0 | ||||
| 7th Foot (Sergeant). Eight bars | 23 | 10 | 0 | ||||
| 9th Foot (Ensign). Four bars: Vittoria, St. Sebastian, Nivelle, Nive | 8 | 10 | 0 | ||||
| 9th Foot. One bar: Roleria | 12 | 0 | 0 | ||||
| 11th Foot. One bar: Busaco | 9 | 0 | 0 | ||||
| 14th Foot. One bar: Java, 1811 | 1 | 4 | 0 | ||||
| 23rd Foot (Sergeant). Ten bars | 38 | 0 | 0 | ||||
| 25th Foot. One bar: Guadaloupe | 13 | 15 | 0 | ||||
| 27th Foot. One bar: Maida, 1806 | 6 | 10 | 0 | ||||
| 27th Foot. Two bars: Egypt, 1801; Maida, 1806 | 7 | 0 | 0 | ||||
| 29th Foot (Lieutenant). Five bars | 16 | 0 | 0 | ||||
| 30th Foot. One bar: Fuentes d'Onor | 13 | 10 | 0 | ||||
| 31st Foot (Quartermaster). Seven bars: Talavera, Albuhera, Vittoria, Pyrenees, Nive, Orthes, Toulouse | 8 | 10 | 0 | ||||
| 32nd Foot (Sergeant). Two bars: Roleira, Vimiera | 3 | 15 | 0 | ||||
| 36th Foot. One bar: Vimiera, 1808 | 5 | 10 | 0 | ||||
| 38th Foot. Three bars: Vimiera, Corunna, Salamanca | 3 | 7 | 6 | ||||
| 39th Foot. Two bars: Vittoria, Toulouse | 1 | 14 | 0 | ||||
| 40th Foot. One bar: Ciudad Rodrigo | 18 | 10 | 0 | ||||
| 40th Foot. Seven bars: Vimiera, Talavera, Albuhera, Toulouse, Ciudad Rodrigo, Vittoria, Pyrenees | 5 | 0 | 0 | to | 7 | 7 | 0 |
| 41st Foot. Two bars: Vittoria, St. Sebastian | 2 | 4 | 0 | ||||
| 42nd Highlanders. One bar: Corunna | 4 | 4 | 0 | ||||
| 42nd Highlanders. Ten bars | 10 | 10 | 0 | to | 13 | 13 | 0 |
| 42nd Highlanders. Six bars | 7 | 7 | 0 | ||||
| 43rd Foot. Two bars: Vimiera, Corunna | 3 | 12 | 6 | ||||
| 43rd Foot. Eight bars | 12 | 10 | 0 | ||||
| 43rd Foot. Nine bars | 15 | 0 | 0 | ||||
| 45th Foot. One bar: Talavera, 1809 | 4 | 12 | 6 | ||||
| 47th Foot. Four bars: Barossa, Vittoria, St. Sebastian, Nive | 4 | 10 | 0 | ||||
| 48th Foot. One bar: Talavera, 1809 | 3 | 17 | 6 | ||||
| 48th Foot. Ten bars | 38 | 0 | 0 | ||||
| 48th Foot. Thirteen bars | 30 | 0 | 0 | ||||
| 52nd Foot. Eight bars: Fuentes d'Onor, Ciudad Rodrigo, Badajoz, Salamanca, Vittoria, Pyrenees, Orthes, Toulouse | 6 | 0 | 0 | to | 12 | 15 | 0 |
| 59th Foot (Drummer). Four bars | 5 | 0 | 0 | ||||
| 60th Foot (Lieutenant). Two bars: Martinique, Guadaloupe | 9 | 15 | 0 | ||||
| 63rd Foot. One bar: Martinique, 1809 | 2 | 17 | 6 | ||||
| 74th Foot. Seven bars | 11 | 11 | 0 | ||||
| 74th Regt. (H.L.I.). Nine bars: Busaco, Fuentes d'Onor, Ciudad Rodrigo, Salamanca, Vittoria, Pyrenees, Nivelle, Orthes, Toulouse | 7 | 0 | 0 | to | 12 | 12 | 0 |
| 77th Foot. One bar: Ciudad Rodrigo | 15 | 0 | 0 | ||||
| 78th Foot. One bar: Java, 1811 | 4 | 12 | 6[Pg 386] | ||||
| 83rd Foot. Ten bars: Talavera, Busaco, Fuentes d'Onor, Ciudad Rodrigo, Badajoz, Vittoria, Pyrenees, Nivelle, Orthes, Toulouse | 12 | 0 | 0 | ||||
| 84th Foot. One bar: Nive | 2 | 10 | 0 | to | 3 | 3 | 0 |
| 88th Foot (Lieutenant). Four bars: Talavera, Busaco, Fuentes d'Onor, Ciudad Rodrigo | 6 | 6 | 0 | ||||
| 89th Foot. One bar: Chrystler's Farm. | 20 | 0 | 0 | ||||
| 91st Foot. Six bars | 7 | 10 | 0 | ||||
| 91st Foot. One bar: Vimiera | 16 | 0 | 0 | ||||
| 95th Foot (Officer). Six bars | 14 | 10 | 0 | ||||
| 95th Foot. Seven bars | 10 | 10 | 0 | ||||
| 97th Foot. Four bars: Roleria, Vimiera, Busaco, Albuhera | 4 | 17 | 6 | ||||
| Royal Staff Corps (Sergeant). Three bars: Roleria, Vimiera, Corunna | 3 | 5 | 0 | ||||
| Staff Surgeon. One bar: Badajoz | 17 | 0 | 0 | ||||
| Royal Sappers and Miners. One bar: Badajoz, 1812 | 3 | 3 | 0 | ||||
| Artillery Driver. One bar: Fuentes d'Onor, 1811 | 10 | 0 | 0 | ||||
| Artillery Driver. Nine bars | 14 | 10 | 0 | ||||
| Royal Artillery (Gunner). Three bars: Pyrenees, St. Sebastian, Toulouse | 2 | 10 | 0 | ||||
| Waggon Train. One bar: Ciudad Rodrigo. Only single bar awarded | 23 | 10 | 0 | ||||
| Canadian Militia. One bar: Fort Detroit | 16 | 0 | 0 | to | 19 | 10 | 0 |
| Native Warrior. Three bars: Fort Detroit, Chateauguay, Chrystler's Farm | 40 | 0 | 0 | ||||
| Royal Garrison Artillery. One bar: Fort Detroit | 26 | 0 | 0 | ||||
| Native Warrior. One bar: Chateauguay | 10 | 5 | 0 | ||||
| One bar: Chateauguay | 10 | 10 | 0 | ||||
| One bar: Fort Detroit | 14 | 10 | 0 | ||||
| One bar: Chrystler's Farm | 13 | 0 | 0 | ||||
| Cavalry | |||||||
| 4th Light Dragoons. Six bars: Talavera, Albuhera, Busaco, Salamanca, Vittoria, Toulouse | 5 | 5 | 0 | ||||
| 10th Hussars. Four bars | 17 | 0 | 0 | ||||
| 11th Light Dragoons. One bar: Salamanca, 1812 | 2 | 17 | 6 | ||||
| 13th Light Dragoons. Four bars | 27 | 0 | 0 | ||||
| 14th Light Dragoons. Ten bars: Talavera, Busaco, Fuentes d'Onor, Badajoz, Salamanca, Vittoria, Pyrenees, Nive, Orthes, Toulouse | 8 | 15 | 0 | ||||
| 14th Light Dragoons. Ten bars: Talavera, Busaco, Fuentes d'Onor, Badajoz, Vittoria, Pyrenees, Nivelle, Orthes, Toulouse | 7 | 0 | 0 | ||||
| 15th Light Dragoons. One bar: Sahagun Private Sale | 35 | 0 | 0 | ||||
| 16th Light Dragoons. Four bars: Talavera, Busaco, Fuentes d'Onor, Vittoria | 3 | 12 | 6[Pg 387] | ||||
| 18th Light Dragoons. Two bars: Sahagun, Toulouse | 16 | 0 | 0 | ||||
| 20th Light Dragoons. One bar: Vimiera | 12 | 0 | 0 | ||||
| 22nd Light Dragoons. One bar: Egypt, 1801 | 3 | 5 | 0 | ||||
| One bar: Sahagun and Benevente | 8 | 10 | 0 | to | 18 | 0 | 0 |
| Three bars: Vittoria, Sahagun, Benevente | 25 | 0 | 0 | ||||
| Ten bars (Officer) | 50 | 0 | 0 | ||||
| Gold Cross | |||||||
| For the Peninsular, with three clasps for seven battles, awarded to Lieutenant-Colonel Sir Charles Sutton | 370 | 0 | 0 | ||||
| Gold Medal | |||||||
| For Vimiera | 72 | 0 | 0 | ||||
| Portuguese Cross | |||||||
| For five engagements in Peninsular. Ensign 5th Foot | 30 | 0 | 0 | ||||
| Naval General Service Medal | |||||||
| One bar: "Nymphe," June 18th, 1793 | 35 | 0 | 0 | ||||
| Four bars: June 1st, 1794, St. Vincent, St. Domingo, Martinique (a rare combination) | 61 | 0 | 0 | ||||
| One bar: June 1794 | 2 | 0 | 0 | ||||
| One bar: March 14th, 1795 | 16 | 10 | 0 | ||||
| One bar: "Lapwing," December 3rd, 1796 (two issued) | 21 | 0 | 0 | ||||
| One bar: San Fiorenzo, March 8th, 1797 (three issued) | 50 | 0 | 0 | ||||
| One bar: St. Vincent (349 issued) | 1 | 16 | 0 | to | 6 | 15 | 0 |
| Two bars: St. Vincent, Nile | 3 | 3 | 0 | to | 10 | 5 | 0 |
| One bar: "Mars," April 21st, 1798 | 15 | 15 | 0 | ||||
| One bar: Camperdown, 1797 (332 issued) | 10 | 0 | 0 | ||||
| One bar: "Lion," July 15th, 1798 (21 issued) | 23 | 0 | 0 | ||||
| One bar: "Sybille," February 28th, 1799 (12 issued) | 12 | 0 | 0 | to | 40 | 0 | 0 |
| One bar: "Harpy," February 5th, 1800 | 21 | 0 | 0 | ||||
| Two bars: "Phœbe," February 19th, 1801, St. Sebastian | 25 | 10 | 0 | ||||
| One bar: Egypt (626 issued) | 2 | 0 | 0 | ||||
| One bar: Boat Service, August 29th, 1800 | 30 | 0 | 0 | ||||
| One bar: Gut of Gibraltar, June 12th, 1801, 1st Lieutenant R.N. | 3 | 0 | 0 | ||||
| One bar: November 4th, 1805 | 10 | 0 | 0 | ||||
| One bar: Curaçoa | 13 | 0 | 0 | ||||
| Two bars: St. Domingo, Algiers | 1 | 18 | 0 | ||||
| One bar: Anson, August 23rd, 1806 | 20 | 0 | 0[Pg 388] | ||||
| Two bars: Off Rota, April 4th, 1808, Syria, 1st Lieutenant R.N. | 15 | 10 | 0 | ||||
| One bar: Pompée, June 17th, 1809 (21 issued) | 17 | 0 | 0 | to | 26 | 0 | 0 |
| One bar: Boat Service, July 29th, 1809 (12 issued) | 26 | 0 | 0 | ||||
| One bar: Spartan, May 3rd, 1810 (32 issued) | 10 | 0 | 0 | ||||
| One bar: Banda Neira | 17 | 0 | 0 | ||||
| One bar: Cherokee, July 10th, 1810 (4 issued) | 26 | 0 | 0 | ||||
| One bar: "Boadicea," September 12th, 1810 (16 issued) | 40 | 0 | 0 | ||||
| Two bars: Martinique (523 issued), Guadaloupe (509 issued) | 3 | 0 | 0 | to | 12 | 10 | 0 |
| One bar: Anhalt, March 27th, 1811 | 31 | 0 | 0 | ||||
| One bar: Java | 4 | 10 | 0 | ||||
| Two bars: Pelagosa, November 29th, 1811, St. Sebastian | 3 | 10 | 0 | ||||
| One bar: "Weasel," April 22nd, 1813 | 36 | 0 | 0 | ||||
| Two bars: "Amazon," March 13th, 1806; Boat Service, January 6th, 1813 | 38 | 0 | 0 | ||||
| Two bars: Boat Service, May 4th, 1811; Boat Service, December 14th, 1814 to Lieutenant | 12 | 0 | 0 | ||||
| One bar: Boat Service, December 14th, 1814 | 6 | 10 | 0 | ||||
| One bar: "Cherub," March 28th, 1814 | 10 | 0 | 0 | ||||
| One bar: "Venerable," January 16th, 1814 | 16 | 0 | 0 | to | 20 | 10 | 0 |
| Three bars: Santa Margarita, June 8th, 1796 (3 issued); "Fisgard," October 20th, 1798 (9 issued); "Eurotas," February 25th, 1814 (29 issued), to Boatswain, a rare combination, very fine | 75 | 0 | 0 | ||||
| Two bars: San Fiorenzo, February 11th, 1805, March 8th, 1808 | 40 | 0 | 0 | ||||
| Three bars: Basque Roads, Martinique, Guadaloupe | 7 | 10 | 0 | ||||
| Two bars: Java, St. Sebastian | 2 | 0 | 0 | ||||
| Three bars: November 4th, 1805; Basque Roads, 1809; Algiers | 15 | 15 | 0 | ||||
| One bar: Off Tamatave, 1811 (79 issued) | 16 | 10 | 0 | ||||
| Two bars: Java, Syria | 1 | 10 | 0 | ||||
| Two bars: "Sapho," Algiers | 40 | 0 | 0 | ||||
| One bar: St. Domingo | 1 | 10 | 0 | ||||
| One bar: Algiers (1,320 issued) | 1 | 0 | 0 | to | 1 | 10 | 0 |
| One bar: Java (715 issued) | 1 | 10 | 0 | to | 2 | 0 | 0 |
| One bar: St. Sebastian (292 issued) | 2 | 2 | 0 | ||||
| One bar: Syria, 1840 (7,057 issued) | 0 | 17 | 6 | ||||
| One bar: Navarino, 1827 (1,123 issued) | 2 | 0 | 0 | ||||
| Trafalgar Medals | |||||||
| Officer's Gold Medal for Trafalgar (Captain H.M.S. "Prince"), sold in 1903. | 245 | 0 | 0 | ||||
| One bar: Trafalgar, 1805 (1,710 issued) | 2 | 0 | 0 | to | 3 | 10 | 0 |
| Two bars: Trafalgar, Algiers | 2 | 12 | 0[Pg 389] | ||||
| Two bars: Egypt, Trafalgar | 1 | 10 | 0 | to | 2 | 10 | 0 |
| Two bars: "Penelope," March 30th, 1800, Trafalgar, to Midshipman Carter | 41 | 0 | 0 | ||||
| Two bars: Trafalgar, Boat Service, December 14th, 1814 | 4 | 5 | 0 | ||||
| Three bars: Copenhagen, Trafalgar, Algiers | 18 | 0 | 0 | ||||
| Davison's Nile and Trafalgar Medals | |||||||
| Battle of Nile, 1798: Davison's Gold Medal, to Officers | 100 | 16 | 0 | ||||
| Battle of Nile, 1798: Davison's Silver Medal, to Officers | 5 | 10 | 0 | ||||
| Battle of Nile, 1798: Davison's Bronze Medal Gilt, to Petty Officers | 0 | 12 | 0 | to | 1 | 10 | 0 |
| Battle of Nile, 1798: Davison's Bronze Medal, to Seamen | 0 | 10 | 0 | to | 1 | 5 | 0 |
| Battle of Trafalgar, October 21st, 1805: Davison's Pewter | 1 | 1 | 0 | to | 1 | 5 | 0 |
| Medals for Seringapatam | |||||||
| Gold Medal for Siege of Seringapatam, May 4th, 1799 | 16 | 10 | 0 | ||||
| Officer's Silver Gilt Medal, Seringapatam | 3 | 15 | 0 | to | 6 | 15 | 0 |
| Officer's Silver Medal, Seringapatam | 1 | 0 | 0 | to | 2 | 2 | 0 |
| Bronze Medal for Seringapatam, 1799 (awarded to N.C.O.'s) | 1 | 1 | 0 | to | 1 | 10 | 0 |
| Tin Medal, Siege of Seringapatam. Awarded to Private Soldiers | 1 | 0 | 0 | to | 1 | 10 | 0 |
| Honourable East India Co.'s Medals | |||||||
| H.E.I. Co.'s Small Deccan Medal, 1784 | 10 | 0 | 0 | ||||
| H.E.I. Co.'s Small Deccan Medal, 1784 | 13 | 5 | 0 | ||||
| H.E.I. Co.'s Mysore Medal, 1791-2 | 10 | 0 | 0 | ||||
| H.E.I. Co.'s Large Mysore Medal. Private Sale | 20 | 0 | 0 | ||||
| H.E.I. Co.'s Java Medal, 1811 | 11 | 0 | 0 | ||||
| H.E.I. Co.'s Medal for Rodriques, Isle of France, 1810 | 14 | 10 | 0 | ||||
| First Burmese War: H.E.I. Co.'s Medal, 1824-6 | 4 | 10 | 0 | to | 5 | 5 | 0 |
| Army of India Medals | |||||||
| Five bars: Allighur, Battle of Delhi, Laswarree, Battle of Deig, Capture of Deig-name impressed (to Officer). Private sale | 150 | 0 | 0 | ||||
| Four bars: Asseerghur, Argaum, Gawilghur, Ara—name impressed (to Officer). Private sale | 100 | 0 | 0 | ||||
| One bar: Corygaum | 100 | 0 | 0[Pg 390] | ||||
| Two bars: Laswarree, Battle of Delhi | 55 | 0 | 0 | ||||
| One bar: Capture of Deig (to Officer of 8th Light Dragoons), only 48 issued to the Regiment. Private sale | 50 | 0 | 0 | ||||
| Two bars: Laswarree, Capture of Deig. (8th Dragoons) | 38 | 0 | 0 | ||||
| One bar: Kirkee | 20 | 0 | 0 | ||||
| Two bars: Assaye and Nagpore | 18 | 0 | 0 | ||||
| Two bars: Maheidpore and Nagpore | 16 | 0 | 0 | ||||
| Two bars: Assaye and Asseerghur (Sergeant Irregular Cavalry) | 15 | 10 | 0 | ||||
| One bar: Laswarree (Sepoy) | 15 | 0 | 0 | ||||
| 22nd Foot. One bar: Capture of Deig | 75 | 0 | 0 | ||||
| 38th Regt. Native Inf. One bar: Seetabuldee and Nagpore | 74 | 0 | 0 | ||||
| 2nd Native Infantry. One bar: Corygaum | 70 | 0 | 0 | ||||
| 94th Foot. Three bars: Asseerghur, Argaum, Gawilghur | 65 | 0 | 0 | ||||
| Two bars: Kirkee and Poona, Corygaum | 51 | 0 | 0 | ||||
| 1st Foot. One bar: Nagpore | 21 | 0 | 0 | ||||
| One bar: Poona | 17 | 10 | 0 | ||||
| Horse Artillery. One bar: Poona | 31 | 0 | 0 | ||||
| One bar: Nepaul, 1816 (Officers) | 6 | 10 | 0 | to | 11 | 10 | 0 |
| Native Infantry (Lieutenant). One bar: Nepaul | 6 | 10 | 0 | to | 12 | 0 | 0 |
| 24th Foot. One bar: Nepaul | 1 | 14 | 0 | ||||
| Sappers and Miners. One bar: Defence of Delhi | 1 | 10 | 0 | ||||
| 87th Foot. One bar: Ava, 1824-6 | 3 | 12 | 6 | ||||
| 38th Foot. Two bars: Poona, Ava | 23 | 0 | 0 | ||||
| 89th Foot. One bar: Ava, 1824-6 | 3 | 17 | 6 | ||||
| Armourers' Mate. One bar: Ava (Naval) | 4 | 12 | 0 | ||||
| Four Bars: Assaye, Argaum, Poona, Bhurtpoor | 23 | 0 | 0 | ||||
| Three bars: Assaye, Argaum, Bhurtpoor | 25 | 0 | 0 | ||||
| 16th Light Dragoons. One bar: Bhurtpoor | 3 | 12 | 6 | ||||
| 14th Foot. One bar: Bhurtpoor | 3 | 7 | 6 | ||||
| Native Infantry. One bar: Maheidpoor | 12 | 10 | 0 | to | 15 | 10 | 0 |
| 11th Light Dragoons. One bar: Bhurtpoor | 4 | 2 | 6 | ||||
| 16th Lancers. One bar: Bhurtpoor | 3 | 7 | 6 | ||||
| 16th Lancers. Ghuznee, July 23rd, 1839 | 1 | 5 | 0 | to | 2 | 10 | 0 |
| Ghuznee, Cabul, 1842 | 2 | 12 | 6 | ||||
| 4th Com. 2nd Battn. Bengal Foot Artillery. Ghuznee, Cabul, 1842 | 5 | 5 | 0 | ||||
| 3rd K.O. Light Dragoons. Cabul, 1842 | 2 | 8 | 0 | ||||
| 40th Regt. Cabul, 1842 | 2 | 2 | 0 | to | 3 | 10 | 0 |
| 1st Troop Horse Brigade, Bombay Artillery. Ghuznee, Cabul, 1842: two wreaths | 4 | 0 | 0 | ||||
| H.M. 40th Regt. Candahar, 1842 | 7 | 0 | 0 | ||||
| 2nd Battn. Artillery. Candahar, 1842 | 1 | 10 | 0 | ||||
| Kelat-i-Ghilzie, 1842 | 14 | 0 | 0 | ||||
| Jellalabad, April 7th, 1842. First type, Mural crown, XIII. P.A.L.I. | 7 | 15 | 0 | to | 13 | 10 | 0[Pg 391] |
| Jellalabad, April 7th, 1842. Second type, "Flying Victory," to XIII. P.A.L.I. | 15 | 0 | 0 | ||||
| 40th Regt. Candahar, Ghuznee, Cabul, 1842 | 2 | 8 | 0 | to | 2 | 15 | 0 |
| Meeanee, 1843 | 7 | 10 | 0 | ||||
| Meeanee (Major) | 20 | 0 | 0 | ||||
| Meeanee (Officer) | 23 | 0 | 0 | ||||
| 22nd Regt. Meeanee. Hyderabad, 1843 | 3 | 10 | 0 | to | 4 | 4 | 0 |
| 1st Troop Horse Artillery. Hyderabad, 1843 | 5 | 0 | 0 | ||||
| Sutlej Campaign (Quartermaster-Sergeant). Three bars: Ferozeshuhur, Aliwal, Sobraon, 1845 | 2 | 17 | 6 | ||||
| 3rd Light Dragoons. Sutlej Campaign. Two bars: Ferozeshuhur, Sobraon | 2 | 2 | 0 | ||||
| 50th Regt. Sutlej. Three bars: Ferozeshuhur, Sobraon, Aliwal | 2 | 2 | 0 | ||||
| 44th Regt. N.I. (Assistant Surgeon). Ferozeshuhur | 2 | 18 | 0 | ||||
| 3rd Light Dragoons. Moodkee, 1845. Two bars: Ferozeshuhur, Sobraon | 3 | 3 | 0 | ||||
| 31st Regt. Moodkee. Three bars: Ferozeshuhur, Aliwal, Sobraon | 3 | 0 | 0 | ||||
| Naval Meeanee, 1843 | |||||||
| Private Sale | 45 | 0 | 0 | ||||
| New Zealand Medals | |||||||
| Naval | |||||||
| 1845-6 | 3 | 10 | 0 | to | 4 | 0 | 0 |
| 1860-1 | 1 | 10 | 0 | to | 2 | 10 | 0 |
| 1863-4 | 1 | 0 | 0 | to | 1 | 10 | 0 |
| Military | |||||||
| 2nd Coast Brigade R.A. 1860-5 | 2 | 10 | 0 | to | 3 | 5 | 0 |
| 12th Regt. 1860-6 | 8 | 0 | 0 | ||||
| 18th Royal Irish Rifles. 1863-6 | 1 | 0 | 0 | to | 1 | 15 | 0 |
| 2nd 14th Regt. 1861-6 | 1 | 0 | 0 | to | 1 | 10 | 0 |
| 40th Regt. 1860-4 | 3 | 7 | 6 | to | 3 | 15 | 0 |
| 40th Regt. 1863-4 | 1 | 1 | 0 | to | 2 | 10 | 0 |
| 70th Regt. 1863-5 | 1 | 5 | 0 | ||||
| Royal Artillery. 1863-6 | 1 | 5 | 0 | to | 1 | 15 | 0 |
| Military Train. 1864 | 3 | 2 | 6 | to | 3 | 15 | 0 |
| 43rd Light Infantry. 1864-6 | 1 | 7 | 0 | to | 1 | 10 | 0 |
| 57th Regt. 1865-6 | 2 | 0 | 0 | to | 2 | 10 | 0 |
| 65th Regt. 1860-1-5 | 2 | 10 | 0 | ||||
| 65th Regt. 1865 | 6 | 0 | 0[Pg 392] | ||||
| China Medals | |||||||
| China, 1842. Lieutenant 26th Regt. Foot | 2 | 2 | 0 | ||||
| China, 1842. A.B. Naval | 0 | 10 | 0 | to | 0 | 18 | 6 |
| China, 1857. Two bars: Unnamed | 0 | 12 | 6 | to | 0 | 15 | 0 |
| China, 1860. Two bars: Unnamed | 0 | 12 | 6 | to | 0 | 15 | 0 |
| China, 1860. One bar: Taku Forts, 1860: Acting Master H.M.S. "Bernici," I.N. | 1 | 10 | 0 | ||||
| China, 1900. One bar: Defence of Legations. Lance-Corporal R.M.L.I. | 9 | 10 | 0 | ||||
| Defence of Legations. Private Sale. (Naval) | 10 | 5 | 0 | ||||
| China, 1900. Relief of Pekin. (Naval) | 0 | 15 | 0 | ||||
| China, 1900. No bar. (Naval) | 0 | 7 | 6 | ||||
| China, 1900. No bar. Nurse | 0 | 15 | 0 | ||||
| Crimea Medals | |||||||
| Military | |||||||
| 1st Royal Dragoons, Heavy Brigade (Quartermaster). Three bars: Balaklava, Inkermann, Sebastopol, Turkish Crimea medal, and Miniature medals of same | 6 | 5 | 0 | ||||
| 17th Lancers, Light Brigade. Four bars: Alma, Balaklava, Inkermann, Sebastopol, and Turkish medal | 5 | 5 | 0 | ||||
| Grenadier Guards. One bar: Inkermann | 0 | 8 | 6 | ||||
| Coldstream Guards (Sergeant). Four bars: Alma, Balaklava, Inkermann, Sebastopol | 1 | 10 | 0 | to | 1 | 15 | 0 |
| Coldstream Guards (Private). Four bars: Alma, Balaklava, Inkermann, Sebastopol | 1 | 7 | 0 | to | 1 | 12 | 0 |
| 2nd Dragoon Guards. One bar: Balaklava | 0 | 15 | 0 | to | 1 | 5 | 0 |
| 2nd Dragoons, Heavy Brigade. Three bars: Balaklava, Inkermann, Sebastopol; Turkish Crimea and Long Service medal | 2 | 10 | 0 | ||||
| 8th Hussars. One bar: Inkermann | 0 | 7 | 6 | ||||
| 18th Regt. (Drum-major). One bar: Sebastopol | 0 | 12 | 0 | ||||
| Royal Artillery (Gunner). Two bars: Inkermann, Sebastopol | 0 | 17 | 0 | ||||
| 55th Regt. One bar: Sebastopol | 0 | 5 | 0 | ||||
| 57th Regt. Two bars: Balaklava, Inkermann | 1 | 0 | 0 | ||||
| 79th Cameron Highlanders. Two bars: Balaklava, Sebastopol | 1 | 5 | 0 | ||||
| Turkish Contingent (English Surgeon). Turkish Crimea | 0 | 15 | 0 | ||||
| Naval | |||||||
| One bar: Sebastopol. Schoolmaster | 0 | 16 | 0 | ||||
| One bar: Inkermann (A.B.) | 0 | 12 | 0 | ||||
| Two bars: Inkermann, Sebastopol (A.B.) | 0 | 10 | 0 | ||||
| Two bars: Inkermann, Sebastopol (Boy) | 0 | 15 | 0[Pg 393] | ||||
| Indian Mutiny Medals | |||||||
| 1st Battn. 5th Fusiliers. Two bars: Defence of Lucknow, 1857 | 2 | 4 | 0 | ||||
| 9th Lancers. Three bars: Delhi, Relief of Lucknow, Lucknow | 2 | 2 | 0 | to | 2 | 12 | 0 |
| 32nd Light Infantry. One bar: Defence of Lucknow | 1 | 16 | 0 | ||||
| 78th Highlanders. Defence of Lucknow | 1 | 12 | 0 | ||||
| 84th Regt. (Corporal). Defence of Lucknow, Lucknow | 1 | 15 | 0 | ||||
| 90th Light Infantry. Two bars: Defence of Lucknow | 1 | 15 | 0 | ||||
| Royal Horse Artillery (Lieutenant). Two bars: Lucknow, Relief of Lucknow | 4 | 12 | 6 | ||||
| 1st Sikhs Infantry (Assistant Surgeon). No bar | 2 | 18 | 0 | ||||
| Naval Brigade | |||||||
| A. B. "Pearl." No bar | 1 | 16 | 0 | ||||
| A.B. 1st Naval Brigade H.M.P.V., "Calcutta" | 2 | 4 | 0 | ||||
| A. B. "Shannon." No bar | 1 | 12 | 0 | ||||
| A.B. "Shannon," 1857. Two bars: Lucknow, Relief of Lucknow | 2 | 14 | 0 | ||||
| A.B. "Shannon," 1857. One bar: Lucknow, "Shannon" | 5 | 5 | 0 | ||||
| African Medals | |||||||
| 2nd Regt. South Africa, 1853 | 0 | 12 | 6 | to | 0 | 15 | 0 |
| South Africa, 1853. (Naval) | 0 | 15 | 0 | ||||
| H.M.S. "Bittern." One bar: Commassie, 1873 | 0 | 15 | 0 | ||||
| 42nd Black Watch. One bar: Commassie | 0 | 12 | 6 | to | 1 | 0 | 0 |
| 1st Royal Highlanders. Five bars: Egypt, 1882; Tel-el-Kebir; Suakin; 1884; El Teb, The Nile, 1884-5; Kirbekan | 3 | 3 | 0 | ||||
| Gordon Highlanders. Four bars: Egypt, 1882; Tel-el-Kebir, Suakin, 1884-5; Khedive's Bronze Star. Long Service medal | 1 | 8 | 0 | ||||
| 1st Royal Highlanders (Black Watch). Two bars: Tel-el-Kebir, Suakin, 1884 | 0 | 10 | 6 | ||||
| 1st Royal Highlanders. Two bars: El Teb, The Nile, 1884-5 | 0 | 12 | 6 | ||||
| 1st Royal Highlanders. Two bars: El Teb, Tamaai | 0 | 14 | 0 | ||||
| 1st Royal Highlanders. Five bars: Tel-el-Kebir; Suakin, 1884, El Teb; The Nile, 1884-5; Kirbekan | 3 | 10 | 0 | ||||
| Royal Artillery (Gunner). Three bars: Suakin, 1884; El Teb; The Nile, 1884-5 | 1 | 0 | 0 | ||||
| Naval. One bar: Witu, 1890 | 1 | 1 | 0 | ||||
| Victoria Column (Trooper). British South Africa Co.'s medal for Matabeleland, 1893 | 2 | 2 | 0[Pg 394] | ||||
| Raaf's Column (Trooper). Matabeleland, 1893, with bar: Rhodesia, 1896. (In 1901 a medal of this kind realised at auction £10) | 3 | 5 | 0 | ||||
| 32nd Bengal Infantry (Sepoy). Central Africa, 1893, with swivel and ring suspender | 3 | 0 | 0 | ||||
| Royal Engineers (Sergeant). West Africa. One bar: 1893-4 | 2 | 18 | 0 | ||||
| B.C.A. Rifles. Central Africa. One bar: 1894-8 | 13 | 13 | 0 | ||||
| 2nd York and Lancs Regt. British South Africa Co.'s medal for Rhodesia, 1896 | 1 | 10 | 0 | ||||
| Kimberley Regt. (Lieutenant). Cape General Service. One bar: Bechuanaland 1896-7 | 3 | 0 | 0 | ||||
| Cape Mounted Rifles. Cape General Service. One bar: Bechuanaland | 1 | 13 | 0 | ||||
| P.A. Guards. One bar: Basutoland, 1896-7 | 1 | 16 | 0 | ||||
| Cape Town Rangers. Cape Colony Service medal. Two bars: Transkei, 1896-7; Basutoland | 2 | 12 | 0 | ||||
| D.E.O.V.R. Cape General Service. One bar: Basutoland, 1896-7 | 1 | 8 | 0 | ||||
| Raaf's Column. British South Africa Co.'s medal for Matabeleland. One bar: Rhodesia, 1896 | 4 | 15 | 0 | ||||
| Gwelo Volunteers (Trooper). British South Africa's Co.'s medal for Rhodesia, 1896. One bar: Mashonaland, 1897 | 2 | 8 | 0 | ||||
| Transport (Corporal). Two bars: Transkei, Bechuanaland, 1896-7 | 4 | 5 | 0 | ||||
| P.A. Guards. Cape General Service. One bar: Bechuanaland, 1896-7 | 2 | 0 | 0 | ||||
| Niger Coast Protectorate (Lieutenant). West Africa. One bar: Benin, 1897 | 1 | 16 | 0 | ||||
| H.M.S. "St. George" (Gunner R.M.A.). West Africa. One bar: Benin, 1897 | 0 | 15 | 6 | ||||
| British South African Police. Mashonaland, 1897 | 2 | 12 | 6 | ||||
| 27th Bombay Light Infantry. East and Central Africa. One bar: Uganda, 1897-8 | 1 | 12 | 0 | ||||
| Africa Field Force (Doctor). Ashanti, 1900 | 3 | 17 | 6 | ||||
| West Africa Field Force. Ashanti, 1900. One bar: Kumassi | 2 | 7 | 6 | to | 2 | 17 | 6 |
| Nigeria Regt. African General Service medal. One bar: North Nigeria, 1900-1 | 1 | 6 | 0 | ||||
| 16th Bombay Light Infantry. One bar: Jubaland, 1900-1 | 1 | 6 | 0 | ||||
| Naval. One bar: Jubaland, 1900-1 | 0 | 15 | 0 | to | 1 | 4 | 0 |
| Lagos Battn. West Africa Field Force. Two bars: Aro, 1901-2; North Nigeria, 1903 | 2 | 10 | 0 | ||||
| Royal Warwick Regt. One bar: Somaliland, 1902-4 | 1 | 2 | 0 | ||||
| 52nd Sikhs. Africa General Service medal. Two bars: Somaliland, 1902-4; Jidballi | 0 | 17 | 0 | to | 1 | 1 | 0[Pg 395] |
| Nigeria Regt. One bar: North Nigeria, 1902 | 1 | 7 | 0 | ||||
| 1/A Northern Nigeria Regt. (Gunner). Two bars: Northern Nigeria, 1903-4: Nigeria, 1904 | 4 | 0 | 0 | ||||
| P.C.E. A.P.F. One bar: East Africa, 1905 | 3 | 5 | 0 | ||||
| 3rd King's African Rifles (A.G.S.). One bar: East Africa, 1906 | 3 | 0 | 0 | ||||
| Southern Nigeria Regt. One bar: West Africa, 1906 | 3 | 3 | 0 | ||||
| Northern D. M. Rifles. Natal Rebellion. One bar: 1906 | 1 | 0 | 0 | ||||
| H.M.S. "Hyacinth" (A.B.). One bar: Somaliland, 1908-10 | 2 | 4 | 0 | ||||
| H.M.S. "Fox." One bar: Somaliland, 1908-10 | 2 | 0 | 0 | ||||
| The British Niger Co.'s Bronze medal with bar, Nigeria, 1886-97 | 2 | 10 | 0 | ||||
| H.M.S. "Sparrow" (A.B.). Two bars: Witu, 1891-2; August, 1893 | 2 | 10 | 0 | ||||
| H.M.S. "Swallow" (R.M.). West Africa. One bar: Witu, August 1893 | 1 | 16 | 0 | ||||
| H.M.S. "Swallow." One bar: Witu, August 1893 | 1 | 6 | 0 | ||||
| H.M.S. "Electo." Two bars: Gambia, 1894; Benin, 1897 | 1 | 10 | 0 | ||||
| One bar: Gambia, 1894 | 0 | 15 | 0 | ||||
| H.M.S. "Forte" (A.B.). One bar: Gambia. Only 15 issued to officers, and 22 to men | 8 | 0 | 0 | ||||
| West India Regt. One bar: Gambia | 1 | 0 | 0 | to | 1 | 5 | 0 |
| H.M.S. "Barossa." Two bars: Brass River, 1895; Benin, 1897. (The medal with same bars to same ship realised £5 7s. 6d. in 1901) | 1 | 5 | 0 | ||||
| H.M.S. "Philomel." Somaliland, 1908-10 | 3 | 10 | 0 | ||||
| 3rd King's African Rifles (A.G.S.). Two bars: East Africa, 1906, Somaliland, 1908-10 | 4 | 0 | 0 | ||||
| Canada Medals for 1866-70 | |||||||
| 25th Regt. One bar: Fenian Raid, 1866 | 1 | 18 | 0 | ||||
| Light Infantry. One bar: Fenian Raid, 1866 | 1 | 15 | 0 | ||||
| 1st Rifle Brigade. Two bars: Fenian Raid, 1866; Fenian Raid, 1870 | 3 | 10 | 0 | ||||
| 7th Royal Fusiliers. One bar: Fenian Raid, 1866. Bugler | 1 | 8 | 0 | ||||
| Montreal G.A. One bar: Fenian Raid, 1870. Gunner | 2 | 0 | 0 | ||||
| North-West Canada, 1885 Medal | |||||||
| One bar: Saskatchewan (Bugler) | 2 | 0 | 0 | ||||
| One bar: Saskatchewan (Naval), awarded to men from the steamer "Northcote" who took part in the Battle of Batouche. (Rare) | 10 | 10 | 0[Pg 396] | ||||
| Boer War Medals | |||||||
| H.M.S. "Powerful" (A.B.). Five bars: Belmont, Modder River, Relief of Kimberley, Paardeberg, Driefontein | 2 | 5 | 0 | ||||
| H.M.S. "Doris" (A.B.). Five bars: Cape Colony, Paardeberg, Driefontein, Diamond Hill, Belfast | 1 | 18 | 0 | ||||
| Cape Mounted Rifles. Four bars: Cape Colony, Wepener, Transvaal, Wittebergen | 1 | 11 | 0 | ||||
| Horse Artillery (Gunner). Three bars: Cape Colony, Orange Free State, Transvaal | 1 | 10 | 0 | ||||
| Lancs Fusiliers. Seven bars: 1900 | 0 | 17 | 6 | ||||
| Dublin Fusiliers. Six bars: 1900 | 0 | 10 | 0 | to | 0 | 15 | 0 |
| Rhodesia Regt. (Trooper). Four bars: Rhodesia. Relief of Mafeking, Orange Free State, Transvaal | 1 | 15 | 0 | ||||
| South African Corps (Captain). Two bars: Relief of Mafeking, Transvaal; and British South Africa Co.'s medal for Rhodesia, 1896 | 4 | 5 | 0 | ||||
| Royal Welsh Fusiliers. Four bars: Relief of Mafeking, Tugela Heights, Relief of Ladysmith, Transvaal | 1 | 16 | 0 | ||||
| British South African Police (Trooper). One bar: Defence of Mafeking | 3 | 0 | 0 | ||||
| K.R.R.C. Eight bars: Cape Colony, Tugela Heights, Orange Free State, Relief of Ladysmith, Laing's Nek, Belfast, S. Africa, 1901, S. Africa, 1902 | 1 | 6 | 0 | ||||
| Brabant's Horse. Five bars: Cape Colony, Wepener, Wittebergen, Belfast, South Africa, 1902 | 1 | 18 | 0 | ||||
| Brabant's Horse (Corporal). Four bars: Cape Colony, Wepener, Wittebergen, Belfast | 2 | 2 | 0 | ||||
| Brabant's Horse (Lieutenant). Two bars: Cape Colony, Wepener | 3 | 12 | 0 | ||||
| Two bars: Defence of Ladysmith and Elandslaagte (realised as much as £3 2s. 6d. in 1905) | 1 | 1 | 0 | to | 1 | 5 | 0 |
| Leicester Regt. Three bars: Cape Colony, Laing's Nek, Belfast. Egyptian Medal. Two bars: The Nile, 1884-5; Abu Klea and Khedive's Bronze Star | 1 | 6 | 0 | ||||
| Modern Indian Medals | |||||||
| 43rd Regt. Native Infantry. One bar: Naga, 1879-80 | 1 | 10 | 0 | ||||
| 44th Regt. Native Infantry | 1 | 14 | 0 | to | 2 | 2 | 0 |
| One bar: Persia | 0 | 9 | 6 | to | 0 | 10 | 6 |
| One bar: Jowaki, 1877-8 | 0 | 10 | 0 | to | 0 | 12 | 0 |
| One bar: North-West Frontier | 0 | 10 | 6 | to | 1 | 0 | 0 |
| One bar: North-West Frontier, 1908 | 0 | 9 | 6 | to | 0 | 12 | 6[Pg 397] |
| 4th Battn. K.R.R.C. One bar: Lushai, 1889-92 | 1 | 14 | 0 | ||||
| One bar: Looshai | 1 | 10 | 0 | to | 2 | 2 | 0 |
| 2nd Kashmir Infantry. Hunza, 1891 | 3 | 5 | 0 | ||||
| 3rd Kashmir Infantry. Hunza, 1891 | 3 | 7 | 6 | ||||
| Muleteer, Peshawar Transport. Hunza, 1891 | 3 | 0 | 0 | ||||
| Bronze Collar badge for Hunza, Naga Expedition, 1891 | 1 | 10 | 0 | ||||
| Defence of Chitral, 1895. Maharajah of Kashmir's bronze medal for Chitral, 1895 | 4 | 0 | 0 | ||||
| Warwick Regt. One bar: North-West Frontier, 1908 | 0 | 14 | 0 | ||||
| Abor, 1911 | 3 | 3 | 0 | to | 4 | 4 | 0 |
| Victoria Cross | |||||||
| The following are a few prices realised in the sale-room: £43 (Lieutenant); £47 (Gunner), R.A.; £50, Argyll and Sutherlands; £53, Madras Fusiliers; £58, 65th Regt.; £54 (Sergeant-Major), 37th B.N.I.; £61, 2nd Dragoons; £62, with Crimean Medals, Grenadier Guards; £67, and Mutiny Medal, 9th Lancers, £67; £80, 49th Regt. (said to be second issued); £85 with Mutiny Medal and three bars, 9th Lancers; V.C. and South Africa Medal to Rorke's Drift hero, £95, 24th Regt.; 145 guineas for group of seven medals including V.C., 8th Lancers, and a V.C. won before Sebastopol, £175; a Naval V.C. has realised £170 at auction. | |||||||
| Conspicuous Gallantry Medal | |||||||
| Together with Ashantee Medal to Naval Gunner. Private Sale | 40 | 0 | 0 | ||||
| Distinguished Service Order | |||||||
| 2nd W. Riding Regt. (Victorian) | 7 | 10 | 0 | ||||
| Order of Merit | |||||||
| 1st Class (gold, enamelled decoration) for Conspicuous Gallantry in the Field | 8 | 10 | 0 | ||||
| 2nd Class (Gold, Enamelled Centre) | 3 | 10 | 0 | to | 4 | 10 | 0 |
| 3rd Class (entirely silver and centre enamelled) | 2 | 10 | 0 | to | 3 | 10 | 0 |
| These orders have realised as much as £58, £40, and £35, according to class. | |||||||
| Royal Red Cross | |||||||
| For services in Crimea | 10 | 10 | 0 | ||||
| The Albert Medal | |||||||
| 1st Class, gold, for Gallantry in saving life on land | 75 | 0 | 0[Pg 398] | ||||
| Groups | |||||||
| Gold Cross for Fuentes d'Onor, Badajoz, Ciudad Rodrigo, Orthes; the Gold Medal with bars for Badajoz and Ciudad Rodrigo, Peninsular Medal with three bars and gold badge of Military Companies of the Order of the Bath, to Lieutenant-Colonel Russell Manners, C.B., 74th Foot | 600 | 0 | 0 | ||||
| 15th Light Dragoons. Waterloo Medal and three-bar Peninsular | 20 | 0 | 0 | to | 30 | 0 | 0 |
| 6th Foot (Lieutenant). Five-bar Peninsular Medal with Gold Order of Knight of Hanover | 28 | 0 | 0 | ||||
| Two Naval, Mutiny, with two bars: Lucknow, Relief of Lucknow. Baltic, 1854-5. To Midshipman who became M.P. | 17 | 0 | 0 | ||||
| One bar: Aro, 1901-2: and West Africa medal. One bar: 1897-8. West Africa Field Force | 2 | 0 | 0 | ||||
| Three to Private, P. A. L. I.: Ghuznee, July 23rd, 1839, Cabul, 1842; Jellalabad, April 7th, 1842, first issue | 7 | 5 | 0 | ||||
| 13th Regt. (Sergeant-Major). Ghuznee, 1839; Cabul, 1842; Jellalabad, 1843; and Meritorious Service Medal | 41 | 0 | 0 | ||||
| 13th Light Infantry. Jellalabad, 1842, with Mural Crown and Indian Mutiny medal. | 5 | 0 | 0 | ||||
| Three to Colour-Sergeant, 31st Regt.: Cabul, 1842; Sutlej, three bars: Ferozeshuhur, Aliwal, Sobraon; Meritorious Service. | 6 | 10 | 0 | ||||
| Two to 43rd Regt.: Kelat-i-Ghilzie, 1842; Ghuznee, Cabul, 1842—two wreaths | 5 | 5 | 0 | ||||
| Two to Gunner, 2nd Battn. Bengal Artillery: Meeanee, Hyderabad, 1843; Indian Mutiny. Three bars: Delhi, Relief of Lucknow, Lucknow | 8 | 5 | 0 | ||||
| Two to Riding-master, 2nd Brigade Horse Artillery: Punniar Star, December 29th, 1843; Sutlej medal, Ferozeshuhur, 1843: one bar: Sobraon | 5 | 15 | 0 | ||||
| Two to Lieutenant, 10th Foot: Sobraon, 1846; Punjab, two bars: Goojerat, Mooltan | 5 | 10 | 0 | ||||
| Three to Sergeant, H.M. 101st Regt.: Indian General Service, one bar: Umbeyla, 1864; Distinguished Conduct in the Field; Meritorious Service | 10 | 10 | 0 | ||||
| Four to 1st Cameron Highlanders: The Sudan: Two bars: The Atbara, Khartoum; English Sudan; Boer War: Four bars: Cape Colony, Orange Free State, Transvaal; King's medal | 1 | 7 | 6 | ||||
| Two, 1895, Defence of Chitral: Maharajah of Kashmir's bronze medal, Chitral, 1895 | 4 | 0 | 0[Pg 399] | ||||
| Three to Able Seaman: West African, Gambia, 1894; Benin River, 1894; Brass River, 1895; Boer War; China, 1900 | 4 | 0 | 0 | ||||
| New Zealand Volunteers, Silver medal for 12 years' service to Lieutenant, New Zealand Field Artillery. Boer War medal to same recipient as Private, N.Z. Mounted Rifles | 6 | 0 | 0 | ||||
| 66th Foot. Afghan, Kandahar, and Distinguished Conduct Medal, July 14th, 1880. For the Battle of Maiwand | 6 | 15 | 0 | ||||
| 1st Connaught Rangers (Sergeant-Major). Five bars: Cape Colony, Tugela Heights, Orange Free State, Relief of Ladysmith, Transvaal, and Medal for Distinguished Conduct in the Field | 6 | 0 | 0 | ||||
| Hampshire Regt. (Sergeant). Four bars: Relief of Kimberley, Paardeberg, Johannesburg, Wittebergen, and West Africa Medal, one bar: 1897-8 | 3 | 3 | 0 | ||||
| North-West Frontier, 1908. King George V, Delhi Durbar medal, December 12th, 1911 (both to Gunner) | 4 | 0 | 0 | ||||
| Miscellaneous Medals | |||||||
| Large silver medal. Naval Reward. Struck for distribution amongst those who had commanded the royal forces and fleets which opposed the double invasion of Monmouth and Argyle | 13 | 10 | 0 | ||||
| Large Silver Medal, Charles II | 4 | 10 | 0 | to | 6 | 6 | 0 |
| Oval Gold Badge, for taking of Portobello by Admiral Vernon | 10 | 0 | 0 | ||||
| American Indian Chief's large silver medal, bust of King George III in armour | 15 | 0 | 0 | ||||
| American Indian Chief's medal. Obverse: Bust of George III, 1794. Reverse: Royal Arms | 2 | 2 | 0 | to | 5 | 0 | 0 |
| Gold Medal and Chain given by German Emperor to eight officers of the 15th Light Dragoons, for "brilliant and important services" at Villiers-en-Couche (near Cambray), April 24th, 1794 | 260 | 0 | 0 | ||||
| Order of Dooranée. 3rd Class. Private sale | 45 | 0 | 0 | ||||
| Highland Society's Silver Medal, for Egypt, 1801 | 2 | 7 | 6 | ||||
| Medal for Coorg, April 1837 | 26 | 0 | 0 | ||||
| Defence of Kars (Turkish) | 1 | 0 | 0 | to | 1 | 5 | 0 |
| Defence of Silistria (Turkish) | 0 | 17 | 6 | to | 1 | 5 | 0 |
| George V Special Reserve medal for Long Service and Good Conduct | 0 | 15 | 0 | ||||
| George V Indian Volunteer Forces Officer's decoration | 1 | 10 | 0 | ||||
| Naval Best Shot | 3 | 3 | 0 | to | 4 | 10 | 0 |
INDEX
- Abor, 1911-12, 261
- Abu Klea, 1885, 213, 324
- — — Regiments engaged at, 214
- Abyssinia, 1867-8, 318
- — Medal for, 191
- — Ships' crews engaged in, 318
- — war, 1864, 189
- — — Regiments engaged at, 191
- Acre, Sultan's medal for, 309
- Afghan war, First, 1839, 94
- — — Second, 1841, 100
- — Medal for, 209
- Afghanistan, 1878-80, 202
- — Medal for, 209
- Africa, Central, medal, 228
- — — 1895, 333
- — East and West, 1887-92, 227, 242
- African General Service Medal, 254, 334
- — West, medal, 229, 329
- Agra, Siege of, 1803, 22
- Ahmed Khel, 1880, 206
- — — Regiments engaged at, 207
- Albert Medal, The, 340
- Albuera, 1811, 38
- — Gold Cross for, 66
- — Regiments engaged at, 41, 130
- Alcantara medal, 66
- Alexandria, 1882, 319
- — Ships engaged at, 320
- — "Black Watch" at, 1801, 15
- Algiers, 1816, 306
- — Ships engaged at, 307
- Ali Musjid, 1878, 203
- — — Regiments engaged at, 203
- Aliwal, 1846, 115
- — Regiments engaged at, 116
- Allighur, 1804, 20
- Alma, 1854, 140
- Amoy, Bombardment, 1841, 99
- Argaum, 1803, 23
- Armada, Spanish, 1588, 1
- — The, medals, 266
- Army medal, instituted by Charles I, 2
- Aro, 1901-2, 334
- Ashantee, 1873-4, 192, 318
- — Medal for, 193
- — Regiments engaged in, 193
- — Ships' crews engaged in, 318
- Ashanti, 1896, Bronze Star for, 229
- — 1900, Medal for, 244
- Assaye (Assye) 1803, 21
- — Regiments engaged at, 21
- Asseerghur, 1803, 22
- Atbara, 1898, 239
- Atwot, 1910, 263
- Austrian Cross, 1813-14, 358
- Ava, 1824-6, 307
- — Ships engaged at, 307
- — Medal for, 91
- Azoff, 1855, 313
- Badajoz, Siege of, 1812, 44
- — Regiments engaged at, 45, 130
- Baird, Sir David, special medal, 16
- Balaklava, 1854, 145
- — Regiments engaged at, 148
- Baltic medal, 314
- Bareilly, Occupation of, 1858, 174
- Barrosa, 1811, 35
- — Regiments engaged at, 36, 130
- Basuto war, 1878-9, 197, 201
- Battle of the Nile, 1798, 284
- — — — Ships engaged at, 286
- Bechuanaland, 1896, 236
- Belgian Star for Waterloo, 85
- Benevente, 1808, 28
- Benin River, 1894, 331
- Bhootan, 1864-6, 188
- — Regiments engaged at, 189
- Bhurtpore (Bhurtpoor), 1826, 93
- — Regiments engaged at, 93
- "Birkenhead," Loss of, 135
- Black Mountain Expedition, 220
- — — — Regiments engaged in, 222
- Blake, General, 5
- Blake's medal, 271
- "Blind Half Hundred," 27
- Boat actions, Bars for, 305 [Pg 402]
- Boer war, 248
- — — Naval medals, 333
- — — Regiments engaged in, 251
- — — Ships' crews engaged in, 334
- Boulton's Trafalgar medal, 291
- Boy's medal for gallantry (Queen Anne), 276
- Brass River, 1895, 331
- British German Legion medal, 69
- British India, Order of, 344
- Brunswick medal for Waterloo, 69, 84
- Burma, 1889-92, 224
- — 1885-7, 329
- — 1885-7, Regiments engaged in, 219
- — Sailors entitled to bar for, 329
- — Annexation of, 1886, 218
- Burmese Chiefs' medal, 92
- — war, First, 1824, 90
- — — First, Regiments engaged in, 91
- — — Second, 137
- Busaco, 1810, 33
- — Regiments engaged at, 34, 130
- "Busaco's bloody ridge," 126
- Cabul, 1842, 103
- — Regiments engaged at, 104, 206
- — 1879, 205
- — Medal for, 1842, 107
- Calcutta, Medal for Seringapatam, 14
- Callis gold medal, 277
- Campaign medal, First, 4
- Camperdown, 1797, 288
- — Ships engaged at, 284
- Canada medal, 218
- Canada, North-West Medal, 217
- Candahar, 1842, 104
- — Battle of, 1880, 208
- — (Kandahar), March to, 1880, 207
- — medal, 107
- — 1880, Regiments engaged at, 207, 208
- Canton, 1857, 178-311
- Cape Colony, 249
- Cape of Good Hope, G. S. M., 236
- Carib war, 1773, 8
- Cashmere Gate, Blowing in of, 1857, 161
- Caucasus, The, 1859-64, 365
- Cawnpore, 1857, 157
- — No bar for, 169
- Central India, 1858, 172
- — — — Regiments engaged in, 175
- Ceylon, 1818, Medal for, 89 [Pg 403]
- — Capture of, 1795-6, Medal for, 11
- Charasia, 1879, 204
- — Regiments engaged at, 205
- Charles I instituted Army medals, 2, 3
- — — Naval medals, 267
- — II, medals, 6, 271
- Chateauguay, 1813, 55
- — Regiments engaged at, 56, 131
- Chilian medal, First, 360
- — — Second, 369
- Chilianwala, 1849, 121
- Chili-Peruvian war, 1879-81, 368
- China, 1840-2, 310
- — 1900, Regiments engaged at, 247
- — medal, First, 1842, 100
- — — Second, 1857, 60
- — — Third, 247
- — — 1900, 245
- Chinese war, First, 1840, 98
- — — Second, 1857, 178
- — — — Regiments engaged at, 181
- — — Ships engaged, 311
- Chin-Lushai, 1889-90, 222
- — Regiments engaged at, 222
- Chitral, Relief of, 1895, 230
- — Defence of, 232
- Chrystler's Farm, 1814, 60
- — — Regiments engaged at, 132
- Ciudad Rodrigo, 1812, 42
- Commassie, 1874, 193
- Commonwealth Naval medals, 268
- "Condor," The plucky, 319
- Conspicuous Gallantry Medal, 338
- — Service Cross, 343
- Continental Peninsular medals, 66
- — War medals, 357
- Coorg, 1837, Medal for, 94
- Copenhagen, 1801, 287
- Corunna, Retreat to, 1808, 29
- — Battle of, 1809, 30
- — Regiments engaged at, 30, 129
- Corygaum, 1818, 89
- Courage, Serbian medal for, 372
- Crescent, Order of, 17
- Crimean war, 1854, 139, 312
- — medals for, 150
- — — Crosses for, 69
- — — Regiments at, 44, 130
- Culloden medals, 1746, 6
- Davison's medal for the Nile, 286
- — Trafalgar medal, 291
- Deccan medal, 1778-84, 9
- Deig, 1804, 24
- Delhi, 1803, 20
- — Defence of, 1804, 23
- — 1857, 158 [Pg 404]
- Detroit Fort, 1812, 48
- — — Regiments engaged at, 48, 131
- Dewey (Admiral) Medal, 370
- "Die-hards," name earned, 126
- Distinction in Service, German medal for, 361
- Distinguished Conduct Medals, 3, 337
- Distinguished Service Medal, 346
- — Service Order, 341
- — — Cross, 345
- Dongola expedition, 1896, 236
- — Regiments engaged at, 237
- Dooranée, Order of, 96
- Drake's medal, 267
- Dunbar, 1650, 4
- — medal, 5
- Dutch wars, 1653, 269
- East Africa, 1902, medal, 257
- — — 1904, medal, 257
- — — 1905-6, medals for, 258
- — India Co., 9
- Edge Hill, 1642, 3
- Edward VII Naval Long Service, 350
- Edwardes's medal, 119
- Egypt, 1801, 14
- — — Regiments engaged in, 18
- — H.E.I. Co.'s medal for, 16
- Egyptian campaign, 1882, 210
- — medal, 1882, 211
- — — for Bravery, 1913, 345
- — wars, 319
- "El Chico Blanco," 58
- — — — Where fell, 120
- Elizabethan Naval medals, 2
- El-Teb, 1884, 321
- — Regiments engaged at, 212
- — Sailors engaged at, 321
- Exmouth gold medal, 307
- Fatshan, 1857, 178
- Ferozeshuhur, 1845, 113
- — Regiments engaged at, 114
- "Fighting Fortieth, The," 105
- "Fighting 43rd," 184
- First Official War Medal, 82
- Fishermen, War medals for, 274
- Foreign war medals, 357
- French medal for Napoleon's veterans, 152
- — — 1870-1, 367
- — veteran's medal, 373
- Fuentes d'Onor, 1811, 37 [Pg 405]
- — — Regiments engaged at, 38, 130
- Galekas and Gaikas, Campaign against, 1877, 196
- Gambia, 1894, 330
- — 1901, 334
- Garibaldian medal, 1860, 364
- "Gate Pah," 1864, 184
- Gawilghur, 1803, 23
- Gemaizah, 1888, 216, 328
- — Regiments engaged at, 216
- — Sailors entitled to bar for, 328
- Geneva Cross, 1870-1, 366
- George I and George II medals, 276 and 277
- George V Naval Long Service, 350
- German medal, 1870-1, 367
- — South-West Africa, 1904-6, 370
- Ghuznee, 1839, 95
- — medal, 1839, 97, 107
- — Recapture of, 1842, 106
- — Regiments engaged at, 95
- Gibraltar, Capture of, 1704, 275
- Gildermaslen, 1795, 19
- "Glorious 1st" of June, The, 279
- Gold Cross for Peninsular commanders, 67
- — medals, Peninsular, 32
- Goojerat, 1849, 122
- — Regiments engaged at, 123
- Gordon, Relief of, 213
- Gordons at Maya, 52
- Governor-General's medal, 97
- Granville, 1703, 275
- Griqua Campaign, 1878, 197
- Guadaloupe, Regiments engaged at, 129
- — — — — (Martinique), 31
- Gwalior Campaign, 1843, 109
- Hanoverian Jubilee medal for Waterloo, 85
- Hanover medal, 84
- Hau-Haus, The, 1866, 185
- Hazara, 1888, 222
- — 1891, 223
- — Regiments engaged at, 223
- "Hazard," H.M.S., 124
- Heavy Brigade, Charge of, 146
- H.E.I. Co.'s Meritorious Service medal, 336
- Hessian medal, 1814-15, 358
- Highlanders at Alexandria, 1801, 15
- Highland Society's medal, 19
- Hodson's daring feat, 161
- Hornby medal and chain, 278
- Hougomont, Guards at, 76 [Pg 406]
- How medals are named, 352
- Hungary, Russian medal for, 1849, 363
- Hunza, 1891, 225
- Hyderabad, 1843, 108
- — medal, 109
- Immortals, The, 40
- India, Long Service, 1859, 350
- — medal, The, 133
- — — 1895, 232
- — Distinguished Service Medal, 342
- — General Service Medal, First, 138
- — General Service Medal, 1903, 258
- — — — — 1908, 260
- — Meritorious Service Medal, 345
- Indian Mutiny, The, 1857, 156
- — — 1858, 316
- — — — Medal for, 175
- — Order of Merit, 343
- Inkermann, 1854, 149
- — Regiments engaged at, 150
- Iron Cross for San Sebastian, 1836, 362
- Isandhlwana, 1879, 199
- Isles of France, 1811, 34
- James I, 2
- Java, 1811, 41
- — H.E.I. Co.'s medal for, 42
- — Regiments engaged at, 42, 130
- Jellalabad, 1841, 101
- — medal, First, 102
- — — Second (Flying Victory), 102
- — Regiments engaged at, 102
- Jowaki, 1877, 195
- — Regiments engaged at, 196
- Jubaland, 1900, 334
- Juba River, 1893, 330
- Kabul-Kandahar Star, 209
- Kaffir war, First, 134
- — — — Regiments engaged in, 135
- — wars, Third, Regiments engaged in, 136
- Kars medal, 154
- Kelat-i-Ghilzie, 1842, Medal for, 105
- Khartoum, 241
- Khedive's Sudan medal, 239
- — Star, 211, 217
- Kimberley Star, 251
- King Edward Long Service Medal, 349
- King George's Long Service Medal, 349
- King's South African medal, 251
- Kirbekan, 1885, 214 [Pg 407]
- — Regiments engaged at, 215
- König Grätz, Cross for, 1866, 366
- Kordofan, South, 1910, 263
- Kotah, 1858, 173
- La Hogue, 1692, 273
- Lake, General, 22
- Lampriere gold medal, 275
- Laswarree, 1803, 22
- Latham gold medal, 38
- Legation, Defence of, 1900, 245
- Légion d'Honneur, 359
- Light Brigade, Charge of, 147
- Liwondi, 1893, 330
- Looshai, 1871-2, 189
- — Regiments engaged at, 189
- Louisbourg, 1758, 278
- — Capture of, 1758, 7
- Lucknow, Defence of, 1857, 163
- — Defence of, regiments engaged in, 167
- — Relief of, 1857, 165
- — Retaking of, 1858, 170
- Lushai, 1889-92, 224
- Mackworth, Colonel, 5
- Maharajpoor Star, 111
- — 1843, 110
- — Regiments engaged at, 110
- Maheidpore, 1817, 88
- Mahratta war, 20
- — — Regiments engaged at, 23
- Maida, 1806, 25
- — Regiments engaged in, 129
- Malakand, 1895, Regiments engaged at, 234
- Malakoff, Capture of, 1855, 144
- Mamelon, 1855, 143
- Martinique, 1809, 30
- — — Regiments at, 31, 129
- Matabeleland, 1893, 235, 237
- — Regiments engaged in, 238
- Maya, Gordons at, 52
- Médaille Militaire, 363
- Mediterranean medal, 251
- Medjidie, Order of, 154
- Meeanee, 1843, 107
- — medal for, 109
- Merit, Indian Order of, 343
- Meritorious Service Medals, 336
- Military Cross, The, 347
- — General Service Medal, 128
- — — — — Regiments receiving same for Egypt, 1801, 128
- — Long Service Medals, 348
- — medals established, 3
- Monk, General, 5
- Moodkee, 1845, 112 [Pg 408]
- — Regiments engaged at, 113
- Mooltan, Regiments engaged at, 121, 122
- — Siege of, 1849, 120
- Moore, Sir John, Death of, 29
- Mutiny Medal, 175
- Mwele, 1895-6, 332
- Mysore Campaign, 1791-3, 9
- Naga, 1879-80, 220
- Naseby, 1645, 5
- Nassau medal for Waterloo, 83
- Natal Native Rebellion, 1908, 259
- Naval Brigade in Crimea, 315
- — Distinguished Service Medal, 346
- — General Service Medal, 292
- — — — — instituted, 127
- Naval gold medal instituted, 280
- — Long Service Medals, 349
- — medals, Elizabethan, 2
- — — First instituted, 1
- — — Types of, 270
- — officers, Gold medals for, 270
- — war medals, 266
- Navarino, 1827, 308
- — Ships engaged at, 309
- Nelson, Death of, 290
- Nepaul, 1814, 86
- — H.E.I. Co.'s medal for, 87
- New Zealand, 1845-6-7, 317
- — — 1860-6, 317
- — — Cross, The, 342
- — — Medal, 186
- — — War, First, 1845, 124
- — — — — Regiments engaged in, 125
- — Ships' crews engaged, 317
- — — — 1860-6, 182
- Nigeria, 1902-6, 256
- Nile, The, 1798, 284
- — — 1884-5, 324
- Nive, 1814, 60
- — Regiments engaged at, 62, 132
- Nivelle, 1814, 57
- — Regiments engaged at, 59, 132
- North-East Frontier, 1891, 225
- "North Star," H.M.S., 124
- North-West Frontier, 1849-68, 187
- — — Expeditions, Regiments engaged in, 187
- North-West Canada, 217
- Nukumaru, 1865, 185
- Nyassa Lake, 1893, 330
- Officers' gold crosses for Peninsular, 68
- — silver crosses for Peninsular, 69 [Pg 409]
- "Old Toughs," 121
- Omdurman, 1898, 240
- — Regiments engaged at, 240
- Orthes, 1814, 62
- — Regiments engaged at, 63, 132
- Papal States Campaign, 1860, 365
- "Pearl of the Age," 96
- Pegu, 1852, 137, 311
- — Regiments entitled to medal, 138
- — Seamen and Marines engaged, 311
- Peiwar Kotal, 1878, 203
- Pekin, 1860, 179
- Peninsular gold cross, 56
- — gold medals, 32
- — war, 1808, 26
- — — medal, 125
- Perak, 194
- — 1876, 318
- — Regiments engaged in, 195
- — Ships' crews engaged, 318
- Persia, 1857, 317
- Persian war, 1856-7, 155
- Picton, Death of, 77
- Pistrucci's Waterloo medal, 374
- Polish insurrection, The, 1863-4, 366
- Prussian Iron Cross, 1813, 360
- — medals, 1813-15, 358
- — oval iron medal, 1815, 357
- Punjab, 1848-9, 311
- — Campaign, Second, 119
- — medal, 123
- Punniar, 1843, 110
- — Regiments engaged at, 110
- — Star, 111
- Pyrenees, 1813, 51
- — Regiments engaged at, 131
- Quatre Bras, 1815, 71
- — — Losses at, 75
- Queen Anne, 274
- Queen's South African medal, 249
- — Sudan medal, 242
- Rangiawahia, 1864, 184
- Rare medals, 89
- Redan, The, 144
- Red Heckle, The, 18
- Regimental designations, 377
- Reissues of earlier medals, 177
- Republican Légion d'Honneur, 360
- Rhodesia, 1893, 237
- Riel's rebellion, 1885, 217
- Rodrigues, 1811, 34
- Roleria, 1808, Regiments at, 27
- Rorke's Drift, 1879, 199 [Pg 410]
- Royal Niger Co.'s medal, 244
- Russian medal for Hungary, 1849, 363
- Sahagun, 1808, 28
- — Regiments engaged at, 129
- Salamanca, 1812, 45
- — Regiments at, 48, 131
- Sale prices, 382
- Samana, 1891, 223
- — Regiments engaged at, 223, 234
- Sanatory Cross, The Serbian, 372
- San Sebastian, 1836, 361
- — — Regiments engaged at, 131
- Sardinian medal, 153
- Saxe-Gotha-Altenburg medal, 84
- Scinde, 1843, 310
- — Sailors engaged, 311
- Seamen's medals, 271
- Sebastian, Siege of, 51
- Sebastopol, Siege of 1854, 142
- — Ships engaged in, 313
- Second general award of medals, 82
- Secundrabagh, 168
- Sedgemoor, 1685, 1
- Serbo-Bulgarian war, 1913, 372
- Serbo-Turkish war, 1912, 371
- Seringapatam, 1799, 11
- — Regiments engaged at, 12
- — — Medals for, 12-14
- "Sepoy General" (Wellington), 33
- Sierra Leone, 1898-9, 332
- Sikh wars, 1845-9, 111
- Sikkim, 1888, 220
- Silistria medal, 153
- Silver Cross for San Sebastian, 1846, 363
- Sobraon, 1846, 116
- — Regiments engaged at, 117
- Soho medal for Seringapatam, 13
- Somaliland, 1902-4, 334
- — Ships' crews engaged, 335
- — 1908-10, 335
- South Africa, 1853, 312
- — Crews engaged, 312
- — — 1877-8-9, Ships' crews engaged in, 318
- Spanish-American war, 370
- — — Medal for, 370
- — Armada, 1588, 1
- Special gold medals for Naval Service, 274
- Standing army founded, 6
- St. Helena medal, 85
- St. Sebastian, 1813, 53
- — — Regiments engaged at, 55
- St. Vincent medal, 1795, 8
- Suakin, 1884, 323 [Pg 411]
- — Crews engaged at, 324
- — 1885, 326
- Sudan, 1899, 241
- — 1910, 262
- — 1912, 261, 263
- — medal, 1910, 264
- — Recovery of, 215
- — war, Second, bars for, 327
- Sutlej medal, 118
- Syria, 1839, 309
- — Ships engaged, 310
- Taku Forts, 1860, 178-311
- Talavera, 1809, 31
- — Regiments at, 31
- Tamaai, 1884, 212, 322
- — Regiments engaged at, 213
- Tel-el-Kebir, 1882, 320
- — Regiments engaged at, 211
- Thin Red Line, The, 145
- Tibet, 1903-4, 259
- Tirah, Regiments engaged at, 234
- Tofrek, 1885, 326
- — Regiments engaged at, 215
- — Sailors engaged at, 326
- Tokar, 1890, 217, 328
- Tonkin, 1883-5, 369
- Toski, 1888, 216
- Toski, Regiments engaged at, 217
- Toulouse, 1814, 64
- — Regiments engaged at, 65, 132
- Trafalgar, 1805, 288
- — Ships engaged at, 290
- — Gold medal for, 291
- — Official medal, 292
- Transport medal, 335
- Triumph medal, The, 271
- Turkestan, 1857-9, 364
- Turkish General Service Medal, 153
- — medals, 152
- Ulundi, 1879, 201
- Umbeyla, 1863, 187
- Union Brigade, Charge of, 1815, 78
- Victoria Cross, The, 139, 338
- Victoria Crosses for New Zealand, 1863, 183
- — — gained at Alma, 142
- — — won by 42nd, 174
- — — — in Zulu war, 200
- Victorian Naval Long Service, 349
- Vimiera, 1808, 27
- — Regiments engaged at, 129
- Vittoria, 1813, 49
- — Gold cross for, 67
- — Regiments engaged at, 50, 131 [Pg 412]
- Waterloo, 1815, 75
- — Eve of, 1815, 70
- — medal, British, 81
- — medals, Continental, 83
- — Regiments engaged at, 80
- Wellesley, The Hon. Arthur, 21
- Wellington's first victory, 21
- West Africa, 1906-8 medals, 258
- William and Mary, Naval medals only, 6
- William IV Naval Long Service, 349
- Witu, 1890, 329
- — 1893, 330
- Wyard medal, 269
- Zeal, Russian medal for, 363
- Zulu medal, 1877-8-9, 202
- — war, 1879, 198, 318
- — — Regiments engaged in, 198, 202
- — Ships' crews engaged, 318
Printed by Hazell, Watson & Viney, Ld., London and Aylesbury.
Printed by Hazell, Watson & Viney, Ltd., London and Aylesbury.
Telephone—6659 Gerrard
Telegraphic Address—Gucien, London
Cable Code—Paul's Simplicode
31, Essex Street,
London, England
1914—1915
Telephone—6659 Gerrard
Telegraphic Address—Gucien, London
Cable Code—Paul's Simplicode
31, Essex Street,
London, England
1914—1915
STANLEY PAUL & CO.'S
STANLEY PAUL & CO.'S
LIST of NEW BOOKS
List of New Books
⁂ Previous Lists Cancelled
⁂ Previous Lists Cancelled
A GREAT LITERARY DISCOVERY
A major literary find
JULIETTE DROUET'S LOVE-LETTERS TO VICTOR HUGO
JULIETTE DROUET'S LOVE LETTERS TO VICTOR HUGO
Edited with a Biography of Juliette Drouet by Louis Guimbaud; translated by Lady Theodora Davidson. Demy 8vo, cloth gilt, with many illustrations, 10/6 net.
Edited with a Biography of Juliette Drouet by Louis Guimbaud; translated by Lady Theodora Davidson. Demy 8vo, cloth gilt, with many illustrations, £10.6 net.
What is described as the most fascinating and notable human document seen for many years has recently been discovered in Paris by a distinguished French author, whose work has received the crown of the Academy. This writer, after ten years' patient work, has brought to light a collection of letters written by Juliette Drouet to Victor Hugo.
What has been called the most captivating and significant human document in many years has recently been found in Paris by a renowned French author, whose work has been honored by the Academy. This writer, after a decade of dedicated effort, has uncovered a collection of letters written by Juliette Drouet to Victor Hugo.
The story of Juliette's love for the great French novelist is one of the most romantic in history. Becoming devotedly attached to him when he first noticed her playing a humble part in "Lucrezia Borgia," she followed him in his exile to Brussels, Guernsey and Jersey, where she inspired some of his greatest poems. To console herself whenever he was absent, she wrote down "everything that came into her head, everything that caused her heart to beat." These are not ordinary love-letters, but "scribbles," as Juliette herself called them, thrown upon paper hour after hour, cast into a corner without being read over, and secured by the lover at each of his visits, as so many trophies of passion.
The story of Juliette’s love for the famous French novelist is one of the most romantic tales in history. She became deeply attached to him when he first noticed her in a minor role in "Lucrezia Borgia." She followed him during his exile to Brussels, Guernsey, and Jersey, where she inspired some of his greatest poems. To comfort herself whenever he was away, she wrote down "everything that came to mind, everything that made her heart race." These weren’t typical love letters but "scribbles," as Juliette called them, jotted down on paper hour after hour, tossed aside without being read, and kept by her lover during his visits, treasured as tokens of their passion.
These letters were written so constantly that they number in all as many as 15,000, and of these a careful selection has been made for publication. M. Louis Guimbaud, who is responsible for the discovery of the letters, has added an extremely interesting biographical study of Juliette and her relations with Victor Hugo. The book, which is illustrated by a remarkable series of illustrations from the Victor Hugo Museum, contains many of the most tender and passionate love-letters ever written.
These letters were so frequently written that there are about 15,000 in total, and a careful selection has been made for publication. M. Louis Guimbaud, who discovered the letters, has included a fascinating biographical study of Juliette and her relationship with Victor Hugo. The book, featuring a remarkable series of illustrations from the Victor Hugo Museum, contains many of the most tender and passionate love letters ever written.
LIFE AND LETTERS IN THE ITALIAN RENAISSANCE
LIFE AND LETTERS IN THE ITALIAN RENAISSANCE
By Christopher Hare, author of "Men and Women of the Italian Reformation," etc.
By Chris Hare, author of "Men and Women of the Italian Reformation," etc.
Demy 8vo, cloth gilt, illustrated, 12/6 net.
Demy 8vo, cloth with gold lettering, illustrated, 12/6 net.
In this author's previous books on the Renaissance, he has told the story of Illustrious Ladies, of Emperors and Kings, Popes and Warriors, as makers of history in Italy and other lands. The present work is concerned with a finer and more enthralling subject: the lives of writers and thinkers as contrasted with the mere pomp and splendour of the time. The Poet, the Humanist, the Historian, the Diplomatist, and the Letter-writer, from Lorenzo the Magnificent to Machiavelli and Baldassare Castiglione, are treated in turn, in a bright, illuminating narrative.
In this author's earlier books about the Renaissance, he shared the stories of notable women, emperors, kings, popes, and warriors as shapers of history in Italy and beyond. This current work focuses on a more nuanced and captivating topic: the lives of writers and thinkers set against the backdrop of the era's mere grandeur and extravagance. The poet, the humanist, the historian, the diplomat, and the letter-writer, from Lorenzo the Magnificent to Machiavelli and Baldassare Castiglione, are discussed in a lively, enlightening narrative.
THE LIFE AND TIMES OF QUEEN ADELAIDE
THE LIFE AND TIMES OF QUEEN ADELAIDE
By Mary F. Sandars, Author of "Princess and Queen of England," etc.
By Mary F. Sandars, author of "Princess and Queen of England," etc.
Demy 8vo, cloth gilt, with many rare illustrations, 16/- net.
Demy 8vo, cloth with gold lettering, featuring many rare illustrations, £16.00 net.
The wife of William IV. came as a foreigner to be Queen of England, and found herself surrounded by difficult and trying circumstances, both political and domestic. In dread of an impending revolution she exerted all her influence on the side of peace, and by this and the purity of her life and aims she earned the title of "Good Queen Adelaide."
The wife of William IV came from abroad to become Queen of England and faced many tough challenges, both politically and at home. Fearing an approaching revolution, she used all her influence to promote peace, and through her pure intentions and way of life, she earned the nickname "Good Queen Adelaide."
THE MARTYR OF LOVE: The Life of Louise de la Vallière
THE MARTYR OF LOVE: The Life of Louise de la Vallière
By Claude Ferval, with an introduction by Jean Richepin; translated by Sidney Dark.
By Claude Ferval, with an introduction by Jean Richepin; translated by Sidney Dark.
Demy 8vo, cloth gilt, illustrated, 16/- net.
Octavo size, cloth with gold lettering, illustrated, £16 net.
No more poignant account of the romance of Louise de la Vallière has ever been written than this by Claude Ferval, the well-known French romantic writer. In its always interesting setting of the gay, intriguing court at Fontainebleau, it tells in delightful, sympathetic language the story of the first mistress of Louis XIV. It is at once a vivid historical study and a passionate romance.
No account of the romance of Louise de la Vallière is more touching than this one by Claude Ferval, the famous French romantic author. Set against the lively and captivating backdrop of the court at Fontainebleau, it beautifully and compassionately narrates the story of Louis XIV's first mistress. It serves as both a vivid historical exploration and an intense romance.
IMPERIAL AMERICA
America's empire
By J. M. Kennedy, Author of "Tory Democracy," etc.
By J.M. Kennedy, Author of "Tory Democracy," etc.
Demy 8vo, cloth gilt, illustrated, 12/6 net.
Demy 8vo, cloth with gold lettering, illustrated, £12.50 net.
Thoughtfully and lucidly, Mr. J. M. Kennedy, who is a well-known authority on international affairs, describes the "imperialistic" attitude of the United States in their relation to the European Powers and especially to Great Britain. The history of the States is traced in this light, the objects of the Monroe Doctrine are explained, and a description is given of the working of the U.S.A. home politics. The book is essentially up-to-date in its assignment of the place of the United States in European controversies.
Thoughtfully and clearly, Mr. J. M. Kennedy, a well-known expert on international affairs, describes the "imperialistic" attitude of the United States in its relations with the European Powers, especially Great Britain. The history of the U.S. is examined through this lens, the goals of the Monroe Doctrine are explained, and there’s an overview of the workings of U.S. domestic politics. The book is essentially current in its analysis of the United States' role in European conflicts.
IRELAND: Vital Hour.
IRELAND: Vital Hour.
By Arthur Lynch, M.P., Author of "Modern Authors: A Review and Forecast," "Approaches: The Poor Scholar's Quest of a Mecca," "Our Poets," "Human Documents," "Prince Azreel," "Psychology: A New System," "Purpose and Evolution," "Sonnets of the Banner and the Star," etc., etc.
By Arthur Lynch, MP, Author of "Modern Authors: A Review and Forecast," "Approaches: The Poor Scholar's Quest of a Mecca," "Our Poets," "Human Documents," "Prince Azreel," "Psychology: A New System," "Purpose and Evolution," "Sonnets of the Banner and the Star," and more.
In Demy 8vo, cloth gilt, 10/6 net.
In Demy 8vo, cloth with gold lettering, £10.60 net.
Here, at length, is a fearless and illuminating book, written with inside knowledge of Irish politics. The author has had opportunity given to few of possessing essential knowledge of Irish organisations. He writes, however, less as an historian than as an engineer. He has entered upon the work in that rare spirit of patriotism which seeks the weaknesses and the strength of the materials of which the Irish nation of the future must be built. He tests the materials remorselessly, cutting down beneath surface-show till he finds sound substance.
Here is a bold and insightful book, written with a deep understanding of Irish politics. The author has had opportunities that few have to gain crucial knowledge of Irish organizations. However, he approaches this work more as an engineer than as a historian. He undertakes this task with a unique spirit of patriotism that aims to identify both the weaknesses and strengths of the elements that will shape the Irish nation of the future. He examines these elements ruthlessly, digging beneath superficial appearances until he uncovers solid substance.
Animated as he is by hope for Ireland he discards flattery and flummery, and some of his criticisms of the existing state of affairs, particularly the influence of the clergy in politics, will produce a deep impression, and perhaps provoke fierce rejoinders. These remarks apply not to the priests only, but to their Orange confreres. His fervent desire is to see religious strife and bigotry eliminated from Irish public life.
Animated by hope for Ireland, he dismisses flattery and nonsense, and some of his critiques of the current situation, especially regarding the influence of the clergy in politics, will leave a strong impact and might spark intense responses. These comments apply not only to the priests but also to their Orange counterparts. His passionate wish is to see religious conflict and bigotry removed from Irish public life.
On the whole the book is both conciliatory and unifying, and the true way of Ireland's concord with England is pointed out. While daringly thrusting his hand into the furnace of burning questions of the day, the author has written in an easy, discursive style, lightening the pages by humourous touches, after the manner of his "Human Documents," or by graphic personal descriptions of famous men—such as Parnell, Davitt and Synge—whom he has encountered in his career. He prefers to illustrate a point by anecdote rather than belabour it by an argument.
Overall, the book is both accommodating and unifying, showing the true path to Ireland's harmony with England. Boldly diving into the pressing issues of the day, the author writes in a relaxed, conversational style, making the pages enjoyable with humorous moments, reminiscent of his "Human Documents," or through vivid personal accounts of notable figures—like Parnell, Davitt, and Synge—whom he has met throughout his career. He favors using anecdotes to illustrate a point instead of hammering it home with heavy arguments.
One of the chapters is in part Autobiographical; another chapter speaks of Parliament, with piquant notes of irony; a fresh and lively discussion of Irish Literature illustrates the author's characteristic style of uttering deep sayings in a light mood; whilst another chapter, dealing with the Irish in America, will be read with peculiar interest at the present time.
One of the chapters is partly autobiographical; another chapter talks about Parliament, with sharp notes of irony; a new and engaging discussion of Irish Literature showcases the author's unique style of expressing profound thoughts in a casual tone; while another chapter, focusing on the Irish in America, will be read with special interest right now.
Altogether an original, bold, sincere, and, above all, upbuilding book.
Overall, it's an original, bold, sincere, and, most importantly, uplifting book.
MARCHING SONGS.
Fight songs.
A pocket book for our soldiers.
A pocket guide for our soldiers.
In cloth limp, 6d. net.
In soft fabric, 6d net.
"A merry heart goes all the day—your sad tires in a mile-a." Every soldier knows that without the rousing song each mile grows longer and longer. The object of this little handbook of melody is to help our weary warriors on their way. Songs which they sang as boys, and still sing as men, are here collected—songs with stirring tunes, swinging choruses, and all in correct time for marching. There is nothing to learn; half the men in a Company would already know both the words and music of most, and the book is but a peg for the memory. To suit all, the tunes are given in the old, and in the tonic-sol-fa notation.
"A cheerful heart lasts all day—your sadness wears you down quickly." Every soldier knows that without an uplifting song, each mile feels even longer. The purpose of this little songbook is to support our tired warriors on their journey. Here are the songs they sang as boys and continue to sing as men—songs with lively melodies, catchy choruses, all timed perfectly for marching. There's nothing to learn; half the men in a Company would already know both the lyrics and the tunes of most songs, and the book is just a reminder. To accommodate everyone, the tunes are provided in both traditional and tonic-sol-fa notation.
THE PRINCESS MATHILDE BONAPARTE
Princess Mathilde Bonaparte
By Philip W. Sergeant, Author of "The Last Empress of the French," etc.
By Philip W. Sergeant, Author of "The Last Empress of the French," and more.
Demy 8vo, cloth gilt, fully illustrated, 16/- net.
Demy 8vo, cloth with gold lettering, fully illustrated, £16.00 net.
Princess Mathilde Bonaparte, the niece of the great Emperor, died only ten years ago. She was the first serious passion of her cousin, the Emperor Napoleon III, and she might have been, if she had wished, Empress of the French. Instead, she preferred to rule for half a century over a salon in Paris, where, although not without fault, she was known as "the good princess."
Princess Mathilde Bonaparte, the niece of the famous Emperor, passed away just ten years ago. She was the first real love of her cousin, Emperor Napoleon III, and she could have been, if she had wanted, the Empress of the French. Instead, she chose to preside over a salon in Paris for fifty years, where, despite her flaws, she was known as "the good princess."
FROM JUNGLE TO ZOO
From Jungle to Zoo
By Ellen Velvin, F.Z.S., Author of "Behind the Scenes with Wild Animals," etc.
By Ellen Velvin, F.Z.S., author of "Behind the Scenes with Wild Animals," and others.
Large crown 8vo, cloth gilt, with many remarkable photographs, 6/- net.
Large 8vo hardcover, gold lettering, featuring many striking photographs, £6.00 net.
A fascinating record of the many adventures to which wild animals and their keepers are subject from the time the animals are captured until their final lodgment in Zoo or menagerie. The author has studied wild animals for sixteen years, and writes from personal knowledge. The book is full of exciting stories and good descriptions of the methods of capture, transportation and caging of savage animals, together with accounts of their tricks, training, and escapes from captivity.
A fascinating account of the many adventures wild animals and their handlers experience from the moment the animals are captured until they settle into a zoo or menagerie. The author has studied wild animals for sixteen years and writes from personal experience. The book is filled with thrilling stories and detailed descriptions of how these animals are captured, transported, and enclosed, along with tales of their tricks, training, and escapes from captivity.
THE ADMIRABLE PAINTER: A study of Leonardo da Vinci
THE ADMIRABLE PAINTER: A study of Leonardo da Vinci
By A. J. Anderson, Author of "The Romance of Fra Filippo Lippi," "His Magnificence," etc.
By A.J. Anderson, Author of "The Romance of Fra Filippo Lippi," "His Magnificence," etc.
Demy 8vo, cloth gilt, fully illustrated, 10/6 net.
Demy 8vo, cloth with gold lettering, fully illustrated, £10.50 net.
In this book we find Leonardo da Vinci to have been no absorbed, religious painter, but a man closely allied to every movement of the brilliant age in which he lived. Leonardo jotted down his thoughts in his notebooks and elaborated them with his brush, in the modelling of clay, or in the planning of canals, earthworks and flying-machines. These notebooks form the groundwork of Mr. Anderson's fascinating study, which gives us a better understanding of Leonardo, the man, as well as the painter, than was possible before.
In this book, we see that Leonardo da Vinci wasn’t just a devout religious painter, but a person deeply connected to all the vibrant movements of his time. Leonardo captured his ideas in his notebooks and developed them through his paintings, sculpting with clay, and designing canals, earthworks, and flying machines. These notebooks provide the foundation for Mr. Anderson's captivating study, which offers us a deeper insight into Leonardo as a person and as an artist than was previously possible.
WOMEN OF THE REVOLUTIONARY ERA
WOMEN OF THE REVOLUTIONARY PERIOD
By Lieut.-Col. Andrew C. P. Haggard, D.S.O., Author of "Remarkable Women of France, 1431-1749," etc.
By Lieut.-Col. Andrew C. P. Haggard, D.S.O., Author of "Remarkable Women of France, 1431-1749," etc.
Demy 8vo, cloth gilt, fully illustrated, 16/- net.
Demy 8vo, cloth with gold lettering, fully illustrated, £16.00 net.
Lieut.-Col. Haggard has many times proved that history can be made as fascinating as fiction. Here he deals with the women whose more or less erratic careers influenced, by their love of display, the outbreak which culminated in the Reign of Terror. Most of them lived till after the beginning of the Revolution, and some, like Marie Antoinette, Théroigne de Méricourt and Madame Roland, were sucked down in the maelstrom which their own actions had intensified.
Lieut.-Col. Haggard has shown many times that history can be just as captivating as fiction. In this work, he explores the women whose somewhat unpredictable lives impacted the events that led to the Reign of Terror through their desire for attention. Most of them lived past the start of the Revolution, and some, like Marie Antoinette, Théroigne de Méricourt, and Madame Roland, were caught up in the chaos that their own actions helped escalate.
TRANSCRIBER'S NOTES
Silently corrected simple spelling, grammar, and typographical errors.
Silently fixed basic spelling, grammar, and typing mistakes.
Retained anachronistic and non-standard spellings as printed.
Retained outdated and unconventional spellings as printed.
Download ePUB
If you like this ebook, consider a donation!