This is a modern-English version of Pork Slaughtering, Cutting, Preserving, and Cooking on the Farm, originally written by Cross, H. Russell, Green, E. Curtis, Jones, William R., Kotula, Anthony, West, R. L. (Roger Lawrence).
It has been thoroughly updated, including changes to sentence structure, words, spelling,
and grammar—to ensure clarity for contemporary readers, while preserving the original spirit and nuance. If
you click on a paragraph, you will see the original text that we modified, and you can toggle between the two versions.
Scroll to the bottom of this page and you will find a free ePUB download link for this book.

PORK Slaughtering, Cutting, Preserving, and Cooking on the Farm
 |
UNITED STATES DEPARTMENT OF AGRICULTURE |
FARMERS’ BULLETIN NUMBER 2265 |
PREPARED BY SCIENCE AND EDUCATION ADMINISTRATION |
||
CONTENTS
| Page | |
| Selection and Care of Animal before Slaughter | 3 |
| Preparing for Slaughter | 4 |
| Slaughter | 7 |
| Chilling the Carcass | 35 |
| Cutting | 36 |
| Freezing and Frozen Storage | 53 |
| Further Processing | 54 |
| Meat Cookery | 62 |
| Precautions | 63 |
| Other Publications | 64 |
Issued June 1978
Slightly revised April 1981
Issued June 1978
Slightly revised April 1981
For sale by the Superintendent of Documents,
U.S. Government Printing Office
Washington, D.C. 20402
For sale by the Superintendent of Documents,
U.S. Government Printing Office
Washington, D.C. 20402
Pork Slaughtering, Cutting,
Preserving, and Cooking on the Farm
Pork Slaughtering, Cutting,
Preserving, and Cooking on the Farm
By H. Russell Cross, Research Food Technologist,1 E. Curtis Green, Meat Marketing Specialist,2 William R. Jones, Extension Meat Specialist,3 Roger L. West, Associate Professor, Meat Science,4 and Anthony W. Kotula, Chief, Meat Science Research Laboratory,5 (Photographs by Donald K. Rough6 and Terry K. O’Driscoll7)
By H. Russell Cross, Research Food Technologist, __A_TAG_PLACEHOLDER_0__ E. Curtis Green, Meat Marketing Specialist,2 William R. Jones, Meat Specialist,3 Roger L. West, Meat Science Associate Professor,4 and Anthony W. Kotula, Head, Meat Science Research Lab,5 (Photographs by Donald K. Rough and Terry K. O'Driscoll__A_TAG_PLACEHOLDER_0__)
SELECTION AND CARE OF ANIMAL BEFORE SLAUGHTER
Several factors should be considered before slaughtering a hog for home consumption. The most important considerations are health, kind of animal (barrow, gilt, sow, or boar), expected meat yield, and care of the animal prior to slaughter.
Several factors should be considered before slaughtering a hog for home consumption. The most important considerations are health, type of animal (barrow, gilt, sow, or boar), expected meat yield, and care of the animal prior to slaughter.
Health
You should take care that an unhealthy animal is not selected for slaughter. At the time of selection, look for signs of sickness such as fever, increased breathing rate, and diarrhea. Animals suspected of being unhealthy should be treated by a veterinarian until the animal is returned to a healthy state.
You should ensure that an unhealthy animal isn’t chosen for slaughter. When selecting, look for signs of illness like fever, rapid breathing, and diarrhea. Animals suspected of being unhealthy should be examined by a vet until they are back to good health.
Animal Care
It is important to exercise proper care of the animal prior to slaughter, if you expect to obtain high quality meat. Pen the animal in a clean, dry place the day before slaughtering. Restrict the animal from feed 24 hours prior to slaughter, but provide access to water at all times. The slaughter of hot, excited animals increases the risk of sickness, injury, and darker meat; therefore, do not run the animal or wrestle with it. Bruises and whip marks cause bloody spots which must be trimmed out.
It’s essential to take good care of the animal before slaughter if you want to get high-quality meat. Keep the animal in a clean, dry area the day before slaughtering. Withhold feed for 24 hours beforehand, but make sure it has access to water at all times. Slaughtering overheated or stressed animals raises the chances of illness, injury, and darker meat, so avoid running or wrestling with the animal. Bruises and whip marks create bloody spots that need to be trimmed off.
Animal Type and Meat Yield
Highest quality pork is produced from young, healthy, well-fed, meaty hogs that weigh from 175 to 240 pounds. The meat-type hog should have full, plump, meaty hams and straight, smooth sides. Fat should be firm, evenly distributed, and not more than 1.6 to 1.7 inches average thickness over the back. The average meat-type hog produces as much pork as a family of two consumes in 10 to 12 months. Heavier, fatter hogs produce less lean and more excess fat.
The best quality pork comes from young, healthy, well-fed, meaty pigs that weigh between 175 and 240 pounds. A meat-type pig should have full, plump hams and straight, smooth sides. The fat should be firm, evenly distributed, and no thicker than 1.6 to 1.7 inches on average across the back. An average meat-type pig produces enough pork for a family of two for about 10 to 12 months. Heavier, fatter pigs yield less lean meat and more excess fat.
A meat-type hog, when cut and trimmed according to the methods described later, will yield approximately 65 to 70 percent of its carcass weight in ham, picnic shoulder, loin, bacon, and Boston butt. Expected yields of major and minor cuts from a U.S. No. 2 hog are presented in table 1.
A meat-type pig, when processed and trimmed using the methods described later, will provide about 65 to 70 percent of its carcass weight in ham, picnic shoulder, loin, bacon, and Boston butt. Expected yields of major and minor cuts from a U.S. No. 2 pig are shown in table 1.
| Cuts | Percentage of USDA carcass weight |
| Ham (trimmed) | 19 |
| Belly (untrimmed) | 18 |
| Collar, fat back, and clear plate | 18 |
| Picnic shoulder and Boston butt (trimmed) | 17 |
| Loin (trimmed) | 17 |
| Feet, tail, and neckbones | 5 |
| Spareribs | 3 |
| Jowl (untrimmed) | 3 |
| 100 | |
| Four lean cuts8 | 53 |
| Adapted from Smith, King & Carpenter, 1975. | |
| 8 Ham, loin, picnic shoulder, and Boston butt. | |
The slaughter of boars is not recommended. Meat from boars has a strong odor during cooking, and an off-flavor. This “sex” odor and flavor is often identified as being “soapy,” and the odor increases as boars approach sexual maturity. If old boars are to be slaughtered, they should be castrated and allowed to heal prior to being slaughtered.
The slaughter of boars is not advised. Boar meat has a strong smell when cooked, and it also has an unpleasant taste. This "sex" smell and flavor is often described as "soapy," and the odor gets stronger as boars get closer to sexual maturity. If older boars need to be slaughtered, they should be castrated and given time to heal before being killed.
PREPARING FOR SLAUGHTER
Prior to the day of slaughter, select the slaughter site, accumulate all equipment, prepare for waste disposal, and, if necessary, arrange with a local processor or meat market for chilling and cutting the carcass. If you plan to have the carcass chilled and cut up, make arrangements concerning the time and day on which the carcass can be accepted, the charges, and specific instructions for chilling, cutting, and wrapping.
Before the day of slaughter, choose the slaughter location, gather all necessary equipment, prepare for waste disposal, and, if needed, coordinate with a local processor or meat market for chilling and butchering the carcass. If you intend to have the carcass chilled and butchered, make sure to confirm the time and date when the carcass can be accepted, the costs involved, and any specific instructions for chilling, butchering, and packaging.
Site Selection
Slaughter site selection is extremely important. The amount of space and equipment needed will depend on the method (scalding or skinning) used. If the carcass is to be scalded, be sure that a site is selected where a fire can be built, and clean, running water is available. If a tree is to be used to suspend the carcass, select a healthy limb, 6 to 8 inches in diameter and 8 to 10 feet from the ground. This will ensure that the limb will not break from the weight of the carcass, and the carcass can be fully extended above the ground for viscera removal and splitting. If the animal is to be slaughtered in a building, be sure that a strong beam 8 to 10 feet from the floor is available. The floor should be clean and, preferably, concrete.
Slaughter site selection is very important. The amount of space and equipment needed will depend on the method (scalding or skinning) used. If the carcass is going to be scalded, make sure to choose a site where a fire can be built and where there is clean, running water available. If a tree is going to be used to hang the carcass, pick a healthy limb that is 6 to 8 inches in diameter and 8 to 10 feet off the ground. This will ensure the limb can support the weight of the carcass, allowing it to be fully extended off the ground for gutting and splitting. If the animal is going to be slaughtered indoors, make sure there is a strong beam that is 8 to 10 feet from the floor. The floor should be clean and preferably made of concrete.
After selection of the slaughter site, clean up the area to ensure that leaves and dirt are not blown on the carcass during slaughter. If the site has a wooden or concrete floor, wash the floor and all equipment with plenty of soap and water. Be sure to rinse thoroughly because sanitizers discolor the meat and may cause off-flavors. If animals are to be slaughtered outdoors, use straw to cover the area where the carcass will be suspended and eviscerated.
After choosing the slaughter site, clean the area to make sure that leaves and dirt don’t blow onto the carcass during the process. If the site has a wooden or concrete floor, wash the floor and all equipment with plenty of soap and water. Be sure to rinse thoroughly, as sanitizers can discolor the meat and lead to off-flavors. If animals are going to be slaughtered outdoors, use straw to cover the area where the carcass will be hung and eviscerated.
The weather on the day of slaughter should also be considered. During hot weather, the animal should be slaughtered during the cooler early morning or late evening hours. Since an inexperienced person will take 2 to 3 hours to complete the slaughter operation, care should be taken to avoid long exposure of the carcass to high temperatures. During cold weather of less than 30° F, the animal can be slaughtered at any time, because spoilage bacteria do not grow rapidly at cold temperatures. During periods of extremely cold weather, avoid letting the carcass freeze immediately after slaughter because the meat will be less tender than if it is permitted to chill without freezing. Slaughter during high winds may result in dirt and other contaminants being blown onto the carcass.
The weather on slaughter day should be taken into account. In hot weather, the animal should be slaughtered in the cooler early morning or late evening hours. Since an inexperienced person will take 2 to 3 hours to finish the slaughter, it’s important to avoid letting the carcass be exposed to high temperatures for too long. In cold weather below 30° F, the animal can be slaughtered at any time, as spoilage bacteria don’t grow quickly at low temperatures. During very cold weather, avoid letting the carcass freeze right after slaughter because the meat will be less tender than if it's allowed to chill without freezing. Slaughtering during high winds might cause dirt and other contaminants to blow onto the carcass.
Waste Disposal
All waste products should be disposed of in a sanitary manner. If the animal is to be slaughtered in the open, select a site with good drainage so that blood and water can drain away from the carcass. Do not allow blood and water to pollute nearby streams or other water supplies.
All waste products should be disposed of in a clean way. If the animal is going to be slaughtered outdoors, choose a location with good drainage so that blood and water can flow away from the carcass. Don't let blood and water contaminate nearby streams or other water sources.
Disposal of viscera and hair is often a problem. Arrange to have a local processor or rendering plant pick up these wastes. If this is not possible, bury them so that dogs and other animals cannot dig them up. Hair can be burned.
Disposing of organs and hair can be a challenge. Set up a local processor or rendering plant to collect these waste materials. If that’s not an option, bury them deep enough so that dogs and other animals can’t unearth them. Hair can be incinerated.
Slaughter Equipment
Elaborate and expensive equipment is not necessary but certain items are essential (fig. 1). The amount of equipment will depend on the slaughter procedure used. If the carcass is to be scalded rather than skinned, additional equipment will be needed (items 16 to 23). The following slaughter equipment is recommended:
Elaborate and expensive equipment isn't necessary, but certain items are essential (fig. 1). The amount of equipment will depend on the slaughter procedure used. If the carcass is going to be scalded instead of skinned, you'll need additional equipment (items 16 to 23). The following slaughter equipment is recommended:

- .22 caliber rifle with long or long rifle cartridges
- Sharp skinning knife and steel
- Boning knife
- Block and tackle or chain hoist—should be strong enough to hold weight of pig to be slaughtered
- Chocks—concrete blocks work well
- Meat saw
- Oil or water stone
- Ample cold water for washing hands, equipment, carcass and byproducts
- Tree with strong limb, beam or tripod 8 to 10 feet high, or tractor with hydraulic lift
- Spreader (gambrel or metal pipe)
- Buckets (2 or 3)
- Ice or cold water
- Straw for placing under animal during evisceration and splitting
- Clean cloths or plastic for protection of meat during transport
- Clean string
- Scalding barrel
- Pot or barrel for heating water
- Bell scrapers (1 or 2)—these are not necessary but helpful
- Plywood or other solid material for scalding platform
- Thermometer which registers up to 200° F
- Dry wood for fire
- Hog or hay hook
- Propane torch or blow torch
Be sure that all equipment that will come in contact with meat is thoroughly cleaned. Blood and other materials that get on the outer garments of workers during slaughter should not be transferred to the carcass after it is washed.
Make sure that all equipment that will come into contact with meat is thoroughly cleaned. Blood and other materials that get on the outer clothing of workers during slaughter should not be transferred to the carcass after it is washed.
Additional equipment needed for cutting the carcass is listed in the section, “Cutting.”
Additional equipment needed for cutting the carcass is listed in the section, “Cutting.”
SLAUGHTER
Stunning
The animal should be killed as quickly and humanely as possible. In most slaughter plants, hogs are immobilized either by electrical stunning or carbon dioxide gas suffocation. On the farm a hog can be stunned by striking it one sharp blow with a mechanical stunner or by shooting it in the forehead midway between and slightly above the eyes. The first attempt should be successful (fig. 2). Improperly placed bullets could cause the animal much pain and injure helpers or other livestock. Animals that become excited during stunning will not bleed as well as those less excited. As always the case whenever using firearms, exercise all appropriate safety precautions.
The animal should be killed as quickly and humanely as possible. In most slaughter plants, hogs are immobilized either by electrical stunning or carbon dioxide gas suffocation. On the farm, a hog can be stunned by delivering a sharp blow with a mechanical stunner or by shooting it in the forehead, midway between and slightly above the eyes. The first attempt should be successful (fig. 2). Misplaced bullets could cause the animal a lot of pain and injure workers or other livestock. Animals that get agitated during stunning won’t bleed as well as those that are calmer. As always when using firearms, be sure to follow all appropriate safety precautions.

Bleeding
Bleeding is a very important part of the slaughtering operation. The animal should be bled within 2 minutes after it is down because the blood pressure may increase and thus break the capillaries and cause an unattractive condition in the meat called “blood splash.” Although meat with this condition is safe for consumption, it is quite unpleasant in appearance.
Bleeding is a crucial part of the slaughtering process. The animal should be bled within 2 minutes after it falls because the blood pressure may rise and cause the capillaries to break, resulting in an unattractive condition in the meat known as “blood splash.” While meat with this condition is safe to eat, it looks quite unappealing.
After stunning the animal, place it on its back, perfectly straight with the head close to the ground. A helper can stand over the animal and hold its front legs. Locate the tip of the breastbone, along the midline (fig. 3). A 6-inch sticking knife sharpened on both sides of the tip is best. However, a regular boning or skinning knife can be used. Hold the knife at a 35 to 40-degree angle, thrust it under the breastbone with the point aimed toward the tail and then give an upward thrust (dip the point) to sever the carotid artery (figs. 4 & 5). No twisting or cross-cutting of the knife is necessary. If the hog does not bleed, insert the knife a little deeper a second time and there should be little difficulty getting a good stick. To avoid a “shoulder stick” do not insert the knife too far to either side. The bloody tissue resulting from a shoulder stick will subsequently require trimming. Care should also be taken to make certain that the hog does not kick you or the knife.
After stunning the animal, lay it on its back, perfectly straight with the head close to the ground. A helper can stand over the animal and hold its front legs. Find the tip of the breastbone, along the midline (fig. 3). A 6-inch sticking knife sharpened on both sides of the tip is best, but a regular boning or skinning knife will work too. Hold the knife at a 35 to 40-degree angle, thrust it under the breastbone with the point aimed toward the tail, and then give an upward thrust (dip the point) to sever the carotid artery (figs. 4 & 5). There’s no need for twisting or cross-cutting the knife. If the hog doesn't bleed, insert the knife a little deeper a second time, and you should have no trouble getting a good stick. To avoid a “shoulder stick,” don't insert the knife too far to either side. The bloody tissue from a shoulder stick will need trimming later. Be careful to ensure that the hog doesn’t kick you or the knife.


Hair or Skin Removal
Once the animal is bled, the hair can be removed by scalding the animal in hot water and scraping; or the skin and hair can be removed by skinning. Traditionally, hogs have been scalded and scraped, and the skin is left intact. Both procedures will be discussed because many people now find the skinning method to be easier, to require less equipment, and to result in an equally acceptable final product.
Once the animal is bled, you can remove the hair by dipping the animal in hot water and scraping it off, or you can take off the skin and hair by skinning. Traditionally, hogs have been dipped and scraped, keeping the skin intact. Both methods will be discussed because many people today find skinning to be easier, needing less equipment, and resulting in a product that is just as good.
Scalding and Scraping Method:
For scalding, the most important consideration is maintaining an adequate supply of properly heated water. Approximately 50 gallons of near boiling water will be needed for each pig. This water should be ready (boiling) before the animal is stunned and bled. After the hot water is placed in the scalding barrel, it can be adjusted to the proper temperature for scalding by adding cold water.
For scalding, the key thing to keep in mind is having enough properly heated water. You'll need about 50 gallons of near-boiling water for each pig. This water should be ready (boiling) before the animal is stunned and bled. Once the hot water is in the scalding barrel, you can adjust it to the right temperature for scalding by adding cold water.
The animal can be scalded by several methods. The easiest method is to have two barrels, one for heating the water and one for use as a scalding vat. Fifty-five gallon barrels will be large enough for most hogs. The scalding barrel can be buried in the ground at a slight angle; thus movement of the hog in and out of the barrel is easier (fig. 6). Be sure the angle of the barrel is not too flat or the barrel will not hold enough water to cover the carcass. Another method for scalding is to have a scalding vat or a barrel under which a fire can be built. This method requires more construction, and the temperature of the water is difficult to control.
The animal can be scalded using several methods. The simplest way is to have two barrels: one for heating the water and one to use as a scalding vat. Fifty-five-gallon barrels are big enough for most hogs. The scalding barrel can be buried in the ground at a slight angle, making it easier to move the hog in and out of the barrel (fig. 6). Make sure the barrel's angle isn't too flat, or it won't hold enough water to cover the carcass. Another method for scalding is to use a scalding vat or a barrel that has a fire built underneath it. This method needs more construction and can make it tricky to control the water temperature.

Slow scald is usually best. Scalding water temperatures between 140° and 145° F are optimal. At these optimal temperatures, 3 to 6 minutes of scalding are required to loosen the hair and scurf (layer of accumulated oil, dirt, and the outer layer of cells on the skin). In the fall when the winter hair is beginning to grow, the hair of most hogs is difficult to remove. Higher water temperatures (146° to 150° F) or longer submersion times are usually required for scalding during this “hard-hair” season. About ¼ cup of rosin, lime, or some other alkaline material added to the scald water to aid in scurf removal results in a whiter skin.
Slow scalding is usually the way to go. Water temperatures between 140° and 145° F are ideal. At these temperatures, it takes 3 to 6 minutes of scalding to loosen the hair and scurf (the layer of accumulated oil, dirt, and outer cells on the skin). In the fall, when winter hair is starting to grow, it's harder to remove the hair from most hogs. During this "hard-hair" season, you typically need higher water temperatures (146° to 150° F) or longer soaking times for scalding. Adding about ¼ cup of rosin, lime, or another alkaline substance to the scald water helps with scurf removal and leads to whiter skin.
On the farm, regulation of water temperature is difficult. Add boiling water to the scalding barrel, then add cool water to adjust to the proper temperature. Begin with the scalding water at 155° to 160° F because it cools rapidly. At these high temperatures, the carcass must be kept in motion and pulled from the barrel several times. This movement prevents overscalding. Overscalding causes the skin to contract around the base of the hair (“setting the hair”) and cooks the skin. If the carcass is overscalded, the hair is extremely difficult to remove.
On the farm, controlling water temperature is tough. Start by adding boiling water to the scalding barrel, then mix in cool water to reach the right temperature. Use scalding water at about 155° to 160° F since it cools down quickly. At these high temperatures, you need to keep the carcass moving and pull it out of the barrel several times. This movement helps prevent overscalding. Overscalding makes the skin tighten around the hair (which is called “setting the hair”) and cooks the skin. If the carcass is overscalded, removing the hair becomes really difficult.
After the proper water temperature has been attained, place the pig in the barrel, head first (fig. 7). Rotate the carcass in the barrel, pulling it in and out of the water occasionally. Check the hair often for ease of removal. The hair slips first over the back and sides, then in the flank regions. When the hair can be pulled easily in the flank regions behind the shoulders, remove the hog from the barrel and place the rear of the hog in the water.
After the water reaches the right temperature, put the pig in the barrel, head first (fig. 7). Rotate the carcass in the barrel, pulling it in and out of the water from time to time. Check the hair frequently to see how easily it comes off. The hair comes off first on the back and sides, then around the flank areas. When the hair can be easily pulled off in the flank areas behind the shoulders, take the hog out of the barrel and submerge the back end in the water.

While the rear of the hog is scalding, pull the toe nails and dew claws from the front feet by inserting a hook into the top of the nail and pulling (fig. 8). Scrape as much of the hair on the head as possible, especially around the ears and snout (fig. 9). When the hair slips in the rear flanks, remove the hog from the barrel. Remove the toe nails and dew claws from the rear legs and pull the hair from the tail.
While the back of the pig is scalding, pull the toenails and dew claws from the front feet by inserting a hook into the top of the nail and pulling (fig. 8). Scrape off as much hair from the head as you can, especially around the ears and snout (fig. 9). When the hair comes off easily from the back flanks, take the pig out of the barrel. Remove the toenails and dew claws from the back legs and pull the hair from the tail.


Grip the legs with both hands and twist to pull off the hair. Remove the hair in the difficult areas (head, feet, jowl) first, then proceed to the easier areas (back, sides). If you use the bell scraper, tilt the scraper upward on the forward edge and pull the scraper forward, applying as much pressure as possible (fig. 10).
Grip the legs with both hands and twist to pull off the hair. Start with the tricky spots (head, feet, jowl), then move on to the easier areas (back, sides). If you're using the bell scraper, angle the scraper upwards at the front edge and pull it forward, applying as much pressure as you can (fig. 10).

Scrape the hot carcass as quickly as possible because the skin tends to “set” as it cools. If patches of hair and scurf are difficult to scrape, cover them with a burlap bag and pour hot water over them. Scraping is made easier by moving the legs or the head in order to stretch the skin, smoothing the wrinkles along the sides.
Scrape the hot carcass as quickly as you can because the skin tends to “set” as it cools. If any patches of hair and scurf are hard to scrape off, cover them with a burlap bag and pour hot water over them. Scraping gets easier by moving the legs or the head to stretch the skin, smoothing out the wrinkles along the sides.
After most of the hair has been removed, pour water over the carcass and continue scraping. Place the scraper flat against the skin and move it in a rotary manner (fig. 11). This procedure aids in removal of scurf and dirt as well as removal of the rest of the hair. If patches of hair cannot be removed with the scraper, use a knife. Some people prefer to use a knife for the entire operation.
After removing most of the hair, pour water over the carcass and keep scraping. Hold the scraper flat against the skin and move it in a circular motion (fig. 11). This process helps get rid of scurf and dirt, as well as the remaining hair. If there are patches of hair that the scraper can't remove, use a knife. Some people prefer to use a knife for the entire process.

The carcass is now ready to be suspended. Clean the feet by cutting away the soles of the feet and cutting between and around the toes (fig. 12). Expose the gambrel tendons by cutting through the skin on the backs of the rear legs from dew claws to hock (fig. 13). Cut down each side of the tendons, being careful not to cut the tendons (fig. 14). Insert the spreader or gambrel under both tendons on each leg. Secure the legs to the spreader bar and suspend the carcass (fig. 15).
The carcass is now ready to be hung. Clean the feet by removing the soles and cutting between and around the toes (fig. 12). Expose the gambrel tendons by slicing through the skin on the backs of the rear legs from dew claws to hock (fig. 13). Cut down each side of the tendons, being careful not to cut the tendons themselves (fig. 14). Place the spreader or gambrel under both tendons on each leg. Secure the legs to the spreader bar and hang the carcass (fig. 15).


If available, a propane torch or blowtorch can be used to singe the remaining hair and scurf (fig. 16). Singeing removes most of the hair and allows small, light hairs to be seen. Use caution during singeing to prevent burning the skin. Shave the remaining hair and wash the carcass thoroughly. Continue with evisceration and splitting (pages 24–35).
If available, a propane torch or blowtorch can be used to singe the remaining hair and skin flakes (fig. 16). Singeing removes most of the hair and lets you see the small, fine hairs. Be careful while singeing to avoid burning the skin. Shave off the remaining hair and wash the carcass thoroughly. Then continue with evisceration and splitting (pages 24–35).

Skinning Method:
The skinning procedure used for pork carcass is similar to that used for beef carcasses. Skinning requires less equipment and can be done faster than scalding and scraping. We have commonly believed that the skin was needed on hams and bacon to assure proper curing; however, this belief is not necessarily correct. A poor skinning job can lower the quality of the belly for bacon.
The skinning process for pork carcasses is similar to that for beef carcasses. Skinning needs less equipment and can be done more quickly than scalding and scraping. It’s commonly thought that the skin is necessary on hams and bacon for proper curing; however, this isn’t always true. A poorly done skinning job can reduce the quality of the belly for bacon.
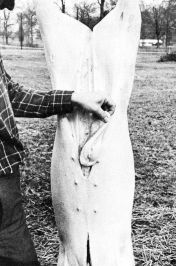
After stunning and bleeding the animal, move the carcass to the location of the hoisting equipment. Place the carcass on a sheet of plywood, a concrete slab, or straw. Wash the blood and dirt from the carcass. Turn the carcass on its back and hold it in place with blocks placed on each side (fig. 17).
After stunning and bleeding the animal, move the carcass to where the hoisting equipment is located. Place the carcass on a sheet of plywood, a concrete slab, or straw. Clean off the blood and dirt from the carcass. Turn the carcass onto its back and keep it steady with blocks placed on each side (fig. 17).


Open the hide down the midline from the point where the animal was stuck, around each side of the pubis area and continue to the anus (fig. 21). Make this cut by inserting the point of the knife under the skin with the blade turned up. This procedure is referred to as cutting from inside out and protects against meat contamination from materials on the hide. Avoid cutting too deeply because you may puncture the intestine and contaminate the carcass.
Open the hide down the middle from where the animal was killed, around each side of the pubic area, and continue to the anus (fig. 21). Make this cut by inserting the point of the knife under the skin with the blade facing up. This procedure is known as cutting from the inside out and helps prevent meat contamination from materials on the hide. Avoid cutting too deeply, as you might puncture the intestine and contaminate the carcass.

Remove the hide from the insides of the hams (fig. 22). Be careful, it is very easy to cut through the fat into the lean. Continue skinning along the sides toward the breast. Grasp the loosened hide in the opposite hand and pull it up and out. This places tension on the hide, removes wrinkles, and allows the knife to glide smoothly. Holding the knife firmly, place it against the hide with the blade turned slightly outward (fig. 23). Skin as far down the sides as possible, but not around the front legs (fig. 24).
Remove the skin from the insides of the hams (fig. 22). Be careful, it's very easy to cut through the fat and into the meat. Keep skinning along the sides toward the breast. Grip the loosened skin with the opposite hand and pull it up and out. This creates tension on the skin, removes wrinkles, and allows the knife to slide smoothly. Holding the knife firmly, press it against the skin with the blade turned slightly outward (fig. 23). Skin as far down the sides as possible, but avoid going around the front legs (fig. 24).


Return to the rear of the carcass and remove the hide left on the rear of the hams (fig. 25). Do not skin the outside of the hams at this time. Remove the rear feet by sawing through the bone about 2 inches above the hock (fig. 26). Insert the spreader under the large tendons on the rear legs (fig. 27) and secure the legs to the spreader.
Return to the back of the carcass and take off the skin that's still attached to the back of the hams (fig. 25). Don’t skin the outside of the hams right now. Remove the back feet by sawing through the bone about 2 inches above the hock (fig. 26). Place the spreader under the large tendons on the back legs (fig. 27) and secure the legs to the spreader.


Hoist the carcass to a convenient working height (waist high) for skin removal from the outside of the hams. Skin around the outsides of the hams, leaving as much fat as possible on the carcass. Remove the hide around the anus and cut through the tail at the joint closest to the body (fig. 28). Pull the hide down over the hips (fig. 29). The hide along the hips and back can be pulled off, leaving the fat on the carcass. Occasionally, you may need to use a knife to cut between the skin and the fat if large pieces of fat are being pulled off.
Hoist the carcass to a comfortable working height (waist high) for skin removal from the outside of the hams. Skin around the outsides of the hams, leaving as much fat as possible on the carcass. Remove the hide around the anus and cut through the tail at the joint closest to the body (fig. 28). Pull the hide down over the hips (fig. 29). The hide along the hips and back can be pulled off, keeping the fat on the carcass. Sometimes, you might need to use a knife to cut between the skin and the fat if large pieces of fat are being pulled off.


Hoist the carcass to a fully extended position. Open the hide down the rear of the forelegs. Remove the hide on each side of the forelegs (fig. 30). Skin along the inside of the forelegs and neck. Skin along the outside of the shoulders and jowls to a point approximately half way to the back of the carcass (fig. 31).
Hoist the body to its highest position. Cut open the skin down the back of the front legs. Remove the skin on each side of the front legs (fig. 30). Skin along the inside of the front legs and neck. Skin along the outside of the shoulders and cheeks to about halfway down the back of the body (fig. 31).


Slowly pull down and out on the hide (fig. 32), removing it along the back. If the fat begins to tear, use a knife to correct the torn area and then continue pulling the hide. Remove the hide as far down the back as possible (fig. 33). When it becomes difficult to pull along the top of the neck, complete removal with a knife.
Slowly pull the hide down and out (fig. 32), taking it off along the back. If the fat starts to tear, use a knife to fix the tear and then keep pulling the hide. Take the hide off as far down the back as you can (fig. 33). When it gets hard to pull at the top of the neck, finish removing it with a knife.


Evisceration


Remove the penis from a slaughtered barrow. Cut through the skin and fatty tissue along each side of the penis and around the penis opening. Lift upward and cut underneath it along the midline (fig. 38). Cut along the penis between the hams, pull the penis upward and remove it at its attachment at the base of the ham (fig. 39). Continue the cut made between the hams, at their natural separation, exposing the white connective tissue. Cut through the tissue to the pelvic (aitch) bone. Continue cutting through the cartilage between the aitch bone and separate the hams (fig. 40). This procedure is satisfactory in young pigs; however, a saw may be needed to split the aitch bone in older hogs.
Remove the penis from a slaughtered barrow. Cut through the skin and fatty tissue along each side of the penis and around the opening. Lift it up and cut underneath along the midline (fig. 38). Slice along the penis between the hams, pull it up, and detach it at its base where it connects to the ham (fig. 39). Keep going with the cut made between the hams, at their natural separation, revealing the white connective tissue. Cut through this tissue to reach the pelvic (aitch) bone. Continue cutting through the cartilage between the aitch bone to separate the hams (fig. 40). This method works well for young pigs; however, a saw might be necessary to split the aitch bone in older hogs.


Open the midline, beginning at the opening made when the aitch bone was split. With the handle of the knife inserted in the opening and with the blade pointed outward to avoid cutting the intestines (fig. 43), open the midline to the opening made at the breast (fig. 44). Allow the intestines and stomach to roll outward and hang (fig. 45). Do not allow them to fall because the esophagus will tear and spill its contents onto the carcass.
Open the midline, starting from the cut made when the aitch bone was split. Insert the handle of the knife into the opening, with the blade facing outward to prevent cutting the intestines (fig. 43), and extend the midline to the opening at the breast (fig. 44). Let the intestines and stomach roll outward and hang down (fig. 45). Make sure they don't drop, as that will tear the esophagus and spill its contents onto the carcass.


Pull the loosened large intestine down past the kidneys (fig. 46). Sever the attachments to the liver and remove it by pulling outward and cutting the connective tissue (fig. 47). Remove the gall bladder from the liver by cutting beneath it and pulling (fig. 48). Be careful not to allow its contents to spill onto the liver.
Pull the loose large intestine down past the kidneys (fig. 46). Cut the connections to the liver and take it out by pulling outward and cutting the connective tissue (fig. 47). Take the gall bladder off the liver by cutting underneath it and pulling (fig. 48). Be careful not to let its contents spill onto the liver.


Pull the stomach and intestines outward and cut through the diaphragm (fig. 49). This is the thin sheet of muscle and white connective tissue that separates the stomach and intestines from the lungs and heart. Pull outward on the lungs and heart and cut down each side of the windpipe, severing its attachment at the head (fig. 50). To separate the heart from the lungs, cut across its top (fig. 51). The heart should be split open to allow thorough washing. Wash the heart and liver thoroughly and put them in ice or ice water.
Pull the stomach and intestines outward and cut through the diaphragm (fig. 49). This is the thin layer of muscle and white connective tissue that separates the stomach and intestines from the lungs and heart. Pull outward on the lungs and heart and cut down each side of the windpipe, cutting its connection at the head (fig. 50). To separate the heart from the lungs, cut across the top of the heart (fig. 51). The heart should be opened up for a thorough wash. Clean the heart and liver well and place them in ice or ice water.


Splitting and Head Removal
Wash the inside of the carcass before splitting. With the saw, begin splitting from the inside between the hams (fig. 52). Keep the split as near the center of the backbone as possible, and saw through the tail region to a point midway through the loin (fig. 53). Move around to the back and continue sawing through the shoulder and neck to the base of the head (fig. 54). If the split gets off center, continue sawing through to the next vertebra and then realign the saw.
Wash the inside of the carcass before cutting it open. Using the saw, start from the inside between the hams (fig. 52). Try to keep the cut as close to the center of the backbone as you can, and saw through the tail area to the halfway point in the loin (fig. 53). Then, move to the back and keep sawing through the shoulder and neck down to the base of the head (fig. 54). If the cut goes off-center, keep sawing to the next vertebra and then adjust the saw back on track.


Remove the head at the atlas joint (the joint closest to the head). This joint should be exposed if the carcass is properly split (fig. 55). After cutting through the joint cut downward along the jaw bone, leaving the jowls attached to the carcass. If desired, remove the tongue, wash it thoroughly, and place it with the liver and heart.
Remove the head at the atlas joint (the joint closest to the head). This joint should be visible if the carcass is properly split (fig. 55). After cutting through the joint, cut downward along the jawbone, keeping the jowls attached to the carcass. If you want, remove the tongue, wash it thoroughly, and put it with the liver and heart.

PN-5355
PN-5355
Figure 55.—Removing head at atlas joint.
Figure 55.—Disconnecting the head at the atlas joint.


Examining the Carcass
All the internal organs and the dressed carcass (fig. 58) should be examined carefully for any abnormalities or conditions that might affect the fitness of the meat for food. Usually a meat inspector or graduate veterinarian is the only person qualified to do this, and one should be present to inspect the carcass; however, under farm conditions, you may need to look for the obvious signs of disease or damage yourself. If any part of the viscera or carcass is questionable, you should obtain expert advice.
All the internal organs and the dressed carcass (fig. 58) should be checked carefully for any abnormalities or conditions that could affect the meat's suitability for consumption. Typically, a meat inspector or a qualified veterinarian is the only one authorized to do this, and one should be present to inspect the carcass; however, in farm situations, you may need to look for obvious signs of disease or damage yourself. If any part of the organs or carcass seems questionable, you should seek expert advice.
Bruises, minor injuries, parasites in the organs, enclosed abscesses, and single tumors are frequently local conditions that can be easily removed. However, congestion or inflammation of the lungs, intestines, kidneys, inner surface of chest, or abdominal cavity and numerous yellowish or pearl-like growths scattered throughout the organs should be viewed seriously. Carcasses and viscera having such abnormalities should be examined by a graduate veterinarian and his opinion obtained as to the wholesomeness of the meat. You should check with a cooperating veterinarian before you slaughter the animal to be certain he will be available if you should seek his advice.
Bruises, minor injuries, organ parasites, encapsulated abscesses, and individual tumors are often local issues that can be easily addressed. However, congestion or inflammation in the lungs, intestines, kidneys, the inner surface of the chest, or the abdominal cavity, along with multiple yellowish or pearl-like growths throughout the organs, should be taken seriously. Carcasses and organs with these abnormalities should be evaluated by a qualified veterinarian, and their opinion should be sought regarding the safety of the meat. You should check with a cooperating veterinarian before you slaughter the animal to ensure they will be available if you need their advice.

CHILLING THE CARCASS
The surfaces of freshly slaughtered hog carcasses are contaminated with bacteria that can spoil the meat unless their growth is promptly checked. Bacterial growth can be slowed by prompt chilling and keeping the carcass at low temperatures. If the weather is suitable (28° to 35° F), the carcass can be wrapped in a sheet, hung, and chilled in a well-ventilated shed. Wrapping with clean cloth will partially protect the carcass from contamination.
The surfaces of freshly slaughtered pig carcasses are contaminated with bacteria that can ruin the meat unless their growth is quickly controlled. You can slow bacterial growth by quickly chilling and keeping the carcass at low temperatures. If the weather is right (28° to 35° F), you can wrap the carcass in a sheet, hang it, and chill it in a well-ventilated shed. Wrapping it with clean cloth will help protect the carcass from contamination.
Do not allow the carcass to freeze because freezing within 1 day after death may toughen the meat. If the carcass cannot be chilled to below 40° F on the farm, it should be transported to a local locker plant or market for chilling. The need for prompt and thorough chilling of warm carcasses cannot be over-emphasized for the inhibition of bacterial growth. The carcass can be cut into retail cuts after it has been chilled for 24 to 48 hours.
Do not let the carcass freeze because freezing within 1 day after death can make the meat tough. If the carcass can’t be cooled to below 40° F on the farm, it should be taken to a local locker plant or market for chilling. The importance of quickly and thoroughly chilling warm carcasses can’t be stressed enough to prevent bacterial growth. The carcass can be cut into retail cuts after it has been chilled for 24 to 48 hours.
CUTTING
Use the following guidelines in determining cutting and packaging instructions for the processor if the carcass is not cut and wrapped on the farm.
Use the following guidelines to figure out cutting and packaging instructions for the processor if the carcass isn’t cut and wrapped on the farm.
Chops.—Can be broiled, braised, or pan fried. Chops should be at least one-half to three-fourths of an inch thick for frying or braising, and 1 inch thick for broiling. Figure one or two chops per serving. Allow three-fourths of a pound of uncooked meat (bone-in) per person as a guide.
Chops.—Can be grilled, braised, or pan-fried. Chops should be at least half an inch to three-quarters of an inch thick for frying or braising, and 1 inch thick for grilling. Plan on one or two chops per serving. Use three-quarters of a pound of uncooked meat (bone-in) per person as a guideline.
Roasts.—Allow three-fourths of a pound per serving for bone-in roasts (ham, picnic, shoulder) and one-half pound per serving for boneless roast (boned and rolled Boston butt or shoulder).
Roasts.—Plan on three-fourths of a pound per serving for bone-in roasts (ham, picnic, shoulder) and half a pound per serving for boneless roast (boned and rolled Boston butt or shoulder).
Sausage.—Allow one-third pound per serving.
Sausage.—Serve one-third pound per person.
Carcass Cutting Equipment
Elaborate and expensive equipment is not necessary but certain items are essential. The following equipment is recommended (fig. 59):
Elaborate and expensive equipment isn't necessary, but some items are essential. The following equipment is recommended (fig. 59):

- Steel
- Boning knife
- Large steak knife
- Meat saw
- Freezer paper (see section on “wrapping”)
- Freezer tape
- Meat grinder (electric or hand powered)
- Clean water
Cutting the Carcass
Remove the hind foot by sawing through the hock joint at the right angle to the length of the foot (fig. 60).
Remove the back foot by cutting through the ankle joint at a right angle to the foot's length (fig. 60).

The ham may be removed two ways. The long-cut ham is cut off at the pelvic arch (bend in the backbone) perpendicular to the length of the side (fig. 61). This style ham lends itself to dry salt curing and aging. The popular short-cut ham is separated from the side by a cut approximately halfway between the pelvic arch and the end of the pelvic bone at a right angle to the shank (fig. 62).
The ham can be removed in two ways. The long-cut ham is cut off at the pelvic arch (the bend in the backbone) straight across the length of the side (fig. 61). This type of ham is suitable for dry salt curing and aging. The more common short-cut ham is taken from the side by cutting about halfway between the pelvic arch and the end of the pelvic bone at a right angle to the shank (fig. 62).


The front foot is removed by sawing through the hock (knee) joint at a right angle to the length of the foot (fig. 63). A shoulder hock may be cut off about halfway up the leg (fig. 64). To separate the shoulder from the loin and belly, locate the second rib from the front and saw through the center of this rib (fig. 65).
The front foot is removed by sawing through the hock (knee) joint at a right angle to the length of the foot (fig. 63). A shoulder hock may be cut off about halfway up the leg (fig. 64). To separate the shoulder from the loin and belly, find the second rib from the front and saw through the center of this rib (fig. 65).


PN-5366
PN-5366
Figure 66.—Separating middle from loin.
Figure 66.—Separating the middle from the loin.

PN-5367
PN-5367
Figure 67.—Separating middle from loin.
Figure 67.—Separating the middle from the loin.
The tail, backbone, and flank are removed from the ham; and the fat over the inside (top), in the pelvic area, and along each side is trimmed close to the lean (fig. 68). Most of the skin and fat are left on the long-cut ham with only a short bevel at the butt (loin) end. Five or six inches of skin may be removed from the short-cut ham by cutting under the skin approximately half the distance between the butt edge and the hock (fig. 69). The exposed fat is then smoothly tapered to a thickness of about one-half inch at the butt end (fig. 70).
The tail, backbone, and flank are taken off the ham; and the fat on the inside (top), in the pelvic area, and along each side is trimmed close to the meat (fig. 68). Most of the skin and fat are left on the long-cut ham with just a small bevel at the butt (loin) end. For the short-cut ham, five or six inches of skin can be removed by cutting under the skin about halfway between the butt edge and the hock (fig. 69). The exposed fat is then smoothly tapered to about a half-inch thick at the butt end (fig. 70).


The fat back is removed from the loin. Starting along the backbone side at the shoulder end, cut and lift the fat over the curve of the loin muscles, being careful not to cut into the lean (fig. 71). Surface fat on the loin can then be trimmed to approximately one-fourth inch in thickness (fig. 72). The loin can be roasted whole, cut into smaller roasts, or sliced into chops (fig. 73). Shoulder, rib, loin, and sirloin chops are made from the loin. However, the most popular chops are from the shoulder end and the center (loin) portion. The ham end is more often roasted. Cut chops one-half to three-fourths of an inch thick for broiling or frying. Chops for stuffing are easily made by cutting them two ribs thick and making a pocket between the ribs. Be careful not to cut through the outer fat surface (fig. 74) when making chops for stuffing.
The excess fat is taken off the loin. Starting from the backbone side at the shoulder end, cut and lift the fat over the curve of the loin muscles, ensuring you don’t cut into the lean (fig. 71). The surface fat on the loin can then be trimmed to about a quarter-inch thick (fig. 72). The loin can be roasted whole, divided into smaller roasts, or cut into chops (fig. 73). Shoulder, rib, loin, and sirloin chops all come from the loin. However, the most popular chops are from the shoulder end and the center (loin) part. The ham end is typically roasted. Cut the chops to half an inch to three-quarters of an inch thick for broiling or frying. Chops for stuffing are easily made by cutting them two ribs thick and creating a pocket between the ribs. Be careful not to cut through the outer fat layer (fig. 74) when making chops for stuffing.


Remove the neck bones from the shoulder by cutting beneath the ribs to the backbone and along each side of the vertebrae, then lift and cut closely around the vertebrae to complete their removal (fig. 75). Cut off the flap of skin, fat, and lean where the hock joins the shoulder (fig. 76). The jowl is removed by a straight cut, parallel to the cut which separates the shoulder from the side, just behind the curve or “dip” in the skin where the ear was removed (fig. 77). Bevel the fat and skin at the top edge of the shoulder (fig. 78).
Remove the neck bones from the shoulder by cutting underneath the ribs to the backbone and along each side of the vertebrae. Then, lift and cut closely around the vertebrae to take them out (fig. 75). Cut off the flap of skin, fat, and lean where the hock connects to the shoulder (fig. 76). The jowl is removed with a straight cut, parallel to the cut that separates the shoulder from the side, just behind the curve or “dip” in the skin where the ear was removed (fig. 77). Trim the fat and skin at the top edge of the shoulder (fig. 78).


The shoulder can be divided into a picnic shoulder and a blade Boston roast by making a cut at a right angle to the sides, starting one-half inch below the edge of the blade bone (figs. 79 and 80). Bevel the skin and fat along the edge of the picnic shoulder (fig. 81). Remove the skin and fat (clear plate) from the Boston roast by starting at the corner over the blade bone and lifting it up and back (fig. 82). Trim the surface fat to a thickness of approximately one-fourth inch (fig. 83).
The shoulder can be split into a picnic shoulder and a blade Boston roast by making a cut at a right angle to the sides, starting half an inch below the edge of the blade bone (figs. 79 and 80). Bevel the skin and fat along the edge of the picnic shoulder (fig. 81). Remove the skin and fat (clear plate) from the Boston roast by starting at the corner over the blade bone and lifting it up and back (fig. 82). Trim the surface fat to about a quarter inch thick (fig. 83).

PN-5379
PN-5379
Figure 79.—Preparing Boston and picnic shoulder.
Figure 79.—Getting ready Boston and picnic shoulder.


The blade Boston roast can be sliced into steaks or used as a roast. It can be made into a boneless cut by removing the portion of the blade bone (fig. 84). The roast can be rolled and tied with strong twine or cord to make an easily carved roast (fig. 85). Be sure to tie the roast so that the back muscles run lengthwise.
The blade Boston roast can be cut into steaks or kept whole as a roast. You can turn it into a boneless cut by taking out the part of the blade bone (fig. 84). The roast can be rolled and tied with sturdy twine or cord to create a roast that's easy to carve (fig. 85). Make sure to tie the roast so that the back muscles run along the length.


Separate the spareribs from the belly by cutting closely underneath the ribs beginning at the flank end of the ribs (fig. 86).
Separate the spareribs from the belly by cutting closely underneath the ribs, starting at the flank end of the ribs (fig. 86).

Prepare a bacon side from the belly by first trimming the lean at the shoulder end approximately the same thickness as the lean in the area where the spareribs were removed. Remove any thin or ragged pieces of lean. Turn the belly over and press it flat. Remove the lower edge by a straight cut, parallel to the cut separating the belly from the loin and just inside the teat line on gilt and barrow bellies (fig. 87). Any enlarged or dark mammary glands should be removed. Trim the flank edge at a slight angle so the bacon side is approximately 1 inch longer on the midline edge—the side opposite the cut made to separate the loin from the belly. This extra length will compensate for differences in shrinkage during curing.
Prepare a bacon side from the belly by first cutting the lean at the shoulder end to match the thickness of the lean where the spareribs were taken out. Cut away any thin or ragged pieces of lean. Flip the belly over and press it flat. Trim the lower edge with a straight cut, parallel to the cut that separates the belly from the loin, just inside the teat line on gilt and barrow bellies (fig. 87). Remove any enlarged or dark mammary glands. Trim the flank edge at a slight angle so that the bacon side is about 1 inch longer on the midline edge—the side opposite the cut separating the loin from the belly. This extra length will make up for differences in shrinkage during curing.

Sausage is made from the fat and lean trimmings produced from making trimmed hams, loins, bellies, picnic shoulders, and Boston roasts. If lean or additional sausage is desired, a picnic shoulder can be boned and added to the trimmings. Sausage should have a lean content of more than 50 percent. Remove skin, bone, cartilage, and bloody portions from the meat before grinding (fig. 88).
Sausage is made from the fat and lean trimmings left over from preparing trimmed hams, loins, bellies, picnic shoulders, and Boston roasts. If you want more lean sausage, you can bone a picnic shoulder and mix it in with the trimmings. Sausage should have a lean content of more than 50 percent. Make sure to remove the skin, bone, cartilage, and any bloody bits from the meat before grinding (fig. 88).

Wrapping
Fresh pork should be properly wrapped, quickly frozen, and stored at a temperature of -10° F or lower immediately after cutting. Proper wrapping is essential to maintain meat quality:
Fresh pork should be wrapped correctly, frozen quickly, and kept at a temperature of -10° F or lower right after cutting. Proper wrapping is crucial for maintaining the quality of the meat:
- use moisture and vapor-proof wrap such as heavily waxed or specially laminated freezer paper
- prepare convenient family-sized packages wrap meat tightly to eliminate as much air as possible
- use a proper wrapping procedure (fig. 89) label and date each package properly

FREEZING AND FROZEN STORAGE
Frozen pork, particularly cured or seasoned pork, will not retain its quality as long as beef or lamb. Pork should be frozen as soon after cutting as possible before any spoilage or rancidity can occur. Usually the hams, bacon, and shoulders are cured and do not require freezing. There should be ample freezer space available for fresh cuts. When using the home freezer be sure to:
Frozen pork, especially cured or seasoned pork, doesn't hold its quality as long as beef or lamb. Pork should be frozen as soon as possible after cutting to avoid spoilage or rancidity. Typically, hams, bacon, and shoulders are cured and don’t need freezing. Make sure there’s enough freezer space for fresh cuts. When using the home freezer, remember to:
- clean and defrost freezer
- freeze meat at -10° F or lower temperature
- freeze only the amount that will freeze in 24 hours
- allow ample air circulation by not over-packing the freezer
- maintain the freezer at a temperature of 0° F or less for storage
Recommended freezer storage times for pork as published in G-160, “Pork in Family Meals,” (see page 64) are as follows:
Recommended freezer storage times for pork as published in G-160, “Pork in Family Meals,” (see page 64) are as follows:
| chops | 3–4 months |
| roasts | 4–8 months |
| fresh sausage | 1–2 months |
| variety meats | 1 month or less |
| cured hams | 1–2 months |
When thawing frozen pork (or any meat), it is best to thaw it in the original package in the refrigerator. Allow approximately 3 hours per pound for small roasts and chops. Meat should not be thawed at room temperature because of increased chances of food spoilage. If thawed properly at refrigerator temperatures, the meat can be refrozen with minimal loss of quality which results from drip, etc. Meat cooked from the frozen state is similar in palatability to thawed meat but requires up to one-third more cooking time.
When thawing frozen pork (or any meat), it’s best to thaw it in the original packaging in the refrigerator. Plan for about 3 hours per pound for small roasts and chops. Avoid thawing meat at room temperature due to the increased risk of food spoilage. If properly thawed at refrigerator temperatures, the meat can be refrozen with minimal loss of quality, such as from dripping, etc. Meat cooked from the frozen state is similar in taste to thawed meat but needs up to one-third more cooking time.
FURTHER PROCESSING
Curing Pork
Precautions: The suggestions described in this bulletin are intended for use at home or on the farm where facilities for curing are limited. The continued use of nitrates and nitrites in meat curing is presently being investigated by the United States Department of Agriculture and the Food and Drug Administration. Therefore, before using nitrates (saltpeter) and nitrites as mentioned in this bulletin, check with your local county agent to determine whether its use has been rescinded. For establishing a commercial curing operation, contact the local Extension Service or your State Department of Agriculture for methods and regulations, or write to the USDA, Food Safety and Quality Service, Washington, D.C. 20250.
Precautions: The suggestions in this bulletin are meant for use at home or on the farm where curing facilities are limited. The ongoing use of nitrates and nitrites in meat curing is currently being studied by the United States Department of Agriculture and the Food and Drug Administration. Therefore, before using nitrates (saltpeter) and nitrites as mentioned in this bulletin, check with your local county agent to see if their use has been discontinued. To start a commercial curing operation, reach out to the local Extension Service or your State Department of Agriculture for methods and regulations, or write to the USDA, Food Safety and Quality Service, Washington, D.C. 20250.
The USDA has recommended that nitrates (saltpeter) not be permitted in commercial curing operations using curing solutions. Nitrates would still be permitted in very limited amounts in dry cured or fermented sausages because of their importance in flavor, color fixation, and retarding bacterial growth. Be very careful in adding nitrates to your meat—they are very poisonous in large amounts.
The USDA has advised that nitrates (saltpeter) shouldn't be allowed in commercial curing processes that use curing solutions. However, nitrates can still be used in small quantities in dry cured or fermented sausages due to their role in flavor, color preservation, and slowing bacterial growth. Be extremely cautious when adding nitrates to your meat—they can be highly toxic in large doses.
Nitrites may be toxic when eaten in large quantities. Care should be taken to use only the required amount. They may be purchased from farm supply stores and some drug stores. Very small quantities of sodium or potassium nitrites are used in curing solutions. It is advisable to have your supplier measure and package separately the amounts you plan to use. For example, the formula for sweet pickle cure includes only 1.18 ounce (33.45 grams or two and a half tablespoons) of nitrite per 100 pounds of meat. Several packages of exactly this amount would greatly aid in preparing curing solutions.
Nitrites can be harmful if consumed in large amounts. It's important to use only the necessary quantity. They are available at farm supply stores and some pharmacies. Very small amounts of sodium or potassium nitrites are used in curing solutions. It’s a good idea to have your supplier measure and package the amounts you intend to use separately. For instance, the recipe for sweet pickle cure calls for just 1.18 ounces (33.45 grams or two and a half tablespoons) of nitrite for every 100 pounds of meat. Having several packages with this exact amount would be very helpful in making curing solutions.
Do not put meat in cure until it has been thoroughly chilled for at least 24 hours. In addition, do not stack cuts which have not been properly chilled because stacking slows chilling and may result in spoilage. Frozen cuts should be thawed prior to curing.
Do not put meat in the cure until it has been completely chilled for at least 24 hours. Also, do not stack cuts that haven’t been properly chilled because stacking slows down the chilling process and may cause spoilage. Frozen cuts should be thawed before curing.
Weigh curing ingredients carefully. Too little salt may allow spoilage. Too much salt will make meat hard, dry, and salty.
Weigh the curing ingredients carefully. Using too little salt could lead to spoilage. Using too much salt will make the meat tough, dry, and overly salty.
Suggestion: Numerous states have published excellent illustrated bulletins on curing meat on the farm. The following bulletins* are recommended:
Suggestion: Many states have released great illustrated guides on curing meat on the farm. The following guides* are recommended:
* A small fee may be required.
* A small charge might be needed.
- Curing Hams Country Style. North Carolina Agr. Ext. Service Cir. No. 405, by J. A. Christian and T. N. Blumer. January 1971. North Carolina State University, Raleigh, N.C. 27607.
- Curing Georgia Hams. University of Georgia Cooperative Ext. Service Bul. No. 627, by J. A. Christian. 1973. University of Georgia, Athens, Ga. 30601.
- Pork Processing on the Farm. University of Kentucky Cooperative Ext. Service Cir. No. 621, by W. Y. Varney and J. D. Kemp, University of Kentucky, Lexington, Ky. 40506
- Curing Ham—Virginia Style. Virginia Polytechnic Institute & State University Ext. Div. Publication No. 223, by R. F. Kelly, P. P. Graham, J. D. Baldock and Jo Anne Barton. 1974. VPI, Blacksbury, Va. 24061
All parts of the pork carcass can be cured. The hams, shoulders, and bellies are usually cured. Although the loin can be cured, it is generally used fresh as chops or roasts.
All parts of the pork carcass can be cured. The hams, shoulders, and bellies are typically cured. While the loin can be cured, it's mostly used fresh as chops or roasts.
The ingredients used in curing are salt, sugar, and sodium nitrate or nitrite. Salt is the preserving agent; nitrates (dry cure only) and nitrites are added for color and flavor development, but are also preserving agents. Sugar is used to counteract the harshness of salt. Commercial cures are available with some added spices and flavorings to give a characteristic flavor, aroma, or appearance.
The ingredients used in curing are salt, sugar, and sodium nitrate or nitrite. Salt is the preserving agent; nitrates (dry cure only) and nitrites are added for color and flavor development, but they're also preserving agents. Sugar is used to balance out the harshness of salt. Commercial cures are available with some added spices and flavorings to give a distinctive flavor, aroma, or appearance.
Curing pork on the farm is usually done by one of two methods: dry cure or brine cure (plain or sugar-cured).
Curing pork on the farm is typically done using one of two methods: dry cure or brine cure (plain or sugar-cured).
Dry Curing
The dry cure method entails rubbing meat with curing ingredients. Check the internal temperature of the largest cut. Be sure it is below 40° F. Federal meat inspection regulations state that the temperature of meat being dry cured should not be allowed to go below 36° F during the salt cure equalization period. Weigh the meat and curing ingredients accurately. For 100 pounds of meat, use an 8-2-2 mix.
The dry cure method involves rubbing the meat with curing ingredients. Check the internal temperature of the largest piece. Make sure it’s below 40°F. Federal meat inspection regulations say that the temperature of meat being dry cured shouldn’t drop below 36°F during the salt cure equalization period. Weigh the meat and curing ingredients accurately. For 100 pounds of meat, use an 8-2-2 mix.
- 8 pounds salt
- 2 pounds sugar
- 2 ounces sodium nitrate (dry cure only)
Mix curing ingredients thoroughly. For curing hams and picnic shoulders, divide into three equal parts. Rub one part of the mixture on all surfaces of the meat, making sure to push the mixture into the shank end of the hams. Put a thin layer (one-eighth inch) of cure over all cuts and stack in the curing room, skin side down on a table or shelf. On the fifth day, remove the hams and shoulders and apply the second one-third of the cure. Apply the last one-third on the tenth day.
Mix the curing ingredients well. For curing hams and picnic shoulders, divide the mixture into three equal parts. Rub one part of the mixture onto all surfaces of the meat, ensuring that you push it into the shank end of the hams. Spread a thin layer (about one-eighth inch) of cure over all cuts and stack them in the curing room, skin side down on a table or shelf. On the fifth day, take out the hams and shoulders and apply the second one-third of the cure. Apply the final one-third on the tenth day.
Bellies will usually cure with only one application. However, like hams and shoulders, they can be resalted on the fifth day.
Bellies usually cure with just one application. However, like hams and shoulders, they can be re-salted on the fifth day.
Federal meat inspection regulations state that the salt (cure) equalization period for hams and picnics is usually less than about 40 days or 3 days per pound of product (fresh weight). Bellies are commonly cured about 7 days per inch of thickness.
Federal meat inspection regulations state that the salt (cure) equalization period for hams and picnics is usually less than about 40 days or 3 days per pound of product (fresh weight). Bellies are commonly cured for around 7 days per inch of thickness.
The curing pork should be stored in a refrigerated place where a constant temperature between 36° F and 42° F is maintained. Bacteria grow rapidly in unsalted meat when the temperature rises above 50° F.
The curing pork should be kept in a fridge where the temperature stays consistently between 36°F and 42°F. Bacteria multiply quickly in unsalted meat when the temperature goes above 50°F.
After curing, soaking the meat will improve its quality and appearance. Soak in lukewarm water (not exceeding 70° F) for approximately 2 minutes for each day in cure. Soaking tends to distribute the seasoning more evenly and draws out some of the heavy salt concentration on the meat surface. Hang cuts up to dry for about 3 hours before smoking.
After curing, soaking the meat will enhance its quality and look. Soak it in lukewarm water (not over 70° F) for about 2 minutes for each day it was cured. Soaking helps to spread the seasoning more evenly and removes some of the excess salt on the meat's surface. Hang the cuts to dry for around 3 hours before smoking.
Sweet Pickle Cure
Place chilled, trimmed cut into a clean crock or barrel and cover with a cold pickle solution. The pickle solution is made by dissolving the following ingredients in 4½ gallons of water:
Place the chilled, trimmed cut into a clean crock or barrel and cover it with a cold brine solution. The brine solution is made by dissolving the following ingredients in 4½ gallons of water:
- 8 pounds salt
- 3 pounds sugar
- 1.18 ounce (33.45 grams or two and a half tablespoons) sodium nitrite (see precautions on nitrite).
Weight the meat down to keep it from floating and cover it with curing solution. Keep the meat cold during the curing period (36° to 40° F).
Weight the meat down to prevent it from floating and cover it with the curing solution. Keep the meat cold during the curing period (36° to 40° F).
Overhaul the meat about once or twice during the curing period to allow the pickle to reach all parts of the meat. To overhaul, remove all the meat, pour out the pickle, repack the meat, and cover with the same restirred pickle. To the extent possible, the cuts should be repacked so that surfaces that were previously in contact with other cuts are now exposed to the curing solution.
Overhaul the meat about once or twice during the curing period to ensure the brine reaches all parts of the meat. To overhaul, take out all the meat, pour out the brine, repack the meat, and cover it with the same mixed brine. Whenever possible, the cuts should be repacked so that surfaces that were previously in contact with other cuts are now exposed to the curing solution.
Curing time for hams and shoulders is 3½ to 4 days per pound. Thus a 6-pound shoulder needs 24 days to cure and a 15-pound ham will require 60 days. A 10-pound belly will cure in about 15 days. However, heavier bellies and loins will require 21 days.
Curing time for hams and shoulders is 3½ to 4 days per pound. So, a 6-pound shoulder needs 24 days to cure, and a 15-pound ham will take 60 days. A 10-pound belly will cure in about 15 days. However, heavier bellies and loins will need 21 days.
During curing the temperature of the pickle should be maintained at around 36° F. At higher temperatures, the brine may become sour or ropy due to the growth of bacteria. Ropy brine looks like partially cooked egg white. If this happens, discard the brine, scrub the meat with hot water, wash and scald the curing container, and repack meat with a new, cold curing solution. If the curing period was half over, make the new solution two-thirds the strength of the original. If three-fourths over, make the new solution one-half the original strength.
During curing, the pickle's temperature should stay around 36° F. At higher temperatures, the brine can turn sour or become slimy because of bacteria growth. Slimy brine resembles partially cooked egg whites. If this occurs, throw away the brine, scrub the meat with hot water, clean and scald the curing container, and repack the meat with a new, cold curing solution. If you’re halfway through the curing period, make the new solution two-thirds the strength of the original. If you’re three-quarters of the way through, make the new solution half the strength of the original.
After curing, prepare the meat for smoking by soaking (as discussed under dry curing) and drying.
After curing, get the meat ready for smoking by soaking it (as mentioned in the dry curing section) and drying it.
Pumping Hams and Shoulders
To speed up curing, most commercial packers pump brine into the hams and shoulders. Brine pumping can be used in conjunction with the other methods, or alone. Pumping requires special needles and a pump (hand or electric) to ensure proper distribution of the brine. The brine solution is prepared using the 8:3:1.18 mixture previously outlined. Two pounds of this cure mixture are dissolved in 1 gallon of cold water and the meat pumped with brine equivalent to 10 percent of its weight. Pumping may be accomplished by using the artery or stitch method. The femoral artery of the ham is located above the big flat bone which is cut when the ham is separated from the carcass. The artery is about halfway between the cut surface of the bone and the point of the aitch bone. With small forceps, you can clamp the end of the artery and push tissue and loose fat away so the pumping needle can be inserted. Stitch pumping is not as effective as artery pumping but is more so than either dry or pickle cure. Stitch pumping is accomplished with a spray needle by pumping along the bone, around the joints, and vertically in thicker, lean parts of the ham or picnic. Cuts should be stored for a day to allow the cure to equilibrate prior to smoking.
To speed up curing, most commercial packers inject brine into the hams and shoulders. Brine pumping can be used along with other methods, or on its own. Pumping requires special needles and a pump (either hand-operated or electric) to ensure even distribution of the brine. The brine solution is made using the 8:3:1.18 mixture previously described. Two pounds of this curing mixture are dissolved in 1 gallon of cold water, and the meat is injected with brine equal to 10 percent of its weight. Pumping can be done using the artery method or the stitch method. The femoral artery of the ham is located just above the large flat bone that is cut when the ham is separated from the carcass. The artery is about halfway between the cut surface of the bone and the aitch bone's tip. With small forceps, you can clamp the end of the artery and push aside tissue and loose fat to insert the pumping needle. Stitch pumping is not as effective as artery pumping but is more effective than either dry or pickle curing. Stitch pumping is done using a spray needle, pumping along the bone, around the joints, and vertically into the thicker, lean parts of the ham or picnic. Cuts should be stored for a day to let the cure settle before smoking.
Smoking
Smoking cured pork improves its appearance and gives it a characteristic aroma and flavor apart from that of any other meat product. Careful attention should be given to smoking and aging procedures to prevent microbial spoilage or insect infestation.
Smoking cured pork enhances its appearance and gives it a unique aroma and flavor that sets it apart from other meat products. It's important to pay careful attention to smoking and aging processes to avoid microbial spoilage or insect infestation.
Smokehouses:
The smokehouse can be simple or elaborate in design, depending on the quantity of meat to be smoked. It should be of reasonably tight construction to permit easy regulation of temperature and flow of air and smoke. Special attention during construction should be given to the control of insect and rodent infestations.
The smokehouse can be basic or complex in design, depending on how much meat needs to be smoked. It should be built fairly tightly to allow for easy control of temperature and airflow. Extra care should be taken during construction to manage insect and rodent problems.
Temporary smokehouses for small quantities of meat can be constructed cheaply and easily. Construction should include a ventilated enclosure for hanging and smoking the meat as well as facilities for generating smoke and supplying it to the house. A barrel or drum with both ends removed, connected by a stove pipe or a covered trench to a fire pit, can be used (fig. 90). Set the barrel over the upper end of the 10 to 12 feet of stove pipe, which is sloped downward to the fire pit. Control the heat of the fire by covering the pit with a piece of sheet metal and mounding earth around the edges, so as to cut off most of the draft. Clean muslin or burlap hung over the top of the barrel will protect a 1-inch opening between the barrel and the cleated top, which rests on broomsticks supporting the meat (fig. 90). This type of smokehouse is large enough for the cuts from one hog. An old refrigerator or a simple frame house can be used rather than a barrel. The fire can also be built in a ventilated barrel which is connected to the smokehouse by a stove pipe.
Temporary smokehouses for small amounts of meat can be built cheaply and easily. Construction should include a ventilated area for hanging and smoking the meat, as well as a way to generate and supply smoke to the enclosure. A barrel or drum with both ends removed, connected by a stovepipe or a covered trench to a fire pit, can be used (fig. 90). Place the barrel over the upper end of the 10 to 12 feet of stovepipe, which slopes down to the fire pit. Control the heat of the fire by covering the pit with a piece of sheet metal and piling earth around the edges to reduce most of the draft. Clean muslin or burlap hung over the top of the barrel will cover a 1-inch opening between the barrel and the slatted top, which is supported by broomsticks holding up the meat (fig. 90). This type of smokehouse is big enough for the cuts from one hog. An old refrigerator or a simple frame structure can also be used instead of a barrel. The fire can be built in a ventilated barrel that connects to the smokehouse through a stovepipe.

Permanent structures suitable for smoking meat should be constructed if large quantities of meat are to be smoked. Tight construction and well-fitted ventilators provide effective regulation of the air flow past the meat. An outside firebox makes temperature control easy and reduces fire hazard. Consult the local extension agent for detailed plans for the construction of permanent smokehouses.
Permanent structures designed for smoking meat should be built if you plan to smoke large amounts of meat. A solid construction and properly fitted vents help control the airflow around the meat effectively. An external firebox makes it easier to manage the temperature and lowers the risk of fire. Check with your local extension agent for detailed plans on how to construct permanent smokehouses.
Smoking Process:
All meat to be smoked should be soaked to remove surface concentration of salt. Cuts should be allowed to dry since a wet surface will not take a uniform smoked color.
All meat that will be smoked should be soaked to get rid of excess salt on the surface. Cuts should be dried since a wet surface won’t absorb the smoke evenly.
Hang the cuts in the smokehouse in such a way that cuts do not touch each other or the wall. Suspend hams and shoulders with string or clean galvanized wire through the shank. Prior to hanging bellies, reinforce the ends with hardwood skewers or clean galvanized wire to hold them square. Bacon hangers can also be made from strips of non-resinous wood through which several small galvanized nails have been driven.
Hang the cuts in the smokehouse so that they don't touch each other or the walls. Use string or clean galvanized wire to suspend hams and shoulders by the shank. Before hanging bellies, reinforce the ends with hardwood skewers or clean galvanized wire to keep them square. You can also make bacon hangers from strips of non-resinous wood with several small galvanized nails driven through them.
In the firepit, build a fire of any hardwood, such as hickory, oak, apple, pecan, and maple. Hickory is the most popular. NEVER use soft woods (pine, cedar, spruce, or other “needle leaf” trees) because their smoke is sooty and contains resin which gives the meat a dark color, bitter taste, and strong odor. Once the fire is burning, hard wood sawdust can be added to deaden the blaze and generate more smoke. Dampen the sawdust with water to prevent it from flaming. A thin haze of smoke is as effective as a dense cloud.
In the firepit, start a fire using any hardwood like hickory, oak, apple, pecan, or maple. Hickory is the most popular choice. NEVER use softwoods (like pine, cedar, spruce, or other needle-leaf trees) because their smoke is sooty and contains resin, which can make the meat dark, bitter, and have a strong smell. Once the fire is going, you can add hardwood sawdust to control the flames and create more smoke. Make sure to dampen the sawdust with water to stop it from catching fire. A light haze of smoke works just as well as a thick cloud.
The absorption of smoke and the change in color of the outside surface of smoked meat is hastened by high temperatures. The type of smokehouse and the outside temperatures are important factors in the length of time required to smoke meat. Federal meat inspection regulations state that whenever the fresh appearance of a product containing pork muscle tissue has been altered to resemble a product that may mistakenly be eaten without cooking or with less than thorough cooking, it must have been treated in an acceptable manner to destroy possible live trichinae by heating to an internal temperature of 137° or otherwise treating (see page 62).
The absorption of smoke and the change in color of the exterior surface of smoked meat are sped up by high temperatures. The type of smokehouse and the outside temperatures are crucial factors in how long it takes to smoke meat. According to federal meat inspection regulations, if the fresh appearance of a product containing pork muscle tissue has been altered to look like a product that could be mistakenly eaten without cooking or with less thorough cooking, it must have been processed in a way that effectively destroys any possible live trichinae by heating it to an internal temperature of 137° or through another acceptable method (see page 62).
A suggested schedule for smoking pumped or pickled cured hams is as follows:
A recommended timeline for smoking pumped or pickled cured hams is as follows:
- 4 hours - 120° F damper open - smoke off
- 6 hours - 140° F damper one-quarter open - smoke on
- Raise temperature to 170° F and hold until internal temperature reaches 142° to 146° F.
To be fully cooked, it is recommended that the cuts remain in the smokehouse until their internal temperature reaches 152° to 155° F.
To be fully cooked, it’s best to keep the cuts in the smokehouse until their internal temperature hits 152° to 155° F.
For smoking bacon, the following schedule may be used:
For smoking bacon, you can use the following schedule:
- 2 hours - 115° F damper open - smoke off
- 2 hours - 130° F damper closed - smoke on
- Raise temperature to 140° F and hold until internal temperature reaches 127–130° F
Storage of Smoked Meats:
Cured, smoked pork can be handled several ways depending on the final product desired. It can be eaten immediately, refrigerated or frozen for future use, canned, or aged for the development of the characteristic “country-cured” flavor. If the product is to be frozen or canned, follow the recommendations given in the Wrapping or Canning sections.
Cured, smoked pork can be prepared in a variety of ways based on the desired final product. It can be eaten right away, stored in the fridge or freezer for later use, canned, or aged to develop that typical “country-cured” flavor. If you plan to freeze or can the product, make sure to follow the guidelines provided in the Wrapping or Canning sections.
Canning
If done properly, pork can be satisfactorily preserved by canning. Meat is a low acid, high protein food that allows for good bacterial growth. The use of a pressure canner is vital to ensure that the sterilization temperature (240° F) is reached and maintained for the proper length of time. A water bath or a steamer is not recommended since neither one attains a sufficiently high temperature to produce effective sterilization. Meat may be canned soon after chilling since aging has little effect on the flavor and tenderness of canned meats.
If done properly, pork can be effectively preserved by canning. Meat is a low-acid, high-protein food that encourages good bacterial growth. Using a pressure canner is essential to ensure that the sterilization temperature (240° F) is reached and maintained for the right amount of time. A water bath or a steamer is not recommended because neither can achieve a high enough temperature for effective sterilization. Meat can be canned shortly after chilling since aging doesn't significantly impact the flavor and tenderness of canned meats.
The proper canning procedure is as follows: Use only pint and quart jars. Larger jars are difficult to heat thoroughly to the center. Cut the meat into small strips or cubes. Place meat into a large shallow pan; add enough water to prevent sticking. Cover the pan and cook slowly until medium done. Stir occasionally so that the meat heats evenly. Two and one-half pounds of boneless meat will fill a quart jar.
The proper canning procedure is as follows: Use only pint and quart jars. Larger jars are hard to heat all the way through. Cut the meat into small strips or cubes. Place the meat in a large shallow pan; add enough water to keep it from sticking. Cover the pan and cook slowly until it's medium done. Stir occasionally so that the meat heats evenly. Two and a half pounds of boneless meat will fill a quart jar.
Pack hot meat loosely in glass jars and cover with hot meat broth or boiling water. Leave 1 inch of head space. For flavor, salt can be added to each jar (approximately one-half teaspoon per pint or 1 teaspoon per quart). Clean any residue from the top of the jar and adjust lids to manufacturer’s specifications and process in a pressure canner at 10 pounds pressure (240° F). Process pint jars for 75 minutes; quarts for 90 minutes.
Pack hot meat loosely in glass jars and cover it with hot meat broth or boiling water. Leave 1 inch of headspace. If you want to add flavor, you can put salt in each jar (about half a teaspoon per pint or 1 teaspoon per quart). Clean any residue from the top of the jar, adjust the lids according to the manufacturer's instructions, and process them in a pressure canner at 10 pounds of pressure (240°F). Process pint jars for 75 minutes and quart jars for 90 minutes.
Allow the canner to cool until the pressure drops to zero. Don’t pour cold water over the canner to hasten the cooling. Remove the jars and space them a few inches apart to cool.
Allow the canner to cool until the pressure drops to zero. Don’t pour cold water over the canner to speed up the cooling. Take out the jars and place them a few inches apart to cool.
If a jar does not seal, re-can the meat in another jar or use it for food at once. When re-canning, heat the meat through. Then pack and process in pressure canner for the full time recommended. Store sealed jars of canned meat in a cool, dry place and don’t allow it to freeze.
If a jar doesn’t seal, re-can the meat in a different jar or use it right away. When re-canning, heat the meat thoroughly. Then pack it and process in a pressure canner for the full recommended time. Store sealed jars of canned meat in a cool, dry place, and make sure they don’t freeze.
Lard Rendering
To produce a high quality lard with good stability, remove all the skin and lean from the back-fat and other fat trimmings. Fats from around the internal organs should be rendered separately because they yield a darker lard than leaf fat and other body fat trimmings.
To make high-quality lard with good stability, take off all the skin and lean meat from the back fat and other fat trimmings. The fat around the internal organs should be rendered separately because it produces darker lard than leaf fat and other body fat trimmings.
Cut the fat into small pieces of similar size for quick uniform rendering. Steam rendering, if available, is most preferable since it eliminates the danger of scorching. When fat is rendered in a kettle over an open fire, it should be stirred frequently and the fire should be kept low to prevent sticking and scorching. Do not use a copper or brass kettle because these metals cause rapid rancidity.
Cut the fat into small, evenly sized pieces for quick, uniform rendering. If possible, use steam rendering as it reduces the risk of scorching. When rendering fat in a kettle over an open flame, stir it frequently and keep the heat low to avoid sticking and scorching. Avoid using a copper or brass kettle, as these metals can cause the fat to go rancid quickly.
The temperature of the fat during rendering should remain about 212° F. As the process continues, water will evaporate and the temperature will increase. Do not allow it to go above 255° F.
The temperature of the fat during rendering should stay around 212°F. As the process continues, water will evaporate and the temperature will rise. Don’t let it exceed 255°F.
As the rendering process proceeds, the cracklings float to the surface and become brown in color. When boiling (evaporation of water) ceases, the rendering process is completed and heating can be discontinued. Strain the lard through several thicknesses of cheese cloth into lard pails or crocks, and cool immediately at a temperature near freezing. While cooling, stir to a creamy stage to prevent graininess. If the lard is dark in color, it is because it was scorched or there was too much lean left on the fat. Additional lard can be obtained by pressing the hot cracklings in a lard press.
As the rendering process continues, the cracklings float to the top and turn brown. When boiling (the evaporation of water) stops, the rendering process is done and you can turn off the heat. Strain the lard through several layers of cheesecloth into lard containers or jars, and cool it quickly at a temperature close to freezing. While it's cooling, stir it until it reaches a creamy consistency to avoid graininess. If the lard is dark, it means it got scorched or there was too much meat left on the fat. You can get more lard by pressing the hot cracklings in a lard press.
Air and light can cause lard to become rancid; therefore, containers should be filled to the top, sealed tightly and stored in a dark, cool place.
Air and light can make lard go bad, so containers should be filled to the top, sealed tightly, and stored in a dark, cool place.
Fresh Sausage
Fresh pork sausage is generally made by grinding and seasoning lean pork trimmings from bellies, hams, and shoulders. Fresh sausage should contain about 20 to 30 percent fat. If more fat is included, the sausage may be too greasy and shrink a lot in cooking. If entire shoulders or hams are used, it may be necessary to add some fat.
Fresh pork sausage is usually made by grinding and seasoning lean pork scraps from bellies, hams, and shoulders. Fresh sausage should have about 20 to 30 percent fat. If there's too much fat, the sausage might be too greasy and shrink a lot while cooking. If whole shoulders or hams are used, you might need to add some fat.
Prepare sausage by grinding the meat through a coarse plate (½-inch holes), mix thoroughly, spread thin, add seasoning, and mix thoroughly. Regrind through a finer plate (⅛-inch holes), for a more uniform mix with the seasoning.
Prepare sausage by grinding the meat using a coarse plate (½-inch holes), mix well, spread it out thin, add seasoning, and mix thoroughly. Grind again using a finer plate (⅛-inch holes) for a more even mix with the seasoning.
For seasoning 100 pounds of trimmings, a suggested seasoning formula would be the following:
For seasoning 100 pounds of trimmings, a recommended seasoning formula would be:
- 2 pounds of salt
- 6 ounces of pepper
- 1 to 2 ounces of sage
Other seasoning such as mace, nutmeg, cloves, or red pepper can be added in small amounts (not to exceed 5 ounces) if desired.
Other seasonings like mace, nutmeg, cloves, or red pepper can be added in small amounts (not more than 5 ounces) if you want.
Seasoned sausage should not be frozen for longer than 2 or 3 months since salt hastens the rancidity of pork. Unseasoned ground pork may be frozen for up to 5 to 6 months, then thawed, seasoned, and used.
Seasoned sausage shouldn't be frozen for more than 2 or 3 months because salt speeds up the spoilage of pork. Unseasoned ground pork can be frozen for up to 5 to 6 months, then thawed, seasoned, and used.
Sausage may also be stuffed into casings for use either with or without smoking. Artificial casings can be obtained from local butchers or natural casings (small intestines) can be used. Natural casings should be washed thoroughly, cleaned, and scraped prior to use. Stuffing sausage requires skill and proper equipment. It is best to have sausage stuffed and smoked by a local custom processor.
Sausage can also be stuffed into casings for use with or without smoking. You can get artificial casings from local butchers, or you can use natural casings (like small intestines). Natural casings should be washed well, cleaned, and scraped before using. Stuffing sausage takes skill and the right equipment. It's best to have your sausage stuffed and smoked by a local custom processor.
Scrapple
Scrapple, a favored breakfast dish in many sections, is made of cooked pork and broth thickened with cornmeal, flour, and sometimes shorts. The following formula is popular:
Scrapple, a popular breakfast dish in many areas, is made from cooked pork and broth thickened with cornmeal, flour, and sometimes fat. The following recipe is commonly used:
- 30 pounds of cooked and ground meat
- 30 quarts of broth
- 10 pounds of cornmeal
- 3 pounds of buckwheat or rye flour
- 1½ pounds of rolled oats
- 15 ounces of salt
- 3 ounces of pepper
Cuts of pork such as the head, tail, kidneys, heart, tongue (skinned), spareribs, and pork trimmings may be used to make scrapple. Clean and trim all pieces thoroughly and place them in a pot or vessel; cover with water and cook until the meat separates easily from the bone. Separate the meat from the bones and grind or chop fine. After grinding return the meat to the broth and bring to a boil, add corn meal, buckwheat flour, and rolled oats and cook until the mixture has the consistency of thick mush. Season with salt, pepper, and spices; remove from the heat and pour into molds or shallow pans to harden.
Cuts of pork like the head, tail, kidneys, heart, skinless tongue, spareribs, and trimmings can be used to make scrapple. Clean and trim all the pieces thoroughly and place them in a pot or container; cover with water and cook until the meat easily separates from the bone. Remove the meat from the bones and grind or chop it finely. After grinding, return the meat to the broth and bring it to a boil. Add cornmeal, buckwheat flour, and rolled oats, and cook until the mixture has the consistency of thick mush. Season with salt, pepper, and spices; remove from heat and pour into molds or shallow pans to harden.
When adding the cereal, moisten it with some of the cooled broth so that it may be added without forming lumps.
When you add the cereal, wet it with some of the cooled broth to prevent lumps from forming.
If made properly, scrapple can be sliced and fried easily with little crumbling.
If made correctly, scrapple can be sliced and fried easily with minimal crumbling.
Headcheese
Headcheese is easy to make. Split the head, remove the eyes, clean the ears and nostrils, cover the cleaned pieces in water with the tongue, heart, and some lean trimmings and cook until the meat is well done and separates easily from the bones. Grind the meat and cover with broth. Add seasoning (salt, pepper, and others if desired), cook for 15 to 20 minutes and pour into pans. Headcheese can be eaten cold or fried the same as scrapple or panhas. Headcheese does not hold together as well as scrapple because of the absence of corn meal and flour.
Headcheese is easy to make. Split the head, remove the eyes, clean the ears and nostrils, cover the cleaned pieces in water along with the tongue, heart, and some lean trimmings, and cook until the meat is fully cooked and easily separates from the bones. Grind the meat and mix it with broth. Add seasoning (salt, pepper, and any other spices you like), cook for 15 to 20 minutes, and pour it into pans. Headcheese can be eaten cold or fried, just like scrapple or panhas. Headcheese doesn’t hold together as well as scrapple because it doesn’t contain cornmeal or flour.
The following quantities of seasoning per 100 pounds of cooked meat, including the added broth, are recommended:
The following amounts of seasoning per 100 pounds of cooked meat, including the added broth, are suggested:
- 2–2½ pounds of salt
- 3–5 ounces of black pepper
- 1 ounce of red pepper
- 1 ounce of ground cloves (if desired)
- 1 ounce of coriander (if desired)
- 2 ounces of sweet marjoram (if desired)
Panhas (pon-hos)
Using the broth remaining after making headcheese, strain out all the bones and thicken with corn meal, buckwheat or rye flour. Use three or four parts broth to one part meal to make a thick paste. To prevent lumping, it is best to slightly moisten the meal with a little cooled broth before adding it to the other broth. Season to taste with the seasonings given for headcheese. Cook for 30 to 45 minutes and pour into shallow pans to cool. Slice and serve like scrapple.
Using the broth left over from making headcheese, strain out all the bones and thicken it with cornmeal, buckwheat, or rye flour. Use three or four parts broth to one part meal to create a thick paste. To avoid lumps, it's best to lightly moisten the meal with a bit of cooled broth before adding it to the other broth. Season to taste with the spices suggested for headcheese. Cook for 30 to 45 minutes and pour into shallow pans to cool. Slice and serve like scrapple.
Pickled Pigs’ Feet
Pigs’ feet should be clean, free from hair, and the toes removed. Make certain to clean between the toes and trim any remaining hair.
Pigs' feet should be clean, free of hair, and have the toes removed. Make sure to clean between the toes and trim any leftover hair.
Cure clean, chilled feet in brine for 15 days to 3 weeks. Use the same brine suggested for curing hams. Weight the feet to keep them from floating above the solution. Use enough solution to completely submerge the feet. Keep the feet cold throughout curing period (at 36° to 40° F, if possible).
Cure clean, chilled feet in brine for 15 days to 3 weeks. Use the same brine recommended for curing hams. Weigh down the feet to prevent them from floating above the solution. Use enough solution to fully submerge the feet. Keep the feet cold throughout the curing period (at 36° to 40° F, if possible).
After curing, slowly cook or simmer the feet until they are tender. Cook them slowly to keep the skin from parting excessively and the feet from pulling out of shape. Thoroughly chill the cured, cooked feet and pack them in cold, moderately strong vinegar, add spices such as bay leaves or allspice. Use the feet at once or store them in the vinegar.
After curing, slowly cook or simmer the feet until they're tender. Cook them slowly to prevent the skin from splitting too much and the feet from losing their shape. Chill the cured, cooked feet completely and pack them in cold, moderately strong vinegar. Add spices like bay leaves or allspice. Use the feet right away or store them in the vinegar.
MEAT COOKERY
Tender cuts of meat are best cooked with dry heat such as broiling, roasting, and panbroiling. Less tender cuts of meat are tenderized by cooking with moist heat. Connective tissue is softened and tenderized by cooking slowly in moisture.
Tender cuts of meat are best cooked with dry heat methods like broiling, roasting, and pan-broiling. Less tender cuts are softened by cooking with moist heat. Connective tissue is broken down and made tender by cooking slowly with moisture.
Temperature control is very important in meat cookery. Meat loses moisture, fat, and other substances during cooking. However, some of the meat juices and fat may be retained in the pan drippings.
Temperature control is really important in cooking meat. Meat loses moisture, fat, and other substances while it's being cooked. However, some of the meat juices and fat might be kept in the pan drippings.
Cooking losses can be minimized by controlling the oven cooking temperature and final internal temperature of the meat. Shrinkage is increased when hot oven temperatures are used for cooking and when meat is cooked to a higher internal temperature.
Cooking losses can be reduced by managing the oven cooking temperature and the final internal temperature of the meat. Shrinkage increases when high oven temperatures are used for cooking and when meat is cooked to a higher internal temperature.
The meat thermometer is the most accurate guide to the degree of doneness of meat. Cooking time in relation to weight is often used as a guide to the degree of doneness, but this may be influenced by the cut’s fat and moisture content and by its shape or size.
The meat thermometer is the best way to check how done your meat is. While cooking time based on weight is commonly used to determine doneness, it can be affected by the amount of fat and moisture in the cut, as well as its shape or size.
Fresh pork, smoked picnic shoulder, shoulder roll, and other smoked products should be cooked to an internal temperature of 160° F (71° C). Excessive cooking will toughen and dry the meat, thus decreasing its acceptability.
Fresh pork, smoked picnic shoulder, shoulder roll, and other smoked products should be cooked to an internal temperature of 160° F (71° C). Overcooking will make the meat tough and dry, which reduces its quality.
Hams cooked to 140° F (60° C) are not fully cooked and should be cooked before eating. Hams which are cooked to 150° F or higher should require no further cooking and are labeled “fully cooked.”
Hams cooked to 140°F (60°C) are not fully cooked and should be cooked before eating. Hams that are cooked to 150°F or higher don't need any further cooking and are labeled “fully cooked.”
Trichinae are rarely found in pork; however, precautions should always be taken. Trichinae are readily destroyed by any of the following conditions:
Trichinae are rarely found in pork; however, precautions should always be taken. Trichinae can be easily destroyed by any of the following conditions:
- Heating meat throughout to an internal temperature of 137° F (58° C)
- Storage at -20° F (-29° C) or below for 6 to 12 days
- Storage at -10° F (-23° C) or below for 10 to 20 days
- Storage at 5° F (-15° C) or below for 20 to 30 days
More detailed instructions for cooking procedures can be obtained from the following source:
More detailed instructions for cooking procedures can be found in the following source:
Lessons on Meat,
National Live Stock and Meat Board,
444 North Michigan Avenue,
Chicago, Illinois 60611
Lessons on Meat,
National Livestock and Meat Board,
444 North Michigan Avenue,
Chicago, Illinois 60611
PRECAUTIONS
The Law
The Federal Meat Inspection Act requires that all meat which is to be sold or traded for human consumption must be slaughtered under inspection in an approved facility under the supervision of a State or USDA meat inspector. A person can slaughter his animals outside such a facility only for use by himself, members of his household, his non-paying guests, or his employees, but he is not allowed to sell any portion of the carcass. For more details about these regulations, consult your county extension agent or write to the Food Safety and Quality Service, United States Department of Agriculture, Washington, D.C. 20250.
The Federal Meat Inspection Act states that all meat intended for sale or trade for human consumption must be processed in an approved facility under the supervision of a state or USDA meat inspector. A person can only slaughter their animals outside such a facility for personal use by themselves, their household members, non-paying guests, or employees, but they cannot sell any part of the carcass. For more information on these regulations, contact your county extension agent or write to the Food Safety and Quality Service, United States Department of Agriculture, Washington, D.C. 20250.
OTHER PUBLICATIONS
The following publications give additional information on selecting and preparing food for your family. Send your requests on a post card to the Office of Governmental and Public Affairs, U.S. Department of Agriculture, Washington, D.C. 20250. Include your return address and ZIP code.
The following publications provide more information on choosing and preparing food for your family. Send your requests on a postcard to the Office of Governmental and Public Affairs, U.S. Department of Agriculture, Washington, D.C. 20250. Make sure to include your return address and ZIP code.
| Order No. | ||
| Family Food Budgeting—for Good Meals and Good Nutrition | G | 94 |
| Vegetables in Family Meals: A Guide for Consumers | G | 105 |
| Beef and Veal in Family Meals: A Guide for Consumers | G | 118 |
| Pork in Family Meals: A Guide for Consumers | G | 160 |
| Keeping Food Safe to Eat | G | 162 |
| Nuts in Family Meals: A Guide for Consumers | G | 176 |
| Your Money’s Worth in Foods | G | 183 |
| Food | G | 228 |
| Sodium Content of Your Food | G | 233 |
| Beef Slaughtering, Cutting, Preserving, and Cooking on the Farm | F | 2263 |
| Lamb Slaughtering, Cutting, Preserving, and Cooking on the Farm | F | 2264 |
This publication contains public information. It is not copyrighted and may be reproduced in whole or in part with or without credit.
This publication contains public information. It is not copyrighted and can be reproduced in whole or in part, with or without credit.
☆ U.S. GOVERNMENT PRINTING OFFICE: 1981 O-338-123
☆ U.S. GOVERNMENT PRINTING OFFICE: 1981 O-338-123
Transcriber’s Notes.
- Silently corrected typographical errors and variations in spelling.
- The original was printed in two column text with illustrations sometimes spanning both columns. In order to reduce ambiguity, the illustrations have been moved adjacent to the paragraph that refers to them.
- Footnotes have been renumbered.
- The cover/title page image has been retouched to remove flaws.
- Images of the original pages are available through Internet Archive. See https://archive.org/details/CAT81755583
Download ePUB
If you like this ebook, consider a donation!