This is a modern-English version of Handbook on dress and cloak cutting, originally written by Hecklinger, Charles.
It has been thoroughly updated, including changes to sentence structure, words, spelling,
and grammar—to ensure clarity for contemporary readers, while preserving the original spirit and nuance. If
you click on a paragraph, you will see the original text that we modified, and you can toggle between the two versions.
Scroll to the bottom of this page and you will find a free ePUB download link for this book.
HANDBOOK
ON
DRESS AND CLOAK CUTTING,
BY
CHAS. HECKLINGER.
BY
CHAS. HECKLINGER.
1884.
1884.
NEW YORK:
PETER DE BAUN, PRINTER, 101 AND 103 FULTON STREET.
NEW YORK:
PETER DE BAUN, PRINTER, 101 AND 103 FULTON STREET.
Entered according to an Act of Congress in the year 1884, by
Entered according to an Act of Congress in the year 1884, by
Charles Hecklinger,
Charles Hecklinger
in the Office of the Librarian of Congress, at Washington, D. C.
in the office of the Librarian of Congress, in Washington, D.C.

The following pages contain the author’s Improved System of Dress and Cloak Cutting, fully explained, with the intention of helping those students who, desirous to follow this branch of industry, are met on the very threshold by a difficulty—the choice of a suitable System.
The following pages include the author’s Enhanced System of Dress and Cloak Cutting, thoroughly explained, to assist students who want to pursue this field but face a challenge right at the beginning—choosing the right system.
The System given has been found to give the greatest security in its results, with the least trouble, it being easy to learn, readily used, and gives the greatest satisfaction to the large number of those using it. Everything in illustrating and explaining has been omitted which might tend to complicate or retard the student in acquiring it. Every point needed to make it clear has been carefully put down—in its illustrations, in the simple description, and in grouping the separate articles in their correct places—making it at once easy to comprehend and perfect as a whole.
The given system has been shown to provide the best results with the least hassle. It’s easy to learn, simple to use, and it brings the greatest satisfaction to the many people who use it. Everything that could complicate or slow down a student’s learning has been left out. Every necessary point has been clearly outlined—in the illustrations, in the straightforward descriptions, and by organizing the individual components in their right places—making it easy to understand and complete as a whole.


Most Systems of proportion, thus far issued, are projected on the breast-measure. It will be evident, on investigating the proportions of the human figure, that a System based only on one size of the body, and that its width, can never lead to the best results.
Most systems of proportion released so far are based on the chest measurement. It will be clear, upon examining the proportions of the human body, that a system relying solely on one body size, specifically its width, cannot achieve the best results.

When the height and width are equal it is immaterial which we use. But this is only the case on normal sizes, from 34 to 38 breast, as all deviations from these sizes are different in their proportions of heights to the widths.
When the height and width are the same, it doesn't matter which one we use. But this only applies to standard sizes, from 34 to 38 bust, since all variations from these sizes differ in their height-to-width proportions.
The problem to be solved in using a proportionate system is to arrange the lengths so that they agree with a certain breast size and use it for the heights.
The issue with using a proportional system is to adjust the lengths so they correspond with a specific breast size and use that for the heights.
In practice we find that the average forms, measuring from 34 to 38 breast, require and can be cut by the full breast-measure, as the lengths agree, in the majority of cases, with this size; but in larger and smaller sizes this breast-measure will either be too small or too large, therefore, in drafting any other sizes than those indicated, we must use the quantities as given in the following Table, as set opposite the full breast-measure, in order that the pattern in its length may be of correct size, and neither too small or too large.
In practice, we see that the average sizes, ranging from 34 to 38 in the bust measurement, require and can be cut using the full bust measurement since the lengths typically match this size. However, in sizes larger or smaller than this range, the full bust measurement will either be too small or too large. So, when drafting sizes outside those specified, we need to use the amounts listed in the following Table, positioned across from the full bust measurement, to ensure that the pattern length is accurate and not too small or too large.
Table of Sizes.
| Breast. | Size to Draft 1/2 Bust Measurement. |
Waistline. |
|---|---|---|
| 30 | 15½ | 22 |
| 31 | 15⅞ | 22½ |
| 32 | 16¼ | 23 |
| 33 | 16¾ | 23½ |
| 34 | 17¼ | 24 |
| 35 | 17⅝ | 24½ |
| 36 | 18 | 25 |
| 37 | 18½ | 25½ |
| 38 | 19 | 26 |
| 39 | 19½ | 26½ |
| 40 | 20 | 27 |
| 41 | 20¼ | 28 |
| 42 | 20¾ | 29 |
| 43 | 21⅛ | 30 |
| 44 | 21⅝ | 31½ |
| 45 | 21 | 33 |
| 46 | 21⅞ | 34½ |
| 47 | 22¼ | 36 |
| 48 | 22¾ | 37½ |
| 49 | 23 | 38½ |
| 50 | 23¼ | 39 |
In considering the human body it must be allowed that sufficient and marked characteristics exist between a young girl and the full-grown woman—the slender, and the large, fleshy form. All these tend to establish that the first elements of a good System for constructing garments is a good proportionate standard.
In looking at the human body, it's clear that there are significant differences between a young girl and an adult woman—the slim figure versus the fuller, curvier shape. These distinctions suggest that one of the fundamental principles for designing clothes is having a solid proportionate standard.

In strict accordance with this we have given diagrams, illustrating the system by which the art of cutting is thoroughly attained; we also give the system as it should be used in drafting by measure.
In strict accordance with this, we have provided diagrams that show the system through which the skill of cutting is fully mastered; we also present the system as it should be applied in drafting by measurement.
Table of Sizes for Children.
| Age. | Breast. | Waistline. | Length of Back to Natural Waist. |
|---|---|---|---|
| 2 | 22 | 22 | 9 |
| 3 | 22¾ | 22¼ | 9½ |
| 4 | 23½ | 22½ | 10 |
| 5 | 24¼ | 22¾ | 10½ |
| 6 | 25 | 23 | 11 |
| 7 | 25¾ | 23¼ | 11½ |
| 8 | 26½ | 23½ | 12 |
| 9 | 27¼ | 23¾ | 12½ |
| 10 | 28 | 24 | 13 |
| 11 | 28¾ | 24¼ | 13½ |
| 12 | 29½ | 24½ | 14 |
| 13 | 30¼ | 24¾ | 14½ |
| 14 | 31 | 25 | 15 |
| 15 | 32 | 25 | 15½ |


The measures required are few, and only such as give correct results (See Fig. 1).
The measures needed are minimal and only those that produce accurate results (See Fig. 1).
Have a tape which fastens around the waist in such a manner that it will be level.
Have a strip that wraps around the waist in a way that keeps it level.
Measure from socket bone at top of back, point O, to waist I below the tape to B, for the highest part of hip, and to the full length of garment wanted.
Measure from the socket bone at the top of the back, point O, to the waist I below the tape to B, for the highest part of the hip, and to the full length of the garment desired.
Take the measure around the arm-hole; then move the arm forward to allow you to put the tape directly under the arm to seam of sleeve at F, and measure down to bottom of tape at J.
Take the measurement around the armhole; then move your arm forward to position the tape directly under the arm to the seam of the sleeve at F, and measure down to the bottom of the tape at J.
Next, put the tape under the arm, close up, and measure the length of the sleeve down to the wrist.
Next, place the tape under the arm, pull it snug, and measure the sleeve length down to the wrist.
Turn to Fig. 2, and measure, as shown, from back of neck, point O, past the front of arm, to bottom of tape at J. This measure must be taken easy, and should run straight down in front of arm.
Turn to Fig. 2, and measure, as shown, from the back of the neck, point O, past the front of the arm, to the bottom of the tape at J. This measurement should be taken loosely and should run straight down in front of the arm.
Measure next from front of arm to centre of back. To take this measure, a little square, having a tape attached, is very handy to use.
Measure next from the front of the arm to the center of the back. To take this measurement, a small square with a tape attached is really useful to use.
Take the breast-measure over the fullest part of the bosom and shoulder blades, then the waist-measure, always taken close, and the hip-measure.
Take the bust measurement at the widest part of the chest and shoulder blades, then the waist measurement, always taken snugly, and the hip measurement.
These are all the measures required for a dress-waist, a jacket, or a long garment. For a skirt we take the length on the side, from the hip down to the floor. For a circular take the width around the shoulders.
These are all the measurements needed for a blouse, a jacket, or a long garment. For a skirt, we measure the length on the side, from the hip to the floor. For a circular garment, we take the width around the shoulders.
FIG. 3 AND 4. THE WAIST PATTERN.
Commence by drawing line O on the edge of a sheet of paper from point O to F, and one line C at right angles with it from O to N.
Commence by drawing line O on the edge of a sheet of paper from point O to F, and one line C at right angles to it from O to N.
From O go down three-fourths of an inch for the actual top of back.
From O, go down three-quarters of an inch for the actual top of the back.
From O to C is one-quarter of the breast-measure, which for a 36 bust would be 9 inches, and from C over to 16 draw line D (see Fig. 4) at right angles with the back line.
From O to C is a quarter of the breast measurement, which for a 36-inch bust would be 9 inches, and from C over to 16, draw line D (see Fig. 4) at a right angle to the back line.
Next, measure from ¾, or the top of back down to F, the length of back, from socket bone to the natural waist and from F draw a line over to the front at T.
Next, measure from ¾, or the top of the back down to F, the length of the back, from the socket bone to the natural waist, and from F draw a line over to the front at T.
From F go in 1½ inch, and draw a line for the centre of the back, from ¾ at top to 1½ at the bottom.
From F, measure 1½ inches in, and draw a line for the center of the back, from ¾ at the top to 1½ at the bottom.
From O over on the top line, place 2 inches to the point marked ⅛. This will be about right for all medium sizes. For large sizes, over 40 breast, make it 2¼ inches to 2½ inches and for sizes under 30 breast-measure let it be 1½ to 1¾ inches. It will make no difference in the fit what this width may be, as it only affects the appearance of the shoulder-seam. A little practice, however, will enable any one to apply the right width.
From O on the top line, measure 2 inches to the point marked ⅛. This should be suitable for all medium sizes. For large sizes, over a 40-inch bust, adjust it to 2¼ inches to 2½ inches, and for sizes under a 30-inch bust, use 1½ to 1¾ inches. This width won't affect the fit; it only influences the look of the shoulder seam. However, with a bit of practice, anyone can learn to apply the right width.
In the middle, between O and E (see Fig. 4), fix point B, and in the centre, between B and E, locate point C, and draw lines B and G from both points.
In the middle, between O and E (see Fig. 4), place point B, and in the center, between B and E, find point C, and draw lines from both points to B and G.
Starting at E, measure over to S one-third of the breast, which is 6 inches for a 36; and add to it one inch, which fixes S; and from S to H place one-fourth, or 4½ inches. All fractions and divisions that we use in explanation are based on the breast-measure, and are found already divided on the square.
Starting at E, measure over to S one-third of the bust, which is 6 inches for a size 36; and add one inch to it, which determines S; and from S to H place one-fourth, or 4½ inches. All the fractions and divisions we use in this explanation are based on the bust measurement and can be found already divided on the square.
At S and H draw lines up, as shown. Where lines S-J and B-J cross, begin by drawing another to the top, at A.
At S and H, draw lines up as shown. Where lines S-J and B-J intersect, start by drawing another line to the top at A.
Now, curve from ¾ to A, and from A to G, which last point is one-half inch above J. Commencing at G curve past J to R, going a trifle inside of straight line, then from R past X to V.
Now, curve from ¾ to A, and from A to G, which is half an inch above J. Starting at G, curve past J to R, going slightly inside the straight line, then from R past X to V.
From R draw a straight line to 1½, and curve the back seam from R by going only a little inside of straight line at 19, thence to 2. Point 2 is 1½ inches from centre 1½. From 2 to 1 place 1 inch, then curve the side-body from 19 to 1.
From R, draw a straight line to 1½, then curve the back seam from R by going just a bit inside the straight line at 19, and then to 2. Point 2 is 1½ inches away from center 1½. From 2 to 1, place 1 inch, then curve the side-body from 19 to 1.
Next, measure from the centre of the back at Z, on the line under the arm, to get the point D in front. This should be one-half of the breast-measure (18). Point D being placed, draw a line from there up and down to N and to U, at right angles with the line under the arm.
Next, measure from the center of the back at Z, along the line under the arm, to find point D in front. This should be half of the breast measurement (18). Once point D is marked, draw a line from there up and down to N and to U, making sure it's at right angles to the line under the arm.

Fig. 3.
Fig. 3.
To form the neck we take one-sixth of the breast and place it from N to P, and, using N as a pivot, sweep from P to 15. One-quarter inch inside of front line at 15 we start to draw the curved front line to the bottom, by going outside of D one-half inch and coming back to straight line again, near U.
To create the neck, we take one-sixth of the bust and position it from N to P. Using N as a pivot, we arc from P to 15. A quarter inch inside the front line at 15, we begin to draw the curved front line down to the bottom by moving outside of D half an inch and then returning to the straight line near U.
One and a half inches below the waist-line, at U, draw a line from T over to 12.
One and a half inches below the waistline, at U, draw a line from T to 12.
From P to B draw a straight line; then take the length of the back shoulder, from A to G, and place the same from P towards 17, and where this reaches is point 17.
From P to B, draw a straight line; then take the length of the back shoulder, from A to G, and place that same length from P towards 17, and where that reaches is point 17.
Having located 17, curve from it above the line of shoulder at 21, and drop one-fourth inch below it at 20; and, also, from 20 draw the arm-hole past 18 to X; but do not quite touch A, and drop below V one-fourth inch.
Having found 17, curve it above the shoulder line at 21, and drop down a quarter inch below it at 20; also, from 20, draw the armhole past 18 to X; but do not quite touch A, and drop down a quarter inch below V.
Point V is midway between S and H; from it draw a straight line to 4; curve a little on both sides of it; that is, starting from V, keep following the line for two inches, then gradually separate towards the waist-line, so that you will have two curves, which will be apart one-fourth inch near waist, but coming together again at 4.
Point V is halfway between S and H; from there, draw a straight line to 4; curve a little on both sides of it; meaning, starting from V, continue along the line for two inches, then gradually move outwards towards the waistline, so that you create two curves which are a quarter inch apart near the waist, but come back together again at 4.
About one-half inch more forward than the middle, between 19 and V, fix point X; and in the centre, between 1 and 4, locate 3; then draw a line from X to 3 and curve it.
About half an inch forward from the middle, between 19 and V, mark point X; and in the center, between 1 and 4, find 3; then draw a line from X to 3 and curve it.
In the middle, between H and D, mark point 12, and in the middle, between 12 and H, point 13.
In the center, between H and D, mark point 12, and in the center, between 12 and H, mark point 13.
Measure the distance from front, at U, to 1, and from 2 to 1½; on this draft it will be 16 inches. Now deduct from this the size of waist, 12 inches, and the remainder, 4 inches, must be taken out in darts. We put them in as follows: From U to 5 place a distance of 2 inches for all average medium sizes; from 5 to 6 is one dart of 2 inches, and between the darts, from 6 to 7, is three-fourths inch, then from 7 to 8 is another dart of 2 inches.
Measure the distance from the front, at U, to 1, and from 2 to 1½; in this draft, it will be 16 inches. Now subtract the waist size, which is 12 inches, and the leftover 4 inches needs to be taken out in darts. We place them as follows: From U to 5, add a distance of 2 inches for all average medium sizes; from 5 to 6 is one dart of 2 inches, and between the darts, from 6 to 7, is three-quarters of an inch, then from 7 to 8 is another dart of 2 inches.
Take two-thirds of the distance under the arm and place it upwards from 7 towards 13 for the height of the back dart, and let the front one start one-half inch lower; then draw them, as shown, from 22 and 23 to 9, 10, 11 and 12.
Take two-thirds of the distance under the arm and measure it up from 7 to 13 for the height of the back dart, and let the front one start half an inch lower; then draw them, as shown, from 22 and 23 to 9, 10, 11, and 12.
Now, at one-fourth inch below 1, curve the lower line past 3, and a trifle above it, to 12, drop point 12 a little below the line; also drop 10 a little below it; from 9 to T remain on the line straight across.
Now, at a quarter inch below 1, curve the lower line just past 3 and a bit above it, to 12. Drop point 12 a little below the line; also drop point 10 a little below it. From 9 to T, stay on the line straight across.
The draft is now finished by proportion, and we can assure our readers that, with the use of the sizes on our Proportionate Table, it is applicable to all forms, the manner of drafting remaining the same in all cases.
The draft is now completed in proportion, and we can assure our readers that, by using the sizes on our Proportionate Table, it works for all forms, with the drafting method remaining consistent in every situation.
All our figures, unless otherwise stated, are drafted without seams. We do this because it is far easier to add the amount necessary on different material than to draft it on the pattern.
All our figures, unless stated otherwise, are created without seams. We do this because it's much easier to add the required amount on different material than to include it on the pattern.
THE WAIST, BY MEASURE.
The measures we shall use are the following: Breast, 36; waist, 24; length of natural waist, 15; height under arm, 7; front of arm, 10½; width of back, 6½; front length, 18½.
The measurements we will use are as follows: bust, 36; waist, 24; natural waist length, 15; underarm height, 7; front of arm, 10½; back width, 6½; front length, 18½.
In drafting this we drop proportion altogether and use only the measures as stated above to get all points on the draft. All the lines and curves will come out in similar manner to the previous draft. Fig. 4 starts by drawing a line O-F and O-N; go down from O three-fourths of an inch, and in from O, to A, two inches, and curve from ¾ to A.
In creating this draft, we completely disregard proportion and only use the measurements mentioned above to determine all points on the draft. All lines and curves will appear similarly to the earlier draft. Fig. 4 begins by drawing a line O-F and O-N; move down from O three-fourths of an inch and in from O, to A, two inches, and curve from ¾ to A.
From ¾ down, measure the length of back 15 inches to F, and at F draw a line over to the front and go in 1½ inches and mark a point.
From ¾ down, measure back 15 inches to F, and at F draw a line to the front and go in 1½ inches to mark a point.
From ¾ to this last point draw a straight line for the centre of the back.
From ¾ to this last point, draw a straight line for the center of the back.
Up from F measure the height under arm 7 inches to E, and from E draw a line to the front.
Up from F, measure the height under the arm 7 inches to E, and from E, draw a line to the front.
From Z to D is one-half of the breast-measure, and draw the front line up and down. Also measure from Z to S, the actual width of the back, and from Z to H, the front of the arm, 10½ inches, or the blade measure which is taken from the front of the arm over the blade to the centre of the back. At S and H draw lines up.
From Z to D is half of the breast measurement, and draw the front line vertically. Also measure from Z to S, which is the actual width of the back, and from Z to H, the front of the arm, 10½ inches, or the blade measurement, which is taken from the front of the arm over the blade to the center of the back. At S and H, draw vertical lines.
In the middle between O and E mark point B, and in the middle between B and E point C, and draw the lines across as shown. (See Fig. 4.)
In the middle between O and E, mark point B, and in the middle between B and E, mark point C, and draw the lines across as shown. (See Fig. 4.)
From where the lines cross at J, draw one across to top of back at A, and curve from A to G which point is one-half inch above J.
From where the lines intersect at J, draw a line to the top of the back at A, and curve from A to G, which is half an inch above J.
Beginning at G curve arm-hole past J, a trifle inside of line between J and R, and from thence to V. This last is midway between S and H.
Beginning at G curve armhole past J, slightly inside the line between J and R, and from there to V. This point is halfway between S and H.
Make the bottom of the back 1½ inches wide. This is only a medium, as it can be made 1 inch or 2 inches, which only places the seam either further back or more to the front. Then from R draw a straight line to 1½ and slightly curve a line drawn to 19 and to 2. Between 19 and 2 curve more towards centre of back. A few trials will enable you to make a nice shaped curve.
Make the bottom of the back 1½ inches wide. This is just a medium size, as it can also be made 1 inch or 2 inches, which just shifts the seam either further back or more to the front. Then from R, draw a straight line to 1½ and slightly curve a line to 19 and to 2. Between 19 and 2, curve more toward the center of the back. A few tries will help you create a nicely shaped curve.

Fig. 4.
Fig. 4.
From 2 on back to side body at 1 is 1 inch, and curve from 19 to 1.
From 2 to the side body at 1 is 1 inch, and the curve from 19 to 1.
From V, straight down, draw a line to 4 and curve a trifle on either side of it, also separate side-body from X to 3. Point X is midway between line R and V and the distance between 3 and 4 is about ½ inch more than X to V.
From V, draw a straight line down to 4 and make a slight curve on each side of it. Also, separate the side-body from X to 3. Point X is halfway between line R and V, and the distance between 3 and 4 is roughly half an inch more than the distance from X to V.
Take ⅙ of the breast, equal to 3 inches, and place it from point N to P and use point N as a pivot and sweep from P to 15.
Take ⅙ of the breast, which is 3 inches, and position it from point N to P. Use point N as a pivot and sweep from P to 15.
At a point on waist-line directly under H, measure up past P, shoulder point, the front length, which is in our measure 18½, deducting the width of top of back, and wherever it reaches to is point P. This may, sometimes, when the person is erect, reach above the line; and again, on hollow or stooping shoulders, be below it. Wherever it reaches is the shoulder point, and when it goes above we sweep at a point above N even with shoulder for neck, and of course, should it be below the line, at a point below N, so that the neck will keep its shape to harmonize with the height of shoulder point.
At a spot on the waistline directly below point H, measure up past point P to the shoulder point, which is the front length. In our measurement, this is 18½, minus the width of the top of the back. The point where this measurement ends is point P. Sometimes, when the person stands straight, this may go above the line, and other times, with slouched or hollow shoulders, it might be below it. The point where it reaches is the shoulder point, and when it goes above, we adjust to a point above N that is level with the shoulder for the neck. If it is below the line, we adjust to a point below N so that the neck maintains its shape to match the height of the shoulder point.

Wherever point P is located by measure, above or below, or on the line, start to draw the line to B, on back, for height of shoulder, and place the width of back shoulder from A to G on this line from P to get point 17. Then from 17 curve above it about one-quarter inch to P, and also draw the arm-hole, going inside of line H, but never over one-half inch, to V, as shown on the diagram. Drop a trifle from 17 to 20.
Wherever point P is measured, whether above, below, or on the line, start drawing the line to B for the shoulder height and mark the width of the back shoulder from A to G on this line from P to find point 17. Then, from 17, curve upward about a quarter of an inch to P, and also draw the armhole, staying inside line H but never going over half an inch, to V, as shown in the diagram. Drop a little from 17 to 20.
At the front, draw the line starting inside of straight line of 15 one-quarter of an inch, gradually curving out till at D we have one-half inch curve, and thence going in again to the line at waist, point U. From U go down 1¼ inch to T, and draw a line across to 12.
At the front, draw a line starting from the inside of a straight line at 15, one-quarter inch, gradually curving out until at D, we have a half-inch curve, and then going back in to the line at the waist, point U. From U, go down 1¼ inches to T, and draw a line across to 12.
Measure the distance F to U, leaving out the opening between 1 and 2, which in this case will be 16 inches. Now, one-half of waist-measure, 12 inches, from 16 leaves 4 inches, which must be taken out in darts.
Measure the distance F to U, skipping the opening between 1 and 2, which will be 16 inches in this case. Now, subtract half of the waist measurement, 12 inches, from 16, leaving 4 inches, which needs to be removed with darts.
To produce the darts in the right place we proceed as follows: first locate a point in the middle between H and D which gives 12, and in the centre between H and 12, another which is marked 13.
To produce the darts in the right place, we do the following: first, find a point in the middle between H and D, which gives 12. Then, in the center between H and 12, locate another point marked 13.
From U to 5 place 2 inches, as we never wish to have the first dart any nearer to the front, then from 5 to 6 is one dart of 2 inches or one-half of the amount to be taken out. Between the darts leave three-fourths inch, and then place another dart of 2 inches from 7 to 8. In the centre of each dart mark a point and draw lines from these to 12 and 13.
From U to 5, measure 2 inches, as we never want the first dart any closer to the front. Then from 5 to 6, mark one dart of 2 inches or half of the amount to be removed. Leave three-fourths of an inch between the darts, and then place another dart of 2 inches from 7 to 8. In the center of each dart, mark a point and draw lines from these to 12 and 13.
One-third of the height under arm from 13 locates 23 while 22 is one-half inch lower, and starting from each of the last points curve the darts as shown.
One-third of the height measured under the arm from 13 is at 23, while 22 is half an inch lower. Starting from each of these points, curve the darts as shown.
It will be seen that they are drawn very pointed at top, and that below the waist-line they run straight down without any spring being given.
It will be noticed that they are sharply pointed at the top, and below the waistline, they go straight down without any curve.
From 1 curve to 3 and 4; but between 3 and 4 it runs a trifle above waist-line, and then from 4 to 12 on lower line. Point 10 is a little lower than the line, while it rests on line, from 9 to T.
From 1 curve to 3 and 4; but between 3 and 4 it runs a bit above the waistline, and then from 4 to 12 along the lower line. Point 10 is slightly lower than the line, while it sits on the line, from 9 to T.
This finishes the draft by measure, and we have only to add that this, as well as the preceding, requires the adding of seams according to material used.
This wraps up the draft by measure, and we just need to add that this, along with the previous one, requires adding seams based on the material used.
FIG. 5. LARGE SIZE WAIST.
In using this by measure, draft in the same way as explained in another article, the difference being only that the measure will be larger. We will explain this by the Proportionate Method: Breast, 44 inches; waist, 31½; drafting size, 21⅝, or equal to a breast-measure of 43¼ inches.
In using this by measurement, draft the same way as explained in another article, with the only difference being that the measurement will be larger. We will explain this using the Proportionate Method: bust, 44 inches; waist, 31½; drafting size, 21⅝, which is equivalent to a bust measurement of 43¼ inches.
It should be understood that this last size of breast is used only for the height, while the original breast-measure must always be used for the width.
It should be understood that this final breast size is used only for the height, while the original breast measurement must always be used for the width.
First draw line O-C, mark point O, and draw a line at right angles with O-C, to A; from O go down three-fourths inch to point 7, the top of back. From 7 to C is the length of the waist, 15½ or 16 inches.
First, draw line O-C, mark point O, and draw a line perpendicular to O-C, to A; from O go down three-fourths inch to point 7, the top of the back. From 7 to C is the length of the waist, 15½ or 16 inches.

Fig. 5.
Fig. 5.
At the waist go in 1½ inch from C; draw a straight line from 7 to 1½ for the centre of the back.
At the waist, measure in 1½ inches from C; draw a straight line from 7 to 1½ for the center of the back.
From O go down to point B, one-quarter of the drafting size, which is, in this case, 10⅝ inches; this is one-quarter of 43⅛, as on large sizes the length is reduced in the shoulders to the drafting size. Now draw a line from B to H, and one from C to J.
From O, go down to point B, which is a quarter of the drafting size, specifically 10⅝ inches; this is one-quarter of 43⅛, as on large sizes, the length is adjusted in the shoulders to the drafting size. Now draw a line from B to H, and another from C to J.
Point D is in the centre between O and B; then from D draw a line over to K.
Point D is in the center between O and B; then from D, draw a line to K.
From B to G is one-third and 1 inch, equal to 8⅛ inches, and from G draw a line up.
From B to G is one-third and 1 inch, which equals 8⅛ inches, and from G, draw a line upward.
From G to E is one-fourth, equal to 5¼ inches; here also draw a line up.
From G to E is one-fourth, which is equal to 5¼ inches; here, also draw a line up.
From O to 6 is one-eighth of breast, 2⅝ inches. From 7 curve to 6, for the top of back, at neck; from K to 6 draw a line, and at 6 begin to curve the line for shoulder, raising it one-half inch above K to 8. Also commence to curve the arm-hole from 8, going inside of line one-eighth inch at 16, and thence past 15 and 4 to E.
From O to 6 is one-eighth of the breast measurement, which is 2⅝ inches. From point 7 to point 6, for the top of the back at the neck; draw a line from K to 6, and at 6 start to curve the line for the shoulder, raising it half an inch above K to 8. Also, begin to curve the armhole from 8, going in one-eighth of an inch at 16, and then continuing past 15 and 4 to E.
Midway between K and G is point 16. Start to make the seam for the back from 16, past 17 to 1; the last point is 1½ inch from 1½. When it is desired to produce a narrow shoulder, raise the seam above 8 one-half inch, and back from 8 fully 1 inch, and draw the arm-hole from 18 to 16.
Midway between K and G is point 16. Begin the seam for the back from 16, going past 17 to 1; the final point is 1½ inches from 1½. If you want to create a narrow shoulder, raise the seam above 8 by half an inch and back from 8 by a full inch, then draw the armhole from 18 to 16.
To draw the first side-body, place 1 inch from 1 to 2, and curve the line from 16 to 17; thence separate and curve nicely to 2.
To create the first side-body, measure 1 inch from points 1 to 2, and curve the line from points 16 to 17; then, separate it and curve smoothly to point 2.
In the centre, between G and E, mark point 4, and draw a line straight down, which will be 5; and, in the middle, between 17 and 4, fix point 15. Also take the distance from 2 to 5, and fix a point in the centre, which will be 3, and then draw a line from 15 to 3; curve a little on each side of these two lines, as shown.
In the center, between G and E, mark point 4, and draw a straight line down, which will be 5; and, in the middle, between 17 and 4, mark point 15. Also, take the distance from 2 to 5, and mark a point in the center, which will be 3, and then draw a line from 15 to 3; curve a little on each side of these two lines, as shown.
In producing the front, be very careful to follow the instructions as here given: From A to F is one-sixth of the breast-measure, 3½ inches; and the same amount from A to I; now, sweep from F to I, using A as pivot; from F to D draw a straight line, and place the same distance, as on the back shoulder from 6 to 8, on to F to 9, and then curve it a little above the line at 20; finish the arm-hole by curving it from 19 downwards past E. It will be seen that it runs over and in front of line E, and one-fourth inch below breast-line at 4.
In making the front, be sure to carefully follow these instructions: From A to F is one-sixth of the breast measurement, 3½ inches; the same goes from A to I. Next, sweep from F to I with A as the pivot point. Draw a straight line from F to D and then mark the same distance, as on the back shoulder from 6 to 8, on F to 9. After that, curve it a little above the line at 20; complete the armhole by curving it from 19 down past E. You’ll notice it goes over and in front of line E, and is one-fourth inch below the breast line at 4.
For the front edge, commence one-fourth inch inside of straight line at I, and go gradually out to one-half inch at H, and in again until it touches line at J and 14.
For the front edge, start one-fourth inch in from the straight line at I, and gradually go out to one-half inch at H, then curve back in until it touches the line at J and 14.
Now to manage to fix the darts: Measure from 1½ to 1-2, to 3, and 3 to J; this will give 19½ inches. But as the measure is only 15¾, one-half of 31½, we take out the difference between these two widths in darts. This amounts to 2¾ inches, which we take out in two darts of 1⅞ inch each.
Now to adjust the darts: Measure from 1½ to 1-2, to 3, and 3 to J; this totals 19½ inches. However, since the measurement is only 15¾, which is half of 31½, we need to remove the difference between these two widths in darts. This comes to 2¾ inches, which we will remove in two darts of 1⅞ inch each.
First find the centre between H and E, which fixes point R; and the centre, also, between R and E, which gives point P. This first dart commences 2¼ inches from J. Then put in one dart of 1⅞; inch. Between the darts, let the space be 1 inch, and then place the width of the other dart, which is also 1⅞ inch, and fix a centre in each dart.
First, find the center between H and E, which marks point R; then find the center between R and E, which gives you point P. This first dart starts 2¼ inches from J. Next, add one dart measuring 1⅞ inch. Keep a space of 1 inch between the darts, then place the width of the other dart, which is also 1⅞ inch, and establish a center in each dart.
From R draw a line through the centre of the first dart, and from P one through the centre of the second; then curve the lines of both darts like those on the diagram. The darts are started two-thirds of the distance up under the arm, but the front one is made one-half inch shorter.
From R, draw a line through the center of the first dart, and from P, one through the center of the second; then curve the lines of both darts as shown in the diagram. The darts begin two-thirds of the way up under the arm, but the front one is made half an inch shorter.
From J go down 1½ inch and draw a line across to 10.
From J, go down 1½ inches and draw a line straight across to 10.
The bottom of the waist is straight from 14 to 13. At 12 begin one-fourth inch below and draw to the line at 11. From 10, also one-fourth inch below, draw a curved line to 5, raising to 3, and back to 2.
The bottom of the waist is straight from 14 to 13. At 12, start one-fourth inch below and draw to the line at 11. From 10, also one-fourth inch below, draw a curved line to 5, raising to 3, and back to 2.
When the back has been narrowed on the shoulders it becomes necessary, also, to conform the front to it; as we have raised above 8 to 18 one-half inch, therefore, we[15] must reduce the shoulder on the front the same amount we added, and it will bring it to 19. Then the waist is finished. Let it again be stated that seams must be added, except in the neck and arm-hole.
When the back has been narrowed at the shoulders, it’s also essential to adjust the front accordingly; since we’ve raised it by half an inch from 8 to 18, we[15] need to reduce the shoulder on the front by the same amount we added, which will bring it to 19. Then the waist is done. It should be emphasized again that seams must be included, except at the neck and armhole.
FIG. 6. LOW NECK DRESS WAIST.
It will be seen that the general arrangement of this draft is the same as all produced by this System.
It can be seen that the overall layout of this draft is the same as all those created by this System.
The pointed basque-like shape at bottom is made to whatever length desired, only, it will be noticed, they are made short on the side just over the hips.
The pointed basque-like shape at the bottom can be made to whatever length you want, but you'll notice that they are short on the sides, just above the hips.

Fig. 6.
Fig. 6.
In making these waists low in the neck, the first point to be considered is that they reach down lower on the shoulders, and, therefore, we have to draft them so as to meet this requirement.
In creating these low-necked waistlines, the first thing to consider is that they sit lower on the shoulders, so we need to design them to accommodate this need.
From S, the original shaped draft, we go out to 10, on line D-10, 1 to 1½ inch, according to the lowness of opening; the same is added from Q to R, and the arm-hole drafted from these two last points.
From S, the original shaped draft, we extend out to 10, on line D-10, 1 to 1½ inches, depending on how low the opening is; the same is added from Q to R, and the armhole is drafted from these last two points.
FIG. 7. BASQUE PATTERN.
This figure represents a short pointed basque as it can be produced by this System—whether by proportion or by measure. We have already fully explained the manner of producing all the upper portions of the draft in previous articles, and it is not necessary to go over it here again, it being the same as any other waist.
This figure shows a short pointed basque as it can be created using this System—either by proportion or by measurement. We've already thoroughly described how to create all the upper parts of the draft in previous articles, so there's no need to repeat it here; it's the same as any other waist.

Fig. 7.
Fig. 7.

On a short basque the back line does not touch point J, it having less spring, and therefore the width of back, at S, is only a little more than at the waist, or about one-half inch on each side of the straight lines.
On a short basque, the back line doesn't reach point J because it has less stretch. As a result, the back width at S is just slightly wider than at the waist, about half an inch on each side of the straight lines.
From J to 28 curve up, to taste. If wanted with a high curve at side, over the hips, it may reach above 28; and when desired straight around the bottom draw it along bottom line, or similar to a jacket, as shown on other Figures.
From J to 28, curve up to your preference. If you want a higher curve at the sides, over the hips, it can go above 28; and if you want it straight around the bottom, draw it along the bottom line, or similarly to a jacket, as shown in other figures.
The side-body at bottom must start at S, level with 28, rising up towards R.
The side-body at the bottom must begin at S, aligned with 28, and rise up toward R.
Q is even with R, and from it to O draw the line a little lower.
Q is level with R, and from there to O, draw the line slightly lower.
Point P is also level with O; thence, forward, it is drawn so that the front point is either level with the back or longer pointed, as shown on the Figure, where it is two inches lower.
Point P is also aligned with O; from there, it extends forward so that the front point is either aligned with the back or more pointed, as shown in the Figure, where it is two inches lower.
The darts are placed the same as on a waist. But below the waist line F they curve, as shown. The best way to produce a good result is to draw straight lines down from 11, 12, 13 and 14, drawing them inside or outside of these lines, as shown. It will thus be seen that 23 comes nearly in the centre of the second dart, because more curve is here needed for the hips, while the space between the darts is drawn so that the distance between 24 and 25 is only a little more than at 12 to 13. In this way, when the darts are sewn up they will take the shape, or the seams will shape themselves like the centre-piece between the darts.
The darts are positioned the same as they are on a waist. However, below the waistline F, they curve, as shown. The best way to achieve good results is to draw straight lines down from 11, 12, 13, and 14, either inside or outside of these lines, as illustrated. This shows that 23 is almost in the center of the second dart since more curvature is needed for the hips here, while the space between the darts is designed so that the distance between 24 and 25 is just slightly more than the distance between 12 and 13. In this way, when the darts are sewn up, they will take shape, or the seams will align like the centerpiece between the darts.
When dividing the side-body, from 18 to 19, directly under the arm draw a straight line down and let the spring on each side of this line be equal, as P and O. Also take out about one-fourth inch above the waist-line along the side-body seams, to curve them more to the shape.
When dividing the side-body, from 18 to 19, draw a straight line down directly under the arm and make sure the spring on each side of this line is equal, like P and O. Also, remove about a quarter inch above the waistline along the side-body seams to create a more curved shape.
From 15 to 20 a straight line is also drawn, and an equal amount is put each side of this line, over the hips, to R and O.
From 15 to 20, a straight line is also drawn, and an equal amount is placed on each side of this line, over the hips, to R and O.
It will be noticed that point 18 is in the middle, between line E and the line K, or point S on Fig. 4; and point 15 is midway between 18 and line K; the width of the side-body, at the waist, is made wider; the line from 18 is always drawn straight down, then divide the distance from point 19 and 2, the centre of which is 20; and from 15 through 20 draw the other line.
It will be noted that point 18 is in the middle, between line E and line K, or point S in Fig. 4; and point 15 is halfway between 18 and line K; the width of the side-body, at the waist, is made wider; the line from 18 is always drawn straight down, then divide the distance from point 19 and 2, the center of which is 20; and from 15 through 20 draw the other line.
FIG. 8. POLONAISE.
This is drafted in the same manner as the one given in Fig. 7. As, however, this is a long garment the amount of drapery must be increased; therefore below the hip line D we spring out till at bottom, point F, it amounts to one inch. At 4 there is one inch over line; at 6, on side-body, one inch; there draw a straight line from 4 down, through this inch, and curve the one-half inch over it. On the side, from 5 to 7, is 1½ inches, the same at bottom.
This is created in the same way as the one shown in Fig. 7. However, since this is a long garment, we need to increase the amount of drapery. So, below the hip line D, we extend it outward until we reach the bottom point F, which measures one inch. At 4, there's an extra inch over the line; at 6, on the side-body, it's one inch; then draw a straight line from 4 straight down through this inch and curve it by half an inch over it. On the side, from 5 to 7, there is 1½ inches, and the same at the bottom.

Fig. 8.
Fig. 8.
Where 3 and X, of fore-part, are located lay the side-body on top of it, 1 resting on 3, and point 3, of side-body, resting on X, then finish the line from X to 14, by the way the side-body lays, and fix the length also by the side-body. Put in two darts, letting them run only 4 inches below the hip line.
Where 3 and X at the front are located, place the side panel on top of it, with 1 resting on 3, and point 3 of the side panel resting on X. Then, finish the line from X to 14, following the shape of the side panel, and adjust the length according to the side panel. Add two darts, allowing them to extend just 4 inches below the hip line.
FIGS. 9 AND 10. THE SLEEVE.

Fig. 9.
Fig. 9.
Commence by drawing lines O-E and O-F. Use the arm-hole size to produce the sleeve, and go down from O to B one-fourth of this; A is in the middle between O and B. Draw lines across.
Commence by drawing lines O-E and O-F. Use the armhole size to create the sleeve, and go down from O to B one-fourth of this; A is in the middle between O and B. Draw lines across.
From O to F is one-half of arm-hole, and from there draw a line down to K.
From O to F is half of the armhole, and from there, draw a line down to K.
From B to F draw a straight line and halve it, which will be point H; and from this last also draw a short line at right angles with the diagonal line from H to J.
From B to F, draw a straight line and divide it in half, which will be point H; then from this point, draw a short line at a right angle to the diagonal line from H to J.
Measure the length of line B-F and take one-third of it and place it from H to J.
Measure the length of line B-F, take one-third of it, and position it from H to J.
Now, using J as pivot, sweep from line at top, point 4, around to the front and the back; from B curve line past 5 to this sweep. Where the sweep crosses line at G draw a line down to K.
Now, using J as the pivot, sweep from the line at the top, point 4, around to the front and the back; from B, curve the line past 5 to this sweep. When the sweep crosses the line at G, draw a line down to K.
Go down from B to C three-fourths of an inch, and from here measure the length of arm to E.
Go down from B to C three-quarters of an inch, and from there measure the length of the arm to E.
Mark a point midway between B and E, which gives D, and draw a line across.
Mark a point halfway between B and E, which will be D, and draw a line across.
In the middle, between the two parallel lines at back, mark a point f.
In the middle, between the two parallel lines at the back, mark a point f.
Now lay the square in such a position on the pattern that 5 inches will touch point E and the long arm will touch f, then draw along the bottom, from E to N, and to f.
Now place the square on the pattern so that 5 inches touches point E and the long arm touches f, then draw along the bottom from E to N and to f.

Begin to curve from C, past L to f, and curve to N.
Begin to curve from C, past L to f, and curve to N.
Go in from D 1½ inch and draw the front-seam of the sleeve.
Go in from D 1½ inch and draw the front seam of the sleeve.
From X, where the curve strikes line B, begin to draw the under-sleeve parallel with upper part 6 to 1.
From X, where the curve meets line B, start drawing the under-sleeve parallel to the upper part 6 to 1.
Measure from B around the sleeve-head to C, and apply number of inches obtained to X, and measure past 1 towards 3, the measure of arm-hole, and 2 inches more. If the upper-sleeve measures 11 inches place 11 on to X and measure 16 inches, adding 2 inches more to line at 3 for a 16-sleeve. Wherever point 3 is located begin to draw back arm-seam to bottom by running straight down, curving out to 2, or as much inside of line 7 as f is outside of it.
Measure from B around the shoulder to C, then take the number of inches you got and apply it to X. Measure past 1 towards 3, which is the measurement for the armhole, and add 2 inches more. If the upper sleeve measures 11 inches, place 11 on X and measure 16 inches, adding another 2 inches to the line at 3 for a 16-inch sleeve. Wherever point 3 is, start to draw the arm seam down to the bottom, running straight down and curving out to 2, or as far inside line 7 as f is outside of it.
FIG. 10.
Draw the line O-G and O-F. From O to C go down one-third, less one-half inch, and draw line over to K. In the middle, between C and O, draw also a line from B to H.
Draw the line O-G and O-F. From O to C, go down one-third, minus one-half inch, and draw a line over to K. In the middle, between C and O, also draw a line from B to H.

Fig. 10.
Fig. 10.
From O to G is one-half of arm-hole size, and draw a line from G downwards.
From O to G is half of the armhole size, and draw a line from G downward.
From C begin to curve the sleeve-top past I to H, touching the top line at I. From L to E apply the length of sleeve. Make F 1¼ inches lower down than E.
From C, start curving the sleeve-top past I to H, touching the top line at I. From L to E, measure the length of the sleeve. Make F 1¼ inches lower than E.
From E to N is an average of 5 inches. Draw a line from H past K to M and N, curving it inside of K about one-half inch and curve the line only a trifle below the elbow. Go in from D 1½ inch, and draw the inside seam from C to E.
From E to N is an average of 5 inches. Draw a line from H past K to M and N, curving it inside of K about half an inch and bending the line slightly below the elbow. Move in from D 1½ inches and draw the inside seam from C to E.
This finishes the upper-sleeve. For the under-sleeve draw from C, curving under straight line to L, thence to J. Point J is 1 inch inside of H. From J draw down to within one-half inch of M and to N.
This completes the upper sleeve. For the under-sleeve, draw from C, curving under the straight line to L, then to J. Point J is 1 inch inside H. From J, draw down to within half an inch of M and to N.
The front-seam is the same as the upper-sleeve from C to E and N.
The front seam is the same as the upper sleeve from C to E and N.
In drawing any sleeve use the measure of the arm-hole, and bear in mind that this manner of drafting has the seams already included.
In drawing any sleeve, use the measurement of the armhole, and remember that this way of drafting already includes the seams.
FIG. 11. SKIRTS.
Cutting and making a dress skirt, of any style and kind, is sometimes considered of very little importance. By many dressmakers the work is entrusted to inexperienced hands and blocked out by a pattern which will not fit the form. Many fine costumes lack style because the laws of cutting skirts for the different figures have not been observed.
Cutting and making a dress skirt, of any style and kind, is sometimes seen as pretty insignificant. Many dressmakers hand this task over to inexperienced workers and use a pattern that doesn’t actually fit the shape. A lot of beautiful outfits lack style because the principles of cutting skirts for different body types haven't been followed.
The fashion for the present, and for some time past, requires the skirt to be fitted with as much care as any other part of the dress. All fullness must be so arranged as to fall into the back breadths of the train. The sloping of the bottom must be proportionate, so as to give a straight even effect across the front and sides and allow the train to suddenly spring out at the lower part of the back widths.
The current fashion, and for a while now, demands that skirts be tailored with the same attention as any other part of the outfit. Any fullness should be designed to fall into the back sections of the train. The slope at the bottom must be balanced to create a smooth, even look across the front and sides, allowing the train to flare out at the lower part of the back widths.

Fig. 11.
Fig. 11.
The careful sloping of the gores at the sides causes the train to fall into a fan-like sweep. The necessity of fine slopes, and a difference of those in different costumes, as well as for different figures, will be readily appreciated when we observe the use for which the dress is intended.
The careful sloping of the gores at the sides makes the train spread out in a fan shape. The need for smooth slopes, and for variations in those slopes for different outfits and body shapes, will be easily understood when we consider the purpose of the dress.
In a walking dress, as it should be to be in harmony with style and the present demands of fashion, the skirts should adhere closely all around the front and sides, leaving whatever fullness there may be at the back. In order to gain this, darts are required between the breadths, which reduce the size needed over the hips down to the size at waist. As the hips proportionately increase at a given ratio at the sides it must be evident that, in order that the skirt may fall down fairly over the hips, these darts at side must be larger there, while towards the front they must be smaller.
In a walking dress, to keep up with modern style and current fashion trends, the skirts should fit closely around the front and sides, allowing for some fullness at the back. To achieve this, darts are needed between the fabric pieces, which help reduce the measurement over the hips down to the waist size. Since the hips increase proportionately at the sides, it's clear that to ensure the skirt drapes properly over the hips, the darts on the sides need to be larger, while those at the front should be smaller.
The bottom should have a regular sweep. This sweep can be gained the easiest by laying the gores in a closing position on the table, drawing a straight line along the centre of the front and extending upwards about the same length as the skirt. At the centre of the back breadth another line is drawn far enough up to cross the first line. In this shape the two lines would represent a cone; at the point attach a string to a pin driven into the table, and extending this string to the lower length of the skirt sweep around the bottom—this will produce a correct effect in every case.
The bottom should have a smooth curve. You can achieve this curve easily by laying the gores flat on the table, then drawing a straight line down the center front and making it about the same length as the skirt. In the center of the back piece, draw another line up high enough to intersect the first line. These two lines will create a cone shape; at the tip, attach a string to a pin stuck into the table, and stretch this string down to the lower edge of the skirt to measure the curve at the bottom—this will ensure a correct shape every time.
The front width is now cut wide enough so that only one additional width is needed at each side. As we have already said, much depends upon goring the sides as regards fitting the hips, but on stout ladies extra care must be taken that the front be also sufficient to cover the round form of the body. The defect liable to occur in this point has the same result as not sloping enough at the side for large hips, namely, the skirt will hitch-up on the waist-band.
The front width is now cut wide enough that only one extra width is needed on each side. As we’ve mentioned, fitting the hips largely depends on how the sides are shaped, but for fuller-figured women, special attention must be given to ensure the front adequately covers the curves of the body. The issue that can arise here is similar to not having enough slope at the sides for larger hips, which means the skirt will ride up on the waistband.
Putting on a skirt to the band is of equal importance. A dart in the apron or front width gives sufficient fullness over the round of the body in front; so also do darts at side. All the rest of the fullness should be pleated or gathered into the few inches left of the band after the front and sides have been sewed to the band.
Putting on a skirt to the band is just as important. A dart in the apron or front width provides enough fullness over the curve of the body in front; darts on the sides do the same. The remaining fullness should be pleated or gathered into the few inches left of the band after the front and sides have been sewn to the band.
We should not advise any one to cut out a skirt, whether short or with train, with out a good pattern, unless they understand how to draft one and know the points of the different shapes in gores.
We shouldn't advise anyone to cut out a skirt, whether it's short or has a train, without a good pattern, unless they know how to create one themselves and understand the different shapes in gores.
Such skirt patterns we are prepared to forward to any address, on application, but in order that students may acquire an idea of how to cut them, Fig. 11 will show the general form and shape of them.
Such skirt patterns can be sent to any address upon request, but to help students understand how to cut them, Fig. 11 will illustrate their general form and shape.
Draw line A, and make it 45 inches long, and mark off all the distances on the line, as shown by the number of inches given at all these points; draw lines across at right angles to line A.
Draw line A, and make it 45 inches long. Mark all the distances on the line as indicated by the inches at each point, then draw lines across it at right angles to line A.
Draw a line from point 6 to 12 and curve it to within one-half inch of 6, and then curve slightly one-half inch below line at centre to 6½ on line A. This finishes top of front breadth; connect 12 and 45, which finishes the bottom.
Draw a line from point 6 to 12 and curve it to within half an inch of 6, and then curve slightly half an inch below the line at the center to 6½ on line A. This completes the top of the front width; connect 12 and 45, which finishes the bottom.
Finish the top of side-breadth by drawing lines from 7 to 11, curving these lines like Figure; at the bottom, curve from 12 to 42.
Finish the top of side-breadth by drawing lines from 7 to 11, curving these lines like in the figure; at the bottom, curve from 12 to 42.
Connect points 32 and 42, also 22 and 12, by straight lines, which finishes the back part; this will give a skirt 38 inches long and the prevailing width.
Connect points 32 and 42, as well as 22 and 12, with straight lines to complete the back section; this will create a skirt that is 38 inches long and the standard width.
Lay the front part, line A, on the fold of the goods.
Lay the front part, line A, on the crease of the items.
In sewing to the band the front and side-breadths are left plain while the back is pleated in three or four large pleats.
In attaching the band, the front and side pieces are kept plain, while the back is gathered into three or four large pleats.
FIGS. 12, 13, 14. SACK JACKET.
It will be seen that every shape and style of garment must be drafted in the same manner as the principle employed in the construction of the waist-body or basque.
It can be observed that every type and design of clothing must be created in the same way as the method used in making the waist-body or basque.
We first commence to draw the back line B and O to F (Fig. 12).
We first start by drawing the back line B and O to F (Fig. 12).

Fig. 12.
Fig. 12.

Fig. 13.
Fig. 13.
From O down, on the first line, place three-fourths of an inch, and from O over to F, one-eighth of the breast-measure, or simply 2 inches, on average size.
From O down, on the first line, mark three-fourths of an inch, and from O over to F, one-eighth of the breast measurement, or just 2 inches on average.
Starting at ¾, measure down to C, the length of natural waist, and to D, the full parts of the hips; also to E the length wanted.
Starting at ¾, measure down to C, the length of the natural waist, to D, the fullest part of the hips; and also to E, the desired length.
From C up to B place the height under the arm. Now at every one of these points draw lines across, all at right angles with the first line.
From C to B, place the height under the arm. Now, at each of these points, draw lines across, all at right angles to the first line.
Go in from C to N 1½ inch, and then draw a line from ¾, at top, to N, and from the last point to E, and curve the back-line, as shown from ¾, past R.
Go in from C to N 1½ inches, then draw a line from ¾ at the top to N, and from the last point to E. Curve the back line, as shown from ¾ past R.
From N to M make the width of back, at waist, 2 inches or more, as desired.
From N to M, make the width of the back at the waist 2 inches or more, as you prefer.
Starting at R, place the width of back to G and draw a line up to S.
Starting at R, measure the width of the back to G and draw a line up to S.
In the middle, between O and B, fix point A, and from there draw a line over to J.
In the center, between O and B, set point A, and from there draw a line to J.
From the point where lines A-J and G-S cross draw a line to F.
From the point where lines A-J and G-S intersect, draw a line to F.
Raise above J one-half inch to S and curve the shoulder from F to S; then from S go inside of line at J and curve the arm-hole of the back to I. This last point is midway between J and G.
Raise above J one-half inch to S and curve the shoulder from F to S; then from S go inside the line at J and curve the armhole of the back to I. This last point is halfway between J and G.
From I draw a line to N, then commence at I and draw line for the side-seam to 8, going inside of straight line a trifle and thence with a decided curve to M.
From I, I draw a line to N, then starting at I, I draw a line for the side seam to 8, slightly inside the straight line and then with a clear curve to M.
Draw a right-angle line with the waist-line F down to 3 from N, and to 4 from 2.
Draw a right-angle line from the waist-line F down to 3 from N, and to 4 from 2.
Now whatever the distance E is drawn from 3 must be placed from 4 to 5, and the back may be finished by drawing the line from 2 to 5.
Now, whatever distance E is pulled from 3 must be positioned from 4 to 5, and you can complete the back by drawing the line from 2 to 5.
In case it is desired to make a narrow back, point E may be nearer to 3; in such case point 5 would also be nearer to 4.
In case you want to create a narrower back, point E can be closer to 3; in that case, point 5 would also be closer to 4.
Cut the back out, and in order to draw the side-body lay it on the paper in such a manner that there will be room enough to cut it out without piecing.
Cut the back out, and to outline the side-body, lay it on the paper in a way that allows enough space to cut it out without needing to piece it together.
THE SIDE-BODY.—FIG. 13.
Lines D-F and O are extended over. From 2 to 10 is 1 inch in every case.
Lines D-F and O are extended. From 2 to 10 is 1 inch in every case.
Draw from I, along the back, to 8, and from thence begin to separate from the back and curve to 10 and down to 6, which is the point on the back where line O and the line from 2 downwards cross. From 6 down give this line a nice curve, not springing out too much nor making it too flat—a medium is what is desired.
Draw from I along the back to 8, and from there start to separate from the back and curve to 10 and down to 6, which is the point on the back where line O and the line from 2 downward intersect. From 6 down, give this line a nice curve, not sticking out too much nor making it too flat—a medium is what is desired.
From B to K is one-fourth of the breast-measure.
From B to K is one-fourth of the breast measurement.
Curve from I to H and K.
Curve from I to H and K.
About 1 inch inside of K draw a line down to L, which should make the side-body as wide from 8 to H as 10 to L.
About 1 inch inside of K, draw a line down to L. This should make the side-body as wide from 8 to H as it is from 10 to L.
At right angles with waist-line draw one down from 10 to 3, and another from L to 4.
At a right angle to the waistline, draw one line from 10 to 3, and another from L to 4.
Now whatever the distance is from 3 to 5 should be placed from 4 to 6, and then the seam from L is drawn past 11 to 6.
Now whatever the distance is from 3 to 5 should be placed from 4 to 6, and then the seam from L is drawn past 11 to 6.
Make the length at bottom one-half inch longer at 5 to 6; also notice that the distance from 7 to 11 may be a little more than that from 9 to 6, as more ease over the hip, at side, is desirable.
Make the length at the bottom half an inch longer at 5 to 6; also note that the distance from 7 to 11 can be slightly greater than the distance from 9 to 6, as having more ease over the hip at the side is preferable.
THE FRONT.—FIG. 14.
All the lines are extended over on the paper, and the side-body and back are laid in the position as when they were drafted, and as shown.
All the lines are drawn out on the paper, and the side and back are positioned as they were when they were drafted, as shown.
First measure from B to V, one-half the breast-measure, and draw line A up and down.
First, measure from B to V, which is half the breast measurement, and draw line A vertically.
From B to R is the measure to the front of the arm, where a line is drawn up. From P back, place one-sixth of the breast to N, here draw a line up and down, as shown.
From B to R measures the front of the arm, where a line is drawn up. From P back, mark one-sixth of the breast to N, then draw a line up and down, as shown.

Fig. 14.
Fig. 14.
Measure up from star on side, marked Z, to line at N, the front length less the width of the top of back, and where this reaches on the line fix the height.
Measure up from the star on the side, marked Z, to the line at N, the front length minus the width of the top of the back, and where this hits the line, set the height.
From this height draw a line to A, which gives the height of shoulder.
From this height, draw a line to A, which indicates the height of the shoulder.
From P as pivot sweep from N to 21 for neck. Place the length of back shoulder from F to S on to N, on line N, and where it reaches will be point 22.
From P as the pivot, sweep from N to 21 for the neck. Place the length of the back shoulder from F to S onto N, on line N, and where it reaches will be point 22.
Drop one-half inch below line and curve from 22 to 23, which is one-fourth above the line, to N. Also curve arm-hole from 22 through R to H.
Drop half an inch below the line and curve from 22 to 23, which is a quarter inch above the line, to N. Also, curve the armhole from 22 through R to H.
Draw the front line one-half inch inside at 21, curving outside one-half inch near V, coming back to line at U, and outside one-half inch at bottom to point 20.
Draw the front line half an inch in at 21, curving out half an inch near V, coming back to the line at U, and out half an inch at the bottom to point 20.
From H, through L, draw line to 11.
From H, through L, draw a line to 11.
Whatever the distance from 11 to 24 is place over from 11 to 13 and then curve from L, through 12, to 13. Sweep the bottom from 13 by a point 1 inch back of N and flatten this curve near 14.
Whatever the distance from 11 to 24 is, measure from 11 to 13 and then curve from L, through 12, to 13. Sweep the bottom from 13 by a point 1 inch behind N and flatten this curve near 14.
Midway between R and V fix point 2, and midway between 2 and R point 1.
Midway between R and V is fix point 2, and halfway between 2 and R is point 1.
Measure the distance from the front at U to 10 and from 2 to C.
Measure the distance from the front at U to 10 and from 2 to C.
Deduct the half size of waist from this last and the remainder is taken out in darts.
Subtract half of the waist size from this last, and the leftover is removed with darts.
From U to 12 is 2 inches.
From U to 12 is 2 inches.
From 12 to 9 is one-half of what is to be taken out in darts.
From 12 to 9 is half of what needs to be taken out in darts.
From 9 to 8 is always three-fourths of an inch.
From 9 to 8 is always three-quarters of an inch.
From 8 to 7 is another dart.
From 8 to 7 is another throw.
Fix a point in the centre of the darts and draw a straight line from 1 and 2 to 6 and 5; and at right angles with waist-line draw lines from centre of dart down to the bottom. Now, one-third of the height under arm, down, fix point 3, and make 4 one-half inch more.
Fix a point in the center of the darts and draw a straight line from points 1 and 2 to points 6 and 5; then, draw lines from the center of the dart down to the bottom at right angles to the waistline. Now, measure one-third of the height from under the arm down and mark point 3, making point 4 an additional half inch longer.
Draw the darts from 3 and 4 through the points, as shown, to 15 and 14.
Draw the darts from 3 and 4 through the points, as shown, to 15 and 14.
FIG. 15. DOUBLE-BREASTED SACK JACKET.

Draft by measure—breast, 36; waist, 24; and hip, 40. Length to waist 14½, and full length, 26.
Draft by measure—bust, 36; waist, 24; and hips, 40. Length to waist 14½, and full length, 26.
By using these measures we will endeavor to show how to draft a jacket, each piece separately, thus doing away with the over-lapping of patterns as it occurs when it is drafted altogether, as in our previous articles on proportionate cutting. It is the same principle, but more practical, as a pattern can thus be cut whole in the skirt.
By using these methods, we will try to demonstrate how to draft a jacket, each piece separately, eliminating the overlapping of patterns that happens when everything is drafted together, as explained in our earlier articles on proportionate cutting. It’s the same principle, but more practical, since this way a pattern can be cut completely in the skirt.
Commence by drawing the back construction line from O to L and O to P.
Commence by drawing the back construction line from O to L and from O to P.
From O down is three-fourths inch to T.
From O down to T is three-fourths of an inch.
From O to E is one-fourth of breast—9 inches.
From O to E is a quarter of the breast—9 inches.
From T measure down to the waist 14½ inches, and the full length to L, 26 inches, and from O over on top line to 5 two inches, and curve the top, T, to 5.
From T measure down to the waist 14½ inches, and the full length to L, 26 inches, and from O over on top line to 5 two inches, and curve the top, T, to 5.
B is midway between O and E.
B is halfway between O and E.
K is 6 inches below the waist; now draw all the lines across.
K is 6 inches below the waist; now draw all the lines across.
At F go in 1½ inch to back, and draw a curved line from the centre seam of the back, from T to 1½, and spring out three-fourths inch at 9, thence to L.
At F, go in 1½ inches from the back, and draw a curved line from the center seam of the back, from T to 1½, and extend out three-fourths of an inch at 9, then to L.
From E to 7 is one-third and one inch, equal to 7 inches. Draw a line up from 7 to 3, and one from 5 to 3.
From E to 7 is one-third and one inch, equal to 7 inches. Draw a line up from 7 to 3, and one from 5 to 3.
Raise above 3 one-half inch to 4, then curve the shoulder-seam of the back; form also the curved line from 4 to 6.
Raise above 3 half an inch to 4, then curve the shoulder seam of the back; also shape the curved line from 4 to 6.
Point 6 is midway between 3 and 7. Make the width of the back at waist 2 inches, and from 2 draw a straight line down to the bottom.
Point 6 is halfway between 3 and 7. Make the width of the back at the waist 2 inches, and from 2, draw a straight line down to the bottom.
Now curve the side seam from 6 past 2 to 10 at bottom, which point is three-fourths of an inch outside of the straight line, also connect L and 10 by a line.
Now curve the side seam from 6 past 2 to 10 at the bottom, which point is three-fourths of an inch outside the straight line, and also connect L and 10 with a line.

Fig. 15
Fig. 15
THE SIDE-BODY.
Cut out the back and lay it on the paper in such a manner that the breast-line will lay on the same line further towards the front, so that there will be sufficient room at the[28] bottom to draft out the side-body whole. Now, first draw along the edge of the back from 6 to 2; go in at 2 one inch, and curve from the blade down to 13.
At 13 draw a straight line down, and curve out from 13 to 18; this last will be exactly underneath point 8 of the back, and from here to the bottom draw it with a slight curve to 20, which is the same length as point 10 of the back.
At 13, draw a straight line down and curve out from 13 to 18; this last point will be directly below point 8 on the back. From here, draw it down to 20 with a slight curve, which should be the same length as point 10 on the back.
From 14 to 13 is 2 inches, and make the distance from 11 to 12 the same; now draw a straight line from 12 to 14, and down to the bottom.
From 14 to 13 is 2 inches, and make the distance from 11 to 12 the same; now draw a straight line from 12 to 14, and down to the bottom.
Go out from 15 to 16 one inch, and curve seam from 14 to 19, which should not be over 1½ inch outside of straight line. Draw line from 20 to 19.
Go out from 15 to 16 by one inch, and curve the seam from 14 to 19, which shouldn’t be more than 1½ inches outside of a straight line. Draw a line from 20 to 19.
THE FRONT.
Lay the side-body on breast-line and back in position against side-body, so that the breast-line of each lays correct and straight, then measure from I on centre of the back to the centre of the front D, half-breast, or 18 inches; at this last point draw a line up and down for front line.
Lay the side piece on the chest piece and position the back against the side piece, ensuring that the chest lines up correctly and straight. Next, measure from point I at the center of the back to the center of the front D, half-breast, or 18 inches. At this last point, draw a vertical line for the front line.

Point 12 of the side-body will now be the same as point 21 of the front; draw down to 27 a line with a slight curve to shape in at waist; also draw a straight line down from 27 to 35 at bottom.
Point 12 of the side will now align with point 21 of the front; draw a slightly curved line down to 27 to shape the waist; also, draw a straight line down from 27 to 35 at the bottom.
From P to C is one-sixth, or 3 inches, and the same to 23, now sweep the neck from P.
From P to C is one-sixth, or 3 inches, and the same to 23; now draw the neck from P.
From C, which is one-half inch above the top line for erect or ordinary builds, on the line draw one to B on the back.
From C, which is half an inch above the top line for upright or regular builds, draw a line to B on the back.
Now measure the length of shoulder on the back from 5 to 4, and place the same from C to 22, and curve a little above it, as shown in Fig. 15. From G on side-body forward to front of arm is one-fourth, or 4½ inches, where a line is drawn from H; then finish arm-hole from 22 to H and 21.
Now measure the length of the shoulder on the back from 5 to 4, and place the same measurement from C to 22, then curve it a little above as shown in Fig. 15. From G on the side of the body forward to the front of the arm is one-fourth, or 4½ inches, where a line is drawn from H; then complete the armhole from 22 to H and 21.
Finish the side-seam by going out at 31 1 inch to 33, and curve seam to 34; also locate the length by laying the side-body, point 12, on 21, and where 19 comes is 34.
Finish the side seam by going out to 31.1 inches to 33, and curve the seam to 34; also determine the length by placing the side body, point 12, on 21, and where 19 lands is 34.
From C, by 34, sweep the bottom of front and straighten this some in the centre.
From C, by 34, sweep the bottom of the front and straighten this a bit in the center.
At the centre of breast-line, beyond D, put one-half of breast, and curve the front line from 23 to waist at S, where it comes back to the straight line, and thence to the bottom at 30, where it is one-half inch outside of it. For a double-breasted jacket make the lap 2½ inches[29] at breast, 2 at waist, and 2¼ at bottom. Whatever the size of the draft at waist, from points S to 1½ on back, exceeds the actual measure must be taken out in darts.
At the center of the bust line, beyond D, measure half of the bust, and curve the front line from 23 to the waist at S, where it returns to the straight line, and then down to the bottom at 30, which should be half an inch outside of it. For a double-breasted jacket, make the lapel 2½ inches at the bust, 2 inches at the waist, and 2¼ inches at the bottom. Any extra size in the draft at the waist, from points S to 1½ on the back, compared to the actual measurement, must be taken out in darts.[29]
In this Figure we take out one dart only, starting in the centre, J, which is between H and D, and take out between points 25 and 26, the full amount which will be about 2½ or 3 inches, starting the dart at 24, two-thirds above 25, and finishing about 4 inches below the hip-line.
In this figure, we remove one dart, starting from the center, J, which is located between H and D. We take out the full amount between points 25 and 26, which will be about 2½ to 3 inches. We begin the dart at 24, two-thirds above 25, and end it about 4 inches below the hip line.
In case two darts are preferred they are put in as already shown in previous Figures.
In case two darts are preferred, they are inserted as previously shown in the earlier figures.
FIG. 16. SACK JACKET.
This shows the manner of drafting a jacket with an extra piece under the arm and only one dart in the front. The correctness of the lines, and the simplicity of the process, will be of much benefit to our students. This method is the same as we have given in several different styles, and therefore it is drafted in a similar manner. It requires only one method to draft all kinds of garments, and our aim in giving the different shapes is to familiarize our readers with its application to a variety of shapes and styles, so that whatever garment they may be called to cut they will be able to do it.
This shows how to draft a jacket with an extra piece under the arm and just one dart in the front. The accuracy of the lines and the simplicity of the process will greatly benefit our students. This method is the same as we've outlined in several different styles, so it's drafted in a similar way. It only takes one method to draft all types of garments, and our goal in presenting the different shapes is to help our readers become familiar with its application to various shapes and styles, so that no matter what garment they need to cut, they will be able to do it.

Let us take a size—36 breast, 24 waist, with a length of 30 inches, and a waist reaching down from neck 15½ inches.
Let’s consider a size—36 bust, 24 waist, with a length of 30 inches, and a waist measurement of 15½ inches from the neck.
In drafting, first draw the line O-F.
In drafting, start by drawing the line O-F.
From O go down three-fourths inch for the top of the back.
From O go down three-quarters of an inch for the top of the back.
From the top of the back to D is the length to the waist, 15½ inches; from the same point down to the bottom of the garment measure 30 inches to F.
From the top of the back to D is the length to the waist, 15½ inches; from the same point down to the bottom of the garment measures 30 inches to F.
At D go in to point 14 1½ inch. Then from the top of the back to 14 draw a straight line, and also draw one from 14 to F, curve slightly over the line below 14, past 20, to F. Make the width from 14 to 2 two inches, and run a line parallel with back-line from 2 to 29, and curve it a trifle, as shown on the Figure.
At D, go in 1½ inches to point 14. Then, from the top of the back to 14, draw a straight line, and also draw one from 14 to F, curving slightly over the line below 14, past 20, to F. Make the width from 14 to 2 two inches, and run a line parallel with the back line from 2 to 29, curving it a little, as shown in the Figure.
From O go down to C one-quarter of the breast, which is 9 inches, and draw a line across. Draw a line from O over to K at right angles with the back-line.
From O go down to C one-quarter of the breast, which is 9 inches, and draw a line across. Draw a line from O over to K at right angles to the back line.
In the middle, between O and C, fix a point marked B and draw a line over to N. From C to G is one-third breast and 1 inch, equal to 7 inches, and draw a line at right[30] angles with line C-G. From G to H is one-fourth breast, equal to 4½ inches, there draw a line at right angles with the one under arm.
In the center, between O and C, place a point labeled B and draw a line to N. The distance from C to G is one-third of a breast measurement plus 1 inch, which totals 7 inches, so draw a line perpendicular to line C-G. From G to H, the distance is one-fourth of a breast measurement, equal to 4½ inches; there, draw a line perpendicular to the line under the arm.
From 1, centre of back, to J, at the front of the breast, place one-half of the breast-measure, equal to 18 inches, and at J draw a right angle line up and down like line K-J and S. From O to 13 is 2 inches.
From 1, center of the back, to J, at the front of the breast, place half of the breast measurement, which is 18 inches, and at J draw a vertical line up and down like line K-J and S. From O to 13 is 2 inches.
From N to 13 draw a line, and then, commencing at 13, curve the shoulder, letting it rise above the last line one-half inch to 14.
From N to 13, draw a line, and then, starting at 13, curve the shoulder, letting it rise above the last line half an inch to 14.
Starting three-fourths inch inside of line G begin to curve the arm-hole past 12 to 17 and H. In the middle, between N and G, fix the point to start seams from for the back. Draw line from thence past 19 to 2 and 29—this makes the back with narrow shoulders.
Starting 0.75 inches inside line G, begin to curve the armhole past 12 to 17 and H. In the middle, between N and G, mark the point to start the seams for the back. Draw a line from there past 19 to 2 and 29—this creates the back with narrow shoulders.
To draw the first side-body place from 2 to 3 one inch, curve the line from 19 to 3, gradually beginning to separate below 19 without curving too much, care being taken to get a neat curve. Below 3 curve toward the back till at hip, 21, it will meet the back, and thence downwards, till at the bottom it will over-lap the back 1 inch to 30.
To create the first side-body shape from 2 to 3, move in one inch, then curve the line from 19 to 3, gradually starting to separate below 19 without excessive curvature, ensuring the curve looks neat. Below 3, curve towards the back until it meets the back at the hip, 21, and continue downwards until it overlaps the back by 1 inch at the bottom, 30.
Make the width of side-body at the top any distance desired, say 3 inches, and make it the same at waist, or from 3 to 4, 3 inches. Then curve from 17 to 4.
Make the width of the side body at the top any distance you want, let's say 3 inches, and keep it the same at the waist, or from 3 to 4, 3 inches. Then curve from 17 to 4.
Lay a long straight-edge, closing at 17, and three-fourths inch from point 4; while in this position mark a line along it from the hip-line downward, and connect it by a curve from 4 to 24.
Lay a long straightedge, closing at 17 and three-fourths inch from point 4; while in this position, mark a line along it from the hip line downward, and connect it with a curve from 4 to 24.
Go in from 4 to 5 a distance of three-fourths inch, and curve from 17 to 5, but be careful to commence to separate side-body only 1½ inch below 17. Lay a straight-edge, as before, at 17, and three-fourths inch from 5, so that it will lay towards front, then from hip downwards draw a line to the bottom and finish by curving from 5 to meet this at hip, 23.
Go in from 4 to 5 a distance of three-fourths inch, and curve from 17 to 5, but be careful to start separating the side body only 1½ inch below 17. Lay a straight-edge, like before, at 17, and three-fourths inch from 5, so that it angles towards the front. Then, from hip downwards, draw a line to the bottom and finish by curving from 5 to meet this at hip, 23.
From 17 to 18 may be only 1½ or 2 inches, according to the size—2 inches will be sufficient for a 36 breast.
From 17 to 18 may be just 1½ or 2 inches, depending on the size—2 inches will be enough for a 36 bust.
Draw a straight line to 6 and take out a slight curve to shape it to the form. Again, lay a straight-edge against 18, and three-fourths inch from 6, and mark along it from the hips downward; curve from 6 to hip.
Draw a straight line to 6 and create a slight curve to shape it. Again, place a straight edge against 18, and three-fourths of an inch from 6, and mark along it from the hips downward; curve from 6 to the hip.
Commencing at 18, curve the front to 7, taking out one-half inch, then lay a straight-edge against 18, and three-fourths inch from 7 mark along it below the hips and finish the curve from 7 to 25.
Commencing at 18, curve the front to 7, removing half an inch, then lay a straight edge against 18, and three-quarters of an inch from 7 mark along it below the hips and finish the curve from 7 to 25.
To produce the front, place from K to P one-sixth of breast, equal to 3 inches, also the same from K to 16. From P to B draw a line, then place the same distance as on the back shoulder from 13 to 24 on to P to produce point 15, or the length of front shoulder, curve it above this line, and at 15 drop it one-half inch below. At 15 curve the arm-hole to H, going outside of the line enough to give the arm-hole a good shape, but under no consideration go beyond point H—rather go inside.
To create the front piece, measure one-sixth of the breast from K to P, which is 3 inches, and do the same measurement from K to 16. Next, draw a line from P to B, and then mark the same distance as you have on the back shoulder, from 13 to 24, onto P to find point 15, which determines the length of the front shoulder. Curve it above this line, and at point 15, drop it down by half an inch. From point 15, curve the armhole to H, ensuring you go outside the line enough to give the armhole a nice shape, but definitely do not go past point H—instead, make sure to go inside.
Curve the front-line one-fourth inch inside of 16, and outside at J one-half inch, and coming back to R, where it should spring out to the bottom one-half inch at S.
Curve the front line a quarter inch inside at 16, and a half inch outside at J, and then come back to R, where it should flare out to the bottom a half inch at S.
Add beyond last curve 1 inch for the lap, on a single-breasted jacket, all the way down.
Add an extra inch beyond the last curve for the lapel on a single-breasted jacket, all the way down.
Measure from 14 to 2, 3 to 4, 5 to 6, and 7 to R, which will be about 15 inches; but as the waist must be 12 inches, or one-half of 24, we must take out the difference in a dart,[31] which is 3 inches. Divide the space between H and J which gives point I, and from this draw a straight line down. Go down from I 2 inches to 17. On each side of the line at 9 place one-half of the dart, 1½ inch, then curve from 17 to 8, 27 and 35; also from the same point to 10, 28 and 36. At the bottom it should be three-fourths inch.
Measure from 14 to 2, 3 to 4, 5 to 6, and 7 to R, which will be about 15 inches; but since the waist needs to be 12 inches, or half of 24, we need to adjust for the difference with a dart,[31] which is 3 inches. Split the space between H and J to find point I, and from there, draw a straight line down. Move down from I 2 inches to 17. On each side of the line at 9, place half of the dart, which is 1½ inch, then curve from 17 to 8, 27, and 35; also from the same point to 10, 28, and 36. At the bottom, it should be three-fourths inch.

Fig. 16.
Fig. 16.
The bottom of the first side-body must be one-half inch longer than the back; the second the same length as the first; and the front must start at the same length as the second, and curve forward 1 inch below line 33 to 37.
The bottom of the first side-body has to be half an inch longer than the back; the second side is the same length as the first; and the front should start at the same length as the second, curving forward 1 inch between lines 33 and 37.
FIG. 17. SHORT JACKET.
This gives a short jacket, of a neat, peculiar shape. As regards the darts all points are the same as given in Fig. 18, except that instead of putting in two side-bodies we only cut a dart out under the arm, and one across the front, both being equal, of a size required to make the waist lay close. The dart in front is started from H and runs into the pocket.
This creates a short jacket with a neat, unique shape. Regarding the darts, all points are the same as shown in Fig. 18, except that instead of adding two side panels, we only cut one dart under the arm and one across the front, both equal in size to ensure the waist fits snugly. The front dart begins at H and extends into the pocket.

Fig. 17.
Fig. 17.
The back is made 4 inches wide at the waist and wide enough at the bottom to harmonize with it. Point F is the hip. Any sleeve cut to the size of arm-hole will go with this.
The back is 4 inches wide at the waist and wide enough at the bottom to match. Point F is the hip. Any sleeve cut to fit the armhole will work with this.
FIG. 18. JERSEY BLOUSE.
Draw line O-J and O-F. From O to D is one-fourth of breast. From O to 20 is three-fourths inch. From O to D take one-half the distance to get point B, and in the centre, between B and D, is point C. From 20 to E is length of back and to F the full length.
Draw line O-J and O-F. From O to D is one-fourth of the breast. From O to 20 is three-fourths of an inch. From O to D, take half the distance to get point B, and in the center between B and D is point C. From 20 to E is the length of the back, and to F is the full length.

Fig. 18.
Fig. 18.
Go in from E 1½ inch and draw the back-line from 20 to 1½ and to F. From O is 2 inches for top of back to 2. From D is one-third of breast and 1 inch to G. Draw a line up from G to 6. From 6 draw one to 2 and curve 1 inch above it at 1.
Go in from E 1½ inches and draw the back line from 20 to 1½ and to F. From O is 2 inches for the top of the back to 2. From D is one-third of the bust and 1 inch to G. Draw a line up from G to 6. From 6, draw one to 2 and curve 1 inch above it at 1.
Curve arm-hole from 1 through 9 to 10. From G to H is one-fourth of breast—4½ inches on a 36 breast. Draw a line up. From back, near D, to K is one-half of breast.[34] Draw line up and down. From J back to I is one-sixth of breast, and the same down to 3.
Curve the armhole from 1 to 9 to 10. From G to H is a quarter of the bust measurement—4½ inches for a 36-inch bust. Draw a line upward. From the back, near D, to K is half of the bust measurement.[34] Draw lines up and down. From J back to I is one-sixth of the bust, and the same measurement goes down to 3.
From I to 6 draw a line. Curve above line at 18 one-half inch for front shoulder, and curve the arm-hole from 18 to 17, and H to 10. Point 10 is about 1½ inch from G.
From I to 6, draw a line. Curve above the line at 18 by half an inch for the front shoulder, and curve the armhole from 18 to 17, and H to 10. Point 10 is about 1½ inches from G.
Make the width of back 5½ inches from 1½ and 9½ inches to point 10, and 10 inches at bottom. Then curve the side-seam at 10 to 5½ and U. From N, at front of the waist, go in 3 inches, to 16 4½ inches, and to 4 6 inches.
Make the back width 5½ inches from 1½ and 9½ inches to point 10, and 10 inches at the bottom. Then curve the side seam from 10 to 5½ and U. From N, at the front of the waist, go in 3 inches to 16, 4½ inches, and to 4, 6 inches.
Draw a straight line up and down through 16, and form the dart, from 20, through 3 and 4, to 5 and 6.
Draw a straight line up and down through 16, and create the dart, from 20, through 3 and 4, to 5 and 6.
Lay the back on the front to meet at 10, 5½ on V, 8 on U, to get the right curve for the side seam.
Lay the back on the front to align at 10, 5½ on V, 8 on U, to achieve the correct curve for the side seam.
Measure the waist and make the distance at V to correspond with it. Using I as pivot sweep from 8 for the bottom of the front.
Measure the waist and adjust the distance at V to match it. Using I as a pivot, sweep from 8 for the bottom of the front.
Add one-half inch button-stand, and 1 inch on the side the buttons are sewed on. Buttons should be 1 inch apart.
Add a half-inch button stand and 1 inch on the side where the buttons are sewn on. Buttons should be 1 inch apart.
The Jersey is finished with standing collar.
The Jersey has a standing collar.
This pattern is intended only for goods which are elastic—like stockinet or tweed.
This pattern is meant only for stretchy materials—like jersey or tweed.
The seams in the dart and at side should be stretched somewhat in pressing, thus allowing them to fit closer to the form.
The seams in the dart and at the side should be stretched a bit when pressing, which will help them fit closer to the shape.
FIG. 19. GIRL’S SACK.

This is a sack for a young girl of size 31 breast, close-fitting. The figure illustrates a very jaunty and comfortable jacket.
This is a snug sack for a young girl with a size 31 bust. The figure shows a stylish and comfy jacket.
For the Fall Season it should be made of heavy ribbed cloaking, of a dark shade of grey, and an extra neat finish is obtained by binding it with a braid of a darker shade, and buttons to match the braid.
For the fall season, it should be made of heavy ribbed fabric in a dark shade of gray, and a neat finish is achieved by trimming it with a braid in a darker shade, along with matching buttons.
It has eight buttons in front, is cut single-breasted, with a very small turn-over lapel, which allows it to be buttoned up close to the neck.
It has eight buttons in front, is cut single-breasted, with a very small turnover lapel, which lets it be buttoned up snug against the neck.
A side edge is imitated on the back by braid, and three buttons put on it.
A side edge is replicated on the back with a braid, and three buttons are added to it.
The full-size pattern may be cut by following the Figure, as represented, using inches for every number marked out.
The full-size pattern can be cut by following the figure as shown, using inches for each number indicated.
In order that this may be readily understood we will go over this manner of doing it again, so that our readers who desire to take them off may not make any mistakes.
In order for this to be easily understood, we will explain this method again so our readers who want to remove them won’t make any mistakes.
First draw a line on the edge of paper, and draw out the back first, by fixing a point at the top.
First, draw a line along the edge of the paper, then outline the back by marking a point at the top.
O is the starting point. From O go down in inches as indicated by the points marked ¾, 2¾, 5¾, 13, 20 and 34.
O is the starting point. From O, move down in inches as noted by the points marked ¾, 2¾, 5¾, 13, 20, and 34.
For the side-body use the same process and you will have the full size. It can be made double-breasted by adding 1½ inch in front of the breast all the way down.
For the side-body, use the same process and you'll have the full size. You can make it double-breasted by adding 1½ inches in front of the breast all the way down.

Fig. 19.
Fig. 19.
FIG. 20. BRAIDED JACKET.
This Figure represents a fashionable style of close-fitting jackets for Spring wear. They are made single-breasted, having the buttons close together, and have the appearance of a Jersey. The same may be made double-breasted by the addition of 2 inches to the front. In trimming they may be plain, with nothing but small flat lasting, or a round crochet button. Braid in military style may be used, or a simple binding.
This figure shows a trendy style of fitted jackets for spring. They are designed to be single-breasted, with buttons placed closely together, giving them a Jersey-like look. They can also be made double-breasted by adding 2 inches to the front. For trimming, they can be kept simple with just small flat lasting or a round crochet button. Military-style braid or a basic binding can also be used.
The Figure is drawn from a pattern of a 36 breast, 25 waist; the length may be regulated to taste. In drafting this pattern use inches for all the figures on the draft.
The figure is based on a pattern with a 36-inch bust and a 25-inch waist; the length can be adjusted to your preference. When creating this pattern, use inches for all the measurements on the draft.

Fig. 20.
Fig. 20.
FIG. 21. DOUBLE-BREASTED CUT-AWAY JACKET.
This gives an elegant and very stylish jacket. The front is double-breasted towards the top with a broad, sharp lap, while at the waist only one button is used.
This creates a sleek and very fashionable jacket. The front is double-breasted at the top with a wide, sharp lapel, while at the waist, there’s just one button.
In order to enlarge the draft to full size, which is a 36 inch breast-measure, use inches for all the figures on the draft.
In order to enlarge the draft to full size, which is a 36-inch chest measurement, use inches for all the numbers on the draft.
The jacket itself is finished at the neck with a collar, which is put on to the cape. The front, at the neck, is held together by an agraffe ornament. This garment, as it should appear, may be seen by the illustration.
The jacket is designed with a collar that attaches to the cape. The front at the neck is secured with an agraffe ornament. You can see how this garment is meant to look in the illustration.

Fig. 21.
Fig. 21.
FIG. 22. LADY’S JACKET.
These drafts illustrate a new style of lady’s jacket, which will be acceptable to many for street wear. The style and general effect at once denote the character of the garment. The jacket is well adapted for outdoor wear. It is made with a moderate addition for double-breasted added on to the fore-part, and the button holes are worked in close together, as the buttons now used are so very small; therefore, on this jacket, they are placed only one inch apart.
These sketches show a new style of women's jacket that's going to be popular for everyday wear. The design and overall look clearly reflect the essence of the garment. The jacket is perfect for outdoor use. It features a slight extension for a double-breasted front, and the buttonholes are sewn closely together since the buttons are quite small; as a result, they are only an inch apart on this jacket.
The waist is medium length, and the skirt can be made to suit the height of the lady. A lap-over is made at the centre of the back skirt, finished off with small buttons put close together.
The waist is of medium length, and the skirt can be tailored to fit the height of the woman. A lap-over is created at the center of the back of the skirt, finished with small buttons placed closely together.
The pockets may be put in at the side like a coat pocket, or only a flap put on, leaving the top edge unfastened, which forms the opening. In the latter case it can be ornamented with buttons. Pockets, however, are only put in when it is cut longer than Figure.
The pockets can be added at the side like a coat pocket, or just a flap can be attached, leaving the top edge unfastened to create the opening. In the second case, it can be decorated with buttons. However, pockets are only added when it is cut longer than Figure.
The sleeves are narrow, finished by a row of buttons, and can be regulated in width by the measure of the arm. This is very essential, as ladies now-a-days like the sleeve as close as possible.
The sleeves are narrow, ending with a row of buttons, and can be adjusted in width based on the arm size. This is very important, as women today prefer their sleeves to be as fitted as possible.
The darts are cut down to the bottom, which is more preferable to running them to a point, as a seam looks better which runs continuously to the bottom. Cutting the dart so that it reaches only to the hip, will, unless carefully made, rise up in a puff at its lower end. It must always be borne in mind that the spring must be allowed to rise at the side-seam.[39] The sudden rise of a lady’s hip, and the marked difference between the size of the waist and of the body but a few inches below, make it extremely difficult to obtain the necessary amount of freedom for the prominence of the figure at this part of the body.
The darts are cut down to the bottom, which is preferred over running them to a point, as a seam that goes continuously to the bottom looks better. If the dart is cut to only reach the hip, it can easily puff out at the lower end unless it’s made carefully. It’s important to remember that the spring needs to rise at the side seam. The sudden rise of a woman’s hip and the noticeable difference between the waist size and the body just a few inches below it make it really challenging to get the necessary freedom for the shape of the figure in this area of the body.[39]
The bottom edge of this jacket should be edged on the inside by a facing of silk, which is held on tight so that the edge may cling close to the dress-skirt.
The bottom edge of this jacket should be finished on the inside with a silk facing, which is secured tightly so that the edge stays close to the dress skirt.
The collar is cut like a coat-collar and the lapel rolls short. A narrow binding one-half inch wide is put on the edge on all goods with a close and firm texture, while on heavy, loose material, the stitching looks more appropriate.
The collar is designed like a coat collar, and the lapel rolls short. There's a narrow binding that's half an inch wide along the edge of all fabrics with a close and firm texture, while on heavier, looser materials, the stitching looks more fitting.

Fig. 22.
Fig. 22.
The button-holes run down to the bottom of the skirt. This form of jacket makes up well in fine diagonal or brocaded velvet.
The buttonholes run down to the bottom of the skirt. This style of jacket looks great in fine diagonal or brocaded velvet.
For heavy winter wear, rough suiting will make very stylish garments.
For winter wear, rugged fabrics will create very stylish outfits.
The lower edge of this jacket may be drawn straight across instead of curving up over the hips as on the Figure, and then it is equally as well adapted to be worn with any dress, as in the shape we illustrate.
The bottom edge of this jacket can be pulled straight across instead of curving up over the hips like in the Figure, and it will still be just as suitable to wear with any dress, just like the style we show.
FIG. 23. SINGLE-BREASTED LONG SACK.
Figure 23 represents a long, close-fitting, single-breasted sack, consisting of back, side-body, front and sleeve. They are all drawn by measuring the lines, and placing the number of inches on each line as designated by the numbers shown on the Figure. Thus, for the back draw a straight line from O, then apply each measure as shown, and draw the lines across at right angles with the line O. When these figures are all located, finish by drawing the outlines.
Figure 23 shows a long, fitted, single-breasted sack, made up of the back, side-body, front, and sleeve. Each part is created by measuring the lengths and marking the number of inches on each line as indicated by the numbers displayed on the figure. To create the back, draw a straight line from O, then apply each measurement as shown, drawing lines across at right angles to line O. Once all the points are marked, complete the design by drawing the outlines.
Draw the straight line O down to the desired length for the side-body; at 28½ apply the figures on the lines—when these are all fixed curve the outlines.
Draw the straight line O down to the desired length for the side body; at 28½ apply the figures on the lines—once these are all set, curve the outlines.
For the front, draw the straight line down from O, and mark the number of inches for both length and width; when these are all fixed finish the outlines.
For the front, draw a straight line down from O, and mark the number of inches for both length and width; once these are all set, finish the outlines.

Fig. 23.
Fig. 23.
The sleeve is drawn from O down to the required length, applying the number of inches for length as well as width, as shown; after these have all been found, and the line drawn at right angles with the line O, draw the outlines. After the upper part of[41] the sleeve has been drawn cut it out; then locate the points for the under-sleeve, and lay the back of upper-sleeve against the points of the back part of the under-sleeve, and draw it like the back of upper-sleeve; fix the points in front, and lay the upper-sleeve on and draw for the front of sleeve, then finish for top, as shown.
The sleeve is measured from O down to the desired length, using the specified number of inches for both length and width as indicated. Once those measurements are taken and the line is drawn at a right angle to line O, sketch the outlines. After the top part of[41] the sleeve has been outlined, cut it out; then determine the points for the under-sleeve, position the back of the upper sleeve against the corresponding points on the back of the under-sleeve, and draw it to match the back of the upper sleeve. Secure the points in front, then place the upper sleeve down and sketch for the front of the sleeve, finishing the top as shown.
FIG. 24. JACKET OR CLOAK—FROM A WAIST PATTERN.
The method which is explained below is one of the most handy, as well as the easiest, that can be used, and will invariably produce good results. It is evident, in the first place, that the original pattern must have the essential qualities of fit and good lines, otherwise it would be of little value as a base or guide to produce another garment. In order to get such a waist pattern one must be able to design it, or have it on hand; in the latter case we are prepared to furnish these patterns when ordered.
The method explained below is one of the most convenient and simplest ones available, and it will always yield good results. First of all, it's clear that the original pattern must have the key qualities of a good fit and clean lines; otherwise, it won’t be very useful as a foundation to create another piece of clothing. To get a proper waist pattern, you need to either design it yourself or have it ready; if you need it, we can provide these patterns upon request.
THE BACK:
In drafting a jacket pattern, first draw a line (like O-G) on the edge of your paper. Lay the back against the line at O and within 1½ inch of the line at the waist, then trace along the centre seam from O to 5. Now move it one-fourth inch away, this is for seam; then the same quantity is allowed above at neck from 1 to 2 and from 2 to 3.
In creating a jacket pattern, start by drawing a line (like O-G) on the edge of your paper. Position the back piece against the line at O and keep it within 1½ inches of the line at the waist, then trace along the center seam from O to 5. After that, move it one-fourth inch away for the seam allowance; allow the same distance above at the neck from 1 to 2 and from 2 to 3.
Along the arm-hole, from 3 to 4, trace close to the pattern. Measure next the length wanted from O to 5 and 9 and draw a line over to 10. From 5 to 9 draw a straight line, and then curve outside of this, at point 8, about one-half inch, as shown on Figure.
Along the armhole, from 3 to 4, trace close to the pattern. Next, measure the desired length from O to 5 and 9 and draw a line over to 10. From 5 to 9, draw a straight line, and then curve outward from this at point 8 by about half an inch, as shown in the figure.
Make the width of waist any size desired, say 3 inches, which establishes point 7, and from this point draw a line down to 10. This line should be no further away from the first line at 10 than at 7, or the distance from the line 9 to 10 should be the same as at waist, from 1½ to 7. Now, starting at 4, slightly curve to 7 and go one-half inch outside of straight line to 10.
Make the width of the waist any size you want, like 3 inches, which sets point 7, and from this point, draw a line down to 10. This line should be no farther from the first line at 10 than it is at 7, meaning the distance from line 9 to 10 should be the same as from 1½ to 7 at the waist. Now, starting at 4, gently curve to 7 and extend half an inch beyond the straight line to 10.
THE SIDE-BODY.
In this case, as on the back, the first thing we do is to draw a straight line from O to 10. Now lay the side-body against it, at O, and swing it away from the line at the waist 1¼ inch. Trace along the pattern from O to 1¼. Then move the pattern one-fourth inch away from the last line, which would leave from 1 to 3 just one-fourth inch for the seam. From 5 to 6 go in one-half the distance allowed over and above the allowance on the back, as from 6 to 7. Now curve the side-body from 2 to 5, keeping as nearly as possible the same shape as the original. Then from 5 draw a line down parallel with the first line which runs from O to 10. Now apply the back from 2 to 9 and regulate the length, which is point 9; then from 5 curve one-half inch outside of straight line at 8 to 9. At 9, square across to 10, and also draw a straight line from 1¼ to 10, and begin to curve from 3, past 7, to 10. This curve should be more round near hip, or begin to curve closer to the waist. The curves on the back and on the side seam, from 5 to 8, may be gradual, as it thus has the appearance of being longer waisted than it actually is.
In this case, like on the back, the first thing we do is draw a straight line from O to 10. Now place the side-body against it at O and swing it away from the line at the waist by 1¼ inches. Trace along the pattern from O to 1¼. Then move the pattern a quarter inch away from the last line, which will leave a quarter inch from 1 to 3 for the seam. From 5 to 6, go in halfway the distance allowed above the back allowance, just like from 6 to 7. Now curve the side-body from 2 to 5, keeping the shape as close to the original as possible. Then from 5, draw a line down parallel to the first line running from O to 10. Next, apply the back from 2 to 9 and adjust the length, which is point 9; then from 5, curve half an inch outside the straight line at 8 to 9. At 9, square across to 10, and also draw a straight line from 1¼ to 10, then start to curve from 3, passing 7, to 10. This curve should be rounder near the hip or begin to curve closer to the waist. The curves on the back and the side seam from 5 to 8 can be gradual to create the illusion of a longer waist than it actually is.
THE FRONT.

Fig. 24.
Fig. 24.
First draw the straight line like O-B. Lay the fore-part of the pattern against this line, touching at the centre of the breast, B, and trace along it at the front from 1 to the bottom at 3. Next move the pattern back one-half inch to B. Trace along the arm-hole without any allowances, but on the top of shoulder add one-fourth inch, also a trifle at neck. On the side-seam, from 15 to 20, add one-fourth inch; then lay the finished side-body on top of the front, touching point 15, and at the waist at 20, and finish the balance[43] from 20 to 22 by the side-body. Now from the top of the shoulder-point, by the bottom, point 22, sweep the bottom to the front at B. From 3 to B draw a straight line, and for a double-breasted jacket, as the Figure given, add on to the front, at B, 3 inches, at waist 2½ inches, at the bottom 3 inches, and shape it as shown. At the bottom, after it has been curved by a sweep, straighten it one-half inch above the sweep in the centre. Instead of two darts at the back only one is used, as shown, and this one can be increased one-half inch, and a cut is also taken out under the arm from 16 to 17.
First, draw a straight line like O-B. Place the front part of the pattern against this line, making sure it touches the center of the breast, B, and trace from 1 down to the bottom at 3. Next, move the pattern back half an inch to B. Trace along the armhole without adding any allowances, but on the top of the shoulder, add a quarter inch, and also a little extra at the neck. On the side seam, from 15 to 20, add a quarter inch. Then, place the finished side body on top of the front, aligning point 15 and the waist at 20, and complete the section from 20 to 22 by the side body. Now, from the top of the shoulder point to the bottom, point 22, curve the bottom to the front at B. Draw a straight line from 3 to B, and for a double-breasted jacket, as shown in the figure, add 3 inches to the front at B, 2½ inches at the waist, and 3 inches at the bottom, shaping it as illustrated. At the bottom, after curving it with a sweep, straighten it half an inch above the center of the sweep. Instead of using two darts at the back, only one is used, as shown, and this one can be increased by half an inch, with a cut taken out under the arm from 16 to 17.
It is evident that two darts can be put in as well as one, or when the same is intended for plush goods the darts can be left out altogether without altering the balance in any manner.
It’s clear that you can use two darts just as easily as one, or if you’re working with plush fabrics, you can skip the darts entirely without affecting the balance at all.
To produce a collar for this jacket draw a line from C, where it is intended to roll, to E, which is one-half inch from curved line of neck; then drop down from this line at 13 to 11 one inch and curve the break, as shown from 11 to E. From 11 to 12 is ¾ inch; curve this also to neckline at F, and thence along the neck to the front. From 11 to 13 make the part of collar which is to turn over 1½ to 2 inches wide, and shape to the front at G.
To create a collar for this jacket, draw a line from C, where you want it to roll, to E, which is half an inch from the curved neck line. Then, drop down from this line at 13 to 11 by one inch and curve the break, as shown from 11 to E. From 11 to 12, measure ¾ inch; curve this into the neckline at F, and then along the neck to the front. From 11 to 13, make the part of the collar that will fold over 1½ to 2 inches wide and shape it to the front at G.
Sleeves for this jacket are cut similar to those already explained.
Sleeves for this jacket are cut the same way as those already explained.
FIGS. 25 AND 26. WALKING COAT.

Fig. 25.
Fig. 25.
By using a sack pattern, cut to the measure, a walking-coat can be cut in the most ready manner.
By using a sack pattern, cut to size, a walking coat can be made very easily.
The back is the same as a sack-jacket. We only measure from the top down to the length of open skirt A. From here add the lap for pleats; single pleats require only 1¼ inch; box pleats, according to size, 2 to 4 inches.
The back is the same as a sack jacket. We only measure from the top down to the length of open skirt A. From there, add the lap for pleats; single pleats need only 1¼ inches; box pleats, depending on size, need 2 to 4 inches.
The side-body is cut off at a length to correspond to 2 on back, plus one-half inch, and curved up some towards side seam.
The side-body is trimmed to a length that matches 2 on the back, plus half an inch, and is slightly curved up toward the side seam.
The front is made as long as the side-body, and the bottom swept from the shoulder-point. When cut it will leave the skirt in pieces as 1, 2, 3 and 4.
The front is the same length as the side-body, and the bottom curves from the shoulder point. When cut, it will leave the skirt in pieces labeled 1, 2, 3, and 4.
Now take these pieces and lay them down, closing at hip, so that the opening will be no more at bottom than at top; they lay close together at 12, 13 and 14.
Now take these pieces and place them down, aligning at the hips so that the opening is no wider at the bottom than at the top; they should be closely aligned at 12, 13, and 14.
Now draw along the skirt at back from 4 to 15. From 4 draw towards 5, raise one-half inch above the pattern to 10, curving pattern at front.
Now draw along the back of the skirt from 4 to 15. From 4, draw towards 5, raising it half an inch above the pattern to 10, curving the pattern at the front.
Put in a dart at 7. From 11 to 16 trace along the front, and also along the bottom. Add the pleat behind.
Put in a dart at 7. From 11 to 16, trace along the front and also along the bottom. Add the pleat in the back.
The side-body in this Figure is laid in a closing position at side, point 2, to show that the seam must have a continuous curve from 1 and 2 to the front.
The side-body in this figure is positioned to the side at point 2 to demonstrate that the seam needs to have a smooth curve from points 1 and 2 to the front.
The distance from 1 and 2 to 3, and from there to the front, is noted, and the skirt from 4 to 5-7 and 11 should be just the same with 1 inch more added, which is pressed in before the skirt is seamed on to the fore-part. It will be noticed that in laying the pieces of the of the skirt together they close at 14, 12 and 13, but at the top and bottom they are separated, equal distances, the cut at 7 reduces one opening, and 1 inch fullness equalizes the amount the fullness is greater at 9 and forward. The addition for single and double-breasted is made by adding on in front of the fore-part and also on to the skirt: for a single-breasted 1 inch is enough, but for a double-breasted from 2 to 3 inches is required.
The distance from 1 and 2 to 3, and from there to the front, is noted, and the skirt from 4 to 5-7 and 11 should be the same but with an extra inch added, which is pressed in before the skirt is sewn onto the front part. You’ll notice that when laying the pieces of the skirt together, they connect at 14, 12, and 13, but at the top and bottom, they are evenly spaced. The cut at 7 reduces one opening, and the additional inch of fullness balances out the greater fullness at 9 and towards the front. The addition for single and double-breasted styles is made by adding in front of the front part and also onto the skirt: for a single-breasted style, 1 inch is enough, but for a double-breasted style, you need to add 2 to 3 inches.

Fig. 26.
Fig. 26.
FIG. 27. DOUBLE-BREASTED NEWMARKET JACKET.

Fig. 27.
Fig. 27.
Commence this by drafting on the same principle as all drafts—by the Proportionate System—by drawing line from O to F. From O go down to 11 three-fourths of an inch, and to 10 2 inches; from 11 to 10 curve the top of the back, and measure from the top of the back, at 11, to C, the length of waist 15 inches, to D 18 inches and to F the full length, 32 inches; at C, O and F draw right angle lines across. From C to the back is 1½ inch; Draw a line from 11 to 1½, and one from 1½ to F; make the width of back from 1½ to[46] 2 inches wide. From O to B is one-fourth of the breast-measure, 9 inches in a 36 inch breast, and A is midway between these two points; draw lines over from A and B. From B to G is one-third of breast and 1 inch, equal to 7 inches; from G to H is one-fourth of breast, or 4½ inches. From Y to J is one-half of breast, 18 inches; draw lines up from G, H and J, also down from J to N.
Start this by drafting using the same method as all drafts—by the Proportionate System—by drawing a line from O to F. From O, go down to 11 three-fourths of an inch, and to 10, go down 2 inches; from 11 to 10, curve the top of the back, and measure from the top of the back at 11 to C for the waist length of 15 inches, to D for 18 inches, and to F for the full length of 32 inches; at C, O, and F, draw right angle lines across. From C to the back is 1½ inches; draw a line from 11 to 1½, and one from 1½ to F; make the width of the back from 1½ to [46] 2 inches wide. From O to B is one-fourth of the breast measurement, which is 9 inches for a 36-inch breast, and A is midway between these two points; draw lines extending from A and B. From B to G is one-third of the breast measurement plus 1 inch, totaling 7 inches; from G to H is one-fourth of the breast, or 4½ inches. From Y to J is one-half of the breast, which is 18 inches; draw lines up from G, H, and J, and also down from J to N.
Where line A crosses line G, at M, draw another line from M to 10; raise one-half inch above M to V, and draw a curved line from 10 to V.
Where line A intersects line G at M, draw another line from M to 10; lift it half an inch above M to V, and draw a curved line from 10 to V.
Commence to curve the arm-hole from V to M and H, dropping one-fourth inch below breast-line at 15.
Commence to curve the armhole from V to M and H, dropping one-fourth inch below the breast line at 15.
In the centre, between M and G, begin to draw the back to 2 at waist, and from there, with a slight curve, to Z at the bottom, so that the distance from F to Z will be about equal to that from C to 2.
In the center, between M and G, start drawing the back to 2 at the waist, and from there, with a slight curve, to Z at the bottom, making sure the distance from F to Z is roughly the same as that from C to 2.
Go in from 2 to 3 one inch and shape the side-body from line under the arm to 3 and S, where it touches the back; make the side-body any width desired, say 2 inches to 14, the same from 3 to 4, curve the seam under the arm and spring it out below 4 to 21, to give it ease over the hips; also draw the curve for the piece under the arm from 14 to 4 and 20. From S curve up to 21, which latter point is 1½ inch above the line S-18. Point 20 is on the same level as 21, the line runs straight across to the front seam which runs down from 5. The piece under the arm is 1½ inch wide at top, from 14 to 15, and 2 inches from 4 to 5; this should be shaped somewhat like draft.
Go in from points 2 to 3 by one inch and shape the side-body from the line under the arm to points 3 and S, where it meets the back; make the side-body any width you want, say between 2 inches to 14, and keep the same from points 3 to 4. Curve the seam under the arm and extend it out below point 4 to point 21 to create ease over the hips; also draw the curve for the piece under the arm from points 14 to 4 and 20. From point S, curve up to 21, which is 1½ inches above the line S-18. Point 20 is on the same level as point 21, and the line runs straight across to the front seam that extends down from point 5. The piece under the arm is 1½ inches wide at the top, from points 14 to 15, and 2 inches wide from points 4 to 5; this should be shaped somewhat like a draft.
From L to I is one-sixth of the breast, 3 inches, and the same down from L to T. Curve the neck; from I to A draw a straight line, and place the length of shoulder from 10 to V on the front from I to U; shape the front of shoulder by dropping below line at U one-half inch, and raise slightly above it at 12.
From L to I is one-sixth of the breast, 3 inches, and the same distance from L to T. Curve the neck; draw a straight line from I to A, and measure the shoulder length from 10 to V on the front from I to U; shape the front of the shoulder by dropping half an inch below the line at U and raising it slightly above at 12.
Finish drawing the arm-hole from U to H, going out beyond the line H at 13 about one half inch.
Finish drawing the armhole from U to H, extending just past the line H at 13 by about half an inch.
Draw from T, at the front, outside of J one-half inch, thence to K at waist, going inside of front line one-fourth inch at K and N to point P at bottom.
Draw from T, at the front, outside of J half an inch, then to K at the waist, going inside the front line a quarter inch at K and N to point P at the bottom.
In the middle, between J and H, locate a point for the dart, and in the centre, between this and H, fix another point for the back dart. From K to 1½, across the waist, measure the distance, taking out 1 inch between 2 and 3, which will be 16 inches; deduct the size of waist, 12 inches, from 16 inches and the remainder, 4 inches, is to be taken out in darts; therefore, put in two darts of 2 inches each. From K to 9 is 2 inches; from 9 to 8 is one dart; from 8 to 7, between the darts, is three-fourths inch; from 7 to 6 is another dart of 2 inches. About 2½ inches below the waist-line begin to draw the darts past 9, 8, 7 and 6, nearly straight down from waist-line. From 21 curve lower seam to 19, 18 and N; at N it is one-half inch below straight line.
In the middle, between J and H, find a point for the dart, and in the center, between this and H, mark another point for the back dart. Measure the distance from K to 1½ across the waist, subtracting 1 inch between 2 and 3, which will equal 16 inches; then subtract the waist size, 12 inches, from 16 inches. The remainder, 4 inches, is to be taken out in darts, so place two darts of 2 inches each. From K to 9 is 2 inches; from 9 to 8 is one dart; from 8 to 7, between the darts, is three-fourths of an inch; from 7 to 6 is another dart of 2 inches. About 2½ inches below the waistline, start drawing the darts past 9, 8, 7, and 6, almost straight down from the waistline. From 21, curve the lower seam to 19, 18, and N; at N, it is half an inch below the straight line.
Make the lapel straight on its inside edge, and 2 inches at waist, and 3 inches at centre of breast, in width, and shape like Figure.
Make the lapel straight along its inner edge, 2 inches wide at the waist, and 3 inches wide at the center of the breast, following the shape in the figure.
To draw the skirt lay a straight-edge from 3 to S against the side-body, and draw a line to R, then curve it about one-half inch more over the hips. Regulate the length by the back. From S draw the upper edge of the skirt to within one-half inch of side-body[47] at 21, thence to N; from N forward add the width of lapel and draw straight down; also put in two cuts on the hip, of one-half inch each, and the skirt will be right to fit the body. Should it, on measuring, be a little too wide, take the extra width off in front; whatever overlaps on the side-body will equalize the loss of the darts.
To draw the skirt, place a straight edge from 3 to S against the side of the body and draw a line to R. Then, curve it about half an inch more over the hips. Adjust the length by measuring from the back. From S, draw the upper edge of the skirt to within half an inch of the side body[47] at 21, then to N. From N, add the width of the lapel and draw straight down. Also, create two cuts on the hip, each half an inch, and the skirt will fit the body correctly. If it's a bit too wide when measuring, remove the extra width from the front; any overlap on the side body will balance out the loss from the darts.
A flap can be put on over the hips. An ordinary coat-collar will suit this jacket.
A flap can be added over the hips. A standard coat collar will work for this jacket.
FIG. 28. TRAVELING ULSTER.

Fig. 28.
Fig. 28.
A Spring and Fall garment for traveling or outdoor wear is represented by this Figure and is a reduced copy of the pattern of a 38 size breast, and can be readily enlarged by simply using inches for the numbers marked upon it. The draft is a close-fitting traveling paletot, double-breasted, and buttons down to the bottom, and has a collar which[48] turns over, as represented by Fig. 5. This collar should be well stretched with the hot iron, at the lower edge, before it is sewed on, in order that it may cling around the neck nicely. This way of making and sewing on a collar is far superior to the usual custom of dressmakers, and is always adopted by tailors in making jackets or other ladies’ garments.
A Spring and Fall garment for traveling or outdoor wear is shown in this figure and is a scaled-down version of the pattern for a size 38 bust. It can easily be adjusted by using inches for the measurements indicated on it. The design is a close-fitting traveling coat, double-breasted, with buttons running down to the bottom, and it features a collar that[48] folds over, as illustrated in Fig. 5. Before attaching, the collar should be well pressed with a hot iron along the lower edge to ensure it fits snugly around the neck. This method of constructing and attaching a collar is much better than the typical practice of dressmakers and is always used by tailors when making jackets or other women's garments.
The back has at its centre, below the waist, a lap, which can be put in a box-pleat or lapped over like a coat, and at the side it has a simple pleat.
The back has at its center, just below the waist, a flap that can be styled in a box pleat or overlapped like a coat, and on the side, there’s a simple pleat.
The front has a large dart cut in one piece—that is, like a sack coat, having the skirt attached to the body—but the side-body is sewed in as cut, in a separate piece. Over the hips pockets are put in covered with liberal flaps.
The front has a large dart cut in one piece—that is, like a sack coat, with the skirt attached to the body—but the side body is sewn in as cut, in a separate piece. Over the hips, pockets are added, covered with generous flaps.
For use as a traveling garment it will be well to make it out of waterproof cloth, but it makes a handsome street paletot when made out of diagonal cloth or melton.
For use as a travel garment, it would be best to make it from waterproof fabric, but it looks great as a street coat when made from diagonal cloth or melton.
FIGS. 29 AND 30. NEWMARKET.

Fig. 29.
Fig. 29.
This style of Newmarket has only one dart. Proceed to make a full size draft in accordance with the directions. First draw a straight line O, and mark off the number of inches down from O, as given on the Figure; at these points draw lines across, and on these lines mark the number of inches as given, in like manner proceed to draw each part of the garment.
This Newmarket style has just one dart. Start by making a full-size draft following the instructions. First, draw a straight line O, and mark the number of inches down from O as shown in the figure; at these points, draw lines across, and on these lines mark the number of inches as indicated. Then, continue to draw each part of the garment.

Fig. 30.
Fig. 30.
FIG. 31. RIDING-HABIT.

Fig. 31.
Fig. 31.
The demand and orders for these garments have, so far, been considerable in the leading houses, and a few hints are always seasonable, not only to those who make them for the highest fashionables, but especially to those who are located in smaller towns and who are not often called upon to make this style of garment. There are now many ladies who have a horse at their disposal, and whose chief enjoyment is in equestrian exercise, and it is quite necessary, not only for the tailor but the dressmaker, to know how a riding-habit should be cut and made. At one time it was thought impossible for anyone but a tailor to make a stylish riding-habit, but now many ladies have them made by their dressmakers.
The demand for these garments has been significant among top retailers so far, and a few tips are always helpful, not just for those making them for high fashion clients but especially for those in smaller towns who don't often get requests for this type of clothing. Nowadays, many women have access to horses and enjoy riding, so it's essential for both tailors and dressmakers to understand how a riding habit should be designed and constructed. In the past, it was believed that only a tailor could create a stylish riding habit, but now many women are having them made by their dressmakers.
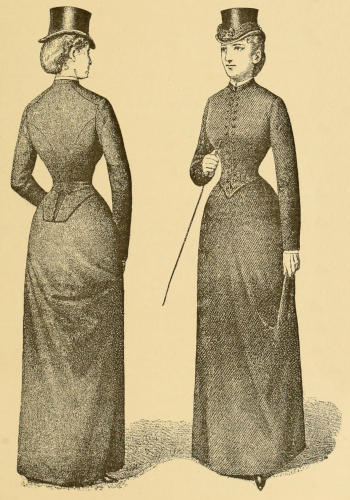
The first thing necessary is a good measure of the form, by which a correct pattern must be cut, as a well-setting, comfortable riding-habit cannot be made without it.
The first thing needed is a good measurement of the shape, which a proper pattern must be cut from, as a well-fitting, comfortable riding outfit cannot be made without it.
The jacket has a few peculiarities:
The jacket has a few quirks:
There should be no seam down the middle of the back; the front, side-body and back are cut one inch below the natural waist.
There should be no seam down the middle of the back; the front, side body, and back are cut one inch below the natural waist.
The skirt and back form a pleat like the skirt-pleat of a coat.
The skirt and back create a pleat similar to the pleat in a coat.
The buttons should be small and round. The sleeves are tightly buttoned up at wrist.
The buttons should be small and round. The sleeves are tightly buttoned at the wrist.
The inside of jacket should be lined with silk, carefully wadded and stitched in close rows. It should have a belt inside, stitched to each seam at waist, which is to close it tight to the form.
The inside of the jacket should be lined with silk, carefully padded and sewn in close rows. It should have a belt on the inside, stitched to each seam at the waist, to keep it snug against the body.
The Figures we give show to advantage some of these peculiarities. The draft is a good model of such a habit, and is universally adopted, being both suitable and elegant. It “looks quite English”[52] and very pretty. A plain standing collar of white linen should be worn with it and a gentleman’s cravat of black silk, or if the jacket is made with the lapels turning down a flat scarf is more appropriate.
The figures we provide highlight some of these unique features effectively. The design is a great example of this style, and it’s widely accepted for being both practical and stylish. It “looks very English”[52] and quite charming. A simple standing collar made of white linen should be worn with it, along with a gentleman’s black silk cravat, or if the jacket has downturned lapels, a flat scarf is more suitable.

We add to this an article published in “Munster’s Gazette of Fashion” on riding-habits. This will enable our readers to be more fully posted, not only on what is worn here but what is in keeping with London styles:
We are also including an article from “Munster’s Gazette of Fashion” about riding habits. This will help our readers stay informed not just about what’s worn here but also about what aligns with London styles:
“We have devoted one of the plates issued with the current number of our publication to the representation of the newest and most fashionable style of a lady’s riding-habit in wear. The lengthening of the waist, which we reported last year, has been maintained, although it has not been increased; and the jacket-skirt is about the same in length. It is fastened up to the throat by buttons and holes, and with a small stand-collar rounded off at the front. The jacket-skirt is cut in one piece instead of two, as heretofore, and at front runs off at an angle from the bottom of the front edge of the fore-part, and is lined with cloth, or interlined with some article of substance, to give it a firmness. The edges of the back skirts terminate in a point at the bottom. A small square tab, with two holes in it, is sewn across under the bottom of the back, and is fastened on to two buttons sewn on the top of the back part of train. The edges are usually trimmed with a narrow silk braid, sewn on flat, and the body and the sleeves lined with light colored silk. Ball buttons and fancy silk buttons are generally used. Five or six buttons are sewn on at the hind-arm; the two lower holes only are worked open.
“We have dedicated one of the plates included with this issue of our publication to showcasing the latest and most stylish ladies' riding outfit. The elongated waistline that we mentioned last year remains, though it hasn't lengthened further, and the jacket-skirt is about the same length. It fastens at the throat with buttons and buttonholes, featuring a small stand collar that is rounded at the front. The jacket-skirt is now made in one piece instead of two, as it was before, and it angles off at the front from the bottom edge. It is lined with fabric or interlined with a sturdy material for added firmness. The back skirt edges come to a point at the bottom. A small square tab with two holes is sewn underneath the back, fastening onto two buttons that are sewn on the top of the back part of the train. The edges are typically trimmed with a narrow silk braid stitched flat, and both the body and sleeves are lined with light-colored silk. Ball buttons and decorative silk buttons are commonly used. Five or six buttons are sewn onto the back of the arm, with only the lower two buttonholes left open."
Some ladies affect a certain tone of severity in their riding-habits, and eschewing all fictitious aids by way of adornment to the bodies have made them perfectly plain, with the edges turned in and stitched, and smoked pearl or vegetable ivory shank buttons.
Some women adopt a serious tone in their riding clothing and avoid any artificial embellishments, making their outfits completely simple, with the edges folded in and stitched, featuring smoked pearl or vegetable ivory buttons.
Veils are no longer considered correct, no doubt because they may be considered too effeminate in character and out of place with the “billy-cock” hat.
Veils are no longer seen as appropriate, likely because they might come across as too feminine and don't match well with the "billy-cock" hat.
The train, as now worn, is only cut a few inches longer than the walking length. It is turned up at the bottom, with a narrow hem only, and the V’s taken out at the seams are covered with ribbon.
The train, now worn, is only a few inches longer than the length of the walk. It is turned up at the bottom, with just a narrow hem, and the V’s taken out at the seams are covered with ribbon.
Colored habits are being worn in rich shades of brown, olive and green—not too light. Blue and black are also worn. The small diagonal elastic coating and Venetian cloth are preferred on account of their making up so satisfactorily. Dress meltons and tweeds are also worn, but the makes are not so appropriate.
Colored habits are being worn in rich shades of brown, olive, and green—not too light. Blue and black are also worn. The small diagonal elastic coating and Venetian cloth are preferred because they work up so well. Dress meltons and tweeds are also worn, but the styles aren’t as suitable.
One inevitable consequence of short and scanty trains is the necessity for every lady, taking equestrian exercise, to wear riding trousers. They are usually made of the same cloth as the habit, with a fly-front open to leg-seam, or with a long opening at each side-seam and a button and button-hole in the centre, and a narrow strap at bottom.”
One unavoidable result of short and skimpy trains is that every woman who rides has to wear riding pants. They're typically made from the same fabric as the riding outfit, featuring a fly-front that opens at the leg seam, or with a long opening on each side seam with a button and buttonhole in the middle, and a narrow strap at the bottom.
In order to produce Figure 31 use inches for all numbers on the draft. But in drafting it to measure use the same principle as laid down for waists, and lengthen the skirt as on Figure 7 and draw the skirt like that on last Figure.
In order to create Figure 31, use inches for all the measurements on the draft. However, when drafting it to measure, follow the same principle as for waists, and lengthen the skirt as shown in Figure 7, and draw the skirt like that in the last Figure.
FIG. 32. CIRCULAR.
Draw lines O-5 and O-J. From O to J is one-fourth of breast. From O to H is one-third of breast. Lay the pattern of the back against H and 1½ inch inside of line at the waist. Lay also the pattern of the front against the shoulder of the back near F and[53] touching front-line at J. Draw along the top of the back from H to 1, and add to the pattern at 1, for seams, one-half inch. Draw from 1 to F and from 2, on the front shoulder, to F. From J, along the front of the body-pattern, draw a straight line to 4. Now from 1 and 2 draw a line and make a point in the centre at 3. Apply the length from H to 5 for full length of what the garment should be, and using point 3 as a pivot sweep from 5 to the front for the lower or bottom edge; then square the bottom at 5, and in front at 4, as shown in the Figure.
Draw lines O-5 and O-J. The distance from O to J is one-fourth of the bust. The distance from O to H is one-third of the bust. Place the back pattern against H and 1½ inches inside the waistline. Also, position the front pattern against the shoulder of the back near F, touching the front line at J. Draw along the top of the back from H to 1, and add an extra half inch at 1 for seams. Then draw lines from 1 to F and from 2 on the front shoulder to F. From J, draw a straight line along the front of the body pattern to 4. Now draw a line from 1 and 2, marking a point in the center at 3. Use the measurement from H to 5 for the full length of the garment, and using point 3 as a pivot, sweep from 5 to the front for the lower edge; then square the bottom at 5 and in front at 4, as shown in the figure.

Fig. 32.
Fig. 32.
If a seam is wanted draw a line through the centre from F and take out about 3 inches at bottom, starting from 6 to 7 and 6 to 8.
If you want a seam, draw a line through the center from F and remove about 3 inches at the bottom, starting from 6 to 7 and 6 to 8.
For a close back, curve from H along the back to 1½ and thence to 5 at bottom.
For a close back, curve from H along the back to 1½ and then to 5 at the bottom.
FIGS. 33 AND 34. RUSSIAN CIRCULAR.
In making a pattern of this garment we first draw a line on the edge of paper and make a point on the right end, as O. From O down place three-fourths of an inch. From O to I is one-half of breast measure, or 9 inches, for a 36 size. Between O and I is J. H and I are at right angles with first back-line. From I over on the line place one-third of breast, equal to 6 inches, and add 1 inch, making in all 7 inches, and draw a line up to 5. Next, from O on top line place 2 or 2½ inches and curve from ¾ to 2½.
In making a pattern for this garment, we start by drawing a line along the edge of the paper and marking a point at the right end, called O. From O, measure down three-fourths of an inch. From O to I, that distance is half of the breast measurement, which is 9 inches for a size 36. The space between O and I is J. Points H and I form right angles with the initial back line. From I, along the line, measure one-third of the breast measurement, which is 6 inches, and add 1 inch, bringing the total to 7 inches. Draw a line up to point 5. Next, from O on the top line, measure 2 or 2½ inches and curve from ¾ inch to 2½ inches.

Fig. 33.
Fig. 33.
Measure down from ¾ to D, the length of waist, say 15 inches, and the whole length to R. Go in from straight line at D 1½ inch and curve the right back-seam from ¾ to 1½ and R.
Measure down from ¾ to D, the length of the waist, about 15 inches, and the total length to R. Move in from the straight line at D by 1½ inch and curve the right back seam from ¾ to 1½ and R.
Make the back, at waist, 4 inches wide and curve from 5 through waist at 11 to 12 at bottom. The run of this line should be nearly straight past V and curving at 11, and should also be wider at bottom, about 1 inch more than from D to 11. From 2½ draw a line raising it one-half inch at 5.
Make the back, at the waist, 4 inches wide and curve from 5 through the waist at 11 to 12 at the bottom. The line should be almost straight past V and curve at 11, and it should also be wider at the bottom, about 1 inch more than from D to 11. From 2½, draw a line raising it half an inch at 5.
For the front (Figure 34) draw a straight line from O to J. From O down to a is one-eighth of breast, equal to 2¼ inches. From O to B is one-sixth of breast, or 3 inches. From O to K is one-fourth of breast, or 9 inches. Square lines across at all these points. From O to A, the neck, is one-sixth of breast.
For the front (Figure 34), draw a straight line from O to J. From O down to a is one-eighth of the bust, equal to 2¼ inches. From O to B is one-sixth of the bust, or 3 inches. From O to K is one-fourth of the bust, or 9 inches. Draw lines across at all these points. From O to A, the neck, is one-sixth of the bust.
Lay the back on to the point A and extreme shoulder resting on the line at C. Now draw along the back shoulder while it is in this position, and also curve from C to 12, which should only be 4 inches below C.
Lay the back on point A with the shoulder resting on the line at C. Now draw along the back shoulder while it's in this position, and also curve from C to 12, which should only be 4 inches below C.
From K go out to H one-quarter of the breast, less 1 inch, equal to 8 inches. Having established this we can curve the shoulder easier, as seen by dotted lines. Measure from K over on the line one-half of breast, equal to 18 inches, and one-third of breast, or 6 inches, added.
From K, go out to H one-quarter of the bust, minus 1 inch, which equals 8 inches. Once that's set, we can curve the shoulder more easily, as shown by the dotted lines. Measure from K along the line one-half of the bust, which is 18 inches, and then add one-third of the bust, or 6 inches.
Now lay the back-line against this last point in such a way that point 5 of the back will rest on line A-13, and so that it will be placed as seen in Figure 35. Then carefully measure to see if the distance from K-H and to the back-line will be exactly one-halt and one-third of breast, or 27 inches. Then curve from 12 to 13 to 14 down the back and reducing it at the bottom about 4 inches from the position as it would be when the back is laid as stated.
Now position the back-line against this last point in a way that point 5 of the back touches line A-13, and make sure it’s placed as shown in Figure 35. Then, carefully measure to ensure that the distance from K-H to the back-line is exactly one-half and one-third of the breast measurement, or 27 inches. Next, curve from 12 to 13 to 14 down the back and reduce it at the bottom by about 4 inches from where it would be when the back is positioned as instructed.
Now by the length of the back regulate that of the front, and then sweep by the point of shoulder A from 10 to J. This latter point, and part of this round, as produced by the sweep, should[55] be shortened about 1 inch. Curve the neck from A to B, and add 1 inch all along the front for a turn-in hem.
From where the back lies against the wing, at O, draw the curve to 13 on the top of sleeve head.
From where the back rests against the wing, at O, draw the curve to 13 at the top of the sleeve head.
The upper part of the sleeve-head should be gathered-in considerable, and at O a notch should be placed to facilitate the sewing in, for notch should be sewn on notch. (See Figure 35.)
The upper part of the sleeve head should be gathered in significantly, and at O, a notch should be placed to make sewing it in easier, because the notch should be sewn on the notch. (See Figure 35.)

Fig. 34.
Fig. 34.
FIG. 35. CLOSED CIRCULAR.
After this has been drawn the same as the Russian circular, lay it against the front and cut without a seam from O down to the bottom. For this shape, after the shoulders are seamed up, gather in the round of sleeve from O forward. The same can be cut like the circular; also cut off in front from top, past V, to the bottom, in a straight line down from B. This makes a wrap with a back wing and a front. When cut in this manner an opening can be left for the hands to go through, as shown on the Figure, below E.
After this is drawn like the Russian circular, place it against the front and cut straight down from O to the bottom without any seams. For this shape, after the shoulders are sewn together, gather the sleeve from O to the front. You can cut it just like the circular; also, cut off the front from the top, past V, in a straight line down from B to the bottom. This creates a wrap with a back wing and a front. When cut this way, you can leave an opening for the hands to go through, as shown in the figure below E.

Fig. 35.
Fig. 35.
A short cape, such as have been worn for some time in Europe, and are just making their appearance here, is cut like this, reaching, however, only to the waist. This same[57] wrap can be cut from a dolman pattern by laying the sleeve of a dolman on to front so that the front notches come together and the two patterns close together some distance above, or till within 4 or 5 inches of the top of the shoulder, then draw along sleeve-top past the back of the sleeve.
A short cape, similar to those that have been worn in Europe for a while and are just starting to show up here, is designed like this, reaching only to the waist. This same[57] wrap can be made from a dolman pattern by placing the sleeve of a dolman on the front so that the front notches line up and the two patterns connect some distance above, or about 4 to 5 inches from the top of the shoulder, then extend along the sleeve top past the back of the sleeve.
If a line is drawn through the shoulder-point, next to the sleeve, at right angles with the front, and the back shoulder-point laid on this line and closing against the sleeve at blade, it will represent exactly this circular cape, and will be one of the easiest ways to make it. The Figure shows the outline of the dolman sleeve by the dotted line from E forward, as it appears when lying in position.
If you draw a line through the shoulder point next to the sleeve, perpendicular to the front, and then place the back shoulder point on this line, making it touch the sleeve at the blade, it will accurately represent this circular cape and will be one of the simplest ways to create it. The figure shows the outline of the dolman sleeve with a dotted line from E forward, as it looks when in position.
These several wraps can be made of silk, and fur-lined, or they may be of brocade, velvet, or seal, and are handsome in shape and outline when correctly cut. As they are so different from the old circular they will be much sought after, because of the newness of design and that the sleeve can be raised on the shoulder to harmonize with the increased prevalence of gathered and high style of sleeve-heads.
These various wraps can be made of silk and lined with fur, or they can be made of brocade, velvet, or seal. They look great in shape and outline when cut correctly. Since they differ from the old circular styles, they will be highly sought after due to their fresh design and the ability to raise the sleeve on the shoulder, which matches the current trend of gathered and high sleeve heads.

FIGS. 36, 37, 38, 39, 40. DOLMAN.
Draw a line O-H; from O, down, mark three-fourths of an inch. From O draw a short line over to 3, and make it 2½ inches. From O down to B is one-fourth of breast, equal to 9 inches on a 36 breast. Point F is in the centre, between O and B; from ¾ to D is the length of the waist, and to H the full length of garment. Draw lines across at F, B and D. Between F and B, directly in the centre, make a mark C, and draw a line across.
Draw a line O-H; from O, go down and mark three-fourths of an inch. From O, draw a short line over to 3, making it 2½ inches long. From O down to B is one-fourth of the bust, which equals 9 inches on a 36-inch bust. Point F is the center between O and B; from ¾ to D is the length of the waist, and to H is the full length of the garment. Draw lines across at F, B, and D. Between F and B, directly in the center, make a mark C and draw a line across.
Go in at the waist 1⅓ inch from line at D; draw line from ¾ to 1½ for the centre of back, and curve below D to H. From 1½, at waist, measure in to 4 3½ inches to 4 inches.
Go in at the waist 1⅓ inches from the line at D; draw a line from ¾ to 1½ for the center of the back, and curve it below D to H. From 1½ at the waist, measure in to 4, 3½ inches to 4 inches.
On line C make the width of back one-third of breast and one inch and draw a line up.
On line C, make the width of the back one-third of the chest and one inch, then draw a line up.
On the top of shoulder draw a line from 3 to 14, and raise it one-half inch above 14; commencing there, exactly[58] at the crossing of the lines, begin to curve past 16 and 4 to 1 at bottom. Having finished the back, first make a line across in the middle, between ¾ and F, from E over; next lay a sleeve pattern, of regular size, on 15 as when sewn in the arm-hole; holding it at 15, swing it down till the upper part of the sleeve-head rests about one-half inch below line E, at 13, and when in this position draw along the round of the sleeve, which will give exactly the round as shown on the Figure from 15, past 13, to 2.
On the top of the shoulder, draw a line from 3 to 14, and raise it half an inch above 14; starting there, exactly[58] at the intersection of the lines, begin to curve past 16 and 4 to 1 at the bottom. After finishing the back, first make a line across the middle, between ¾ and F, from E over; next, lay a standard sleeve pattern on 15 as it would be sewn into the armhole; holding it at 15, swing it down until the top part of the sleeve head sits about half an inch below line E, at 13, and when in this position, draw along the curve of the sleeve, which will create the exact round as shown in the figure from 15, past 13, to 2.

Fig. 36.
Fig. 36.
Next, placing the width over from B on the back line, measure to 10, 24 inches, and curve the sleeve from 2 to 10, running below the line 2 inches. Point G is about 12 inches below the waist, and from this place 1 inch more than one-quarter of the hips to 8, and draw from 6, which is one-quarter of hip from D, a line through 8 to 9; then finish the curve at bottom, and shape the round of front of sleeve to any desired shape. The front is constructed by drawing a line from O down the front edge or centre of front.
Next, take the width measurement from B along the back line, measuring out to 10, 24 inches, and curve the sleeve from 2 to 10, going 2 inches below the line. Point G is about 12 inches below the waist, and from this point, measure 1 inch more than one-quarter of the hips to 8, and draw a line from 6, which is one-quarter of the hip from D, through to 8 and 9; then finish the curve at the bottom, and shape the front of the sleeve to your preferred style. The front is made by drawing a line from O down the front edge or center of the front.

Fig. 37. Fig. 38.
Fig. 37. Fig. 38.
From O over to shoulder point is one-sixth breast, the same down to 3; also go down one-eighth breast and draw a line across; curve the neck from ⅙ to 3, and apply the same width of shoulder as the back on the front, ⅙ to 10. From O down is one-half breast to E, there draw a line over to 8 and make last point, from E, one-fourth breast less 1 inch.
From O to shoulder point is one-sixth of the chest, the same measurement down to 3; also go down one-eighth of the chest and draw a line across; curve the neck from ⅙ to 3, and use the same shoulder width on the front as on the back, from ⅙ to 10. From O down is one-half of the chest to E, then draw a line over to 8 and mark the last point, from E, one-fourth of the chest less 1 inch.
Measure the distance on the back, from B to H, and place it from E to P, then sweep the bottom of the front by the shoulder-point, which gives line P to K. Make the distance over from H to J one-quarter of the hips, and 1 to 1½, inch more; draw a line from K through J to L. Next measure the back from 6 to 9 and place the same from K up to L; curve arm-hole from 10 through 8 to L. Add 3 inches for a lap of double-breasted style; mark and space the buttons.
Measure the distance on the back, from B to H, and then place it from E to P. Next, create a line from the bottom of the front at the shoulder point to draw line P to K. For the distance from H to J, measure one-quarter of the hips, plus an additional 1 to 1½ inches; then draw a line from K through J to L. After that, measure the back from 6 to 9 and place that distance from K up to L; curve the armhole from 10 through 8 to L. Add 3 inches for a lap in a double-breasted style and mark and space the buttons.

The under-sleeve is cut like the upper part from 2 to 10 and 11, like the outside curve. The inside curve from 2 to 7 is short, just as much as is needed to sew in the front—to find how much this should be we make a notch opposite 14 and one at 2, which is about 10 inches from 14. This measure, less 1 inch, is marked from 10 to 16, and at that point make another notch. What is left from 16 to L must be placed from 2 to 7, and this curve should be like curve on front. Lastly, draw a line from 7 to the star, which finishes the whole garment.
The under-sleeve is cut similarly to the upper part from 2 to 10 and 11, following the outside curve. The inside curve from 2 to 7 is short, just enough to sew in the front. To determine how much this should be, we make a notch opposite 14 and another at 2, which is about 10 inches from 14. This measurement, minus 1 inch, is marked from 10 to 16, and at that point, we make another notch. The remaining length from 16 to L needs to be placed from 2 to 7, and this curve should match the curve on the front. Lastly, draw a line from 7 to the star, which completes the garment.
In order to draft a dolman pattern which will fit well and hang with a good balance the same manner of drafting as that which produces a good shaped sack should be used, then the balance and hang of the garment will be equally as good as in a tight-fitting sack, and a dolman can then be cut as close as a sack, if so desired.
To create a dolman pattern that fits well and drapes nicely, you should use the same drafting technique that gives a well-shaped sack. This way, the balance and drape of the garment will be just as good as in a fitted sack, and you can cut the dolman as closely as you would a sack if you want to.
The manner of drafting the back, side-body and front, are, in fact, just like a sack, the main difference being in the shape of the sleeve. The sleeve, even in the upper part, must be like an ordinary coat-sleeve, while the lower part may be any of the various shapes in fashion.
The way to design the back, side, and front is basically like a sack, with the main difference being the shape of the sleeve. The sleeve, even at the top, should look like a regular coat sleeve, while the bottom can have any of the different styles that are currently in trend.
In drafting make a line to start on from O to F (Figure 37); from O down is three-fourths inch, and from O over to top line is 2¼ inches to 1. From O to B is one-fourth of breast, 9 inches of a 36 size. Point D is in the middle, between O and B, and point 6 is in the middle, between O and D. From ¾, which is the top of the back, measure down to C 15 inches, and to F 40 inches, the full length. Point E is 6 inches, or one-third of breast, below the waist-line at C. At all these points draw lines across. From B to H is one-third and 1 inch, equal, on 36 breast, to 7 inches; draw a line up to J; in the middle, between I, the point where the two lines cross and H, mark point K. At the waist-line go in from straight line C to 3 one and one-half inches, then draw line down from ¾ to 3 and from 3 to F. Also draw a straight line at right angles with waist-line from 3 to 6 at bottom.
In drafting, draw a line from O to F (Figure 37); from O down measure three-quarters of an inch, and from O over to the top line measure 2¼ inches to 1. From O to B is one-fourth of the bust, which is 9 inches for a size 36. Point D is in the middle between O and B, and point 6 is in the middle between O and D. From ¾, which is the top of the back, measure down to C 15 inches, and to F 40 inches, the full length. Point E is 6 inches, or one-third of the bust, below the waistline at C. At all these points, draw lines across. From B to H is one-third plus 1 inch, which equals 7 inches for a 36 bust; draw a line up to J. In the middle, between I (where the two lines cross) and H, mark point K. At the waistline, measure in from the straight line C to 3 one and one-half inches, then draw a line down from ¾ to 3, and from 3 to F. Also, draw a straight line at right angles to the waistline from 3 to 6 at the bottom.
Make the width at waist, from 3 to 4, about 3 inches, and draw also a line down to 7. Now curve back-seam, as shown, and whatever amount there is from 6 to F place from 7 to 8, and curve from 4 past 5 to 8.
Make the waist width, from 3 to 4, about 3 inches, and draw a line down to 7. Now curve the back seam, as shown, and whatever gap there is from 6 to F, place it from 7 to 8, and curve from 4 past 5 to 8.
Draw a line from I to 1, raise above I to J three-fourths[61] inch, and curve the shoulder. Starting from J up upright line, curve back seam to 4 and 8; also mark a dim line from J past I, K to G, just like in a sack back—the dotted line shows that. Point G is one-fourth of breast, or 9 inches, from B.
Draw a line from I to 1, then raise above I to J three-fourths[61] inch, and curve the shoulder. Starting from J, draw an upright line, then curve back the seam to 4 and 8; also mark a faint line from J past I, K to G, similar to a sack back—the dotted line indicates that. Point G is one-fourth of the breast, or 9 inches, from B.
Notice that the curve on the back, from C to 3, is a trifle outside of the straight line, and that below 3 it runs a shade inside to give an appearance of a long waist, and below E it curves outside again to F.
Notice that the curve on the back, from C to 3, is slightly outside of the straight line, and that below 3 it runs a bit inside to create the look of a long waist, and below E it curves outside again to F.

Fig. 39.
Fig. 39.
The inside seam from J past breast-line should be very nearly straight, and begin to curve only near the waist, and from 5 down it must have the same curve as outside line below point E to F.
The inner seam from J just below the breast line should be almost straight and should start to curve only near the waist. From point 5 down, it needs to have the same curve as the outer line from point E to F.
Now have a sleeve cut for a 36 size and lay this on to K, as shown, so that the sleeve-head rests against the line from K to I; then in the centre, between I and K, find point 2 and stick a pin.
Now take a sleeve pattern for a size 36 and place it onto K, as shown, so that the top of the sleeve rests along the line from K to I. Then, in the center between I and K, locate point 2 and stick a pin there.
Now turn to Figure 38: In the middle, between line A and D, draw line E; keeping it pinned at 2, move the lower part of the sleeve towards the back till the top of the sleeve-head[62] just touches line E at 10. While it lays thus draw along the top from 2 to 10 and 9, also down from 9, in front of sleeve pattern, to line B. This gives the outline of the sleeve, but we modify it by drawing a corrected line from 10, inside of point 9 of sleeve, down to 12.
Now look at Figure 38: In the center, between line A and D, draw line E; keeping it pinned at 2, move the lower part of the sleeve toward the back until the top of the sleeve-head[62] just meets line E at 10. While it’s positioned like this, draw along the top from 2 to 10 and 9, and also down from 9 in front of the sleeve pattern to line B. This provides the outline of the sleeve, but we tweak it by drawing a corrected line from 10, inside point 9 of the sleeve, down to 12.

Figure 39 gives the balance of the sleeve. First draw a line in the centre, between lines B and C, which places line D.
Figure 39 shows the balance of the sleeve. First, draw a line in the center, between lines B and C, which will create line D.
Then take out the pin which was placed in the sleeve at point 2, and without moving the sleeve stick a pin at point U; this point is found two-thirds of the width of the sleeve forward. When this is done take hold of the sleeve at its lower point and move it upwards, till point T of sleeve rests on line D at N, and then curve from 16 to N. To produce this curve just right take the distance from line B at 18 to line D at 17, and place the same from 17 to 19, and draw a straight line from 19 to 18, then curve line from 16, resting on line at 20, thence to N. From N curve form of sleeve to 21 and 15, and to 13 for one style of sleeve, or from U to 21 and 14 for another style.
Then remove the pin that was placed in the sleeve at point 2, and without moving the sleeve, stick a pin at point U; this point is located two-thirds of the width of the sleeve forward. After this, hold the sleeve at its lower point and lift it until point T of the sleeve rests on line D at N, and then curve from 16 to N. To create this curve accurately, measure the distance from line B at 18 to line D at 17, and replicate that distance from 17 to 19, then draw a straight line from 19 to 18, and curve the line from 16, resting on the line at 20, then to N. From N, curve the shape of the sleeve to 21 and 15, and to 13 for one style of sleeve, or from U to 21 and 14 for another style.
Go in from 4 to 5 three-quarters of an inch; curve from 10, past 2, touching the back, and along it past line B, and thence separate from the back to 5 and 14—this last line must touch at point 13 on the straight line which was drawn down from point 4 on Fig. 37 and is marked 5 on the same.
Go in from 4 to 5, three-quarters of an inch; curve from 10, past 2, touching the back, and along it past line B, and then separate from the back to 5 and 14—this last line must touch at point 13 on the straight line that was drawn down from point 4 on Fig. 37 and is marked 5 on the same.
THE FRONT—FIG. 40.
Lay the back down on paper and extend all the lines across, line A, B, C, D and bottom line. Measure from Z to A on line B, one-half of breast, or 18 inches; from B to H is one-third of breast and 1 inch; H to P is one-fourth of breast, equal to 4½ inches. Draw a line up at P, and one up and down at A. Mark line A also. From K to L is one-sixth of breast, equal to 3 inches, and K to 7 is the same, 3 inches; curve neck.
Lay the back down on paper and extend all the lines across: lines A, B, C, D, and the bottom line. Measure from Z to A on line B, which is half the bust measurement, or 18 inches; from B to H is one-third of the bust and 1 inch; H to P is one-fourth of the bust, equal to 4½ inches. Draw a vertical line up at P, and another vertical line both up and down at A. Mark line A as well. From K to L is one-sixth of the bust, equal to 3 inches, and K to 7 is the same, 3 inches; create a neck curve.
Draw a line from L to D and place the width of the top of shoulder on the back from L to 8, and curve from 8 upwards above the line one-fourth inch; draw from 8 down in front of line P to 9. This will be three-fourths inch in front of line P. Let this curve of the arm-hole extend below line B, or nearly down to midway between lines B and C, and curve to 6. From 6 draw down to 5, which is three-fourths inch from 4 to 15 and 17; at the last point it should be about 1¼ inch over the straight line drawn down from 4 on the back.
Draw a line from L to D and measure the width of the top of the shoulder on the back from L to 8. Curve from 8 upwards above the line by one-fourth inch; then draw a line from 8 down to the front of line P to 9. This should be three-fourths inch in front of line P. Let this curve of the armhole continue below line B, or almost halfway between lines B and C, and then curve to 6. From 6, draw down to 5, which is three-fourths inch from 4 to 15 and 17; at this last point, it should be about 1¼ inch over the straight line drawn down from 4 on the back.
From point G, which, as before stated, is one-fourth of the breast-measure, 9 inches from B, draw a straight line down. Curve from G to 12, 13 and 18; the last point is 2 inches from T; also curve from G to 12, 14 and 19. Point 19 is the same distance from T as 18.
From point G, which is one-fourth of the bust measurement and 9 inches from B, draw a straight line down. Curve from G to 12, 13, and 18; the last point is 2 inches from T. Also, curve from G to 12, 14, and 19. Point 19 is the same distance from T as 18.
Draw bottom line from 19 to 30 at front, where curve three-fourths inch below the line. Add in front over F line, for double-breasted 3 inches, and for single-breasted 1½ inches.
Draw the bottom line from 19 to 30 at the front, where the curve is three-fourths of an inch below the line. Add in front over the F line, for double-breasted, 3 inches, and for single-breasted, 1½ inches.

Fig. 40.
Fig. 40.
Now we have only to show how the under-sleeve is produced. This is done by measuring first the sleeve-head from O, where point J of the back is sewn on, to 16, which point is in middle, between 9 and 18. This will measure 10½ inches; as we put in 1 inch of fullness in the sleeve-head it leaves us only 9½ inches, which is measured down the front from 8 to 10 and notched. Lay sleeve notch, marked 16, on to notch on the fore-part 10, hold it there with a pin, move it till line on sleeve, marked C, will lay parallel with[64] any of the lines, as C or B on fore-part. Then mark on the fore-part along the sleeve, from notch at 10 to N of sleeve, and from N to 21; the sleeve will now be marked on the fore-part line 10 to O, P and A, and will be cut the same shape as the arm-hole from 10 to A, and can be traced off on another sheet of paper.
Now we just need to show how to create the under-sleeve. First, measure the sleeve-head from point O, where point J of the back is attached, to point 16, which is in the middle between points 9 and 18. This will measure 10½ inches; since we add 1 inch of fullness to the sleeve-head, we are left with only 9½ inches, which is measured down the front from point 8 to point 10 and notched. Place the sleeve notch marked 16 on the notch on the fore-part at point 10, hold it in place with a pin, and move it until the line on the sleeve marked C is parallel with any of the lines, like C or B on the fore-part. Then, mark on the fore-part alongside the sleeve, from the notch at point 10 to N of the sleeve, and from N to 21; the sleeve will now be marked on the fore-part line from 10 to O, P, and A, and will be cut in the same shape as the armhole from 10 to A, and can be traced onto another sheet of paper.
The principle as given in this article is suitable, and the only thing necessary, to produce any style of dolman. The change necessary for the short or long pointed sleeve, or for any shape of arm-wing, does not alter the principle. Pleated backs, or very much fullness in the top of the sleeve, must be met by putting enough extra goods in to meet the amount required for pleats or fullness.
The principle outlined in this article is appropriate and the only requirement to create any style of dolman. Adjustments needed for a short or long pointed sleeve, or any shape of arm-wing, do not change the principle. If there are pleats or significant fullness at the top of the sleeve, you need to add enough extra fabric to accommodate the amount needed for the pleats or fullness.
When a regular pattern is cut addition is made where pleats are wanted. When more fullness is wanted in the sleeve the easiest and most correct plan is to cut the sleeve in two, from the highest part of the sleeve-head, and opened as far as required, about 1 or 2 inches, and a little more round put on the top.
When a regular pattern is cut, you add fabric where you want pleats. If you need more fullness in the sleeve, the easiest and most accurate method is to cut the sleeve in half from the highest point of the sleeve head and open it up as much as needed, about 1 or 2 inches, adding a little extra around the top.
The principle, as shown in this book, will produce for every style of garment a correct fit, and yet it may be urged upon all using it, that in order to produce new styles, or garments of such styles that contain pleats or ornaments laid on the cloth, the reader’s own judgment must necessarily help to carry him through.
The principle outlined in this book will create a proper fit for every type of garment, but it's important for everyone using it to remember that, to create new styles or garments featuring pleats or embellishments on the fabric, their own judgment is crucial to navigate the process.
In conclusion, let me say—that any point or measuring that does not seem clear, by addressing me I will always be ready to enlighten to the best of my ability.
In conclusion, I want to say that if there's anything unclear, feel free to reach out to me, and I'll always be ready to help clarify to the best of my ability.

Download ePUB
If you like this ebook, consider a donation!